Craving a sweet treat that’s easy to make? You’re in the right place! I’ll show you how to whip up delicious Chocolate Almond Butter Cups. With just a few simple ingredients, you can create a tasty snack that satisfies your sweet tooth. Follow my step-by-step guide and discover tips for perfecting this treat. Let’s dive into making these yummy cups you won’t want to miss!
Why I Love This Recipe
- Deliciously Indulgent: These chocolate almond butter cups are a perfect blend of rich dark chocolate and creamy almond butter, making them a decadent treat.
- Easy to Make: This recipe requires minimal ingredients and simple steps, making it perfect for both beginner and seasoned bakers alike.
- Healthier Option: With natural sweeteners and wholesome almond butter, these cups offer a guilt-free dessert alternative that satisfies your sweet tooth.
- Customizable: You can easily modify the recipe by adding your favorite toppings or using different nut butters to suit your taste preferences.
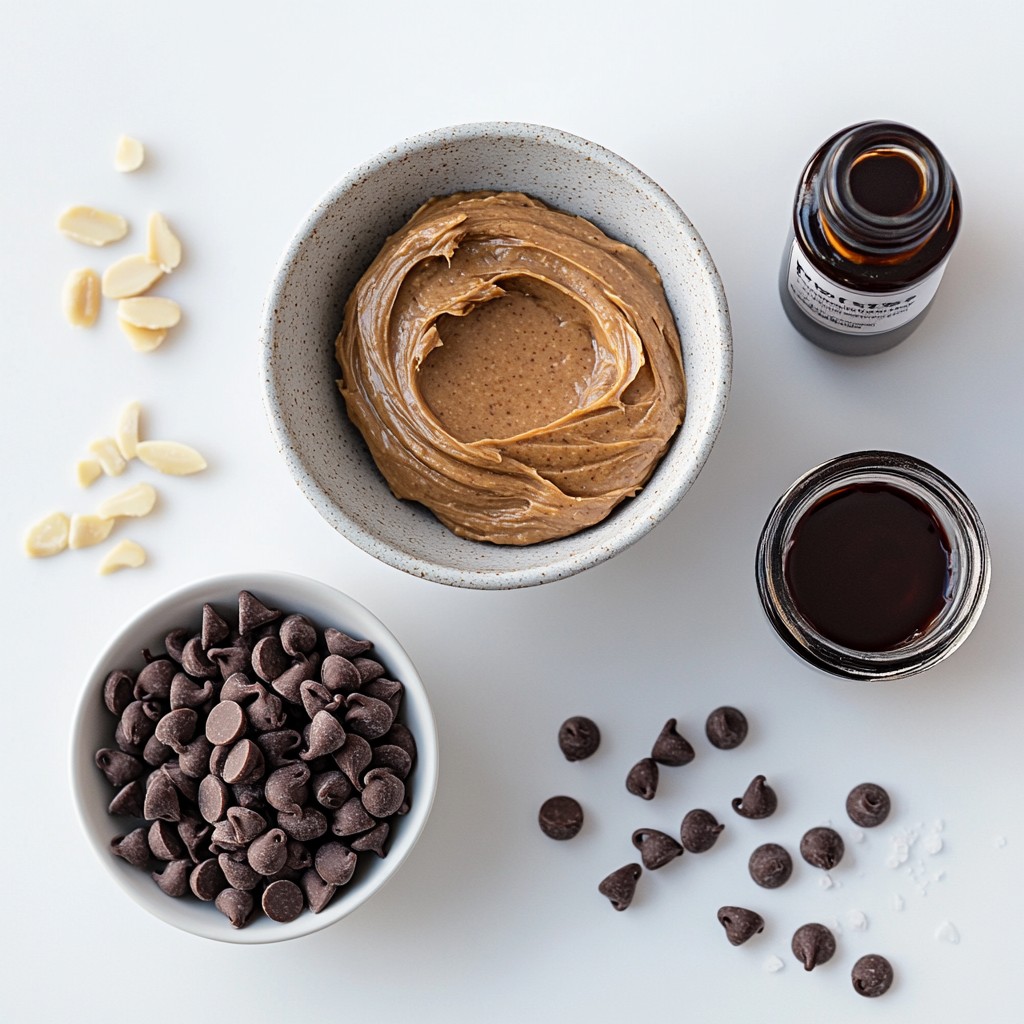
Ingredients
Chocolate Components
- 1 cup dark chocolate chips
Dark chocolate gives these cups a rich taste. It melts well and sets nicely. You can use semi-sweet chocolate if you prefer a sweeter treat.
Almond Butter and Sweeteners
- 1/2 cup almond butter (smooth)
This gives your cups a creamy texture. Almond butter also adds protein and healthy fats.
- 2 tablespoons maple syrup (or honey)
This sweetens the almond butter mix. Maple syrup is a great choice for a rich flavor.
- 1 teaspoon vanilla extract
Vanilla adds a warm, sweet aroma. It brings all the flavors together nicely.
- 1/4 teaspoon sea salt
Salt enhances the sweetness of the chocolate and almond butter. It balances the flavors.
Optional Ingredients
- Mini cupcake liners
These help shape your cups and make them easy to serve. You can find these in most grocery stores. You can also add toppings like chopped nuts or sea salt for extra crunch.
Step-by-Step Instructions
Melting the Chocolate
To start, gather your dark chocolate chips. Place them in a microwave-safe bowl. Heat the chocolate in the microwave for 30 seconds. After each interval, stir the chocolate. Repeat until it’s smooth. Be careful. If you overheat, the chocolate can burn. Smooth chocolate is key for a great taste.
Preparing the Cupcake Liners
Next, take your mini muffin tin. Line it with mini cupcake liners. This helps with easy removal later. Make sure each liner fits snugly in the tin. This step is simple but very important for a clean finish.
Assembling the Cups
Now, let’s build the cups! First, spoon about a teaspoon of melted chocolate into each liner. Use the back of a spoon to spread it evenly. Once done, place the muffin tin in the freezer for about 10-15 minutes. This helps the chocolate harden.
While you wait, mix the almond butter filling. In a small bowl, combine almond butter, maple syrup, vanilla extract, and sea salt. Stir until it’s smooth and well mixed.
After the chocolate layer sets, take the muffin tin out of the freezer. Spoon about a teaspoon of the almond butter mixture on top of the chocolate. Make sure to cover it well. Then, pour another teaspoon of melted chocolate over the almond butter. Smooth the tops if needed.
Finally, return the muffin tin to the freezer. Let the cups freeze for an additional 15-20 minutes. This is key for a perfect bite. Once set, gently peel the mini cupcake liners away. Enjoy your tasty chocolate almond butter cups!
Tips & Tricks
Ensuring Perfect Melting
To get the best melt on your chocolate, use a microwave-safe bowl. Place dark chocolate chips in the bowl. Microwave in short bursts of 30 seconds. Stir the chocolate after each burst. This helps it melt evenly. You do not want burnt chocolate. If it clumps, keep stirring until smooth. The heat from the bowl can help with melting too.
Customizing Flavors
You can change up the flavor of your almond butter cups. Add a pinch of cinnamon or nutmeg to the almond butter mix. You can also use different sweeteners like agave syrup. If you love a bit of crunch, mix in some chopped nuts. Want a fruity twist? Add a few drops of almond extract. Each change makes it special and unique.
Making Clean Layers
To keep your layers clean, let each layer set before adding the next. After pouring the chocolate base, freeze it for 10-15 minutes. This helps the layers stick together. When adding the almond butter, make sure it does not touch the sides. Pour the top layer of chocolate slowly and evenly. This makes your cups look neat and tasty.
Pro Tips
- Use Quality Chocolate: Opt for high-quality dark chocolate for the best flavor and texture in your cups.
- Room Temperature Ingredients: Make sure your almond butter is at room temperature for easier mixing and spreading.
- Experiment with Fillings: Feel free to mix in different nut butters or add a sprinkle of sea salt on top for a unique twist.
- Storing Tips: Store your chocolate almond butter cups in an airtight container in the fridge for up to two weeks.
Variations
Vegan Chocolate Almond Butter Cups
You can easily make these cups vegan. Just swap dark chocolate chips for vegan ones. Many brands offer great options. You will still enjoy the same rich taste. Use pure maple syrup instead of honey. This keeps the recipe plant-based. The almond butter stays the same, which adds great flavor.
Gluten-Free Options
These chocolate almond butter cups are naturally gluten-free. The ingredients do not contain gluten. Just make sure the chocolate chips are labeled gluten-free. Most brands are, but it's good to check. This treat fits well with many diets. You can enjoy these cups without worry.
Different Nut Butters
Feel free to switch almond butter for other nut butters. Peanut butter works well and adds a fun twist. Cashew butter and hazelnut butter can also be great options. Each nut butter brings its own unique flavor. You can even mix different nut butters for a new taste adventure. Get creative with your choices!
Storage Info
How to Store Homemade Cups
To keep your chocolate almond butter cups fresh, use an airtight container. Place a piece of parchment paper between layers to prevent sticking. Store the cups in the fridge for the best taste and texture. They stay firm and tasty this way.
Shelf Life and Freezing
Your homemade cups can last about one week in the fridge. If you want to save them longer, freezing is a great option. When frozen, they can last up to three months. Just make sure to wrap them well in plastic wrap or foil.
Reheating Tips
If you want to enjoy your cups at room temperature, take them out of the fridge. Let them sit for about 10 minutes before eating. If they are frozen, let them thaw in the fridge overnight. Avoid microwaving them, as that can change their texture. Enjoy your treats!
FAQs
How long do chocolate almond butter cups last?
Chocolate almond butter cups can last up to two weeks. Store them in an airtight container. Keep them in a cool, dry place. If you want them to last longer, freeze them. They can stay fresh for up to three months in the freezer. Just let them thaw in the fridge before you eat them.
Can I use milk chocolate instead?
Yes, you can use milk chocolate instead of dark chocolate. Milk chocolate will make the cups sweeter and creamier. If you like a richer flavor, go for dark chocolate. It adds depth and pairs well with almond butter. Adjust the sweetness if needed, as milk chocolate is sweeter.
What's the best way to remove the liners?
To remove the liners, wait until the cups are fully set. Gently peel the liners away from the sides. Start at the edge to avoid breaking the cups. If they stick, chill them in the fridge for a few minutes. This helps loosen them for easy removal.
In this blog post, we explored how to make chocolate almond butter cups. We looked at key ingredients, melting steps, and how to assemble the cups. I shared tips for perfect layers and flavor options. We also discussed storage and common questions you might have.
Remember, making these treats is fun and simple. You can customize them to suit your taste. Enjoy your chocolate almond butter cups!