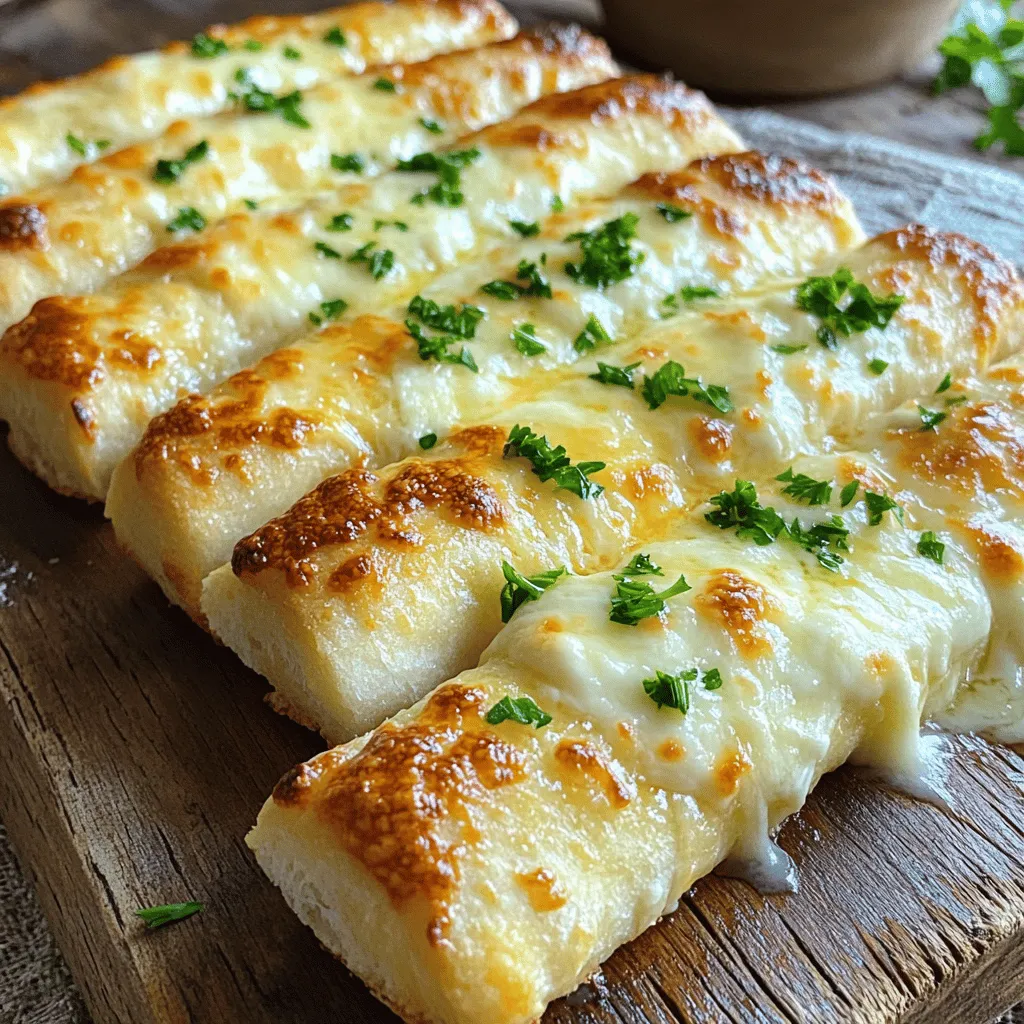
Are you craving a warm, cheesy treat that’s easy to make? These Cheesy Garlic Breadsticks are just what you need! I’ll show you how to whip up this tasty snack using simple ingredients, from dough to toppings. Whether you’re having a movie night or a cozy dinner, these breadsticks will impress everyone at the table. Ready to bake some deliciousness? Let’s get started!
Ingredients
Main Ingredients Needed
– 2 cups all-purpose flour
– 1 packet (2 ¼ teaspoons) instant yeast
– 1 teaspoon sugar
– ½ teaspoon salt
– ¾ cup warm water (110°F or 43°C)
These main ingredients form the base of our cheesy garlic breadsticks. The flour gives structure, while yeast helps the dough rise. Sugar adds a hint of sweetness, and salt boosts flavor. Warm water helps activate the yeast, making the dough soft and fluffy.
Flavor Enhancers
– 2 tablespoons olive oil
– 1 teaspoon garlic powder
– ½ teaspoon dried oregano
Olive oil adds richness to the dough. Garlic powder gives that classic garlic taste, while oregano adds a nice herb flavor. These enhancers make each bite savory and fragrant, elevating your breadsticks.
Cheesy Toppings
– 1 cup shredded mozzarella cheese
– ¼ cup grated Parmesan cheese
– 2 tablespoons unsalted butter, melted
– Fresh parsley, chopped (for garnish)
Mozzarella cheese brings gooeyness, while Parmesan adds a sharp kick. The melted butter brushed on top gives a golden finish and extra flavor. Chopped parsley is a colorful garnish that brightens the dish.
Step-by-Step Instructions
Preparing the Dough
To start making cheesy garlic breadsticks, you need to prepare the dough. First, take a large bowl and combine the dry ingredients. Add:
– 2 cups all-purpose flour
– 1 packet (2 ¼ teaspoons) instant yeast
– 1 teaspoon sugar
– ½ teaspoon salt
Mix these well. Next, slowly add warm water and olive oil. Use ¾ cup warm water at about 110°F (43°C) and 2 tablespoons of olive oil. Stir this mixture gently until it forms a dough.
Now it’s time to knead. Place the dough on a lightly floured surface. Knead the dough for about 5-7 minutes. You want it to feel smooth and elastic. This step is key to getting the right texture.
Allowing the Dough to Rise
After kneading, place the dough in a greased bowl. Cover it with a damp cloth. Let it rise in a warm area for about 30 minutes. This helps the dough grow and become fluffy. When it doubles in size, you know it’s ready.
Forming and Baking the Breadsticks
Once the dough has risen, preheat your oven to 400°F (200°C). Line a baking sheet with parchment paper to prevent sticking.
Now, punch down the risen dough to release air. Roll it out into a rectangular shape, about ½ inch thick.
Then, sprinkle the garlic powder and dried oregano evenly over the dough. Top it with:
– 1 cup shredded mozzarella cheese
– ¼ cup grated Parmesan cheese
Use a sharp knife or pizza cutter to slice the dough into strips. Make sure to cut through the cheese.
Next, brush melted butter over the top of the strips. This adds flavor and helps them turn golden brown.
Finally, bake the breadsticks in the preheated oven for about 15-20 minutes. Keep an eye on them. You want them golden brown and the cheese bubbling.
Once baked, let them cool for a minute. Then, sprinkle with chopped fresh parsley and serve warm.
Tips & Tricks
Perfecting the Dough
To knead the dough well, use your palms. Push down and fold the dough over. Repeat this for about 5 to 7 minutes. This helps develop gluten, making your breadsticks chewy.
Keep the dough in a warm spot to rise. A good spot is near a warm oven or in a sunny window. Cover the bowl with a damp cloth. This keeps it moist and helps the dough double in size.
Cheese Options
For the best flavor, use mozzarella cheese. It melts well and gives a nice stretch. You can also add Parmesan cheese for a salty kick. Another great option is cheddar for a sharper taste.
To add more flavor, mix in seasonings. Try Italian herbs like basil or thyme. You can also sprinkle some chili flakes for heat. This can make your breadsticks even more exciting!
Serving Suggestions
Dip your cheesy garlic breadsticks in marinara sauce. The tangy sauce pairs well with the cheesy flavor. Ranch dressing is another great option if you like creamy dips.
These breadsticks work well as a side for pasta or salad. They can also be a fun snack on movie night. Enjoy them hot for the best taste!
Variations
Flavor Additions
You can easily change the flavor of your cheesy garlic breadsticks. Try adding herbs like rosemary or thyme. These fresh herbs add a nice touch and will make your breadsticks smell amazing. You can also mix in cooked spinach or other veggies. This way, you make the dish healthier while keeping it tasty.
Gluten-Free Version
If you need a gluten-free version, use flour alternatives like almond flour or gluten-free all-purpose flour. Just make sure the flour has a good binding agent. You might need to adjust the water in your recipe. Always check the dough’s texture. It should still be smooth and easy to work with.
Vegan Adaptations
For a vegan option, you can use dairy-free cheese. Many brands offer great substitutes that melt well. You can also swap regular butter for a vegan butter substitute. This keeps the flavor rich and helps in getting that golden finish without any animal products.
Storage Info
Refrigeration Guidelines
To store leftovers properly, wrap your cheesy garlic breadsticks in plastic wrap or foil. This keeps them fresh. You can also place them in an airtight container. In the fridge, they last about 3 to 4 days. Just make sure they cool down before storing.
Freezing Instructions
Freezing cheesy garlic breadsticks is easy. First, let them cool completely. Then, wrap each breadstick in plastic wrap and place them in a freezer bag. This helps prevent freezer burn. They can last for up to 3 months in the freezer. To reheat frozen breadsticks, take them out and let them thaw in the fridge overnight. This prepares them for reheating.
Reheating Tips
When it comes to reheating, you have options. The microwave is quick but can make them soft. For a crispy finish, use the oven. Preheat the oven to 350°F (175°C) and bake for 10 minutes. This keeps the breadsticks crispy. Whichever method you choose, you’ll enjoy warm and tasty cheesy garlic breadsticks again!
FAQs
How long do homemade cheesy garlic breadsticks last?
Homemade cheesy garlic breadsticks stay fresh for about 3 to 5 days in the fridge. Store them in an airtight container to keep them soft. If you want to save them longer, freeze them. In the freezer, they can last for up to 2 months. Be sure to wrap them well in plastic wrap or foil before freezing.
Can I make the dough in advance?
Yes, you can make the dough ahead of time! Prepare the dough and let it rise. After it rises, punch it down and wrap it tightly. Keep it in the fridge for up to 24 hours. When you are ready, roll it out and continue with the recipe. This saves time on a busy day.
What dips pair well with cheesy garlic breadsticks?
Cheesy garlic breadsticks taste great with many dips. Here are a few ideas:
– Marinara sauce
– Ranch dressing
– Garlic butter dip
– Spinach-artichoke dip
These dips add extra flavor and make your breadsticks even more fun to eat.
This blog post covered how to make delicious cheesy garlic breadsticks from scratch. You learned about the main ingredients, the step-by-step process, and helpful tips. We discussed tasty variations, storage methods, and common questions.
Making these breadsticks is fun and rewarding. Enjoy experimenting with flavors and serving them warm. With practice, you’ll master this dish and impress your friends and family. Happy baking!