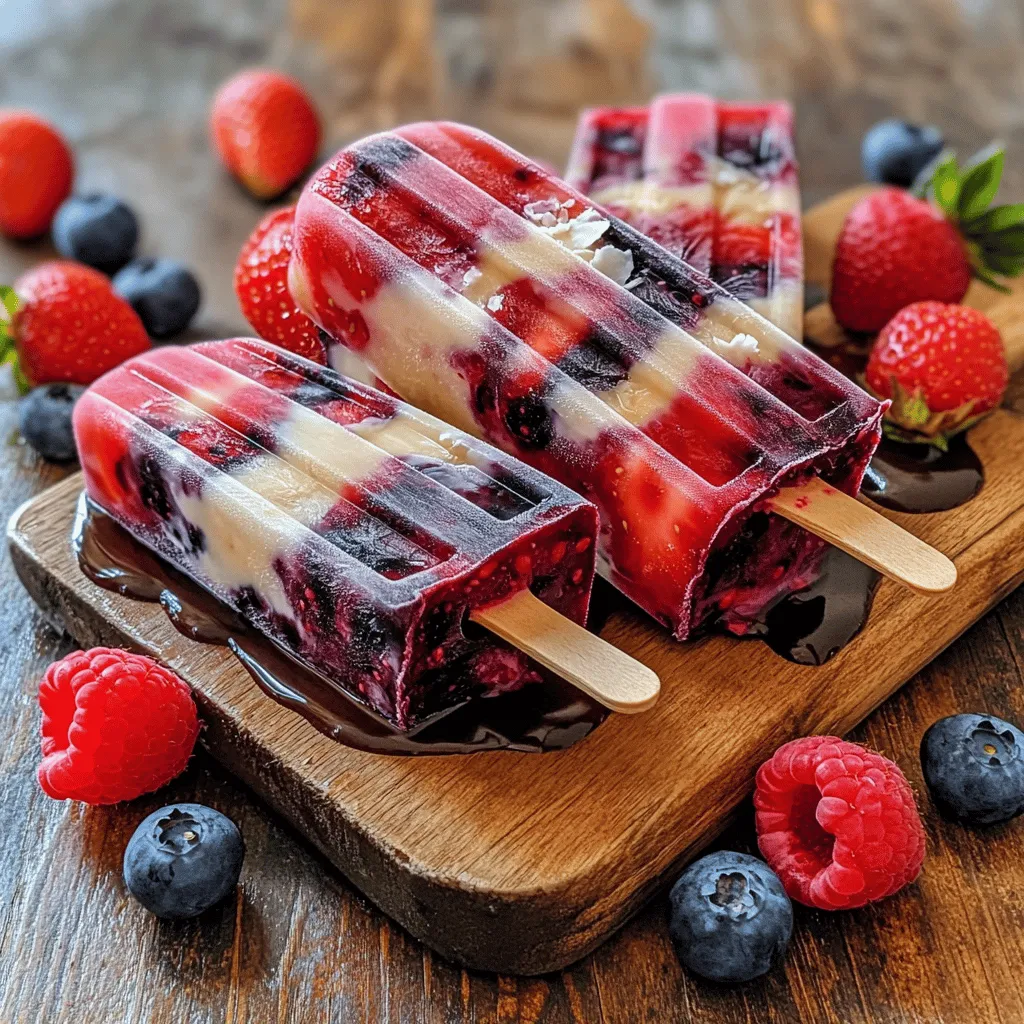
Summer days call for something cool and tasty! I’m excited to share my Berry Coconut Popsicles recipe, a simple treat bursting with fruity flavor and creamy coconut goodness. With just four main ingredients and easy steps, you’ll whip up these refreshing delights in no time. Plus, I’ve got tips for sweetening to your taste and fun variations to please everyone. Ready to make your summer sweeter? Let’s dive in!
Ingredients
To make Berry Coconut Popsicles, you need a few simple ingredients. Here’s what you’ll need:
– Mixed berries (strawberries, blueberries, raspberries)
– Coconut milk (full fat for creaminess)
– Sweetener options (honey or maple syrup)
– Vanilla extract and salt
These ingredients come together to create a fresh and creamy treat. The mixed berries give a sweet and tangy flavor, while the coconut milk adds a rich creaminess. You can adjust the sweetness to your liking with honey or maple syrup. A dash of vanilla and a pinch of salt enhance the taste, making each bite delightful.Enjoy the burst of berry flavors and the smoothness of coconut in every refreshing bite!
Step-by-Step Instructions
Preparing the Berry Mixture
First, gather your mixed berries. You can use strawberries, blueberries, and raspberries. Add them to the blender with one tablespoon of honey or maple syrup and a pinch of salt. Blend until smooth. You want it slightly chunky. This adds great texture. If you blend too much, you lose that fun bite.
Preparing the Coconut Layer
Next, we move to the coconut layer. In the same blender, pour in one can of coconut milk. Add the remaining tablespoon of honey or maple syrup and one teaspoon of vanilla extract. Blend this mix until it is completely smooth. This coconut layer is rich and creamy. It’s the perfect contrast to the berry mixture.
Assembling the Popsicles
Now it’s time to fill your molds. Pour the berry mixture into each mold, filling them about one-third full. Then, carefully add the coconut layer. Fill each mold to the top. To create a marbled effect, use a toothpick or skewer. Gently swirl the two layers together. This step makes each popsicle unique.
Freezing Process
For the freezing, place your molds in the freezer for at least 4 to 6 hours. You want the popsicles to be completely solid. When ready to remove them, run warm water over the outside of the molds for a few seconds. This helps release them easily. Then, gently pull them out. Enjoy your tasty treat!
Tips & Tricks
Choosing the Best Berries
When making Berry Coconut Popsicles, I often choose between fresh and frozen berries. Fresh berries taste great, but they may not always be in season. Frozen berries are always available and can be just as tasty. Both options work well in this recipe.
For flavor combinations, I love mixing strawberries, blueberries, and raspberries. This mix gives a nice balance of sweet and tart. You can also try blackberries or even cherries for a fun twist.
Sweetening to Taste
Sweetness can vary based on the berries used. I recommend starting with two tablespoons of honey or maple syrup. You can adjust this to match your taste. If you want a healthier option, try using agave syrup or stevia.
Natural sweeteners can add unique flavors. For example, coconut sugar gives a deeper taste. Experiment with what you like best!
Presentation Suggestions
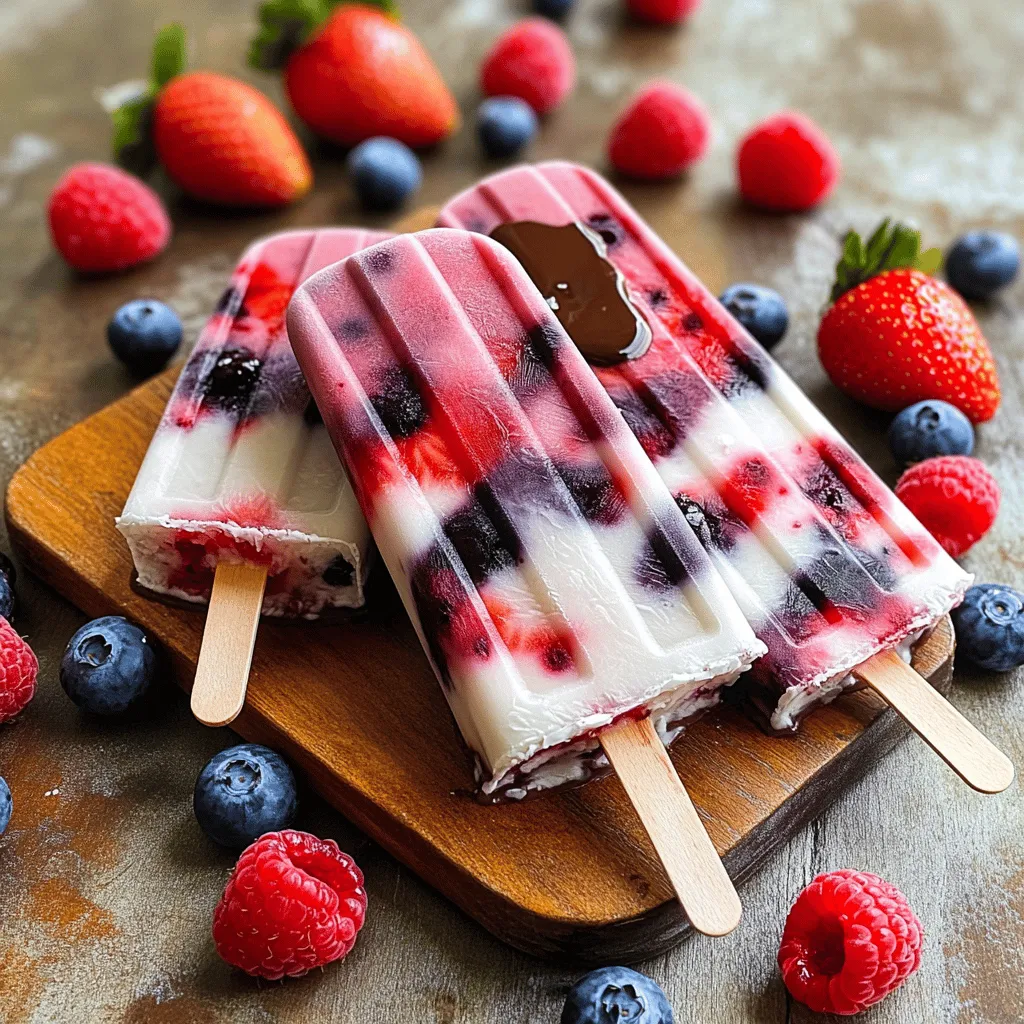
Presentation is key for impressing guests. Garnishing with whole berries makes popsicles look great. You can place them on a wooden board with some whole berries scattered around.
For a party, serve them on colorful plates. You can also drizzle melted dark chocolate over the popsicles. This adds flair and a sweet touch.Enjoy this fresh and creamy delight!
Variations
Dairy-Free Options
If you want to make these popsicles dairy-free, use almond or oat milk instead of coconut milk. Both options work well and add their own unique flavors. Almond milk gives a nutty taste, while oat milk is creamy and smooth. You can use the same amount as the coconut milk in the recipe. This swap keeps it light and refreshing.
Adding Flavor Enhancements
You can enhance these popsicles with fresh herbs or citrus zest. Adding mint or basil brings a fresh twist to the berry flavor. Simply chop a few leaves and blend them into the berry mixture. For citrus zest, use lemon or lime. Just a little zest can brighten the popsicles. This small addition can make a big difference in taste.
Child-Friendly Variations
Kids love fun shapes and creamy textures. You can add yogurt to the coconut layer for extra creaminess. Greek yogurt adds protein and makes them taste richer. Use fun molds to create shapes kids enjoy. Stars, hearts, or animals make eating these popsicles more exciting. These little changes can turn a simple treat into a fun snack time experience.
Storage Info
Storing Leftover Popsicles
To keep your Berry Coconut Popsicles fresh, place them in an airtight container. This prevents freezer burn and keeps flavors intact. You can also wrap them in plastic wrap. For best results, eat them within three months.
Shelf Life
These popsicles can last up to three months in the freezer. However, check for signs of spoilage. If you see ice crystals or changes in color, it’s time to toss them.
Reusing Popsicle Molds
Cleaning your molds is easy. Use warm, soapy water and a soft sponge. Avoid harsh scrubbing pads to protect the mold’s surface. After cleaning, let them air dry completely. This helps maintain their shape and prevents odors.
FAQs
Can I use other fruits instead of berries?
Yes, you can use other fruits! Try mango, peaches, or even bananas. Just keep in mind that softer fruits may need less sweetener. If you use tart fruits, like kiwi or pineapple, add a bit more sweetener to balance the flavor.
How long do Berry Coconut Popsicles take to freeze?
The average freezing time is about 4 to 6 hours. However, for the best texture, I suggest leaving them overnight. This way, they set perfectly and are easy to enjoy the next day.
Can I use sweeteners other than honey or maple syrup?
Absolutely! You can use agave syrup, stevia, or coconut sugar. Each sweetener has a different flavor. Adjust the amount based on your taste. Just remember, some sweeteners are stronger than others, so taste as you go.
Are these popsicles healthy?
Yes, these popsicles are quite healthy! The mixed berries provide vitamins, fiber, and antioxidants. Coconut milk adds healthy fats while keeping it creamy. Plus, they are low in calories. You can also use low-calorie sweeteners to make them even lighter.
What can I do if my popsicles are hard to remove from the molds?
If your popsicles are stuck, run warm water over the outside of the molds for a few seconds. This warms the sides and helps loosen them. Gently pull the popsicle out. If it still resists, repeat the warm water method. Enjoy your Berry Coconut Popsicles!
You learned how to make delicious berry coconut popsicles. We covered the key ingredients, step-by-step instructions, and smart tips for success. I shared fun variations to try and helpful storage info.
These popsicles are perfect for hot days or gatherings. You can make them healthy with fresh ingredients. Enjoy experimenting with all the flavors! Remember, your homemade popsicles can bring joy and refreshment.