Skip to content
DisclaimerTerms Of UseGDPR PolicyCookie Policy

Recipes Pursuit

  • Home
  • Drinks
  • Appetizers
  • Dinner
  • Dessert
  • About
  • Contact
  • Privacy Policy
DisclaimerTerms Of UseGDPR PolicyCookie Policy

Emma Smith

- 1 cup graham cracker crumbs - 1 cup all-purpose flour - 1 teaspoon baking powder - 1/2 teaspoon baking soda - 1/4 teaspoon salt - 1/2 cup unsweetened cocoa powder - 1/2 cup granulated sugar - 1/2 cup brown sugar, packed - 2 large eggs - 1/2 cup buttermilk - 1/4 cup vegetable oil - 1 teaspoon vanilla extract - 1/2 cup boiling water - 3 egg whites - 3/4 cup granulated sugar - 1/4 teaspoon cream of tartar - 1 teaspoon vanilla extract - 1 cup mini marshmallows for topping - Optional chocolate sauce for drizzling - Extra graham cracker crumbs - Chocolate shavings or mini chocolate chips When making these perfect s'mores cupcakes, gathering the right ingredients is key. The cupcake base uses simple items like graham cracker crumbs and cocoa powder to bring that classic s'mores flavor to life. The addition of buttermilk makes the cupcakes moist and rich. For the marshmallow frosting, egg whites and sugar create a fluffy texture. This frosting is like a sweet cloud on top of your cupcake. You can finish them off with mini marshmallows and a drizzle of chocolate sauce for a real treat. You can find the full recipe linked above to guide you through the steps. Be sure to have all these ingredients on hand for the best results. Enjoy your baking adventure! 1. Preheat the Oven: Set your oven to 350°F (175°C). Line a 12-cup muffin tin with cupcake liners. This step ensures the cupcakes bake evenly. 2. Mix Dry Ingredients: In a large bowl, combine 1 cup graham cracker crumbs, 1 cup all-purpose flour, 1 teaspoon baking powder, 1/2 teaspoon baking soda, 1/4 teaspoon salt, 1/2 cup cocoa powder, 1/2 cup granulated sugar, and 1/2 cup brown sugar. Whisk these together until they blend well. 3. Whisk Wet Ingredients: In another bowl, whisk together 2 large eggs, 1/2 cup buttermilk, 1/4 cup vegetable oil, and 1 teaspoon vanilla extract. Mix until smooth and set aside. 1. Gradually Combine Mixtures: Slowly add the wet ingredients to the dry mix. Stir gently until just combined. This helps keep the cupcakes light. 2. Stir in Boiling Water: Carefully add 1/2 cup boiling water to the batter. Stir until you have a smooth mixture. The hot water helps the cocoa bloom, enhancing the chocolate flavor. 1. Fill the Cupcake Liners: Pour the batter into the lined muffin tin. Fill each liner about two-thirds full. This gives the cupcakes room to rise. 2. Bake: Place the tin in the oven for 20-22 minutes. Check for doneness by inserting a toothpick into the center. If it comes out clean, they are ready. Remove from the oven and let them cool completely. 1. Prepare Frosting in a Double Boiler: In a heatproof bowl, combine 3 egg whites, 3/4 cup granulated sugar, and 1/4 teaspoon cream of tartar. Place the bowl over a pot of simmering water. Whisk constantly for about 5 minutes until the mixture is warm and the sugar dissolves. 2. Whip the Frosting: Transfer the mixture to a stand mixer. Whip on high speed for 7-10 minutes until stiff peaks form. Add 1 teaspoon vanilla extract and mix to combine. The frosting should be glossy and fluffy. 1. Frost Cooled Cupcakes Generously: Use a piping bag or spatula to spread the marshmallow frosting on each cooled cupcake. Go big; they deserve it! 2. Add Toppings: Top each cupcake with mini marshmallows, a sprinkle of graham cracker crumbs, and drizzles of optional chocolate sauce. For a fun touch, lightly toast the marshmallows with a kitchen torch for that campfire vibe! For a complete guide, check out the Full Recipe. Enjoy your delicious Perfect S’mores Cupcakes! To make the best cupcakes, you must measure ingredients with care. Accurate measuring helps keep the balance of flavors and texture. For light and fluffy cupcakes, sift your dry ingredients. This adds air and helps your cupcakes rise well. Using a piping bag makes frosting fun and easy. Choose your favorite tip for a beautiful design. For an extra touch, you can toast the marshmallows on top. A kitchen torch works great for this. It gives a nice golden color and adds flavor. Present cupcakes on a rustic wooden board or a tiered cake stand. This makes them look inviting. You can also pair them with milk or hot cocoa. A scoop of vanilla ice cream beside the cupcake adds a tasty twist. Enjoy your Perfect S’mores Cupcakes! For the full recipe, see above. {{image_2}} You can mix up the flavor of your cupcakes. Try using vanilla instead of chocolate for a lighter taste. You might also use lemon or orange zest to add a fresh twist. For the frosting, consider chocolate ganache. It adds rich flavor and pairs well with the graham cracker base. If you need gluten-free cupcakes, use almond flour or a gluten-free blend. For a vegan version, swap eggs with flaxseed meal and use plant-based milk. You can replace butter with coconut oil. Always check ingredient labels for allergens. This way, you can enjoy these cupcakes without worry. You can adapt these cupcakes for holidays. For fall, add pumpkin spice to the batter. During winter, try peppermint extract for a festive touch. Change the look by using colored liners or themed decorations. Seasonal sprinkles can also add a fun pop to your cupcakes. For more ideas and tips, check the Full Recipe. To keep your cupcakes fresh, store them at room temperature. Use an airtight container to prevent them from drying out. If it’s very hot, you can place them in the fridge. Just make sure they are covered well. This helps to keep the marshmallow frosting nice and fluffy. If you want to enjoy a warm cupcake, reheat it in the microwave. Heat for about 10-15 seconds. This warms the cupcake without making it dry. For best results, cover it with a damp paper towel. This keeps the moisture in and helps the cupcake stay soft. To freeze your cupcakes, first freeze them without frosting. Place them in a single layer on a baking sheet. After they are frozen solid, transfer them to a freezer bag. For the frosting, store it in a separate container. When you’re ready to serve, thaw the cupcakes in the fridge overnight. Frost them just before serving for the best taste. Enjoy these Perfect S’mores Cupcakes! For the full recipe, check the section above. These cupcakes stay fresh for about three days at room temperature. They can last up to a week in the fridge. Keep them in an airtight container to maintain moisture. Yes, you can make the frosting a day ahead. Store it in the fridge in an airtight container. Before using, let it sit at room temperature for about 30 minutes. Then, whip it briefly to restore its texture. To prevent sticking, use cupcake liners. You can also grease the muffin tin lightly before adding the liners. This ensures easy removal after baking. You can use milk with a splash of vinegar or lemon juice as a buttermilk substitute. Mix one tablespoon of vinegar or lemon juice into one cup of milk. Let it sit for five minutes before using it in the recipe. In this post, we covered the ingredients, steps, and tips for making delicious cupcakes. You learned how to mix batter, bake, and create a fluffy marshmallow frosting. We shared ways to store leftovers and even offered flavor variations to try. Now, it’s time to get in the kitchen and craft your treats. Enjoy sharing your tasty results with friends and family!

Perfect S’mores Cupcakes Irresistible Treat Idea

Are you ready to indulge in a treat that combines the classic flavors of s’mores into a cupcake? My Perfect

- 2 cups basmati rice, rinsed - 4 chicken thighs, bone-in and skin-on - 1 cup chicken broth - 1/2 cup honey - 1/4 cup BBQ sauce - 1 tablespoon soy sauce - 1 teaspoon smoked paprika - 1 teaspoon garlic powder - 1 teaspoon onion powder - Salt and pepper to taste - 1 cup corn (fresh, frozen, or canned) - 1 red bell pepper, diced - 1/2 cup green onions, sliced (for garnish) Gathering the right ingredients is key to making One-Pan Honey BBQ Chicken Rice. I love using basmati rice because it cooks fluffy and absorbs flavors well. The chicken thighs are juicy and tender, especially when cooked with the skin on. You’ll need honey for sweetness and BBQ sauce for that rich, smoky taste. Chicken broth adds depth. The spices like smoked paprika, garlic powder, and onion powder bring out the best in the dish. Don't forget salt and pepper to enhance all these flavors! Lastly, colorful veggies like corn and red bell pepper not only taste great but also make the dish look beautiful. Sliced green onions on top add a fresh touch. This blend of ingredients makes each bite a delight. For the full recipe and more details, check out the [Full Recipe]. Start by seasoning the chicken thighs. Use salt, pepper, smoked paprika, garlic powder, and onion powder. Rub these spices on both sides. This step adds great flavor. Next, heat a drizzle of olive oil in your skillet over medium-high heat. Place the chicken thighs skin-side down in the hot pan. Sear them for about 5-7 minutes. This makes the skin golden and crispy. Flip the chicken and sear the other side for another 5 minutes. Remove the chicken from the pan and set it aside. Now, it's time to cook the rice and sauce. In the same pan, add 2 cups of rinsed basmati rice. Pour in 1 cup of chicken broth, 1/2 cup of honey, 1/4 cup of BBQ sauce, and 1 tablespoon of soy sauce. Stir well to mix all the ingredients together. This step creates a rich flavor base. Return the chicken to the pan, placing it on top of the rice mixture. Add 1 cup of corn and 1 diced red bell pepper around the chicken. Bring this mixture to a gentle boil. Next, reduce the heat to low. Cover the pan with a lid, and let it cook for about 25-30 minutes. Check the rice to see if it's tender and has absorbed all the liquid. Once cooked, remove the pan from heat and let it sit for another 5 minutes. Fluff the rice with a fork and check that the chicken is cooked through. The internal temperature should reach 165°F (75°C). For an extra touch, garnish with sliced green onions before serving. For the full recipe, check the section above. To get a great sear, always place the chicken skin-side down. This helps to crisp the skin, making it tasty and golden. Use medium-high heat for the best results. This heat level helps the chicken cook without burning. You can add more spices for extra flavor. Try cayenne for heat or thyme for a fresh taste. If you want to change the BBQ sauce, mix in some mustard or hot sauce. This will give it a unique twist that matches your taste. Serving directly from the pan gives a rustic feel. It’s easy and fun for guests. For a pop of color, drizzle extra BBQ sauce on top. Adding sliced green onions not only looks good but adds a fresh bite. Enjoy your meal with beautiful and tasty flair! {{image_2}} You can change the chicken cuts for this dish. Chicken breasts work well. They cook faster and stay juicy. You can also use chicken tenders if you prefer smaller pieces. If you want to try other meats, pork chops are great. They give a rich flavor. You can also use boneless turkey thighs. These options keep the meal tasty and fun. Adding different veggies can change the dish. You can use broccoli, zucchini, or peas. These veggies add color and nutrients. For seasonal freshness, try asparagus in spring. In summer, use cherry tomatoes for a sweet burst. In fall, butternut squash adds a warm flavor. Each choice makes your meal unique. If you want to make your sauce, mix ketchup, brown sugar, and vinegar. This homemade sauce can fit your taste. You can even add hot sauce for a kick. For healthier choices, look for low-sugar BBQ sauces. They keep the flavor but cut down on sugar. You can also use sauce made from fruit, like peach or apple. This adds a sweet twist to your chicken. For the full recipe, check the main article. To keep your One-Pan Honey BBQ Chicken Rice fresh, store it in airtight containers. Let it cool to room temperature first. Then, place it in the fridge. This way, it stays good for up to four days. If you want to freeze it, pack it in freezer-safe bags. Be sure to remove as much air as possible. This helps prevent freezer burn. You can freeze it for up to three months. When it's time to enjoy leftovers, you can reheat them safely. The best methods are the microwave or stovetop. For the microwave, place the rice and chicken in a bowl. Add a splash of water to keep it moist. Cover it with a lid or microwave-safe wrap. Heat in short bursts until hot, stirring often. If you're using the stovetop, heat it in a skillet over low heat. Stir gently to keep it from sticking. To maintain texture and flavor, avoid overheating. Check that the chicken reaches 165°F (75°C) again. This keeps it safe to eat and tasty! The total cook time is about 1 hour. Here’s the breakdown: - Prep time: 10 minutes - Cooking time: 30 minutes - Resting time: 5 minutes This timing makes it easy to plan your meal. You can spend the prep time gathering your ingredients and seasoning the chicken. Once the chicken is cooked, the rice takes about 25 to 30 minutes to become tender. Yes, you can make this dish ahead of time. To prepare in advance, cook the dish as usual. Once it cools, store it in an airtight container. Keep it in the fridge for up to three days. You can also freeze it for up to two months. Just thaw it overnight in the fridge when ready to eat. I recommend using basmati rice for this dish. Basmati has a nice texture and flavor. It cooks well and absorbs the honey BBQ sauce perfectly. You can also use jasmine rice as an alternative. Both types of rice complement the chicken nicely, giving you a tasty meal. Other rice types may not give the same results in texture or taste. In this blog post, we explored making One-Pan Honey BBQ Chicken Rice. We detailed the key ingredients, from rice and chicken thighs to flavorful sauces. The step-by-step instructions guided you through prepping, cooking, and final touches. I shared tips for searing chicken, enhancing flavors, and presenting the dish beautifully. With variations and storage ideas, you can customize and enjoy each meal. Remember, cooking should be fun and creative. Try this recipe and make it your own to impress friends and family. Enjoy your cooking journey!

One-Pan Honey BBQ Chicken Rice Simple and Tasty Meal

Looking for a quick dinner that’s bursting with flavor? You’re in the right place! This One-Pan Honey BBQ Chicken Rice

To make Lemon Garlic Shrimp Orzo, you'll need fresh and tasty ingredients. Here’s what to gather: - 1 cup orzo pasta - 1 pound large shrimp, peeled and deveined - 4 tablespoons olive oil, divided - 4 cloves garlic, minced - 1 lemon, zested and juiced - 1 teaspoon red pepper flakes (adjust to taste) - Salt and black pepper to taste - 1 cup cherry tomatoes, halved - 1 cup baby spinach - 1/4 cup fresh parsley, chopped - Grated Parmesan cheese (for serving) These ingredients make the dish bright and flavorful. The shrimp adds protein, while the orzo serves as a hearty base. Along with the main ingredients, you might have some staples on hand. Olive oil, salt, and black pepper are common in many kitchens. Having these ready makes cooking easier. To make your dish pop, consider some tasty toppings. Here are a few suggestions: - Extra chopped parsley for freshness - Lemon wedges for an extra zing - A sprinkle of red pepper flakes for heat - Grated Parmesan cheese for creaminess These toppings enhance the dish's look and flavor. You can mix and match based on what you enjoy. For the full recipe, check out the complete guide! To cook orzo, start by boiling water in a medium pot. Add a pinch of salt to the water for flavor. Once boiling, add 1 cup of orzo pasta. Cook it according to the package instructions until it's al dente. This typically takes about 8-10 minutes. After cooking, drain the orzo in a colander and set it aside. This step is crucial as the orzo will soak up the lemon and garlic flavors later. Next, heat 2 tablespoons of olive oil in a large skillet over medium heat. When the oil is hot, add 4 minced garlic cloves and 1 teaspoon of red pepper flakes. Stir them for about 30 seconds, just until they smell great. Then, add 1 pound of shrimp that is peeled and deveined. Season the shrimp with salt and black pepper. Cook the shrimp for about 2-3 minutes on each side, until they turn pink and opaque. Once done, take the shrimp out of the skillet and set them aside. In the same skillet, add the remaining 2 tablespoons of olive oil. Then, add the cooked orzo, the zest and juice of 1 lemon, and 1 cup of halved cherry tomatoes. Stir everything together and cook for about 2-3 minutes. You want the tomatoes to soften a bit. After that, fold in 1 cup of baby spinach and the cooked shrimp. Stir until the spinach wilts. Taste your dish and add more salt or pepper if needed. Finally, remove the skillet from the heat and mix in 1/4 cup of chopped fresh parsley. Serve your Lemon Garlic Shrimp Orzo warm and top it with grated Parmesan cheese for extra richness. For the full recipe, check the earlier section. To get the best flavor, use fresh ingredients. Fresh garlic, shrimp, and lemon make a big difference. I love adding lemon zest. It brightens the dish. Red pepper flakes give a nice kick. Adjust the amount based on your taste. If you want a milder dish, cut back on the spice. Cook shrimp until they turn pink and opaque. This usually takes 2-3 minutes on each side. Overcooked shrimp can become tough. Keep an eye on them. If they curl tightly, they are overcooked. Remove them from the skillet as soon as they are done. This keeps them juicy and tender. To prevent overcooking the orzo, follow the package instructions carefully. Cook it until it is al dente. This means it should still have a slight bite. After draining, toss it with a bit of olive oil. This prevents it from sticking together. If you add it to the skillet too soon, it can get mushy. Wait until the other ingredients are ready before mixing everything together. For the full recipe, check out the recipe section above. {{image_2}} You can easily make this dish gluten-free. Swap the orzo with rice or quinoa. Both work well with the flavors. For a vegetarian option, use chickpeas instead of shrimp. They add protein and texture. You can change the shrimp for scallops for a different taste. If you love spice, add chorizo for a kick. For a fresh twist, try adding asparagus or bell peppers. These veggies add color and crunch. Pair this dish with a fresh salad or garlic bread. A simple green salad with a lemon vinaigrette works best. For drinks, a chilled white wine or sparkling water with lemon is perfect. These pairings enhance the meal's bright flavors. For the full recipe, check out the Lemon Garlic Shrimp Orzo section. To keep your Lemon Garlic Shrimp Orzo fresh, let it cool down first. Then, transfer the orzo to an airtight container. Make sure to seal it well to avoid any air. It will last in the fridge for about three days. If you plan to eat it later, don’t forget to separate any toppings like cheese. This keeps everything fresh. When you're ready to enjoy your leftovers, reheat the orzo on the stove. Add a splash of water or olive oil to the pan. This helps to keep it moist. Heat it over medium-low heat and stir often. You can also use the microwave. Just cover the bowl with a damp paper towel to keep the moisture in. Heat it in short bursts, stirring in between. If you want to store Lemon Garlic Shrimp Orzo for a longer time, freezing is a good option. Portion the orzo into freezer-safe bags or containers. Make sure to remove as much air as possible before sealing. It can stay good in the freezer for up to three months. When you’re ready to eat, thaw it in the fridge overnight. Then, reheat it on the stove for the best texture. For the complete recipe, check out the Full Recipe link. You can serve Lemon Garlic Shrimp Orzo with a simple green salad. A fresh Caesar salad pairs well too. Garlic bread adds a nice touch and helps soak up the sauce. If you want a more filling meal, grilled vegetables or roasted asparagus work great. Yes, you can use frozen shrimp. Just thaw them before cooking. Place them in cold water for about 15 minutes. This way, they cook evenly. Frozen shrimp may need a minute more to cook through. You can add more red pepper flakes to the shrimp while cooking. Try using a spicy seasoning mix or hot sauce too. A pinch of cayenne pepper gives it a nice kick. Adjust the heat level to match your taste. Yes, you can prepare this dish in advance. Cook the orzo and shrimp separately. Store them in airtight containers in the fridge. Combine them just before serving to keep everything fresh. You can also reheat it gently on the stove. For best results, add a splash of olive oil or lemon juice when reheating. For the complete recipe, check out the Full Recipe section above. This blog post covers everything you need for Lemon Garlic Shrimp Orzo. We explored key ingredients, essential steps, and useful tips. You learned how to cook the orzo and shrimp while avoiding common mistakes. We also discussed substitutions and storage for leftover meals. Try this recipe to impress your guests or enjoy a tasty meal at home. With these tips, you'll cook with confidence and creativity. Enjoy your cooking journey!

Lemon Garlic Shrimp Orzo Simple and Savory Recipe

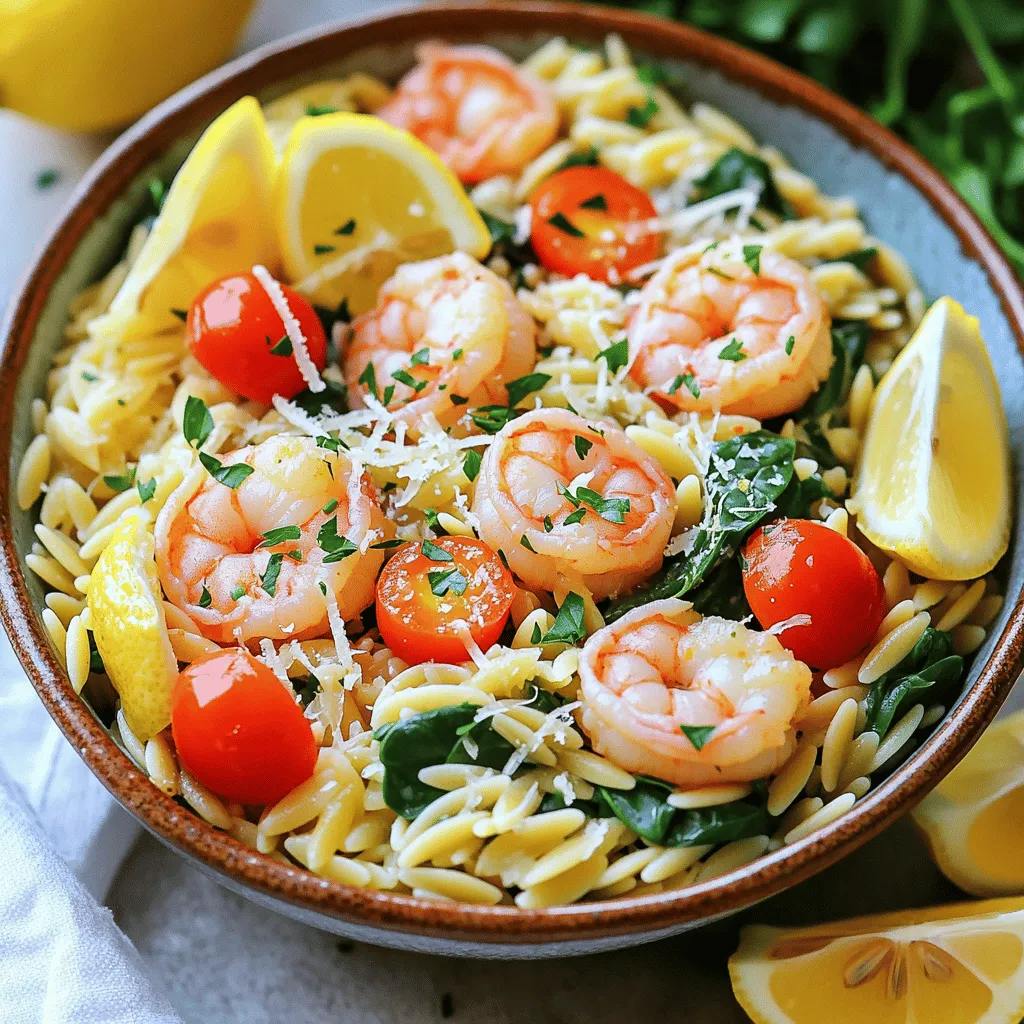
Craving a meal that’s both simple and full of flavor? My Lemon Garlic Shrimp Orzo recipe is just that! This

To make a tasty Vegan Buddha Bowl, gather these fresh ingredients: - 1 cup quinoa, rinsed - 2 cups vegetable broth - 1 cup chickpeas, cooked or canned - 1 cup sweet potato, diced - 1 cup broccoli florets - 1 avocado, sliced - 1 red bell pepper, thinly sliced - ½ cup shredded carrots - ¼ cup tahini - 2 tablespoons lemon juice - 1 tablespoon maple syrup - 1 tablespoon olive oil - 1 teaspoon garlic powder - Salt and pepper to taste - Fresh herbs (like cilantro or parsley) for garnish You can use fresh or canned chickpeas in this dish. Fresh chickpeas take longer to cook. If you choose canned ones, rinse them well. This helps reduce sodium and improves taste. Canned options save time and are often just as nutritious. Both choices provide protein and fiber, making them great for your bowl. The ingredients in this Vegan Buddha Bowl offer many health benefits: - Quinoa is a complete protein, meaning it has all essential amino acids. - Sweet potatoes provide vitamin A and fiber for good digestion. - Broccoli is rich in vitamins C and K, boosting your immune system. - Avocado adds healthy fats that keep you full longer. - Tahini is a good source of calcium and magnesium, supporting bone health. This dish is not just colorful; it's also packed with nutrients to keep you energized! For the full recipe, check the main text above. To make a Vegan Buddha Bowl, follow these easy steps. You will have a tasty and colorful meal. Start by rinsing 1 cup of quinoa. Place the quinoa in a medium pot. Add 2 cups of vegetable broth. Bring it to a boil over high heat. Once it boils, lower the heat and cover the pot. Let it simmer for about 15 minutes. The quinoa will be fluffy when done. Remove it from the heat and let it sit for a few minutes before fluffing it with a fork. Next, let's roast the veggies. Preheat your oven to 400°F (200°C). Line a baking sheet with parchment paper. Dice 1 cup of sweet potato and toss it with 1 tablespoon of olive oil, 1 teaspoon of garlic powder, salt, and pepper. Spread the sweet potatoes on the baking sheet. Roast them in the oven for 15 minutes. After 15 minutes, add 1 cup of broccoli florets to the baking sheet. Continue roasting for another 10 minutes. The veggies should be tender and slightly caramelized. This step brings out their natural sweetness. Now it's time to assemble your Buddha bowl! Divide the cooked quinoa among serving bowls. Next, arrange the roasted sweet potatoes, broccoli, 1 cup of chickpeas, sliced avocado, red bell pepper, and shredded carrots in sections over the quinoa. Drizzle the tahini dressing, made from ¼ cup of tahini, 2 tablespoons of lemon juice, and 1 tablespoon of maple syrup, over the top. For a beautiful finish, garnish with fresh herbs like cilantro or parsley. Use wide, shallow bowls to show off the colorful toppings. You can also sprinkle some sesame seeds for extra crunch. This recipe, found in the Full Recipe section, is quick and easy, making it perfect for any meal! To make a smooth tahini dressing, start with good tahini. Mix it in a bowl. Add lemon juice and maple syrup. Then, slowly add water a little at a time. Stir until it gets creamy. If it’s too thick, add more water. If it’s too thin, add more tahini. This balance makes your dressing just right for drizzling. Store your Buddha bowl leftovers in an airtight container. Keep the tahini dressing separate to avoid sogginess. The quinoa and veggies stay fresh for up to three days in the fridge. If you want to save the avocado, add it fresh when you serve the bowl again. This keeps it green and tasty. Cook quinoa and roast veggies ahead of time. You can make a big batch and store them. This way, you can easily mix and match for quick meals. Also, prep your tahini dressing and store it in the fridge. This makes it easy to grab when you need it. Just shake or stir before using! For more great ideas, check out the Full Recipe. {{image_2}} If you want a gluten-free Vegan Buddha Bowl, quinoa is a great choice. It's naturally gluten-free and packed with protein. Instead of quinoa, you can use brown rice or millet. Both options work well. For the dressing, use a gluten-free soy sauce if you prefer a different flavor. To boost protein in your bowl, add more chickpeas or use lentils. Tofu is another excellent choice. You can bake or sauté it for extra flavor. Tempeh also adds protein and a nutty taste. Consider using edamame for a fresh twist. Seasonal ingredients can change your Buddha bowl's flavor. In spring, add asparagus or peas for a fresh touch. In summer, use ripe tomatoes or zucchini. Fall is perfect for roasted root veggies like carrots or beets. In winter, kale and Brussels sprouts shine. Always use fresh, local produce when possible for the best taste. For a complete guide, refer to the Full Recipe. After enjoying your Vegan Buddha Bowl, store any leftovers in airtight containers. This keeps your food fresh and tasty. Let the dish cool before sealing it up. You can also separate the dressing to keep flavors bright. Most ingredients in your bowl will last well in the fridge. Here’s a quick guide: - Cooked quinoa: 3-5 days - Roasted sweet potatoes and broccoli: 3-5 days - Chickpeas: 3-5 days if cooked; longer if canned - Fresh avocado: 1-2 days, best eaten fresh - Tahini dressing: 1 week in the fridge When reheating, do it gently to keep flavors and textures intact. Use a stovetop or microwave. For best results: - Quinoa and vegetables: Add a splash of water or broth before reheating. - Chickpeas: Heat them in a pan to keep some crunch. - Tahini dressing: Stir in a bit of water to thin it if needed before drizzling it back on your bowl. You can find the full recipe to make this delightful dish from scratch. You can use almond butter or sunflower seed butter instead of tahini. Both options give a creamy texture. If you want a nut-free choice, try using yogurt made from coconut. These substitutes will change the flavor a bit, but they work well. Yes, you can make this bowl ahead of time! Cook the quinoa and roast the veggies. Store them in separate containers. You can keep them in the fridge for about five days. Just assemble the bowl when you're ready to eat. This makes meal prep quick and easy. Absolutely! You can add or swap any toppings you like. Try adding kale, spinach, or your favorite nuts. You can also use different beans, like black beans or lentils. The more colorful and varied, the better! To boost protein, add more chickpeas or include tofu or tempeh. You can also sprinkle some hemp seeds or chia seeds on top. These options will help you feel full and satisfied. Enjoy experimenting with different combinations! For the full recipe, check out the complete steps in my Vegan Buddha Bowl guide! This blog post shared how to make a delicious Vegan Buddha Bowl. We explored key ingredients, cooking steps, and tips for the best results. Nutrition and storage advice added extra value. You can have fun with variations and personalize your bowl to match your tastes. Remember to enjoy your meal prep and try new combinations. A nutritious, flavorful dish is now within your reach. Dive in, create your bowl, and nourish your body!

Vegan Buddha Bowl Easy and Nutritious Recipe

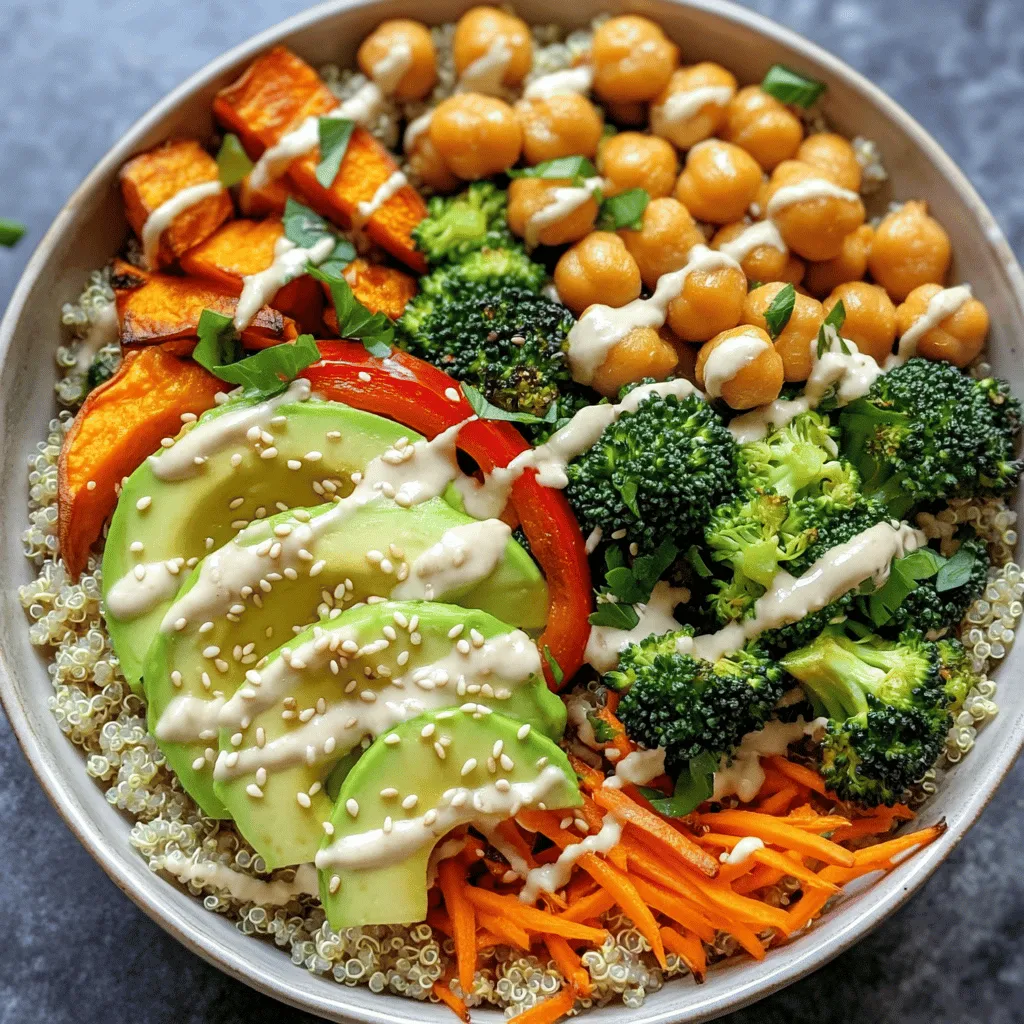
Are you ready to whip up a meal that’s both tasty and healthy? This Vegan Buddha Bowl is not just

To make avocado toast with poached egg, gather these items: - 2 slices of whole-grain bread - 1 ripe avocado - 2 large eggs - 1 tablespoon lemon juice - Salt and pepper to taste - 1/4 teaspoon red pepper flakes (optional for heat) - Fresh herbs for garnish (cilantro or chives work well) - Extra virgin olive oil for drizzling Using fresh ingredients makes a big difference. For the avocado, choose one that yields slightly when pressed. This shows it's ripe and ready. When picking bread, look for whole-grain options that feel firm. Fresh eggs should be clean, with no cracks. Store them in the fridge for best quality. You can mix it up if you want. Try different types of bread like sourdough or rye. For the avocado, you can add tomatoes or radishes for more flavor. If you need a vegan version, skip the egg and use a chickpea mash instead. You could also try hummus for a creamy touch. To start, grab two slices of whole-grain bread. Place the slices in a toaster or under a broiler. Toast them until they turn a lovely golden brown. This takes about 3-5 minutes. Crispy bread gives the dish a nice crunch. It also holds the avocado and egg well, making it easier to eat. While the bread is toasting, let’s make the poached eggs. Fill a pot with water and bring it to a gentle simmer. You can add a splash of vinegar if you want. This helps the egg whites stay together. Crack each egg into a small bowl. Slowly slide each egg into the simmering water. Poach them for about 3-4 minutes. The whites should be set, but the yolk needs to be runny. When done, use a slotted spoon to take them out. Place the eggs on a paper towel to drain. Now, let’s prepare the avocado. Take your ripe avocado and cut it in half. Remove the pit. Use a fork to mash the avocado in a bowl. Add one tablespoon of lemon juice to keep it fresh. Season with salt and pepper to taste. Mix it well until creamy. This tasty spread will go on your toasted bread. For the full recipe, check out the detailed instructions above. To poach an egg well, start with fresh eggs. Fresh eggs hold their shape better. Use a pot with water and add a splash of vinegar. This helps the egg whites stay together. Bring the water to a gentle simmer, not a boil. Crack each egg into a bowl first. Slowly slide the egg into the water. Cook for 3-4 minutes. The whites should be set, but the yolk must stay runny. Use a slotted spoon to lift the egg out. Pat it dry with a paper towel before placing it on the toast. You can change up your avocado mash to keep it fresh. Add different seasonings or ingredients. A pinch of garlic powder gives a nice kick. You can mix in diced tomatoes for a fresh touch. For a creamy texture, add a spoonful of Greek yogurt. Want some heat? Stir in chopped jalapeños or a dash of hot sauce. A sprinkle of cumin can add a warm flavor. Get creative and find what you enjoy most. Garnishes can take your avocado toast to the next level. Fresh herbs like cilantro or chives add bright flavor. You can sprinkle them on top for color. Add red pepper flakes for a spicy touch. A drizzle of extra virgin olive oil enhances the taste and look. For a crunch, consider adding toasted seeds or nuts. A squeeze of lemon juice adds brightness and freshness. These small touches make your dish pop and impress everyone. For the full recipe, refer to the previous section. {{image_2}} To add a kick, try spicy avocado toast. Start with the basic recipe. Then, mix in 1/4 teaspoon of red pepper flakes into your avocado mash. If you want more heat, add sliced jalapeños on top. You can also drizzle some hot sauce over the egg. This brings a nice balance to the creamy avocado. Want a vegan twist? Skip the eggs and use tofu instead. Smash firm tofu and season it with salt, pepper, and nutritional yeast. Add a little turmeric for color. Spread the seasoned tofu on your toast like you would the avocado. Top it with your favorite veggies, like tomatoes or radishes. You’ll get a great taste and texture. If you want more protein, try adding smoked salmon or chickpeas. For salmon, place a few slices on top of the poached egg. If you prefer chickpeas, mash them with the avocado for extra protein. You can also add a sprinkle of feta cheese. This adds creaminess and a salty flavor that pairs well with the avocado. For all these variations, feel free to check the Full Recipe for guidance. Enjoy making your avocado toast unique! After making avocado toast, you may have extra ingredients. Store leftover bread in a cool, dry place. Keep the avocado in the fridge if you have any left. Wrap it tightly in plastic wrap to slow browning. If you have leftover poached eggs, place them in a bowl of cold water. This keeps them fresh for later. To store whole avocados, keep them at room temperature until they ripen. Once ripe, place them in the fridge to slow down spoilage. If you cut an avocado, coat it with lemon juice. This helps prevent browning. Use it within a day or two for best taste. For reheating toast, pop it in the toaster again for a few minutes. This keeps it crispy. If you need to reheat poached eggs, place them in warm water for a few minutes. This gentle method warms them without cooking further. Enjoy your avocado toast fresh for the best flavor. For the full recipe, check out the section above. To poach an egg perfectly, start with fresh eggs. Use a pot of water and bring it to a gentle simmer. Add a splash of vinegar to help the egg whites stay together. Crack the egg into a small bowl, then gently slide it into the water. Cook for about 3-4 minutes. The whites should be set, and the yolk should still be runny. Use a slotted spoon to lift the egg out. Let it drain on a paper towel to remove extra water. Yes, you can use frozen avocado. However, fresh avocado gives the best flavor and texture. If you use frozen, thaw it first. Frozen avocado will be softer, which can change the texture of your mash. This might make it less chunky but still tasty. Remember, fresh is always best for this avocado toast. Whole-grain bread works best for avocado toast. It has a hearty texture that pairs well with creamy avocado. Sourdough is also a good choice, adding a tangy flavor. You can use gluten-free bread if needed. Just ensure it can hold the weight of the toppings. Toast until golden for the best crunch. For the full recipe, check out the details earlier in the article. Avocado toast is a simple dish you can make at home with fresh ingredients. We covered key tips to pick ripe avocados, toast bread, and poach eggs perfectly. You can even try spicy or vegan versions. Remember to store leftovers well to keep everything fresh. In the end, avocado toast is versatile and fun. I hope these tips help you create a tasty meal!

Avocado Toast with Poached Egg Quick and Easy Recipe

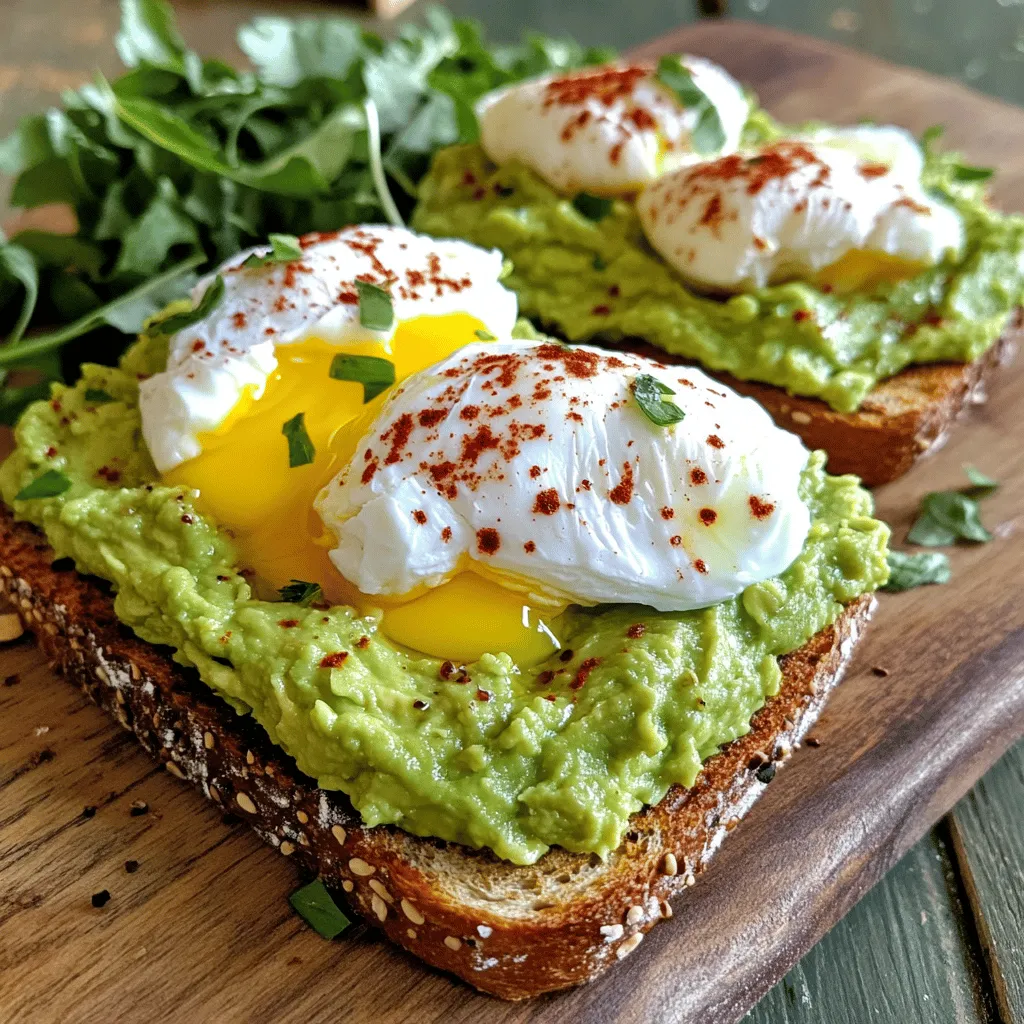
Looking for a quick meal that’s both tasty and good for you? Avocado toast with a poached egg is a

To make these no-bake chocolate peanut butter bars, you need a few simple items: - 1 cup peanut butter (creamy or crunchy, your choice) - 1/2 cup honey or maple syrup - 1 teaspoon vanilla extract - 2 cups rolled oats - 1/2 cup chocolate chips (dark or semi-sweet) - 1/4 teaspoon sea salt - Optional toppings: crushed nuts, shredded coconut, or extra chocolate drizzle Peanut butter options: You can choose between creamy or crunchy peanut butter. Creamy gives a smooth texture, while crunchy adds a fun bite. Alternative sweetness: You can use honey or maple syrup as your sweetener. Honey gives a rich taste, while maple syrup adds a unique flavor. Optional toppings: You can add crushed nuts, shredded coconut, or an extra drizzle of chocolate. These toppings make your bars even more delicious and fun! Now that we have our ingredients, let’s get ready to make some tasty bars! Want to see the full recipe? Check out the [Full Recipe]. Step 1: Mixing the base ingredients In a medium bowl, add 1 cup of peanut butter, 1/2 cup of honey (or maple syrup), and 1 teaspoon of vanilla extract. Mix them well until smooth. This base gives your bars a rich flavor. Step 2: Incorporating oats and sea salt Next, add 2 cups of rolled oats and 1/4 teaspoon of sea salt to the mixture. Use a spatula or a wooden spoon to blend everything together. The mixture should feel thick and sticky. Step 3: Folding in chocolate chips Now, gently fold in 1/2 cup of chocolate chips. Make sure they spread evenly throughout the mixture. This adds sweetness and a chocolatey touch to every bite. Step 4: Pressing the mixture into the baking pan Line an 8x8-inch baking pan with parchment paper. Leave some paper hanging over the sides for easy removal later. Pour the mixture into the pan and press it down firmly. Use the back of a spoon or a spatula to make it flat. Step 5: Adding optional toppings and chilling If you want, sprinkle on some crushed nuts or shredded coconut for extra flavor. Press them down lightly. Cover the pan with plastic wrap or foil. Place it in the fridge for at least 2 hours to let it firm up. After that, lift the bars out using the parchment paper and cut them into squares. For a special touch, drizzle melted chocolate over the top before serving. This is how you create No-Bake Chocolate Peanut Butter Bars. For the complete recipe, refer to the Full Recipe. To get your bars just right, start with the mixture's consistency. It should be thick and sticky. If it feels too dry, add a splash of honey or maple syrup. This will help bind everything together. If it's too wet, sprinkle in more oats until it feels just right. When pressing the mixture into the pan, use the back of a spoon or a spatula. Press firmly and evenly to ensure the bars hold together. A good tip is to cover your fingers with a little water. This will help prevent sticking while you shape the mixture. Adjusting sweetness is easy. If you like it sweeter, add more honey or chocolate chips. For less sweetness, cut back on the honey or use dark chocolate. The texture is also key. If you want a crunch, mix in some crushed nuts or seeds. If you prefer smooth, stick to just the peanut butter and oats. For the full recipe, check the complete list above. Enjoy your tasty treats! {{image_2}} You can easily change the flavors in your no-bake bars. Here are some fun ideas: - Nut substitutions: Try using almond butter or cashew butter. Each nut brings a unique taste. Almond butter adds a slight sweetness, while cashew butter is creamier. - Adding superfoods: You can boost nutrition by adding chia seeds or flax seeds. Chia seeds give a nice crunch, and flax seeds add healthy omega-3s. Just a couple tablespoons will do the trick. - Different chocolate options: Switch up the chocolate by using white chocolate or dark chocolate. White chocolate adds a sweet touch, while dark chocolate gives a rich flavor. You can even mix different types for a layered taste experience. These variations keep the recipe exciting and let you customize it to your liking. Feel free to experiment! For the complete recipe, check out the [Full Recipe]. To keep your no-bake chocolate peanut butter bars fresh, store them properly. Start by placing the bars in the fridge. They can last for about one week when stored this way. Use an airtight container to prevent them from drying out. If you want to keep them longer, freezing is a great option. Wrap each bar in plastic wrap or foil. Place the wrapped bars in a freezer-safe bag or container. This method can extend their life to about three months. Remember to label the bag with the date for easy tracking. When you're ready to enjoy a frozen bar, simply take it out of the freezer. Let it thaw in the fridge for a few hours. You can also let it sit at room temperature for about 30 minutes. This way, your bars will be soft and easy to bite into. Store your no-bake chocolate peanut butter bars correctly, and they will stay delicious for longer! For the full recipe, check out the main article. Can I use natural peanut butter? Yes, you can use natural peanut butter. It adds a rich flavor. Just check if it stirs well. Natural peanut butter can sometimes be runny or thick. How long do these bars last in the fridge? These bars last about one week in the fridge. Store them in an airtight container. This keeps them fresh and tasty for longer. Can I make these bars vegan? Absolutely! Use maple syrup instead of honey. Ensure your chocolate chips are dairy-free. This way, you can enjoy a vegan treat. What can I substitute for oats? You can use crushed graham crackers or almond flour. Both add different textures. Each option can change the taste, so choose what you like best. For the full recipe, check the No-Bake Chocolate Peanut Butter Bars section above. In this post, we examined how to make no-bake chocolate peanut butter bars. You learned about key ingredients, step-by-step instructions, and helpful tips. We also explored flavor variations and best storage methods. These bars are easy, tasty, and versatile. Feel free to adjust the recipe to fit your needs and preferences. Enjoy making your sweet treats, and share them with friends and family! There's no better way to satisfy cravings than with homemade bars.

No-Bake Chocolate Peanut Butter Bars Simple Recipe

Craving a sweet treat that’s easy to make? You’ll love my No-Bake Chocolate Peanut Butter Bars! This simple recipe mixes

- 2 medium zucchini, spiralized - 1 cup bell peppers (red, yellow, and green), sliced - 1 cup snap peas, trimmed - 1 medium carrot, julienned - 1 small onion, thinly sliced - 3 cloves garlic, minced - 1 tablespoon fresh ginger, minced - 2 tablespoons soy sauce (or tamari for gluten-free) - 1 tablespoon sesame oil - 1 tablespoon olive oil - 1 teaspoon chili flakes (adjust to taste) - 2 green onions, chopped (for garnish) - Sesame seeds (optional, for garnish) When I cook this dish, I love using fresh and colorful ingredients. The zucchini gives a nice twist, while the bell peppers add sweetness. Snap peas bring a crisp bite, and carrots add a pop of color. Every bite is packed with flavor and nutrition. Using the right pantry staples makes this dish quick and easy. Soy sauce and sesame oil give depth. Chili flakes add a nice kick if you like heat. Feel free to experiment with garnishes. Chopped green onions add freshness, while sesame seeds give a nice crunch. You can find the full recipe for Zesty Zucchini Noodle Stir-Fry at the end of this article. Enjoy making this quick and healthy meal! To start, grab two medium zucchinis. Use a spiralizer to make long noodles from them. This tool is fun and easy. After spiralizing, lay the noodles on a clean kitchen towel. This helps soak up extra water. Zucchini can release moisture, so this step is key. Next, heat a large non-stick skillet or wok. Pour in one tablespoon of olive oil over medium-high heat. Add one thinly sliced onion to the pan. Chop three cloves of garlic and one tablespoon of fresh ginger. Toss these in with the onion. Stir-fry for about two minutes. This brings out their rich smell. Now, add one cup of sliced bell peppers and one cup of trimmed snap peas to the mix. Also, add one julienned medium carrot. Stir-fry for three to four minutes. You want them soft but still crunchy. Then, it's time for the zucchini noodles. Add them to the pan. Pour in two tablespoons of soy sauce and one tablespoon of sesame oil. Mix everything gently. Cook for another two to three minutes. The noodles should be just tender. Want it spicy? Add one teaspoon of chili flakes. Toss again to spread the spice evenly. Finally, remove from heat. Garnish with chopped green onions and sesame seeds if you like. Enjoy this quick and tasty meal! You can find the full recipe in the previous section. To spiralize zucchini, start with firm, fresh zucchini. Cut the ends off each zucchini. Place it in the spiralizer and twist to create long noodles. If you don’t have a spiralizer, a vegetable peeler works too. Just peel long strips to get a similar look. After spiralizing, lay the noodles on a clean kitchen towel. This helps soak up any extra water. Prep your veggies ahead of time. Slice the bell peppers, snap peas, and carrots while the zucchini noodles sit. You can even do this the night before. Store them in airtight containers for easy access. Also, use pre-minced garlic and ginger. This way, you can cut your cooking time in half. Taste as you cook! Start with the basic soy sauce and sesame oil mix. If you like more heat, add extra chili flakes. For a sweeter touch, drizzle a bit of honey or maple syrup. You can also add a splash of rice vinegar for tang. The key is to make the dish yours. Experiment and find the perfect balance of flavors that you love! {{image_2}} You can make your zucchini noodle stir-fry heartier by adding protein. Chicken is a great choice. Use thin slices or cubes for quick cooking. Tofu works well if you want a vegetarian option. Just press it to remove moisture, then cube it before cooking. Shrimp adds a nice touch too. They cook quickly and pair well with the flavors in the dish. Feel free to mix up the veggies in your stir-fry. Broccoli, mushrooms, and baby corn bring different textures. You can also use bok choy or zucchini blossoms for a fun twist. The key is to choose veggies that cook at the same time. You want everything to stay crisp and vibrant. Don’t hesitate to get creative with what you have on hand. For a gluten-free version, simply use tamari instead of regular soy sauce. This keeps the dish tasty without gluten. If you want to make it vegan, ensure your protein choice is plant-based. Tofu or chickpeas are excellent options. You can also enhance the flavor with spices or fresh herbs instead of relying on meat. These variations let you customize your meal to your liking. Enjoy the zest and health benefits of this dish while keeping it fresh and exciting. For the complete recipe, check out the Full Recipe section! To keep your zucchini noodle stir-fry fresh, store it in an airtight container. Make sure to cool it first. Place it in the fridge and enjoy within three days. This helps keep the flavors strong and the texture nice. If you have extra zucchini noodles, store them separately. This prevents them from getting soggy. When you reheat your stir-fry, use a skillet over medium heat. This method warms the dish evenly. Add a splash of water to keep it moist. Stir gently until heated through. Avoid using the microwave, as it can make the noodles mushy. For best results, reheat in small batches. Freezing zucchini noodles is easy but requires some care. First, spiralize your zucchini. Then, blanch them in boiling water for one minute. This step helps preserve the color and taste. After blanching, cool them in ice water. Drain well and pack into airtight bags. Remove as much air as you can. You can freeze them for up to three months. When ready to use, cook from frozen for best texture. Yes, you can use regular pasta. However, zucchini noodles have fewer carbs and calories. They also add a fresh taste. If you prefer pasta, choose whole wheat or gluten-free options. Cook the pasta as directed and mix it with the stir-fry. This gives you a hearty meal. To keep zucchini noodles firm, follow these tips: - Spiralize and drain: After spiralizing, set them on a clean towel. This helps absorb moisture. - Sauté quickly: Cook them last and only for a few minutes. This keeps them from getting too soft. - High heat: Use medium-high heat when cooking. This helps maintain their texture. You have many options for sides. Here are some ideas: - Brown rice or quinoa: These grains add a nice base. - Grilled chicken or tofu: This adds protein and makes the meal filling. - A fresh salad: A light salad offers a crunchy contrast. For the complete recipe, check out the Zesty Zucchini Noodle Stir-Fry. This dish is quick, easy, and full of flavor! This blog post shared how to make a tasty zucchini noodle stir-fry. We covered fresh and pantry ingredients, plus tasty options to boost flavor. I walked you through step-by-step instructions, from spiralizing zucchini to cooking veggies. You got tips for easy prep and ways to adjust flavors. We explored protein options and veggie mixes to suit your taste. Lastly, I provided storage tips to keep leftovers fresh. Enjoy your cooking adventure and create your perfect stir-fry!

Zucchini Noodle Stir-Fry Quick and Flavorful Meal

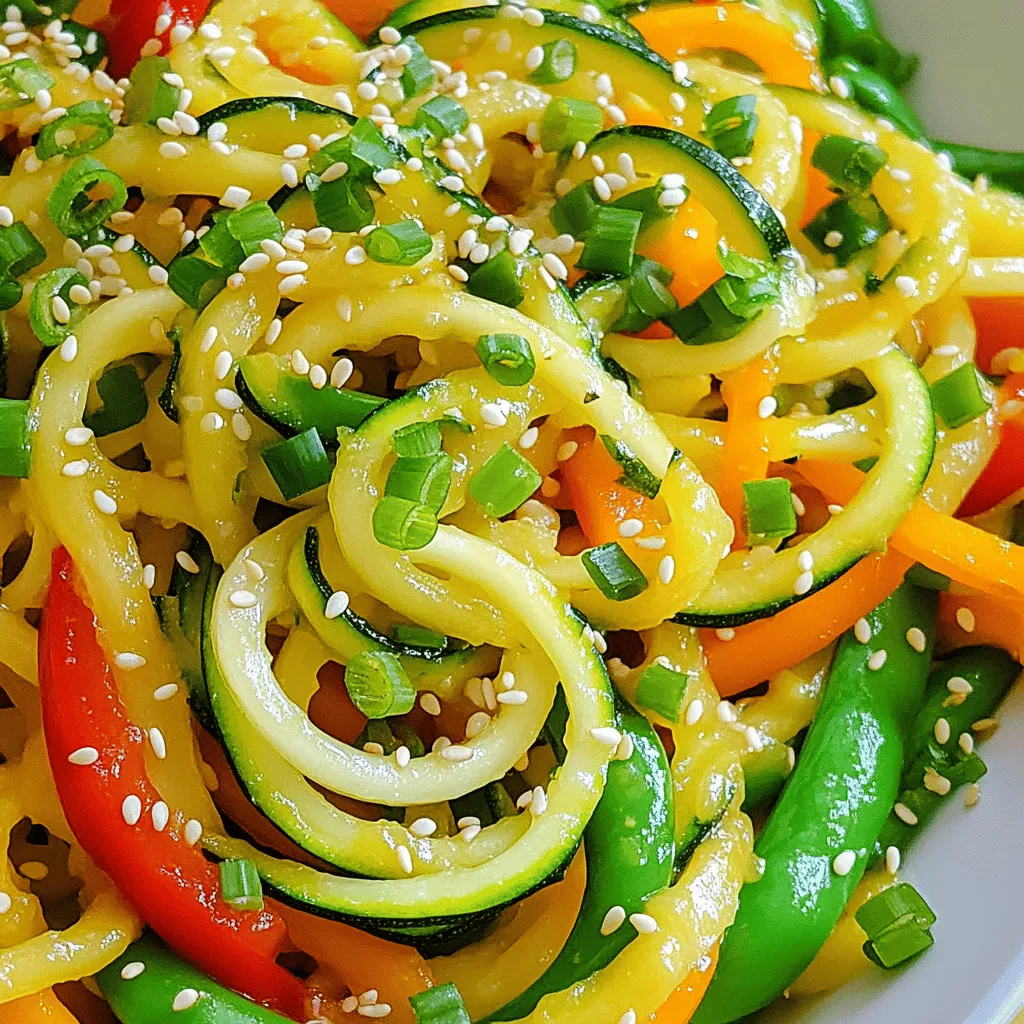
Looking for a quick and tasty meal? You’ve found it! Zucchini Noodle Stir-Fry packs fresh flavors and colorful veggies into

To make Instant Pot creamy mushroom risotto, you need simple, fresh ingredients. Here’s what you will gather: - 1 cup Arborio rice - 4 cups vegetable broth (low sodium) - 8 ounces cremini mushrooms, sliced - 1 small onion, finely chopped - 2 cloves garlic, minced - 1 cup Parmesan cheese, grated - 2 tablespoons unsalted butter - 1 tablespoon olive oil - 1 teaspoon thyme (fresh or dried) - 1 teaspoon salt - ½ teaspoon black pepper - Chopped parsley for garnish These ingredients work together to create a rich and creamy dish. Arborio rice is key for its starchiness, which helps thicken the risotto. The vegetable broth adds depth, while the cremini mushrooms provide an earthy flavor. Using fresh onion and garlic enhances the taste, making the dish even better. Parmesan cheese gives that creamy texture, while butter and olive oil add richness. Thyme, salt, and pepper are essential for seasoning. Lastly, chopped parsley adds a pop of color and freshness to each bowl. Gather these items before you start cooking for the best results. You can find the full recipe in the next section. - Sauté aromatics in the Instant Pot: Set your Instant Pot to the Sauté function. Add olive oil and butter. Once melted, toss in the chopped onion. Cook for 3 to 4 minutes. The onion should be soft and clear. - Add garlic and mushrooms: Stir in the minced garlic and sliced cremini mushrooms. Cook for about 5 minutes. Stir often until the mushrooms are soft and brown. - Toast the rice: Add the Arborio rice to the pot. Stir for around 2 minutes. You want the rice to look a bit clear. - Add broth and seasoning: Pour in the vegetable broth. Add thyme, salt, and black pepper. Stir well to mix everything. - Pressure cook the risotto: Close the lid and seal the vent. Set your Instant Pot to Manual, high pressure, for 6 minutes. - Quick release the pressure: When the timer goes off, carefully move the vent to venting. This will release the steam quickly. - Stir in Parmesan cheese: Open the lid and add the grated Parmesan cheese. Stir until it melts and makes the risotto creamy. Taste and adjust the seasoning if needed. - Garnish and serve: Spoon the risotto into bowls. Top with chopped parsley for a fresh look. Enjoy your meal! For the full recipe, check out the [Full Recipe]. Choosing the right rice For risotto, use Arborio rice. This rice has a high starch content. It gives risotto its creamy texture. Other types of rice may not yield the same results. Stick to Arborio for the best dish. Importance of low sodium broth Using low sodium broth is key. It allows you to control the salt level in your dish. This broth enhances the flavor without overpowering it. Always taste and adjust your seasoning as needed. Achieving the desired creaminess The creaminess of your risotto comes from two main factors: starch and technique. Stirring the rice releases starch. This gives your risotto that velvety mouthfeel. Be patient and stir often while cooking. Adjusting cooking times Cooking times for risotto in an Instant Pot are shorter. Set your pot to high pressure for just six minutes. This quick cooking keeps the rice tender. Follow up with a quick release for the best texture. Maintaining the right pressure Ensure your lid is sealed tight during cooking. This keeps the pressure steady. If your Instant Pot loses pressure, the risotto may not cook fully. Always check the vent before starting. Pairing with side dishes Risotto pairs well with simple side dishes. A light salad or steamed vegetables works great. These sides add freshness and balance to your meal. Consider using seasonal greens for added flavor. Best wines to complement risotto A crisp white wine like Sauvignon Blanc is ideal. It complements the earthy mushrooms well. If you prefer red, a light Pinot Noir is a good choice. Enjoy the meal with your favorite drink to enhance the experience. For the detailed recipe, check out the Full Recipe. {{image_2}} You can make this creamy mushroom risotto even better. Try adding proteins like chicken or shrimp. Simply sauté them after the onions. This gives you a heartier dish. If you want more color, toss in some peas or asparagus. These veggies add a nice crunch and vibrant look. Want a vegan version? Swap the cheese for a plant-based alternative. You can also use olive oil instead of butter. This keeps the flavor rich, without dairy. If you need gluten-free options, use gluten-free broth. Just make sure your rice is certified gluten-free. Using seasonal mushrooms can make a big difference. Try chanterelles in the spring or shiitakes in the fall. Each type brings its own unique taste. Fresh herbs also change with the seasons. Use basil in summer or rosemary in winter for a fresh flavor boost. You can find tasty herbs at local markets. Using seasonal ingredients makes your dish not just good, but great. For the full recipe, check out the full recipe section. To keep your risotto fresh, store it in an airtight container. Place it in the fridge. Make sure it cools to room temperature first. Use the leftover risotto within three days for best taste. Always check for any signs of spoilage before eating. You can reheat risotto in different ways. A microwave is quick and easy. Place the risotto in a bowl and add a splash of broth or water. Heat for one minute, stir, and heat again if needed. You can also use a skillet. Heat over low heat, adding broth slowly. Stir until warm and creamy. To freeze risotto, let it cool completely. Spoon it into freezer bags or containers. Press out as much air as you can before sealing. Label and date the bags. Risotto can last for up to three months in the freezer. When you're ready to eat, thaw it overnight in the fridge. Then, reheat it on the stovetop or microwave. Add a little broth or water to restore its creamy texture. How to make Instant Pot risotto? To make risotto in an Instant Pot, I start by sautéing onion in butter and olive oil. After it becomes soft, I add garlic and mushrooms. Then, I toast Arborio rice before adding vegetable broth and seasoning. I seal the pot and cook on high pressure for six minutes. Finally, I release the pressure quickly and stir in Parmesan cheese. Can I use other types of rice? You can use other rice, but Arborio rice works best. It gives risotto its creamy texture. If you prefer, you can try Carnaroli or Vialone Nano. These types also help achieve that perfect creaminess. What to do if the risotto is too dry? If your risotto is too dry, add a bit more broth or water. Stir it in slowly. This helps to bring back the creamy texture. Always taste it to check the flavor after adding more liquid. What can I use instead of Arborio rice? If you need a substitute for Arborio rice, try using Carnaroli or Vialone Nano. You can also use farro or quinoa, but they will change the dish's texture. They are good options if you want something different. Alternatives for Parmesan cheese? For Parmesan cheese, you can use Pecorino Romano for a sharper taste. Nutritional yeast is great for a vegan option. It gives a cheesy flavor without dairy, making it a good choice for many diets. What if my risotto is undercooked? If your risotto is undercooked, add a small amount of broth and seal the pot again. Cook for another minute or two. This should help finish cooking the rice without overcooking it. Why did the Instant Pot give a burn warning? The burn warning usually means that food is stuck to the bottom. It can happen if there is not enough liquid. To prevent this, always scrape the bottom of the pot after sautéing. If you get the warning, add a bit more broth and restart the cooking. In this article, I broke down how to make delicious Instant Pot risotto. We covered the ingredients, step-by-step cooking instructions, and tips to perfect your dish. Remember, using the right rice and broth makes a huge difference. Explore flavor variations and seasonal ingredients to keep it fresh. Lastly, proper storage and reheating will ensure you enjoy leftovers safely. Make this risotto your own and delight friends and family with each creamy bite!

Instant Pot Creamy Mushroom Risotto Simple Delight

If you crave a cozy dish that’s easy to make, you’ll love my Instant Pot Creamy Mushroom Risotto. This recipe

To make the best chocolate chip cookie dough dip, gather these simple ingredients: - 1 cup all-purpose flour - ½ cup unsalted butter, softened - ¾ cup brown sugar, packed - ¾ cup granulated sugar - 1 teaspoon vanilla extract - 1 cup chocolate chips (semi-sweet or milk chocolate) - 1 package (8 oz) cream cheese, softened - ½ cup powdered sugar - ¼ teaspoon salt - 2 tablespoons milk (or more for consistency) Each ingredient plays a vital role in creating a dip that tastes just like cookie dough. Why these ingredients matter: 1. All-purpose flour: This gives the dip that classic cookie dough texture. 2. Unsalted butter: It adds richness and creaminess. 3. Brown and granulated sugar: These sweeteners provide that deep, sweet flavor we love. 4. Vanilla extract: This adds warmth and depth to the flavor. 5. Chocolate chips: Of course, these are the stars of the dip! 6. Cream cheese: It makes the dip rich and smooth. 7. Powdered sugar: This adds sweetness without grittiness. 8. Salt: A pinch enhances all the flavors. 9. Milk: This helps achieve your desired consistency. The right balance of these ingredients makes your chocolate chip cookie dough dip truly irresistible. Check out the Full Recipe for detailed instructions! 1. Beat the butter and cream cheese together. Start with a large mixing bowl. Add your softened butter and cream cheese. Use a hand mixer or a sturdy spoon. Mix until smooth and creamy. 2. Incorporate brown and granulated sugar. Add in the packed brown sugar and granulated sugar. Mix well until fully combined. You want a fluffy texture that feels light. 3. Mix in vanilla extract and salt. Next, stir in the vanilla extract and salt. This adds great flavor. Make sure everything is well mixed. 4. Gradually mix in the all-purpose flour. Take your all-purpose flour and slowly add it to the bowl. Stir a little at a time to avoid clumps. Keep mixing until there are no dry patches. 5. Fold in the chocolate chips. Once the flour is combined, gently fold in the chocolate chips. This will ensure they are evenly spread throughout the dip. 6. Add milk for desired texture. If the dip is too thick, add milk one tablespoon at a time. Mix well after each addition. Keep going until you reach a smooth and dippable texture. 7. Transfer and chill before serving. Transfer the cookie dough dip to a serving bowl. If you want it to be firmer, chill it in the fridge for about 30 minutes. This helps it set nicely. This recipe is fun and easy to make. You can find the full recipe listed above. Enjoy dipping with graham crackers, fruit, or pretzels! To make this dip truly shine, start with room temperature ingredients. This makes mixing much easier and ensures a smooth texture. Softened butter and cream cheese blend better, giving you that creamy base we crave. If you want an even better dip, chill it for about 30 minutes before serving. This helps the dip firm up, making it easier to scoop and enjoy. A good presentation makes any dish more tempting. Serve your dip in a shallow bowl. This way, it looks inviting and is easy to dip into. Top it with extra chocolate chips for a sweet touch. Arrange dippable items like graham crackers or fresh fruit around the bowl. This not only adds color but also gives people plenty of choices to enjoy your delicious dip. {{image_2}} You can make this dip even more fun! Try adding nuts like walnuts or pecans. They add a nice crunch and flavor. You can also use different types of chocolate. Dark chocolate chips will give a richer taste. White chocolate chips can add sweetness. For a unique twist, add a splash of almond extract. This gives the dip a light, nutty flavor. Just a little goes a long way. Mix it in when you add the vanilla extract. This dip is great with many things. You can serve it with graham crackers or mini cookies. Fresh fruit like strawberries or apple slices works well too. Pretzels bring a salty crunch that pairs nicely with the sweet dip. You can also get creative and use it as a topping. Try it on ice cream for a delightful treat. It also tastes amazing on pancakes. Just spoon it on top and enjoy a sweet breakfast! To keep your chocolate chip cookie dough dip fresh, store it in an airtight container. This prevents it from drying out or absorbing other smells from the fridge. Use a glass or plastic container with a tight lid for best results. If you make a big batch, you can also divide it into smaller containers for easy snacking. You can store this dip in the fridge for up to five days. After that, it may start to lose its flavor and texture. Look for signs of spoilage, like an off smell or any change in color. If you see any mold, it's best to throw it away. Always trust your senses when it comes to food safety! Can I eat raw flour in this dip? Raw flour can contain harmful bacteria. I recommend baking it first. To do this, spread the flour on a baking sheet and bake at 350°F for about 5 minutes. This kills any bacteria and makes it safer to eat in your dip. How can I make this dip gluten-free? To make this dip gluten-free, use a gluten-free flour blend. Many brands offer blends that work well in recipes. Just substitute the all-purpose flour with the same amount of gluten-free flour. What can I substitute for cream cheese in the recipe? If you need a cream cheese substitute, try Greek yogurt or mascarpone. Both will give you a creamy texture. You can also use a dairy-free cream cheese if you prefer a vegan option. Can I freeze chocolate chip cookie dough dip? Yes, you can freeze this dip! Place it in an airtight container. It will last up to three months. When ready to eat, thaw it in the fridge overnight. You may need to stir in a bit of milk for the right texture. What are the best snacks to dip into this cookie dough dip? This dip pairs well with many snacks. Try it with graham crackers, fresh fruit, or pretzels. Mini cookies also make a fun dippable treat. You can even use apple slices for a tasty twist! This blog post covered a delicious chocolate chip cookie dough dip recipe. We went through the key ingredients, preparation steps, and tips for making it perfect. You learned about flavor variations and how to store leftovers. Finally, we answered common questions to help you succeed. Try making this dip for your next gathering. It will impress your friends and family with its creamy texture and rich taste. Enjoy every bite and have fun experimenting with different dippables!

Chocolate Chip Cookie Dough Dip Irresistible Recipe

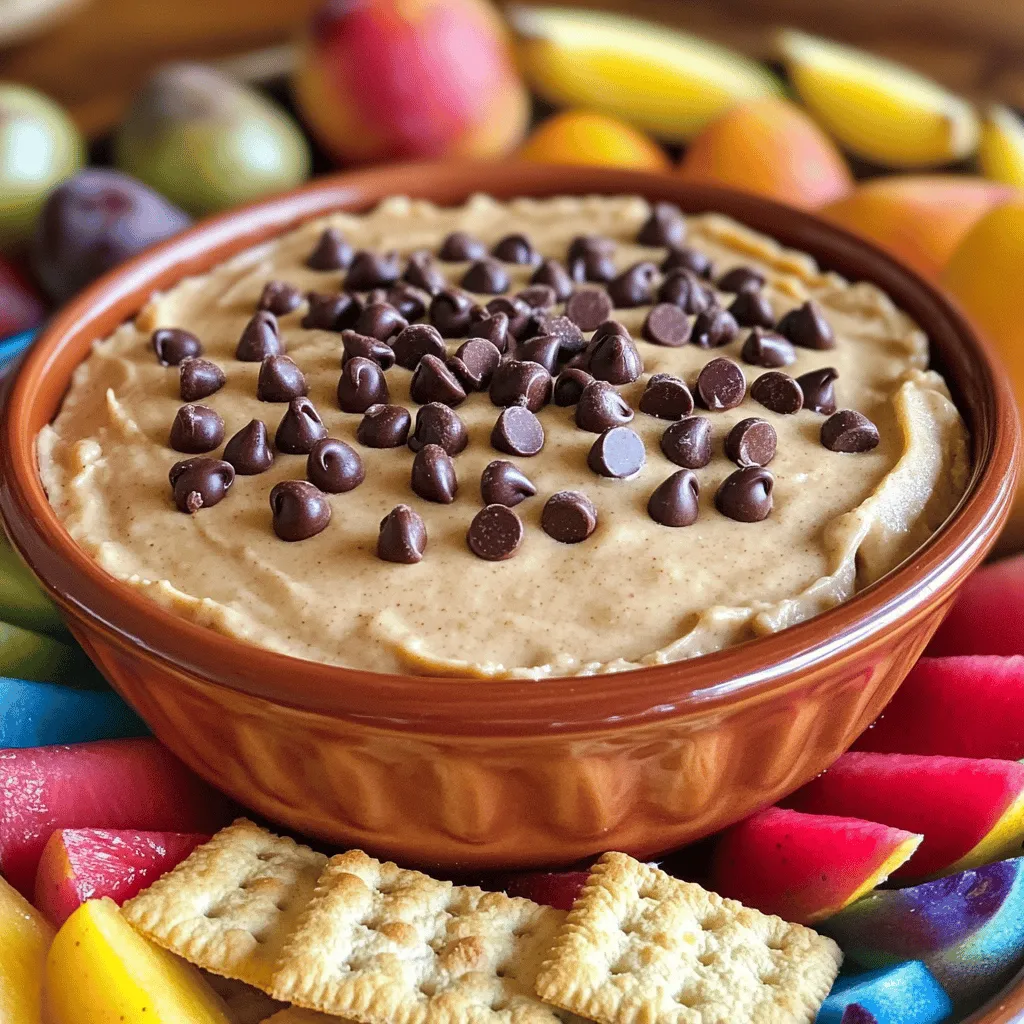
Craving a sweet treat that’s easy to make? Look no further! This Chocolate Chip Cookie Dough Dip is simple, fun,

- 2 ripe avocados - 1 cup cherry tomatoes, halved - 1 cup fresh mozzarella balls, halved - 1/4 cup fresh basil leaves, chopped - 2 tablespoons balsamic glaze - 1 tablespoon extra virgin olive oil - Salt and pepper to taste When you make Caprese Stuffed Avocado, start with ripe avocados. They should feel slightly soft when you press them. Next, gather sweet cherry tomatoes. Their bright color adds great flavor. Fresh mozzarella balls bring creaminess and a chewy texture. You will also need fresh basil leaves. Their smell alone makes this dish special. Then, balsamic glaze adds a tangy sweetness. Extra virgin olive oil gives richness. Finally, salt and pepper enhance all the flavors. This simple dish uses fresh, high-quality ingredients. I always recommend using the best you can find. For the full recipe, check out the instructions later in the article. 1. Cutting and preparing avocados Start by cutting the ripe avocados in half. Use a sharp knife for safety. Carefully remove the pit with a spoon. This step is key for avoiding mess. Next, use a spoon to scoop out a little flesh from each half. This creates space for the filling. 2. Mixing Caprese ingredients In a bowl, combine the halved cherry tomatoes, mozzarella balls, and chopped basil. This mixture brings fresh flavors together. Drizzle in the olive oil and balsamic glaze. Season with salt and pepper to taste. Toss gently to combine so all the flavors mix. 3. Stuffing the avocado halves Now it’s time to fill the avocado halves. Spoon the Caprese mixture into each half. Make sure to pack it well for a full bite. Each half should look colorful and inviting. 1. Drizzling balsamic glaze To make your dish pop, drizzle a little more balsamic glaze on top. This adds a glossy finish and extra flavor. It draws the eye and enhances taste. 2. Garnishing with basil Finish your dish by garnishing with a few extra basil leaves. This adds a fresh touch and enhances the aroma. It makes the dish look more appealing and vibrant. What are the signs of ripeness? Look for avocados that feel slightly soft when you press them. The skin color can vary by type. For Hass avocados, dark skin usually means ripeness. Avoid ones with large dark spots or dents. How should I store avocados? If they are not ripe, place them on the counter. When ripe, keep them in the fridge to slow down spoilage. You can also store cut avocado with lemon juice to keep it fresh longer. What are ideal pairings for Caprese Stuffed Avocado? Pair this dish with crusty bread or a fresh side salad. A light white wine, like Sauvignon Blanc, complements the flavors well. For a heartier meal, serve with grilled chicken or shrimp. What are good portion sizes and presentation ideas? Each half avocado serves one person. You can place them on a colorful plate for a pop of color. Drizzle extra balsamic glaze over the top for a fancy touch. Add a few basil leaves for garnish and extra flavor. For the complete recipe, check out the Full Recipe. {{image_2}} You can change the flavors in Caprese Stuffed Avocado easily. Instead of fresh mozzarella, try feta or goat cheese. These choices add a nice tang. For the tomatoes, cherry tomatoes work great, but you can use grape tomatoes or even diced heirloom tomatoes. Each type brings a unique taste and texture. Want to make your dish even better? Adding proteins can transform it. Grilled chicken or shrimp can make the meal more filling. Cook the protein with some herbs for extra flavor. You can also play with herbs and spices. Try adding oregano or a pinch of red pepper flakes for a kick. Fresh thyme or chives can add a lovely touch. These simple swaps and additions can keep your Caprese Stuffed Avocado exciting and new. Explore these variations to find your favorite! For the full recipe, check out the Caprese Stuffed Avocado section. To keep your Caprese stuffed avocado fresh, store any leftovers in the fridge. Place the stuffed halves in an airtight container. This prevents browning and keeps the flavors strong. You can also squeeze some lemon juice on top to slow down browning. For the ingredients, store unused avocados at room temperature until ripe. Once ripe, you should store them in the fridge. Keep cherry tomatoes on the counter, away from direct light. Store mozzarella balls in their brine to keep them fresh. Fresh basil should be in a glass of water, like a flower. Cover it loosely with a plastic bag. Reheating stuffed avocados is tricky but possible. Start by using the oven for best results. Preheat your oven to 350°F (175°C). Place the avocados on a baking sheet. Heat them for about 10 minutes. This warms them through without making them mushy. You can also use the microwave. But be careful, as it can make the avocado too soft. Heat on low power for about 30 seconds. Check often to avoid overheating. Enjoy your meal warm, but fresh is always best! Can I prepare Caprese Stuffed Avocado in advance? Yes, you can prepare the filling in advance. Mix the tomatoes, mozzarella, and basil. Store them in the fridge. Cut the avocados just before serving. This keeps them fresh and green. Is this dish suitable for meal prep? Yes, it is great for meal prep! You can keep the filling and avocados separate. This way, you can enjoy a fresh meal all week long. Just stuff the avocados when you're ready to eat. What can I serve with Caprese Stuffed Avocado? You can serve this dish with a simple salad or crusty bread. A light soup pairs well too. It also makes a great starter for a dinner party. How can I make this recipe vegan? To make it vegan, swap the mozzarella for a plant-based cheese. You can also use tofu for added protein. The rest of the ingredients are already vegan-friendly. Enjoy your tasty, plant-based meal! For the full recipe, check the Caprese Stuffed Avocado section. Caprese stuffed avocados combine simple ingredients for a fresh and tasty dish. We covered how to prepare, present, and store this meal, plus tips on choosing ripe avocados. You can enhance flavors with different proteins or herbs. This dish is fun and flexible for any occasion. Remember, great meals start with fresh ingredients. Enjoy making this simple, healthy recipe!

Caprese Stuffed Avocado Flavorful Fresh Dish

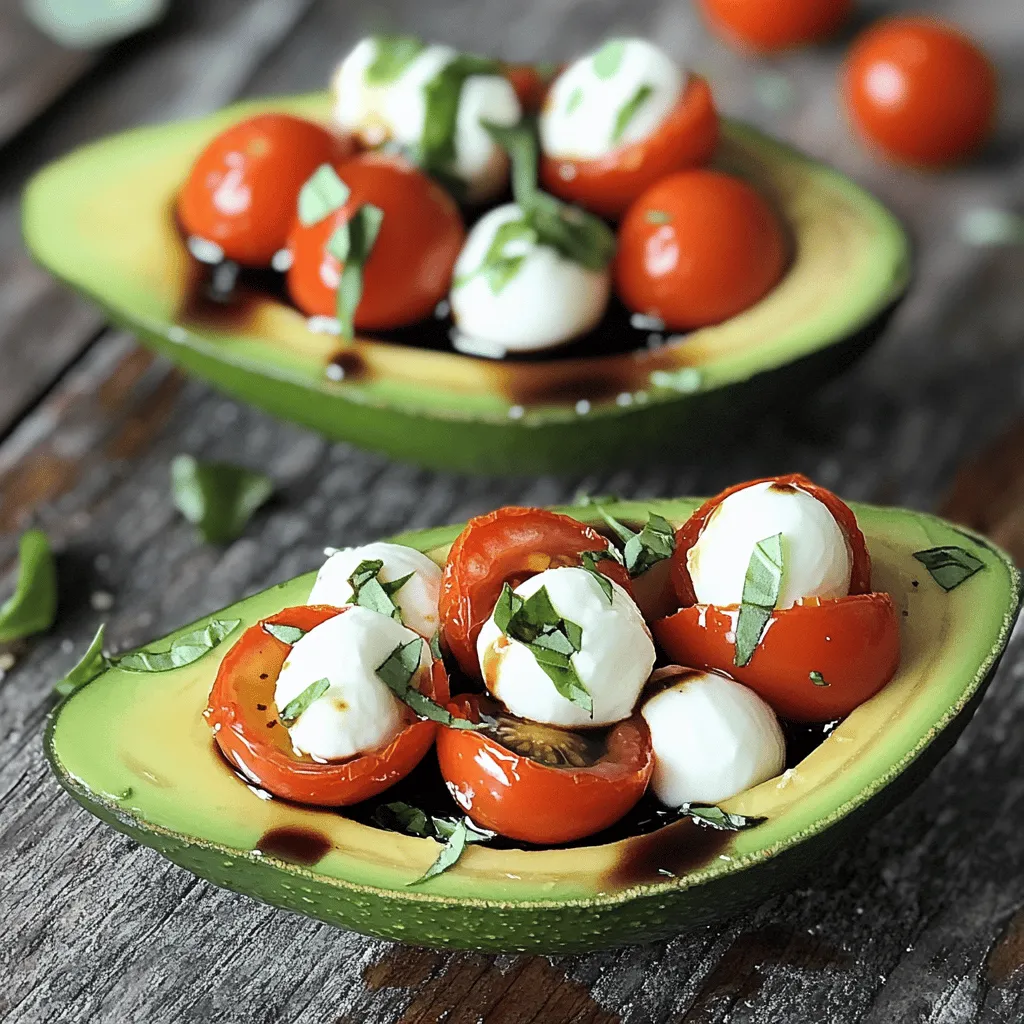
Looking for a fresh and tasty dish that’s easy to make? You’ll love my Caprese Stuffed Avocado! This vibrant meal

Older posts
Newer posts
← Previous Page1 … Page46 Page47 Page48 … Page59 Next →

dsad

© 2025 Recipes Pursuit • Built with GeneratePress

Our Policies

  • Copyright Policy
  • Cookie Policy
  • GDPR Policy
  • Privacy Policy
  • Disclaimer
  • Terms Of Use

More Information

  • Home
  • About
  • Contact
  • Appetizers
  • Dessert
  • Dinner
  • Drinks
©2025, Recipes Pursuit About Back To Top