Skip to content
DisclaimerTerms Of UseGDPR PolicyCookie Policy

Recipes Pursuit

  • Home
  • Drinks
  • Appetizers
  • Dinner
  • Dessert
  • About
  • Contact
  • Privacy Policy
DisclaimerTerms Of UseGDPR PolicyCookie Policy

Emma Smith

To make Blueberry Chia Seed Jam, you'll need simple and fresh ingredients. Here’s what you should gather: - 2 cups fresh or frozen blueberries - 1/4 cup maple syrup (or honey) - 2 tablespoons chia seeds - 1 tablespoon lemon juice - 1/2 teaspoon vanilla extract - Pinch of salt These ingredients work together to create a jam that is both tasty and healthy. The blueberries give a sweet and tangy flavor, while chia seeds help thicken the jam. Maple syrup or honey adds sweetness without refined sugar. Lemon juice brightens the taste, and vanilla brings warmth. This jam is perfect for spreading on toast or topping your favorite pancakes. With this recipe, you can enjoy a homemade treat that is easy to make and packed with nutrients. For the full recipe, be sure to check out the detailed instructions! Start by adding the blueberries and maple syrup to a medium saucepan. Stir them together over medium heat. This mix needs to come to a gentle simmer. You will see the blueberries burst and release their juices in about 5 to 7 minutes. While the blueberries cook, think about how you want your jam to feel. If you like a chunky texture, use a fork or potato masher to mash some of the blueberries. If you prefer a smoother jam, leave them whole. Your choice will affect the final jam's texture. Once the blueberries are ready, add the chia seeds, lemon juice, vanilla extract, and a pinch of salt. Stir everything well to combine. The chia seeds will help thicken the jam as it cooks. Let the jam simmer for an additional 5 to 10 minutes. Stir it regularly to prevent sticking. You will notice the mixture getting thicker. This thickening happens because the chia seeds absorb the liquid. Keep an eye on it until it reaches your desired thickness. After cooking, remove the saucepan from the heat. Let the jam cool for a few minutes. Then, transfer it to a clean glass jar or an airtight container. Cool it completely before you store it in the fridge. This jam lasts for up to 2 weeks, so enjoy it in many ways! To adjust the sweetness of your jam, taste it as you cook. If you want it sweeter, add more maple syrup or honey. For less sweetness, reduce the sweetener. If your jam is too thick, add a splash of water or more lemon juice. If it’s too runny, let it simmer longer. The chia seeds will absorb liquid and thicken it over time. Chia seeds and blueberries are both superfoods. Chia seeds are rich in omega-3 fatty acids, fiber, and protein. They help keep you full and support digestion. Blueberries are high in antioxidants and vitamins. They may boost heart health and improve memory. Together, they make a nutritious topping for any meal. Serve your Blueberry Chia Seed Jam on toasted bread or pancakes. Add a dollop to yogurt for a tasty breakfast. For a beautiful touch, garnish with fresh blueberries. Sprinkle some chia seeds on top for added texture. A drizzle of honey can also enhance the look and flavor. This jam not only tastes great but also looks inviting! {{image_2}} You can transform your blueberry chia seed jam by adding herbs or spices. For a fresh twist, try adding a sprig of mint while it cooks. This gives a nice cooling flavor. You could also add a pinch of cinnamon for warmth. This spice pairs well with blueberries, making the jam comforting and rich. Just remember to taste as you go. You want the new flavors to blend with the blueberries, not overpower them. If you want to change the sweetness, consider other options. Maple syrup is great, but honey works too. You can even use agave syrup for a lighter taste. Each sweetener brings its own flavor. If you prefer a sugar-free option, try using stevia or monk fruit sweetener. Just adjust the amount to your taste. These alternatives can make your jam fit your diet better and still taste delicious. To keep this recipe vegan, focus on the sweeteners. Maple syrup is already plant-based, so you’re good there. If you choose honey, simply replace it with maple syrup. This keeps the jam vegan-friendly. Also, check the vanilla extract. Most are fine, but some brands may add dairy. Look for pure extracts to ensure they fit your plant-based needs. Making these small changes allows everyone to enjoy this tasty jam! Store your blueberry chia seed jam in the fridge. Use a clean glass jar or airtight container. Make sure the jam cools completely before sealing. This helps keep it fresh longer. Always use a clean spoon to scoop out the jam. This keeps germs away and helps it last. Your jam can stay good for up to two weeks in the fridge. Check for any mold or off smells before using. If it looks or smells strange, throw it away. Keeping it in a cool area helps maintain its taste and texture. To store the jam long-term, you can freeze it. Use freezer-safe containers and leave some space at the top. The jam will expand as it freezes. It can last up to six months in the freezer. When you want to use it, just thaw it in the fridge overnight. This keeps it safe and tasty. Yes, you can use frozen blueberries. They work well in this recipe. Just add them directly to the pot without thawing. Frozen berries may release more juice than fresh ones. This can make your jam a bit runnier at first. If it seems too thin, just let it simmer longer. The chia seeds will still thicken it up nicely. Your jam will take about 10 to 15 minutes to thicken. After adding the chia seeds, keep stirring and simmering. You will notice it getting thicker as it cooks. The chia seeds absorb liquid and help it set. If you want a thicker jam, let it simmer a bit longer. You can serve this jam with many tasty dishes. Try it on toasted bread or pancakes for breakfast. It also goes well with yogurt or oatmeal. You can even use it as a topping for ice cream or cheesecake. The jam adds a sweet and fruity flavor to any meal. Chia seeds are great for thickening, but you can use alternatives. Flaxseeds can work, but they may change the flavor slightly. You can also use gelatin for a different texture. However, if you want a vegan option, stick with chia seeds. They are easy to use and very healthy. This jam recipe is easy and fun to make. You learned how to prepare fresh or frozen blueberries and combine them with simple ingredients. Remember to adjust the sweetness and experiment with flavors. This jam is healthy and works great on toast or in yogurt. Store it properly for long-lasting enjoyment. Try new variations to keep it exciting. Make this delicious jam your own, and enjoy every bite.

Blueberry Chia Seed Jam Easy and Healthy Recipe

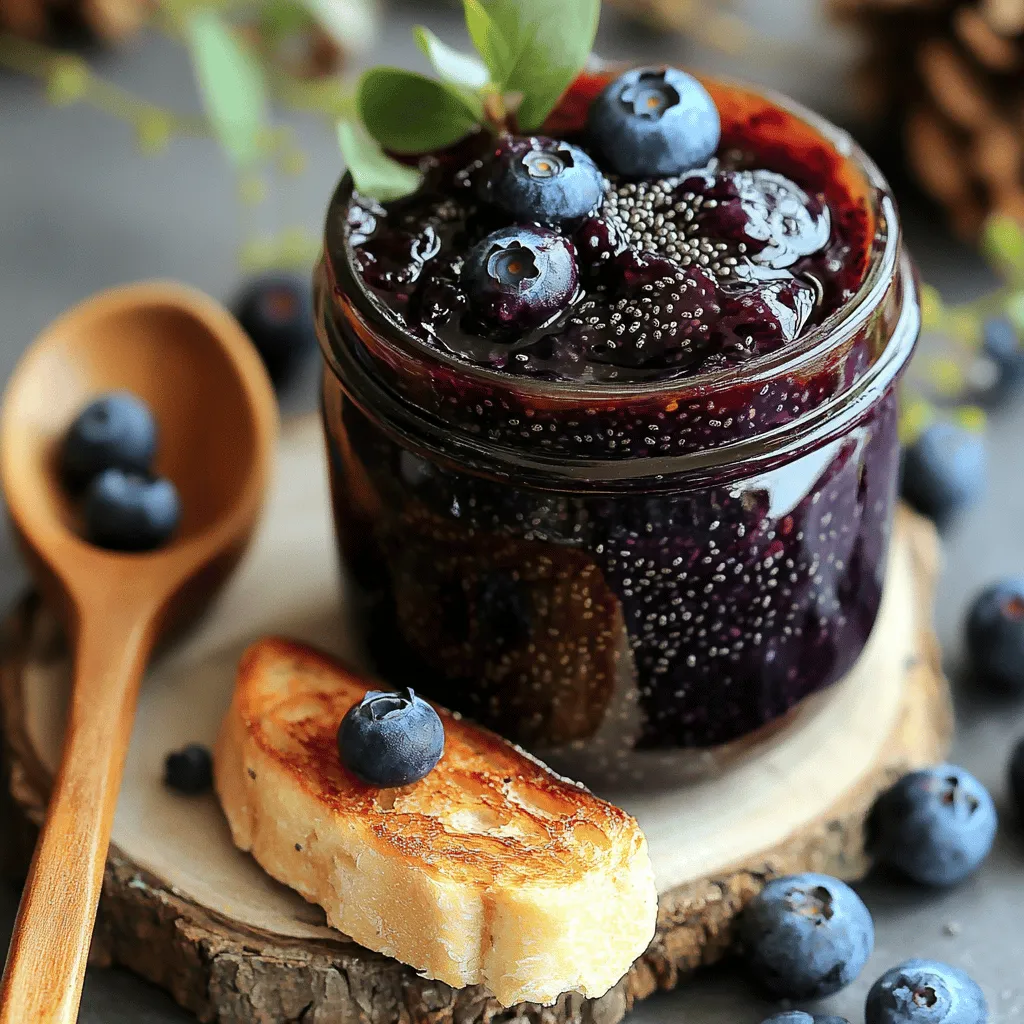
Are you ready to make a delicious treat that’s also good for you? This Blueberry Chia Seed Jam recipe is

To make this delightful cookie dough dip, gather the following items: - 1 cup all-purpose flour (heat-treated) - 1/2 cup unsalted butter, softened - 3/4 cup brown sugar, packed - 1/4 cup granulated sugar - 1 teaspoon vanilla extract - 1/2 teaspoon salt - 3/4 cup mini chocolate chips - 1/3 cup cream cheese, softened - 1/4 cup Greek yogurt Using heat-treated flour is key to safety. Raw flour can contain harmful bacteria. Heat-treating removes these risks. To heat-treat, spread flour on a baking sheet and bake at 350°F (175°C) for about 5 minutes. This step makes the flour safe for eating in dips and no-bake treats. It also gives the dip a nice texture. This cookie dough dip pairs well with many tasty dippers. Here are some great options: - Graham crackers - Pretzels - Apple slices - Celery sticks - Vanilla wafers Feel free to mix and match! Each dipper adds a fun twist to the overall experience. Enjoy your delicious creation with friends and family. For the full recipe, check out the detailed instructions above. To start, you need to heat-treat the flour. This step makes sure the flour is safe to eat. Preheat your oven to 350°F (175°C). Spread the flour evenly on a baking sheet. Bake it for about 5 minutes. Let it cool completely before you mix it into your dip. This step makes a big difference! Next, take a mixing bowl. Add the softened butter, brown sugar, and granulated sugar. Beat these ingredients together until they are creamy. Use an electric mixer on medium speed for about 2-3 minutes. The mix should look fluffy and well combined. This creates a sweet base for your dip. Once your butter and sugars are mixed, add the softened cream cheese and Greek yogurt. Blend everything together until it’s smooth and creamy. This adds a nice tang to your dip and makes it extra rich. You’ll love how well these ingredients work together! Now, it’s time to add more flavor. Pour in the vanilla extract and sprinkle in the salt. Mix until everything is well combined. The vanilla gives a sweet aroma, while the salt balances the flavors. This step is key for a delicious dip. Next, you’ll want to incorporate your cooled, heat-treated flour. Gradually add it into the mixture. Stir gently until it reaches a dough-like consistency. This will give your dip that cookie dough texture! Make sure there are no dry spots left. Now comes the fun part! Gently fold in the mini chocolate chips. Make sure they are evenly distributed throughout the dip. The chocolate chips add a delightful crunch and rich flavor. They are the perfect finishing touch! If you want the best flavor, consider chilling the dip. Cover it with plastic wrap and let it sit in the fridge for about 30 minutes. Chilling helps the flavors meld together. It also makes the dip even creamier. To serve, transfer the dip to a nice bowl. You can serve it with an assortment of dippers. Try graham crackers, pretzels, or fresh apple slices. Each dipper adds a unique taste. Enjoy your Chocolate Chip Cookie Dough Dip with friends and family! For the complete recipe, check out the Full Recipe section. To make your dip creamy, start with softened butter and cream cheese. This helps mix well and blend smoothly. Use a hand mixer and beat until fluffy. If the dip feels too thick, add a bit more Greek yogurt. This will give it a nice texture without changing the taste. Keep your dip in an airtight container. This helps to lock in freshness. Store it in the fridge for up to five days. If you want to enjoy it later, freeze the dip in small portions. When you're ready to eat, just let it thaw overnight in the fridge. You can make this dip even better with fun add-ins. Try mixing in peanut butter for a nutty twist. Or, add a splash of almond extract for extra flavor. You can also use different types of chocolate chips, like dark or white chocolate. For a fruity touch, toss in some mini marshmallows or dried fruit. These small changes can make this dip a delightful treat every time. For the full recipe, check out the details above. {{image_2}} You can make this cookie dough dip gluten-free. Use gluten-free flour blends instead of regular flour. Look for a blend that works well in baking. Make sure to heat-treat your gluten-free flour as you would with regular flour. This step keeps the dip safe to eat. To make a vegan version, swap the butter with coconut oil or vegan butter. Use dairy-free cream cheese and yogurt. You can also replace the granulated sugar with coconut sugar or maple syrup. These swaps keep the flavor rich and tasty without using animal products. Want to mix things up? Add different flavors to your dip. For a peanut butter twist, stir in 1/2 cup of creamy peanut butter. This adds a nutty taste and extra creaminess. If you love mint, add a few drops of mint extract. This gives the dip a fresh and cool taste. You can also try adding crushed cookies or sprinkles for fun and color. To keep your Chocolate Chip Cookie Dough Dip fresh, store it in an airtight container. This will protect it from air and moisture. If you have any leftovers, make sure to cover the dip well. You can also press plastic wrap directly onto the dip's surface. This helps to keep it creamy and tasty. You can freeze this dip if you want to save it for later. To freeze, scoop the dip into a freezer-safe container. Leave some space at the top for expansion. When you're ready to enjoy it, take it out and let it thaw in the fridge. This may take a few hours. After it thaws, stir it well before serving. This will help restore its creamy texture. Chocolate Chip Cookie Dough Dip will stay fresh in the fridge for about 5 days. To enjoy it at its best, eat it within this time. If you notice any changes in color or smell, it’s best to toss it. Always check for freshness before serving. Remember to use clean utensils when scooping to avoid contamination. Yes, you can eat cookie dough dip raw. The dip is safe because we heat-treat the flour. This step kills any harmful bacteria. You can enjoy it straight from the bowl! The dip lasts about 3 to 5 days in the fridge. Just make sure to store it in an airtight container. This keeps it fresh and tasty for snacking later. You can use sour cream as a substitute for Greek yogurt. It adds creaminess and tang. Alternatively, try using regular yogurt or even silken tofu for a dairy-free option. To make this dip healthier, reduce the sugar. You can also use a sugar substitute. Consider adding more Greek yogurt for creaminess without adding extra calories. Using whole wheat flour can add fiber, too. Yes, you can make this recipe ahead of time. Prepare the dip and chill it in the fridge. This allows the flavors to blend, making it taste even better. Just serve it when you're ready! For the full recipe, check out the details above. In this blog post, I covered how to make a delicious Chocolate Chip Cookie Dough Dip. We discussed key ingredients, including the importance of heat-treated flour, and suggested tasty dippers. I provided step-by-step instructions for preparation and shared tips to keep your dip creamy and fresh. You also learned about variations and storage info to maximize flavor and shelf life. Enjoy experimenting with this versatile dip and share it with friends! It’s a fun treat that’s sure to please everyone.

Chocolate Chip Cookie Dough Dip Delightful Indulgence

If you love cookie dough, you’re in for a treat! In this post, I’ll show you how to whip up

To make a great homemade veggie burger, you need these key ingredients: - 1 cup cooked quinoa - 1 can black beans, drained and rinsed - 1/2 cup breadcrumbs (gluten-free if needed) - 1/2 cup grated carrot - 1/4 cup finely chopped onion - 2 cloves garlic, minced - 1 tablespoon soy sauce or tamari - 1 teaspoon ground cumin - 1 teaspoon smoked paprika - 1/2 teaspoon cayenne pepper (optional) - Salt and pepper to taste - 1/4 cup fresh cilantro, chopped - 1 tablespoon olive oil (for cooking) - Burger buns of your choice You can customize your veggie burger with tasty toppings. Here are some ideas: - Crisp lettuce - Fresh tomato slices - Creamy avocado - Crunchy pickles - Your favorite sauces like ketchup or mustard Feel free to mix and match these toppings to create your perfect burger! If you want to boost the flavor, try these seasonings: - A dash of garlic powder - A sprinkle of onion powder - A pinch of chili powder for heat You can also add fresh herbs like basil or parsley for a fresh twist. Adjust these to your taste for a unique experience. For the full recipe, check out the earlier section. Start by mashing the black beans in a large bowl. Use a fork or potato masher. You want them mostly smooth but with some bits for texture. Then, add in the cooked quinoa, grated carrot, chopped onion, minced garlic, soy sauce, ground cumin, smoked paprika, cayenne (if you like spice), salt, and pepper. Mix it all together until well combined. Gradually stir in the breadcrumbs. The mixture should feel sticky but hold together when shaped into a patty. If it feels too wet, add more breadcrumbs. Finally, fold in the chopped cilantro for a fresh touch. Take a handful of the mixture and shape it into a patty. You can make about 4 to 6 patties, depending on how thick you want them. Press each patty firmly so it holds its shape. If the mixture crumbles, add a bit more breadcrumbs. Lay the formed patties on a plate as you shape the rest. Heat olive oil in a non-stick skillet over medium heat. Once hot, add the patties carefully. Cook them for about 4 to 5 minutes on each side. Look for a golden-brown color. This means they are crispy and ready to eat. While the patties cook, prepare your burger buns and toppings. Once they are done, it’s time to assemble your veggie burgers. Place a patty on a bun and add your favorite toppings. Enjoy your delicious homemade veggie burger! For more details, check out the Full Recipe. To make a great veggie burger, texture is key. Start with black beans. Mash them well but leave some chunks. This gives your patty a hearty bite. Next, add cooked quinoa for extra moisture and a nice chew. It helps bind the mixture. If your patty feels too wet, add breadcrumbs slowly until it holds shape. You can cook your veggie burger in a skillet or on a grill. If you use a skillet, heat olive oil over medium heat. Cook each side for four to five minutes until golden brown. The skillet gives you a nice crust. If you choose to grill, make sure the grill is hot. This will help prevent sticking. Either method works well, so pick what you prefer. Pair your veggie burger with fresh sides. A simple salad with mixed greens works great. You can also add sweet potato fries for a tasty crunch. For a drink, serve lemonade or iced tea. These pairings balance the flavors and make your meal feel complete. You can find the full recipe above for more ideas on toppings and sides. {{image_2}} You can mix up your veggie burger by changing a few ingredients. Try adding sweet potato for a creamy texture. You can also use lentils instead of black beans. Chickpeas will give a nice nutty flavor. Want some crunch? Add chopped bell peppers or zucchini. For herbs, try parsley or basil. These swaps make your burger unique and tasty. If you want a vegan burger, skip the egg and use flaxseed meal. Mix one tablespoon of flaxseed with three tablespoons of water. Let it sit for a few minutes to thicken. For gluten-free options, use gluten-free breadcrumbs or oats. Quinoa works well too. These changes keep your burger tasty and safe for all diets. Toppings can elevate your veggie burger. Try avocado for creaminess and healthy fats. Fresh lettuce adds crunch, while tomato slices give juiciness. Pickles add a tangy kick. You can also use hummus or tzatziki sauce for extra flavor. Experiment with different cheeses or even kimchi if you like bold tastes. Your burger will impress everyone! For the full recipe, check out the Ultimate Homemade Veggie Burger Delight. Storing veggie burger patties is easy. First, let them cool completely. Place the patties in an airtight container. You can stack them with parchment paper between each burger. This keeps them from sticking together. Store them in the fridge for up to three days. If you want to keep them longer, consider freezing. To reheat your veggie burgers, use a skillet for the best taste. Heat the skillet over medium heat. Add a bit of olive oil to prevent sticking. Place the patties in the skillet and cook for about three minutes on each side. This keeps them crispy and warm. You can also use a microwave, but they may become soft. If you use the microwave, heat them for about 30 seconds to one minute. Freezing veggie burgers is a great way to prepare meals ahead. After cooling, wrap each patty in plastic wrap. Then, place them in a freezer-safe bag. Remove as much air as possible to avoid freezer burn. You can freeze them for up to three months. When you are ready to eat, thaw them overnight in the fridge. Then, follow the reheating steps for best flavor. Enjoy your homemade veggie burger whenever you want! To keep veggie burgers from falling apart, use enough binding agents. Breadcrumbs and mashed beans help hold the mixture together. Make sure to mash the black beans well. This gives the patties a sturdy base. If your mix feels too wet, add more breadcrumbs. This small step can save your burgers. Yes, you can make these burgers ahead of time. Form the patties and store them in the fridge. They stay fresh for up to three days. You can also freeze them for later use. Wrap each patty in plastic wrap, then place them in a bag. When you are ready to cook, thaw them first. Healthy sides can make your meal fun and tasty. Consider serving a fresh salad with greens and veggies. Sweet potato fries are a delicious and nutritious option. You can also try roasted vegetables or a quinoa salad. These sides are easy to prepare and add color to your plate. Veggie burgers are done when they are golden brown on each side. A nice crust shows they cooked well. You should also check the heat inside. The patties should be hot throughout. A food thermometer can help; aim for around 165°F. If you don’t have one, just cut a patty in half. It should be warm and firm. Absolutely! Grilling these homemade veggie burgers adds great flavor. Preheat your grill to medium heat. Brush the grill with oil to avoid sticking. Cook the patties for about 4-5 minutes on each side. Keep an eye on them, as grilling can cook faster. Enjoy the smoky taste that grilling brings! For the full recipe, check out the details above. This blog post covered everything you need to know about making veggie burgers. We looked at the main ingredients, step-by-step instructions, and tips for the best texture. You learned fun variations and how to store leftovers, too. Remember, making veggie burgers is easy and fun. With a little practice, you can create tasty meals that everyone will enjoy. Try out different flavors and toppings to make them your own! Happy cooking!

Homemade Veggie Burger Flavorful and Easy Recipe

Are you ready to create the best homemade veggie burger? This easy and flavorful recipe will impress your taste buds.

To make cinnamon sugar churros, you need these simple ingredients: - 1 cup water - 1/2 cup unsalted butter - 1 tablespoon granulated sugar - 1/4 teaspoon salt - 1 cup all-purpose flour - 2 large eggs - 1 teaspoon vanilla extract - Oil for frying (vegetable or canola) - 1/2 cup granulated sugar (for coating) - 1 tablespoon ground cinnamon Understanding the benefits of these key ingredients helps you appreciate your churros. - Water: It hydrates the flour, making a soft dough. - Unsalted Butter: Adds rich flavor and helps with texture. - Granulated Sugar: Sweetens the dough and the coating. - Salt: Enhances all the flavors in the dough. - All-Purpose Flour: Provides structure and chewiness. - Eggs: Bind the dough and add richness. - Vanilla Extract: Brings warmth and sweetness. - Oil: Needed for frying, creating that crispy exterior. - Cinnamon: Adds a cozy, sweet spice flavor. Sometimes, you might want to swap ingredients based on what you have. Here are some easy alternatives: - Unsalted Butter: Use margarine or coconut oil. - All-Purpose Flour: Try gluten-free flour for a gluten-free option. - Vegetable or Canola Oil: Use peanut oil for a different flavor. - Granulated Sugar: Substitute with brown sugar for a deeper flavor. - Ground Cinnamon: Mix in nutmeg or pumpkin spice for a twist. For the full recipe, follow the steps provided and enjoy making this tasty treat! To start, gather your ingredients. You need water, butter, sugar, salt, flour, eggs, and vanilla. In a medium saucepan, mix the water, butter, sugar, and salt. Heat this mixture on medium heat until it boils. Stir it often to keep it from sticking. Once it boils, take it off the heat. Now, add the flour to the pan. Stir fast with a wooden spoon until the dough forms a ball. It should pull away from the sides of the pan easily. Let it cool for about five minutes. Next, add the eggs one at a time. Mix well after each egg. Finally, stir in the vanilla extract. Your dough should be smooth and ready for piping. Now, it’s time to fry! Heat oil in a deep pan or fryer to 350°F (175°C). This is the right temperature for crispy churros. Grab a piping bag and fit it with a large star tip. Fill the bag with your dough. Carefully pipe strips of dough about 4-5 inches long into the hot oil. Fry them for about 2-3 minutes until they are golden brown. Use tongs to flip them over and fry for another 2-3 minutes. Once done, take the churros out and place them on a plate lined with paper towels. This will help drain any extra oil. While the churros cool, mix the sugar and ground cinnamon in a shallow bowl. When the churros are cool enough to handle, roll each one in the cinnamon sugar mix. Make sure they are fully coated for that sweet crunch! Serve your warm churros right away. They taste best fresh and hot. For a fun twist, try dipping them in chocolate or caramel sauce. For the full recipe, check out the complete guide. Enjoy your delicious cinnamon sugar churros! To make great churros, you need the right dough. Start with fresh ingredients. Use unsalted butter for better control of flavor. When mixing the dough, add eggs slowly. This way, you ensure a smooth texture. If the dough feels too thick, add a tiny bit of water. This helps in piping the dough easily. Frying is key to churro success. Heat your oil to 350°F (175°C). This temperature gives you a crisp outside while keeping the inside soft. Use a deep pan to allow the churros to float freely. Fry a few at a time to avoid cooling the oil. When they turn golden brown, flip them carefully. This way, they cook evenly. Presentation makes a big difference. Serve churros warm, right after frying. Roll them in the cinnamon sugar mix for a lovely coating. You can stack them high on a plate or place them in a cup. Add a small bowl of chocolate or caramel sauce for dipping. This adds a fun twist and makes them look even better. For the complete process, check out the Full Recipe. {{image_2}} You can easily change up the flavor of your churros. Try adding cocoa powder for a chocolate twist. Mix in about 2 tablespoons of unsweetened cocoa when you combine the flour. For vanilla, simply add an extra teaspoon of vanilla extract to the dough. You can also play with spices like nutmeg or cardamom. Each option gives a new taste to your churros. Dipping sauces make churros even more fun. Chocolate sauce is a classic choice. Melt dark or milk chocolate and serve it warm. Caramel sauce adds a rich, sweet flavor. You can drizzle it on top or serve it in a bowl for dipping. If you want something fruity, try raspberry or strawberry sauce. Each sauce changes the taste of the churros and makes them feel special. If you need gluten-free churros, swap out the all-purpose flour. Use a gluten-free flour blend instead. Most blends will work well in this recipe. Just make sure it has xanthan gum for the right texture. Follow the same steps in the Full Recipe, and you'll have tasty gluten-free churros. Enjoy them just like the classic ones! After you make your cinnamon sugar churros, you might have extras. To keep them fresh, place churros in an airtight container. Make sure they cool down first. This helps prevent sogginess. Store them at room temperature for up to two days. If you want them to last longer, consider refrigerating them. Just remember, they taste best when fresh! Reheating churros is easy. You can use an oven or a pan. For the oven, preheat it to 350°F (175°C). Place churros on a baking sheet for about 5-7 minutes. This will make them warm and crispy again. You can also use a skillet over medium heat. Heat the churros for a few minutes, turning them often. Avoid using a microwave, as it makes them chewy. If you have more churros than you can eat, freezing is a great option. First, let them cool completely. Then, arrange them in a single layer on a baking sheet. Freeze for about an hour. Once they are firm, place them in a freezer bag. Remove as much air as possible. They can last up to three months in the freezer. When you’re ready to enjoy them, just reheat like mentioned above. This method keeps their texture intact! Try making these churros with the full recipe for a fun treat. To make cinnamon sugar churros, start with a simple dough. You need water, butter, sugar, salt, flour, eggs, and vanilla extract. Boil water, butter, sugar, and salt in a pot. Then, mix in the flour until it forms a ball. Let it cool, add eggs, and mix well. Finally, pipe strips into hot oil and fry until golden. Roll them in cinnamon sugar, and enjoy! You can find the full recipe above. The best oil for frying churros is vegetable or canola oil. These oils have high smoke points. They heat well and fry churros evenly. Avoid oils with strong flavors, like olive oil. A neutral oil helps keep the churro taste clean and delicious. Yes, you can bake churros, but they will not be the same. Baking gives a different texture. If you want a healthier option, bake at 375°F (190°C) for 15-20 minutes. Brush them with melted butter and roll in cinnamon sugar. They will be less crispy, but still tasty! You can buy quality churros at local bakeries or Mexican restaurants. Many grocery stores also sell frozen churros. Look for brands that use simple ingredients. You can also find churros at fairs or festivals, where they serve them fresh and hot. You can make delicious cinnamon sugar churros at home using simple steps. We covered everything from ingredients to frying techniques. Remember to use the right oil for crispiness and try fun flavor twists. Proper storage helps keep your churros fresh for later. With these tips, your churros can impress anyone who tries them. Enjoy the sweet crunch and create joy at your next get-together!

Cinnamon Sugar Churros Irresistible Dessert Delight

If you crave a sweet treat, look no further than cinnamon sugar churros! These crispy, warm delights are coated in
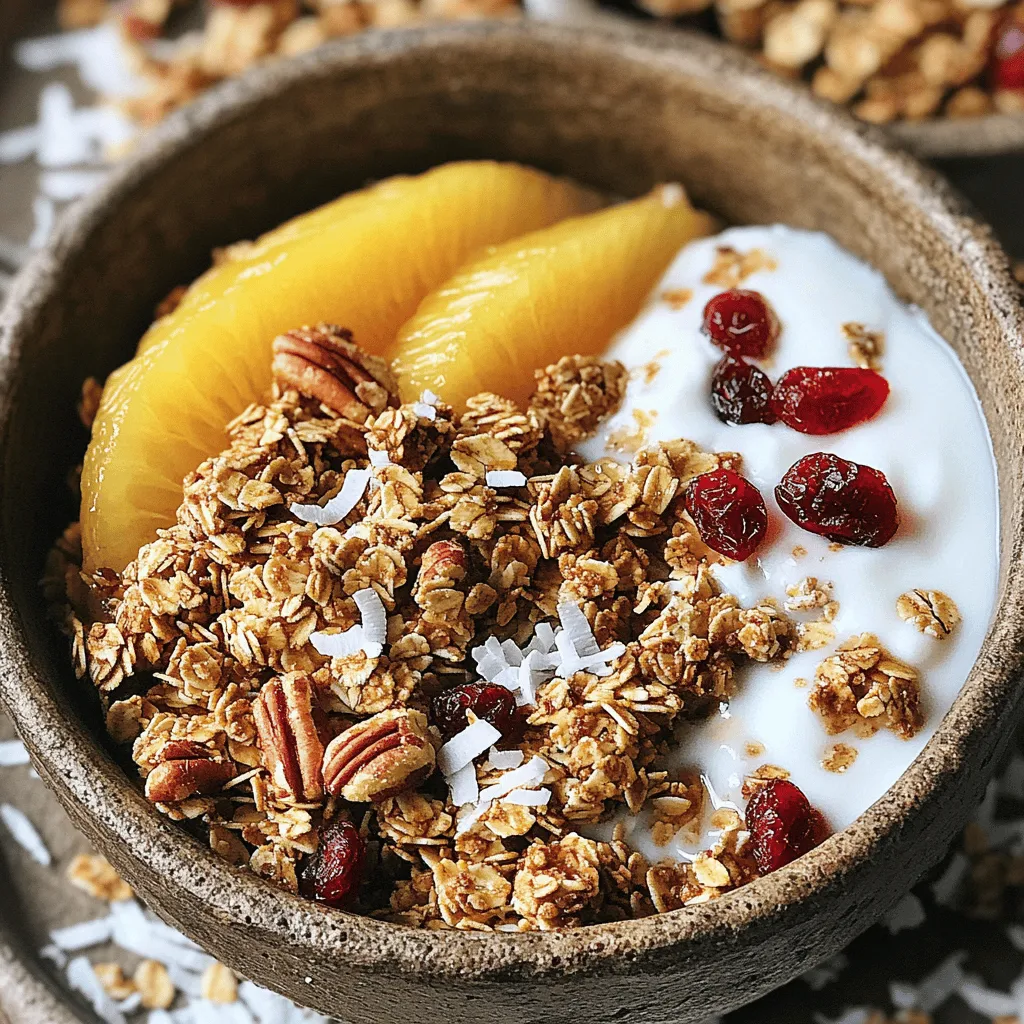
- 1 cup rolled oats - 1 cup almond milk (or any milk of choice) - 1 tablespoon chia seeds These are the base of your Lemon Blueberry Overnight Oats. Rolled oats give a chewy texture. Almond milk adds creaminess without extra calories. Chia seeds boost fiber and nutrients. - 1 teaspoon lemon zest - 2 tablespoons maple syrup or honey - 1/2 teaspoon vanilla extract Lemon zest gives a bright, fresh taste. Maple syrup or honey adds sweetness. Vanilla extract rounds out the flavor nicely. - 1/2 cup fresh blueberries (for mixing and topping) - Greek yogurt for creaminess - Pinch of salt Fresh blueberries bring a burst of flavor. Greek yogurt makes the oats extra creamy. A pinch of salt enhances all the flavors. This simple list makes a tasty meal. Follow the [Full Recipe] for all the details. To start, gather your ingredients. First, in a medium-sized bowl, combine the rolled oats, chia seeds, lemon zest, and a pinch of salt. You want to mix them well. This ensures the dry items blend evenly. Next, take another bowl or jar. Whisk together the almond milk, maple syrup, and vanilla extract until smooth. Now, pour the almond milk mixture over the dry ingredients. Stir gently until everything combines. Be careful not to over-mix. Then, fold in the fresh blueberries. Try not to mash them. After this, divide the mixture into jars or containers. Seal them tightly. Place the jars in the fridge overnight, or for at least four hours. This lets the oats absorb the milk and thicken nicely. In the morning, take the jars out of the fridge. Give the oats a good stir. If you want a creamier texture, mix in a dollop of Greek yogurt. Finally, add more blueberries on top. A sprinkle of lemon zest adds a nice touch. Your lemon blueberry overnight oats are now ready to enjoy! For full details on the recipe, check the [Full Recipe]. To achieve a creamier texture, I suggest adding Greek yogurt. It makes the oats rich and smooth. If you prefer a lighter feel, skip the yogurt. Instead, adjust the liquid you use. You can add more almond milk if you want a thinner mix. Just remember, oats soak up liquid. So, keep an eye on it. You can make your oats sweeter by using maple syrup or honey. Start with two tablespoons, then taste it. If you like it sweeter, add more. For a fun twist, try using agave nectar or coconut sugar. Adjusting the sweetness helps you personalize your dish. Serving your overnight oats in clear jars is a great idea. This way, you can show off the bright colors of the blueberries and lemon. For garnishing, sprinkle extra lemon zest on top. You might also add a few whole blueberries for a pop of color. This makes your breakfast look as good as it tastes. For the full recipe, check out the earlier sections. {{image_2}} You can change up the fruit in your Lemon Blueberry Overnight Oats for a new taste. - Mixed berries variation: Use strawberries, raspberries, and blackberries with the blueberries. This mix adds a fun burst of flavors. - Tropical fruit twist: Swap blueberries for diced mango, pineapple, or kiwi. This will give your oats a bright, sunny vibe. Adding different flavors can elevate your overnight oats. - Adding spices like cinnamon: A pinch of cinnamon can warm up the dish. It pairs well with the lemon and adds depth. - Nut butters for richness: Stir in almond or peanut butter. This adds creaminess and a satisfying nutty flavor to your oats. You can also adjust the recipe to fit your dietary needs. - Vegan options (using plant-based milks): Almond milk works great, but feel free to use coconut or oat milk. These alternatives keep it fully plant-based. - Gluten-free options: Make sure your rolled oats are certified gluten-free. This way, everyone can enjoy the dish without worry. For the full recipe, check out the provided link and start creating your delicious breakfast! How long can it be stored? You can store Lemon Blueberry Overnight Oats in the fridge for up to five days. This makes them great for meal prep. Best practices for keeping oats fresh Use airtight containers to keep your oats fresh. Glass jars work well. Make sure to seal them tightly. This keeps out air and moisture. Each time you take out a portion, close the lid again right away. Can you freeze overnight oats? Yes, you can freeze overnight oats! They freeze well and maintain their taste. How to thaw and serve To thaw, move your oats from the freezer to the fridge. Let them sit overnight. This makes them ready for breakfast. If you want to warm them, heat them in the microwave for a minute. Stir them well before eating. Adjusting portions for meal prep If you want to make more, simply double or triple the recipe. This saves time on busy mornings. Ideas for doubling or tripling the recipe Use a larger bowl to mix all your ingredients. It’s easy to scale up. Just remember to use enough jars for storage. You can enjoy different flavors each day by switching up your toppings. Check out the Full Recipe for more details! Lemon Blueberry Overnight Oats can last up to five days in the fridge. Make sure to store them in airtight containers. This helps keep the oats fresh and tasty. Remember to check for any changes in smell or texture before eating. Yes, you can use quick oats. They will absorb liquid faster, so the texture will be a bit softer. If you prefer a chewier bite, stick with rolled oats for the best result. You can use any milk you like. Options include cow's milk, soy milk, or oat milk. Each type will give a different flavor. Choose one that fits your taste or dietary needs. Absolutely! This recipe is perfect for meal prep. You can make a batch at the start of the week. Just store it in jars. You'll have a quick and healthy breakfast ready each morning. Yes, frozen blueberries work well too! They can add a nice burst of flavor. Keep in mind that they may release more juice, which can change the color of your oats. To warm up overnight oats, place them in a microwave-safe bowl. Heat in short intervals of 30 seconds, stirring in between. This way, you can control the heat and avoid overheating. Enjoy them warm for a cozy breakfast boost! For the complete recipe, check out the [Full Recipe]. In this post, we explored how to make Lemon Blueberry Overnight Oats. We covered the main ingredients, flavor enhancers, and optional additions. The step-by-step guide made preparation simple. We also shared tips for adjusting sweetness and consistency. Variations like different fruits and dietary swaps added fun. Lastly, proper storage helps keep your oats fresh longer. Enjoying your breakfast should be easy and tasty. These oats are a great choice for busy mornings. Prepare them tonight for a delicious start tomorrow.

Lemon Blueberry Overnight Oats Tasty Breakfast Boost

Looking for a bright start to your day? Lemon Blueberry Overnight Oats are the perfect mix of tangy and sweet!

- 1 medium head of cauliflower, cut into bite-sized florets - 1 cup all-purpose flour - 1 cup water - 1 teaspoon garlic powder - 1 teaspoon onion powder - 1 teaspoon smoked paprika - 1/2 teaspoon salt - 1/2 teaspoon black pepper - 1 teaspoon cayenne pepper (adjust to taste) - 1/2 cup buffalo sauce - 1 tablespoon olive oil - Fresh parsley, chopped (for garnish) Gather these ingredients before you start. The cauliflower gives a great base for this fun snack. The flour and water mix creates a smooth batter that coats the florets well. The seasonings add a burst of flavor, making each bite delicious. Adjust the cayenne pepper if you want more or less heat. The buffalo sauce brings that classic kick and tang. Finally, a sprinkle of fresh parsley makes your dish pop with color. You can find the full recipe in the article above. - In a mixing bowl, whisk together the flour, water, garlic powder, onion powder, smoked paprika, salt, black pepper, and cayenne pepper until smooth. This mixture will coat the cauliflower well and give it flavor. - Next, take your cauliflower florets and dip them into the batter. Make sure each piece is well coated. Shake off any extra batter to avoid sogginess. - Preheat your air fryer to 400°F (200°C). This step helps in achieving that perfect crunch. - Arrange the coated cauliflower bites in the air fryer basket. Lay them in a single layer, so they cook evenly. If needed, cook in batches. - Air fry the cauliflower for 12-15 minutes. Don’t forget to shake the basket halfway through to ensure even cooking. You want them to be golden and crispy. - After frying, place the crispy bites in a large mixing bowl. Pour in the buffalo sauce and toss until every bite is coated. This adds that fiery kick we all love. - Return the coated cauliflower bites to the air fryer. Cook for an additional 5 minutes. This step helps set the buffalo sauce, giving you an extra burst of flavor. Now you’re ready to enjoy your Air Fryer Cauliflower Buffalo Bites! For the complete recipe, check out the Full Recipe. - Use a non-stick spray to help the bites cook evenly. - Shake the basket halfway through cooking to ensure even crispiness. Getting that perfect crunch is key. By using non-stick spray, you prevent sticking and burning. Shaking the basket halfway helps all sides cook well, giving you a nice crisp. - Adjust cayenne pepper to control the heat level. - Let the bites rest a few minutes after cooking for extra crunch. The spice level can change the whole dish. If you love heat, add more cayenne. If not, use less. After cooking, resting the bites lets them firm up, making them even crunchier. - Serve with fresh celery sticks for a cool crunch. - Pair with ranch or blue cheese dressing for dipping. These bites are great on their own, but pairing them with celery adds freshness. Dipping in ranch or blue cheese dressing brings a creamy contrast that elevates the flavors. For the full recipe, check out the complete guide. {{image_2}} You can switch up the sauce. Try barbecue sauce for a sweet twist. It adds a fun flavor to your bites. You might also want to use a vegan-friendly hot sauce. This option keeps the dish plant-based while still being spicy. Feel free to get creative with spices! You can add cumin or chili powder for a different taste. These spices bring warmth and depth. If you love cheese, mix some into the batter. This will give you a cheesy version that is just as tasty. If you prefer baking, it’s easy to adapt. Preheat your oven to 425°F (220°C). Place the coated cauliflower on a baking sheet lined with parchment paper. Bake for about 25-30 minutes, flipping halfway through. This will help achieve a similar crispiness to the air fryer method. For the best results, keep an eye on them to avoid overcooking. To store your leftover cauliflower buffalo bites, let them cool fully. Place them in an airtight container. This keeps them fresh. They stay good in the fridge for about 3 to 4 days. Enjoy them later as a tasty snack or meal addition! Want to save some for later? You can freeze these bites! First, let them cool completely. Then, place them in a single layer on a baking sheet. Freeze until solid, about 1 hour. Once frozen, transfer them to a freezer-safe bag. They will stay fresh for about 2 to 3 months. When you're ready to eat, reheating is key. For the best crispiness, use your air fryer. Preheat it to 400°F (200°C). Cook the bites for about 5 to 7 minutes. They will come out hot and crispy! If you use a microwave, they may get soggy. The microwave is faster but not as crispy. So, stick with the air fryer for that perfect crunch. Yes, you can make these bites gluten-free! Instead of all-purpose flour, use gluten-free flour like almond flour or chickpea flour. These options will still give you a great texture. Just mix the gluten-free flour with the same amount of water and seasoning as the original recipe. You can also try using cornstarch for an extra crispy bite! To adjust the spice level, you can change the amount of cayenne pepper in the batter. If you want it spicier, add more cayenne. For a milder taste, reduce the cayenne or leave it out entirely. Another option is to use a different hot sauce for the coating. Some sauces are milder, which can help you create your perfect balance of heat. Yes, you can prep these bites ahead of time! Cut the cauliflower and coat it with the batter. Then, place them in a single layer on a baking sheet. Cover and store them in the fridge for up to a day. When you're ready to cook, just air fry them straight from the fridge. This method saves time and makes for a quick snack! This recipe gives you a tasty, spicy treat that you can easily make at home. You learned how to air fry cauliflower bites and coat them in buffalo sauce. Adjust the spice level to your taste and experiment with different sauces for new flavors. Whether you enjoy them right away or save them for later, these bites are sure to please. Use the tips shared to achieve the best results every time. Get ready to enjoy a fun snack that's both crispy and full of flavor!

Air Fryer Cauliflower Buffalo Bites Crispy Snack Recipe

Looking for a delicious snack that’s both crispy and spicy? You’ll love these Air Fryer Cauliflower Buffalo Bites! With just

- 2 medium sweet potatoes, peeled and diced - 1 can (15 ounces) black beans, rinsed and drained - 1 tablespoon olive oil - 1 teaspoon cumin - 1 teaspoon paprika - 1/2 teaspoon garlic powder - 1/2 teaspoon chili powder - Salt and pepper to taste - 8 small corn tortillas - 1/4 cup cilantro, chopped - 1 avocado, sliced - Lime wedges for serving - Optional: 1/2 cup feta cheese or vegan cheese for topping These ingredients make the tacos tasty and healthy. Sweet potatoes offer fiber and vitamins. They are sweet, creamy, and filling. Black beans add protein and help balance the dish. The spices bring warmth and flavor. Olive oil helps cook the sweet potatoes and adds richness. Each taco has about 200 calories. They contain around 8 grams of protein and 30 grams of carbs. Fats are about 6 grams, mostly from the olive oil and avocado. Sweet potatoes are rich in vitamin A. They support good vision and skin health. Black beans provide iron and magnesium. They help with muscle function and energy. You will need a baking sheet to roast the sweet potatoes. A saucepan heats the black beans. A skillet warms the tortillas. Use measuring cups and spoons for accuracy. This simple equipment makes the cooking process easy. For the full recipe, you can check the Sweet Potato Black Bean Tacos. 1. First, preheat your oven to 400°F (200°C). This makes sure the sweet potatoes roast well. 2. Next, peel and dice the sweet potatoes. Grab a baking sheet and toss the sweet potatoes with olive oil, cumin, paprika, garlic powder, chili powder, salt, and pepper. Make sure each piece is coated evenly. 1. Spread the sweet potatoes in one layer on the baking sheet. Roast them for 25-30 minutes. Flip them halfway to get a nice crisp. 2. Meanwhile, heat a medium saucepan over medium heat. Add the rinsed black beans with a pinch of salt and pepper. Stir and cook for about five minutes until they are warm. 1. Take the corn tortillas and warm them in a skillet. Heat them for about 30 seconds on each side. This makes them soft and easy to fold. 2. Now, layer the roasted sweet potatoes and black beans on each tortilla. 3. To finish, add fresh cilantro, sliced avocado, and optional feta cheese on top. 4. Serve with lime wedges on the side for a zesty kick! For the complete recipe, check out the Full Recipe link. Enjoy making these tasty tacos! Roasting sweet potatoes is key for flavor. Cut them into small, even pieces. This helps them cook evenly. Toss the sweet potatoes with olive oil and spices. Spread them out on a baking sheet. Avoid crowding them. This allows for better roasting. Bake at 400°F for 25-30 minutes. Flip them halfway for even crispiness. For heating tortillas, use a skillet. Warm them for about 30 seconds on each side. This makes them soft and pliable. You can also wrap them in a damp paper towel. Microwave for about 20 seconds. This method works well too. To boost flavor, add spices like cayenne or smoked paprika. You can also drizzle hot sauce for a kick. Think about lime juice for a fresh taste. Customizing toppings can make a big difference. Try adding shredded cabbage or salsa. If you love cheese, feta or vegan cheese can work wonders. One common mistake is overcooking sweet potatoes. This makes them mushy. Check for tenderness but keep them a bit firm. Another mistake is underseasoning black beans. They need salt and spices to shine. Always taste your beans before serving. Adjust seasoning as needed. These simple tips can elevate your tacos! {{image_2}} You can easily make these tacos vegan. If you want to skip the cheese, try using avocado or nutritional yeast. Avocado adds creaminess and healthy fats. Nutritional yeast gives a cheesy flavor without dairy. Both options keep your tacos rich and tasty. For plant-based protein, you can use lentils or chickpeas. Both are nutritious and fill you up. Just cook them with some spices to add flavor. This way, you create a satisfying meal that everyone can enjoy. If you need gluten-free tacos, choose gluten-free tortillas. Many brands offer great options made from corn or brown rice. They work just as well as regular tortillas. Feel free to swap other ingredients too. Use quinoa instead of beans or add extra veggies like bell peppers. These changes keep your tacos tasty and safe for those with gluten allergies. You can change your tacos based on the season. In summer, try adding fresh corn or zucchini. In fall, swap black beans for pinto beans or kidney beans. Each season brings unique flavors to your dish. You can also change the spices. Try adding cinnamon or nutmeg in fall. For a summer twist, use fresh herbs like basil or cilantro. These small changes can create new and exciting flavor profiles. For the full recipe, check the detailed instructions that guide you through every step. To keep your Sweet Potato Black Bean Tacos fresh, refrigerate them within two hours of cooking. Place the tacos in an airtight container. This helps maintain their flavor and texture. You can also store the filling separately from the tortillas. This prevents soggy shells. To reheat your tacos, preheat your oven to 350°F (175°C). Place the tacos on a baking sheet and cover them with foil. Heat for about 10-15 minutes. This keeps the tortillas from getting too hard. You can also use a microwave. Heat tacos for 30 seconds, then check if they’re warm enough. If not, heat for another 15 seconds. Yes, you can freeze Sweet Potato Black Bean Tacos. Wrap each taco tightly in plastic wrap. Place them in a freezer-safe bag. They can last for up to three months. When you’re ready to eat, thaw them in the fridge overnight. Reheat them in the oven or microwave. This way, they taste fresh! For the full recipe, check the earlier section. Sweet Potato Black Bean Tacos can last for about 3 to 5 days in the fridge. To keep them fresh, store them in an airtight container. Make sure to separate the toppings from the tacos. This helps keep the tortillas from getting soggy. When you reheat, check for any signs of spoilage, like bad smells or discoloration. Always prioritize food safety! Yes, you can make these tacos ahead of time. For easy meal prep, cook the sweet potatoes and black beans in advance. Store them in separate containers in the fridge. When you're ready to eat, just warm them up. Heat the corn tortillas on a skillet for a few seconds. This makes assembly quick and easy! If you want to switch things up, you can use other beans. Pinto beans or kidney beans are great options. You can also try lentils for a different texture. For a protein boost, shredded chicken or ground turkey works well too. These substitutes will still make your tacos tasty! These Sweet Potato Black Bean Tacos are easy to make and tasty. You start by gathering simple ingredients, like sweet potatoes and black beans. You learned how to prepare, cook, and serve them nicely. I also shared tips for cooking and storing leftovers. With these steps, you can enjoy a healthy meal anytime. Remember, you can always adjust the recipe to match your taste. Now, it’s time to try them out and make them your own!

Savory Sweet Potato Black Bean Tacos Recipe

Craving a filling, tasty meal? Let me introduce you to my Savory Sweet Potato Black Bean Tacos! These delicious tacos

- Coconut milk - Ripe mango - Chia seeds - Sweetener options - Vanilla extract - Salt - Garnishes To create my Mango Coconut Chia Pudding, you need simple ingredients that blend well. - Coconut milk: Start with one cup of coconut milk. This can be from a can or a carton. It adds creaminess and flavor. - Ripe mango: Use one medium ripe mango. Puree it for the base and save some for topping. Mango gives a sweet and tropical taste. - Chia seeds: You will need a quarter cup of chia seeds. These tiny seeds absorb liquid and create a thick pudding. - Sweetener options: Add two tablespoons of honey or maple syrup. You can adjust this based on how sweet you like it. - Vanilla extract: Use half a teaspoon of vanilla extract for a warm flavor boost. - Salt: A pinch of salt enhances all the flavors. - Garnishes: Fresh mint leaves are optional but add a nice touch. These ingredients combine to make a tasty treat. You can find the full recipe in the section above. Enjoy this delight that is both healthy and satisfying! First, grab a medium mixing bowl. Add 1 cup of coconut milk and 1 medium ripe mango, pureed. Use a whisk to blend them until smooth. Next, mix in 2 tablespoons of honey or maple syrup for sweetness. You can adjust this based on how sweet you want it. Don’t forget to add 1/2 teaspoon of vanilla extract. This adds a nice flavor. Finally, sprinkle in a pinch of salt. Salt enhances all the flavors. Now it's time for the chia seeds. Gradually add 1/4 cup of chia seeds to the bowl. Stir continuously as you add them. This helps avoid clumping. You want to make sure each seed gets mixed in well, so the pudding thickens evenly. After mixing, cover the bowl with plastic wrap. You can also use an airtight container if you prefer. Refrigerate the mixture for at least 4 hours. For the best results, let it chill overnight. This gives the chia seeds time to absorb the liquid. When you are ready to serve, stir the pudding again. If it’s too thick, just add a little more coconut milk. Enjoy your Mango Coconut Chia Pudding! For the full recipe, check the earlier section. To get the right texture for your mango coconut chia pudding, start by adjusting the liquid. If your pudding is too thick, add more coconut milk slowly. Mix it in gently until you reach your desired creaminess. Stirring is key! Use a whisk to mix your ingredients well before adding chia seeds. This helps avoid clumps. After you add the seeds, stir continuously for a minute. This keeps the seeds evenly spread in the mix. Sweetness can vary based on taste. If you love it sweet, add more honey or syrup. For a lighter touch, use less. You can also swap in natural sweeteners like agave or stevia. These options give you control over how sweet you want your pudding. How you serve your pudding can make it more inviting. Use clear glasses or bowls to show off the layers and color. Top each serving with a spoonful of mango puree. Fresh mint leaves add a pop of green and a fresh taste. Colorful dishes not only please the eye but also make the meal feel special. For the full recipe, check out the details above. {{image_2}} You can change the taste of your mango coconut chia pudding easily. Adding other fruits makes it fun. Berries like strawberries or blueberries bring a sweet burst. Bananas add creaminess and natural sweetness. You can also use different plant-based milks. Almond or oat milk gives a new twist. Each choice changes the flavor and keeps it interesting. If you want it vegan, skip honey and use maple syrup. This keeps your pudding plant-based. For those looking to eat keto, use a low-carb sweetener. You can also avoid allergens by checking each ingredient. Make sure your coconut milk is safe for all. This way, everyone can enjoy the treat. When you have a large gathering, you can scale up the recipe. Just double or triple the ingredients. This way, everyone gets to taste it. For storage, use separate jars for easy grabbing. If you make a big batch, keep some in the fridge. It stays fresh for a few days. Enjoy it throughout the week! To keep your mango coconut chia pudding fresh, use an airtight container. This helps to lock in the flavors and moisture. I recommend glass containers for easy cleaning and safe storage. Make sure to seal the lid tightly to avoid any leaks or spills. Store it in the fridge right after making it. Your pudding will stay fresh in the fridge for up to five days. Look for changes in texture or smell. If it smells sour or has an off taste, it’s time to toss it. The chia seeds should remain plump and not mushy. Always trust your senses to check for freshness. You can freeze chia pudding for longer storage. Pour the pudding into freezer-safe containers. Leave some space at the top for expansion. When you're ready to enjoy it, move it to the fridge for a slow thaw overnight. Once thawed, stir it well. If it looks too thick, add a little coconut milk to bring it back to life. Enjoy your healthy treat anytime! For the full recipe, check out the link. Chia pudding is a great source of nutrition. Chia seeds are full of fiber. They help with digestion and keep you full longer. They also have omega-3 fatty acids, good for your heart. Plus, they are rich in protein and calcium. This makes chia pudding a healthy snack or breakfast option. Yes, you can easily make this pudding ahead of time. In fact, I recommend it! Chia pudding needs some time to thicken. You can prepare it the night before, which saves time in the morning. Just store it in an airtight container in the fridge. It will be ready when you are, making meal prep easy and fun. If your chia pudding is too thick, don’t worry! You can fix it quickly. Just add a little more coconut milk. Stir it well until you reach the right texture. You can adjust it to your liking. Remember, it should be creamy but not too runny. Enjoy your perfect mango coconut chia pudding! For the full recipe, check the section above. You now know how to make a delicious chia pudding. We covered key ingredients, step-by-step instructions, tips, and storage options. You can mix coconut milk and ripe mango for a tasty base, add chia seeds for texture, and sweeten it to your liking. Feel free to explore flavor variations and adjust serving sizes. Remember, this pudding is easy to make ahead of time. Enjoy your creation, and don't hesitate to share your unique twist!

Mango Coconut Chia Pudding Simple and Healthy Treat

Are you ready to treat yourself to a simple and healthy dessert? Mango Coconut Chia Pudding combines the creamy richness

To make a great maple pecan granola, you need these main ingredients: - 3 cups rolled oats - 1 cup chopped pecans - 1/2 cup unsweetened coconut flakes These ingredients create a hearty base. Rolled oats provide fiber and texture. Pecans add crunch and healthy fats. Coconut flakes give a sweet, chewy touch. The liquid ingredients bind everything together. You’ll need: - 1/2 cup pure maple syrup - 1/4 cup melted coconut oil - 1/2 teaspoon vanilla extract Maple syrup gives sweetness and flavor. Coconut oil helps with clumping and adds a light taste. Vanilla extract enhances the overall taste. To boost the flavor, you’ll want to add: - 1/2 teaspoon ground cinnamon - 1/4 teaspoon salt - Optional: 1/2 cup dried cranberries or raisins Cinnamon brings warmth and depth. A touch of salt balances the sweetness. Dried fruit adds extra flavor and chewiness if you like. For the full recipe, check the section above. Each ingredient plays a role in making your granola crunchy and tasty. - Preheat oven to 350°F (175°C) and prepare baking sheet. - In a large mixing bowl, combine the rolled oats, chopped pecans, coconut flakes, ground cinnamon, and salt. Mix well to distribute the dry ingredients evenly. Starting with a clean workspace helps a lot. Make sure you have all your ingredients ready. I like to measure everything out first. It saves time and keeps you organized. - Whisk together coconut oil, maple syrup, and vanilla extract. In another bowl, whisk together the melted coconut oil, maple syrup, and vanilla extract. This step blends the flavors well. The warm oil helps the syrup flow easily. - Combine and coat ingredients, spread evenly, bake, and cool. Now, pour the liquid mixture over the dry ingredients. Stir until everything is coated. This is where the magic happens! Spread the granola mixture evenly on your prepared baking sheet. Press it down gently to help it clump together. Bake for 20-25 minutes until golden brown. Stir halfway through for even baking. Once done, take it out and let it cool completely on the baking sheet. If you want, mix in dried cranberries or raisins while it’s still warm. Once cooled, break the granola into clusters. Store it in an airtight container. You can find the full recipe above to ensure you don’t miss a step! To get that perfect crunch in your granola, clumping is key. Here’s how you can make it stick together: - Press it down: After spreading your granola on the baking sheet, press it down firmly. This helps it stick during baking. - Use less liquid: Too much maple syrup can make the granola too loose. Stick to the 1/2 cup as listed in the Full Recipe. Even baking is also important. Stir the granola halfway through baking. This ensures it cooks evenly. Uneven baking can lead to some parts burning while others remain soft. Adding extra spices can elevate your granola. Try: - Nutmeg: Just a pinch offers warmth. - Ginger: Adds a zesty kick. When mixing in dried fruits, do this after baking. Adding them too early can cause them to burn. If you want to add cranberries or raisins, mix them in while the granola is warm. This helps them stick better. Enjoy your maple pecan granola in many ways. Here are some ideas: - With yogurt: Top your granola with yogurt and fresh fruit for a tasty breakfast. - In milk: Serve it like cereal with milk for a quick meal. You can also get creative. Use granola as a topping for desserts like ice cream or sprinkle it on salads for extra crunch. The possibilities are endless! {{image_2}} You can mix up the nuts in your granola. Try almonds, walnuts, or hazelnuts. Each nut gives a new taste and crunch. If you want a nut-free version, use seeds instead. Sunflower seeds or pumpkin seeds work great. They add protein and good fats without the nuts. Maple syrup is sweet and rich, but you can change it up. Honey or agave syrup are good choices. They add their own unique flavors. If you like it sweeter, add more sweetener. If you prefer less sweetness, reduce the amount. Taste as you mix to find what you like. Want to spice things up? Add chocolate chips for a sweet twist. Dark chocolate adds a rich flavor. You can also try spices like nutmeg or ginger. For seasonal fun, add pumpkin spice in the fall. Each of these changes keeps the granola exciting. Explore new flavors with every batch! For the full recipe, check out the Maple Pecan Granola. To keep your granola fresh, use airtight containers. Glass jars or plastic bins work great. They protect the granola from air and moisture. Store them in a cool, dry place like a pantry. Avoid leaving them open or near heat sources. If you live in a hot area, you might want to use the fridge. This extra step can help keep your granola crisp longer. Granola can last about two weeks at room temperature. If stored in the fridge, it can last up to a month. Always check for signs of spoilage. If it smells off or feels soft, it might be time to toss it. Hard clumps or a stale taste are also signs of aging. If your granola loses its crunch, don’t worry! You can easily restore its texture. Spread it on a baking sheet and heat it in the oven at 300°F for about 10 minutes. Keep an eye on it to avoid burning. Stir it halfway through to ensure even heating. Once it cools, it should be crunchy again. Enjoy your Maple Pecan Granola just like you made it fresh! To make your maple pecan granola gluten-free, you can use gluten-free oats. These oats are processed in a way that avoids cross-contamination with gluten. If you want to replace the oats, consider using quinoa flakes or puffed rice. They add a nice crunch. You can also use almond flour or coconut flour for extra flavor. Just remember, the texture may change a bit. Yes, you can freeze maple pecan granola. First, let it cool completely after baking. Then, place it in an airtight container or a zip-top freezer bag. Make sure you squeeze out the air before sealing. When you want to eat it, thaw it in the fridge overnight. You can also reheat it in the oven for a few minutes to get it crispy again. Maple pecan granola is not just tasty; it’s also good for you. Here are some benefits: - Oats are rich in fiber. They help with digestion and keep you full. - Pecans are full of healthy fats and antioxidants. They support heart health. - Maple syrup has some vitamins and minerals, like manganese and zinc. - Coconut flakes provide healthy fats and can help boost energy. This granola gives you a balanced start to your day or a healthy snack. You can find maple pecan granola at many stores. Health food stores often have good options. Brands like Nature Valley and Purely Elizabeth make tasty granola. You can also check local grocery stores. They often have a cereal aisle with various brands. If you prefer to make it at home, you can follow the Full Recipe I provided. It's simple and fun! Making maple pecan granola is easy and fun. We covered the main ingredients, like oats and pecans, along with the best ways to mix and bake. You got tips for texture, flavor, and serving ideas. Remember to store granola properly to keep it fresh. You can even try different nuts or sweeteners. Whether you enjoy it with yogurt or as a snack, this recipe brings joy to your day. Happy cooking and enjoy your delicious creation!

Maple Pecan Granola Crunchy and Flavorful Breakfast Treat

Are you ready to start your mornings on a crunchy note? My Maple Pecan Granola is your new go-to breakfast

To make these delicious caramel apple cheesecake bars, gather the following ingredients: - 1 cup graham cracker crumbs - 1/4 cup granulated sugar - 1/2 cup unsalted butter, melted - 2 (8 oz) packages cream cheese, softened - 1 cup powdered sugar - 1 teaspoon vanilla extract - 2 large eggs - 2 cups finely chopped apples (about 2 medium apples, peeled and cored) - 1 teaspoon ground cinnamon - 1/4 cup caramel sauce (plus more for drizzling) - 1/2 cup chopped pecans or walnuts (optional) You will need a few tools to make these bars. Here’s what I recommend: - 8x8 inch baking dish - Parchment paper - Mixing bowls - Electric mixer - Spatula - Measuring cups and spoons - Knife and cutting board If you need to make some swaps, here are a few ideas: - Graham cracker crumbs: Use crushed cookies like digestive biscuits or vanilla wafers. - Granulated sugar: Coconut sugar works well for a healthier option. - Cream cheese: Neufchâtel cheese or a vegan cream cheese can be used. - Eggs: For an egg-free version, use 1/4 cup of applesauce per egg. - Chopped apples: Pears or a mix of both can add a fun twist. - Chopped nuts: Omit them if you want a nut-free version or swap for seeds like pumpkin. These swaps keep the spirit of the recipe while making it work for your needs. Enjoy the process and feel free to get creative! For detailed instructions, check out the Full Recipe. First, set your oven to 325°F (160°C). This temperature helps the bars bake evenly. Next, take an 8x8 inch baking dish and line it with parchment paper. Make sure to leave some paper hanging over the edges. This makes removing the bars easy later on. In a medium bowl, mix together 1 cup of graham cracker crumbs, 1/4 cup of granulated sugar, and 1/2 cup of melted unsalted butter. Stir these ingredients until they blend well. Now, press this mixture firmly into the bottom of your baking dish. This forms a solid crust. Bake it for 10 minutes and then let it cool slightly. In a large bowl, beat together 2 packages of softened cream cheese with an electric mixer. Mix until it is smooth and creamy. Gradually add in 1 cup of powdered sugar and 1 teaspoon of vanilla extract. Keep mixing until everything is smooth. Next, add 2 large eggs one at a time. Mix just until blended after each egg. Be careful not to overmix! Then, fold in 2 cups of finely chopped apples, 1 teaspoon of ground cinnamon, and 1/4 cup of caramel sauce. If you want a crunchy touch, you can also add 1/2 cup of chopped pecans or walnuts. Mix gently to combine everything well. Pour the cheesecake mixture over your cooled crust. Use a spatula to smooth the top. Place it in your preheated oven and bake for 35-40 minutes. Keep an eye on it; the center should be set and only slightly jiggly. After baking, let the cheesecake bars cool at room temperature for about 30 minutes. Then, move them to the fridge for at least 2 hours. This helps them firm up nicely. Once chilled, lift the bars out using the parchment paper and cut them into squares. Before serving, drizzle some extra caramel sauce on top for a sweet finish. Enjoy your caramel apple cheesecake bars! For the complete recipe, check out the Full Recipe. To get the best texture for your caramel apple cheesecake bars, focus on your cream cheese. Make sure it is soft before mixing. This helps you avoid lumps. Beat it well until smooth. Add the eggs slowly. Mix just until blended. Overmixing can make your bars tough. Fold in the apples gently. This keeps them from breaking apart. One common mistake is not cooling your crust enough. If it's hot, the cheesecake filling can melt. Let it cool for a few minutes. Another mistake is using too many apples. Stick to about two medium apples. Too much moisture can make the bars soggy. Watch the baking time closely. If you bake them too long, they can crack. These bars shine when served with a drizzle of caramel sauce. Drizzle some on top right before serving. You can also add a sprinkle of chopped pecans or walnuts for crunch. Serve them chilled for a refreshing treat. Pair them with a scoop of vanilla ice cream for a delightful dessert. For a cozy feel, enjoy them with warm apple cider. For the full recipe, check out the details above! {{image_2}} You can easily switch up the flavors in these caramel apple cheesecake bars. Try adding different fruits like pears or peaches. For a nutty twist, add almond extract instead of vanilla. You can even fold in some chocolate chips for a rich taste. Adding spices like nutmeg or ginger can give your bars a warm kick. Each variation brings a new flavor adventure. If you need a gluten-free version, it’s simple. Use gluten-free graham cracker crumbs for the crust. Make sure to check your caramel sauce for gluten as well. Most brands are fine, but it's good to be safe. The rest of the ingredients are usually gluten-free too, so you can enjoy these bars worry-free. To make these bars vegan, replace the cream cheese with a plant-based option. You can use a vegan cream cheese or silken tofu blended until smooth. Substitute the eggs with flax eggs or applesauce. For the butter, use coconut oil or vegan margarine. These swaps keep the bars tasty while fitting a vegan diet. Don't forget to check your caramel sauce for dairy! For the full recipe, you can refer to the original source. After baking, let the caramel apple cheesecake bars cool completely. Place them in an airtight container. This helps keep them fresh. Store them in the fridge for best results. The cold helps the flavors blend and stay tasty. If you want to save some for later, freezing works well. Cut the bars into squares, then wrap each piece tightly in plastic wrap. Place the wrapped bars in a freezer-safe bag or container. This prevents freezer burn. You can freeze them for up to three months. In the fridge, these cheesecake bars last about five days. If you freeze them, they stay good for three months. For the best taste, eat them fresh. But they still taste great even after some time. You can find the full recipe for these delicious treats above! Yes, you can make these bars a day in advance. This allows the flavors to blend well. Just store them in the fridge. Cover them tightly with plastic wrap to keep them fresh. They taste great chilled or at room temperature. I recommend using tart apples like Granny Smith. They add a nice contrast to the sweet cheesecake. Honeycrisp apples also work well for a sweeter flavor. Make sure to peel and core them before chopping. This step helps the texture blend smoothly in the bars. To avoid cracks, mix your ingredients gently. Overmixing introduces air, which can cause cracks. Also, bake the cheesecake at a low temperature. Let it cool slowly in the oven with the door slightly open. This gradual cooling helps maintain a smooth top. For more details, check the Full Recipe. You now have a complete guide on making delicious cheesecake bars. We covered ingredients, tools, and various substitutions. I walked you through step-by-step instructions for baking, tips to perfect your bars, and variations for any diet. Remember, good storage keeps them fresh longer. Don't be afraid to try new flavors or make them ahead of time. Enjoy baking and sharing these treats! You’ll impress everyone with your cheesecake bars!

Caramel Apple Cheesecake Bars Delectable Fall Treat

Fall is here, and it’s time to indulge in sweet treats like my Caramel Apple Cheesecake Bars. Imagine creamy cheesecake

Older posts
Newer posts
← Previous Page1 … Page42 Page43 Page44 … Page60 Next →

dsad

© 2025 Recipes Pursuit • Built with GeneratePress

Our Policies

  • Copyright Policy
  • Cookie Policy
  • GDPR Policy
  • Privacy Policy
  • Disclaimer
  • Terms Of Use

More Information

  • Home
  • About
  • Contact
  • Appetizers
  • Dessert
  • Dinner
  • Drinks
©2025, Recipes Pursuit About Back To Top