Skip to content
DisclaimerTerms Of UseGDPR PolicyCookie Policy

Recipes Pursuit

  • Home
  • Drinks
  • Appetizers
  • Dinner
  • Dessert
  • About
  • Contact
  • Privacy Policy
DisclaimerTerms Of UseGDPR PolicyCookie Policy

Emma Smith

- 1 pound shrimp, peeled and deveined - 3 tablespoons honey - 3 tablespoons soy sauce - 2 cloves garlic, minced - 1 tablespoon sesame oil - 1 teaspoon fresh ginger, grated - 1 tablespoon lime juice - 8 small corn or flour tortillas - 1 cup red cabbage, shredded - 1 avocado, sliced - Fresh cilantro, for garnish - Lime wedges, for serving - Salt and pepper to taste The base of my honey garlic shrimp tacos is fresh shrimp. You want them peeled and deveined for easy eating. Next, we have honey and soy sauce, which create a sweet and salty mix. I love garlic, so I add minced garlic for that rich flavor. Sesame oil gives it a nutty taste, while fresh ginger adds a zing. Lime juice cuts through the sweetness and brightens the dish. For the tacos, I use small corn or flour tortillas. They hold the filling well. Shredded red cabbage adds crunch and color. Sliced avocado gives a creamy texture. Fresh cilantro is a must for garnish. Lastly, lime wedges help to enhance the taste right before you take a bite. These ingredients come together beautifully in my full recipe for honey garlic shrimp tacos. To start, gather your ingredients for the marinade. In a bowl, whisk together: - 3 tablespoons honey - 3 tablespoons soy sauce - 2 cloves garlic, minced - 1 tablespoon sesame oil - 1 teaspoon fresh ginger, grated - 1 tablespoon lime juice This mix brings a sweet and savory flavor to the shrimp. When you combine these ingredients, you create a rich sauce that enhances the shrimp's taste. Next, add the shrimp to the bowl. Make sure every shrimp gets coated in the marinade. Let them sit for at least 15 minutes. If you have time, let them marinate for up to 30 minutes. This will deepen the flavor. Now it's time to cook the shrimp. Heat a little oil in a large skillet over medium heat. Once the oil is hot, add the marinated shrimp. Cook them for about 2-3 minutes on each side. You want them to turn pink and opaque. This means they are done. After cooking, remove the shrimp from heat. Season with salt and pepper to taste. The seasoning will make the shrimp even more tasty. Now for the fun part: assembling the tacos! Warm your tortillas in a separate dry skillet or microwave until they are soft and pliable. On each tortilla, place a handful of shredded cabbage. This adds a nice crunch. Next, add several shrimp on top. Then, finish with a few avocado slices. To bring it all together, garnish with fresh cilantro. A squeeze of lime juice over the top adds a burst of freshness. Your tacos are now ready to enjoy! For the complete recipe, refer to the full recipe section. To get the best taste from your honey garlic shrimp, marinate them for at least 15 minutes. If you have time, go for 30 minutes. This lets the shrimp soak up all the flavors. The honey, soy sauce, and garlic make a tasty mix. The longer they sit, the more flavor they will have. Cooking shrimp is simple but needs care. Heat a bit of oil in a large skillet over medium heat. Once it’s hot, add the marinated shrimp. Cook them for 2-3 minutes on each side. They will turn pink and opaque when done. Be careful not to overcook them. Overcooked shrimp can be tough and chewy. When serving your tacos, start with a base of shredded red cabbage on each tortilla. This adds crunch and color. Then, pile on the cooked shrimp. Top with fresh avocado slices for creaminess. Finish with cilantro and a squeeze of lime juice. You can also serve lime wedges on the side for extra zest. For the full recipe, check out the detailed instructions above. {{image_2}} You can swap shrimp for chicken or tofu. Both options work well in this recipe. For chicken, use boneless thighs or breasts, cut into bite-sized pieces. Marinate them the same way as shrimp. Cook until they reach an internal temperature of 165°F. For tofu, choose firm or extra-firm varieties. Press it to remove excess moisture, then cut into cubes. Marinate and sauté until golden brown. These swaps give you tasty tacos and cater to different diets. Want to spice things up? Add fresh jalapeños to your tacos. Slice them thin and layer them on top of the shrimp. You can also mix diced jalapeños into the marinade for a kick. If you like it hotter, use pickled jalapeños for tangy heat. Adjust the amount based on your spice level. This adds depth to the sweet honey garlic flavor. While I love red cabbage and avocado, you can try other toppings. Use shredded lettuce or arugula for a fresh crunch. Pickled red onions add a tangy bite. You can also use diced tomatoes or corn salsa for a twist. Fresh herbs like mint or basil can replace cilantro. Let your taste buds guide you. Mix and match toppings to find your favorite combination. Check the Full Recipe for more ideas! To keep your tacos fresh, place leftovers in an airtight container. Store them in the fridge. They will stay good for about two days. Make sure the shrimp are separate from the tortillas. This helps prevent sogginess. You can also store the shrimp and toppings separately. This way, they maintain their taste and texture. When you are ready to eat your tacos again, reheat the shrimp in a skillet. Heat them over medium-low heat. Stir them gently until they are warm. This keeps the shrimp tender. For the tortillas, warm them in a dry skillet or microwave. This makes them soft and easy to fold. Avoid overheating, as that may make them tough. You can freeze the shrimp and marinade if you want to save them for later. Place the shrimp in a zip-top bag with the marinade. Squeeze out the air and seal it tightly. You can freeze this for up to three months. When you are ready to cook, thaw it in the fridge overnight. This method preserves the flavors well. For best results, do not freeze cooked shrimp. You can serve many tasty sides with these tacos. Here are some ideas: - Rice: Cilantro lime rice pairs well with the shrimp. - Beans: Black beans or refried beans add protein. - Salad: A fresh salad with lime dressing brightens your meal. - Salsa: Mango or pico de gallo salsa adds a nice touch. - Chips: Tortilla chips with guacamole are a fun snack. Feel free to mix and match these sides based on your taste. They will complement the sweet and savory shrimp. Yes, you can use frozen shrimp. Just follow these steps: 1. Thawing: Place the shrimp in the fridge overnight or run them under cold water for quick thawing. 2. Cooking: Once thawed, pat them dry to remove excess moisture. This helps them sear better. Using frozen shrimp can save time and still give you great flavor. To make these tacos gluten-free, choose corn tortillas. Here’s how: - Tortillas: Make sure to pick tortillas labeled gluten-free. - Soy Sauce: Use gluten-free soy sauce or tamari instead of regular soy sauce. These small changes keep your tacos delicious and safe for those with gluten issues. Enjoy your meal without worry! This blog post covered how to make tasty honey garlic shrimp tacos. We explored the simple ingredients needed, the marinade, and cooking steps. I shared tips for getting the best flavor, cooked shrimp tips, and fun variations like using chicken or adding heat. Don’t forget to store leftovers correctly for later enjoyment. You can easily customize these tacos to your taste. Try different proteins or toppings. Enjoy making this dish and impress others with your cooking!

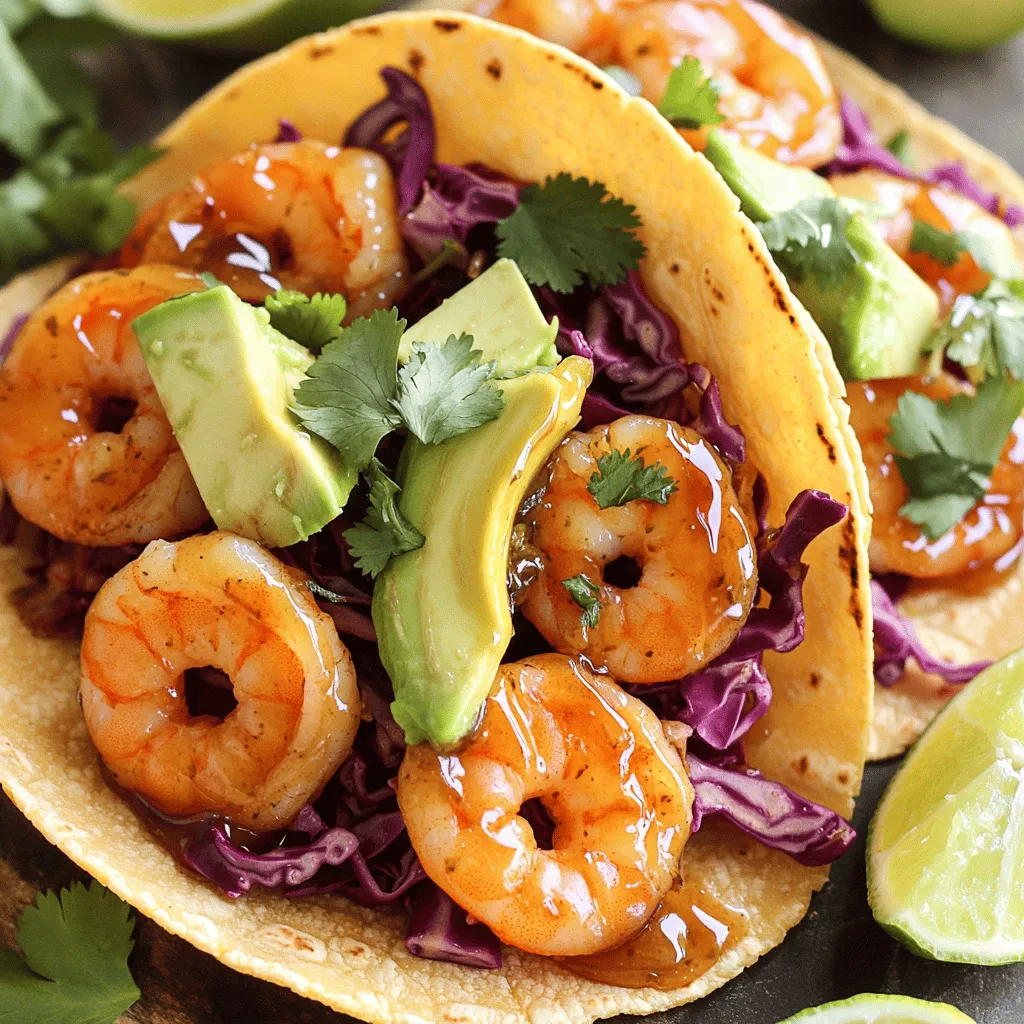
Honey Garlic Shrimp Tacos Flavorful and Easy Recipe

Craving a quick and tasty meal? Look no further than Honey Garlic Shrimp Tacos! This easy recipe combines sweet honey,

To make a delicious roasted beet and goat cheese salad, you will need: - 4 medium beets, trimmed and washed - 2 tablespoons olive oil - Salt and pepper to taste - 4 cups mixed salad greens (arugula, spinach, and frisée) - 1/2 cup goat cheese, crumbled - 1/2 cup walnuts, roughly chopped - 1/4 cup dried cranberries - 2 tablespoons balsamic vinegar - 1 tablespoon honey - 1 tablespoon Dijon mustard - Fresh herbs (optional: parsley or chives) for garnish You can easily adjust this salad to fit your taste. Here are some great swaps: - Beets: Use golden beets for a milder flavor. - Goat Cheese: Feta cheese works well if you prefer a stronger taste. - Nuts: Try pecans or almonds instead of walnuts. - Greens: Kale or romaine can replace mixed greens for added crunch. - Dried Fruit: Use raisins or chopped apples in place of cranberries. These changes can make the salad your own while still keeping it tasty. Choosing fresh ingredients is key to a great salad. Here are a few tips: - Beets: Look for firm, smooth beets with no soft spots or blemishes. - Greens: Choose vibrant greens that are crisp and free of wilting. - Goat Cheese: Opt for cheese that is creamy and fresh, not dried out. - Nuts: Select raw or lightly roasted nuts for the best flavor. - Dried Fruit: Pick dried cranberries that are plump and not hard. Fresh ingredients boost the flavor and health of your salad. Enjoy the process of picking the best for your dish! To start, preheat your oven to 400°F (200°C). This heat helps to bring out the beet's natural sweetness. Next, trim and wash your beets. Wrap each beet in aluminum foil. Place them on a baking sheet to catch any drips. Roast the beets for 45-60 minutes. You know they are done when a fork goes through easily. Once roasted, take them out and let them cool. After cooling, peel off the skins. They should come off easily. While the beets roast, you can make the dressing. In a small bowl, combine 2 tablespoons of balsamic vinegar, 1 tablespoon of honey, and 1 tablespoon of Dijon mustard. Whisk these together until smooth. Slowly add 2 tablespoons of olive oil while whisking. This creates a creamy texture. Don't forget to add salt and pepper to taste. Set the dressing aside for later. Once your beets are peeled and cooled, slice them into wedges. In a large bowl, combine 4 cups of mixed salad greens, the beet wedges, 1/2 cup of crumbled goat cheese, 1/2 cup of toasted walnuts, and 1/4 cup of dried cranberries. Drizzle your dressing over the salad and toss gently. This helps to mix the flavors without breaking the beets. If you like, add some fresh herbs for garnish. Now you have a colorful salad ready to enjoy. For the complete recipe, check the full recipe link. Roasting beets is simple and rewarding. Start by preheating your oven to 400°F (200°C). Wrap each beet in aluminum foil. This keeps them moist. Place the wrapped beets on a baking sheet. Roast for 45 to 60 minutes. The beets are done when a fork goes in easily. After roasting, let them cool before peeling. The skins come off easily. You’ll enjoy the sweet, earthy flavor of roasted beets. To boost flavor, consider adding fresh herbs. Chives or parsley brighten the salad. You can also swap walnuts with pecans for a different crunch. For a tangy kick, try adding feta cheese instead of goat cheese. A sprinkle of fresh lemon juice brightens the dish too. You may even mix in some sliced apples or pears for sweetness. These changes keep your salad exciting and fresh. Presentation matters when serving salad. Arrange the mixed greens in a large bowl first. Then layer the roasted beet wedges on top. Crumble the goat cheese evenly over the beets. Scatter the toasted walnuts and cranberries next. This creates a beautiful mix of colors. For a finishing touch, drizzle the dressing just before serving. You can garnish with fresh herbs to impress your guests. They will love the look and taste of this delightful salad. For the complete recipe, check out the Full Recipe. {{image_2}} You can add fruits or veggies to this salad to change flavors. In spring, try adding strawberries or radishes. They add a sweet and crunchy touch. In fall, sliced apples or pears work well. They bring a nice contrast to the earthiness of the beets. You can also add roasted sweet potatoes for a cozy, warm twist. If you want to switch the cheese, you have options! Feta is a great choice. It offers a salty flavor that pairs well with beets. Blue cheese is another option if you like bold tastes. For a creamier option, try ricotta. Its soft texture balances the salad without overpowering it. Nuts add crunch and flavor to your salad. Walnuts are great, but you can also use pecans. They add a sweet, buttery taste. Almonds bring a nice crunch, too. Try slicing them for a different texture. If you prefer seeds, sunflower or pumpkin seeds work nicely as well. They add crunch and nutrition without the nutty flavor. Feel free to explore these variations as you create your own roasted beet and goat cheese salad. Each twist makes this dish even more enjoyable! For the complete recipe, check out the Full Recipe. After enjoying your roasted beet and goat cheese salad, store leftovers in an airtight container. This keeps the flavors fresh. Refrigerate the salad for up to three days. Keep the dressing separate to avoid sogginess. For long-lasting ingredients, follow these tips: - Beets: Store in a cool, dark place. They last for weeks if unpeeled. - Greens: Keep mixed greens in a salad spinner or container lined with paper towels. This prevents moisture and wilting. - Goat cheese: Wrap tightly in plastic wrap or store in a sealed container. This keeps it fresh and tasty. If you want warm beets, here’s how to reheat them: - Oven: Preheat to 350°F (175°C). Wrap the beets in foil and heat for 10-15 minutes. - Microwave: Cut the beets into smaller pieces. Place them in a bowl with a splash of water. Cover and heat for 1-2 minutes. This method helps keep the beets moist while warming them up. Enjoy the full recipe to make this delightful salad! Yes, you can prepare the salad ahead. Roast the beets and make the dressing. Store the beets and dressing separately in the fridge. Combine them with greens just before serving. This keeps the salad fresh and crisp. If you don’t have goat cheese, try feta or ricotta. Both options add creaminess. You can also use a dairy-free cheese if needed. This keeps the flavor interesting while catering to dietary needs. To avoid sogginess, keep the components separate until serving. Store the dressing and salad greens in different containers. Mix them just before eating. This ensures each bite stays crunchy and fresh. In this article, we explored the roasted beet and goat cheese salad from start to finish. We discussed key ingredients, prepping tips, and variations to spice up your dish. Remember, choosing fresh ingredients helps make your salad shine. When roasting beets, keep an eye on timing for perfect results. You can also customize it with different cheeses or nuts. With these tips, your salad will impress anyone. Enjoy making this dish and share it with others for a healthy treat!

Roasted Beet and Goat Cheese Salad Flavorful Delight

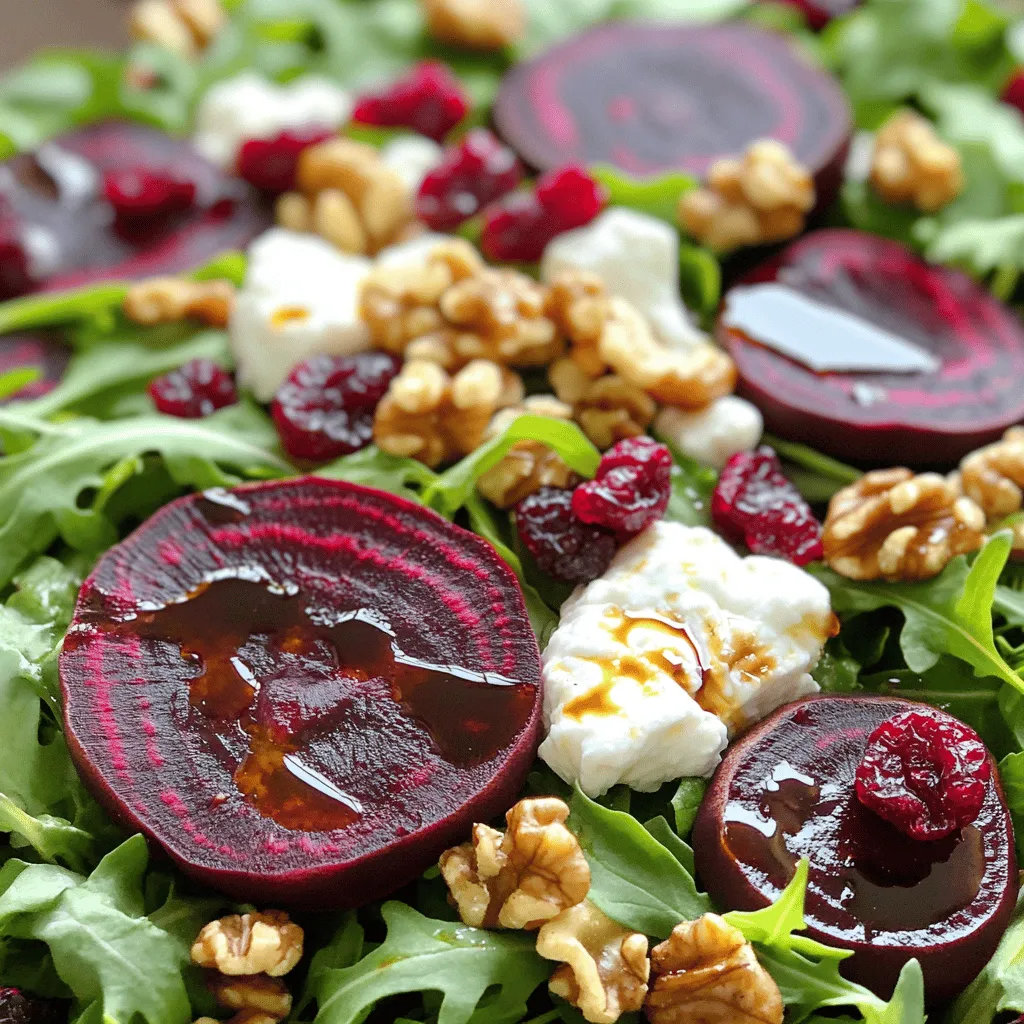
Are you looking for a fresh, tasty dish that shines at any meal? This Roasted Beet and Goat Cheese Salad

To make Coconut Curry Lentil Soup, you will need these key ingredients: - 1 cup red lentils, rinsed - 1 can (13.5 oz) coconut milk - 1 tablespoon coconut oil - 1 medium onion, diced - 3 cloves garlic, minced - 1 tablespoon fresh ginger, grated - 1 tablespoon curry powder - 1 teaspoon turmeric powder - 1 teaspoon cumin - 4 cups vegetable broth - 1 medium carrot, diced - 1 red bell pepper, diced - 1 cup spinach, fresh - Salt and pepper to taste - Fresh cilantro, for garnish - Lime wedges, for serving These ingredients come together to create a rich and creamy soup. The red lentils provide protein and fiber, while coconut milk adds smoothness. You can enhance the soup with some optional ingredients: - 1 tablespoon soy sauce or tamari for depth - 1 teaspoon chili flakes for heat - 1 tablespoon lime juice for brightness - A handful of mushrooms for earthy flavor These optional ingredients can help personalize your soup. Feel free to mix and match based on your taste. Here's a look at the nutrition in some key ingredients: - Red lentils: High in protein and fiber, they are great for heart health. - Coconut milk: Adds healthy fats and a rich flavor, but watch the calories. - Spinach: Packed with vitamins A, C, and K, it boosts your immune system. Knowing what each ingredient offers helps you eat well. This soup is not only tasty but also healthy. For the full recipe, check out the recipe section above. To make Coconut Curry Lentil Soup, start by gathering all your ingredients. You will need red lentils, coconut milk, coconut oil, onion, garlic, ginger, curry powder, turmeric powder, cumin, vegetable broth, carrot, bell pepper, spinach, salt, pepper, cilantro, and lime. 1. In a large pot, heat the coconut oil over medium heat. 2. Add the diced onion and sauté for 3-4 minutes. Wait until it becomes soft and clear. 3. Next, stir in the minced garlic and grated ginger. Cook for 1-2 minutes until you smell their aroma. 4. Now, sprinkle in the curry powder, turmeric, and cumin. Let the spices cook for another minute. This helps to bring out their flavor. 5. Pour in the vegetable broth. Add the rinsed lentils, diced carrot, and bell pepper next. 6. Bring the mix to a boil. Then, lower the heat and let it simmer. Leave it uncovered for about 20-25 minutes. The lentils and veggies should be soft when done. 7. Once cooked, stir in the coconut milk and fresh spinach. Heat everything for about 5 minutes. 8. Taste and season with salt and pepper as needed. 9. Serve it hot. Garnish with fresh cilantro and lime wedges for an extra kick. For the best texture, rinse the lentils before cooking. This removes any dust and helps them cook evenly. If you want a creamier soup, blend part of it after cooking. Just scoop some into a blender, blend until smooth, and mix it back in. This makes the soup thick and rich without losing the chunky bits. You can also make this soup in a slow cooker or Instant Pot. For a slow cooker, sauté the onion, garlic, and ginger first. Then add all the other ingredients and set it on low for 6-8 hours. If using an Instant Pot, follow the same steps but cook on high pressure for about 10 minutes. Release the pressure naturally for the best results. Each method brings its own unique flavor and texture to the soup. To make your Coconut Curry Lentil Soup even tastier, focus on layers of flavor. Start with fresh spices. Use whole spices like cumin seeds for a rich taste. Toast them in the coconut oil before adding the onion. This step brings out their oils and fragrance. For texture, try adding a splash of lime juice at the end. It brightens the soup and balances the creaminess of coconut milk. You can also toss in some diced sweet potatoes for a heartier feel. One common mistake is overcooking the lentils. They should be tender but not mushy. Check them often as they cook. Another pitfall is skipping the sauté step. Sautéing the onion, garlic, and ginger builds a solid base for flavor. Make sure to stir the spices well to avoid burning them. Lastly, don’t forget to season your soup. A pinch of salt and pepper can elevate the dish, so taste as you go. For a complete meal, serve your soup with warm naan or crusty bread. This adds a nice touch and soaks up the soup. You can also pair it with a fresh salad for a balance of flavors. Top your soup with fresh cilantro and a wedge of lime for a burst of color and zest. If you want to add protein, consider serving it with grilled chicken or shrimp. For the full recipe, check out the complete guide. {{image_2}} This soup is already vegan and vegetarian. You can enjoy it as is. If you want to make it creamier, add more coconut milk. For a protein boost, toss in some tofu or chickpeas. These options make the dish heartier without losing its charm. You can easily swap ingredients to fit your needs. If you need gluten-free options, ensure your vegetable broth is certified gluten-free. For a lower-carb version, replace lentils with cauliflower rice. You can also use almond milk instead of coconut milk if you want a lighter taste. Coconut Curry Lentil Soup is a canvas for flavor. Add some diced tomatoes for a tangy kick. Want more heat? Toss in chili peppers or red pepper flakes. You can also mix in fresh herbs like basil or mint to give it a fresh twist. Each change brings a new vibe to the soup. After you enjoy your Coconut Curry Lentil Soup, let it cool. Use airtight containers to keep the soup fresh. This method will help avoid spills and keep out air. Store the soup in the fridge for up to four days. Label your containers with the date to remember when you made it. If you want to save your soup for later, freezing is a great option. Use freezer-safe bags or containers. Leave some space at the top. This space allows the soup to expand when it freezes. You can freeze it for up to three months. When you are ready to eat it, just pull it out and let it thaw in the fridge overnight. To reheat, pour your soup into a pot over low heat. Stir it often so it heats evenly. If the soup is too thick, add a splash of vegetable broth or water. You can also use the microwave. Heat it in a bowl, stirring every minute until hot. Enjoy your soup just as delicious as when you first made it! Rinse the lentils well under cold water. This helps remove any dirt or debris. Use red lentils for this recipe. They cook quickly and become soft. You don’t need to soak them first. Just rinse and add them directly to the pot! Yes, you can make this soup ahead of time. It tastes even better the next day! Store it in an airtight container in the fridge. It will last for about three to four days. Reheat it on the stove or in the microwave. You may want to add a splash of broth if it thickens. This soup pairs well with several sides. Try serving it with warm naan or rice. A simple green salad can also balance the meal. For a crunchy bite, add some toasted pita chips. Fresh lime wedges on the side add a nice zing! Absolutely! This soup freezes well. Let it cool completely before packing it. Use freezer-safe containers or bags. It can be frozen for up to three months. When ready to eat, thaw it overnight in the fridge and reheat. To control the spice, start with less curry powder. You can always add more later. If you want more heat, try adding a pinch of cayenne pepper. For milder flavors, skip the cumin. Adjust the seasonings to suit your taste! Toppings can enhance the soup's flavors. Fresh cilantro adds a bright touch. Sliced green onions bring crunch. A dollop of yogurt or sour cream can add creaminess. Lime wedges are also great for squeezing on top. While red lentils are best, you can use green or brown lentils. They will take longer to cook and may not break down as much. Adjust the cooking time accordingly. You may need to add more broth to keep a good soup consistency. Yes! This soup is perfect for meal prep. It’s filling and nutritious. Make a big batch and portion it out for the week. It will save you time on busy days. Enjoy it for lunch or dinner! You can find the complete recipe and detailed instructions for Coconut Curry Lentil Soup [Full Recipe]. Enjoy cooking this hearty and flavorful dish! This blog post covered a tasty Coconut Curry Lentil Soup. We looked at key ingredients, cooking steps, and helpful tips to make it perfect. I shared variations for different diets and how to store leftovers safely. Enjoy this soup warm and fresh, or as leftovers. You can adapt it to fit your taste or dietary needs. With simple steps and easy swaps, you can craft a dish you love. Now, it's time to enjoy your cooking adventure!

Coconut Curry Lentil Soup Hearty and Flavorful Dish

Welcome to a dish that warms your soul: Coconut Curry Lentil Soup! This hearty and flavorful delight is perfect for

For a vibrant grilled vegetable pasta salad, you need fresh vegetables. Freshness makes all the difference in taste and nutrition. Here’s what you will use: - 8 oz farfalle (bowtie pasta) - 1 zucchini, sliced - 1 bell pepper (any color), cut into strips - 1 cup cherry tomatoes, halved - 1 red onion, cut into wedges - ¼ cup olive oil - 2 tablespoons balsamic vinegar - 1 teaspoon dried oregano - Salt and pepper to taste - ¼ cup fresh basil, chopped - ½ cup feta cheese, crumbled (optional) Using seasonal vegetables can enhance flavor. Look for local produce to ensure quality. For the pasta, I recommend farfalle. Its shape holds the dressing well and adds fun to the dish. You can also use: - Penne - Fusilli - Or any pasta you like If you need gluten-free options, try quinoa pasta or brown rice pasta. They work well and taste great. You can make this salad your own with toppings. Consider adding: - Crumbled feta cheese for creaminess - Fresh herbs like parsley or dill for extra flavor For dressings, I suggest using balsamic vinaigrette, which complements the grilled flavors. You can also try lemon juice or a simple olive oil drizzle. Check the [Full Recipe] for all details! To start, fill a large pot with water. Add salt, about one tablespoon. Bring the water to a rolling boil. Once boiling, add 8 ounces of farfalle pasta. Cook it for about 10-12 minutes, or as the package says. You want it to be al dente, which means it should still have a little bite. To check, taste a piece. If it feels firm but not hard, it’s ready. Drain the pasta in a colander. Rinse it under cold water to stop cooking. This step keeps the pasta from getting mushy. Set it aside to cool while you grill the veggies. Now, let’s get to grilling. First, preheat your grill or grill pan to medium-high heat. While it heats, prepare your veggies. Take a bowl and toss the sliced zucchini, bell pepper strips, halved cherry tomatoes, and red onion wedges with 2 tablespoons of olive oil. Add salt and pepper to taste. Once your grill is hot, place the veggies on it. Grill them for about 5-7 minutes. You want the veggies to be tender and to have nice grill marks. Keep an eye on them so they don’t burn. When they are done, take them off the grill and let them cool for a bit. While the veggies cool, let’s make the dressing. In a small bowl, whisk together 2 tablespoons of olive oil, 2 tablespoons of balsamic vinegar, and 1 teaspoon of dried oregano. Add salt and pepper to taste. If you like a sweeter dressing, add a bit more vinegar. For a stronger flavor, you can add more oregano. Taste it to see what you like best. This dressing will bring all the flavors together in your salad. Now, you can combine everything. In a large mixing bowl, mix the cooled pasta, grilled veggies, and fresh basil. Pour your dressing over the top and toss gently. This way, everything gets coated. If you want, sprinkle some crumbled feta cheese on top before serving. Enjoy your fresh and flavorful dish! For more details, check the Full Recipe. To grill vegetables perfectly, choose fresh ones. Zucchini, bell peppers, and onions stand out. Slice them evenly for even cooking. Brush them with olive oil and season well. This helps prevent sticking. - Best Methods: - Use medium-high heat for a nice char. - Grill zucchini and bell peppers for about 5-7 minutes. - Cherry tomatoes need less time, around 3-5 minutes. Common mistakes can ruin your veggies. Avoid flipping them too soon. Let them sear for good grill marks. Also, don’t overcrowd the grill. This ensures even cooking and prevents steaming. Herbs and spices can transform your dish. Fresh basil adds a burst of flavor. Oregano brings warmth and earthiness. You can also try thyme or rosemary for a unique twist. To spice things up, add crushed red pepper flakes. A pinch of cayenne can also elevate the dish. If you love citrus, a splash of lemon juice brightens the flavors. Grilled vegetable pasta salad shines at any temperature. It’s great warm, at room temperature, or chilled. If serving warm, enjoy its fresh-off-the-grill taste. For plating, use a large, colorful bowl. This creates a feast for the eyes. Garnish with extra basil leaves for a pop of color. Drizzle some olive oil on top to make it shine. This makes your dish look as good as it tastes. You can find the full recipe [here](#). {{image_2}} You can change your grilled vegetable pasta salad based on what is in season. During spring, use fresh asparagus or peas. In summer, try eggplant, summer squash, or corn. Fall brings great options like roasted butternut squash or Brussels sprouts. In winter, use hearty veggies like carrots or root vegetables. To adapt the salad, think about what is fresh at your local market. Use what looks best. This will make your dish more vibrant and tasty. You can also mix different colors for a beautiful presentation. If you want a vegan or vegetarian option, skip the feta cheese. Replace it with a vegan cheese or nutritional yeast for a cheesy flavor. For a gluten-free version, use gluten-free pasta. Quinoa can be a great base too. It adds protein and a nice texture. If you are watching carbs, try using spiralized zucchini or cauliflower rice instead of pasta. This keeps the dish light and healthy. You can change the dressing to give your salad a new taste. Try a lemon vinaigrette or a creamy tahini sauce. Adding fresh herbs like cilantro or mint can also change the flavor. For an ethnic twist, consider using soy sauce and sesame oil for an Asian flair. You can also add spices, like cumin or smoked paprika, for a smoky taste. Mix and match to find what you love most. By making these variations, you can keep your grilled vegetable pasta salad fresh and exciting. Remember to check the [Full Recipe] for more details! To store leftovers, place your grilled vegetable pasta salad in an airtight container. Keep it in the fridge for up to three days. For best flavor and texture, add fresh basil and feta just before serving. This helps keep those ingredients vibrant and tasty. You can freeze the grilled vegetable pasta salad for up to three months. To do this, use a freezer-safe container. Pack the salad tightly to avoid air pockets. When you’re ready to eat, thaw it in the fridge overnight. Reheat it gently in a pan over low heat, or serve it cold for a refreshing bite. In the fridge, the salad stays fresh for about three days. Check for signs of spoilage like an off smell or a slimy texture. If you see these signs, it's best to toss the salad. Enjoying it fresh ensures the best flavor and quality. You can make this salad in advance! Here’s how: - Prep the Pasta: Cook the pasta and cool it down. Store it in the fridge in an airtight container. - Grill the Veggies: Grill the vegetables a day before. Let them cool, then keep them in the fridge. - Make the Dressing: Whisk the dressing and store it in a jar. Just shake it before using. - Mix Before Serving: Combine everything right before serving. This keeps the flavors fresh and bright. Yes! Adding protein boosts flavor and makes the salad heartier. Here are some great options: - Grilled Chicken: Slice cooked chicken breast and mix it in. - Shrimp: Toss in grilled shrimp for a seafood twist. - Legumes: Add chickpeas or white beans for a veggie option. They make the salad filling and tasty. Some veggies grill better than others. Here’s a list of my favorites and their grilling times: - Zucchini: 5-7 minutes, cut into slices. - Bell Peppers: 5-7 minutes, cut into strips. - Cherry Tomatoes: 4-6 minutes, leave them whole or skewer them. - Red Onion: 6-8 minutes, cut into wedges. Grill these veggies until they are tender and have nice grill marks. Enjoy the smoky flavor they add to your pasta salad! This grilled vegetable pasta salad combines fresh ingredients, tasty dressings, and easy steps. You can choose different pasta and add your favorite toppings for truly personal flavors. Remember to grill your vegetables well and store leftovers properly. Enjoy this versatile dish, whether warm or chilled. With a few variations, you can make this salad fit your needs and taste. Try it out, and enjoy healthy meals that excite your palate!

Grilled Vegetable Pasta Salad Fresh and Flavorful Dish

Summer is the perfect time to enjoy a vibrant and tasty grilled vegetable pasta salad. This fresh and flavorful dish

To make no-bake chocolate oatmeal cookies, gather these simple ingredients: - 1 cup quick oats - 1/2 cup creamy peanut butter - 1/2 cup honey or maple syrup - 1/4 cup unsweetened cocoa powder - 1/4 cup unsweetened shredded coconut (optional) - 1/2 teaspoon vanilla extract - A pinch of salt - 1/4 cup dark chocolate chips (optional, for extra chocolatey goodness) These ingredients come together to create a treat that is rich in flavor and easy to make. Quick oats form the base and add texture. Creamy peanut butter gives a nutty taste and binds the cookies. Honey or maple syrup adds sweetness. Unsweetened cocoa powder provides that deep chocolate flavor. Adding shredded coconut offers a fun twist, but it’s not a must. Vanilla extract enhances the flavors, while a pinch of salt balances the sweetness. If you want an extra chocolate hit, toss in dark chocolate chips. When you have all these ingredients ready, you're well on your way to making a delicious batch of no-bake cookies. For the full recipe, check out the detailed steps. To make no-bake chocolate oatmeal cookies, you need just a few simple steps. First, gather all your ingredients. This will help you stay organized. You can find the full recipe below for reference. Start by mixing the dry ingredients. In a medium bowl, add: - 1 cup quick oats - 1/4 cup unsweetened cocoa powder - 1/4 cup unsweetened shredded coconut (optional) Stir these ingredients well. Make sure they blend nicely. This step is important for even flavor in your cookies. Now, it’s time to combine the wet ingredients. In a small saucepan over low heat, add: - 1/2 cup creamy peanut butter - 1/2 cup honey or maple syrup Stir this mixture continuously for 3-4 minutes. It should become smooth and creamy. Once it’s ready, take it off the heat. Add: - 1/2 teaspoon vanilla extract - A pinch of salt Now, pour this warm mix over the dry ingredients. Use a spatula to mix it well. Make sure all the oats are coated. If you want, fold in: - 1/4 cup dark chocolate chips Once everything is combined, drop spoonfuls onto a parchment-lined baking sheet. Flatten them slightly to form cookie shapes. Now, refrigerate the cookies for 30 minutes. This helps them set. Enjoy your tasty treats! To get the right texture, use quick oats. They mix well with the other ingredients. If you want chewy cookies, add a little more peanut butter. For a firmer cookie, let them chill longer. The mix should hold together but not be too dry. If it feels too crumbly, add a splash of water or more syrup. One big mistake is not measuring the ingredients. Too much cocoa can make cookies dry. Using chunky peanut butter may change the texture. Remember to stir the wet mix well until smooth. This step makes sure everything blends nicely. Don’t skip the chilling time. It helps the cookies set properly. These cookies are great on their own, but you can dress them up! Serve them with a glass of cold milk or hot cocoa. You can even put them on a platter with fresh fruit. For a fun twist, drizzle melted chocolate on top. They also work well as a topping for yogurt or ice cream. For the full recipe, check out the details above. {{image_2}} You can make these cookies even better by adding nuts or seeds. Chopped almonds, walnuts, or pecans add a nice crunch. You can also use seeds like sunflower or pumpkin for extra nutrition. Just mix in about 1/4 cup of your favorite nuts or seeds when you combine the dry ingredients. This simple change makes the cookies more filling and tasty. While honey or maple syrup works great, you can switch sweeteners for new flavors. Agave nectar or brown rice syrup are good options. These sweeteners change the taste a bit but keep the cookies sweet. Just use the same amount as you would with honey or maple syrup. This lets you enjoy different flavors while keeping the same yummy texture. Want to kick up your cookie game? Try adding flavor enhancers. A dash of cinnamon or nutmeg can bring warmth to the taste. You can also add a bit of espresso powder for a rich coffee flavor. If you're a coconut lover, try using coconut extract instead of vanilla. Each small tweak can create a new favorite cookie. Check out the Full Recipe for more ideas and details! Store your no-bake cookies in an airtight container. Use parchment paper between layers. This keeps them fresh and prevents sticking. You can keep them at room temperature for up to three days. If it's hot, place them in the fridge. This helps them stay firm and tasty. Freezing is a great way to save cookies for later. Place cooled cookies in a freezer-safe bag. Make sure to remove as much air as possible. You can freeze them for up to three months. To enjoy, just take them out and let them thaw at room temperature. The cookies taste best fresh but can last well. If stored properly, they last about one week at room temperature. Keep an eye on texture and smell. If they feel dry or smell off, it’s best to toss them. Enjoy your no-bake cookies at their best! Check the Full Recipe for more tips. Yes, you can use rolled oats instead of quick oats. However, the texture will be chewier. Quick oats absorb liquid better, giving a softer cookie. If you use rolled oats, chop them a bit for a closer texture. To make these cookies vegan, swap honey for maple syrup. Use dairy-free chocolate chips if you want extra chocolate. The rest of the ingredients are already vegan-friendly. You can add many fun mix-ins! Try chopped nuts, seeds, or dried fruit. You can also use different nut butters, like almond or cashew. Get creative with flavors and make them your own! For the full recipe, check out the details above. This blog post covers everything you need to make no-bake cookies. We explored ingredients like quick oats and creamy peanut butter and shared easy steps for mixing them. I also provided tips to perfect your cookie texture and avoid common errors. Remember, you can customize these cookies with nuts or different sweeteners. Store them properly to keep them fresh. Enjoy experimenting with flavors and variations. Happy baking, and enjoy your delicious treats!

No-Bake Chocolate Oatmeal Cookies Simple Delight

Looking for a sweet treat that’s easy to make? No-Bake Chocolate Oatmeal Cookies are the perfect solution! With just a

- 1 cup canned chickpeas, drained and rinsed - 4 cloves roasted garlic - 3 tablespoons tahini - 2 tablespoons fresh lemon juice - 2 tablespoons extra virgin olive oil These ingredients work together to create a creamy, rich dip. Canned chickpeas save time and keep the dish simple. Roasted garlic adds a sweet, mellow flavor, making every bite a delight. Tahini brings a nutty taste, while fresh lemon juice adds brightness. Extra virgin olive oil gives a smooth finish. - Paprika - Chopped parsley - Additional olive oil Garnishes elevate the dish. Paprika adds color and a hint of spice. Chopped parsley introduces freshness. A drizzle of olive oil on top enhances the richness. Choosing high-quality ingredients is key. Look for canned chickpeas with no added salt or preservatives. Fresh garlic will roast better than older bulbs. Use pure tahini made only from sesame seeds. Fresh herbs always taste better than dried. They can bring your hummus to life! To start, you will roast the garlic. Preheat your oven to 400°F (200°C). Take four cloves of fresh garlic and wrap them in aluminum foil. Drizzle a bit of olive oil over them before wrapping. This helps the garlic become tender and sweet. Roast the garlic for 30 to 35 minutes. You will know it is ready when it is soft and caramelized. Once the garlic is done, let it cool for a few minutes. You can carefully unwrap the foil to let steam escape. When it's cool enough to handle, squeeze the garlic cloves out of their skins. They should pop out easily, leaving you with soft, roasted garlic. Now it’s time to blend the hummus. In your food processor, add the following ingredients: - 1 cup canned chickpeas, drained and rinsed - 4 cloves of roasted garlic - 3 tablespoons tahini - 2 tablespoons fresh lemon juice - 2 tablespoons extra virgin olive oil - 1/2 teaspoon ground cumin - Salt to taste Pulse the mixture for a few seconds. Scrape down the sides to ensure everything mixes well. To get the perfect creamy texture, add water, one tablespoon at a time. Blend until your hummus is smooth. Taste your hummus. You can add more salt, lemon juice, or tahini if you want. Blend again to mix in any changes. Once your hummus is ready, transfer it to a bowl. Drizzle some extra virgin olive oil on top. You can sprinkle paprika and chopped parsley for a nice touch. For serving, pair your hummus with pita bread, fresh veggies, or crackers. It makes a great dip for snacks or a flavorful spread for wraps. Enjoy your creamy and flavorful dip! For the complete recipe, check out the Full Recipe. What if my hummus is too thick? If your hummus is too thick, add water. Start with one tablespoon at a time. Blend it well after each addition. The goal is a smooth, creamy texture. What if my hummus is too thin? If your hummus is too thin, add more chickpeas or tahini. Blend until it thickens. You can also add a bit of olive oil for richness. How can I enhance the flavor? Boost the flavor by adding spices. Try a dash of smoked paprika or cumin. Fresh herbs like cilantro or basil work well too. These small tweaks can make a big difference. How do I store my hummus? To store roasted garlic hummus, place it in an airtight container. Keep it in the fridge for up to a week. This will help the flavors meld together. Should I chill it? Yes, chilling it for a few hours helps the taste develop. Take it out about 30 minutes before serving. This way, it warms slightly and becomes creamy again. What can I pair with hummus? Hummus pairs well with many snacks. Serve it with pita chips, fresh veggies, or crackers. You can also use it as a spread in wraps or sandwiches. How else can I use hummus? Use hummus in other dishes too! It’s great in grain bowls or as a dip for grilled meats. You can even mix it into pasta for a creamy sauce. Explore these ideas to enjoy your hummus more! {{image_2}} You can add exciting flavors to your roasted garlic hummus. Roasted red peppers bring a sweet, smoky taste. Just blend in a half cup of roasted red peppers after mixing the main ingredients. Fresh herbs like basil or parsley also work great. They make the dip taste fresh and bright. For a spicy kick, add chili flakes to your hummus. Start with a pinch and taste. You can always add more if you like heat. This hummus is naturally gluten-free, so everyone can enjoy it. If you want a vegan version, it is already vegan! Just check your tahini to ensure it is dairy-free. You might want to swap the olive oil for avocado oil if you prefer. This keeps the flavor rich while changing the oil type. How you serve your hummus can make it even more fun. You can serve it in a bowl, drizzled with olive oil and sprinkled with paprika. Try using it as a spread in wraps with fresh veggies. You can also use it as a dip for pita bread or veggies. Serve it with colorful plates to make it pop! For a creative twist, try mini cups for individual servings. For the full recipe details, check out the Full Recipe section. Roasted garlic hummus lasts about five days in the fridge. Keep it stored in an airtight container. This helps maintain its creamy texture and rich flavor. If you notice any change in smell or taste, it's best to toss it out. You can freeze hummus for up to three months. To freeze, scoop it into an airtight container. Leave some space at the top to allow for expansion. When you want to eat it, move it to the fridge overnight to thaw. For quicker thawing, you can use the microwave on low power. Use airtight containers for the best storage. Glass jars work well because they do not absorb odors. Plastic containers are also fine, but make sure they seal tightly. This keeps your hummus fresh and delicious for longer. You can find the full recipe for this tasty dip above. To make roasted garlic, you need a few easy steps. First, preheat your oven to 400°F (200°C). Next, take whole garlic bulbs and slice off the top to expose the cloves. Drizzle them with olive oil and wrap them in aluminum foil. Roast in the oven for about 30-35 minutes. The garlic should be tender and slightly caramelized. Allow it to cool for a bit before using. Roasted garlic adds a sweet, rich flavor to your dishes. You can use fresh garlic, but the taste will differ. Fresh garlic is sharp and pungent. Roasted garlic has a milder, sweeter flavor. If you like bold flavors, fresh garlic is fine. For a smoother, creamier taste, roasted garlic works best. It blends well in hummus, giving it a rich, creamy texture. Roasted garlic has many health benefits. It is rich in antioxidants and can boost your immune system. It may help lower blood pressure and improve heart health. Roasted garlic also has anti-inflammatory properties. Adding it to your meals can enhance flavor while supporting your overall health. Incorporating roasted garlic into your diet is a tasty way to enjoy these benefits. This blog post covered how to make delicious roasted garlic hummus. We discussed essential ingredients, like canned chickpeas and tahini, as well as optional garnishes for extra flavor. I shared clear instructions for roasting garlic and blending hummus, along with tips for perfecting the texture. In closing, high-quality ingredients and careful preparation make all the difference. Enjoy experimenting with flavors and serving ideas. This simple dish can spice up any meal or snack. Now, it's time to enjoy your homemade roasted garlic hummus!

Roasted Garlic Hummus Creamy and Flavorful Dip

Get ready to elevate your snacking with creamy and flavorful roasted garlic hummus! This simple dip packs a punch of

- Cherry tomatoes - Fresh mozzarella balls (bocconcini) - Fresh basil leaves The main ingredients of Caprese Salad Skewers are bright and fresh. Cherry tomatoes give a sweet burst of flavor. Fresh mozzarella balls, also called bocconcini, add creaminess. Fresh basil leaves bring an aromatic touch. These three ingredients combine for a classic taste. - Extra virgin olive oil - Balsamic glaze - Salt and pepper The additional ingredients enhance the dish's flavor. Extra virgin olive oil adds richness and depth. Balsamic glaze provides a sweet and tangy kick. A sprinkle of salt and pepper brightens all the flavors. Together, they make the skewers even more delicious. - Skewers (6-inch size) - Cutting board - Knife To make these skewers, you'll need some simple tools. Six-inch skewers work best for easy handling. A cutting board gives you a safe space to prep. A knife helps cut the tomatoes in half and drain the mozzarella. Having these items ready makes the process smooth and fun. For the full recipe, check out the detailed instructions. 1. Wash and halve cherry tomatoes: Start by rinsing the cherry tomatoes under cold water. This removes any dirt or residue. Next, cut each tomato in half. This makes them easier to eat and helps blend the flavors. 2. Drain mozzarella balls: If your mozzarella balls are in water, drain them well. This step is crucial to prevent the skewers from becoming soggy. 1. Threading tomato, basil, and mozzarella: Take a skewer and begin with a half cherry tomato. Next, add a fresh basil leaf. Then, slide on a mozzarella ball. Repeat this pattern until the skewer is full. Aim for three or four sets on each skewer. 2. Recommended order for assembly: The order is important. Start with the tomato, then basil, and finish with mozzarella. This order keeps the flavors balanced and looks great. 1. Drizzling olive oil and balsamic glaze: Once your skewers are complete, place them on a platter. Drizzle them with extra virgin olive oil. This adds richness. Then, drizzle balsamic glaze over the skewers for a sweet touch. 2. Seasoning the skewers: Finish by sprinkling a pinch of salt and freshly cracked pepper. These simple seasonings really enhance the dish's flavor. For the full recipe, check out Caprese Salad Skewers. Enjoy making these vibrant and tasty bites! To impress guests, present your Caprese salad skewers on a bright platter. Arrange them in colorful patterns. You can also lay them on a bed of fresh greens for a pop of color. Pair these skewers with light drinks. A crisp white wine or sparkling water works well. For a fun twist, try pairing with a fruity mocktail. The flavors blend nicely with the fresh ingredients. Choosing fresh ingredients is key. Look for firm cherry tomatoes and creamy mozzarella. Fresh basil should smell sweet and fragrant. Avoid pre-packaged items when possible; they often lack flavor. Seasoning matters too. A sprinkle of salt enhances the taste of the tomatoes and mozzarella. Freshly cracked black pepper adds a kick. Use high-quality extra virgin olive oil and balsamic glaze for the best flavor. Prep your ingredients in advance to save time. Wash the tomatoes and basil, and drain the mozzarella beforehand. This way, you can quickly assemble the skewers. For crowd servings, use longer skewers or double up. You can stack more ingredients on each one. This makes it easy for guests to grab a skewer and enjoy. For the full recipe, check out the Caprese Salad Skewers . {{image_2}} You can change the cheese in your Caprese salad skewers. Instead of mozzarella, try burrata or feta. Both give great flavor. You can also add other veggies, like bell peppers or zucchini. Fruits work too! Try using strawberries or peaches for a sweet twist. To make your skewers pop, add pesto or flavored oils. A drizzle of garlic oil can bring a nice kick. You can also add proteins. Prosciutto pairs perfectly with the fresh flavors. Grilled chicken is another good option for a heartier bite. Make your skewers match the season or theme. For holidays, use festive colors. Red, white, and green work well for Christmas. For a summer BBQ, add corn or avocado. You can create a whole array of flavors for themed parties. Fun, easy, and sure to impress! To store leftover Caprese skewers, wrap them in plastic wrap or place them in an airtight container. This keeps them fresh and tasty. Try to eat them within 2 days for the best flavor. Make sure to keep them in the coldest part of your fridge. For maintaining freshness, avoid adding salt before storage. Salt can draw moisture out, making them soggy. Drizzle olive oil and balsamic glaze just before serving. This adds flavor without affecting the texture. Can you freeze Caprese skewers? It’s not the best idea. Freezing changes the texture of fresh tomatoes and mozzarella. If you must freeze them, remove the tomatoes. You can freeze the mozzarella and basil together. To properly freeze, wrap the mozzarella tightly in plastic wrap, then place it in a freezer bag. When ready to use, thaw in the fridge for a few hours. For basil, chop and freeze in ice cube trays for easy use. The expected lifespan of prepared skewers is about 2 days in the fridge. After that, they may lose their taste and texture. Look for signs of spoilage, like mushy tomatoes or a bad smell. If you notice these things, it’s best to toss them. Fresh ingredients make the best Caprese salad skewers, so always check before you eat. For Caprese salad skewers, fresh mozzarella is the best choice. Fresh mozzarella has a soft texture and rich flavor. It melts in your mouth and pairs well with tomatoes and basil. Pre-packaged mozzarella can be firmer and less creamy. It often lacks that fresh taste. When you pick mozzarella, look for the term "bocconcini." These small balls of fresh mozzarella are perfect for skewers. They offer the ideal size and texture for each bite. Yes, you can make these skewers ahead of time. To prep, assemble the skewers as directed. Then, store them in the refrigerator. Use an airtight container to keep them fresh. If you plan to serve them later, drizzle the olive oil and balsamic glaze just before serving. This keeps the flavors bright and fresh. You can prep these skewers up to a day in advance, making them great for parties or gatherings. To make vegan Caprese skewers, you can substitute the mozzarella. Use plant-based cheese that melts well. Look for vegan mozzarella or cashew cheese. You can also add other flavorful ingredients. Try using avocado slices or marinated tofu for creaminess. For added flavor, drizzle with a balsamic reduction or a splash of lemon juice. These swaps keep the dish fresh and tasty while meeting vegan needs. Enjoy the same vibrant flavors in a plant-based way! In this post, we explored making tasty Caprese skewers. We covered ingredients like cherry tomatoes, mozzarella, and fresh basil. You learned how to assemble the skewers and add your favorite touches. Tips for serving and storing these treats help keep them fresh. You can even switch ingredients for fun twists. Enjoy your new skills as you create these easy appetizers for any occasion!

Caprese Salad Skewers Fresh and Flavorful Delight

Looking for a simple yet tasty appetizer? Caprese Salad Skewers pack vibrant flavors and fresh ingredients into each bite! With

- 2 boneless, skinless chicken breasts, sliced into thin strips - 1 tablespoon olive oil - 1 red bell pepper, sliced - 1 green bell pepper, sliced - 1 medium onion, sliced - 2 cloves garlic, minced - 1 teaspoon chili powder - 1 teaspoon cumin - 1 teaspoon paprika - ½ teaspoon salt - ¼ teaspoon black pepper - Juice of 1 lime - 4 small flour tortillas The main ingredients in chicken fajitas bring a burst of flavor. Sliced chicken breasts form the heart of this dish. Use fresh, tender chicken for the best taste. The bell peppers add color and sweetness. Red and green peppers balance each other well. Onions provide a strong base flavor, while garlic adds depth. Seasonings like chili powder, cumin, and paprika give it a warm kick. Don't forget the lime juice! It adds brightness to the dish. - Sour cream - Guacamole - Shredded cheese - Chopped cilantro Toppings can transform your fajitas! Sour cream adds creaminess and coolness. Guacamole brings rich avocado flavor. Shredded cheese adds a nice, melty touch. Chopped cilantro gives a fresh herbal note. Feel free to mix and match toppings based on your taste! - Skillet - Kitchen knife - Cutting board You need a few simple tools to make fajitas. A skillet is essential for cooking the chicken and veggies. A sharp kitchen knife helps you slice the chicken and vegetables easily. A cutting board keeps your workspace tidy. With these tools, you can create a delicious meal with ease. For a complete guide, check the Full Recipe. - Slicing chicken and vegetables: Start by slicing your chicken breasts into thin strips. Use a sharp knife for clean cuts. Next, slice the red and green bell peppers into strips. Then, slice the onion. Make sure all pieces are similar in size to cook evenly. - Measuring seasonings: Measure out your spices: one teaspoon each of chili powder, cumin, and paprika. Also, measure half a teaspoon of salt and a quarter teaspoon of black pepper. Keep these ready to add flavor to your chicken. - Heating the skillet and olive oil: Heat a large skillet over medium-high heat. Add one tablespoon of olive oil to the skillet. Let it warm for a minute. This helps the chicken cook nicely without sticking. - Cooking the chicken strips: Add the sliced chicken to the hot skillet. Sprinkle the measured seasonings over the chicken. Cook for about five to seven minutes. Stir occasionally until the chicken turns golden brown and is cooked through. - Adding vegetables and sautéing: Once the chicken is cooked, add in the sliced bell peppers and onions. Sauté these for about four to five minutes. You want them to be tender but still a bit crisp. This adds great texture. - Stirring in garlic and lime juice: Next, stir in the minced garlic and the juice of one lime. Cook for one more minute until you smell the garlic. This adds a fresh kick to your chicken fajitas. Now your chicken fajitas are nearly ready to serve! Check the [Full Recipe] for more details. To ensure chicken is tender, slice it thinly. Thin strips cook faster and stay juicy. Always heat your skillet well before adding the chicken. This helps lock in moisture. Let the chicken sear without stirring for a minute. Then, stir occasionally until it turns golden brown. For crispy vegetables, add them after the chicken has cooked. This way, they stay crunchy. Sauté them just until they soften slightly. A little crunch adds great texture to your fajitas. Marinating the chicken makes a big difference. Mix olive oil, lime juice, and spices in a bowl. Let the chicken soak for at least 30 minutes. This gives time for flavors to blend into the meat. Adding fresh herbs like cilantro boosts flavor. Chop them finely and sprinkle on top before serving. This adds a fresh taste and bright color to your dish. The best sides to pair with fajitas are rice and beans. These add heartiness to your meal. You can also serve tortilla chips with salsa for a fun crunch. For creative plating, stack tortillas on a platter. Spoon the chicken and veggies into a bowl in the center. Garnish with lime wedges and cilantro. This makes your meal look as good as it tastes! Check out the Full Recipe for more details. {{image_2}} You can switch up the chicken for beef or shrimp. Beef gives a rich flavor and works well. Just slice it thin and cook for a few minutes. Shrimp cooks fast and adds a nice touch. If you want a vegetarian option, use tofu or beans. Tofu can soak up flavors well. Beans add protein and a hearty texture. For a kick, add jalapeños or your favorite hot sauce. This will spice up your dish. You can also try a spicy fajita seasoning mix. It gives a nice heat and depth. Adjust the spice level to your taste for a perfect meal. If you are gluten-free, use gluten-free tortillas. Many brands offer great options. For low-carb diets, try lettuce wraps instead of tortillas. This keeps the flavors but cuts the carbs. You can enjoy fajitas no matter your diet! To store your leftover chicken fajitas, let them cool first. Place the chicken and veggies in an airtight container. This keeps them fresh and prevents odors. You can store them in the fridge for up to three days. If you want to keep them longer, consider freezing. For reheating, you can use a microwave or a skillet. If you microwave, put the fajitas on a microwave-safe plate. Cover to keep moisture. Heat in short bursts to avoid drying out. If you use a skillet, heat it on low. Add a splash of water or broth to keep the chicken tender. Stir until heated through. To freeze fajitas, pack the cooled chicken and veggies in a freezer bag. Squeeze out extra air to avoid freezer burn. These can last for up to three months in the freezer. When you’re ready to eat, thaw them overnight in the fridge. For a quick method, you can defrost in the microwave. Reheat them in a skillet for best taste. For the full recipe, check [Full Recipe]. To boost flavor, marinate your chicken. Use lime juice, garlic, and spices. Let it sit for 30 minutes. This helps the flavors soak in. You can also add fresh herbs like cilantro before serving. Another option is to use smoked paprika for a deeper taste. Yes, you can prepare chicken fajitas in advance. Cook the chicken and veggies, then store them in the fridge. They stay fresh for up to three days. When ready to eat, just reheat in a skillet. This makes dinner quick and easy. Flour tortillas are the best choice for chicken fajitas. They are soft and easy to fold. Corn tortillas are a good option too, but they are more fragile. Choose the one you enjoy most. You can even try both for variety! For the full recipe, check out the detailed cooking steps above. This article covered everything you need for perfect chicken fajitas. We looked at key ingredients like chicken, fresh veggies, and fun seasonings. You learned the steps for preparation, cooking, and combining flavors. Tips helped you make fajitas tender and tasty, while variations showed ways to mix it up. Remember, leftovers can be stored easily and reheated for more meals. Enjoy experimenting with flavors and sides. Now, get cooking and delight your taste buds!

Easy Chicken Fajitas Flavorful and Quick Recipe

Looking for a quick and tasty meal? You’ll love these Easy Chicken Fajitas! This recipe comes together fast, making it

To make veggie stuffed peppers, gather these ingredients: - 4 large bell peppers (any color) - 1 cup cooked quinoa - 1 can (15 oz) black beans, rinsed and drained - 1 cup corn (fresh, frozen, or canned) - 1 medium onion, finely chopped - 2 cloves garlic, minced - 1 teaspoon cumin - 1 teaspoon paprika - 1 teaspoon chili powder - 1 cup diced tomatoes (fresh or canned) - 1 cup shredded cheese (cheddar or a dairy-free alternative) - 2 tablespoons olive oil - Salt and pepper to taste - Fresh cilantro, for garnish You can change this recipe to fit your taste. Here are some ideas: - Swap quinoa for rice or couscous. - Add chopped spinach or kale for extra greens. - Use different beans like kidney or pinto. - Spice it up with jalapeños or red pepper flakes. - Try different cheeses like mozzarella or feta. These veggie stuffed peppers are not just tasty; they are healthy too. Each serving contains good nutrients. Here is a quick overview: - Calories: About 300 per serving - Protein: 15g - Fiber: 10g - Carbohydrates: 45g - Fat: 10g This dish offers a great balance of protein, carbs, and healthy fats. You can enjoy a filling meal that is also good for you! If you want to know more details, check the Full Recipe. Start by preheating your oven to 375°F (190°C). Take your large bell peppers and slice the tops off. Make sure to remove the seeds and membranes. If the peppers wobble, trim the bottoms a bit. This helps them stand tall in the dish. In a large skillet, heat two tablespoons of olive oil over medium heat. Add one medium chopped onion and sauté it for 3-4 minutes until it softens. Then, stir in two minced garlic cloves and cook for one more minute. This brings out a lovely smell. Next, add one cup of cooked quinoa, one can of rinsed black beans, one cup of corn, and one cup of diced tomatoes. Sprinkle in one teaspoon of cumin, paprika, chili powder, and season with salt and pepper. Mix it all well and cook for about five minutes. Finally, stir in half of the one cup of shredded cheese to the mix. Time to fill the peppers! Spoon the veggie mixture generously into each pepper. Press it down gently to pack it in. Top each pepper with the rest of the shredded cheese. Place the stuffed peppers upright in a baking dish. Pour a small amount of water into the bottom of the dish. This helps steam the peppers while they bake. Cover the dish with foil and bake for 25 minutes. After that, remove the foil and bake for another 15 minutes. The peppers should be tender, and the cheese should be melted and bubbly. Once done, take them out and garnish with fresh cilantro. Enjoy your colorful, tasty meal! For the full recipe, check here. Seasoning is key for great flavor in your veggie stuffed peppers. I love using cumin, paprika, and chili powder. These spices give a warm taste to the filling. You can also add some Italian herbs for a different twist. A dash of lime juice adds freshness. Don’t forget to taste as you go. Adjust the salt and pepper to fit your liking. You can cook stuffed peppers in the oven or air fryer. The oven gives them a nice, even cook. Preheat it to 375°F (190°C) for best results. Cover the dish with foil to keep moisture in while baking. If you want a quicker option, try the air fryer. It cooks them faster and can make the peppers a bit crispy. Set the air fryer to 350°F (175°C) and cook for about 15-20 minutes. Check for doneness to ensure the peppers are tender. Texture adds to the joy of eating. To make the filling more exciting, mix in nuts or seeds. Chopped walnuts or sunflower seeds add crunch. You can also use a mix of grains. Try brown rice or farro instead of quinoa for a chewy bite. Adding some sautéed mushrooms can boost the umami flavor, making the dish richer. For a creamier texture, mix in a bit of cream cheese or sour cream before stuffing the peppers. Enjoy customizing your veggie stuffed peppers for the best flavor! Check out the Full Recipe for more details. {{image_2}} If you want to make these veggie stuffed peppers vegan, you can skip the cheese. There are many great options. Use cashew cheese, which you can make by blending soaked cashews with lemon juice and nutritional yeast. You can also try coconut yogurt. It adds creaminess without dairy. Another option is using a vegan cheese brand. Many taste great and melt well. You can swap quinoa for other grains. Brown rice or farro work well. They add different textures and flavors. For legumes, try lentils or chickpeas instead of black beans. Both bring protein and fiber. They also make the dish heartier. Mix and match to find what you like best. Using seasonal veggies can boost flavor and nutrition. In summer, add zucchini or eggplant for a fresh taste. Fall is great for roasted butternut squash. Winter calls for hearty greens like kale or spinach. Just chop them up and mix them in with the filling. This way, your stuffed peppers will always stay exciting and new. For the full recipe, check out the main article. To keep your veggie stuffed peppers fresh, allow them to cool first. Place them in an airtight container. They can stay in the fridge for up to 4 days. If you want to store them longer, consider freezing. When you’re ready to eat, you can reheat them in the oven or microwave. For the oven, preheat it to 350°F (175°C). Place the stuffed peppers in a baking dish and cover with foil. Heat for about 20 minutes, or until warm. In the microwave, heat for 2 to 3 minutes. Make sure they are hot all the way through. To freeze your stuffed peppers, wrap each one in plastic wrap. Then place them in a freezer-safe bag. They can stay frozen for up to 3 months. When you’re ready to enjoy them, thaw them in the fridge overnight before reheating. This way, they keep their flavor and texture. For the full recipe, check the earlier section. You can use rice, farro, or couscous instead of quinoa. Each adds a different texture. Brown rice gives a nutty flavor, while couscous cooks faster. You can even use lentils for added protein. Just ensure you adjust cooking times based on the grain you choose. Yes, you can prepare them a day in advance. Cook the filling and stuff the peppers. Cover them and store in the fridge. When ready to bake, just pop them in the oven. They may need a few extra minutes to heat through. To add spice, include jalapeños or red pepper flakes in the filling. You can also use spicy cheese for an extra kick. For more flavor, try adding herbs like oregano or fresh basil. This will elevate the taste and make your stuffed peppers shine. Veggie stuffed peppers are tasty and easy to make. We covered the key ingredients, step-by-step instructions, and helpful tips. You can customize your peppers with different veggies and grains. Remember to store your leftovers properly for later enjoyment. In the end, stuffed peppers are a fun way to get creative in the kitchen. Try new flavors and make them your own! Enjoy your cooking and have fun with this dish.

Veggie Stuffed Peppers Flavorful and Healthy Recipe

Are you craving a dish that’s both tasty and healthy? Look no further! My Veggie Stuffed Peppers are packed with

To make Berry Coconut Popsicles, you need a few simple ingredients. Here’s what you’ll need: - Mixed berries (strawberries, blueberries, raspberries) - Coconut milk (full fat for creaminess) - Sweetener options (honey or maple syrup) - Vanilla extract and salt These ingredients come together to create a fresh and creamy treat. The mixed berries give a sweet and tangy flavor, while the coconut milk adds a rich creaminess. You can adjust the sweetness to your liking with honey or maple syrup. A dash of vanilla and a pinch of salt enhance the taste, making each bite delightful. For the full recipe, check out the detailed steps to create these popsicles. Enjoy the burst of berry flavors and the smoothness of coconut in every refreshing bite! First, gather your mixed berries. You can use strawberries, blueberries, and raspberries. Add them to the blender with one tablespoon of honey or maple syrup and a pinch of salt. Blend until smooth. You want it slightly chunky. This adds great texture. If you blend too much, you lose that fun bite. Next, we move to the coconut layer. In the same blender, pour in one can of coconut milk. Add the remaining tablespoon of honey or maple syrup and one teaspoon of vanilla extract. Blend this mix until it is completely smooth. This coconut layer is rich and creamy. It’s the perfect contrast to the berry mixture. Now it’s time to fill your molds. Pour the berry mixture into each mold, filling them about one-third full. Then, carefully add the coconut layer. Fill each mold to the top. To create a marbled effect, use a toothpick or skewer. Gently swirl the two layers together. This step makes each popsicle unique. For the freezing, place your molds in the freezer for at least 4 to 6 hours. You want the popsicles to be completely solid. When ready to remove them, run warm water over the outside of the molds for a few seconds. This helps release them easily. Then, gently pull them out. Enjoy your tasty treat! For the full recipe, check the provided link. When making Berry Coconut Popsicles, I often choose between fresh and frozen berries. Fresh berries taste great, but they may not always be in season. Frozen berries are always available and can be just as tasty. Both options work well in this recipe. For flavor combinations, I love mixing strawberries, blueberries, and raspberries. This mix gives a nice balance of sweet and tart. You can also try blackberries or even cherries for a fun twist. Sweetness can vary based on the berries used. I recommend starting with two tablespoons of honey or maple syrup. You can adjust this to match your taste. If you want a healthier option, try using agave syrup or stevia. Natural sweeteners can add unique flavors. For example, coconut sugar gives a deeper taste. Experiment with what you like best! Presentation is key for impressing guests. Garnishing with whole berries makes popsicles look great. You can place them on a wooden board with some whole berries scattered around. For a party, serve them on colorful plates. You can also drizzle melted dark chocolate over the popsicles. This adds flair and a sweet touch. For the full recipe, check the Berry Coconut Popsicles section. Enjoy this fresh and creamy delight! {{image_2}} If you want to make these popsicles dairy-free, use almond or oat milk instead of coconut milk. Both options work well and add their own unique flavors. Almond milk gives a nutty taste, while oat milk is creamy and smooth. You can use the same amount as the coconut milk in the recipe. This swap keeps it light and refreshing. You can enhance these popsicles with fresh herbs or citrus zest. Adding mint or basil brings a fresh twist to the berry flavor. Simply chop a few leaves and blend them into the berry mixture. For citrus zest, use lemon or lime. Just a little zest can brighten the popsicles. This small addition can make a big difference in taste. Kids love fun shapes and creamy textures. You can add yogurt to the coconut layer for extra creaminess. Greek yogurt adds protein and makes them taste richer. Use fun molds to create shapes kids enjoy. Stars, hearts, or animals make eating these popsicles more exciting. These little changes can turn a simple treat into a fun snack time experience. For the full recipe, check out the Berry Coconut Popsicles section. To keep your Berry Coconut Popsicles fresh, place them in an airtight container. This prevents freezer burn and keeps flavors intact. You can also wrap them in plastic wrap. For best results, eat them within three months. These popsicles can last up to three months in the freezer. However, check for signs of spoilage. If you see ice crystals or changes in color, it’s time to toss them. Cleaning your molds is easy. Use warm, soapy water and a soft sponge. Avoid harsh scrubbing pads to protect the mold's surface. After cleaning, let them air dry completely. This helps maintain their shape and prevents odors. Yes, you can use other fruits! Try mango, peaches, or even bananas. Just keep in mind that softer fruits may need less sweetener. If you use tart fruits, like kiwi or pineapple, add a bit more sweetener to balance the flavor. The average freezing time is about 4 to 6 hours. However, for the best texture, I suggest leaving them overnight. This way, they set perfectly and are easy to enjoy the next day. Absolutely! You can use agave syrup, stevia, or coconut sugar. Each sweetener has a different flavor. Adjust the amount based on your taste. Just remember, some sweeteners are stronger than others, so taste as you go. Yes, these popsicles are quite healthy! The mixed berries provide vitamins, fiber, and antioxidants. Coconut milk adds healthy fats while keeping it creamy. Plus, they are low in calories. You can also use low-calorie sweeteners to make them even lighter. If your popsicles are stuck, run warm water over the outside of the molds for a few seconds. This warms the sides and helps loosen them. Gently pull the popsicle out. If it still resists, repeat the warm water method. Enjoy your Berry Coconut Popsicles! You learned how to make delicious berry coconut popsicles. We covered the key ingredients, step-by-step instructions, and smart tips for success. I shared fun variations to try and helpful storage info. These popsicles are perfect for hot days or gatherings. You can make them healthy with fresh ingredients. Enjoy experimenting with all the flavors! Remember, your homemade popsicles can bring joy and refreshment.

Berry Coconut Popsicles Fresh and Creamy Delight

Summer days call for something cool and tasty! I’m excited to share my Berry Coconut Popsicles recipe, a simple treat

Older posts
Newer posts
← Previous Page1 … Page41 Page42 Page43 … Page60 Next →

dsad

© 2025 Recipes Pursuit • Built with GeneratePress

Our Policies

  • Copyright Policy
  • Cookie Policy
  • GDPR Policy
  • Privacy Policy
  • Disclaimer
  • Terms Of Use

More Information

  • Home
  • About
  • Contact
  • Appetizers
  • Dessert
  • Dinner
  • Drinks
©2025, Recipes Pursuit About Back To Top