![The key ingredients for these cookies create a rich, warm flavor. You will need: - 1 cup canned pumpkin puree - 1 cup brown sugar, packed - 1/2 cup granulated sugar - 1/2 cup unsalted butter, softened - 1 large egg - 1 teaspoon vanilla extract - 2 cups all-purpose flour - 1 teaspoon baking soda - 1 teaspoon baking powder - 1 teaspoon ground cinnamon - 1/2 teaspoon ground nutmeg - 1/2 teaspoon ground ginger - 1/2 teaspoon salt - 1 cup semi-sweet chocolate chips Using canned pumpkin puree is key. It is smooth and consistent. This gives your cookies a perfect texture. Fresh pumpkin can work, but it may not blend as well. Canned puree also adds moisture and flavor without being too watery. I use both brown and granulated sugar in this recipe. Brown sugar keeps the cookies soft and chewy. Granulated sugar adds a bit of crispness to the edges. The mix of these sugars makes each bite delightful. You can customize your cookies with some fun extras: - Additional spices like cloves or allspice - Different types of chocolate chips, like dark or white - Chopped nuts, like walnuts or pecans - Dried fruits, like cranberries or raisins Adding spices like cloves can enhance the flavor. You can also try different chocolate chips for variety. Dark chocolate adds a richer taste, while white chocolate can make it sweeter. If you like crunch, nuts are a great choice. Dried fruits can add a lovely chewiness and sweetness. Get creative! These options let you make the cookies your own. Just remember, the base recipe is perfect on its own, too. For the full recipe, check out the details in the article. To start, you need to preheat your oven to 350°F (175°C). This step is key. A hot oven helps the cookies rise and bake evenly. While the oven warms up, grab a baking sheet. I always line mine with parchment paper. This keeps the cookies from sticking. It also makes for an easy cleanup. Next, we will mix the wet and dry ingredients. In a large bowl, cream together the softened butter, brown sugar, and granulated sugar until it's light and fluffy. This process adds air to the mixture, making your cookies soft. Once that’s done, add the canned pumpkin puree, a large egg, and vanilla extract. Mix it all well until combined. Now, take another bowl for the dry ingredients. Whisk together the all-purpose flour, baking soda, baking powder, cinnamon, nutmeg, ginger, and salt. This step helps distribute the leavening agents and spices evenly. Gradually add this dry mix to your wet ingredients. Mix until just combined; be sure not to overmix. Overmixing can lead to tough cookies. Now it’s time to bake the cookies. Use a cookie scoop or a spoon to drop rounded tablespoons of dough onto the lined baking sheet. Make sure to space them about 2 inches apart. This allows them room to spread. Pop the baking sheet in the preheated oven. Bake for 10-12 minutes. You want the edges to turn lightly golden. The centers can look a bit underbaked, but that’s okay. They will harden as they cool. Once done, let the cookies sit on the baking sheet for 5 minutes. Then, transfer them to a wire rack to cool completely. For the full recipe, check out the details above! To get the best texture for your cookies, avoid overmixing the dough. When you add the dry ingredients to the wet ones, mix just until you see no flour. Overmixing makes the cookies tough. Your baking conditions also matter. Bake at 350°F (175°C) for chewy cookies. Watch for the edges turning golden. The centers may look soft, but they will firm up as they cool. You can swap out butter and milk for dairy-free options. Use coconut oil instead of butter. For milk, try almond or oat milk. These swaps keep the flavor rich and delicious. If you need a gluten-free option, use a gluten-free flour blend. It works well in this recipe. Just make sure it has xanthan gum to help with the texture. If your cookies spread too much, chill the dough for 30 minutes before baking. This helps keep their shape. You can also add a bit more flour to the dough. For dry or crumbly cookies, check your butter's temperature. It should be soft but not melted. If the dough feels too dry, add a splash of milk or extra pumpkin puree. This will help keep your cookies moist and tasty. For the full recipe, visit the [Full Recipe]. {{image_2}} You can change the flavors of your cookies with fun add-ins. Adding cranberries gives a tart burst. White chocolate chips add a sweet twist. Both options pair well with pumpkin. For a crunch, try adding nuts or seeds. Pecans or walnuts add texture. Sunflower seeds offer a nut-free choice. Get creative with spices! You can add a pinch of allspice or cloves. Each spice adds its own warmth. Want to try something different? Make Pumpkin Spice Chocolate Chip Cookies. Just mix in more pumpkin spice for an extra kick. The result is a cookie packed with fall flavor. You can make your cookies healthier too! First, cut back on sugar. You can also swap in honey or maple syrup. These options bring natural sweetness. If you want a vegan treat, replace the egg with a flax egg. This easy swap keeps your cookies soft. To keep your pumpkin chocolate chip cookies fresh, store them in an airtight container. Place parchment paper between layers to avoid sticking. Keep the container at room temperature, away from sunlight. This helps them stay soft and tasty for longer. If you want them even fresher, add a slice of bread to the container. The bread helps keep the cookies moist. You can freeze cookie dough or baked cookies for later use. To freeze raw dough, scoop cookie portions onto a baking sheet. Freeze them until solid, then transfer them to a freezer bag. This keeps them from sticking together. For baked cookies, let them cool completely first. Then, place them in an airtight container or freezer bag. When you want to enjoy them, just thaw the cookies at room temperature. When stored correctly, these cookies last about one week at room temperature. If you store them in the fridge, they can stay fresh for about two weeks. Always check for signs of spoilage. Look for mold or an off smell. If the cookies feel dry or crumbly, it’s time to toss them out. Enjoying them fresh is best! For the full recipe, check out the Pumpkin Spice Chocolate Chip Cookies. Yes, you can use fresh pumpkin. Fresh pumpkin gives a bright taste. However, it takes more time to prepare. You must cook and puree it first. Canned pumpkin is easy and ready to use. It also has a consistent texture. If you're short on time, go for canned. Check the edges of the cookies. They should look light golden brown. The centers may still look soft. This is fine; they will firm up as they cool. You can also gently touch the top. If it springs back, they are done. Trust your eyes and your touch! Yes, you can make the dough ahead of time! Store it in an airtight container. Keep it in the fridge for up to three days. You can also freeze it for longer. Just scoop the dough onto a baking sheet and freeze. Once firm, store the balls in a bag. When you're ready, bake them straight from the freezer. It’s that easy! You now have a complete guide for making delicious pumpkin chocolate chip cookies. You learned about the best ingredients, step-by-step instructions, and helpful tips. Customizing cookies and exploring variations adds fun to baking. Proper storage ensures your cookies stay fresh and tasty. Remember, experimenting is key. Whether you share them or enjoy them solo, these cookies bring joy. Dive into your baking adventure, and enjoy every bite!](https://recipespursuit.com/wp-content/uploads/2025/05/46206f22-e093-4a96-9a14-6e70abd9591a.webp)
Pumpkin Chocolate Chip Cookies Delightful and Easy Recipe
Craving a festive treat that’s easy to whip up? Look no further! This Pumpkin Chocolate Chip Cookie recipe blends warm
Craving a festive treat that’s easy to whip up? Look no further! This Pumpkin Chocolate Chip Cookie recipe blends warm
![To make a delicious strawberry banana smoothie bowl, you will need: - 1 cup fresh strawberries, hulled - 1 ripe banana, sliced - 1 cup Greek yogurt (or almond yogurt for a dairy-free option) - ½ cup almond milk (or any milk of your choice) - 1 tablespoon honey or maple syrup - 1 tablespoon chia seeds - Toppings: sliced fresh strawberries, banana slices, granola, shredded coconut, and nuts (almonds or walnuts) This smoothie bowl is not just tasty; it's also healthy! It provides protein, fiber, and essential vitamins. The Greek yogurt adds protein and calcium. Strawberries and bananas give you vitamins C and B6. Chia seeds are a great source of omega-3 fatty acids. These nutrients help your body stay strong and energized. You can easily switch some ingredients. If you don't have Greek yogurt, try almond yogurt or regular yogurt. Any milk works, so use oat or soy milk if you prefer. If you want a sweeter bowl, use agave syrup instead of honey. For toppings, you can use any fruit you like. Try blueberries, kiwi, or even mango for a twist. These small changes keep the recipe fun and fresh! To make your Strawberry Banana Smoothie Bowl, first, gather the ingredients. You will need fresh strawberries, a ripe banana, Greek yogurt, almond milk, honey, and chia seeds. 1. Blend the Base: Start by adding the hulled strawberries, sliced banana, Greek yogurt, and almond milk to your blender. 2. Add Sweetness: Next, add honey or maple syrup and the chia seeds to the mix. 3. Blend Away: Blend everything on high until it is smooth and creamy. If it’s too thick, add more almond milk to reach your preferred texture. 4. Pour It Out: Once blended, pour the smoothie mixture into a bowl. To get a perfect blend, make sure your blender is powerful. Here are some tips: - Layer Wisely: Always add liquids first. This helps the blades move freely. - Use Frozen Fruit: If you want a thicker texture, try using frozen strawberries or bananas. - Pulse Before Blending: If your blender has a pulse option, use it first. This breaks down the ingredients before blending fully. Making your smoothie bowl look good is important. Here’s how to do it: - Topping Arrangement: Start by placing a ring of sliced strawberries and bananas on top. - Add Crunch: Scatter granola around the edges for a nice crunch. - Final Touches: In the center, add shredded coconut and some nuts for extra flavor. - Garnish: For a fresh look, consider adding a sprig of mint or a colorful spoon next to the bowl. Displaying on a bright plate enhances the visual appeal. Follow these steps to make a delicious and beautiful Strawberry Banana Smoothie Bowl. You can find the full recipe above for all the details! When picking strawberries, look for bright red color. The berries should be firm and plump. Avoid any with white spots or mold. The green tops should be fresh and green. For bananas, choose ones that are yellow with some brown spots. This means they are sweet but not overripe. A firm, yellow banana gives the best flavor. You can make this smoothie bowl ahead of time. Blend the smoothie mixture and store it in the fridge. Use an airtight container to keep it fresh. It lasts about one day. If you want to store it longer, freeze the smoothie. Just remember to leave space in the container for expansion. When ready to eat, let it thaw in the fridge overnight. To make your smoothie bowl even better, try adding extras. A scoop of nut butter can add richness. You can also mix in spinach for extra nutrients. Another fun option is to include a splash of vanilla extract. For a tropical twist, add some pineapple or mango. These flavors blend well with the strawberries and bananas. You can find the full recipe [here]. {{image_2}} You can use many types of yogurt in your smoothie bowl. Greek yogurt gives a thick and creamy texture. It has more protein than regular yogurt. If you want a lighter option, try plain yogurt. For a dairy-free choice, almond yogurt works great. Coconut yogurt adds a tropical flavor. You can also use soy or cashew yogurt for a different taste. Experiment with these options to find your favorite! Seasonal fruits can make your smoothie bowl even better. In spring, try adding fresh peaches or cherries. In summer, blueberries and raspberries add a nice touch. Fall brings apples and pears, which mix well with bananas. Winter is perfect for citrus fruits like oranges or tangerines. You can also use frozen fruits if fresh ones aren’t available. Just add them in the blender with your other ingredients for a cool, refreshing bowl. Toppings are key to making your smoothie bowl fun and tasty. Sliced fruits like strawberries and bananas are classic. Granola adds a nice crunch. You can use shredded coconut for a tropical flair. Nuts, like almonds or walnuts, provide healthy fats and more texture. Seeds, such as pumpkin or sunflower seeds, also work well. For a sweet touch, drizzle honey or maple syrup on top. Get creative and mix your favorite toppings for a unique bowl! To keep your strawberry banana smoothie bowl fresh, store it in the fridge. Use an airtight container to stop any air from getting in. This helps keep the flavors strong and the texture nice. If you have toppings, store them separate. This way, they stay crunchy and fresh. You can freeze smoothie bowls if you want to save some for later. Pour the smoothie mixture into a freezer-safe container. Leave some space at the top, as the mixture will expand. To enjoy later, thaw it in the fridge overnight. Blend it again if needed to make it smooth. The best containers for smoothie bowl storage are glass or BPA-free plastic. Glass containers don’t stain or hold odors. Plastic is lighter and easier to handle. Look for containers with tight-fitting lids to keep your smoothie bowl fresh. Choose sizes that fit your needs, whether for single servings or sharing. You can use almond yogurt for a dairy-free option. It has a creamy texture. You can also try coconut yogurt or soy yogurt. Each option adds its own flavor. Just pick one you like best! Yes, you can make it vegan! Use almond yogurt and maple syrup instead of honey. Swap regular milk for any plant-based milk. Your smoothie bowl will still taste great and be fully vegan. A smoothie bowl lasts about one day in the fridge. It tastes best when fresh. If you store it, cover it tightly to keep it from getting brown. Give it a good stir before eating again. In this blog post, we explored how to make a tasty strawberry banana smoothie bowl. We covered the key ingredients, nutritional tips, and substitutions you can try. I shared easy steps for preparation and blending to achieve a smooth texture. We also discussed how to enhance flavor and present your bowl beautifully. Don't forget to try different toppings and seasonal fruits! Remember, you can store leftovers or freeze them for later. Enjoy this delicious bowl while experimenting with your favorite flavors and textures!](https://recipespursuit.com/wp-content/uploads/2025/05/43242ac1-baf2-423f-be1b-c3ddce8354df.webp)
Want a delicious way to start your day? This Strawberry Banana Smoothie Bowl mixes health and taste. Packed with fresh
![- 1 lb chicken breast, sliced into strips - 1 red bell pepper, sliced - 1 yellow bell pepper, sliced - 1 red onion, sliced - 2 tablespoons olive oil - 2 cloves garlic, minced - 1 teaspoon chili powder - 1 teaspoon cumin - 1 teaspoon smoked paprika - Salt and pepper to taste - 8 small flour tortillas - 1 avocado, sliced (for topping) - Fresh cilantro, chopped (for garnish) - Lime wedges (for serving) Each serving of chicken fajitas has about 300 calories. They also provide protein, vitamins, and healthy fats. You get a good mix of nutrients from the chicken and veggies. This recipe serves four. Each person can enjoy two fajitas. You can easily adjust the recipe for more or fewer servings. - Combine chicken with seasonings First, take 1 lb of chicken breast and slice it into strips. In a large bowl, add the chicken, 2 tablespoons of olive oil, and 2 cloves of minced garlic. Sprinkle in 1 teaspoon of chili powder, 1 teaspoon of cumin, and 1 teaspoon of smoked paprika. Season with salt and pepper to taste. Toss everything well to coat the chicken with the spices. - Preheat and prepare the skillet Now, heat a skillet over medium-high heat. Make sure it gets hot before adding the chicken. This step helps the chicken brown nicely. - Cook the chicken until golden brown Add the seasoned chicken to the hot skillet. Cook it for about 5-7 minutes. Stir occasionally, and watch for it to turn golden brown and cook through. This gives the chicken a great flavor and texture. - Sauté bell peppers and onions Once the chicken is done, take it out and set it aside. In the same skillet, add the sliced red and yellow bell peppers, along with the sliced red onion. Cook these for about 3-4 minutes until they are just tender. This step adds sweetness and crunch to your fajitas. - Warm tortillas To make the fajitas easy to roll, warm 8 small flour tortillas. You can do this in a dry skillet or microwave them for a few seconds until soft. - Assemble and serve the fajitas Now, it’s time to put it all together! Take a warm tortilla and place a generous amount of the chicken and veggie mix in the middle. Top with sliced avocado and fresh cilantro. Squeeze a little lime juice on top for added zest. Roll up the tortilla to enclose the filling and serve right away. Enjoy your meal from the [Full Recipe]! To make your chicken fajitas shine, use a flavorful marinade. Combine lime juice, olive oil, and spices like cumin and chili powder. Let the chicken soak for at least 30 minutes. This step adds a great taste. Complementary spices can elevate the dish too. Consider adding oregano or coriander for an extra kick. A dash of cayenne can also bring some heat. Experiment and find your perfect blend! Garnishing makes your fajitas look amazing. Top them with fresh cilantro and slices of avocado. A sprinkle of lime juice adds brightness. You can also serve with a side of salsa or sour cream for extra flavor. When serving, roll the tortillas tightly. Arrange them on a platter for a colorful display. You might even want to add lime wedges on the side. This makes it easy for guests to customize their meals. One common mistake is overcooking the chicken. This can make it dry and tough. Cook the chicken until it’s just done. Aim for a golden brown color, about 5-7 minutes in the skillet. Another mistake is not slicing the vegetables properly. Thin slices cook faster and blend better with the chicken. Focus on even cuts for a nice texture in every bite. {{image_2}} You can switch up the protein in your fajitas. Try beef or shrimp for a tasty twist. Beef adds a rich flavor, while shrimp cooks quickly and has a light taste. For a vegetarian option, use mushrooms or tofu. Both options soak up flavors well. They add heartiness and pair nicely with the spices. The seasoning can transform your fajitas. You can use taco seasoning for a classic taste. This mix has chili, cumin, and garlic. It gives a well-rounded flavor. Another great choice is a Southwest spice mix. This blend often includes paprika, oregano, and cayenne. It adds a little heat and depth. You can easily make your own by mixing these spices to your liking. Fajitas are great with side dishes. Consider serving them with rice or beans. These sides balance the meal and add texture. You can also pair your fajitas with dips and sauces. Guacamole is a favorite for added creaminess. Salsa brings freshness and zest. Sour cream can cool down any heat too. Explore these options to find your perfect combination. For the full recipe, check out the Sizzling Chicken Fajitas section. To store leftovers, place them in an airtight container. This keeps moisture in and flavors fresh. Cooked chicken fajitas can last in the fridge for about 3-4 days. Make sure to cool them before sealing the container. The best way to reheat chicken fajitas is in a skillet. Heat it over medium heat and add a splash of water. This helps steam the leftovers, keeping them moist. Stir occasionally for even heating. If you prefer using a microwave, cover the dish to keep moisture in. You can freeze chicken fajitas for about 2-3 months. Allow them to cool fully before freezing. Divide them into single servings for easy thawing. To thaw, place in the fridge overnight. Reheat in a skillet or microwave, adding a bit of water if needed. This keeps the fajitas tasty and prevents dryness. It takes about 20 minutes to make easy chicken fajitas. This includes 10 minutes for prep and 10 minutes for cooking. You can have a tasty meal in no time. Yes, you can make easy chicken fajitas in advance. Cook the chicken and veggies, then store them in the fridge. They will stay good for up to three days. Reheat everything before serving. The best tortillas for chicken fajitas are small flour tortillas. They are soft and flexible. Corn tortillas are also a good choice if you prefer a gluten-free option. Absolutely! Cooking chicken fajitas on the grill adds a smoky flavor. Marinate the chicken and veggies. Then grill them until cooked. This method gives you a fun outdoor cooking experience. Yes, there are tasty vegetarian options for chicken fajitas. You can use grilled veggies like zucchini, mushrooms, and bell peppers. You can also add black beans or lentils for protein. Enjoy a delicious meal without meat! You can make tasty chicken fajitas with just a few key ingredients. We covered the steps, tips, and variations to enhance your meal. Fajitas are simple, fun, and great for any occasion. Remember, you can adjust flavors and proteins to fit your taste. Follow these easy guidelines, and you’ll impress everyone at the table. Enjoy your cooking adventure and savor every bite!](https://recipespursuit.com/wp-content/uploads/2025/05/1adc5e29-f64c-4924-a311-82ef14e3f3ab.webp)
If you’re looking for a quick and tasty meal, you’ve come to the right place! In this blog post, I’ll
![To make Chocolate Hazelnut Energy Balls, gather these ingredients: - 1 cup rolled oats - 1/2 cup hazelnuts, toasted and roughly chopped - 1/2 cup almond butter - 1/3 cup maple syrup - 1/4 cup cocoa powder - 1 teaspoon vanilla extract - 1/4 teaspoon sea salt - 1/4 cup chocolate chips (dark or dairy-free) - Optional: 1/4 cup shredded coconut for rolling Each energy ball has about 100 calories. Here’s a rough breakdown: - Carbohydrates: 12g - Protein: 3g - Fat: 5g - Fiber: 2g These numbers can vary based on your specific brands and any substitutions you make. - Rolled oats: Great for energy, oats keep you full longer. They help lower cholesterol too. - Hazelnuts: Packed with healthy fats, they support heart health. They also add crunch and flavor. - Almond butter: A good source of protein and healthy fats, it helps build and repair muscles. - Maple syrup: This natural sweetener offers antioxidants and can boost your energy. - Cocoa powder: Rich in antioxidants, cocoa can improve mood and heart health. - Vanilla extract: It adds flavor and may help reduce stress. - Sea salt: A little salt can enhance flavors and maintain your body's fluid balance. - Chocolate chips: They add sweetness and can improve heart health in moderation. - Shredded coconut: This adds fiber and healthy fats, plus a tropical taste. These ingredients not only taste good but also offer health benefits. For the full recipe, check out the directions to make these delicious snacks! Start by gathering your dry ingredients. In a large bowl, mix the rolled oats, chopped hazelnuts, cocoa powder, and sea salt. Stir well to combine everything evenly. This step is key to a balanced taste in your energy balls. Make sure no lumps remain in the dry mix. In a separate bowl, whisk the almond butter, maple syrup, and vanilla extract together. Mixing these ingredients until smooth is important. They’ll add sweetness and richness to the energy balls. A smooth consistency ensures even blending with the dry mix later. Now, pour the wet ingredients into the dry mix. Stir them together until fully combined. The mixture should feel thick and dough-like. Next, fold in the chocolate chips, ensuring they spread throughout the dough. With clean hands, scoop about one tablespoon of the mixture and roll it into a ball. If you like, you can roll the balls in shredded coconut for an extra touch. Place the energy balls on a parchment-lined baking sheet. Chill them in the refrigerator for about 30 minutes. This step helps them firm up nicely. After chilling, transfer the balls to an airtight container. Store them in the fridge for up to a week or freeze them for longer freshness. Enjoy these snacks anytime you need a quick energy boost! You can find the full recipe at the beginning of this article. To get the best texture, mix your dry and wet ingredients well. The dough should be thick and a bit sticky. If it's too dry, add a little more almond butter. If it's too wet, add more oats. Rolling them into balls helps set the texture, too. The chill time in the fridge makes them firmer and easier to eat. You can easily swap ingredients to match your needs. If you have nut allergies, try sunflower seed butter instead of almond butter. For a vegan option, use maple syrup and dairy-free chocolate chips. If oats are a concern, you can use quinoa flakes or crushed rice cereal. Feel free to experiment to find what works for you! You can serve these energy balls in many fun ways. Try stacking them on a plate with fresh fruit. You can also pack them in lunch boxes for snacks on the go. For a party, place them in a decorative bowl. These energy balls make a great treat for kids and adults alike. For the full recipe, check back to see how you can make these delightful snacks! {{image_2}} You can swap almond butter for other nut butters. Peanut butter gives a classic taste. Cashew butter adds a creamy texture. Sunflower seed butter is great for nut-free diets. Each choice changes the flavor but keeps it tasty. Make your energy balls unique by adding spices or extracts. A pinch of cinnamon adds warmth. You can try a drop of almond extract for a nutty kick. Adding a bit of sea salt boosts the sweet taste. These small tweaks can transform your snack. Coating your energy balls can add fun textures. Roll them in chopped nuts for crunch. Seeds like sesame or chia bring a nice pop. Shredded coconut adds a tropical feel. Each coating changes the look and taste of your balls. Try a mix for a colorful treat! After making your Chocolate Hazelnut Energy Balls, you should refrigerate them. Place each ball in an airtight container. This helps keep them fresh and tasty. Make sure to separate layers with parchment paper to avoid sticking. These energy balls can last up to a week in the fridge. If you want to keep your energy balls for a longer time, freezing is a great option. First, let them cool in the fridge for about 30 minutes. Then, lay them on a baking sheet. Freeze them until solid, usually about an hour. After that, move them to a freezer-safe bag. They can stay fresh for up to three months in the freezer. Pay attention to the smell and texture when you take them out. If they smell off or feel mushy, it’s best to toss them out. Always check for signs of freezer burn if frozen for a long time. These tips will help ensure you enjoy every bite of your Chocolate Hazelnut Energy Balls. These energy balls can last up to a week in the fridge. Store them in an airtight container. They stay fresh and tasty. If you freeze them, they can last for three months. Just thaw them when you want a snack. Yes, you can use other sweeteners. Honey or agave syrup works well too. Just remember that different sweeteners may change the taste a bit. Adjust the amount based on how sweet you want it. Absolutely! These energy balls are great for meal prep. You can make a big batch ahead of time. Just store them in the fridge or freezer. Grab one whenever you need a quick snack. To make these energy balls vegan, use maple syrup as your sweetener. Choose dairy-free chocolate chips. Also, ensure your almond butter has no added dairy. This way, you keep all the flavors while making them vegan-friendly. Yes, you can skip the chocolate chips. If you want to add something different, try dried fruit or nuts. This gives a nice twist to the flavor while keeping the energy balls delicious. Check the [Full Recipe] for more details. You learned about making tasty Chocolate Hazelnut Energy Balls. We explored ingredients, their nutrition, and health perks. I shared easy steps to prepare your snacks with tips for the best texture. You can customize flavors and store them well for later use. These energy balls are simple, fun, and flexible. They fit many diets and preferences. Enjoy making them your way, and keep them fresh for your next snack!](https://recipespursuit.com/wp-content/uploads/2025/05/d5467818-f8ee-4d05-ad3e-fcc2f0bf5230.webp)
Looking for a tasty yet healthy snack? Chocolate Hazelnut Energy Balls are your answer! They’re easy to make and packed
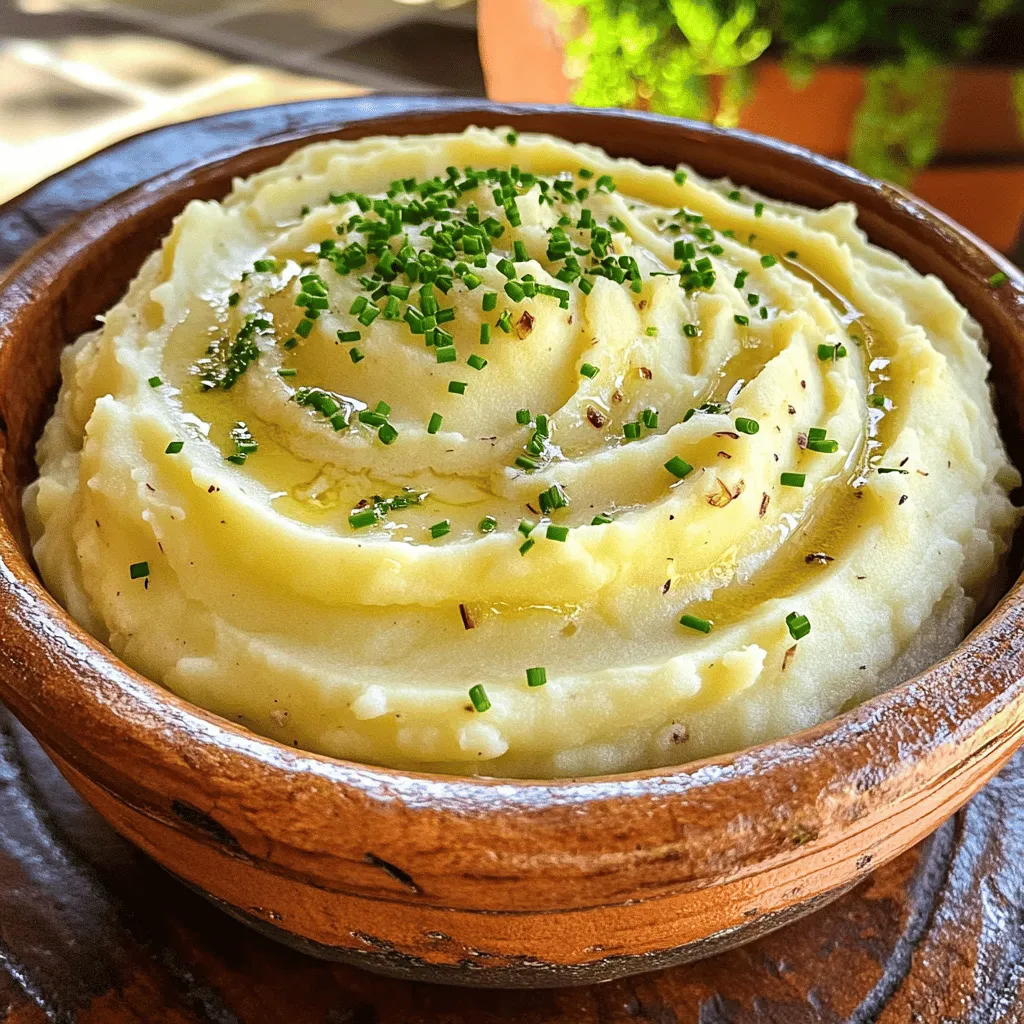
Are you ready to elevate your meal with a side dish that steals the show? Creamy garlic mashed potatoes are
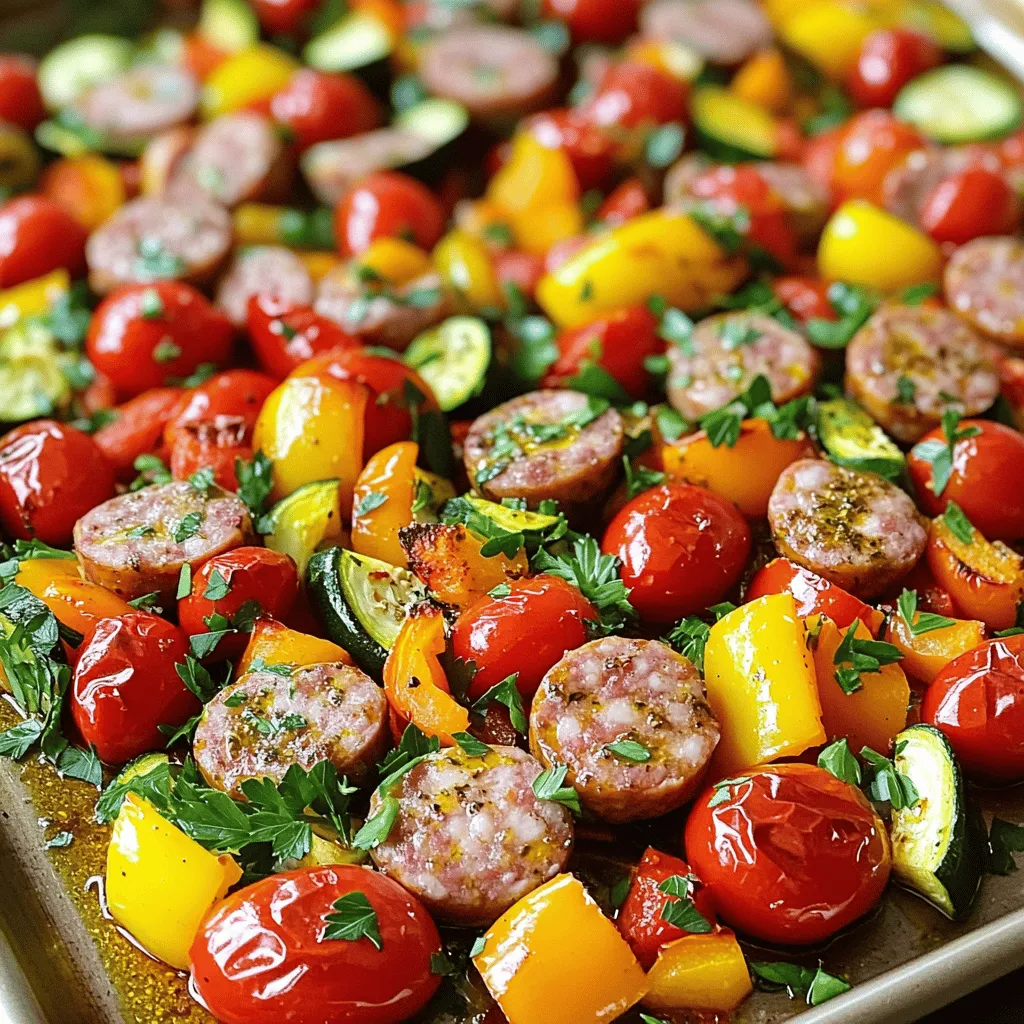
Looking for a quick, tasty meal? Try my Satisfying Sheet Pan Sausage and Veggies recipe! It’s perfect for busy nights
![- 1 cup semi-sweet chocolate chips - 1 cup mini marshmallows - 1 tablespoon unsalted butter - 1 teaspoon vanilla extract - 1/2 teaspoon sea salt - Graham crackers for dipping - Fresh strawberries for garnish (optional) You will need some tasty ingredients for this S'mores Dip. First, grab one cup of semi-sweet chocolate chips. They provide rich flavor and melt well. You also need one cup of mini marshmallows. They give that fluffy, sweet touch. Next, get a tablespoon of unsalted butter. It adds a creamy texture. Don’t forget one teaspoon of vanilla extract. This will enhance the sweet taste. A half teaspoon of sea salt balances the flavors perfectly. For dipping, graham crackers are a must. They are crunchy and sweet, making them perfect for this dip. If you want to add a fresh twist, use some strawberries for garnish. They make the dish look pretty and add a fruity taste. You can find the full recipe above for more details on how to make this delightful treat! - Preheat the oven to 350°F (175°C). - Melt the butter in an oven-safe skillet. - Stir in chocolate chips until melted. Start by setting your oven to 350°F. This heat will help your dip become warm and gooey. Next, take an oven-safe skillet and add a tablespoon of unsalted butter. Melt it over medium heat. Stir it gently so it doesn’t brown. Once the butter is melted, it’s time to add one cup of semi-sweet chocolate chips. Keep stirring until the chocolate chips melt into a smooth blend. This step takes about 2-3 minutes. - Add vanilla extract and sea salt. - Spread mini marshmallows on top. - Bake for 5-7 minutes until golden. After you mix in the chocolate, take it off the heat. Add a teaspoon of vanilla extract and half a teaspoon of sea salt. This will enhance the flavors. Stir until everything is smooth and well combined. Next, spread one cup of mini marshmallows evenly on top of the melted chocolate. Now, place your skillet in the preheated oven. Bake for 5-7 minutes. Watch closely until the marshmallows turn golden and puffy. - Let cool before serving. - Dip graham crackers into the mixture. - Garnish with fresh strawberries if desired. Once your dip is ready, let it cool for a few minutes. This helps prevent burns. Grab some graham crackers for dipping. You can also garnish your dip with fresh strawberries for a fruity touch. This makes each bite even more special. For the full recipe, you can refer to the instructions earlier. Enjoy your perfect S'mores Dip! - Best chocolate chips to use I love semi-sweet chocolate chips. They melt well and balance the sweet marshmallows. - How to achieve perfect melted marshmallows Bake the dip until marshmallows puff up and turn golden brown. This creates a nice texture. - Importance of using an oven-safe skillet An oven-safe skillet lets you melt chocolate and bake marshmallows in one dish. It makes cleanup easy! - Creative ways to serve S'mores Dip Serve in a fun bowl or a cast-iron skillet. You can even add toppings like crushed cookies. - Pairings with sweet treats Try dipping strawberries or pretzels. They add a nice crunch and balance the dip's sweetness. - Recommended beverages for accompaniment Pair with milk or hot cocoa for a cozy treat. I also enjoy it with sweet iced tea. - What to do if chocolate doesn't melt properly If chocolate is too thick, add a small amount of milk. This helps it melt smoothly. - Handling marshmallow burn issues If marshmallows burn, simply scrape off the burnt part. You can add fresh ones on top. - Adjustments for dietary restrictions Use dairy-free chocolate chips for a vegan option. You can also swap marshmallows with a vegan brand. {{image_2}} You can switch up the chocolate in S'mores Dip. Try using dark chocolate for a richer taste. White chocolate adds a sweet twist too. To make it fun, add flavored extracts like almond or mint. This can give your dip a unique flair. You can also mix in chopped nuts or peanut butter for extra crunch and creaminess. Each option adds a new layer of flavor that you will love. Change your toppings with the seasons. For holidays, sprinkle crushed candy canes or festive sprinkles on top. In summer, add fresh berries like raspberries or blueberries. These fruits pair great with chocolate. You can even make themed S'mores Dip for birthdays or parties, using fun colors or shapes. This keeps the treat exciting for any occasion. You can cook S'mores Dip in different ways. A slow cooker lets you keep it warm for longer, perfect for gatherings. If you're in a rush, use the microwave. Just melt the chocolate and marshmallows in short bursts. For outdoor fun, try making it over a campfire. Just use a cast-iron skillet or foil. This brings a smoky flavor that everyone will enjoy. [Full Recipe] To keep your S'mores Dip fresh, store it in an airtight container. Make sure it cools down first. If you leave it out, it may lose its taste and texture. Use a glass or plastic container with a tight lid. This helps prevent it from drying out. When you want to enjoy your S'mores Dip again, gently reheat it. You can use a microwave or oven. Heat in short bursts. If using a microwave, do it in 20-second intervals. Stir it often to keep the chocolate and marshmallows smooth. If using an oven, cover it with foil. This keeps the dip moist. You can freeze S'mores Dip, but the texture may change. To freeze it, let it cool completely first. Then, place it in a freezer-safe container. Make sure to seal it well. When you want to eat it, thaw it overnight in the fridge. After thawing, reheat it as described above for the best taste. S'mores Dip is a warm, gooey treat that brings the joy of campfire s'mores to your home. Unlike traditional s'mores, which require toasting marshmallows over a fire, S'mores Dip layers chocolate and marshmallows in a skillet. You simply bake it until the marshmallows puff up and turn golden. The ease of this dessert makes it a hit at parties and family gatherings. Yes, you can prepare S'mores Dip ahead of time. Just follow the steps to mix the chocolate and marshmallows, then cover it and store it in the fridge. When it's time to serve, just pop it in the oven. For the best flavor, let it sit at room temperature for a bit before baking. This helps the flavors blend nicely and ensures a warm and melty dip. While graham crackers are classic, you can use many things for dipping. Try pretzel sticks for a salty crunch or apple slices for a fruity touch. For a healthier option, carrot sticks or celery can be fun and unique. You can even use cookies like Oreos for a sweet twist! The options are endless, so get creative and enjoy! This S'mores Dip is easy and fun. You learned how to make it with just a few ingredients and steps. We covered tips for perfect results and how to store leftovers. You can even customize it with different flavors and methods. Whether for a party or a cozy night, S'mores Dip is a crowd-pleaser. Enjoy creating your own tasty version!](https://recipespursuit.com/wp-content/uploads/2025/05/370f6f19-9826-432e-827d-46c719c3ccc5.webp)
Craving a sweet treat that’s both fun and easy? Let me introduce you to S’mores Dip—a warm, gooey delight loaded
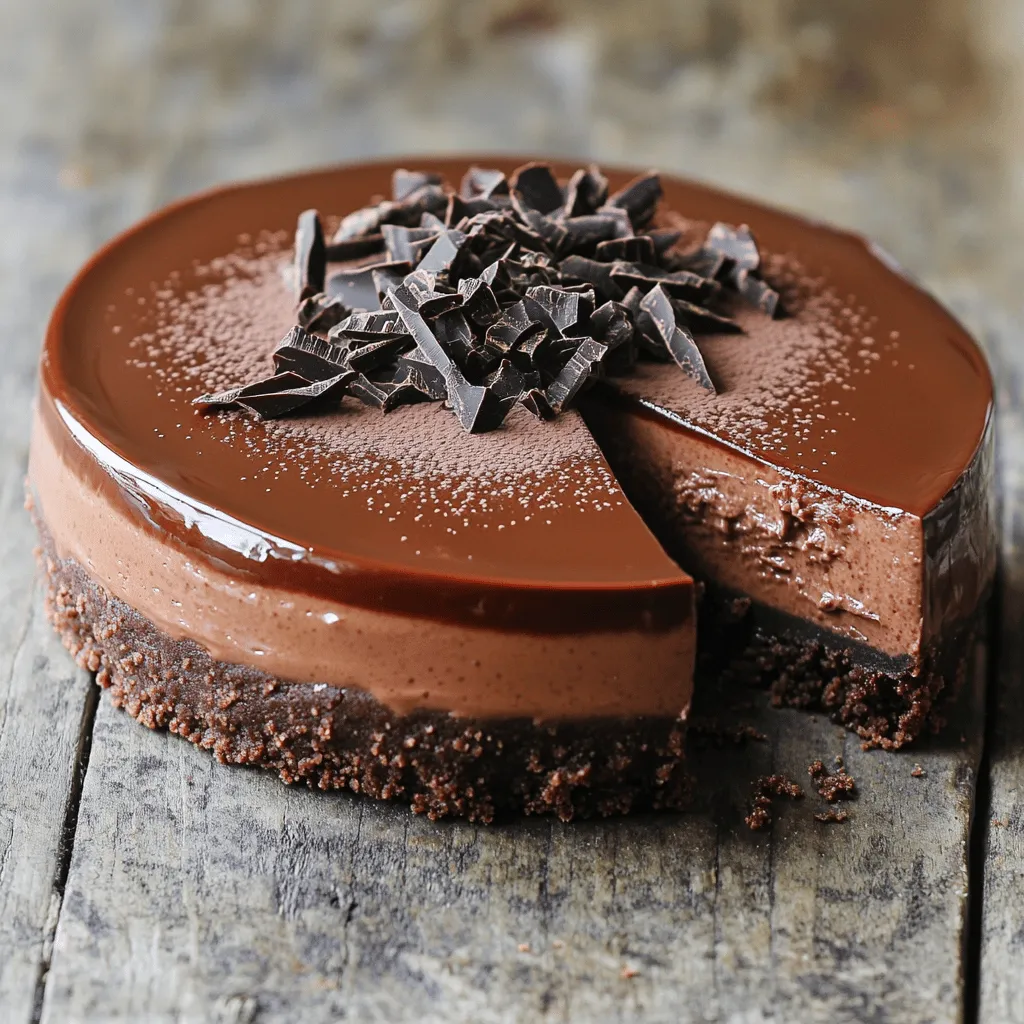
Are you ready to whip up a dessert that’s easy and delicious? This No-Bake Chocolate Cheesecake is perfect for any
. Start by preheating your oven to 350°F (175°C). This step warms your oven for even baking. While the oven heats, grease a bundt pan using non-stick spray or butter. If you're using homemade biscuit dough, prepare it first. Cut it into small, bite-sized pieces. If you have store-bought dough, simply open the package and separate the pieces. Next, take a large bowl and mix the melted butter, minced garlic, Italian seasoning, salt, and pepper. If you like a bit of spice, add red pepper flakes. Stir this mixture until everything blends well. Then, add your biscuit dough pieces into the bowl. Toss them gently until each piece is well coated in the buttery mixture. Now it’s time to layer the dough and cheese. First, take half of the coated biscuit pieces and spread them in the bottom of your greased bundt pan. This forms the base. Next, sprinkle half of your mozzarella and cheddar cheese evenly over this layer. Add the remaining biscuit pieces on top of the cheese. Finish by adding the rest of the cheese on top. This layering gives you melty cheese in each bite. Place the bundt pan in your preheated oven and bake for 25-30 minutes. You want the top to turn a golden brown and the dough to be fully cooked. To ensure even baking, check the center of your monkey bread with a toothpick. If it comes out clean, your monkey bread is ready. After baking, remove the bundt pan from the oven. Let it cool for about 5 minutes. This cooling time helps it set. Carefully invert the pan onto a serving plate. This step lets the monkey bread fall out nicely. For a pop of color and flavor, garnish with freshly chopped parsley. Enjoy your cheesy garlic monkey bread warm! For the full recipe, refer back to the [Full Recipe]. To get that soft and fluffy texture, use fresh biscuit dough. If you make it from scratch, follow the recipe closely. Cut the dough into even pieces for uniform cooking. Toss the dough in the buttery garlic mixture gently to coat each piece well. This helps them rise and bake evenly. Avoid overmixing your dough. This can lead to tough bread. Also, don't skip greasing the pan. Sticking is a common issue if you forget this step. Make sure to layer the dough pieces and cheese properly. If you just dump them in, the bread may not cook evenly. Lastly, watch your baking time. Overbaking can dry out the bread. For even cooking, preheat your oven fully before baking. This helps the dough rise and cook through. Place the bundt pan in the center of the oven for best results. If your oven has hot spots, consider rotating the pan halfway through cooking. This ensures all sides get the same heat. After baking, let it cool for a few minutes before inverting. This will help it hold its shape. You can find the Full Recipe for Cheesy Garlic Monkey Bread to guide you through the process. {{image_2}} You can change the cheese mix for fun. Try using provolone for a rich taste. You might enjoy adding gouda for a smoky flavor. Blend in some feta for a tangy bite. Mix and match your favorites to create new flavors. Cheese is key to making your monkey bread special. Adding veggies boosts flavor and nutrition. Try diced bell peppers for a sweet crunch. Spinach adds color and a fresh taste. You can also add mushrooms for an earthy touch. Just make sure to sauté them first. This way, they won’t make the bread soggy. Fun fact: each veggie adds unique nutrients! If you crave something sweet, switch things up. Use cinnamon and sugar instead of garlic. Add chocolate chips for a delightful treat. You can even drizzle a glaze on top after baking. For a fruity twist, mix in fresh berries. A sweet version is perfect for brunch or dessert! Check out the Full Recipe to get started on your cheesy garlic monkey bread journey! To store leftover cheesy garlic monkey bread, let it cool first. Wrap it tightly in plastic wrap. You can also use an airtight container. This keeps the bread fresh and moist. Store it in the fridge for up to three days. For the best flavor, reheat the monkey bread in the oven. Preheat your oven to 350°F (175°C). Place the bread on a baking sheet. Cover it with foil to keep it from drying out. Heat for about 10-15 minutes. If you prefer the microwave, heat it in short bursts. Use a damp paper towel to keep it moist. You can freeze cheesy garlic monkey bread for later. Wrap it tightly in plastic wrap and then in foil. This helps prevent freezer burn. Store it in the freezer for up to three months. To enjoy, thaw it in the fridge overnight. Reheat it as mentioned above. This way, you can savor that delicious flavor again! For the Full Recipe, check back to make your own delicious monkey bread! Serve Cheesy Garlic Monkey Bread with marinara sauce for dipping. This adds a nice touch. You can also pair it with a fresh salad. A green salad adds balance to the meal. Try some roasted veggies on the side as well. They complement the rich flavors of the bread. Yes, you can make this recipe ahead of time. Prepare the dough and garlic mix, then store it in the fridge. Assemble the bread but do not bake it. This way, it stays fresh and ready to bake. When you are ready, bake it straight from the fridge. Just add a few extra minutes to the baking time. Check for a golden brown color on top. The dough should be risen and firm to the touch. You can also insert a toothpick into the bread. If it comes out clean, your monkey bread is done. Let it cool for five minutes before serving. This helps the flavors settle. Yes, homemade biscuit dough works great for this recipe. Just make sure it is cold before using. Cut it into small pieces for better texture. Homemade dough can add a personal touch to your monkey bread. It’s a fun way to experiment with flavors too. Cheesy garlic monkey bread is an easy and fun dish to make. You can enjoy it as a snack or a side. Here’s how to create this tasty treat. - 3 cups of biscuit dough (store-bought or homemade) - 1 cup shredded mozzarella cheese - 1 cup shredded cheddar cheese - 1/2 cup unsalted butter, melted - 4 cloves garlic, minced - 1 tablespoon Italian seasoning - 1/4 cup fresh parsley, chopped (for garnish) - Salt and pepper to taste - Optional: 1/2 teaspoon red pepper flakes for heat 1. Preheat your oven to 350°F (175°C) and grease a bundt pan. 2. Cut the biscuit dough into bite-sized pieces. Use homemade or store-bought dough. 3. In a bowl, mix melted butter, garlic, Italian seasoning, salt, and pepper. If you like heat, add red pepper flakes. 4. Toss the biscuit pieces in the butter mixture until coated. 5. Place half of the coated biscuit pieces in the bundt pan. 6. Sprinkle half of the mozzarella and cheddar cheese on top. 7. Add the rest of the biscuit pieces, then top with the remaining cheese. 8. Bake for 25-30 minutes until golden brown and cooked through. 9. Let the pan cool for about 5 minutes, then invert it onto a plate. 10. Garnish with parsley for extra color. This recipe is simple and quick. It takes about 15 minutes to prep and 30 minutes to bake. You serve it warm with marinara sauce for dipping. Enjoy your cheesy garlic monkey bread! For the full recipe, refer to the ingredients and instructions above. You’ve learned about making cheesy garlic monkey bread from start to finish. We discussed key ingredients and tips for quality. I shared step-by-step instructions for mixing, layering, and baking. You also discovered great variations, like adding vegetables or using different cheeses. Remember to store any leftovers properly and follow reheating tips for the best taste. With these insights, you can avoid common mistakes and enjoy perfect monkey bread every time. Get ready to bake something delicious and impress everyone!](https://recipespursuit.com/wp-content/uploads/2025/05/a0685134-c01f-478c-9d69-e80015cd7b8c.webp)
If you love cheesy, garlicky flavors, you’re in for a treat! Cheesy Garlic Monkey Bread is the perfect blend of
![- 1 cup rolled oats - 1/2 cup pumpkin puree - 1/4 cup almond butter (or peanut butter) - 1/4 cup honey or maple syrup - 1/4 cup ground flaxseed - 2 teaspoons pumpkin spice blend (cinnamon, nutmeg, ginger, cloves) - 1/2 teaspoon vanilla extract - 1/4 cup mini chocolate chips (optional) - Pinch of salt These ingredients create a tasty and healthy snack. Let's take a closer look at what each part brings to the mix. Rolled oats are the base of these bites. They provide fiber and help keep you full. The pumpkin puree adds moisture and a nice flavor. It also gives you vitamins A and C. Almond butter or peanut butter gives protein and healthy fats. Honey or maple syrup adds a touch of sweetness. Ground flaxseed is a great source of omega-3 fatty acids. The pumpkin spice blend brings that warm, cozy taste we all love. A bit of vanilla extract enhances the flavor. If you like chocolate, mini chocolate chips can add a fun surprise. Finally, a pinch of salt balances all the flavors. - Caloric value per serving: About 100 calories - Macronutrient breakdown: 3g protein, 5g fat, 12g carbs - Health benefits of key ingredients: - Rolled oats: Good for heart health - Pumpkin puree: Supports your vision - Nut butter: Helps with muscle repair - Flaxseed: May lower cholesterol This snack is not only simple to make but also packed with nutrition. You get energy without the crash. For the Full Recipe, check out the steps to make these delicious bites! Start by mixing the dry and wet ingredients. In a large bowl, add: - 1 cup rolled oats - 1/2 cup pumpkin puree - 1/4 cup almond butter (or peanut butter) - 1/4 cup honey or maple syrup - 1/4 cup ground flaxseed - 2 teaspoons pumpkin spice blend - 1/2 teaspoon vanilla extract - Pinch of salt Stir everything together until it forms a sticky dough. If the mix feels dry, add a tablespoon of water or more pumpkin puree. This helps it hold together well. Now, let's form the energy bites. Scoop about 1 tablespoon of the mix and roll it into a ball. Place these on a parchment-lined baking sheet. If you want mini chocolate chips, fold them in before rolling. Once you have all the bites rolled, chill them in the fridge for at least 30 minutes. This step is key for firmness. After chilling, they will be ready to enjoy. For a fun presentation, serve the energy bites in a decorative jar. Tie it with a ribbon for a great gift. These bites pair well with a warm cup of tea or coffee. You can also enjoy them with yogurt or fruit for a tasty snack. For the complete recipe, check out the [Full Recipe]. - Overmixing the ingredients: Mixing too much can make your bites tough. You want a sticky dough, not a dry paste. Mix just until combined. - Not chilling long enough: Chilling is key for firmness. If you skip this step, your bites may fall apart. Always refrigerate for at least 30 minutes. - Adding nuts or seeds: Chopped almonds or sunflower seeds can add a nice crunch. They also boost the nutrition of your bites. Feel free to experiment with your favorites. - Adjusting sweetness level: Taste the mixture before you roll. If you want it sweeter, add more honey or maple syrup. Just remember, a little goes a long way. - Batch preparation tips: Make a large batch and store them for quick snacks. You can double the recipe if you want more bites. They are perfect for meal prep. - Freezing for longer storage: Energy bites freeze well. Store them in a single layer on a baking sheet first. Once frozen, transfer to an airtight container. This way, you can enjoy them anytime! For the complete recipe, check out the Full Recipe section. {{image_2}} You can change the taste of your energy bites easily. Adding cocoa powder gives a chocolate twist. You can also use vanilla protein powder for extra protein. This boosts flavor and nutrition. Try different nut butters too. Almond butter offers a nutty taste, while peanut butter adds creaminess. Each nut butter gives a unique flavor and texture. Want to make them vegan? Swap honey for maple syrup. This keeps your bites sweet without any animal products. For gluten-free bites, ensure the oats are certified gluten-free. You can also lower sugar by cutting the honey or syrup in half. This makes them healthy for those watching their sugar intake. Seasonal ingredients make these bites fun. In winter, add dried cranberries for a festive touch. They add color and a tart flavor. In spring, mix in citrus zest. Lemon or orange zest brightens the bites and gives them a fresh taste. These seasonal variations keep your snacks exciting all year long. To keep your pumpkin spice energy bites fresh, store them in an airtight container. This method keeps them moist and tasty. Place them in the fridge right after they chill. The cool air helps maintain their texture. For best results, use glass or plastic containers. Glass keeps flavors strong and does not stain. Plastic containers are lightweight and easy to handle. Make sure the lid fits tightly to avoid air exposure. These energy bites last about a week in the refrigerator. If you want to enjoy them later, freezing is a great option. They can stay fresh in the freezer for up to three months. To freeze, place them in a single layer on a baking sheet first. Once frozen, store them in a freezer-safe bag or container. This method prevents them from sticking together. Check for signs of spoilage before eating. If they smell off or show a change in color, toss them. A dry texture or a hard bite can also mean they aren't fresh anymore. Always trust your senses when deciding if food is still good. Pumpkin Spice Energy Bites stay fresh for about a week in the fridge. I recommend storing them in an airtight container. This keeps them moist and tasty. If you want them to last longer, you can freeze them. They can stay good for up to three months in the freezer. Yes, you can swap ingredients based on what you have. For example, you can use peanut butter instead of almond butter. This change affects the taste slightly but keeps the bites creamy. You can also use maple syrup instead of honey for a vegan option. Just remember, these swaps may alter the flavor a bit. These energy bites are great for kids! They are packed with healthy oats, pumpkin, and nut butter. The bites provide energy without too much sugar. However, watch for allergies. The recipe includes nuts, so make sure your child isn’t allergic. You can also skip the chocolate chips if needed. In this blog post, we explored how to make delicious Pumpkin Spice Energy Bites. We covered the key ingredients, their health benefits, and step-by-step instructions for perfecting the recipe. You learned tips to avoid common mistakes and ways to enhance flavor. With various options for dietary needs and seasonal twists, these energy bites are versatile. Now, you can enjoy a tasty snack that fuels your day. Don’t forget to store them properly for lasting flavor! Enjoy making these nutritious bites for yourself or loved ones.](https://recipespursuit.com/wp-content/uploads/2025/05/de408da1-3222-4cfa-bdf5-ec4aef895389.webp)
Looking for a quick and tasty snack that packs a nutritious punch? You’ve come to the right place! These Pumpkin
