Skip to content
DisclaimerTerms Of UseGDPR PolicyCookie Policy

Recipes Pursuit

  • Home
  • Drinks
  • Appetizers
  • Dinner
  • Dessert
  • About
  • Contact
  • Privacy Policy
DisclaimerTerms Of UseGDPR PolicyCookie Policy

Emma Smith

- 1 pound large shrimp, peeled and deveined - 1 cup grits (quick or stone-ground) - 4 cups chicken broth - 1 cup sharp cheddar cheese, grated - 1 cup milk - 1/2 cup cream cheese, softened - 1/2 small onion, finely chopped - 1 red bell pepper, finely chopped - 2 cloves garlic, minced - 1 teaspoon Cajun seasoning - 1 teaspoon smoked paprika - 1/2 teaspoon salt - 1/4 teaspoon black pepper - 2 green onions, chopped (for garnish) Cajun seasoning adds a spicy, warm kick to the dish. This blend often includes paprika, garlic powder, and herbs. Smoked paprika gives a deep, rich flavor, adding complexity to the casserole. Fresh vegetables like onion and bell pepper bring sweetness and texture. They make the dish colorful and tasty. Using these special ingredients elevates the classic shrimp and grits into a delightful casserole. The result is a burst of flavor in every bite. For the full experience, don’t forget to check out the Full Recipe. 1. Preheat the oven and prepare the dish: Start by preheating your oven to 375°F (190°C). Grease a 9x13-inch casserole dish with a little oil. This step helps prevent sticking and makes serving easier later. 2. Cooking the grits and incorporating dairy: In a medium saucepan, bring 4 cups of chicken broth to a boil. Slowly whisk in 1 cup of grits. Cook according to the package instructions until the grits thicken. Once thickened, remove from heat. Stir in 1 cup of milk, 1/2 cup of softened cream cheese, and 1/2 of the grated sharp cheddar cheese. Mix until creamy and smooth. Set this mixture aside. 1. Sautéing vegetables and shrimp: In a large skillet over medium heat, add some olive oil. Sauté 1/2 small chopped onion and 1 chopped red bell pepper for about 5 minutes until they soften. Add 2 minced garlic cloves and cook for another minute until fragrant. 2. Adding seasonings for flavor: Toss in the peeled and deveined shrimp. Sprinkle with 1 teaspoon Cajun seasoning, 1 teaspoon smoked paprika, 1/2 teaspoon salt, and 1/4 teaspoon black pepper. Cook the shrimp for about 3-4 minutes until they turn pink and opaque. Then, remove the skillet from heat. 1. Combining grits, shrimp, and vegetables: In a large mixing bowl, combine the grits mixture with the shrimp and vegetable mixture. Stir gently to mix all the flavors together. 2. Pouring into the casserole dish and topping with cheese: Pour the combined mixture into the greased casserole dish. Sprinkle the remaining cheddar cheese on top for a delicious, cheesy crust. Now you’re ready to bake! Follow the remaining instructions in the Full Recipe to enjoy your savory shrimp and grits casserole. The right consistency is key for great grits. You want them creamy, not too thick or runny. Start by using a good chicken broth for flavor. When you add milk and cream cheese, mix them in slowly. This helps to keep the grits smooth. If they seem too thick, add a splash more milk. To know when shrimp are done, look for their color. They should turn pink and opaque. This usually takes just 3 to 4 minutes. Avoid overcooking shrimp; they can become tough. Remove them from heat as soon as they change color. For a nice touch, garnish your dish with chopped green onions. They add color and freshness. Serve the casserole warm, right from the oven. Pair it with a side of mixed greens for a full meal. This not only looks good but also balances the flavors. For the full recipe, check out the instructions above. {{image_2}} You can add bacon or sausage to your casserole for a richer taste. Cook the meat until crispy, then mix it into your shrimp and grits. It brings a savory depth that many will love. You can also try using different types of cheese. A mix of gouda or pepper jack can add unique flavors. Experimenting with cheese can make the dish your own. For those who need gluten-free options, use certified gluten-free grits. They taste just as good and keep the dish creamy. If you're looking for vegetarian adaptations, skip the shrimp. Instead, add mushrooms or zucchini for texture and flavor. You can also use vegetable broth instead of chicken broth to keep it plant-based. To adjust the heat level, add more spices like cayenne or red pepper flakes. This makes the dish exciting and bold. You can also incorporate diced jalapeños or a splash of hot sauce. This adds a kick that many people enjoy. Just remember to taste as you go, so the heat fits your preference. To store your shrimp and grits casserole, let it cool first. Once it cools, transfer it to an airtight container. Place it in the fridge. Proper cooling helps keep flavors fresh. You can enjoy leftovers for up to three days. When you’re ready to eat, reheat the casserole in the oven. Set the oven to 350°F (175°C). Cover the dish with foil to keep it moist. Heat it for about 20 minutes or until warm. You can also microwave portions for quick meals. Just cover the dish and heat for 2 to 3 minutes. If you want to freeze the casserole, do it before cooking. Follow all steps of the recipe, but don’t bake it. Instead, cover your casserole dish tightly with foil or plastic wrap. Then, place it in the freezer. It can last up to three months frozen. When you’re ready to cook, take it out of the freezer. Let it thaw overnight in the fridge. For best results, bake it straight from the fridge at 375°F (190°C). Add an extra 10 minutes to the cooking time to ensure it heats through. This way, you enjoy a hot, tasty meal anytime! Check the full recipe for more details. You can pair this dish with several great sides. Here are my top picks: - Mixed greens salad: A fresh salad adds a nice crunch. - Coleslaw: Creamy coleslaw offers a cool contrast. - Garlic bread: Crispy garlic bread brings added flavor and texture. - Steamed vegetables: Choose seasonal veggies for a healthy touch. These sides balance the richness of the casserole and enhance your meal. Making Shrimp and Grits Casserole ahead is easy and smart. Here’s how: - Prepare the grits: Cook the grits and mix in the cheese and cream cheese. Store this in the fridge. - Cook the shrimp: Sauté the shrimp and veggies, then cool them before storing. - Assemble later: Combine everything in the casserole dish right before baking. This way, you save time on busy days. Just bake it when you’re ready! Yes! You can create a tasty vegetarian option. Here’s how: - Omit the shrimp: Use mushrooms or a plant-based protein, like tofu or tempeh. - Add more veggies: Consider zucchini, spinach, or corn for extra flavor. - Use vegetable broth: Swap chicken broth for vegetable broth in the recipe. These changes keep the dish hearty and satisfying without any seafood. Enjoy experimenting! This blog post has guided you through making a delicious shrimp and grits casserole. We covered the key ingredients and the special flavors that make this dish stand out. Following the step-by-step instructions ensures your casserole will be tasty and well-textured. Remember, there are many variations to suit your taste! In cooking, creativity is just as important as following a recipe. Enjoy making this dish your own. Happy cooking!

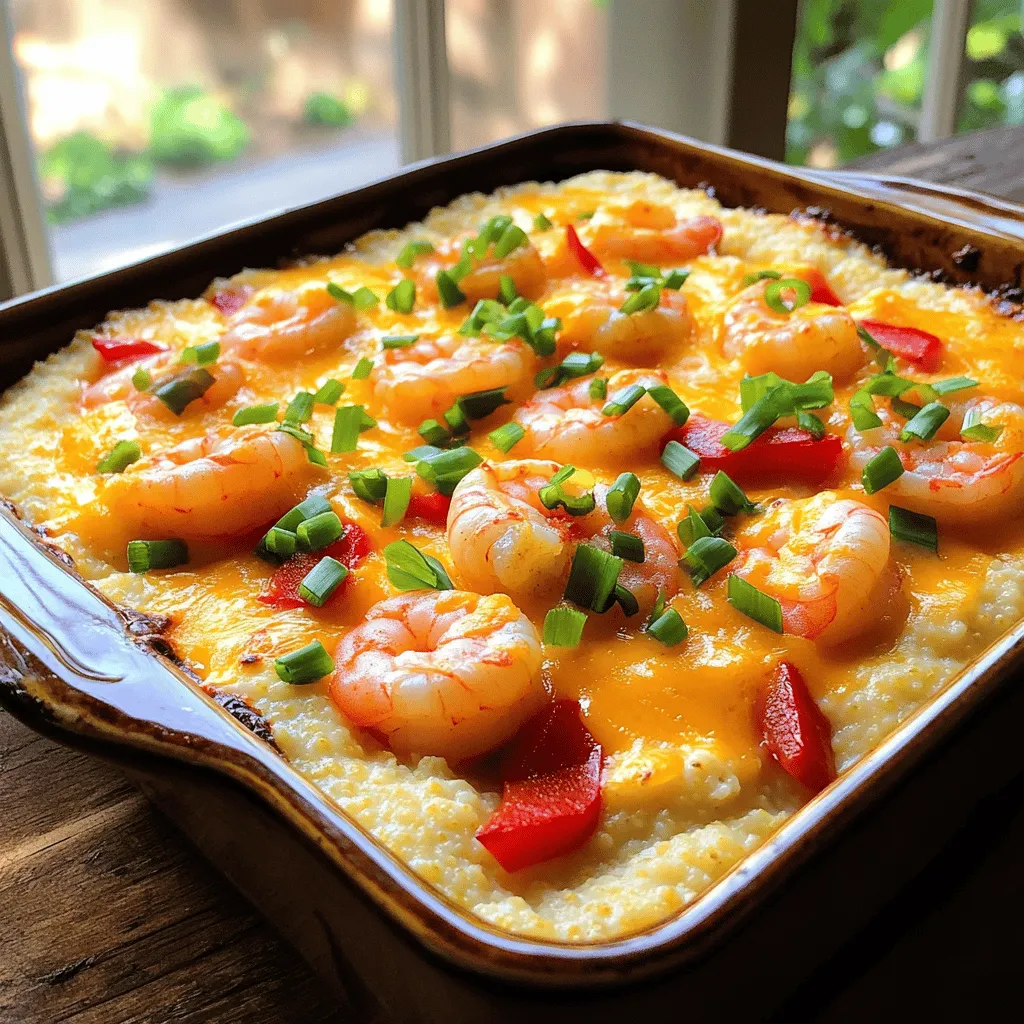
Savory Shrimp and Grits Casserole Recipe Delight

If you love the rich flavors of Southern cuisine, you’ll adore this savory shrimp and grits casserole. It’s a cozy

- 400g spaghetti - 6 cloves garlic, thinly sliced - 1/2 cup extra-virgin olive oil - 1 teaspoon red pepper flakes (adjust to taste) - 1/4 cup fresh parsley, chopped - Zest of 1 lemon - 1 tablespoon lemon juice - Salt to taste - Freshly grated Parmesan (optional, for serving) When I make Spaghetti Aglio e Olio, I love using fresh ingredients. The garlic brings a strong flavor that makes the dish shine. Extra-virgin olive oil adds richness, while the red pepper flakes give it a nice kick. I use fresh parsley for color and zest to brighten the dish. - Large pot - Skillet - Strainer I recommend using a large pot for boiling the spaghetti. This helps the pasta cook evenly. A skillet is perfect for making the garlic sauce. Don’t forget a strainer to drain the pasta! - Garlic bread - Caesar salad To make it a full meal, I love serving garlic bread on the side. A Caesar salad adds a nice crunch and freshness. These pair well with the pasta's bold flavors. For the complete cooking steps, check out the Full Recipe. Enjoy your simple and flavorful dish! - Bring a large pot of salted water to a boil. - Add 400g spaghetti and cook according to package instructions until al dente. - Reserve 1 cup of pasta water, then drain the spaghetti. - Heat 1/2 cup of extra-virgin olive oil in a skillet over medium heat. - Add 6 cloves of thinly sliced garlic and sauté until golden, about 2-3 minutes. - Mix the drained spaghetti with the garlic oil in the skillet. - If the pasta seems dry, add reserved pasta water slowly until you reach the right consistency. To make a great sauce, start by sautéing the garlic slowly. Use medium heat. Watch it closely. If you burn the garlic, the sauce becomes bitter. Sauté for about 2-3 minutes until it turns golden. This step is key. Adjust the spice level with red pepper flakes. Start with a teaspoon. If you want more heat, add more slowly. Remember, you can always add, but you can’t take away. When serving, use wide bowls for a nice presentation. Portion the spaghetti well. Aim for about a cup per person. Garnish with extra parsley and lemon slices for color. This makes the dish look fresh and inviting. Pair your Spaghetti Aglio e Olio with white wine. A light Pinot Grigio works great. It balances the garlic and spice nicely. If you need to cook for many, scale the recipe easily. Just multiply each ingredient by the number of servings you need. Keep the same cooking times. Timing is important. Start cooking the pasta as you prepare the sauce. This way, everything is ready at the same time. Make sure to have fun while cooking; it makes the meal even better! {{image_2}} You can add shrimp or chicken to this dish for extra flavor. For shrimp, sauté them in the garlic oil until pink. If you choose chicken, grill or pan-fry it first, then slice it. Vegetarians can use chickpeas or white beans for protein. These options keep the dish filling and nutritious. Try different herbs or spices to change the taste. Basil or oregano can add a fresh twist to the dish. You might also want to add spinach for color and nutrition. Cherry tomatoes can bring a sweet, juicy burst of flavor. These add-ons make the dish more vibrant and fun. If you're vegan, try non-dairy cheese options for creaminess. Nutritional yeast gives a cheesy flavor without dairy. Cashew cheese can also add richness to your dish. For those who enjoy dairy, Pecorino Romano is a good choice. Parmesan brings a nutty depth, enhancing the overall taste. This recipe has many ways to adapt and enjoy. Feel free to experiment and find your favorite combination! Check out the Full Recipe for more details on making this dish. To store leftovers, let the spaghetti cool first. Place it in an airtight container. This helps keep the dish fresh. You can store it in the fridge for up to three days. After that, the flavor and texture may not be good. If you want to freeze Spaghetti Aglio e Olio, follow these steps: 1. Cool the dish completely. 2. Place it in freezer-safe bags or containers. 3. Remove as much air as possible. 4. Label the bags with the date. You can freeze it for up to three months. To thaw, move the spaghetti to the fridge for several hours or overnight. For quick thawing, you can use the microwave. When reheating, add a splash of olive oil or reserved pasta water. This will keep the dish moist. Heat it on low on the stove. Stir often to avoid burning. If using a microwave, cover the dish with a damp paper towel. This helps trap steam and keeps it from drying out. Enjoy your flavorful spaghetti! Aglio e Olio is Italian for garlic and oil. This dish uses these two simple ingredients. The name shows its focus on bold flavors. It highlights how few ingredients can create something delicious. Yes, you can easily make Spaghetti Aglio e Olio vegan. Just skip the Parmesan cheese. You can also use nutritional yeast for a cheesy flavor. This swap keeps your dish tasty and plant-based. You can add your favorite ingredients to make this dish your own! Here are some ideas: - Mix in sautéed spinach or kale for greens. - Toss in cherry tomatoes for sweetness. - Add shrimp or chicken for protein. - Use different herbs like basil or oregano for a new flavor. You can find the complete method for Spaghetti Aglio e Olio with a Twist in the earlier section of this article. In this post, we covered how to make Spaghetti Aglio e Olio. You learned about the basic ingredients and tools needed. I shared easy step-by-step instructions to get the best sauce. Tips helped you perfect the flavor and serve it well. You can even try different twists, like adding protein or veggies. Remember to store leftovers properly and follow my reheating tips to keep the taste. Enjoy making this simple yet fantastic dish!

Spaghetti Aglio e Olio Simple and Flavorful Dish

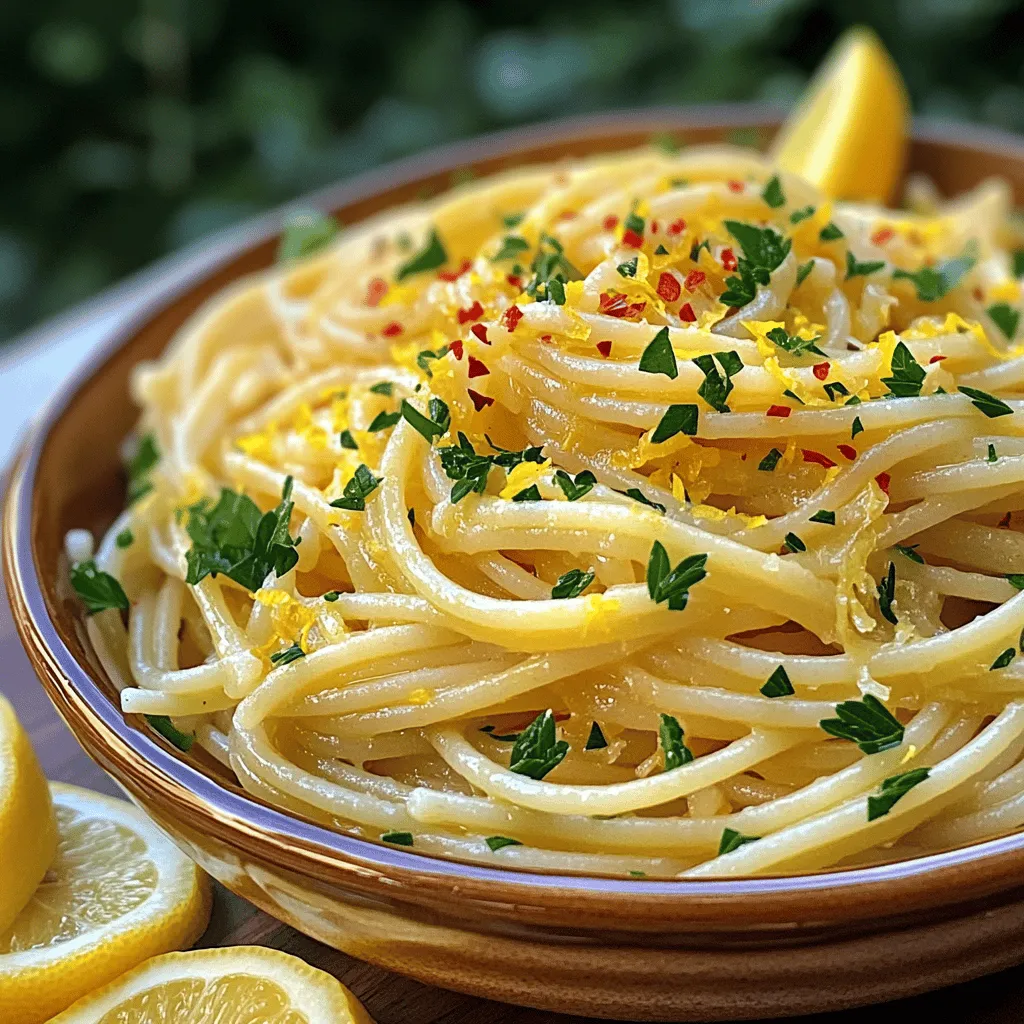
Looking for a simple yet flavorful dish? Spaghetti Aglio e Olio is the answer! With just a few ingredients and

To start, gather these key ingredients for oven-baked chicken fajitas: - 1 lb boneless, skinless chicken breasts, sliced into thin strips - 1 large bell pepper, sliced (choose red, yellow, or green) - 1 large onion, sliced - 2 tablespoons olive oil - 2 teaspoons chili powder - 1 teaspoon cumin - 1 teaspoon garlic powder - 1 teaspoon smoked paprika - 1 teaspoon onion powder - Salt and pepper to taste - 8 small flour or corn tortillas These ingredients create a tasty base for your dish. The chicken brings protein, while peppers and onions add color and crunch. Feel free to add some fun with these toppings: - Avocado slices - Sour cream - Fresh cilantro - Lime wedges These toppings provide freshness and creaminess. They let you customize each bite. The spices in this dish are key. They bring out the best flavor in chicken and veggies. Here’s what you need: - Chili powder adds heat and depth. - Cumin provides a warm, earthy flavor. - Garlic powder gives a punch of aroma. - Smoked paprika adds a nice smokiness. - Onion powder enhances the onion flavor. Using these spices makes your fajitas stand out. You can adjust them based on your taste. For the full recipe, check the earlier part of the article. Start by gathering all your ingredients. You will need 1 pound of chicken, one bell pepper, and one onion. Slice the chicken into thin strips. Then, slice the bell pepper and onion. Make sure all pieces are even in size. This helps them cook evenly. Place all the sliced items into a large mixing bowl. Next, drizzle 2 tablespoons of olive oil over the chicken and veggies. Then, add your spices. Use 2 teaspoons of chili powder, 1 teaspoon of cumin, 1 teaspoon of garlic powder, 1 teaspoon of smoked paprika, and 1 teaspoon of onion powder. Add salt and pepper to taste. Toss everything together well. You want the chicken and vegetables to be coated with the oil and spices. This step gives your fajitas a great flavor. Now, preheat your oven to 400°F (200°C). Spread the seasoned chicken and vegetables evenly on a large baking sheet. Bake for 20 to 25 minutes. Stir halfway through cooking to ensure even baking. Once done, let them cool for a few minutes. Warm the tortillas in a skillet or oven. Serve the fajitas hot and let everyone add their favorite toppings. You can use avocado, sour cream, fresh cilantro, or lime wedges. Enjoy your tasty meal! For the full recipe, check out the details provided earlier. To bake fajitas just right, first, cut the chicken and veggies into thin strips. This helps them cook evenly. Preheat your oven to 400°F (200°C). Line a baking sheet with parchment paper for easy cleanup. Spread the chicken and veggies in a single layer on the sheet. If they overlap, they may not cook well. Bake for 20-25 minutes. Stir halfway through to ensure all sides get nice and brown. To make your fajitas pop, use a mix of spices. Chili powder, cumin, and smoked paprika create a tasty base. You can also add lime juice for a fresh twist. Marinate the chicken for a few hours or overnight. This lets the flavors soak in, making every bite better. Don’t forget to season with salt and pepper to balance the flavors. One mistake is overcrowding the baking sheet. This traps steam and makes the chicken soggy. Another error is skipping the stirring step. Stirring helps cook the chicken and veggies evenly. Lastly, don’t forget to warm your tortillas. Cold tortillas can ruin the fajita experience. For the best results, follow the [Full Recipe] closely. {{image_2}} You can make these fajitas meat-free. Use a mix of bell peppers, onions, and zucchini. Add black beans for protein. You can also include mushrooms for a hearty texture. Season the veggies with the same spices for great flavor. This option is just as tasty and colorful. If you like heat, add jalapeños or chili peppers. Slice them thin and mix them with the chicken and veggies. You can also increase the chili powder or add cayenne pepper. For extra spice, serve with a spicy salsa. This version will wake up your taste buds. You don’t have to stick with chicken. Try beef strips for a richer flavor. Shrimp also works well and cooks faster. For a lighter option, use turkey breast. Adjust the cooking time based on the protein you choose. Each option creates a different twist on this classic. For the full recipe, check above. After you enjoy your oven-baked chicken fajitas, you might have some leftovers. Store them in an airtight container. They will keep well in the fridge for up to three days. Make sure to let them cool down first. This helps keep the texture nice. When you want to eat your leftovers, reheating is easy. You can use a microwave for quick warmth. Place the fajitas on a plate and cover them with a damp paper towel. Heat for about one to two minutes. If you prefer the oven, preheat it to 350°F (175°C). Spread the fajitas on a baking sheet and heat for about 10 minutes. This method keeps them crispy. If you have extra fajitas, freezing is a great option. Wrap them tightly in plastic wrap, then place them in a freezer bag. Remove as much air as possible. They can last in the freezer for up to three months. To enjoy later, thaw them in the fridge overnight before reheating. This method helps maintain the flavors and textures. For the full recipe, check out the details above! You can add more chili powder or fresh jalapeños. Try using hot sauce, too. Another option is to mix in cayenne pepper. Adjust to your taste. I love adding some diced chipotle peppers for a smoky kick. Don’t be shy; spice it up! Yes, you can use frozen chicken. Just make sure to thaw it first. Thaw it in the fridge overnight for best results. You can also use the microwave, but be careful not to cook it. Frozen chicken may need a bit more time to bake. Always check for doneness. I recommend serving rice or beans for a hearty meal. A fresh salad adds a nice crunch. Guacamole and salsa are great dips, too. You can also serve chips for extra fun. These sides enhance the flavor and make your meal complete. Check out the Full Recipe for more ideas! In this post, we explored how to make oven-baked chicken fajitas. We covered essential ingredients, step-by-step instructions, and helpful tips. You can create tasty fajitas with easy steps and fun variations. Remember to store leftovers properly and reheat them well. Fajitas are versatile, so mix and match toppings or try different proteins. Enjoy making this dish for your next meal!

Oven-Baked Chicken Fajitas Flavorful and Simple Meal

Are you ready to create a tasty and simple meal? Oven-Baked Chicken Fajitas are your answer! This dish is full

- 1 cup quinoa, rinsed Quinoa is the star of this salad. It adds protein and fiber. Rinsing it removes any bitter taste. - 2 cups vegetable broth (or water) Use broth for more flavor. Water works if you want a lighter taste. - 1 cup cherry tomatoes, halved These add sweetness and color. You can also use grape tomatoes if you prefer. - 1 cucumber, diced Cucumbers bring crunch and freshness. Pick English or Persian cucumbers for a mild flavor. - 1 red bell pepper, diced This adds a sweet crunch. You can swap it for a green pepper for a sharper taste. - 1/2 red onion, finely chopped Red onions give a nice bite. If too strong, use green onions or shallots instead. - 1/2 cup Kalamata olives, pitted and sliced Olives add a salty depth. You can use green olives if you want a different flavor. - 1/2 cup feta cheese, crumbled Feta gives a creamy texture. For a dairy-free option, try vegan feta or omit it. - 1/4 cup fresh parsley, chopped This herb adds freshness. You could use basil or mint for a different twist. - 2 tablespoons olive oil Olive oil adds richness. For a lighter option, use avocado oil. - 1 tablespoon lemon juice Lemon juice brightens the dish. Lime juice is a great substitute for a zesty kick. - 1 teaspoon dried oregano Oregano brings warmth and earthiness. You can use Italian seasoning if you prefer. - Salt and pepper to taste These enhance all the flavors. Adjust to your liking for the best taste. Each ingredient plays a role in creating a flavorful and healthy salad. You can mix and match based on your taste or dietary needs. Check the Full Recipe for detailed instructions on how to bring this dish together! To start, you need to prepare the quinoa. This step is simple. - Boil the quinoa: In a medium saucepan, mix 1 cup of quinoa with 2 cups of vegetable broth or water. Place it on the stove over medium-high heat. Bring it to a boil. - Simmer: Once it boils, lower the heat. Cover the pot and let it simmer for about 15 minutes. The quinoa is ready when it is fluffy and all liquid is gone. Turn off the heat and let it cool. For cooking tools, you’ll need a medium saucepan with a lid. A fine-mesh strainer is helpful for rinsing the quinoa before cooking. Next, it’s time to mix the salad. This is where the magic happens. - Combine fresh ingredients: In a large bowl, add the cooled quinoa. Then, toss in 1 cup of halved cherry tomatoes, 1 diced cucumber, 1 diced red bell pepper, 1/2 finely chopped red onion, 1/2 cup sliced Kalamata olives, and 1/2 cup crumbled feta cheese. Mix gently. - Importance of cooling quinoa: Make sure the quinoa is cool before mixing. Hot quinoa can wilt the fresh veggies. It also helps the flavors blend better. Now, let’s dress the salad. A good dressing brings everything together. - Make the dressing: In a small bowl, whisk together 2 tablespoons of olive oil, 1 tablespoon of lemon juice, 1 teaspoon of dried oregano, and salt and pepper to taste. - Tips for balancing flavors: Taste the dressing. Adjust it to your liking. You can add more lemon juice if you want it tangy or more olive oil for richness. After dressing, pour it over the salad. Toss gently to mix all the flavors. For the full recipe, check out the detailed instructions above. Enjoy your cooking! To get fluffy quinoa, rinse it well. This removes the bitter coating. Use two parts liquid for each part quinoa. Bring it to a boil, then reduce heat and cover. Let it cook for about 15 minutes. After cooking, let it sit for five minutes before fluffing with a fork. Chop your vegetables evenly to ensure a nice bite. Use a sharp knife for clean cuts. Try to make pieces about the same size. This helps all the flavors mix well in each bite. Add fresh herbs like basil or mint for a twist. These herbs add bright taste. You can also use spices like cumin or paprika. They bring warmth and depth to the salad. For oil and vinegar, a good ratio is three parts oil to one part vinegar. Use extra virgin olive oil for rich flavor. A splash of balsamic vinegar can add sweetness and balance. Serve your salad in a big bowl to show off the colors. A glass bowl looks pretty and lets you see the layers. You can also use individual bowls for a nice touch at meals. Pair this salad with grilled chicken or shrimp for protein. It also goes well with warm pita bread. This adds a nice crunch and complements the salad's flavors. {{image_2}} To make a vegan version, leave out the feta cheese. You can replace it with avocado or add more olives for creaminess. For protein, think about using chickpeas or lentils. These options keep the salad filling and tasty. Grilling vegetables can add a nice smoky flavor. Think about bell peppers, zucchini, or eggplant. Slice these veggies into even pieces for quick grilling. Brush them lightly with olive oil and season with salt. Grill until tender and add to your salad for extra taste. If you want to meal prep, double the recipe. Store individual portions in airtight containers. This keeps the salad fresh for up to five days. To keep it crisp, keep the dressing separate until you're ready to eat. This way, your salad stays fresh and tasty throughout the week. For the full recipe, check out the details above. To keep your Mediterranean Quinoa Salad fresh, use airtight containers. Glass containers work well because they do not stain. You can also use plastic containers, but make sure they close tightly. Before you store it, let the salad cool. If you place warm salad in the fridge, it can make other food spoil faster. Store the salad in the fridge right after it cools. Your salad will stay fresh for about 3 to 5 days in the fridge. After that, the flavors may fade. You might notice the vegetables lose their crispness. If you see any signs of sliminess or odd smells, it's time to toss it. Always check for these signs before eating. You can enjoy your quinoa salad cold or warm. If you prefer it warm, gently heat it in a pan on low. Stir it often to avoid burning. For a quick heat, you can use the microwave. Just warm it for 30 seconds at a time until it’s hot. If you like it cold, serve it straight from the fridge. A chilled salad can be very refreshing on a hot day. You can also add some fresh herbs before serving for extra flavor. Yes, you can make Mediterranean Quinoa Salad ahead of time. It actually tastes better after resting. Here are some best practices: - Cool the quinoa: Let it cool completely before mixing in other ingredients. - Dress before serving: Add dressing just before serving to keep the salad fresh. - Store properly: Keep it in an airtight container in the fridge. It can last up to four days. If you need a feta cheese substitute, you have options: - Dairy-free cheese: Look for plant-based feta. Many brands offer tasty versions. - Goat cheese: It has a similar texture and tangy flavor. - Ricotta cheese: This is a mild option that can work well, too. Adding protein is easy and delicious. Here are some ideas: - Chickpeas: They add a nice texture and flavor. Just rinse and mix them in. - Grilled chicken: Slice it thin and place on top for a hearty meal. - Tofu: Cube and grill it for a plant-based protein boost. For the complete recipe, check out the Full Recipe. This blog post covered how to make a tasty Mediterranean Quinoa Salad. We began with the ingredients, offering various substitute options for different diets. I provided step-by-step instructions for cooking quinoa and mixing the salad. You learned tips for perfecting texture and balancing flavors in the dressing. We explored different variations and discussed storage methods to keep your salad fresh. In closing, this salad is not only versatile but also healthy. Enjoy experimenting with flavors and make it your own!

Mediterranean Quinoa Salad Tasty and Healthy Delight

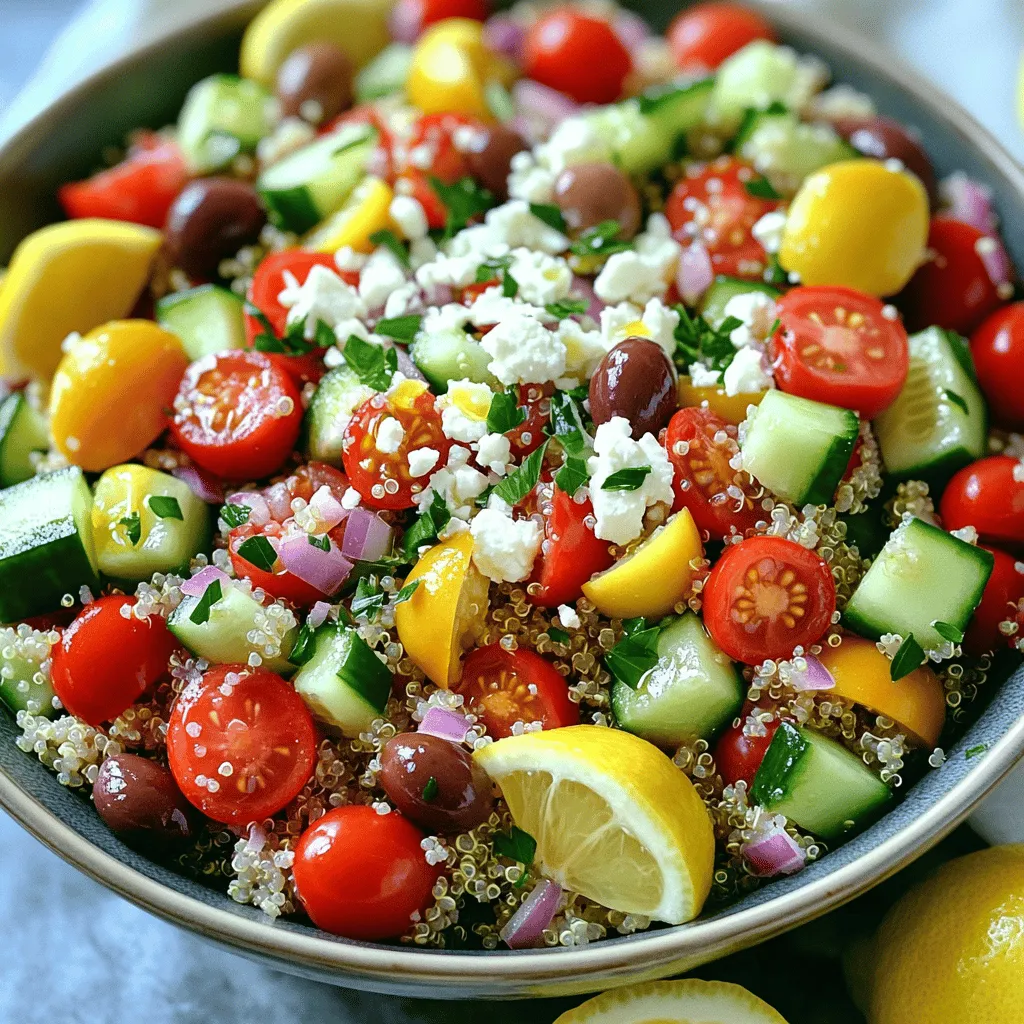
Mediterranean Quinoa Salad is a tasty, healthy delight that you can enjoy any time. This colorful dish combines fresh veggies,

This creamy spinach artichoke dip is a crowd-pleaser. It’s perfect for gatherings or any snack time. You can enjoy it warm with chips or veggies. The recipe combines rich flavors with healthy greens. To make this delightful dip, gather these ingredients: - 1 cup fresh spinach, chopped - 1 can (14 oz) artichoke hearts, drained and chopped - 1 cup cream cheese, softened - ½ cup sour cream - ½ cup mayonnaise - 1 cup shredded mozzarella cheese - ½ cup grated Parmesan cheese - 2 cloves garlic, minced - 1 teaspoon onion powder - ½ teaspoon red chili flakes (optional for heat) - Salt and pepper to taste You can swap some ingredients to fit your taste. Use Greek yogurt instead of sour cream for a tangy touch. You can also use cottage cheese for a lower fat option. If you want a vegan dip, try cashew cream in place of cream cheese and sour cream. For a lighter dip, use low-fat mayonnaise. Feel free to mix and match these swaps to create your perfect dip! Start by preheating your oven to 350°F (175°C). This step is key for even baking. In a large bowl, mix the softened cream cheese, sour cream, and mayonnaise. You want this mixture to be smooth. Next, add the chopped spinach and artichoke hearts. Toss in the minced garlic and onion powder. If you like a bit of spice, add red chili flakes. Now, fold in the shredded mozzarella and grated Parmesan cheese. Ensure everything is mixed well. Season your dip with salt and pepper to taste. This gives it flavor. Then, transfer the mixture to a baking dish and spread it evenly. Once your oven is hot, place the baking dish inside. Bake the dip for 25 to 30 minutes. You will know it’s ready when it is hot and bubbly. Look for a lightly golden top, which means it is perfectly baked. Keep an eye on your dip as it bakes. You can check if it’s done by looking for bubbles around the edges. A golden top shows it's ready to enjoy. If you want a bit more color, you can broil it for 1-2 minutes. Just watch it closely so it doesn’t burn. After baking, let it cool for a few minutes before serving. This helps with the dip's flavor and makes it easier to scoop. Enjoy your creamy spinach artichoke delight! For the full recipe, refer to the recipe section above. To make the best Spinach Artichoke Dip, start with fresh ingredients. Use fresh spinach for a vibrant flavor. Drain the artichoke hearts well to avoid excess moisture. Cream cheese should be softened for easy mixing. Combine all the ingredients in a large bowl and mix until smooth. This helps all flavors blend nicely. Bake it until golden and bubbly for a delightful finish. A watery dip can ruin your dish. To prevent this, always drain your artichokes well. You can also squeeze excess water from the spinach. If using frozen spinach, thaw it and press it dry. Another tip is to bake your dip longer if needed. This allows moisture to evaporate. Letting it cool slightly before serving can help too. Serve your Spinach Artichoke Dip warm for the best taste. I love pairing it with tortilla chips or pita bread. Fresh vegetable sticks also make a great option. For a fun twist, offer crackers or toasted baguette slices. Garnish with extra Parmesan or fresh parsley for a pop of color. Enjoy this creamy delight at your next gathering! {{image_2}} You can make this dip lighter without losing taste. Swap the cream cheese for Greek yogurt. This change keeps it creamy and adds protein. You can also use low-fat sour cream and mayonnaise to cut calories. For a dairy-free option, try using cashew cream. Blend soaked cashews with water until smooth. It gives a rich taste and texture. Want to spice it up? Add roasted red peppers for a sweet kick. You can also mix in chopped sun-dried tomatoes for a tangy twist. If you love herbs, try adding fresh basil or dill. These herbs bring a bright taste that pairs well with spinach and artichokes. For a smoky flavor, mix in smoked paprika. This dip can easily become vegan. Replace all dairy with plant-based alternatives. Use vegan cream cheese and sour cream. Nutritional yeast adds a cheesy flavor without dairy. You can also add more veggies, like chopped bell peppers or mushrooms. This not only boosts flavor but also adds nutrients. Enjoy your Spinach Artichoke Dip with these fun variations! For the full recipe, check out the details above. After enjoying your spinach artichoke dip, let it cool. Then, transfer the leftovers to an airtight container. This helps keep the dip fresh. Store it in the fridge for up to three days. If you want to keep it longer, consider freezing it. To freeze the dip, use a freezer-safe container. Make sure to leave some space at the top, as it may expand. You can freeze it for up to three months. When ready to enjoy, thaw it overnight in the fridge. This keeps it safe and tasty. To reheat, place the dip in an oven-safe dish. Preheat your oven to 350°F (175°C). Heat for about 20 minutes, or until hot and bubbly. Stir it halfway through for even heating. You can also microwave it in a bowl. Heat in 30-second bursts, stirring in between. This ensures your dip stays creamy and delicious. Yes, you can use frozen spinach. Just make sure to thaw and drain it well. Frozen spinach is convenient and still tasty. Use about 1 cup of thawed spinach. It will save you some prep time. You can store Spinach Artichoke Dip in the fridge for about 3 to 5 days. Make sure to place it in an airtight container. This keeps it fresh and ready for snacking. If you want to keep it longer, you can freeze it. Frozen dip can last for up to 3 months. I love serving this dip with tortilla chips or pita bread. Fresh veggie sticks like carrots and celery also work great. You can even use toasted bread slices for a crunchy bite. Try different options based on your taste. For a fun touch, add some extra Parmesan on top before serving. Check out the Full Recipe for more ideas! This article covered everything you need to make Spinach Artichoke Dip. We explored the main ingredients, how to substitute, and shared prep and baking steps. I gave you tips to prevent a watery dip and ideas for serving. We also discussed variations for health and taste, plus how to store leftovers. You can now make this dip for any occasion. Enjoy it fresh or reheat it later. Spinach Artichoke Dip is a crowd-pleaser that everyone loves.

Spinach Artichoke Dip Wholesome and Flavorful Recipe

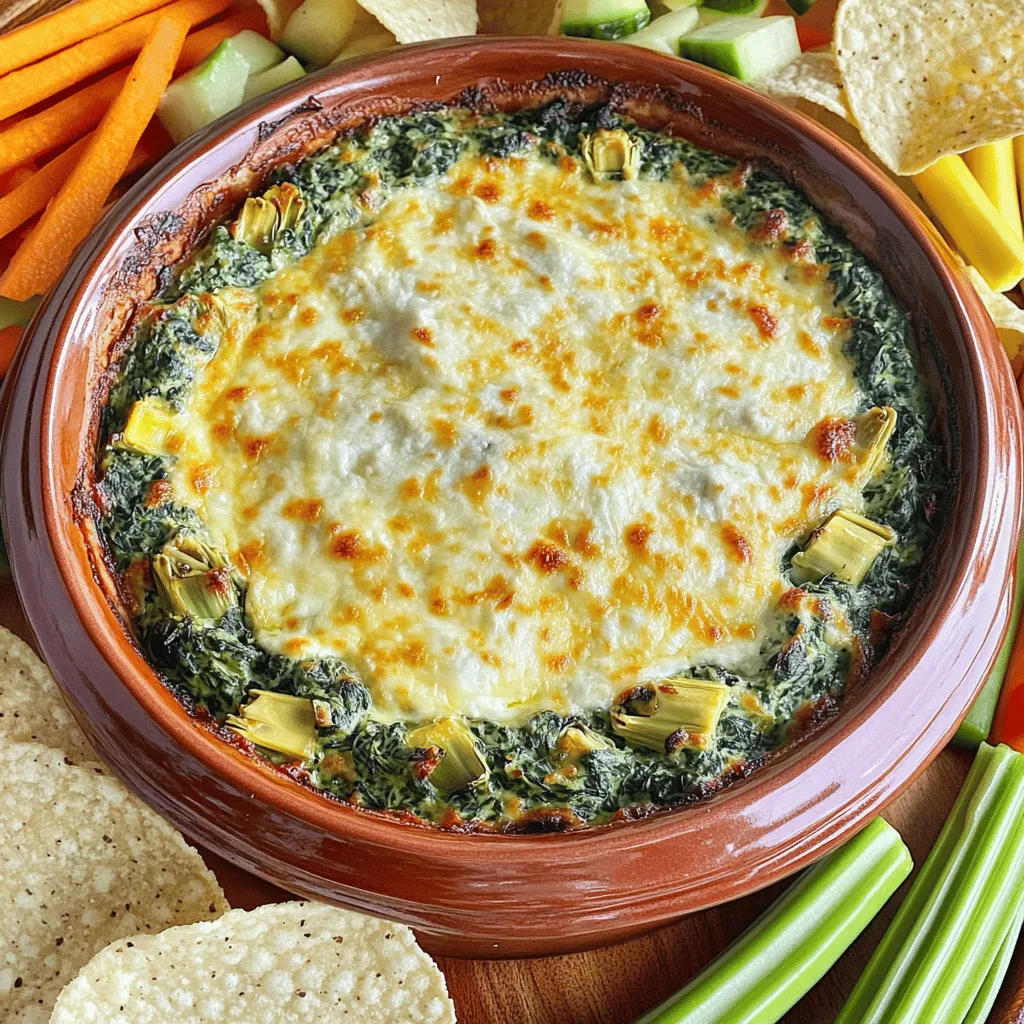
Are you ready to whip up a creamy, delicious Spinach Artichoke Dip? This wholesome recipe brings together fresh flavors and

- 2 medium sweet potatoes, peeled and diced - 1 bell pepper (red or yellow), chopped - 1 small red onion, diced - 2 cloves garlic, minced - 4 large eggs Sweet potatoes are the star here. They add a sweet and creamy taste. Eggs bring protein and richness, making this dish filling. The bell pepper adds crunch and color. Red onion gives a nice bite. Garlic adds a lovely aroma and taste. - 1 teaspoon smoked paprika - 1/2 teaspoon cumin - Salt and pepper to taste Smoked paprika gives a smoky flavor. Cumin adds warmth and depth. Salt and pepper enhance all the flavors. These spices make the dish lively and fun. - 2 tablespoons olive oil - Fresh parsley, chopped (for garnish) Olive oil helps cook the veggies perfectly. Fresh parsley adds a bright touch on top. It looks nice and tastes fresh. For the full recipe, check out the [Full Recipe]. 1. Peeling and dicing sweet potatoes: Start by peeling the sweet potatoes. Use a sharp peeler for ease. After peeling, cut them into small cubes. Aim for about half an inch in size. This helps them cook evenly. 2. Chopping vegetables: Next, chop the bell pepper and red onion. You can use any color bell pepper. Dice the onion finely. This adds more flavor to the hash. Mince the garlic cloves, too. Garlic gives a nice aroma when cooked. 1. Sautéing sweet potatoes: Heat two tablespoons of olive oil in a large skillet over medium heat. Add the diced sweet potatoes. Season them with salt, pepper, smoked paprika, and cumin. Cook for about 10-15 minutes. Stir occasionally to avoid burning. Wait until they soften and turn golden. 2. Adding vegetables: Once the sweet potatoes are ready, add the chopped bell pepper, diced onion, and minced garlic. Stir everything together. Cook for 5-7 more minutes. The vegetables should be tender and fragrant. 3. Cooking eggs in the hash: Now it’s time for the eggs! Make four small wells in the hash mixture. Crack an egg into each well. Cover the skillet with a lid. Cook for 5-8 minutes. You want the egg whites to set but keep the yolks runny. Adjust the time to your liking. - Recommended dishes to pair with: This dish goes great with a side of avocado or fresh fruit. You can also serve it with toast for a complete meal. - Presentation tips: For a beautiful finish, sprinkle fresh parsley on top. Use a colorful plate to make it pop. Serve hot for the best taste. Check out the Full Recipe for more details! To get the best sweet potatoes, start by peeling and dicing them into small cubes. This helps them cook evenly. Heat olive oil in a skillet over medium heat. Add the sweet potatoes and season them with salt, pepper, smoked paprika, and cumin. Cook for about 10 to 15 minutes. Stir often until they soften and turn golden. For eggs, create small wells in the sweet potato mix. Crack an egg into each well. Cover the skillet with a lid. Cook for 5 to 8 minutes. This lets the egg whites set while keeping the yolks runny. If you like your eggs firmer, cook them a little longer. To boost flavor, try adding a pinch of cayenne pepper or red pepper flakes for heat. You can also sprinkle some cinnamon for a hint of sweetness. Fresh herbs like thyme or cilantro can brighten the dish. Don’t hesitate to mix in a splash of hot sauce before serving for extra zing. Prep your ingredients ahead of time to make cooking easier. Peel and dice the sweet potatoes the night before. Store them in water to keep them fresh. You can also chop your bell pepper, onion, and garlic in advance. If you have leftover sweet potatoes from another meal, use them in this hash. Just cut them into cubes and add them to the skillet. This saves time and reduces waste. For the full recipe, check the earlier section. {{image_2}} You can change up your sweet potato hash easily. If you want, try other potatoes. Yukon gold or red potatoes work well too. They give a nice taste and texture. For a vegan option, you can swap eggs for tofu or chickpea flour. Silken tofu scrambles well and adds protein. Chickpea flour mixed with water creates a great egg-like texture. Making sweet potato hash ahead of time is simple. Cook the hash as per the Full Recipe. Once done, let it cool. Store it in an airtight container in the fridge for up to four days. To freeze, let the hash cool completely. Place it in a freezer-safe bag or container. It lasts about three months. When ready to enjoy, thaw in the fridge overnight. Reheat in a skillet over medium heat, stirring until warm. You can also add a splash of water to steam it a bit. If you need gluten-free options, this dish is naturally gluten-free. Just check your spices and oils to ensure they are also gluten-free. For low-carb options, you can cut down on the sweet potatoes. Use cauliflower instead. Cauliflower gives a similar texture without the carbs, making it a great swap. To store leftovers, let the sweet potato hash cool down. Then, place it in an airtight container. This keeps it fresh and tasty. The recommended shelf life is about 3 to 4 days. Make sure to label the container with the date so you know when it was made. You can freeze cooked sweet potato hash if you want to save it for later. First, let it cool completely. Then, pack it into freezer-safe bags or containers. Be sure to remove as much air as possible to avoid freezer burn. For thawing, simply move it to the fridge overnight. This helps keep the texture nice. To reheat without losing flavor, I recommend using the stovetop. Heat a skillet over low heat and add a splash of olive oil. Stir the hash gently as it warms up to keep it moist. If you prefer the microwave, use a microwave-safe dish and cover it. Heat in short bursts, stirring in between, until hot. This way, you maintain the delicious taste of your sweet potato hash. You can add jalapeños or hot sauce to your hash for a kick. Chop one or two jalapeños and mix them in with the sweet potatoes. If you prefer, drizzle hot sauce over your dish before serving. This will bring heat and flavor to your breakfast. Absolutely! You can add many vegetables to your hash. Try spinach, zucchini, or mushrooms for more texture and taste. Just chop them up and add them in when you add the bell pepper and onion. This lets them cook through while keeping their flavor. A serving of Sweet Potato Hash with Eggs offers great nutrients. It has about 250 calories, 10 grams of protein, and 8 grams of fiber. The sweet potatoes provide vitamins A and C, while the eggs add healthy fats and protein. This makes it a balanced breakfast option. To change the servings, simply adjust the number of sweet potatoes and eggs. For more servings, double the ingredients. For fewer, cut them in half. Keep the cooking times the same, but watch the eggs closely. Make sure they are cooked to your liking. This blog post covered making a tasty sweet potato hash with eggs. You learned about key ingredients like sweet potatoes, eggs, and spices. I shared easy steps for preparing and cooking the dish. You also got tips on enhancing flavors and storing leftovers. In the end, sweet potato hash is great for meals at any time. With so many ways to customize it, think of it as your blank canvas. Enjoy experimenting with flavors to make it your own!

Sweet Potato Hash with Eggs Energizing Breakfast Recipe

Looking for a breakfast that fuels your day? Try my Sweet Potato Hash with Eggs! This tasty dish combines creamy

- 1 can (15 oz) chickpeas, drained and rinsed - 2 tablespoons olive oil - 1 teaspoon smoked paprika - 1 teaspoon garlic powder - Salt and pepper to taste - 1 cup cherry tomatoes, halved - 1 cucumber, diced - 1 bell pepper (any color), diced - ¼ red onion, finely chopped - 1 avocado, diced - 2 cups mixed greens (spinach, arugula, or lettuce) - 2 tablespoons fresh lemon juice - 2 tablespoons tahini - 1 tablespoon honey or maple syrup (for a vegan option) Chickpeas are the star of this salad. They provide protein and fiber. The olive oil adds healthy fat and helps the chickpeas crisp up. Smoked paprika gives a smoky flavor, while garlic powder boosts taste without fresh garlic. Fresh veggies like cherry tomatoes and cucumbers add crunch and freshness. Avocado offers creaminess, while mixed greens keep it light. The tahini dressing ties everything together, adding a nutty taste. If you want to swap chickpeas, try black beans or lentils. For oil, you can use avocado oil. Instead of smoked paprika, use regular paprika or cumin for a different flavor. You can add any favorite veggies, like carrots or radishes. For tahini, try almond butter or yogurt as a creamy alternative. Use lime juice instead of lemon for a twist. To start, grab a can of chickpeas. Drain and rinse them well under cold water. This helps remove excess salt and makes them clean. Then, preheat your oven to 400°F (200°C). In a mixing bowl, add the chickpeas, olive oil, smoked paprika, garlic powder, salt, and pepper. Stir until each chickpea is coated. This seasoning adds great flavor. Spread the seasoned chickpeas on a baking sheet in a single layer. This is key for even cooking. Roast them in the oven for 25-30 minutes. Halfway through, shake the pan to turn the chickpeas. This ensures they crisp up nicely. They should turn golden brown and crunchy. While the chickpeas roast, chop your salad ingredients. In a large bowl, mix halved cherry tomatoes, diced cucumber, bell pepper, finely chopped red onion, diced avocado, and mixed greens. This creates a colorful base. For the dressing, whisk together fresh lemon juice, tahini, honey, and a pinch of salt and pepper in a small bowl. If it seems thick, add a splash of water. Once the chickpeas are done and slightly cooled, add them to the salad. Drizzle with the tahini dressing and toss gently to combine. Enjoy your crispy chickpea salad fresh! For more details, check the Full Recipe. To get crispy chickpeas, start with dry chickpeas. Pat them dry before cooking. This helps them crisp up nicely. Toss them in olive oil and spices like smoked paprika and garlic powder. Make sure they are evenly coated. Spread them out on a baking sheet in a single layer. This allows air to circulate and cook them evenly. Roast them at 400°F for 25 to 30 minutes. Shake the pan halfway through for even browning. They should be golden and crunchy when done. You can boost the flavor of your salad easily. Try adding fresh herbs like cilantro or parsley. They add a nice green touch. Consider mixing in some feta cheese for a salty bite. If you like heat, sprinkle in some red pepper flakes. A squeeze of fresh lemon juice brightens the whole dish. You can also add nuts or seeds for a crunchy texture. These simple changes make the salad more exciting and tasty. To serve, place the salad in a large bowl. Make sure to layer the crispy chickpeas on top. This keeps them crunchy until you eat. You can also serve the salad in jars for a fun presentation. Add extra avocado slices or a sprinkle of seeds for a pretty look. Consider pairing the salad with pita bread or a light soup. This makes a complete meal full of flavors. For the full recipe, check the previous sections. Enjoy your healthy, crispy chickpea salad! {{image_2}} You can change up the salad to fit your taste. Here are some great swaps: - Chickpeas: Use black beans or lentils. - Greens: Try kale or romaine instead of mixed greens. - Veggies: Add shredded carrots or radishes for crunch. - Nuts: Toss in some walnuts or almonds for extra texture. These swaps keep the salad fresh and exciting! This salad is easy to make vegan and gluten-free. Here’s how: - Vegan: Use maple syrup instead of honey. - Gluten-Free: All the ingredients are gluten-free. Just check your tahini for any gluten. These simple changes keep the dish friendly for everyone! Dressing can change the whole salad vibe. Here are some tasty ideas: - Creamy Avocado Dressing: Blend avocado with lemon juice and a bit of water. - Balsamic Vinaigrette: Mix balsamic vinegar with olive oil for a tangy twist. - Yogurt-Based Dressing: Use dairy-free yogurt with herbs for a creamy finish. Feel free to experiment with these dressings to find your favorite! For the full recipe, check out the Crispy Chickpea Salad 🥗. To store your crispy chickpea salad, place it in an airtight container. Make sure to keep the salad and dressing separate. This helps keep the chickpeas crispy. You can store the salad in the fridge for up to three days. When reheating chickpeas, use the oven for the best results. Preheat your oven to 350°F (175°C). Spread the chickpeas on a baking sheet. Heat them for about 10-15 minutes. This will restore some of their crunch. Avoid the microwave, as it can make them soggy. Most of the salad ingredients have a good shelf life: - Chickpeas: Canned chickpeas last for years when unopened. Once opened, use within three days. - Vegetables: Cherry tomatoes and cucumbers stay fresh for about a week in the fridge. - Avocado: Once cut, eat it within a day or two. - Mixed greens: These last about three to five days. - Dressing: The tahini dressing lasts a week in the fridge. For the full recipe, check out the detailed steps to make this salad. Yes, you can use dried chickpeas. Start by soaking them overnight. This helps them cook faster. After soaking, boil them until soft, about 1 to 2 hours. Drain and let them cool. Then, follow the same steps for roasting in the recipe. Just remember, dried chickpeas take more time. You can prep the salad ahead of time. Chop your veggies and store them in the fridge. Keep the crispy chickpeas in a separate container to stay crunchy. Make the dressing and store it in a jar. When ready to eat, mix everything together. This keeps your salad fresh and tasty. One mistake is not drying the chickpeas before roasting. Wet chickpeas won’t get crispy. Another mistake is overcrowding the baking sheet. Spread them out for even roasting. Lastly, don’t skip the seasoning. It adds great flavor. Follow these tips for a delicious salad. In this blog post, we explored the Crispy Chickpea Salad in detail. We covered the essential ingredients, how to prepare and roast chickpeas, and tips for great flavor. You learned about variations and how to store leftovers properly. Crispy Chickpea Salad is easy to make and fun to customize. With each bite, you enjoy a mix of texture and taste. Now, you can create a salad that fits your style. Enjoy your cooking and make it yours!

Crispy Chickpea Salad Fresh and Flavorful Delight

Looking for a fresh and tasty salad that’s simple to make? You’ve come to the right place! In this article,

Making Lemon Blueberry Pancakes is simple and fun. Here are the ingredients you will need: - 1 cup all-purpose flour - 2 tablespoons sugar - 1 tablespoon baking powder - 1/2 teaspoon baking soda - 1/4 teaspoon salt - 1 cup buttermilk - 1 large egg - 2 tablespoons melted butter - Zest of 1 lemon - 2 tablespoons fresh lemon juice - 1 cup fresh blueberries (or frozen, thawed) - Additional butter or oil for cooking These ingredients blend together to create a fluffy, zesty pancake. The lemon zest and juice add a bright flavor that pairs perfectly with the sweet blueberries. The buttermilk gives the pancakes a soft texture. Make sure you gather everything before you start. It helps keep the cooking process smooth and enjoyable. You can find the full recipe details later in the article. Enjoy the process and get ready for a delicious breakfast! - Step 1: Whisk dry ingredients Start by taking a large bowl. Add 1 cup of all-purpose flour, 2 tablespoons of sugar, 1 tablespoon of baking powder, 1/2 teaspoon of baking soda, and 1/4 teaspoon of salt. Whisk these together until they blend well. This helps the pancakes rise nicely. - Step 2: Combine wet ingredients In another bowl, mix 1 cup of buttermilk, 1 large egg, and 2 tablespoons of melted butter. Add the zest of 1 lemon and 2 tablespoons of fresh lemon juice. Stir until everything is well combined. This mix gives your pancakes a rich flavor. - Step 3: Mix wet and dry ingredients Now, pour the wet mix into the dry ingredients. Gently stir until just combined. It’s okay if there are small lumps. Overmixing can make your pancakes tough, and we want them fluffy. - Step 4: Fold in blueberries Carefully add 1 cup of fresh blueberries to your batter. Gently fold them in so they spread evenly. This adds bursts of sweet and tangy flavor in each bite. - Step 5: Heat skillet and grease Preheat your non-stick skillet over medium heat. Add a little butter or oil to grease the pan. This will help the pancakes cook evenly and not stick. - Step 6: Pour batter and cook For each pancake, pour about 1/4 cup of batter onto the skillet. Watch for bubbles to form on the surface. This usually takes about 2-3 minutes. The edges should look set when it’s time to flip. - Step 7: Flip pancakes and finish cooking Gently flip the pancakes over. Cook for another 2-3 minutes until they turn golden brown. Check to see if they are cooked through by inserting a toothpick. If it comes out clean, your pancakes are ready! For the complete recipe, please refer to the Full Recipe section. Enjoy your cooking! - Avoid overmixing the batter: Mix just until the wet and dry parts blend. Lumps are okay. Overmixing makes pancakes tough instead of fluffy. - Adjust heat for even cooking: Start with medium heat. If pancakes brown too fast, lower the heat. You want a nice, golden color. - Use fresh or thawed blueberries: Fresh blueberries burst with flavor. If using frozen, thaw them first. This keeps the batter nice and thick. - Presentation ideas for serving: Stack pancakes high on a plate. Dust with powdered sugar. Add fresh blueberries and a lemon slice for color. - Recommended toppings: Drizzle with maple syrup for sweetness. A homemade lemon glaze adds zing. You can also top with whipped cream or Greek yogurt for creaminess. These tips will help you make the best lemon blueberry pancakes! For the full recipe, check out the details above. Enjoy your cooking! {{image_2}} If you want to make your lemon blueberry pancakes gluten-free, use a gluten-free flour blend. Check the package instructions for the right amount. Often, you can replace the all-purpose flour with a 1:1 blend. This keeps the texture light and fluffy. For a vegan option, swap the egg for a flax egg. To make a flax egg, mix 1 tablespoon of ground flaxseed with 2.5 tablespoons of water. Let it sit for five minutes to thicken. You can also use plant-based milk instead of buttermilk. Almond milk or oat milk works well here. You can change up the fruits in your pancakes. Try mixing in strawberries, raspberries, or even peaches for a twist. Each fruit adds its unique taste, making breakfast exciting. Another great idea is to add spices. A dash of cinnamon brings warmth, while a splash of vanilla extract gives sweetness. These flavors enhance the lemon and blueberry, making each bite special. For the full recipe, check out the details above! To keep your leftover pancakes fresh, first let them cool. Once they are cool, stack them with parchment paper in between. This helps stop them from sticking together. Then, place the stack in an airtight container or a zip-top bag. You can refrigerate them for up to three days. If you want to store them for longer, freeze the pancakes. Use the same stacking method with parchment paper. Then, place the stack in a freezer-safe bag. Label the bag with the date, so you know when you made them. Frozen pancakes can last for up to two months. When you are ready to eat, reheating is easy. For quick reheating, use a microwave. Heat them for about 30 seconds, checking if they are warm. If you prefer a crispy edge, use a skillet. Just warm them over medium heat for a couple of minutes on each side. Lemon blueberry pancakes stay fresh for a good time if stored right. In the fridge, they last about three days. If you freeze them, they can remain good for up to two months. Always check for any signs of spoilage, like off smells or discoloration, before eating. For the best taste, enjoy your pancakes fresh, but storing them well ensures you can savor them later. To make lemon blueberry pancakes fluffier, use buttermilk. Buttermilk adds moisture and lightness. Also, don’t overmix the batter. Stir gently until just combined. Leaving some lumps helps keep the pancakes airy. You can separate the egg, whip the white, and fold it in at the end for extra fluff. This method makes a big difference in texture. Yes, you can use frozen blueberries. Thaw them first and drain any extra juice. This keeps your batter from turning too blue. Frozen blueberries are a great option, especially when fresh ones are out of season. They still provide that sweet burst in every bite. Serve lemon blueberry pancakes with maple syrup. The sweet syrup complements the tart lemon. Add whipped cream for a rich touch. Fresh berries on top add color and flavor. Another great idea is a drizzle of lemon glaze for a zesty finish. You can also serve them with yogurt for a creamy side. To store leftover pancake batter, cover it tightly with plastic wrap or a lid. Keep it in the fridge for up to two days. When ready to use, stir it gently. If it thickens, add a splash of buttermilk to loosen it up. Avoid storing cooked pancakes in the batter; they need different storage methods. You have learned how to make tasty lemon blueberry pancakes. We covered the right ingredients, easy steps, and helpful tips. Remember to mix well but not too much, and adjust your heat for the best results. You can add your own twist with flavors or even dietary changes. Lastly, store any leftovers for fun morning meals later. Now, grab your ingredients and enjoy making these pancakes!

Lemon Blueberry Pancakes Simple and Tasty Treat

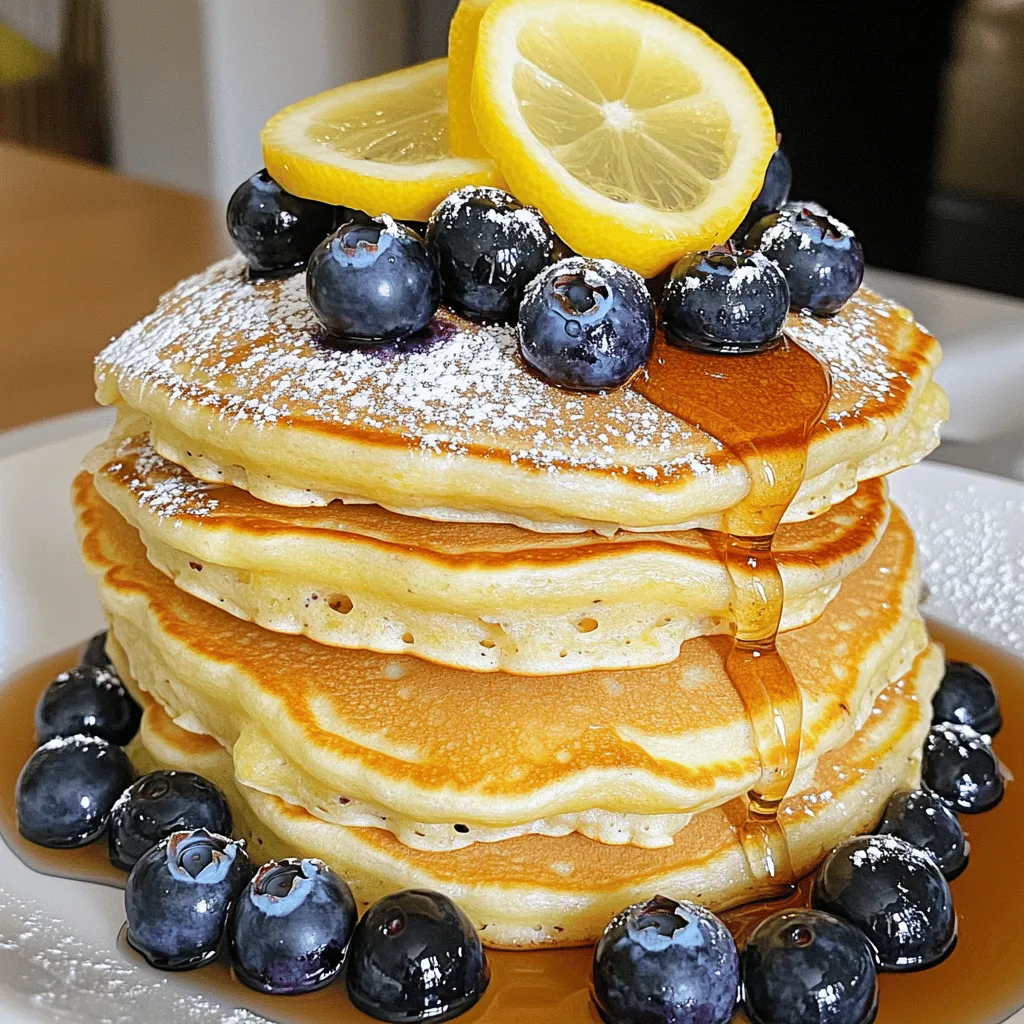
Are you ready to flip your breakfast game? These Lemon Blueberry Pancakes are simple and oh-so-tasty! With bright flavors and

- 1 cup quinoa, rinsed - 2 cups vegetable broth or water - 1 small onion, diced - 2 cloves garlic, minced - 1 bell pepper, diced (any color) - 1 cup cherry tomatoes, halved - 1 cup baby spinach - 2 large eggs (or tofu scramble for a vegan option) - 1 avocado, sliced Quinoa is the star of this dish. It is full of protein and fiber. I love how it brings a nutty flavor. You can use any bell pepper you like. The cherry tomatoes add sweetness. The spinach gives a nice green touch. - Salt and pepper to taste - 1 tablespoon olive oil Salt and pepper enhance the flavors of your bowl. Olive oil adds richness and helps cook the veggies. Always taste as you go. This ensures your dish is just right. - Avocado slices - Feta cheese crumbles - Fresh herbs Toppings make your bowl special. I love adding creamy avocado slices. Feta cheese offers a salty kick that pairs well. Fresh herbs add a burst of flavor. You can mix and match according to your taste. If you want the full recipe, check it out [here](Full Recipe)
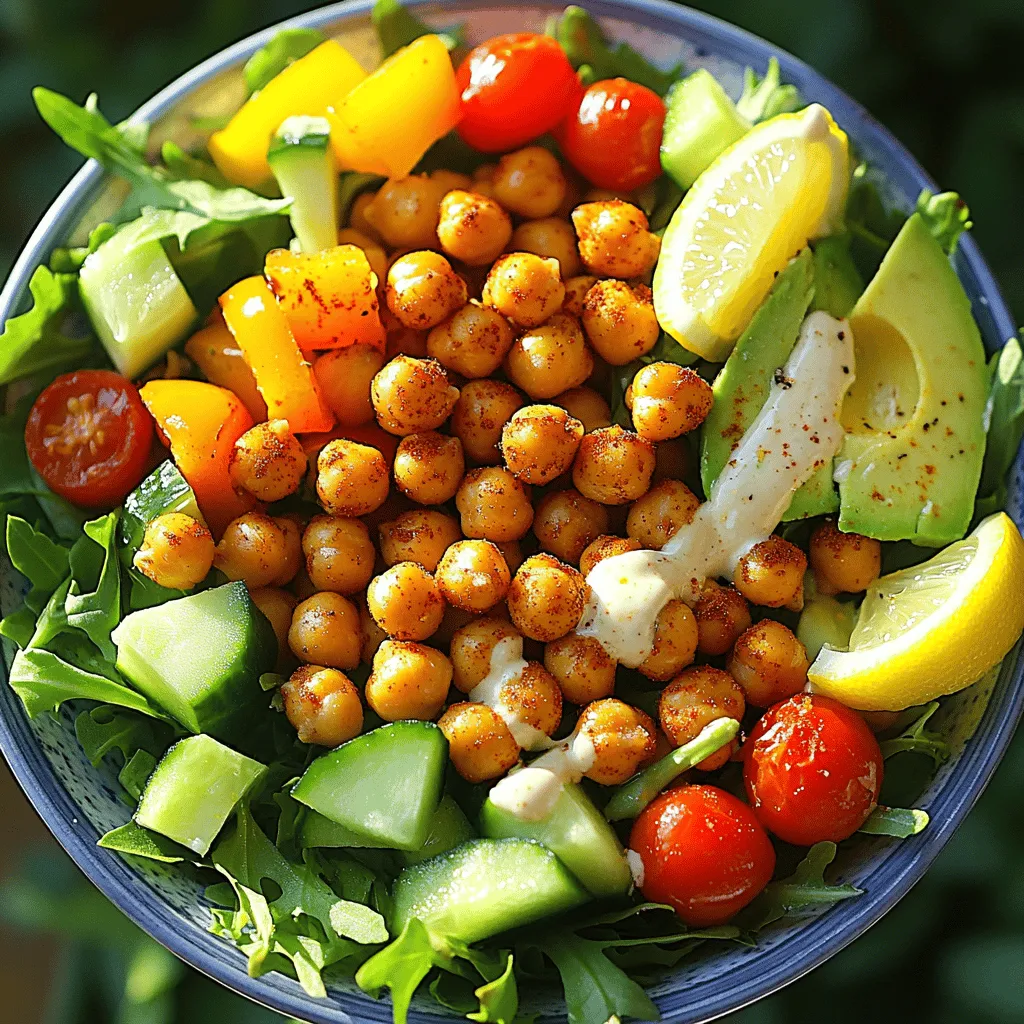
. To start, I bring the vegetable broth to a boil. This liquid gives the quinoa great flavor. Once it boils, I add the rinsed quinoa. Then, I reduce the heat to a simmer. I cover the pot and cook it for about 15 minutes. I check to see if the liquid is absorbed. When it is, I fluff the quinoa with a fork and set it aside. Next, I heat olive oil in a large skillet over medium heat. I add the diced onion and sauté it until it turns translucent. This usually takes about 3-4 minutes. Then, I add the minced garlic and diced bell pepper. I keep cooking for another 2-3 minutes until the peppers soften. After that, I stir in the halved cherry tomatoes. I let them cook for about 2 minutes to blister and soften. Finally, I add the baby spinach, stirring until it wilts in about 1-2 minutes. I season the mixture with salt and pepper to taste. While the vegetables cook, I prepare the eggs. I crack them into a non-stick skillet over medium heat. I often cook them sunny-side up or over easy, depending on my mood. For a tofu scramble, I crumble tofu into another skillet. I season it well and sauté until hot. This gives a nice texture and flavor to the dish. For the full and detailed recipe, check out the Full Recipe. To make the best quinoa, start by rinsing it well. Rinsing removes the bitter coating called saponin. Use a fine mesh strainer and rinse under cold water for a minute. This step is key for a tasty bowl. Cooking time is important too. If you want softer quinoa, add a bit more water and cook it longer. About 20 minutes should do the trick. Always fluff it up with a fork after cooking. This keeps it light and airy. Feel free to switch out the veggies based on the season. In winter, use root vegetables like carrots or sweet potatoes. In summer, add zucchini or corn for a fresh taste. Adding spices can enhance the flavor too. Try smoked paprika or cumin for a warm kick. A dash of red pepper flakes adds heat, while herbs can brighten your dish. For sunny-side up eggs, heat a non-stick skillet over medium heat. Crack the eggs gently and let them cook until the whites are set but the yolks remain runny. This gives you a lovely, rich sauce when you cut into it. If you prefer a vegan option, tofu is a great choice. Just crumble firm tofu and cook it in a skillet with your favorite spices. It absorbs flavors well and adds protein. You can also add nutritional yeast for a cheesy taste. For the full recipe, check out the Savory Breakfast Quinoa Bowl section. {{image_2}} You can easily swap proteins in your breakfast quinoa bowl. Adding chickpeas or black beans boosts fiber and flavor. Both options make your meal hearty and filling. If you follow Whole30 or keto diets, you can add cooked chicken or turkey. These meats fit well with the dish. They keep it low in carbs while adding protein. For a plant-based alternative, consider tempeh or more tofu. To spice things up, try adding hot sauce or sriracha. These sauces add heat and excitement to your bowl. Just a dash can transform your meal from good to great! You can also incorporate different cheeses. Feta cheese crumbles add a tangy taste. If you prefer creaminess, try goat cheese or cheddar. Each cheese brings a new layer of flavor. Meal prepping makes this bowl a breeze. You can prepare several servings at once. Store them in separate containers for quick breakfasts all week. Don’t forget about leftovers! This dish is just as tasty for lunch. Heat it up, and you have a nutritious meal ready to go. You can even add a fresh salad on the side to make it more filling. To keep your savory breakfast quinoa bowl fresh, store it in airtight containers. This prevents moisture and odors from getting in. If you have leftovers, they can last for about three to four days in the fridge. Make sure to check the ingredients too. Cooked quinoa can stay fresh for up to a week. However, fresh veggies like tomatoes and spinach only last a few days, so use them quickly. When it’s time to eat your leftover quinoa bowl, the best method is to use a microwave. Heat it in 30-second intervals, stirring in between. This helps keep the texture nice and fluffy. You can also reheat it in a skillet over low heat. Add a splash of water or broth to keep it moist. This way, you maintain the flavor and avoid dryness. If you want to store your quinoa bowl for longer, freezing is a great option. Cooked quinoa freezes well. Place it in a freezer-safe bag or container. It can last for up to three months. When you’re ready to eat it, just thaw it overnight in the fridge. For veggies, chop and freeze them in small portions. This makes it easy to add them later. Just remember to sauté them after thawing for the best taste. You can find the full recipe for this delicious breakfast quinoa bowl to make it again anytime! Yes, you can easily make this quinoa bowl vegan! For the egg, use tofu instead. Tofu scrambles well and gives you protein. Simply crumble it and sauté it with your veggies. You can also use chickpeas or black beans for extra protein. They add a nice texture and flavor to the bowl. To cook quinoa perfectly, rinse it first to remove bitterness. A common mistake is not using enough water. Use a ratio of 1 cup quinoa to 2 cups water or broth. Bring it to a boil, then reduce to a simmer. Cover and cook for about 15 minutes. Fluff it with a fork when done. This keeps it light and fluffy! Quinoa is a superfood! It is rich in protein and fiber. One cup of cooked quinoa has about 8 grams of protein and 5 grams of fiber. This helps keep you full and satisfied. It also provides essential amino acids, which are great for your body. Quinoa is gluten-free and packed with vitamins and minerals. Enjoy it as a healthy start to your day! You now have a complete guide to making a delicious quinoa bowl. We covered key ingredients like quinoa, veggies, and eggs or tofu. I shared tips for cooking, enhancing flavors, and even suggested storage methods. Remember, you can mix and match ingredients to make it your own. Explore different proteins and toppings to keep meals fresh and fun. Enjoy this healthy dish and feel great about your choices!

Savory Breakfast Quinoa Bowl Simple and Healthy Meal

Start your day right with a Savory Breakfast Quinoa Bowl. This simple and healthy meal packs flavor and nutrients. You

To make this rich chocolate lava cake, gather these simple ingredients: - 1/2 cup (115g) unsalted butter - 1 cup (170g) semi-sweet chocolate chips - 2 large eggs - 2 large egg yolks - 1/4 cup (50g) granulated sugar - 2 tablespoons all-purpose flour - 1/4 teaspoon salt - 1 teaspoon vanilla extract - Powdered sugar for dusting - Fresh berries for garnish (optional) I love using semi-sweet chocolate chips for this recipe. They give a great balance of sweetness and depth. If you prefer dark chocolate, choose one that is at least 60% cocoa. Unsalted butter is best because it lets you control the salt in your dish. Just remember to melt the butter and chocolate together gently to keep the mix smooth. You can use gluten-free flour if you want a gluten-free version. Almond flour or a gluten-free blend works well. For a dairy-free option, coconut oil or vegan butter can replace the unsalted butter. You can also use vegan chocolate chips for a fully dairy-free treat. This way, you can enjoy this dessert no matter your dietary needs! Start by preheating your oven to 425°F (220°C). Next, take four ramekins and grease them well with unsalted butter. This step helps the cakes come out easily. Dust the insides with cocoa powder. This prevents sticking and adds a nice flavor. In a microwave-safe bowl, combine 1/2 cup of butter and 1 cup of semi-sweet chocolate chips. Microwave this mix in 30-second intervals. Stir after each interval until it melts completely. It should be smooth and glossy. Let it cool for a few minutes before using. In a separate mixing bowl, whisk together 2 large eggs, 2 egg yolks, and 1/4 cup of granulated sugar. Whisk until the mix turns pale and thick. This should take about 3-4 minutes. Gently fold the melted chocolate mixture into the egg mix. Be careful not to deflate the eggs too much. Next, sift together 2 tablespoons of all-purpose flour and 1/4 teaspoon of salt. Fold this into the chocolate batter until just combined. Stir in 1 teaspoon of vanilla extract for extra flavor. Divide the batter evenly among the prepared ramekins. Place them in the preheated oven and bake for 12-14 minutes. The edges should be firm, but the center must remain soft. Keep an eye on them to avoid overbaking. Once done, remove the ramekins from the oven. Let them sit for about 1 minute. Carefully run a knife around the edges of each ramekin. Then, invert them onto serving plates. Dust with powdered sugar for a sweet finish. You can also add fresh berries for a lovely touch. Enjoy this decadent dessert right away! For the full recipe, check the details above. To get that oozy center, timing is key. Bake your lava cake for 12-14 minutes. The edges should be firm, while the center stays soft. If you bake too long, the center will harden. Keep a close eye on them! Ovens can vary. If your oven runs hot, reduce the time a bit. If it runs cool, add a minute or two. Every oven is unique. A simple test is to poke a toothpick in the edge. If the edge is set but the center is still jiggly, you’re good! Use ramekins for this recipe. They help shape the cake and give a nice presentation. A microwave-safe bowl works great for melting chocolate. Don't forget a whisk for mixing, and a spatula for folding ingredients. These tools make the process easier and more fun! For the full recipe, check the ingredients and instructions above. {{image_2}} You can change up the flavor of your chocolate lava cake easily. Adding espresso gives it a rich depth. Just mix in a teaspoon of instant espresso powder with the melted chocolate. Another option is orange zest. This adds a fresh, bright taste. Simply grate the zest from one orange and fold it into the batter. If you want a vegan chocolate lava cake, swap the eggs and butter. Use flax eggs instead. To make one flax egg, mix one tablespoon of ground flaxseed with three tablespoons of water. Let it sit for five minutes. For butter, use coconut oil or vegan butter. These swaps keep the cake rich and delicious. Pair your lava cake with a scoop of vanilla ice cream for a classic combo. The cold ice cream balances the warm cake perfectly. You can also drizzle chocolate sauce or raspberry sauce over the top. Fresh berries make a great garnish too, adding color and flavor. For the full recipe, check the article above. To store leftover chocolate lava cake, let it cool first. Place each ramekin in the fridge. Cover them tightly with plastic wrap. You can keep them in the fridge for up to three days. If you want to save space, you can transfer the cakes to an airtight container. When you want to enjoy your leftover lava cake, preheat your oven to 350°F (175°C). Place the ramekin on a baking sheet. Heat it for about 8-10 minutes. Check if the center feels warm. If you prefer, you can microwave it for about 30 seconds. Just be careful not to overheat it. You can prepare the batter ahead of time. Simply mix it and pour it into the ramekins. Cover them and store in the fridge for up to 24 hours. When ready to bake, just add a few extra minutes to the baking time. This way, you can enjoy fresh lava cakes anytime! For the full recipe, check out the complete steps above. Chocolate lava cake is a sweet dessert that has a gooey, molten center. When you cut into it, warm chocolate flows out like a lava flow. It is rich, decadent, and perfect for chocolate lovers. This cake combines the texture of a soufflé and a brownie. It often has a crisp edge and a soft, warm core. You can tell when the cake is done by checking the edges. They should be firm and set, while the center remains soft. The baking time is usually around 12 to 14 minutes. If the edges look firm but the middle jiggles slightly, it's ready. You can also insert a toothpick; it should come out with some batter but not completely wet. Yes, you can use different types of chocolate in this recipe. Dark chocolate gives a rich flavor, while milk chocolate adds sweetness. White chocolate can also work, but it will change the taste. Just make sure to adjust the sugar if you're using a sweeter chocolate. Each type will give you a unique taste, so feel free to experiment! If your lava cake is not flowing, it may be overbaked. The center needs to remain soft for the gooey texture. Another reason could be the type of chocolate used; some chocolates may not melt as well. Lastly, make sure to follow the recipe closely, especially the baking time. If your lava cake is burnt, don't worry too much. You can cut off the burnt edges and serve the inside. If the center is still soft, you can spoon it out and serve it in a bowl. Adding a scoop of ice cream on top can help hide the burnt taste too. It’s not perfect, but it can still be tasty! For the full recipe, refer to the detailed instructions provided earlier. This article covers everything you need to make a delicious chocolate lava cake. You learned about the right ingredients, substitutes, and all the steps to create this tasty treat. I shared tips for perfect results and ways to change flavors or meet dietary needs. Remember to store leftovers properly and know how to reheat them. With these details, you can wow your friends with a dessert that melts in their mouths. Enjoy baking and have fun exploring your own variations!

Chocolate Lava Cake Irresistible Dessert Recipe

Craving a sweet treat that oozes rich chocolate? You’re in the right place! This Chocolate Lava Cake recipe is simple

Older posts
Newer posts
← Previous Page1 … Page36 Page37 Page38 … Page62 Next →

dsad

© 2025 Recipes Pursuit • Built with GeneratePress

Our Policies

  • Copyright Policy
  • Cookie Policy
  • GDPR Policy
  • Privacy Policy
  • Disclaimer
  • Terms Of Use

More Information

  • Home
  • About
  • Contact
  • Appetizers
  • Dessert
  • Dinner
  • Drinks
©2025, Recipes Pursuit About Back To Top