Skip to content
DisclaimerTerms Of UseGDPR PolicyCookie Policy

Recipes Pursuit

  • Home
  • Drinks
  • Appetizers
  • Dinner
  • Dessert
  • About
  • Contact
  • Privacy Policy
DisclaimerTerms Of UseGDPR PolicyCookie Policy

Emma Smith

Here’s what you need to make this tasty treat: - 2 cans refrigerated cinnamon roll dough (with icing) - 6 large eggs - 1 cup milk - 1/2 cup heavy cream - 1 teaspoon vanilla extract - 1 teaspoon ground cinnamon - 1/4 teaspoon nutmeg - 1/2 cup maple syrup - 1/2 cup chopped pecans or walnuts (optional) - Powdered sugar for dusting (optional) These ingredients come together to create a soft, gooey delight. The cinnamon rolls are the star, giving you that warm, sweet taste. The eggs, milk, and cream make it rich and creamy. Adding vanilla and spices brings out more flavor. If you want a little crunch, sprinkle some nuts on top. Finally, a dusting of powdered sugar adds a pretty finish. You can find the full recipe in the article for easy cooking. Enjoy gathering these ingredients for a fun, simple dish! - Preheat your oven to 350°F (175°C). - Grease a 9x13 inch baking dish with cooking spray or butter. - Open the cinnamon roll cans. Cut each roll into quarters. - Place the pieces evenly in the prepared baking dish. - In a large mixing bowl, whisk together the following: - 6 large eggs - 1 cup milk - 1/2 cup heavy cream - 1 teaspoon vanilla extract - 1 teaspoon ground cinnamon - 1/4 teaspoon nutmeg - 1/2 cup maple syrup - Mix until all ingredients blend well together. - Pour the egg mixture over the cinnamon roll pieces. - Ensure all pieces get coated well. - Press down gently to submerge them in the liquid. - If you want, sprinkle 1/2 cup of chopped pecans or walnuts on top. - Bake in the preheated oven for 25-30 minutes. - Look for a puffed and golden brown casserole. - Once done, take it out and let it cool for a few minutes. - Drizzle the icing that came with the cinnamon rolls over the top. - Serve warm, dusted with powdered sugar if desired, and enjoy your delightful Cinnamon Roll Casserole! To make the best cinnamon roll casserole, ensure even coating of the cinnamon rolls. Cut the rolls into quarters and mix them well with the egg mixture. This step helps each piece soak up the delicious flavors. Adjust the baking time based on your texture preference. For a softer casserole, bake for 25 minutes. If you like it more crispy, extend the time to about 30 minutes. You can make this dish even better by pairing it with fresh fruit or whipped cream. Slices of strawberries or blueberries add color and flavor. Serve it as a breakfast or brunch dish. The warm, sweet flavors will impress your guests. {{image_2}} You can change the flavors in your cinnamon roll casserole easily. Here are some ideas: - Add chocolate chips for a sweet twist: Just sprinkle them over the cinnamon rolls before adding the egg mixture. The chocolate melts and makes it extra tasty. - Incorporate fruit like apples or berries: Cut apples into small pieces or add fresh berries. They add a nice tartness that balances the sweetness. You can make this casserole fit your diet too. Here are some swaps: - Use dairy-free milk and cream for a vegan option: Almond milk or coconut cream works well. This way, everyone can enjoy it! - Substitute gluten-free cinnamon rolls for a gluten-free version: Many brands offer gluten-free options. Look for them in your store. This keeps all your guests happy. Feel free to mix and match these ideas! The full recipe makes it so easy to create a delicious dish that suits your taste. To keep your Cinnamon Roll Casserole fresh, refrigerate it in an airtight container. This keeps the casserole moist and tasty. Make sure to let it cool before sealing it up. It can last in the fridge for about three days. If you want to save it longer, consider freezing it. For the best taste, reheat the casserole in the oven. Preheat your oven to 350°F (175°C). Place the casserole in a baking dish and cover it with foil. Heat for about 15-20 minutes until warm. You can also use the microwave for a quick warm-up, but it may not heat evenly. If you prefer, add a little milk before reheating to keep it moist. Enjoy your delicious treat just like the first time! To keep your casserole from getting soggy, follow these tips: - Use less liquid: You can cut back on milk or cream a bit. - Bake it right: Make sure to bake until it is golden on top. - Don’t over-soak: Pour the egg mixture slowly and don’t let it sit too long. These steps help keep your casserole fluffy and light. Yes, you can prepare it ahead of time! Here’s how: - Assemble it: Follow the recipe but don’t bake it yet. - Cover it: Wrap the dish with plastic wrap and place it in the fridge. - Bake later: When ready, take it out, let it sit for a few minutes, then bake as directed. This way, you save time on busy mornings. Pair your casserole with these tasty options: - Fresh fruit: Slices of strawberries or bananas add a nice touch. - Beverages: A hot cup of coffee or sweet tea complements the dish well. - Whipped cream: A dollop on top makes it feel extra special. These choices enhance your meal and make it more delightful. For the complete Cinnamon Roll Casserole Delight Recipe, check out the [Full Recipe]. This cinnamon roll casserole recipe is simple yet delicious. You combine easy ingredients and bake them for a great meal. Remember to choose toppings you love. Try different flavors, like fruit or chocolate. With these tips, you can make it your own. Enjoy this dish for breakfast or brunch. Whether for family or friends, it will impress everyone. Now you have all you need to create something special. Happy baking!

Cinnamon Roll Casserole Tasty and Simple Treat

Are you ready to indulge in a warm, delicious treat with minimal effort? This Cinnamon Roll Casserole is the perfect

For this Vegetable Stir-Fry with Tofu, you need a mix of fresh veggies and tofu. Here’s what I use: - 1 block (14 oz) firm tofu, pressed and cubed - 1 red bell pepper, sliced - 1 cup broccoli florets - 1 cup snap peas - 1 carrot, thinly sliced - 2 cloves garlic, minced - 1 inch ginger, grated - 2 green onions, sliced - Sesame seeds for garnish You’ll also need some key condiments and seasonings: - 2 tablespoons soy sauce - 1 tablespoon sesame oil - 1 tablespoon olive oil - 2 tablespoons cornstarch - Salt and pepper to taste Measuring your ingredients accurately makes a big difference. Use a kitchen scale for the tofu. This ensures you have just the right amount. For vegetables, chop them into even pieces. This helps them cook at the same rate. When it comes to brands, I recommend using high-quality soy sauce. Look for organic or low-sodium options. For sesame oil, a cold-pressed brand adds a nice flavor. Each serving of this Vegetable Stir-Fry with Tofu has around 250 calories. You get protein from the tofu, vitamins from the veggies, and healthy fats from the sesame oil. - Calories: Approximately 250 per serving - Protein: About 15 grams - Fat: Roughly 10 grams - Carbohydrates: About 25 grams This dish is rich in vitamins A and C, thanks to the colorful veggies. It’s a great choice for a healthy meal. Eating a variety of vegetables can boost your health and help you feel good. To start, you need to prepare the tofu. First, press the block of tofu for about 15 minutes. This step removes extra moisture. Next, cut the pressed tofu into bite-sized cubes. This size helps it cook evenly. Now, let's marinate the tofu. In a bowl, toss the tofu cubes with 2 tablespoons of soy sauce. Let them soak for 10 minutes. This adds great flavor. After marinating, sprinkle 2 tablespoons of cornstarch over the tofu. Gently toss to coat all sides. This coating helps the tofu get crispy. For cooking, heat 1 tablespoon of sesame oil in a large non-stick skillet or wok. Set the heat to medium-high. Once hot, add the marinated tofu to the skillet. Stir-fry the tofu for about 5 to 7 minutes. Look for a golden brown and crispy texture. Once done, remove the tofu from the pan and set it aside. Next, it’s time to add flavor. In the same skillet, pour in 1 tablespoon of olive oil. Then, sauté 2 cloves of minced garlic and 1 inch of grated ginger for about 30 seconds. This step makes your kitchen smell amazing. Now, add your vegetables. Toss in the sliced red bell pepper, 1 cup of broccoli florets, 1 cup of snap peas, and 1 thinly sliced carrot. Stir-fry these for about 3 to 5 minutes. You want the veggies tender-crisp. This means they should be bright and still have a little crunch. Finally, return the crispy tofu to the skillet. Toss everything together and cook for another 2 minutes. Season with salt and pepper to taste. For a lovely finish, sprinkle sliced green onions and sesame seeds on top before serving. This dish is all about fresh flavors and textures. Enjoy your vibrant Veggie Tofu Stir-Fry! For the full details, check the Full Recipe. To ensure crispy tofu every time, start by pressing it well. Remove moisture by placing a heavy object on it for about 15 minutes. This step helps it brown nicely. After pressing, cube the tofu and marinate it in soy sauce. Then, coat the cubes with cornstarch. This coating seals in flavor and helps achieve a crispy texture. When cooking vegetables, adjust cooking times based on their types. Hard veggies like carrots take longer than soft ones like bell peppers. Add carrots first, then follow with broccoli and snap peas. This method keeps everything tender-crisp. To boost flavor, consider adding spices or sauces. Try a dash of chili flakes for heat. You can also use hoisin sauce or oyster sauce for depth. These additions make the dish more exciting and tasty. Garnishes can elevate your stir-fry. Use sesame seeds for crunch and green onions for freshness. These simple touches add both flavor and visual appeal to your dish. If you want options beyond stovetop stir-frying, you can try oven-baking or air frying. For oven-baking, spread the tofu on a baking sheet and roast until golden. This method uses less oil but still gives a nice texture. Adjustments for serving sizes are easy. If cooking for more, double the ingredients. If serving fewer, cut the recipe in half. Just keep an eye on cooking times to ensure everything cooks evenly. For the full recipe, check out the Vibrant Veggie Tofu Stir-Fry section. {{image_2}} If you want to change the protein in your stir-fry, there are many great options. You can swap tofu for tempeh, which has a nutty flavor. Chicken is another tasty choice. Just cut it into bite-sized pieces and cook until done. Shrimp is also a quick protein that cooks fast. Any of these can add a new twist to your dish. For vegetarian and vegan options, tempeh and jackfruit are excellent. They soak up flavors well and give a nice texture. Feel free to mix up the veggies based on what you have. Seasonal vegetables work best. In spring, use asparagus and peas. In winter, try carrots and Brussels sprouts. Leafy greens like spinach or kale add color and nutrients. Mushrooms bring an earthy flavor. You can use shiitake or button mushrooms based on your taste. The more colors you use, the better your stir-fry looks and tastes. Want to add some flair to your stir-fry? Try incorporating flavors from different Asian cuisines. For a Thai touch, toss in some basil and lime juice. For a Chinese vibe, use oyster sauce and five-spice powder. If you want to get creative, mix in some Italian herbs for a fusion twist. You can even use taco spices for a unique take. The options are endless! Explore different flavors and see what you enjoy best. For the full recipe, check out the details above. To store your vegetable stir-fry with tofu, let it cool first. Place it in an airtight container. This keeps it fresh longer. The stir-fry lasts about 3 to 4 days in the fridge. Be sure to check for any signs of spoilage before eating. If you want to freeze it, follow these steps. First, let the stir-fry cool completely. Then, store it in a freezer-safe bag or container. Remove as much air as you can. This helps prevent freezer burn. You can freeze the dish for up to 2 months. When ready to eat, thaw it in the fridge overnight. To reheat, use a skillet for best results. Heat it on medium until warm. Stir gently to keep the texture nice. You can also use a microwave, but be cautious. Heat in short bursts, stirring in between. Make sure to check that it’s hot all the way through. Always ensure leftovers reach at least 165°F for safety. Yes, you can use frozen vegetables in your stir-fry. They are quick and easy to use. Frozen veggies are picked at peak ripeness, so they retain nutrients. However, they may release extra water during cooking. This can make your stir-fry soggy. To fix this, cook frozen vegetables a bit longer to help them dry out. To make this recipe gluten-free, swap soy sauce for tamari. Tamari has a similar taste without gluten. Also, check your cornstarch to ensure it's gluten-free. Most brands are, but it's good to confirm. You can also use coconut aminos for a different flavor. Pressing tofu is easy and helps remove water. Here’s how: 1. Take the block of tofu and drain the water. 2. Wrap it in a clean kitchen towel or paper towels. 3. Place a plate on top and add a weight, like a can. 4. Let it sit for about 15 minutes. This will help you get crispy tofu in the stir-fry. You can adjust the spice in your stir-fry easily. Here are some ideas: - Add red pepper flakes for a bit of heat. - Mix in sriracha or chili sauce for extra flavor. - Use fresh sliced chili peppers if you like it hot. Start small and taste as you go to find your perfect heat level. This blog post explored how to make a delicious stir-fry. We covered key ingredients, precise measurements, and nutritional benefits. You learned step-by-step instructions for perfecting your tofu and vegetables. Plus, I shared tips to enhance flavor and various options for personalization. Stir-fry is versatile and can fit many diets. With practice, you’ll create dishes that delight. Enjoy experimenting with flavors, methods, and ingredients to make this dish your own. Happy cooking!

Vegetable Stir-Fry with Tofu Flavorful and Simple Recipe

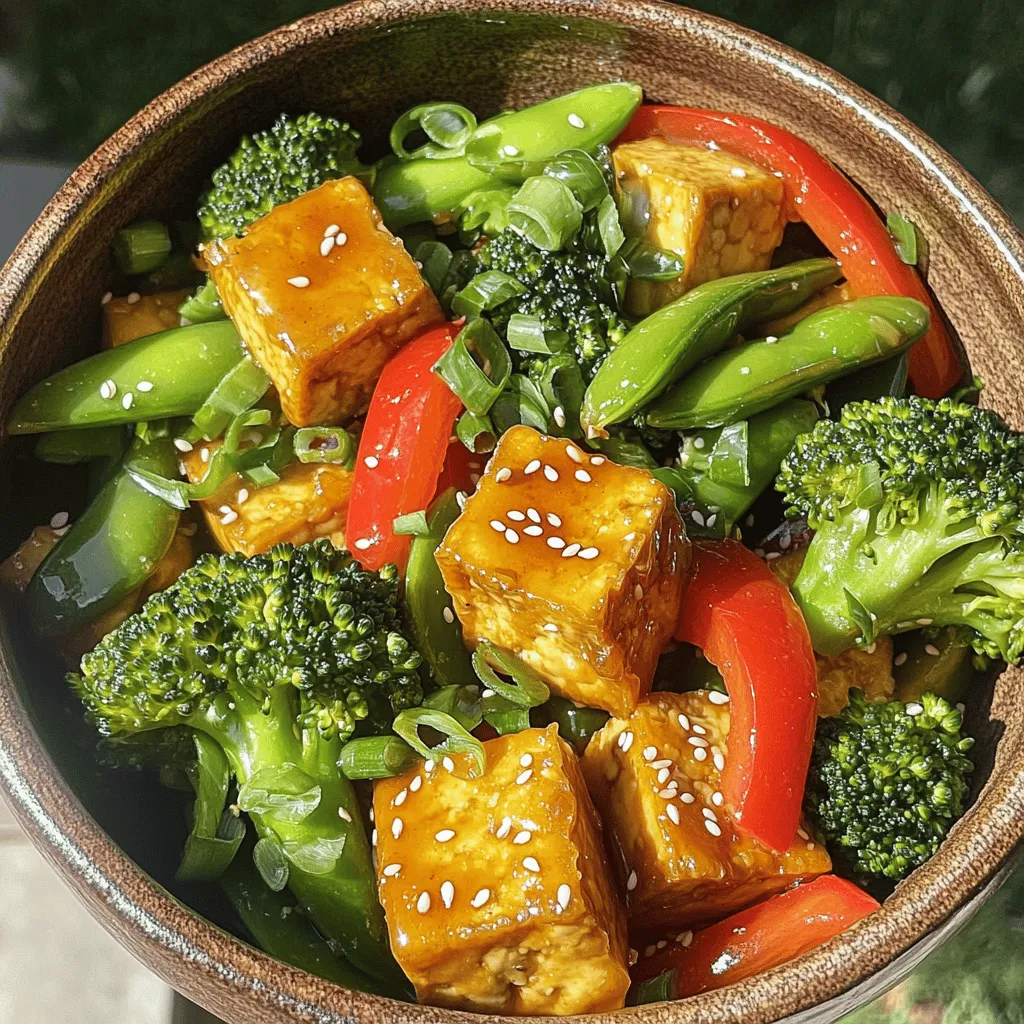
Looking for a quick and tasty meal? This Vegetable Stir-Fry with Tofu is just what you need! Packed with fresh

To make savory sweet potato hash, gather these ingredients: - 2 large sweet potatoes, peeled and diced - 1 red bell pepper, diced - 1 green bell pepper, diced - 1 small red onion, finely chopped - 3 cloves garlic, minced - 2 tablespoons olive oil - 1 teaspoon smoked paprika - 1/2 teaspoon cayenne pepper (optional, for heat) - Salt and pepper to taste - 1 cup cooked black beans (rinsed and drained) - 4 large eggs (optional) - Fresh cilantro or parsley, for garnish You can make this dish your own with these substitutions: - Sweet Potatoes: Try butternut squash or regular potatoes for a different flavor. - Beans: Use pinto beans or chickpeas instead of black beans. - Spices: Swap smoked paprika with cumin or chili powder for a unique twist. Each serving of savory sweet potato hash contains: - Calories: About 320 - Protein: 10 grams - Fat: 14 grams - Carbohydrates: 40 grams - Fiber: 8 grams This dish packs nutrients and flavor, making it a great breakfast choice. For the full recipe, check out the detailed instructions on how to prepare this tasty meal. First, gather your ingredients. You need two large sweet potatoes, peeled and diced. Heat one tablespoon of olive oil in a large skillet over medium heat. Add the sweet potatoes to the pan. Season them with salt, pepper, smoked paprika, and cayenne pepper if you like some heat. Cook the sweet potatoes for about 10 to 15 minutes. Stir them occasionally. You want them to soften and become slightly crispy on the edges. When the sweet potatoes start to soften, it’s time to add the colorful vegetables. Toss in one diced red bell pepper, one diced green bell pepper, and one small finely chopped red onion. Sauté this mix for about 5 to 7 minutes. The peppers should be tender, and the onions should look translucent. This step adds a lovely crunch and flavor. Next, stir in three minced garlic cloves and one cup of cooked black beans, which you should rinse and drain first. Cook this mixture for another 2 to 3 minutes. The garlic will become fragrant, and the beans will heat through. If you want to add eggs for extra protein, create small wells in the hash and crack a large egg into each well. Cover the skillet and cook on low heat for about 4 to 6 minutes. The eggs should be sunny side up or to your liking. Finally, remove the skillet from heat and garnish the hash with fresh cilantro or parsley. Enjoy your flavorful breakfast delight! For the full recipe, check the previous section. To get crispy edges on sweet potatoes, start with dry cubes. After peeling, pat them with a towel. Heat your skillet well before adding oil. Use enough oil to coat the bottom. Cook the sweet potatoes in a single layer. Avoid crowding the pan; this keeps them from steaming. Flip them after a few minutes to ensure even browning. If they are not crispy yet, give them more time. Patience is key for that perfect crunch! To make your hash even tastier, consider adding spices and herbs. Cumin and chili powder bring warmth and depth. Fresh thyme or rosemary adds a nice herbal touch. You can also try adding a splash of lime juice for brightness. If you love heat, add more cayenne or some diced jalapeños. Remember to taste as you go; adjust the flavors to your liking! Cooking times can change based on your stovetop. Gas stoves may cook faster than electric ones. If you want softer sweet potatoes, cook them longer. For a firmer texture, reduce cooking time. You might also want to change the heat level. If things seem to cook too fast, lower the heat. If they take too long, turn it up a bit. Finding the right balance is important for your perfect hash. {{image_2}} You can easily boost the protein in your savory sweet potato hash. Try adding cooked sausage, like chorizo or turkey sausage. Simply crumble it into the pan while the sweet potatoes cook. You could also use quinoa for a healthy twist. Quinoa adds a nice nutty flavor and a good protein boost. Just cook it separately and mix it in with the beans. This recipe is very easy to adapt for vegetarians or vegans. For a vegetarian option, skip the eggs and sausage. You can add extra veggies instead, like spinach or mushrooms. For a vegan version, replace the eggs with tofu. Crumble firm tofu into the hash and cook until golden. It soaks up flavors well and adds protein. Using seasonal ingredients can make your hash even better. In spring, add asparagus or peas for a fresh taste. In summer, zucchini and corn can add a burst of sweetness. In fall, consider adding diced butternut squash or kale. These swaps not only change the flavor but also keep your meals interesting. Experiment with what's fresh at your local market to find new favorites. To keep your savory sweet potato hash fresh, let it cool first. Then, place it in an airtight container. You can refrigerate it for up to four days. For longer storage, freeze it in a sealed freezer bag. Make sure to remove as much air as possible to prevent freezer burn. To reheat the hash, the stovetop works best. Heat a skillet over medium heat. Add a splash of olive oil to keep it moist. Stir the hash until it's heated through. You can also use a microwave. Place the hash in a microwave-safe dish, cover it, and heat in short bursts. Stir in between to ensure even heating. In the fridge, your savory sweet potato hash lasts around four days. If you freeze it, you can enjoy it for up to three months. Just remember to label your containers with dates. This helps you keep track of freshness. For the best taste, eat it sooner rather than later. Yes, you can make Savory Sweet Potato Hash ahead of time. You can prepare the hash and store it in the fridge for up to three days. Just let it cool completely before putting it in a container. When you're ready to eat, simply reheat it in a skillet or microwave until hot. If you like, you can also cook the eggs fresh each time. This keeps them tasty and bright. Savory Sweet Potato Hash pairs well with many sides. You can serve it with fresh fruit for a light touch. Avocado slices add creaminess and extra flavor. A dollop of sour cream or yogurt can enhance the dish. You might also enjoy it with toast, or a side of crispy bacon for added crunch. Yes, you can make Savory Sweet Potato Hash in the oven. Preheat your oven to 400°F (200°C). Toss the sweet potatoes, peppers, and onions with olive oil and spices on a baking sheet. Bake for 25-30 minutes, stirring halfway through. For the eggs, create small wells in the hash and crack an egg into each well. Bake for another 5-7 minutes or until the eggs are cooked as you like. This method gives a nice roasted flavor. For the full recipe, check out the details above and enjoy! This blog post covered the delicious and healthy Savory Sweet Potato Hash. We discussed the key ingredients, how to cook them, and tips for perfect texture. I shared substitutions, nutritional info, and variations to suit any diet. You can store leftovers well and easily reheat them. Remember, cooking is fun, and this dish is versatile. Don’t hesitate to try new flavors or ingredients. Enjoy your cooking journey, and make the hash that fits your taste best!

Savory Sweet Potato Hash Flavorful Breakfast Delight

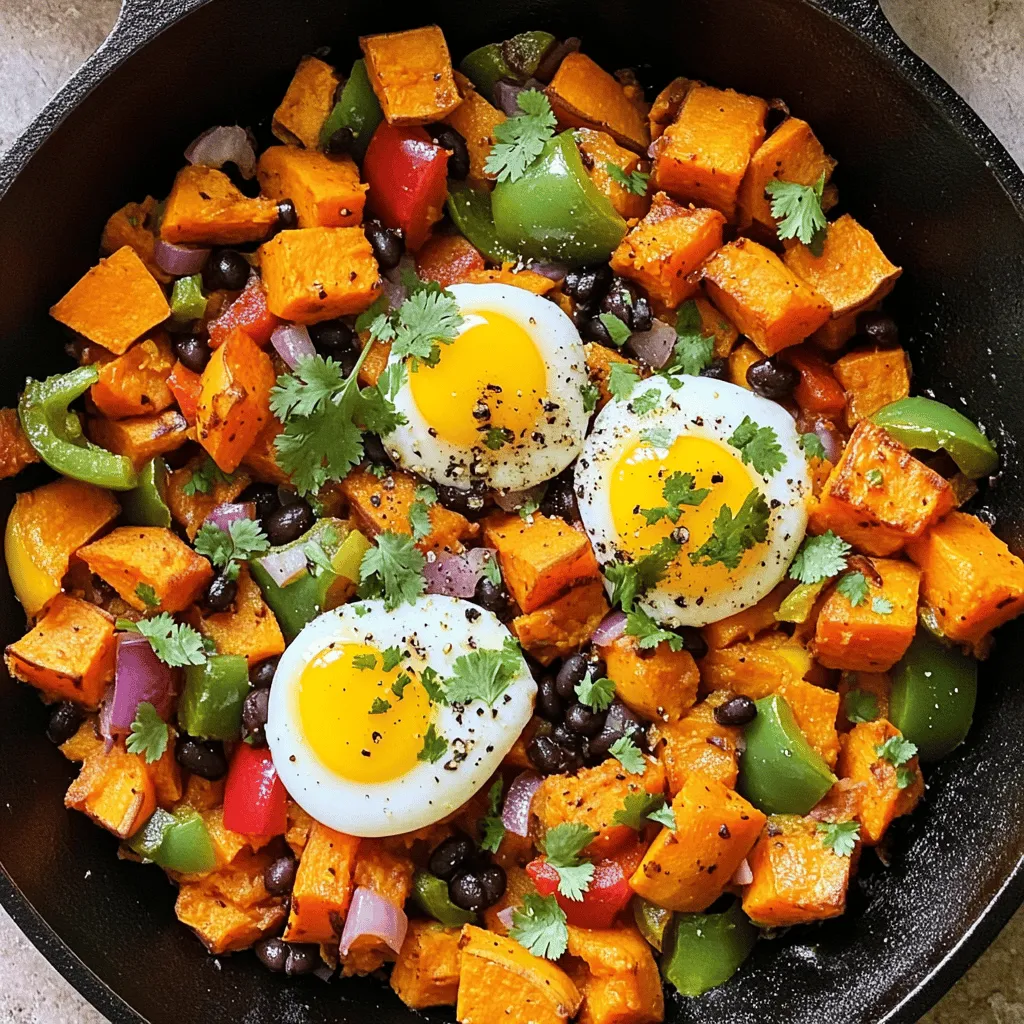
Start your day on a delicious note with my Savory Sweet Potato Hash! This flavorful breakfast delight is packed with

To make spicy shrimp tacos with mango salsa, gather these ingredients: - 1 pound shrimp, peeled and deveined - 2 tablespoons olive oil - 2 teaspoons chili powder - 1 teaspoon cumin - 1/2 teaspoon garlic powder - 1/2 teaspoon paprika - Salt and pepper to taste - 8 small corn tortillas - 1 ripe mango, diced - 1/2 red onion, finely chopped - 1 jalapeño, minced - 1/4 cup cilantro, chopped - 2 tablespoons lime juice - Sliced radishes and lime wedges for garnish Using fresh ingredients is key to great flavor. Choose ripe mangoes, as they add sweetness. Fresh shrimp gives the best taste and texture. Look for shrimp that smells like the ocean, not fishy. Fresh cilantro brightens the dish. It adds a nice herbal note. Use fresh lime juice instead of bottled for a zesty kick. You may already have some pantry staples needed for this recipe. Olive oil is great for cooking shrimp. Chili powder and cumin are crucial for spice. Garlic powder and paprika give depth. Make sure to have salt and pepper on hand to season. These basics enhance the overall taste of your tacos. For a twist, consider adding some extra spices you enjoy. For the full recipe, check out the details above. To start, gather your ingredients. You need one pound of shrimp, olive oil, and spices. The spices are chili powder, cumin, garlic powder, and paprika. I like to add salt and pepper to taste. In a bowl, mix the shrimp with two tablespoons of olive oil. Add two teaspoons of chili powder, one teaspoon of cumin, half a teaspoon of garlic powder, and half a teaspoon of paprika. Make sure each shrimp gets coated with the spices. Now, heat a skillet over medium-high heat. Once it's hot, add the seasoned shrimp. Cook for two to three minutes on each side. The shrimp will turn pink when they are done. Remove the shrimp from heat and set them aside. While the shrimp cooks, let’s make the mango salsa. You will need one ripe mango, half a red onion, one jalapeño, cilantro, and lime juice. Start by dicing the mango. Then, finely chop half a red onion and mince one jalapeño. In a bowl, combine the diced mango, red onion, jalapeño, and a quarter cup of chopped cilantro. Add two tablespoons of lime juice to the mix. Stir gently to combine everything. Season with a pinch of salt for flavor. Next, warm the corn tortillas. Use a dry skillet and heat each tortilla for about 30 seconds on each side. This makes them soft and pliable. Now it’s time to assemble the tacos! Place a few shrimp on each tortilla. Top with a generous spoonful of mango salsa. For an extra touch, garnish with sliced radishes and lime wedges. For the full recipe, you can refer to the section above. Enjoy your delicious spicy shrimp tacos with mango salsa! To cook shrimp just right, start with fresh shrimp. They should be pink and firm. I like to marinate them for at least 15 minutes. This lets the flavors blend well. Heat your skillet to medium-high. Cook the shrimp for 2-3 minutes on each side. They are done when they turn pink and opaque. Overcooking makes shrimp rubbery. So, watch closely! You can adjust the spice level to fit your taste. For mild shrimp, skip the jalapeño in the salsa. If you want more heat, add extra chili powder or fresh chopped peppers. I often use a pinch of cayenne for a spicy kick. Taste your mix before cooking. This helps you find the right balance. Remember, it’s all about what you enjoy! Warm and soft tortillas make your tacos shine. Use corn tortillas for the best flavor. Heat a skillet on medium. Cook each tortilla for about 30 seconds on each side. This warms them up and makes them pliable. If you like, wrap them in a clean kitchen towel to keep them warm. This step helps avoid cracks when you fill them. For the full recipe, check out the detailed steps above! {{image_2}} You can switch up shrimp for other proteins. Chicken is a great choice. It cooks well and takes on flavors nicely. Fish like tilapia or cod works too. Just season them the same way. If you want a plant-based option, try using tofu. Firm tofu soaks up the spices well. Mango salsa shines, but you can explore more. Pineapple salsa adds a sweet twist. Mix diced pineapple, red onion, and cilantro for a bright blend. A classic tomato salsa works too. Use fresh tomatoes, onion, and lime juice. If you like heat, try a spicy peach salsa. It pairs well and adds a kick. Toppings can enhance your tacos. Try adding shredded cabbage for crunch. It gives a refreshing bite. You can also use avocado slices for creaminess. A drizzle of crema or sour cream adds richness. Don’t forget lime wedges for extra zing. Fresh herbs like cilantro or parsley brighten each bite. For crunch, sprinkle some crushed tortilla chips on top. For more ideas, check out the Full Recipe. You can store leftover shrimp in an airtight container. Make sure it is cool before sealing. Place it in the fridge. Use the shrimp within two days for best taste. If you want to keep it longer, freeze the shrimp. Wrap it tightly in plastic wrap and then in foil. This method helps to keep it fresh for up to three months. To keep your mango salsa fresh, store it in a sealed container. Place it in the fridge right after making it. Use it within three days for the best flavor. If you want to keep it longer, avoid adding lime juice until you are ready to use it. This helps to prevent browning and keeps the salsa vibrant. To reheat your tacos, use a skillet or oven. Place the tacos in a dry skillet over medium heat. Heat for about one minute on each side. If using an oven, wrap them in foil and heat at 350°F for about 10 minutes. This keeps the tortillas soft and the shrimp warm. Avoid using a microwave, as it can make the tortillas soggy. The best shrimp for these tacos is large, fresh shrimp. Look for shrimp labeled "jumbo" or "extra-large." These sizes hold up well during cooking and pack great flavor. You can use raw, peeled, and deveined shrimp for easy prep. If you choose frozen shrimp, make sure to thaw them completely before cooking. This ensures even cooking and the best taste. Yes, you can prepare some parts ahead. You can cook the shrimp and make the mango salsa a few hours in advance. Store them separately in the fridge. Just warm the tortillas before serving. This way, your tacos stay fresh and tasty. Avoid assembling the tacos too early, as the tortillas may get soggy. To make these tacos gluten-free, use corn tortillas. They are naturally gluten-free and perfect for any filling. Always check labels for any added ingredients that may contain gluten. When seasoning the shrimp, use gluten-free spices and sauces. This keeps your tacos safe for anyone with gluten sensitivities. Many side dishes go well with shrimp tacos. Consider serving a fresh salad or black beans for added protein. Cilantro lime rice is also a nice touch. For a crunchy side, try tortilla chips with guacamole or salsa. These sides balance the flavors in the tacos and make your meal complete. This blog post covered everything you need for shrimp tacos. We talked about fresh ingredients, making mango salsa, and preparing shrimp. I shared tips for cooking shrimp just right and customizing spice levels. You can also explore variations with different proteins and salsas. Use leftover shrimp wisely with proper storage tips. No matter how you serve these tacos, they will impress. Enjoy the flavors, and don’t hesitate to get creative! Your perfect shrimp taco adventure starts now.

Spicy Shrimp Tacos with Mango Salsa Delight

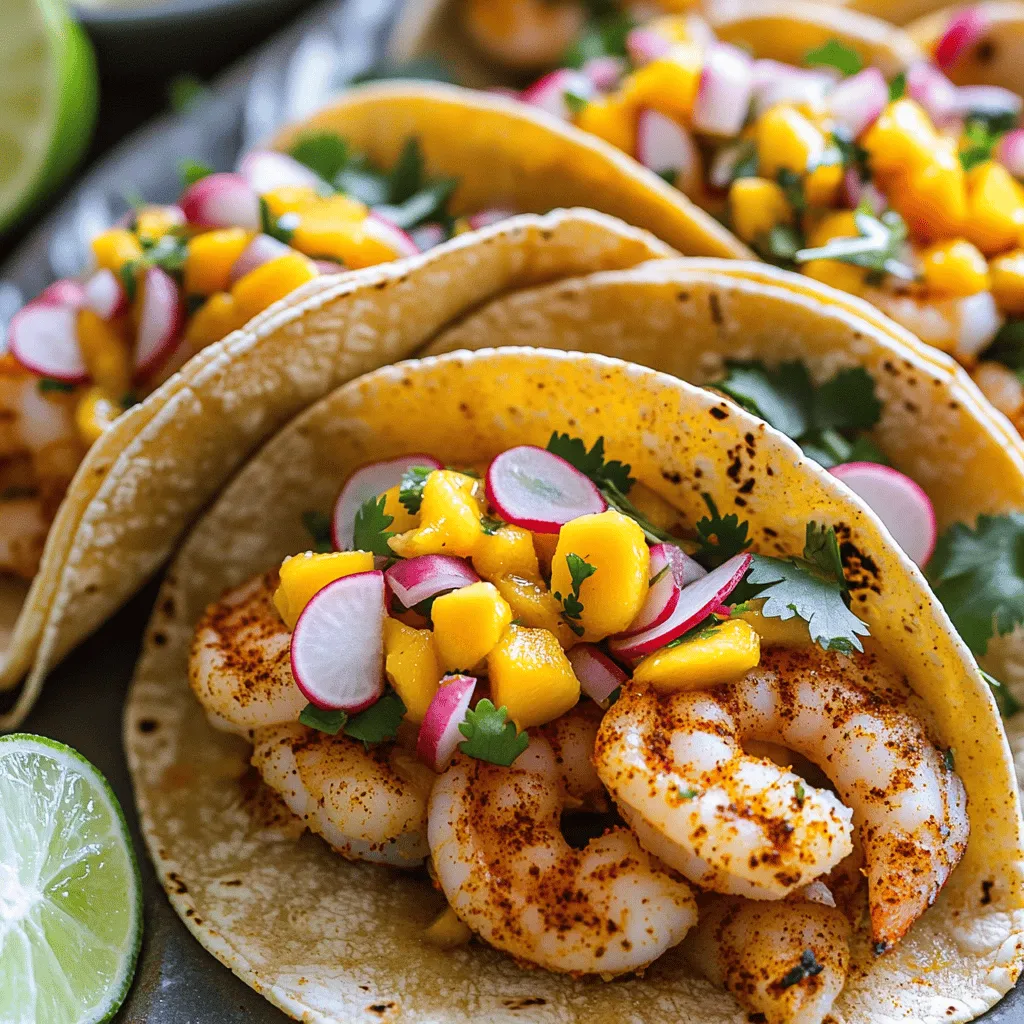
Get ready to spice up your dinner with my Spicy Shrimp Tacos with Mango Salsa! These tacos are bold, bright,

- 1 pound boneless, skinless chicken breasts - 1 red bell pepper, sliced into strips - 1 green bell pepper, sliced into strips - 1 yellow onion, sliced into thin wedges - 3 tablespoons olive oil - 2 teaspoons chili powder - 1 teaspoon paprika - 1 teaspoon cumin - 1/2 teaspoon garlic powder - 1/2 teaspoon onion powder - Salt and pepper to taste For this dish, you need just a few key items. First, choose one pound of boneless, skinless chicken breasts. The chicken will be the main focus. You can slice it into thin strips for even cooking. Next, grab assorted bell peppers: one red, one green, and one yellow. These add color and flavor. Also, include one yellow onion. Slice it into thin wedges to mix well with the chicken and peppers. You’ll need three tablespoons of olive oil to help with cooking and flavor. For spices, use two teaspoons of chili powder, one teaspoon of paprika, and one teaspoon of cumin. These will give your fajitas a great kick. Add half a teaspoon each of garlic powder and onion powder for extra depth. Finally, don’t forget salt and pepper to taste. - Fresh cilantro, chopped (for garnish) - Lime wedges (for serving) - 8 small flour or corn tortillas - Suggested sides (rice, beans, etc.) For garnishing, fresh cilantro adds a nice touch. It brightens up the dish. Lime wedges are perfect for squeezing over the fajitas before eating. They add a burst of freshness. You can serve the fajitas in small flour or corn tortillas. This makes it easy to eat. Also, consider suggested sides like rice or beans to round out your meal. They complement the fajitas well and make it filling. For the full recipe, you can check the details and instructions to ensure a perfect meal every time! 1. Preheat your oven to 400°F (200°C). 2. Line a large baking sheet with parchment paper. This makes cleanup easy. 3. In a large mixing bowl, combine the sliced chicken, bell peppers, and onion. 4. Drizzle the olive oil over the mixture. 5. Add chili powder, paprika, cumin, garlic powder, onion powder, salt, and pepper. 6. Toss everything together until well coated in spices. 1. Spread the chicken and vegetable mixture evenly on the prepared baking sheet. 2. Make sure not to overcrowd the pan so everything cooks well. 3. Bake in the preheated oven for 20-25 minutes. 4. Check when the chicken is golden and cooked through. 5. Stir halfway through cooking for even roasting. 1. Once done, take the pan out of the oven. 2. Let the fajitas rest for a couple of minutes. 3. Serve the mixture on warm tortillas. 4. Garnish with fresh cilantro and a squeeze of lime juice for added flavor. To amp up the flavor in your Sheet Pan Chicken Fajitas, try adding more spices. You can use cayenne pepper for heat or smoked paprika for depth. A splash of lime juice or vinegar can brighten the dish. Mix in a marinade of yogurt and spices to tenderize the chicken. This will add moisture and flavor. Using the right cooking techniques ensures great results. First, do not overcrowd the pan. If you pile on too many ingredients, they will steam instead of roast. This will make them soggy. Spread the chicken and veggies in a single layer. Next, stir the mixture halfway through cooking. This helps everything cook evenly. By moving the food around, you ensure that each piece gets golden and tender. Following these tips will give you the best fajitas every time. For the Full Recipe, check the earlier section. {{image_2}} You can swap chicken for beef, shrimp, or tofu. Each choice offers a new twist. If you use beef, choose sirloin or flank steak. Slice it thinly like the chicken. For shrimp, use large, peeled shrimp. They cook fast, so cut the time to about 10-12 minutes. Tofu is a great plant-based option. Use firm tofu, drain, and press it to remove extra moisture. Cut it into strips and bake for 20-25 minutes. Adjust cooking times based on your protein choice to ensure everything cooks just right. Try adding more veggies to boost flavor and nutrition. Zucchini and mushrooms work well in this dish. Slice zucchini into half-moons and mushrooms into thick slices. They both add nice texture. Toss them in with your chicken and peppers. If you want to spice it up, add jalapeños or poblano peppers for heat. Adjust the spice level to fit your taste. You can also add corn for sweetness or black beans for extra protein. This way, you can create your own unique fajita mix. To store leftovers in the fridge, place fajitas in an airtight container. This keeps them fresh and tasty. You can eat the leftovers within three days. To reheat, simply warm them in the microwave. For best taste, avoid reheating more than once. Best practices for keeping fajitas fresh include separating the chicken from the veggies. This helps prevent sogginess. Store tortillas in a separate bag to keep them soft. If you have extra lime, keep that in a small container too. To freeze chicken fajitas, first cool them completely. Place the chicken and veggies in a freezer-safe bag. Remove as much air as possible before sealing. You can freeze them for up to three months. When you’re ready to eat, thaw them overnight in the fridge. For reheating, place the fajitas in a skillet over medium heat. Add a splash of water to keep them moist. Cook until heated through. You can also use the microwave if you're in a hurry. Just cover the dish with a lid to trap steam. It takes about 30 minutes to cook Sheet Pan Chicken Fajitas. You will spend 15 minutes prepping. The cooking time is around 20 to 25 minutes. Make sure the chicken is fully cooked and the veggies are tender. Yes, you can make these fajitas in advance. Prepare the chicken and veggies a day before. Store them in the fridge in a sealed container. When you're ready to eat, just bake them. They reheat well in the oven. Serve these fajitas on a colorful platter. Keep the tortillas warm in a towel or a warmer. You can add lime wedges for a fresh taste. Pair them with sides like rice or beans for a full meal. You can find the Full Recipe for Sheet Pan Chicken Fajitas with detailed instructions. This will help you get all the steps and ingredients right! You now have a full guide to make delicious Sheet Pan Chicken Fajitas. From selecting the best ingredients to smart cooking tips, each step is clear. Remember, you can customize this dish with different proteins and veggies. Leftovers are easy to store and reheat. Don’t shy away from adding spices to enhance flavor. These fajitas are fun to make and serve. Enjoy cooking and sharing this tasty meal with family and friends. You’ll love the results!

Sheet Pan Chicken Fajitas Flavorful Easy Dinner Recipe

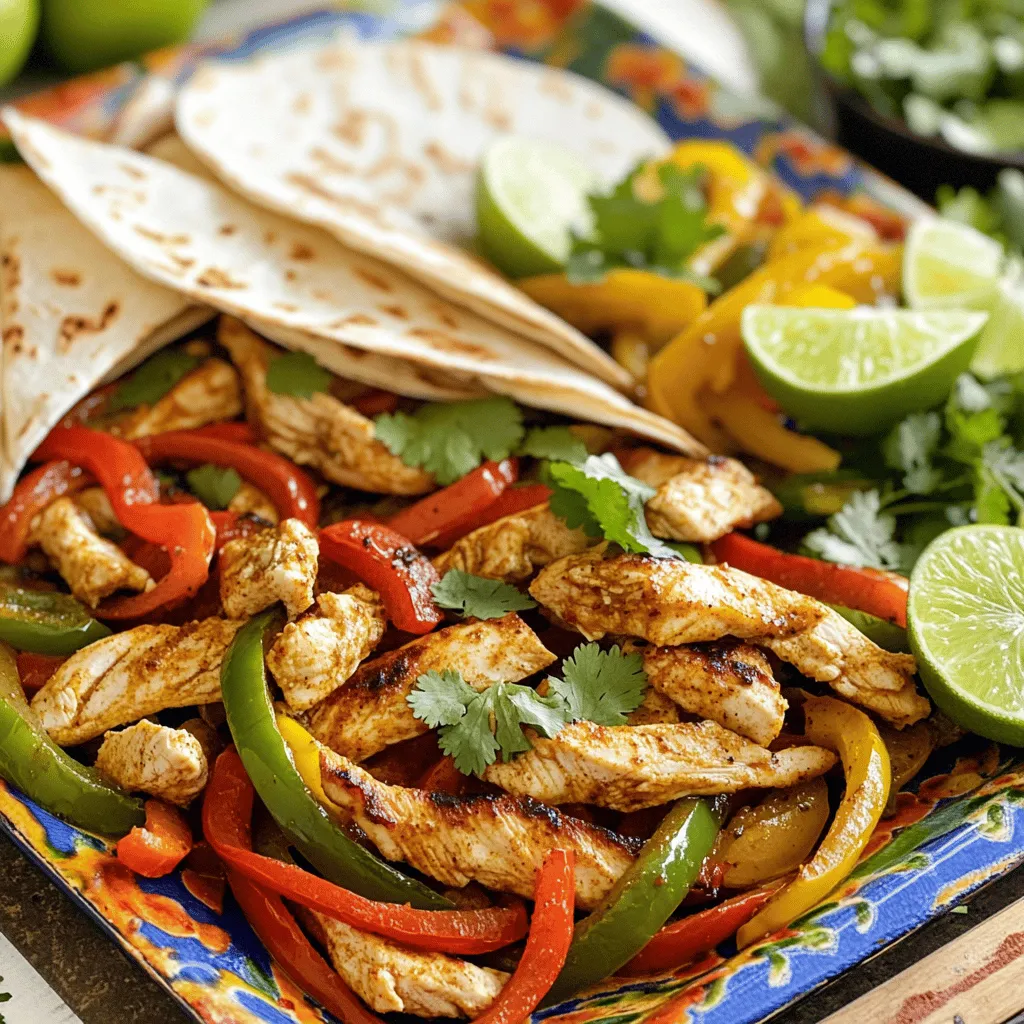
Are you ready for a quick and tasty dinner? My Sheet Pan Chicken Fajitas are your answer! This easy recipe

To make honey garlic roasted carrots, gather these simple ingredients: - Baby carrots or chopped regular carrots - Honey - Olive oil - Garlic - Fresh thyme leaves or dried thyme - Salt - Black pepper - Optional garnish Using fresh and high-quality ingredients is key. Baby carrots are sweet and tender. If you use regular carrots, cut them to be similar in size for even cooking. Honey adds a natural sweetness. Olive oil helps the carrots brown nicely. Garlic brings a rich flavor that pairs well with the honey. Thyme adds a lovely herbal note. Salt and pepper enhance the taste, making each bite special. For an extra touch, consider adding chopped fresh parsley on top. This not only adds color but also gives a fresh taste. All these ingredients work together to create a dish that is both easy and delicious. You can find the full recipe for this delightful side dish in the recipe section. First, preheat your oven to 400°F (200°C). This step helps the carrots cook evenly. Next, in a mixing bowl, whisk together the honey, olive oil, minced garlic, fresh thyme, salt, and black pepper. Mix until everything is combined well. Now, add the baby carrots to the bowl. Toss them in the honey garlic mixture until they are fully coated. This coating gives them great flavor. Spread the coated carrots out in a single layer on a baking sheet lined with parchment paper. This makes cleanup easy. Roast the carrots in the oven for 25-30 minutes. Stir them halfway through. This step helps them cook evenly and get that nice caramel color. Once the carrots are done roasting, take them out of the oven. Let them cool for a few minutes. For a pop of color and extra flavor, you can garnish with chopped fresh parsley. This makes the dish even more inviting. Enjoy these honey garlic roasted carrots as a tasty side! For the complete guide, check the Full Recipe. To make honey garlic roasted carrots shine, balance the flavors well. The sweet honey and savory garlic should blend perfectly. You can cut your carrots into uniform pieces. This helps them cook evenly. Aim for about the same size—around one inch long. This way, they all roast at the same time. Feel free to get creative with herbs and spices. Adding a pinch of cumin or paprika can give a nice twist. Fresh herbs like rosemary or parsley also work well. If you want to try different carrots, look for purple or orange varieties. They add vibrant color and flavor to your dish. How you serve your dish matters. Arrange the roasted carrots on a colorful plate. You can sprinkle them with fresh parsley for a bright touch. A drizzle of balsamic reduction adds a tangy flavor and a fancy look. This makes your side dish pop at any meal. {{image_2}} You can change the sweetener in this recipe. Maple syrup or agave works well. Each brings a unique flavor. If you want a richer taste, try using brown sugar. It adds a nice depth. For the oil, olive oil is great, but you can switch it up. Use avocado oil for a mild flavor. It has a high smoke point, perfect for roasting. Grapeseed oil is another option. It adds a light taste without overpowering the carrots. Want to spice things up? Add some cumin or paprika to the honey garlic mix. Both give a warm, earthy flavor. You can also try adding chili powder for some heat. Citrus flavors brighten the dish too. A splash of lemon or orange juice can enhance the sweetness. Zest from these fruits adds a nice aroma. It makes your dish smell amazing! These honey garlic roasted carrots pair well with proteins. Try them alongside chicken or fish. They also work great in salads. Add them to a green salad for a sweet crunch. If you meal prep, these carrots are a fantastic side. They hold up well in the fridge. Pack them with grains or roasted veggies for a hearty lunch. You can find the full recipe to make this delicious side dish. After you make honey garlic roasted carrots, let them cool. Place them in an airtight container. This keeps them fresh. Store them in the fridge for up to 4 days. If you want to keep them longer, freezing is a great option. You can reheat roasted carrots in two ways: the oven or the microwave. For the oven, preheat it to 350°F (175°C). Spread the carrots on a baking sheet. Heat for about 10 minutes. This keeps them crisp. For the microwave, place them in a bowl. Cover with a damp paper towel. Heat for 1-2 minutes. Check if they are warm enough. This method may make them a bit soft. To freeze roasted carrots, let them cool completely. Place them in a freezer-safe bag or container. Remove as much air as possible. They can last for up to 3 months. When you're ready to eat them, thaw in the fridge overnight. Reheat using the oven or microwave for the best taste. Enjoy your tasty carrots again! Roast carrots at 400°F (200°C). This high heat helps them get sweet and tender. It also caramelizes the sugars, giving them a nice golden color. Yes, you can use regular carrots. Just chop them into similar sizes as baby carrots. This helps them cook evenly. Baby carrots are great, but regular carrots add a fresh taste and texture. To make this dish vegan, replace honey with maple syrup or agave nectar. Both options add sweetness and work well with garlic. You still get that yummy flavor without animal products. Carrots are done when they are tender and can be pierced with a fork. They should also be slightly caramelized on the outside. A good roasting time is about 25-30 minutes. Yes, you can make the honey garlic mix ahead of time. Store it in the fridge for up to a week. This way, you save time when you're ready to cook. Just give it a stir before using it again. For the full recipe, check out the details above. Roasting carrots is easy and delicious. We covered the key ingredients, from honey to garlic. The steps to prepare and roast carrots ensure perfect flavor. Remember to stir the carrots halfway for even cooking. Enjoy adding your twist with spices or different oils. Store leftovers well, and you can even freeze them. Follow these tips for tasty carrots every time. Experiment, share, and enjoy!

Honey Garlic Roasted Carrots Easy Flavorful Side Dish

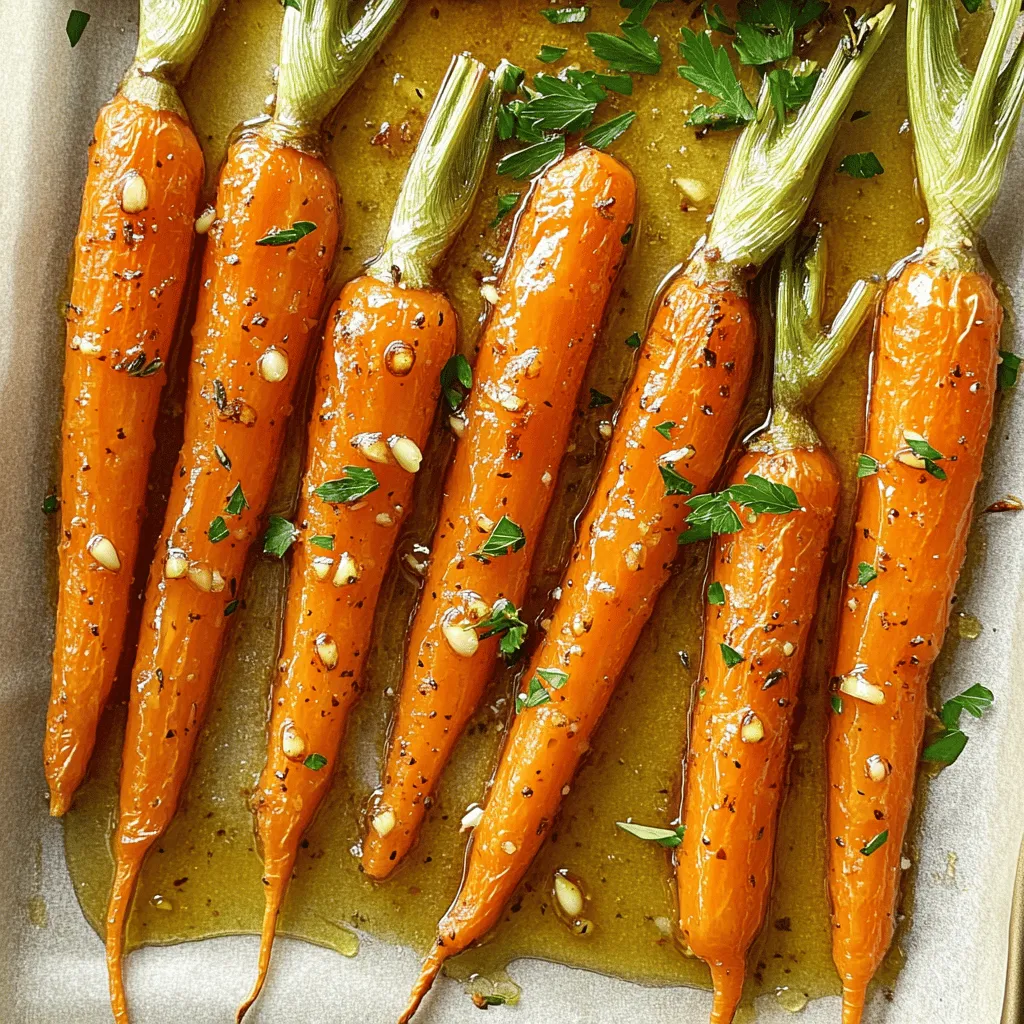
Looking for a simple yet delicious side dish? Honey Garlic Roasted Carrots are the perfect choice! They combine sweet honey

To create your savory avocado toast with poached egg, gather these key ingredients: - Ripe avocados - Whole grain or sourdough bread - Large eggs - White vinegar - Olive oil - Garlic powder - Salt and pepper - Red pepper flakes - Fresh herbs - Lemon wedges These ingredients make the perfect base for a delicious meal. The ripe avocados provide creaminess, while the eggs add protein and richness. Whole grain or sourdough bread gives the toast a hearty texture. White vinegar is essential for poaching the eggs, helping them hold their shape. Olive oil and garlic powder enhance the flavor of the avocado mix. Season with salt and pepper for a balanced taste. Red pepper flakes offer a spicy kick, and fresh herbs add a pop of color and freshness. Lastly, lemon wedges brighten the dish with a zesty finish. For the full recipe, check out the detailed instructions to bring this dish to life! To achieve the perfect toast, start with good bread. I recommend using whole grain or sourdough. Both types give great flavor and texture. Toast the bread until it is golden brown and crispy. This step adds a nice crunch to your dish. For poaching eggs, prepare your water with a gentle simmer. Add one tablespoon of white vinegar. This helps the eggs hold their shape. Crack each egg into a small bowl first. Create a whirlpool in the simmering water with a spoon. Carefully slide each egg into the center. Poach the eggs for about 3-4 minutes for runny yolks. If you like firmer yolks, poach them longer. Next, scoop out the flesh of the ripe avocados into a bowl. Mash them with a fork until creamy but still chunky. This gives your toast a nice texture. Add one tablespoon of olive oil and one teaspoon of garlic powder. Season with salt and pepper to taste. You can also add a squeeze of lemon for extra flavor. Now it's time to assemble your avocado toast. Spread a generous layer of the avocado mixture on each slice of toasted bread. Carefully place a poached egg on top of each one. For garnish, sprinkle red pepper flakes over each egg. Fresh herbs like cilantro or basil also add a bright touch. Serve with lemon wedges on the side for a zesty finish. For the full recipe, check out the details above. Enjoy your delicious avocado toast! To get the perfect poached egg, timing is key. Cook the egg for about 3 to 4 minutes for a runny yolk. If you like it firmer, let it sit a minute longer. Use a timer to help you keep track. Common poaching problems include eggs spreading in water or not cooking evenly. To fix this, use fresh eggs. Fresh eggs hold their shape better. Adding a little vinegar to the water also helps the egg whites stay together. To make your avocado toast even better, try adding seasonings. A sprinkle of garlic powder or a dash of paprika can add depth. For a zestier kick, consider using lemon juice or hot sauce. Different avocados can change the taste too. Hass avocados are creamy and rich. If you find them too buttery, try Fuerte avocados for a milder flavor. Bread choice matters too. Whole grain adds a nutty taste, while sourdough gives a nice tang. Plating is important for making your toast look appealing. Spread avocado in a smooth layer on the toast. Place the poached egg right in the center. This creates a focal point for your dish. For serving, consider adding a small salad on the side. You can also serve it with lemon wedges for a fresh touch. This adds color and makes the meal feel special. Check out the Full Recipe for more ideas on how to create this delightful dish! {{image_2}} If you want a vegan avocado toast, skip the poached egg. You can use a simple tofu scramble instead. Crumble firm tofu and sauté it with turmeric, salt, and pepper. This gives a nice texture and flavor. You still get a protein boost without the egg. Adding extra toppings makes your avocado toast more fun. You can incorporate proteins like: - Smoked salmon - Crispy bacon These give a savory touch. For a fresh crunch, add vegetables like: - Sliced tomatoes - Thin radish rounds These toppings balance flavors and add vibrant colors to your toast. You can explore different flavors from around the world. For a Mexican twist, add: - Chopped jalapeños - A sprinkle of cotija cheese For a Mediterranean vibe, try: - Feta cheese - Drizzled olive oil - Diced cucumbers You can also adjust toppings based on the season. In summer, fresh herbs like basil shine. In fall, roasted pumpkin seeds add warmth. One recipe can lead to endless variations. Get creative and make it your own! For the full recipe, refer to the earlier instructions. To keep your avocado toast fresh, store the components separately. Toasted bread stays crispy in an airtight container. For the avocado, place it in a bowl and cover with plastic wrap. Press the wrap directly onto the avocado to minimize air exposure. This helps slow browning. Use it within one day for the best quality. If you have leftover avocado toast, refresh it in the oven. Preheat your oven to 350°F (175°C). Place the toast on a baking sheet and warm for about 5-7 minutes. This will revive the crunch. Avoid microwaving, as it can make the toast soggy. Can you freeze avocados? Yes, you can! However, it's best to mash them first. Add a little lemon or lime juice to prevent browning. Store the mash in an airtight container. It can last up to 3 months in the freezer. When ready to use, thaw it in the fridge overnight. To make the best poached egg, use fresh eggs. Fresh eggs hold their shape better. Add one tablespoon of white vinegar to the water. This helps the egg whites firm up. Bring the water to a gentle simmer, not a boil. Create a gentle whirlpool in the water. This helps the egg stay together. Crack the egg into a small bowl first. Then, slide it into the whirlpool. Poach for about 3 to 4 minutes. This gives you a runny yolk. If you want a firmer yolk, cook it a bit longer. You can prepare some parts of avocado toast in advance. Toast the bread ahead of time. Store it in an airtight container. It stays crispy for a short time. You can also mash the avocados. Add lemon juice to prevent browning. Store the mix in the fridge for a day. When ready to eat, assemble it fresh. This keeps everything tasting great. Healthy toppings can make your avocado toast even better. Try adding sliced tomatoes for freshness. Radishes add a nice crunch. You can also use spinach or arugula for greens. Add a sprinkle of seeds for extra nutrition. Chia seeds or sesame seeds work well. For protein, consider adding a slice of smoked salmon or a poached egg. These toppings boost both flavor and health. Yes, avocado toast with poached egg is perfect for breakfast. It is quick to make, taking about 20 minutes. The combination of healthy fats and protein keeps you full. It also works well for brunch. You can serve it with fresh fruit or a smoothie. It fits any morning meal perfectly. For a fun twist, try it with different toppings or spices. Avocado toast is a simple, tasty dish. We covered the best ingredients, toasting bread, and poaching eggs. You learned how to mash avocados and layer them perfectly. With tips for flavor and presentation, your toast can shine. Don't forget the fun variations and storage tips to keep it fresh. Enjoy experimenting with toppings to find your favorite mix. This dish suits breakfast or brunch, so get creative. Your ideal avocado toast is just a recipe away!

Savory Avocado Toast with Poached Egg Delight

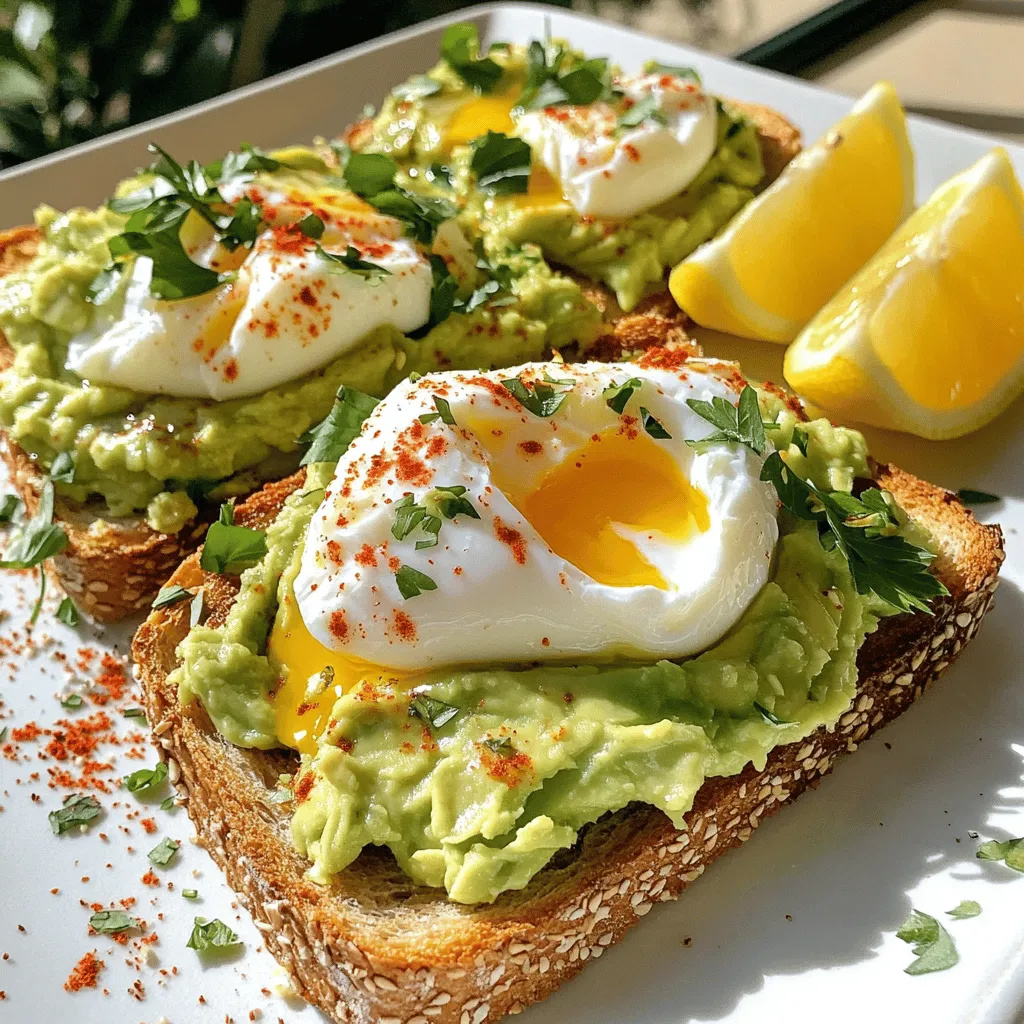
Welcome to my kitchen! Today, I’m excited to share a delightful recipe for savory avocado toast with a perfectly poached

- 8 oz (225g) pasta (penne or fettuccine) - 1 tablespoon olive oil - 3 cloves garlic, minced - 1 can (14 oz) diced tomatoes, drained - 1 cup heavy cream - 2 cups fresh spinach, roughly chopped - Freshly grated Parmesan cheese for serving - 1 teaspoon dried Italian herbs (oregano, basil, thyme) - Salt and pepper to taste - Optional: Red pepper flakes for a kick Gather these ingredients before you start. This makes cooking smoother. I love using penne or fettuccine for this dish. Both hold the sauce well. The heavy cream is key for that rich, creamy texture. Fresh spinach adds a pop of color and nutrients. You can use other greens if you prefer, but spinach works best. Don’t skip the garlic! It enhances the dish's flavor. The dried Italian herbs bring warmth and depth. Adjust the salt and pepper to your taste. If you enjoy heat, sprinkle in some red pepper flakes. You can find the full recipe at the end of this section. Enjoy the process of cooking this simple, yet flavorful dish! Start by boiling a large pot of salted water. Add the pasta and cook it until it's al dente. This means it should be firm when you bite it. Once done, reserve about 1 cup of pasta water before draining it. This water will help adjust the sauce later. While the pasta cooks, heat one tablespoon of olive oil in the same pot over medium heat. Add three cloves of minced garlic and sauté them for about one minute. You want the garlic fragrant but not browned. Then, stir in one can of drained diced tomatoes. Cook this mixture for two to three minutes to let the flavors meld and heat through. Now, pour in one cup of heavy cream and stir well to combine. Bring the sauce to a gentle simmer and reduce the heat to low. Next, add two cups of roughly chopped spinach and one teaspoon of dried Italian herbs. Cook until the spinach wilts, which takes about two to three minutes. Finally, gently fold in the cooked pasta. If the sauce seems too thick, add some reserved pasta water until you reach your desired consistency. Enjoy your creamy tomato spinach pasta! For the full recipe, check the link. To avoid overcooking the pasta, cook it just until al dente. This means it should still have a bit of bite when you chew it. Always check the package for cooking time, and taste it a minute or two before time is up. Reserve some pasta water before draining. This starchy water helps to thicken your sauce later. To maximize flavor in the sauce, sauté the garlic until just fragrant. Don’t let it brown, as this can make it bitter. Add the tomatoes and let them cook for a few minutes. This helps blend their flavors before adding cream. Stir in the cream slowly, allowing it to heat gently. This keeps the sauce smooth. Pair your creamy tomato spinach pasta with garlic bread. The bread soaks up the sauce nicely. A fresh salad also works well. Try a simple mix of greens with a light vinaigrette. For garnishing, sprinkle fresh herbs like basil or parsley on top. A generous amount of freshly grated Parmesan cheese adds a rich finish. For best results, use a large pot for boiling pasta. A deep skillet or saucepan is ideal for making the sauce. A wooden spoon helps combine everything without scratching your cookware. Have a colander ready to drain the pasta. A good set of measuring spoons will help you keep track of ingredients. With these tips and equipment, your creamy tomato spinach pasta will shine. For the full recipe, you can refer to the earlier section. {{image_2}} You can easily make this dish vegetarian or vegan. For a vegetarian version, skip any meat and use vegetable broth instead of chicken broth. To make it vegan, replace heavy cream with coconut milk or a nut-based cream. You can also find vegan cheese to sprinkle on top. For gluten-free options, choose gluten-free pasta. Many brands offer great choices that taste wonderful. Look for options made from rice, corn, or lentils. They cook well and hold the sauce nicely. Want to change it up? Add proteins like chicken or shrimp. Cook them in the olive oil before adding garlic. This gives extra flavor to the dish. Chicken breast works well, while shrimp cooks quickly and adds a lovely taste. You can also explore different herbs and spices. Try adding fresh basil or parsley for a bright flavor. A pinch of smoked paprika can add a nice depth. Experiment with what you have at home to find your favorite blend. This creamy tomato spinach pasta tastes best hot. Serve it right away for the creamiest texture. If you want to serve it cold, let it cool down first. It makes a tasty pasta salad for lunch. For meal prep, make it ahead of time. Store it in the fridge for quick lunches or dinners. You can easily reheat it in the microwave. Just add a splash of water to keep it creamy. For the full recipe, check the link. To store your creamy tomato spinach pasta, let it cool first. Then, place it in an airtight container. This keeps it fresh and prevents odors. You can store it in the fridge for up to three days. After three days, the taste and texture may change. To freeze this dish, let it cool completely. Place it in a freezer-safe container. Make sure to leave some space for expansion. It can last in the freezer for up to three months. When you are ready to eat it, thaw it in the fridge overnight. Reheat it gently to keep the creamy texture. You can reheat this pasta in two ways: in the microwave or on the stovetop. For the microwave, place the pasta in a bowl and cover it. Heat it in short bursts, stirring in between. For the stovetop, add a splash of water or cream in a pan. Stir it over low heat until warm. This helps keep it creamy and delicious. Yes, you can! This dish works well with many pasta shapes. Some great options are: - Fusilli - Rotini - Bowtie - Spaghetti Each shape will hold the creamy sauce differently, so feel free to explore. If you want a lighter option, use these substitutes: - Milk and butter: Mix ¾ cup of milk with ¼ cup of melted butter. - Half-and-half: This gives a similar richness but with less fat. - Coconut milk: For a dairy-free choice, this option adds a nice flavor. These alternatives may change the taste slightly, but they still work well. Absolutely! To make it more appealing for kids, try these tips: - Add fun shapes of pasta. Kids love the surprise of different shapes. - Mix in some cooked chicken or meatballs for added protein. - Top with extra cheese or a sprinkle of herbs for flavor. - Serve with garlic bread or a side of crunchy veggies. These small steps can make mealtime more exciting for little ones. This blog post shared a simple recipe for pasta with a creamy sauce. We covered key ingredients, from pasta to fresh spinach. You learned step-by-step cooking methods and useful tips to make your dish shine. We explored variations, storage suggestions, and answers to common questions. Cooking can be easy and fun. Enjoy experimenting with flavors and ingredients. Trust your taste, and make this recipe your own. Happy cooking!

Creamy Tomato Spinach Pasta Flavorful Weeknight Meal

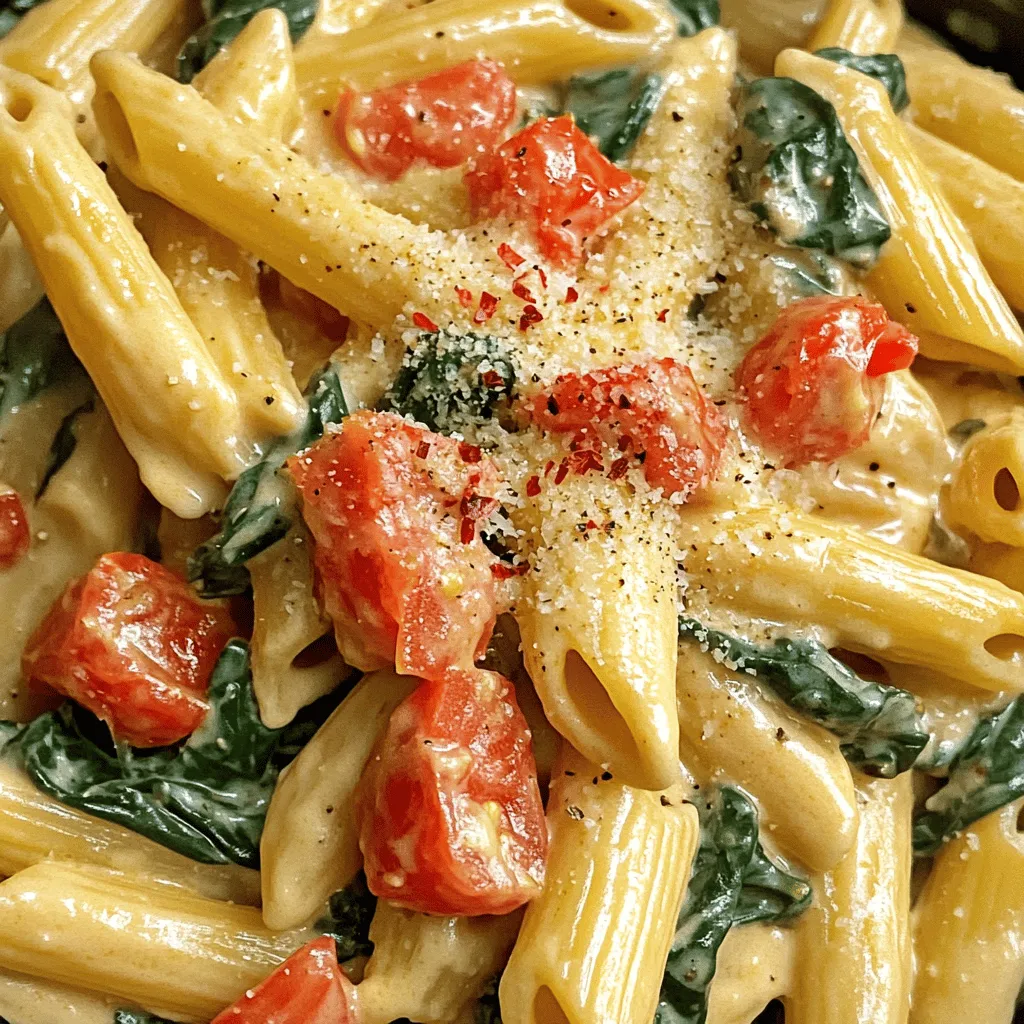
Are you looking for a simple yet delicious weeknight meal? Let me introduce you to my Creamy Tomato Spinach Pasta!

To make a smooth and rich Chocolate Avocado Mousse, you need a few key ingredients: - 2 ripe avocados, peeled and pitted - ½ cup unsweetened cocoa powder - ½ cup maple syrup or honey - 1 teaspoon vanilla extract - 1 pinch of sea salt - 3 tablespoons almond milk (or any milk of choice) These ingredients create a creamy texture and a deep chocolate flavor. The ripe avocados give the mousse its rich, smooth quality without the need for heavy cream. You can add fun garnishes to enhance your mousse: - Fresh berries (like raspberries or strawberries) - Mint leaves These not only add color but also a fresh taste that pairs well with chocolate. You can get creative with your garnishes, using whatever you enjoy! This mousse is not just tasty; it is also good for you: - Avocados are full of healthy fats and vitamins. They help keep your heart healthy. - Cocoa powder is rich in antioxidants, which are great for your body. - Maple syrup or honey provides natural sweetness without refined sugar. - Almond milk adds a creamy touch while keeping it dairy-free. Using these ingredients means you can enjoy dessert while still being kind to your body. For the full recipe, check out the Chocolate Avocado Mousse. Start by gathering your ingredients. You will need ripe avocados, cocoa powder, maple syrup, vanilla extract, sea salt, and almond milk. Cut the avocados in half, remove the pit, and scoop the green flesh into your blender. Add the cocoa powder, maple syrup, vanilla extract, and sea salt. This mix gives the mousse its rich flavor. Blend everything on high until it looks smooth and creamy. If you see lumps, keep blending. You want a velvety texture to impress your guests. Next, it's time to get the texture just right. Slowly add almond milk to the mix. Blend again until the mousse reaches your preferred creaminess. Taste it! If you want it sweeter, add a bit more maple syrup or honey. Blend once more to make sure it’s all combined. The mousse should be thick but not too stiff. Remember, it will firm up in the fridge. Now, spoon your mousse into serving cups or bowls. Cover them with plastic wrap and place them in the fridge. Let them chill for at least one hour. This wait allows the flavors to blend and the mousse to set. When it’s time to serve, add fresh berries and a mint leaf on top. This garnish adds a nice touch and color. Enjoy your creamy delight! For the complete method, check the Full Recipe. One mistake is using hard avocados. Make sure your avocados are ripe. They should feel soft when you squeeze them gently. Another mistake is not blending enough. You want it super smooth. If you see lumps, keep blending until it is creamy. Lastly, do not skip the salt. A pinch of sea salt enhances the chocolate flavor. To make the chocolate taste pop, use high-quality cocoa powder. Look for unsweetened cocoa for deeper flavor. You can also add a small amount of espresso powder. This little boost makes the chocolate stand out. If you want a richer flavor, mix in a bit of dark chocolate. Just melt it and blend it in with the other ingredients. If your mousse is too sweet, add a bit more cocoa powder. This can balance out the sweetness. If it is too thick, pour in a bit more almond milk. Blend it again until smooth. For a sweeter taste, add more maple syrup or honey. Taste as you go to get it just right. {{image_2}} If you want to change the sweet taste, try other sweeteners. You can use agave syrup, stevia, or coconut sugar. Each sweetener adds a unique flavor. Agave syrup makes it smoother. Stevia gives it a lower-calorie option. Coconut sugar is less sweet and adds a hint of caramel. You can make this mousse even more fun with added flavors. Try a pinch of sea salt for a richer taste. Add instant coffee for a mocha twist. You can mix in cinnamon for warmth. Experiment with orange zest for a fresh kick. Each flavor brings a new twist to the dish. This mousse is already a great choice for vegans. Use maple syrup for sweetness. Choose almond milk or coconut milk for a creamy base. Make sure to check that all ingredients are vegan. With these options, everyone can enjoy this rich dessert. For the full recipe, refer to the section above. After you make this rich and creamy mousse, you might have some left. To keep it fresh, store it in an airtight container. This way, it won’t absorb other smells from the fridge. You can also cover the top with plastic wrap. Make sure it touches the mousse. This helps keep the air out and prevents browning. You can freeze this mousse if you want to save it for later. Scoop the mousse into a freezer-safe container. Leave some space at the top, as it will expand when frozen. Cover it well with a lid or plastic wrap. When you want to enjoy it again, thaw it in the fridge overnight. You can also use the microwave for a quick thaw, but be careful not to heat it too much. This mousse can last up to 3 days in the fridge. If you freeze it, it can last for about a month. However, for the best taste and texture, eat it within two weeks. Always check for any changes in color or smell before eating. If you notice anything off, it’s best to toss it out. Enjoying the mousse fresh will give you the best experience! For the full recipe, check the main article. Yes, you can use different types of chocolate. Dark chocolate adds a rich taste. Milk chocolate makes it sweeter. If you prefer white chocolate, it will change the flavor. Just melt the chocolate first before adding it to the mix. Remember to adjust the sweetness based on the chocolate type you choose. This gives you room to play with flavors. To make this mousse vegan, use maple syrup instead of honey. This recipe is already vegan-friendly, as it only uses avocados and plant-based milk. Use almond milk, soy milk, or oat milk. These options work well and keep the mousse creamy. Just follow the Full Recipe for easy steps to create a vegan treat. Yes, Chocolate Avocado Mousse is healthy! Avocados are full of good fats and fiber. They help keep your heart healthy. Cocoa powder has antioxidants that are great for your body. This mousse is a tasty way to enjoy a dessert without guilt. It’s a nutritious treat that satisfies your sweet tooth. Chocolate avocado mousse is a tasty treat you can easily make at home. I shared key ingredients, step-by-step prep, and tips for the best flavor. Remember to avoid common mistakes for a smooth texture. Feel free to try different sweeteners or flavor add-ins. This mousse is not just fun to make; it is also healthy. Store leftovers properly for later enjoyment. Enjoy your creamy dessert, knowing it’s good for you too!

Chocolate Avocado Mousse Rich and Creamy Delight

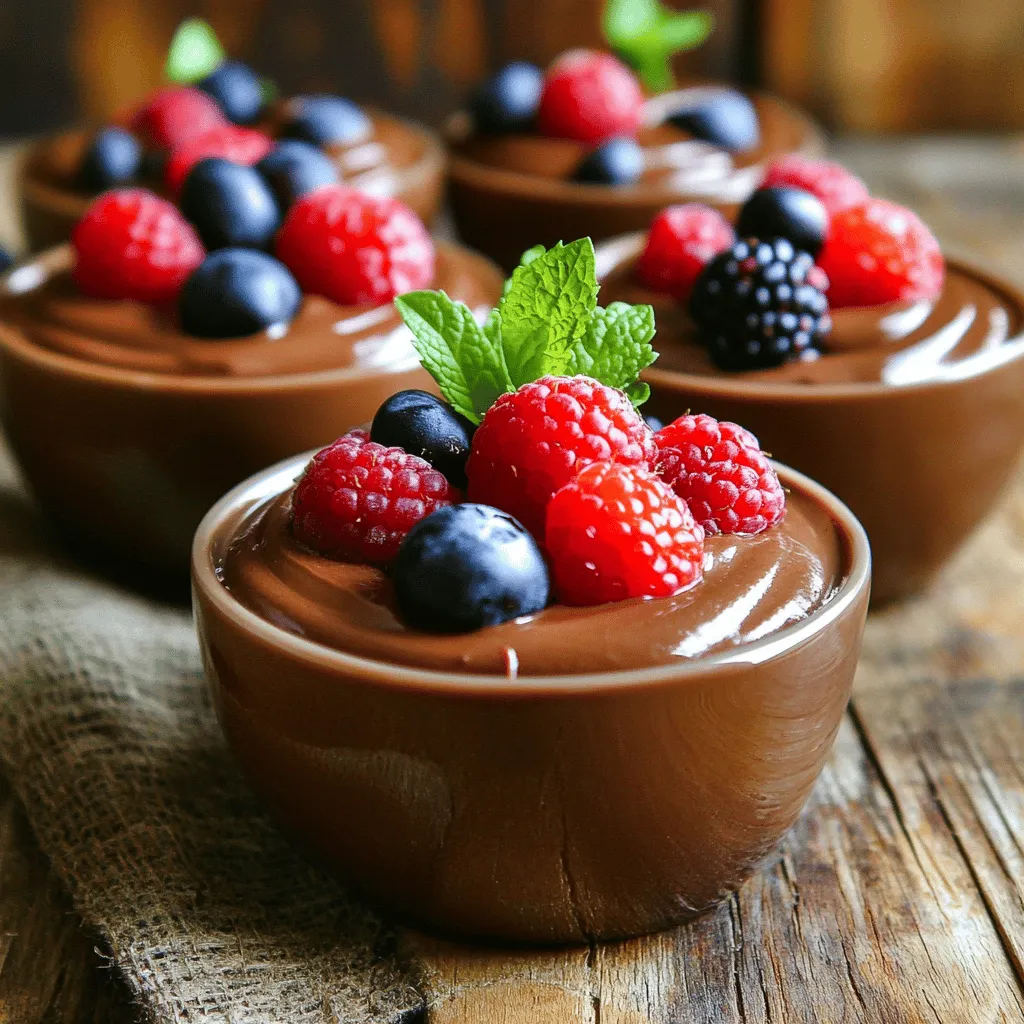
Get ready to indulge in a rich and creamy dessert that’s good for you! Chocolate Avocado Mousse is not just

To make a tasty Mediterranean chickpea salad, you need fresh and simple ingredients. Here’s what you will need: - Chickpeas: Use one can (15 oz), drained and rinsed. - Fresh Vegetables: Gather one cup of halved cherry tomatoes, one diced cucumber, and 1/4 of a finely chopped red onion. You will also need 1/2 cup of pitted and sliced Kalamata olives. - Optional Add-ins: If you like, add 1/4 cup of crumbled feta cheese and 1/4 cup of chopped fresh parsley. These ingredients work together to create a bright and flavorful dish. The chickpeas provide protein and fiber, making this salad filling and nutritious. The fresh vegetables add crunch and color. If you choose to include feta, it gives a creamy touch. For the dressing, you will mix 2 tablespoons of olive oil, 1 tablespoon of lemon juice, and 1 teaspoon of oregano. Add salt and pepper to taste. This dressing pulls all the flavors together. You can find the full recipe above to see how to combine these ingredients for a delightful meal. 1. Combine salad ingredients In a large mixing bowl, add the chickpeas, cherry tomatoes, diced cucumber, red onion, olives, and parsley. This mix gives you color and crunch. 2. Make the dressing In a small bowl, whisk together the olive oil, lemon juice, oregano, salt, and pepper. This dressing brightens the salad and ties the flavors together. 3. Toss and serve Pour the dressing over the salad mix. Gently toss everything together until well combined. If you like, add crumbled feta cheese on top. Let the salad sit for about 10 minutes. This wait helps all the flavors blend nicely. For the full recipe, check out the complete instructions above. Enjoy your fresh and simple Mediterranean Chickpea Salad! How to choose ripe tomatoes Pick firm tomatoes that feel heavy for their size. Look for a bright color. A nice smell can also tell you they are ripe. This adds great taste to your salad. Adjusting flavors to personal taste Taste your salad before serving. You can add more salt or lemon juice if needed. If you like it spicier, add a pinch of red pepper flakes. Trust your taste buds! Allowing flavors to meld Let your salad sit for about 10 minutes before serving. This waiting time helps the flavors mix well. The olive oil, lemon juice, and herbs create a more delicious bite. For the full recipe, check the details above. {{image_2}} When making Mediterranean chickpea salad, you can mix things up. Here are some great options: - Vegan options for feta cheese: If you want a vegan salad, try using tofu instead of feta. You can crumble firm tofu and toss it in for a creamy touch. Another option is to use a store-bought vegan feta. It adds flavor without dairy. - Alternative dressing recipes: You can change the dressing to suit your taste. Try balsamic vinegar instead of lemon juice for a sweeter taste. Or, mix Greek yogurt with olive oil for a creamy dressing. It adds a nice tang and richness. - Adding proteins for a heartier meal: If you want to make your salad filling, add proteins. Grilled chicken or shrimp work well. You can also use canned tuna or chickpea patties for a fun twist. These additions make it a complete meal. These variations let you play with flavors and textures. Don’t be afraid to experiment. You can find your favorite mix! For the full recipe, check out the Mediterranean Chickpea Salad section. Storing your Mediterranean chickpea salad is easy. First, place any leftovers in an airtight container. This keeps it fresh. For refrigerator storage, eat the salad within three days. The flavors will stay good, but some veggies may lose crunch. If you want to freeze it, I suggest not freezing the salad with the dressing. Instead, freeze the salad without the dressing for up to a month. When you’re ready to eat, thaw it in the fridge overnight. Add fresh dressing just before serving. To keep ingredients fresh, store the salad and dressing separately. This way, your salad stays crisp and vibrant. For the best taste, eat your salad soon after making it. For the full recipe, check the details above. Can I make this salad ahead of time? Yes, you can make this salad ahead of time. I often prepare it a day before serving. This allows the flavors to blend well. Just keep it in the fridge. The salad stays fresh and tasty. What are the health benefits of chickpeas? Chickpeas pack a punch of nutrition. They are high in protein and fiber. This helps keep you full longer. They also support heart health and aid digestion. Plus, they are low in fat and great for your diet. How long does Mediterranean Chickpea Salad last in the fridge? When stored in the fridge, this salad lasts about 3 to 4 days. Ensure you keep it in an airtight container. If you add feta cheese, it may last a little less. Always check for freshness before eating. For the full recipe, check out the Mediterranean Chickpea Salad section above. In this blog post, we explored how to make a tasty Mediterranean chickpea salad. We covered the key ingredients, simple steps to prepare it, and tips for improvement. You learned how to choose ripe tomatoes and adjust flavors to fit your taste. I shared variations and healthy storage tips to keep your salad fresh. Remember, this salad is easy to customize. Enjoy making it your own and savor each bite! This dish brings flavor, health, and fun to your meals.

Mediterranean Chickpea Salad Fresh and Simple Delight

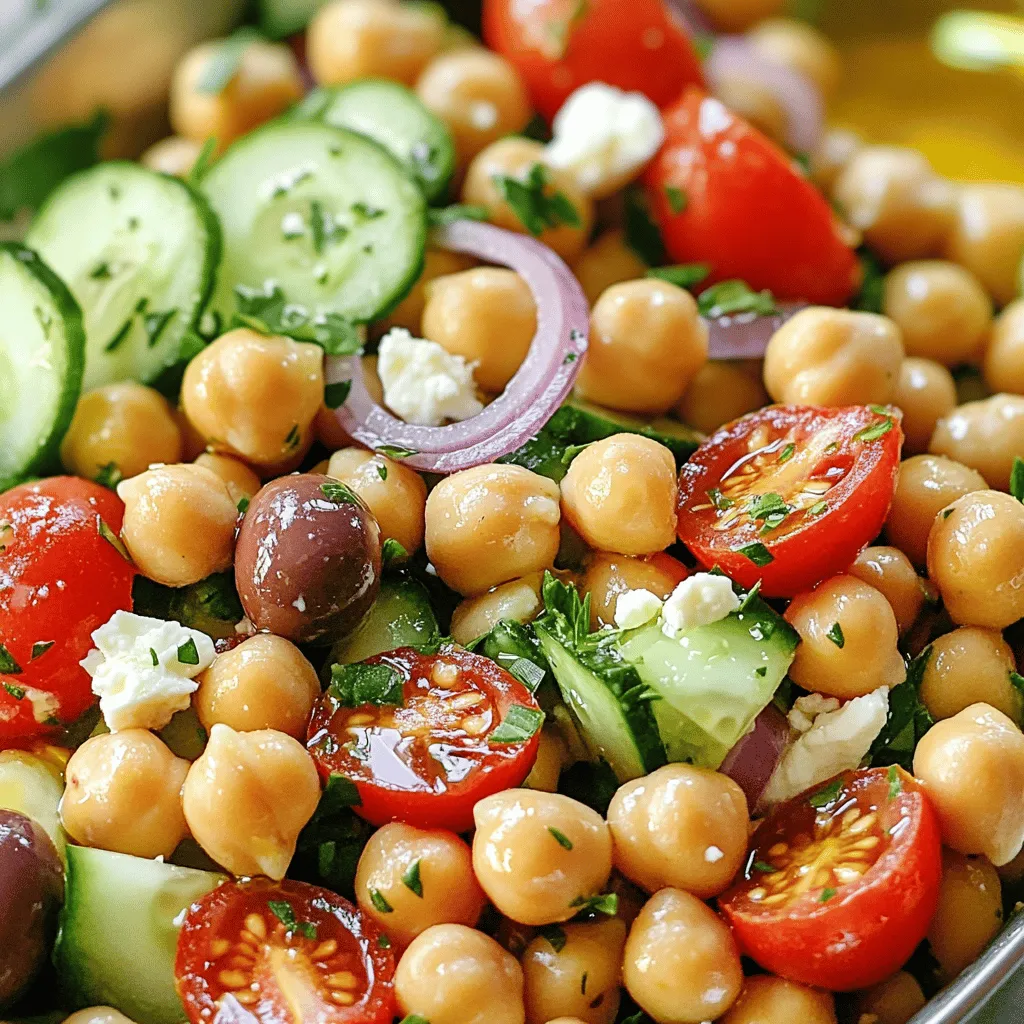
Are you ready to create a burst of flavor with a Mediterranean Chickpea Salad? This fresh and simple delight combines

Older posts
Newer posts
← Previous Page1 … Page35 Page36 Page37 … Page62 Next →

dsad

© 2025 Recipes Pursuit • Built with GeneratePress

Our Policies

  • Copyright Policy
  • Cookie Policy
  • GDPR Policy
  • Privacy Policy
  • Disclaimer
  • Terms Of Use

More Information

  • Home
  • About
  • Contact
  • Appetizers
  • Dessert
  • Dinner
  • Drinks
©2025, Recipes Pursuit About Back To Top