Skip to content
DisclaimerTerms Of UseGDPR PolicyCookie Policy

Recipes Pursuit

  • Home
  • Drinks
  • Appetizers
  • Dinner
  • Dessert
  • About
  • Contact
  • Privacy Policy
DisclaimerTerms Of UseGDPR PolicyCookie Policy

Emma Smith

To make a delicious cinnamon roll casserole, you need some simple ingredients. Here’s what you will need: - 2 cans (about 16 oz each) refrigerated cinnamon rolls - 6 large eggs - 1 cup milk - 1 teaspoon vanilla extract - 1 teaspoon ground cinnamon - 1/2 cup chopped pecans (optional) - 1/2 cup maple syrup - Powdered sugar for dusting (optional) Each of these items plays a key role in creating that sweet, gooey goodness. The cinnamon rolls provide a soft base, while the eggs and milk create a custard-like filling. Vanilla extract adds warmth, and ground cinnamon enhances the flavor. If you like a nutty crunch, toss in some chopped pecans. Maple syrup brings an extra layer of sweetness. Finally, a dusting of powdered sugar adds a lovely finish. This combination makes your casserole a tasty morning delight. For the complete cooking process, check the Full Recipe. Start by preheating your oven to 375°F (190°C). This temperature helps the casserole rise nicely. While the oven heats, grease a 9x13-inch baking dish. Use butter or cooking spray to ensure nothing sticks. Next, open the two cans of refrigerated cinnamon rolls. Cut each roll into quarters. Place these pieces evenly in the greased baking dish. They will expand as they bake, so leave some space between them. In a large bowl, whisk together the six large eggs, one cup of milk, one teaspoon of vanilla extract, one teaspoon of ground cinnamon, and half a cup of maple syrup. Mix until it’s smooth and creamy. Pour this egg mixture evenly over the cinnamon roll pieces. Make sure every piece gets coated. If you want, sprinkle half a cup of chopped pecans on top for a crunchy texture. Now, bake your casserole in the preheated oven for 25 to 30 minutes. Keep an eye on it. You want the top to be golden brown and puffed. When it looks done, you can check it by inserting a toothpick into the center. If it comes out clean, your casserole is ready! Once baked, take it out and let it cool for a few minutes. If you like, dust the top with powdered sugar before serving. Enjoy the delicious gooey goodness of your cinnamon roll casserole! You can find the full recipe above. To make a great cinnamon roll casserole, ensure you coat every piece evenly. After mixing your egg mixture, pour it slowly over the cinnamon rolls. Move the rolls around gently with a spatula to coat them well. This step helps each piece soak up the flavor. If some rolls are dry, they won’t taste as good. Serving this casserole warm is a must. You can top it with powdered sugar for a sweet finish. Maple syrup drizzled on top adds a nice touch. You can also serve it with fresh fruit, like strawberries or bananas. This adds color and flavor. A dollop of whipped cream can make it feel even more special. Avoid making your casserole soggy. To do this, do not let the egg mixture sit too long before baking. If you over-soak the rolls, they can become mushy. Always check for doneness by inserting a toothpick in the center. If it comes out clean, your casserole is ready. Make sure the tops are golden brown to avoid undercooked rolls. For the full recipe, check out the section above! {{image_2}} You can make your cinnamon roll casserole even more fun! Add seasonal fruits like apples, berries, or peaches. These fruits add a fresh taste and color. You can also toss in chocolate chips for a sweet twist. The chocolate melts and makes every bite richer. Mix and match to find your favorite flavors. If you need gluten-free or dairy-free options, there are simple swaps. Use gluten-free cinnamon rolls instead of regular ones. For a dairy-free version, try almond or oat milk instead of regular milk. You can also use dairy-free eggs or egg substitutes. These changes keep the casserole tasty and friendly for all diets. Toppings make your dish shine! Drizzle extra icing on top for sweetness. You can also use flavored syrups, like caramel or maple. These toppings add a fun flair and extra flavor. Dust some powdered sugar on top for a pretty finish. Get creative with your toppings, and enjoy the delicious results! You can store leftover cinnamon roll casserole in the fridge. Wait until it cools. Then, cover it tightly with plastic wrap or aluminum foil. This keeps it fresh for up to three days. To enjoy later, just take out a piece and reheat it. To freeze your casserole, first let it cool completely. Cut it into individual servings. Wrap each piece in plastic wrap, then place them in a freezer bag. Be sure to remove as much air as possible. This method helps it last for up to three months. When you’re ready to eat, you can reheat it easily. For the best results, use the oven. Preheat it to 350°F (175°C). Place the casserole in an oven-safe dish and cover it with foil. Heat for about 15-20 minutes until warm. This keeps the texture soft and gooey, just like when it was fresh. You can also use the microwave if you're in a hurry. Just heat in short bursts, checking often to avoid drying it out. Enjoy your delicious cinnamon roll casserole! A cinnamon roll casserole is a warm, sweet dish made from cinnamon rolls. You cut the rolls into pieces and mix them with eggs and milk. This blend creates a soft, gooey treat. The best part? It is super easy to make and perfect for breakfast or brunch. You get all the flavors of classic cinnamon rolls in one dish. Everyone loves it because it is simple to serve and share! Yes, you can prepare this casserole the night before. Just follow these steps: - Cut the cinnamon rolls and place them in the baking dish. - Mix the egg mixture and pour it over the rolls. - Cover the dish with plastic wrap and refrigerate overnight. In the morning, just bake it for about 30 minutes. This saves time and lets the flavors blend overnight. Cinnamon roll casserole lasts about 3 to 4 days in the fridge. Be sure to store it in an airtight container. Signs of spoilage include an off smell or mold. If you want to keep it longer, consider freezing it. When properly frozen, it can last up to 2 months. Just thaw it in the fridge overnight before reheating. Enjoy that delicious gooey goodness later! In this blog post, we explored a tasty cinnamon roll casserole. We covered the essential ingredients, step-by-step cooking instructions, and helpful tips. You learned how to avoid common mistakes, create variations, and properly store leftovers. This dish offers a warm and fun way to enjoy cinnamon rolls. It’s perfect for breakfast or brunch. Try it out! With a few easy changes, you can make it your own. Enjoy your cooking adventure and let flavors shine!

Cinnamon Roll Casserole Tasty Morning Delight

Start your day with a warm, sweet hug in the form of Cinnamon Roll Casserole! This delightful dish marries fluffy

- 4 large bell peppers (any color) - 1 cup quinoa, rinsed - 2 cups vegetable broth or water - 1 can (15 oz) black beans, rinsed and drained - 1 cup corn (fresh, frozen, or canned) - 1 small onion, finely chopped - 2 cloves garlic, minced - 1 teaspoon cumin - 1 teaspoon smoked paprika - 1 teaspoon chili powder - Salt and pepper to taste - 1 cup diced tomatoes (fresh or canned) - 1 cup shredded cheese (cheddar, Monterey Jack, or a dairy-free alternative) - Fresh cilantro or parsley for garnish When you gather these ingredients, you set the stage for a hearty dish. Bell peppers bring color and crunch. Quinoa adds protein and fiber, making this meal both tasty and healthy. The black beans and corn add texture and sweetness. Flavor comes from the spices. Cumin gives a warm, earthy taste. Smoked paprika adds depth. Chili powder adds a bit of heat. Together, they create a balance that excites the palate. Don't forget the cheese! It melts beautifully, adding creaminess to each bite. The fresh herbs on top bring brightness and freshness. You can find the full recipe [here](#). - Preheat your oven to 375°F (190°C). - Cut the tops off the bell peppers and remove seeds and membranes. Place them upright in a baking dish. - Combine rinsed quinoa and vegetable broth in a saucepan. - Bring to a boil, then reduce heat and simmer until liquid is absorbed. This takes about 15 minutes. - Sauté chopped onion and minced garlic until softened, around 3-4 minutes. - Add black beans, corn, diced tomatoes, cumin, smoked paprika, chili powder, salt, and pepper to the skillet. Cook for another 5-6 minutes. - Mix the cooked quinoa with the filling ingredients. - Spoon the mixture into each pepper and top with shredded cheese. - Add a splash of water to the baking dish, cover with foil, and bake for 25-30 minutes. - Remove the foil and bake for an additional 5-7 minutes to brown the cheese. You can find the full recipe above. Enjoy the burst of flavors in each bite! To get the best quinoa, rinse it well. This step removes bitterness. After rinsing, cook it in vegetable broth for added flavor. Allow the cooked quinoa to cool a bit before mixing it with other ingredients. This keeps the filling fluffy and prevents sogginess. You can boost the taste of your stuffed peppers. Try adding spices like oregano or a pinch of cayenne pepper. These spices add warmth and depth. For a bright twist, squeeze some lime juice into the filling. This gives a fresh zest that enhances the dish. How you serve your stuffed peppers matters. I love to serve them with avocado or a crisp salad. This adds creaminess and freshness. Use colorful bell peppers for your dish. The mix of red, yellow, and green makes it eye-catching and fun. This vibrant look will impress your family and friends. {{image_2}} You can change up the protein in your stuffed peppers. One easy swap is to use brown rice or couscous instead of quinoa. Both add a hearty base. You can also add cooked ground turkey or chicken for extra protein. Lentils work well, too, if you prefer a plant-based option. Each choice brings a unique flavor and texture. If you want a vegan dish, just skip the cheese. You can also use a dairy-free cheese if you like. Adding more veggies boosts the flavor and nutrition. Try zucchini or fresh spinach for a colorful twist. These additions make the dish even more satisfying and healthy. Adjust the serving size to fit your needs. If you have a big crowd, simply scale the recipe up. You can also use mini bell peppers. These make great appetizers or snacks. They are fun to eat and perfect for parties. Each bite is packed with flavor, and they look cute on a platter. For the full recipe, check out the previous section. Store leftover stuffed peppers in an airtight container in the fridge. They can be kept for up to 3-4 days. This way, you can enjoy them again without losing flavor or texture. Just make sure the lid is on tight to keep them fresh! Freeze unbaked stuffed peppers for easy meal prep. This method makes cooking simple on busy days. You can also freeze fully cooked peppers, but they may have a softer texture when you reheat them. If you want to enjoy them later, just wrap them well before placing them in the freezer. Reheat in the oven at 350°F (175°C) until warmed through. This helps maintain the peppers' shape and flavor. For quick meals, microwave individual servings for about 1-2 minutes. Just keep an eye on them to avoid overheating. Enjoy your stuffed peppers fresh and warm! For the full recipe, check out the details above. Stuffed bell peppers typically take 25-30 minutes to cook. If you want the cheese to brown, add a few more minutes. Yes, you can prep stuffed peppers ahead of time. Just bake them right before serving for best taste. If you want a cheesy taste without dairy, use nutritional yeast. You can also skip cheese for a vegan dish. Absolutely! Stuffed bell peppers are full of protein, fiber, and nutrients. They make a great meal choice for health. Yes, feel free to swap bell peppers for poblano or jalapeño. Each type adds its own unique flavor. Stuffed bell peppers are a fun, healthy dish. We covered key ingredients, cooking steps, and tasty variations. Quinoa adds protein, while beans and veggies boost flavor. Feel free to customize with spices and protein choices that you enjoy. Don't forget to garnish for a colorful finish! With simple storage tips, these can easily become meal prep favorites. Enjoy making these tasty peppers your own!

Stuffed Bell Peppers with Quinoa Flavorful and Healthy

Are you looking for a tasty and healthy dish? Stuffed bell peppers with quinoa might be just what you need!

- 4 boneless, skinless chicken breasts - 1 cup breadcrumbs (preferably panko for extra crunch) - 1/2 cup grated Parmesan cheese - 1 teaspoon Italian seasoning - 1 teaspoon garlic powder - Salt and pepper to taste - 1 cup marinara sauce (store-bought or homemade) - 1 1/2 cups shredded mozzarella cheese - Fresh basil leaves for garnish - Olive oil spray When I make Oven-Baked Chicken Parmesan, I love to use fresh and tasty ingredients. The chicken breasts are the star here. They should be boneless and skinless for easy cooking. I prefer panko breadcrumbs for that extra crunch. They give the chicken a nice crispy texture. Mixing the breadcrumbs with Parmesan cheese adds flavor. Italian seasoning and garlic powder bring warmth and depth to the dish. Salt and pepper are must-haves to enhance the taste. The marinara sauce is the next key ingredient. You can use store-bought sauce or make your own. Homemade sauce adds a personal touch. It can elevate the dish even more. For the cheesy goodness, I use shredded mozzarella. It melts beautifully on top of the chicken. Finally, a sprinkle of fresh basil leaves gives a bright finish. - Baking sheet - Parchment paper - Shallow dish for mixing breadcrumbs - Measuring cups and spoons - Meat thermometer (for perfect cooking) In the kitchen, the right tools make cooking easier. A baking sheet lined with parchment paper helps with cleanup. It keeps the chicken from sticking, which is a big win. A shallow dish is perfect for mixing the breadcrumbs and cheese. Measuring cups and spoons are essential for getting the quantities just right. A meat thermometer is a smart tool too. It helps ensure the chicken cooks to the ideal temperature. - Preheat the oven to 400°F (200°C) and line a baking sheet with parchment paper. - In a shallow dish, combine 1 cup of breadcrumbs, 1/2 cup of grated Parmesan cheese, 1 teaspoon of Italian seasoning, 1 teaspoon of garlic powder, and a pinch of salt and pepper. Mix well until all ingredients blend. - Pat 4 boneless, skinless chicken breasts dry with paper towels. Season both sides with salt and pepper. - Lightly spray each chicken breast with olive oil. Dredge the chicken in the breadcrumb mixture. Press down to ensure the crumbs stick well on both sides. - Place the coated chicken breasts on the prepared baking sheet. Bake for 20 minutes until golden and crispy. - Carefully remove the baking sheet from the oven. Spoon marinara sauce over each chicken breast. Be generous with the sauce. - Sprinkle 1 1/2 cups of shredded mozzarella cheese evenly on top of the sauce-covered chicken. - Return the chicken to the oven and bake for another 10 minutes, until the cheese is bubbly and slightly golden. - Once done, take it out of the oven and let it sit for a few minutes. Garnish with fresh basil leaves before serving. You can find the full recipe to guide you through this delicious dish. Choosing the right breadcrumbs makes a big difference. I love using panko breadcrumbs. They create a light and crispy coating that adds great texture. Regular breadcrumbs can work, but they won’t give the same crunch. Another key to crunch is olive oil spray. It helps the breadcrumbs brown nicely. A light spray ensures even cooking and keeps the chicken moist inside. Don’t skip this step! For a flavor boost, add herbs or spices to your breadcrumb mix. Try mixing in dried oregano or parsley. You can also add a pinch of red pepper flakes for some heat. These small changes can make a tasty difference. If you want to up your sauce game, think about homemade marinara. A simple blend of tomatoes, garlic, and onion can make your dish shine. It adds freshness and deep flavor that store-bought sauces might lack. Cooking time can vary based on chicken thickness. Thicker breasts may need more time. Always check the internal temperature. Chicken should reach 165°F for safe eating. This is where a meat thermometer comes in handy. It ensures your chicken is fully cooked, juicy, and safe to eat. With these tips, you can make your Oven-Baked Chicken Parmesan a crunchy and tasty dish. For the full recipe, check the link provided. {{image_2}} You can make your Oven-Baked Chicken Parmesan even more cheesy. Try using different cheeses. Provolone adds a nice flavor. Gouda gives a smoky taste. Both melt well and taste great. If you want creaminess, add a layer of ricotta cheese. Spread it on the chicken before the sauce. This step makes every bite rich and smooth. Want to add some greens? Spinach is a great choice. You can mix it in with the marinara sauce. It boosts nutrition and adds color. Mushrooms are another tasty addition. They bring a nice earthy flavor to the dish. For sides, think about serving with roasted vegetables. Broccoli or zucchini pairs well. You can also add a simple salad for a fresh crunch. If you need gluten-free options, don’t worry! You can swap regular breadcrumbs. Use gluten-free breadcrumbs instead. They work just as well for crunch. Another option is almond flour. It creates a crispy coating that tastes great. This way, everyone can enjoy this dish, no matter their diet. For the full recipe, check out the [Full Recipe]. After enjoying your Oven-Baked Chicken Parmesan, let it cool down. This helps keep the flavors intact. Place the leftovers in an airtight container. Store it in the fridge for up to three days. If you want to keep it longer, consider freezing it. Just remember to separate the chicken from the marinara sauce for the best results. To reheat your chicken, use an oven or an air fryer for the best crunch. Preheat your oven to 350°F (175°C). Place the chicken on a baking sheet and cover it with foil. Heat for about 15-20 minutes. If using an air fryer, set it to 350°F (175°C) and heat for about 8-10 minutes. For a quick option, you can use a microwave. Place the chicken on a microwave-safe plate and cover it with a damp paper towel. Heat for 1-2 minutes, but keep in mind it may not stay crispy. You can freeze unbaked chicken for meal prep. Just coat the chicken breasts as per the recipe and place them in a freezer-safe container. Freeze for up to three months. When you're ready to cook, thaw it overnight in the fridge. Then, bake it according to the Full Recipe instructions. This lets you enjoy a fresh meal without the hassle! To check if your chicken is done, use a meat thermometer. Insert it into the thickest part of the chicken. The safe temperature for cooked chicken is 165°F (75°C). If you don’t have a thermometer, look for visual cues. The chicken should be golden brown and the juices should run clear. No pink should remain inside. Yes, you can prepare this dish ahead of time. Cook the chicken, add the sauce and cheese, then cool it down. Store it in the fridge for up to two days. When ready to eat, reheat in the oven at 350°F (175°C) until hot. This will keep it crunchy. To boost flavor, add fresh herbs like basil or oregano to the breadcrumbs. You can also mix in some red pepper flakes for heat. For the sauce, try adding sautéed onions or garlic. A splash of balsamic vinegar can add depth to your marinara. You can make Oven-Baked Chicken Parmesan healthier by adjusting the recipe. Use whole wheat breadcrumbs instead of regular ones. Reduce the amount of cheese or swap for a low-fat version. For less sodium, make a homemade sauce with fresh tomatoes and herbs. This way, you control the ingredients. This blog post covered how to make a tasty Oven-Baked Chicken Parmesan. We discussed key ingredients, useful tools, and step-by-step instructions. You learned tips for achieving the perfect crunch and some appealing variations. In conclusion, this simple dish offers great flavor and flexibility. You can enjoy it tonight or prep it for later. Explore different ingredients to make it your own. Cooking can be fun and rewarding, so give it a try!

Oven-Baked Chicken Parmesan Crunchy and Tasty Dish

Are you ready to elevate your meal game? Oven-Baked Chicken Parmesan is a crowd-pleaser that combines crispy chicken, cheesy goodness,

- 1 cup rolled oats - 1/2 cup natural peanut butter - 1/4 cup honey or maple syrup These are the heart of the recipe. Rolled oats give energy and fiber. Natural peanut butter adds protein and a rich flavor. Honey or maple syrup sweetens the mix, making it delicious. - 1/2 cup chocolate chips (dark or semi-sweet) - 1/4 cup ground flaxseeds - 1/2 teaspoon vanilla extract - A pinch of sea salt These ingredients enhance the energy balls. Chocolate chips bring sweetness and joy. Ground flaxseeds add healthy omega-3s. Vanilla extract gives a warm flavor. A pinch of sea salt balances all the tastes. This simple combination makes these energy balls both tasty and healthy. You can find the full recipe above for all the steps. Enjoy making these energy balls! First, take a large bowl. In this bowl, combine your dry ingredients. Add 1 cup of rolled oats, 1/4 cup of ground flaxseeds, and a pinch of sea salt. Mix them well. This helps distribute the flavors evenly. Next, grab a separate bowl. In this bowl, whisk together your wet ingredients. Measure out 1/2 cup of natural peanut butter, 1/4 cup of honey or maple syrup, and 1/2 teaspoon of vanilla extract. Whisk until smooth. You want this mixture to be creamy and well-blended. Now, it’s time to combine. Gradually pour the wet mixture into the dry ingredients. Stir them together until they blend completely. You want no dry spots left. After that, fold in your chocolate chips. Use 1/2 cup of dark or semi-sweet chocolate chips. Make sure they spread evenly throughout the mixture. This adds a nice sweet touch. Next, scoop the mixture. Use your hands to grab about a tablespoon of the mixture. Roll it into a ball. Repeat this step until all the mixture is formed into balls. Finally, place the energy balls on a lined baking sheet or plate. Refrigerate them for at least 30 minutes to firm up. This makes them easier to handle and adds texture. Enjoy your Peanut Butter Chocolate Chip Energy Balls as a quick snack! For the full recipe, check the section above. To get the best texture, you can tweak the peanut butter or oats. If your mixture is too dry, add a splash of peanut butter. If it’s too wet, add more oats. The key is to mix your ingredients well. This helps to evenly distribute everything. You want a sticky but manageable mixture. You can enhance flavor by trying different add-ins. Shredded coconut or chopped nuts can add great taste and crunch. If you want a twist, swap out chocolate chips for dried fruit or seeds. Each choice gives a unique flavor and texture. These energy balls pair nicely with fresh fruit or a dollop of yogurt. They make a great snack for any time of day. For serving sizes, aim for one or two balls per person. They are perfect for parties or a quick boost before workouts. Enjoy them anytime you need a power boost! For the complete recipe, check out the Full Recipe. {{image_2}} You can easily adapt these energy balls for different diets. For a nut-free option, replace peanut butter with sunbutter or soy nut butter. These alternatives give a similar taste and texture. If you want a vegan version, use maple syrup instead of honey. This swap makes them plant-based and still sweet. For gluten-free needs, ensure that your oats are certified gluten-free. This way, you can enjoy these treats without worry. Want to spice things up? Adding cinnamon or nutmeg can give these energy balls a warm flavor. Start with a half teaspoon of either spice. You can also swap out sweeteners. Try agave syrup for a lighter taste or date syrup for a rich flavor. Each sweetener changes the flavor and texture slightly, so feel free to experiment. Get creative with the shape of your snacks. Instead of rolling them into balls, mold them into bars. This way, you have a convenient snack for on-the-go. If you want a fun twist, use cookie cutters to make shapes. Kids love fun shapes, and it makes snack time exciting. Just remember to adjust the size to keep the energy boost just right. For more ideas, check the Full Recipe and find your perfect match. To keep your Peanut Butter Chocolate Chip Energy Balls fresh, store them in an airtight container. This helps lock in moisture and flavor. I recommend placing them in the fridge for up to one week. After a week, they may start to lose their taste and texture. If you want to store them longer, freezing is a great option. Place the energy balls in a single layer on a baking sheet and freeze until firm. Then, transfer them to an airtight container or freezer bag. They can last for up to three months in the freezer. When you're ready to enjoy one, simply thaw it in the fridge or at room temperature for a quick snack. In the fridge, these energy balls last about one week. In the freezer, they can stay good for about three months. Always check for signs of spoilage. If you see any mold or notice a strange smell, it's best to toss them. Proper storage keeps these treats tasty and safe! These energy balls last about one week in the fridge. In the freezer, they can stay fresh for up to three months. To store them, place them in an airtight container. This helps keep them from drying out and losing flavor. Always check for any signs of spoilage, like unusual smells or changes in texture. Yes, you can easily customize these energy balls! If you have allergies or personal preferences, there are many options. You can swap peanut butter for almond butter or sunflower seed butter. You can also use different sweeteners, like agave syrup or maple syrup. If you don't like chocolate, try dried fruit or coconut flakes instead. This recipe is very flexible! Each energy ball contains about 100 calories. They have 4 grams of protein, 5 grams of fat, and 11 grams of carbs. The exact numbers can change based on the ingredients you choose. If you add more nuts or seeds, the protein will increase. These energy balls offer a good mix of nutrients for a quick snack. If you want to avoid peanut butter, use any nut or seed butter. Almond butter, cashew butter, or sunflower seed butter work well. You can even try soy nut butter for a nut-free option. Just replace the peanut butter with the same amount of your chosen butter. The taste will change a bit, but they'll still be tasty! For the full recipe, check out the link. This blog explored how to make tasty peanut butter chocolate chip energy balls using simple ingredients. You learned about key ingredients like rolled oats and flaxseeds and how to mix them properly. I shared tips to perfect texture and flavor, plus ways to customize them for dietary needs. Remember to store your energy balls well to keep them fresh. Make these snacks your own with fun shapes or add-ins. Enjoy making and sharing these healthy treats in your daily routine!

Peanut Butter Chocolate Chip Energy Balls Power Boost

Looking for a quick snack that packs a punch? Peanut Butter Chocolate Chip Energy Balls are your solution! These tasty

- 2 cups fresh spinach, chopped - 1 cup canned artichoke hearts, drained and roughly chopped - 1 cup cream cheese, softened - ½ cup sour cream - ½ cup mayonnaise - 1 cup shredded mozzarella cheese - ½ cup grated Parmesan cheese - 2 cloves garlic, minced - 1 teaspoon lemon juice - Salt and pepper to taste - 1 teaspoon red pepper flakes (optional, for heat) Each ingredient plays a key role in the flavor and texture of the dip. Fresh spinach adds a vibrant color and earthy taste. Canned artichoke hearts bring a subtle sweetness and unique texture. Cream cheese gives the dip a rich, creamy base. Sour cream and mayonnaise add tanginess, making the dip luscious. Mozzarella cheese melts beautifully, creating a gooey texture. Parmesan cheese adds a salty, nutty flavor that enhances the dish. Garlic contributes aromatic warmth, while lemon juice brightens the overall taste. Salt and pepper elevate the flavors, and red pepper flakes provide an optional kick. Using high-quality ingredients makes a big difference. Fresh spinach and artichokes yield a better taste than frozen or jarred options. Always check labels for added preservatives in canned goods. This way, you ensure a fresh and tasty dip. For a complete guide, check the Full Recipe. With these ingredients, you can craft a creamy, delicious dip that everyone will love. 1. Preheat your oven to 350°F (175°C). This step helps cook the dip evenly. 2. In a medium mixing bowl, combine the cream cheese, sour cream, and mayonnaise. Mix until smooth and creamy. This base gives the dip its rich texture. 3. Stir in the chopped spinach and artichoke hearts. Add minced garlic and lemon juice too. Then mix in the mozzarella and Parmesan cheeses. This combination brings a great flavor. 1. Transfer the mixture to a baking dish and spread it evenly. This helps it cook properly. 2. Bake for about 25-30 minutes. You want the dip to be hot and bubbly, with a lightly golden top. This means it’s ready to eat! 3. Let it cool slightly before serving. This makes it safer to eat and helps the flavors settle. For the complete experience, check out the Full Recipe. Enjoy this creamy spinach and artichoke dip with chips, bread, or veggies! To get that smooth, creamy dip, start with softened cream cheese. Soft cream cheese blends easily with other ingredients. It helps create a nice, creamy texture. If your cream cheese is cold, it will not mix well. Leave it out for a bit before you start. When mixing, use a fork or a hand mixer. A hand mixer will make it fluffy. Mix until you see no lumps. You want a smooth blend before adding the other items. This step is key for the best results. Seasoning is very important for a great dip. Start with salt and pepper. These basics bring out the flavors in the spinach and artichokes. You can also add garlic powder or onion powder for more taste. If you like some heat, try adding red pepper flakes. A little goes a long way! Want to change it up? You can add a dash of cayenne pepper or smoked paprika for depth. For extra fun, consider adding some herbs. Fresh basil or parsley can add brightness. You can also try a squeeze of lime or lemon juice for a zesty kick. Explore these options to make the dip your own. Check out the Full Recipe for more details! {{image_2}} You can change the flavor by adding different cheeses. Try using sharp cheddar for a bolder taste. Creamy goat cheese adds a tangy kick. Mixing in feta cheese gives it a Mediterranean vibe. If you want a lighter dip, use low-fat cream cheese. For those who prefer vegan or dairy-free options, swap cream cheese with cashew cream. Nutritional yeast can add a cheesy flavor without dairy. Vegan cream cheese is also a great choice. These swaps keep the dip creamy and tasty. To spice things up, consider adding herbs or spices. Fresh basil or oregano can brighten the dip. A pinch of cayenne pepper adds a nice kick. For a smoky flavor, try smoked paprika. You can also create different flavor profiles. For a Mediterranean twist, add sun-dried tomatoes or olives. If you love bold flavors, try a splash of hot sauce or sriracha. Experimenting with these spices can make your dip unique and exciting. For the full recipe, check out the section above. To keep your creamy spinach and artichoke dip fresh, store it in an airtight container. Place it in the fridge within two hours of cooking. This helps prevent bacteria growth. The dip stays good for about three to five days. If you want to keep it longer, freeze the dip. Use a freezer-safe container and leave some space at the top. This allows for expansion. The dip can last up to three months in the freezer. When you’re ready to enjoy your dip again, don’t worry about losing its creamy texture. You can reheat it in the oven or microwave. For the oven, preheat it to 350°F (175°C). Place the dip in a baking dish and heat for about 15-20 minutes. Stir halfway through for even heating. If using a microwave, heat in short bursts of 30 seconds. Stir after each burst until hot. Serve the dip warm with chips or bread. Enjoy it just as you did fresh! Can I make this dip ahead of time? Yes, you can prepare this dip in advance. Mix all the ingredients and place them in a baking dish. Cover it with plastic wrap and keep it in the fridge. When you are ready, bake it as per the instructions. This makes it easy to enjoy during parties or gatherings. What can I serve with this dip? This dip pairs well with many items. You can serve it with: - Tortilla chips - Sliced baguette - Fresh vegetable sticks - Pita chips These options add crunch and flavor, making each bite a delight. How do I know when my dip is done baking? Your dip is ready when it is hot and bubbly. Look for a lightly golden top. Bake it for about 25-30 minutes. If you see it bubbling around the edges, it’s a good sign it’s done. Can I add meat to this recipe? Absolutely! You can add cooked chicken or crumbled bacon for extra flavor. Mix the meat in with the other ingredients. This adds a nice twist to your creamy spinach and artichoke dip. For the full recipe, check the section above. This blog post covered how to make a creamy spinach and artichoke dip. You learned about the key ingredients, step-by-step instructions, and helpful tips for a perfect dip. I shared variations to suit your taste and how to store it properly. With these insights, you can create a delicious dip for any occasion. Enjoy sharing this easy recipe at your next gathering!

Creamy Spinach and Artichoke Dip Flavorful Delight

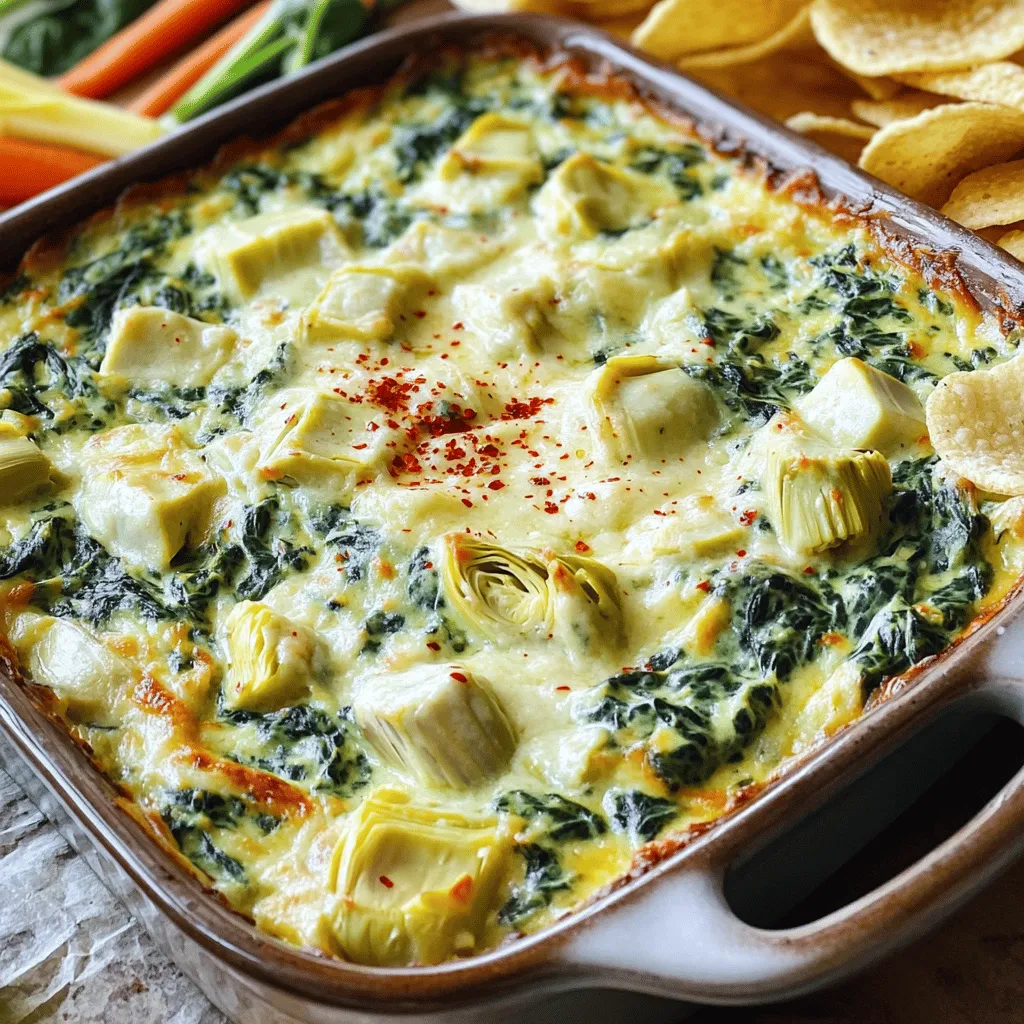
Are you ready to indulge in a dip that’s creamy, rich, and oh-so-delicious? My Creamy Spinach and Artichoke Dip will

To make crispy garlic Parmesan Brussels sprouts, you need fresh ingredients. Here’s what you’ll need: - 1 lb Brussels sprouts, trimmed and halved - 3 tablespoons olive oil - 4 cloves garlic, minced - 1/2 cup grated Parmesan cheese - 1 teaspoon garlic powder - 1 teaspoon onion powder - 1/2 teaspoon red pepper flakes (optional) - Salt and pepper to taste - Fresh parsley, chopped (for garnish) These ingredients work together to create a tasty dish. The Brussels sprouts give a nice crunch. The garlic adds flavor, while Parmesan brings a savory twist. Use fresh parsley for a pop of color and freshness. For the full recipe, follow the detailed steps in the cooking section. 1. Preheat the Oven Start by setting your oven to 425°F (220°C). This high heat helps the Brussels sprouts get crispy. 2. Prepare the Brussels Sprouts Take 1 lb of Brussels sprouts. Trim the ends and cut them in half. This makes them cook evenly. 3. Mix the Coating Ingredients In a big bowl, combine the halved sprouts with 3 tablespoons of olive oil. Add 4 cloves of minced garlic, 1 teaspoon of garlic powder, 1 teaspoon of onion powder, and 1/2 teaspoon of red pepper flakes if you want some heat. Season with salt and pepper. Toss well so each sprout gets coated. 1. Spread on Baking Sheet Line a rimmed baking sheet with parchment paper. Spread the Brussels sprouts in a single layer. Make sure they are not too close together. This helps them roast better. 2. Roast for Maximum Crispiness Place the baking sheet in the oven. Roast for 20 to 25 minutes. Flip the sprouts halfway through cooking. You want them golden brown and crispy on the edges. 3. Add Parmesan Cheese After roasting, take them out and sprinkle 1/2 cup of grated Parmesan cheese on top. Return the baking sheet to the oven for 5 more minutes. This melts the cheese and gives it a nice brown color. 1. Garnish and Serve Once the sprouts are done, take them out of the oven. Garnish with freshly chopped parsley before serving. Enjoy your Crispy Garlic Parmesan Brussels Sprouts! For the full recipe, check the details above. To get that perfect crunch, keep these tips in mind: - Avoid Overcrowding the Baking Sheet: When you pack Brussels sprouts too closely, they steam instead of roast. This makes them soft, not crispy. Spread them out in a single layer. This gives air space for even cooking. - Importance of High Oven Temperature: Preheat your oven to 425°F (220°C). A hot oven helps to caramelize the sprouts. This caramelization brings out their natural sweetness and ensures a crispy texture. Boost the taste of your Brussels sprouts with these ideas: - Additional Seasoning Ideas: Besides garlic and Parmesan, you can try adding lemon zest for a fresh kick. A sprinkle of smoked paprika or a dash of balsamic vinegar can also add depth. Experiment with your favorite herbs, like thyme or rosemary, for a unique twist. - Serving Suggestions: Serve these crispy sprouts as a side dish with roasted chicken or steak. They can also shine as a tasty snack or appetizer. Pair them with a tangy dip like ranch or yogurt sauce to add a creamy contrast. For the full recipe, check the details above. {{image_2}} Cheese Alternatives You might want a change from Parmesan. Try using Pecorino Romano for a sharper taste. Nutritional yeast works for a dairy-free option. It adds a cheesy flavor without the milk! Vegetable Mix-Ins Brussels sprouts pair well with other veggies. Toss in cauliflower or carrots for extra color and taste. You can also add bell peppers for a sweet twist. Mix and match to find your favorite combo! Appetizer vs. Side Dish Crispy garlic Parmesan Brussels sprouts shine as an appetizer or side dish. Serve them alone with a dip for a tasty starter. As a side, they enhance any main course beautifully. Complementary Dishes These Brussels sprouts go great with grilled chicken or fish. They also pair well with pasta dishes. The garlic and cheese elevate the meal, making every bite delightful. For a veggie feast, serve them with quinoa or rice. Check out the Full Recipe for more ideas! Best Practices for Refrigeration To store leftover Brussels sprouts, let them cool first. Place them in an airtight container. This keeps them fresh and tasty. You can enjoy them for up to three days. If you want to keep them longer, consider freezing. Freezing Options To freeze, spread the cooled sprouts on a baking sheet. Freeze them until solid, then transfer to a freezer bag. This way, they won’t stick together. You can keep them for up to three months. Oven vs. Microwave The oven is best for reheating. Preheat it to 375°F (190°C). Spread the sprouts on a baking sheet. Heat for about 10-15 minutes. This keeps them crispy and tasty. The microwave can work too, but it may make them soggy. Ensuring Crispiness upon Reheating To keep your Brussels sprouts crispy, avoid covering them. Covering traps steam and makes them soft. You can also add a sprinkle of olive oil before reheating. This helps bring back some of that crunch. For the best results, stick with the oven. For the full recipe, check out the details above. Enjoy your crispy garlic Parmesan Brussels sprouts! Roast Brussels sprouts for 20 to 25 minutes at 425°F (220°C). This time helps them get crispy and golden. Flip them halfway through for even cooking. The high heat gives them a great flavor. Yes, you can make this recipe vegan! Just leave out the Parmesan cheese. You can add nutritional yeast for a cheesy flavor. You will still have tasty Brussels sprouts that everyone can enjoy. These sprouts pair well with many dishes. Serve them with grilled chicken, steak, or fish. They also work great as a side for pasta or a hearty grain salad. You can even enjoy them alone as a snack! Store leftovers in an airtight container in the fridge for up to three days. To reheat, use an oven to keep them crispy. Heat at 350°F (175°C) for about 10 minutes. This method helps maintain their crunch. This blog post shared a simple and tasty recipe for Crispy Garlic Parmesan Brussels Sprouts. You learned about the key ingredients, preparation steps, and cooking methods to achieve perfect crispiness. I also provided helpful tips, variations, and storage advice to make the most of your dish. Enjoy experimenting with flavors and servings. You can easily adapt this recipe to suit your taste. Now, it’s time to grab those sprouts and start cooking! Your kitchen adventure awaits!

Crispy Garlic Parmesan Brussels Sprouts Perfectly Roasted

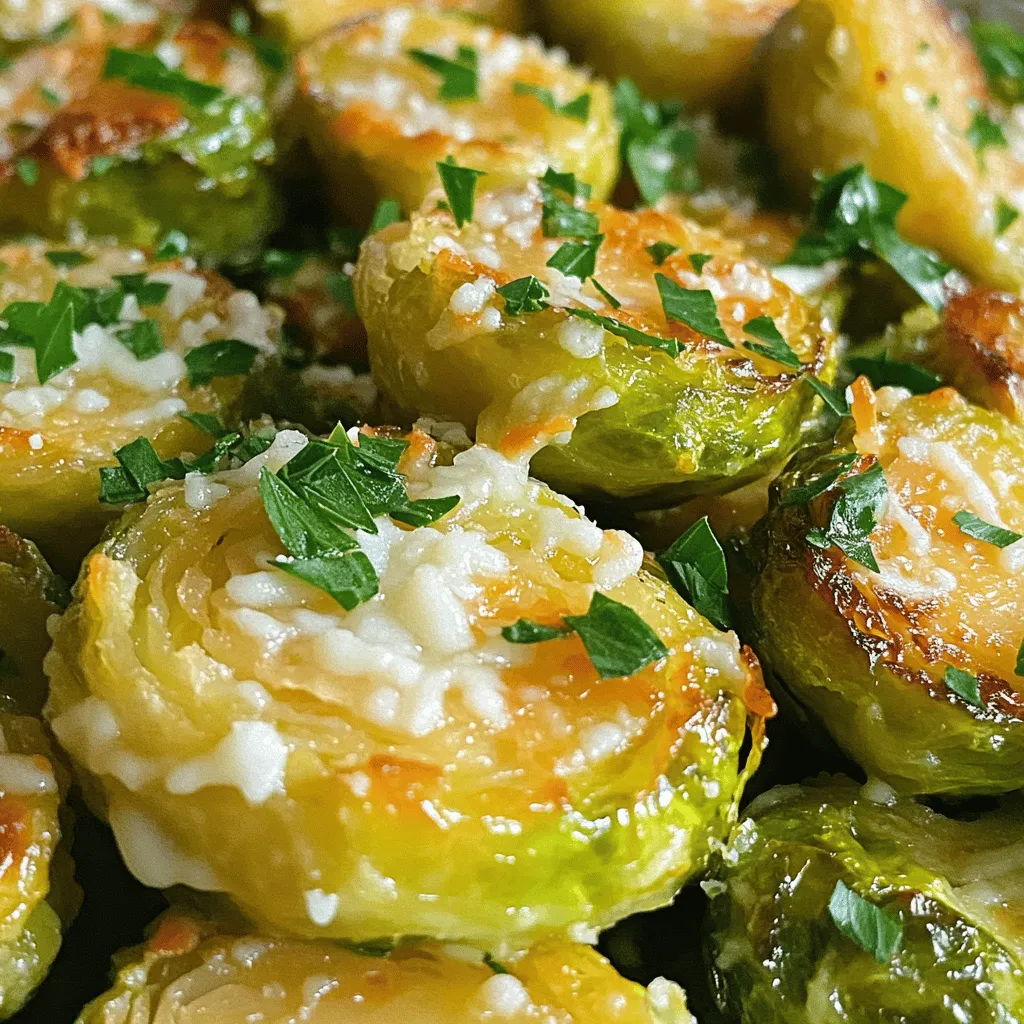
Are you ready to transform your Brussels sprouts into a crispy, cheesy delight? In this recipe for Crispy Garlic Parmesan

- 4 bone-in, skin-on chicken thighs - 1/4 cup honey - 1/4 cup Dijon mustard - 2 tablespoons olive oil - 2 cloves garlic, minced - 1 teaspoon dried thyme - 1 teaspoon smoked paprika - Salt and pepper to taste - Fresh parsley, chopped (for garnish) When I make honey mustard chicken thighs, I always start with the main ingredients. The chicken thighs are key. They have skin, which helps keep them moist and full of flavor. Honey adds a sweet touch, while Dijon mustard gives it a tangy kick. Olive oil helps everything blend well. Next, I focus on seasoning and aromatics. I love adding minced garlic for its strong flavor. Dried thyme gives a nice herbal note. Smoked paprika adds a bit of warmth and color. Salt and pepper complete the mix, balancing all the flavors. If you want to make it pretty, add fresh parsley as a garnish. It looks nice and adds a fresh taste. For the full recipe, check out the details above. Enjoy making this dish with your family! To start, grab a bowl and whisk together these simple ingredients: - 1/4 cup honey - 1/4 cup Dijon mustard - 2 tablespoons olive oil - 2 cloves garlic, minced - 1 teaspoon dried thyme - 1 teaspoon smoked paprika - Salt and pepper to taste Make sure the mixture is smooth. Next, add the chicken thighs to the bowl. Use your hands to coat each piece well in the marinade. Cover the bowl and place it in the fridge. Let it sit for at least 30 minutes. For even better taste, I recommend marinating for up to 2 hours. Now it’s time to prepare for baking. Preheat your oven to 400°F (200°C). While that heats up, take a greased baking dish. Remove the chicken from the marinade and place it skin-side up in the dish. Don’t forget to save the leftover marinade for later! Place the baking dish in the oven and bake the chicken for 30-35 minutes. You want the skin to turn crispy and golden. Use a meat thermometer to check the internal temperature. It should reach 165°F (75°C). In the last 10 minutes, take that reserved marinade and brush it over the chicken. This extra glaze adds more flavor and a shiny finish. For the full recipe, feel free to check the details above! For the best flavor, always use fresh ingredients. Fresh honey and Dijon mustard combine for a sweet and tangy taste. Marinate the chicken thighs longer for richer taste. I recommend at least 30 minutes, but two hours is even better. This time allows the flavors to sink in deeply. Using a meat thermometer helps you cook the chicken perfectly. Aim for an internal temperature of 165°F (75°C). This ensures the chicken is safe to eat. For extra crispiness, broil the chicken for a minute at the end. This quick step gives the skin a beautiful golden brown finish. Pair your honey mustard chicken thighs with roasted vegetables for a colorful plate. A fresh salad also makes a great side. Both options add nutrition and balance to your meal. You can find the full recipe above to get started on this delicious dish! {{image_2}} I love adding herbs to my honey mustard chicken thighs. Fresh herbs like rosemary or basil bring great flavor. Just chop them up and mix them into the marinade. This simple step adds a layer of depth to the dish. You will be amazed at how fresh herbs enhance the taste. It makes the meal feel special, like a fine restaurant dish. If you enjoy heat, try the spicy honey mustard variation. Adding cayenne pepper or red pepper flakes gives the chicken a kick. This twist makes the dish exciting and bold. You can control the spice level based on your taste. I recommend starting with a small amount, then adding more if desired. The heat pairs well with the sweetness of the honey too. Grilling is another fantastic option for honey mustard chicken thighs. It adds a smoky flavor that baking cannot achieve. Just marinate the chicken as usual, then grill over medium heat. Cook until the internal temperature reaches 165°F (75°C). This method gives your chicken a nice char and juicy texture. Plus, grilling is perfect for summer gatherings and outdoor meals. For detailed steps, check out the Full Recipe. Store leftovers in an airtight container for up to 3 days. This keeps the chicken fresh. When you want to eat it again, just take it out and enjoy! You can freeze marinated chicken thighs for up to 3 months before cooking. This is great for busy days. Just remember to thaw them in the fridge overnight before cooking. To reheat, place the chicken in the oven at 350°F (175°C) until heated through. This helps keep the skin crispy. Enjoy your flavorful meal without losing any taste! For best flavor, marinate for at least 30 minutes, preferably up to 2 hours. This time lets the chicken soak up the honey and mustard mix. It enhances the taste, making it juicy and flavorful. Yes, you can use boneless chicken thighs. Just adjust the cooking time to around 25-30 minutes. Boneless thighs cook faster and still stay tender when done right. Roasted potatoes, green beans, and rice are excellent choices. They balance the sweet and tangy flavors of the chicken. You can also try salads or steamed veggies for a fresh touch. Yes, you can cook it in an air fryer. Set it to 375°F (190°C) for about 25 minutes. The air fryer makes the skin crispy without using too much oil. Yes, this recipe is great for meal prep. You can marinate the chicken ahead of time and cook it when you are ready to eat. This makes it easy to enjoy a tasty meal any day. For the full recipe, refer to the earlier sections. This blog post took you through a tasty honey mustard chicken thighs recipe. We covered key ingredients, easy steps, and helpful tips. You learned about marinating and cooking options, along with ways to store leftovers. You can enjoy this dish with various sides or even grill it for a change. Remember, the right herbs and spices can make a big difference. Try out your own variations to keep it exciting. Cooking can be fun and rewarding with this simple recipe!

Honey Mustard Chicken Thighs Flavorful Family Dinner

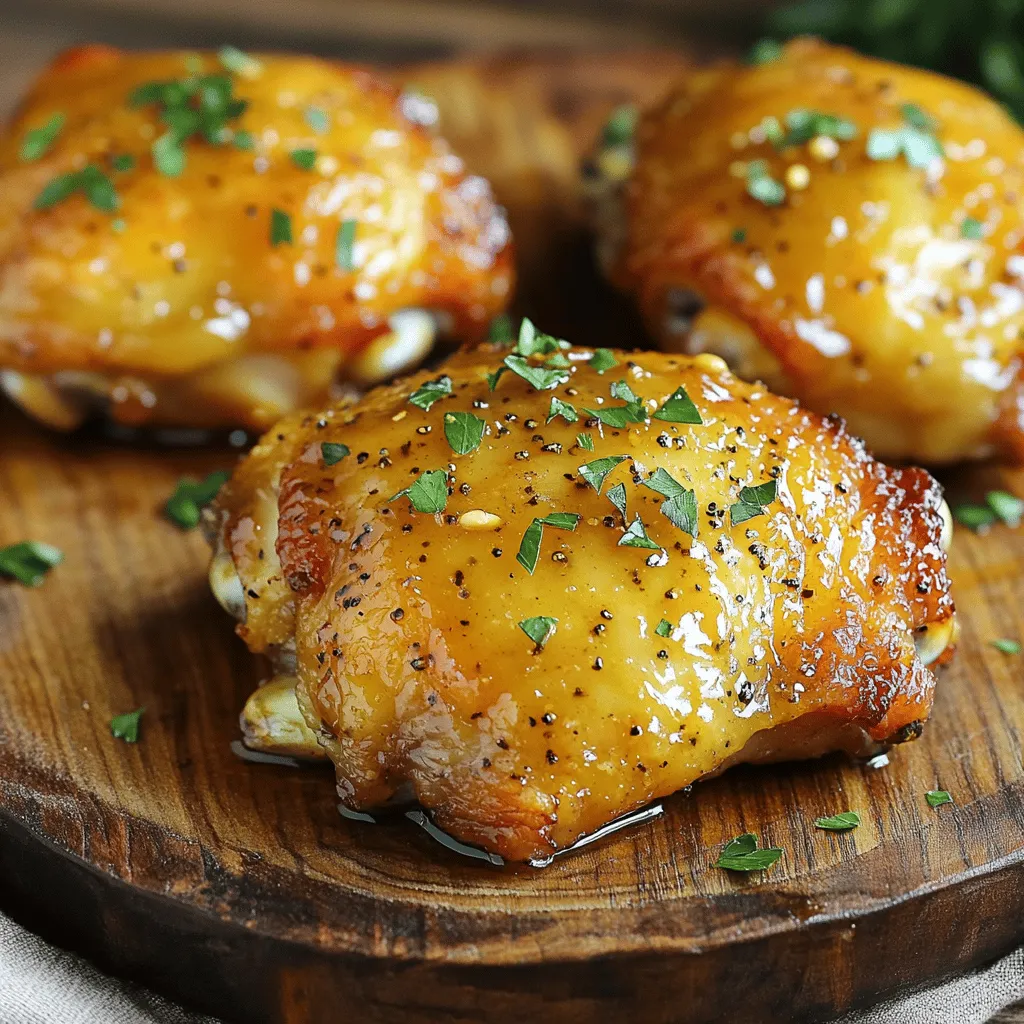
Looking for a family dinner that impresses without all the fuss? Honey Mustard Chicken Thighs are your answer! With just

To make savory oatmeal with spinach and eggs, gather these items: - 1 cup rolled oats - 2 cups vegetable broth (or water) - 2 cups fresh spinach, chopped - 2 large eggs - 1 tablespoon olive oil - 1 teaspoon garlic powder - Salt and pepper to taste - 1 tablespoon soy sauce (optional) - Red pepper flakes (for garnish) - Grated Parmesan cheese (optional) You can swap some ingredients for what you have at home: - Use chicken broth instead of vegetable broth for a richer taste. - Swap fresh spinach with kale or Swiss chard for different greens. - Try using poached eggs instead of fried for a lighter option. - If you don’t have garlic powder, fresh garlic works well too. - For a vegan version, skip the eggs and add avocado or tofu. This dish is not just tasty; it’s also good for you. Here’s what you get per serving: - Calories: ~300 - Protein: ~15g - Carbohydrates: ~40g - Fiber: ~6g - Fat: ~10g This recipe helps you get nutrients while enjoying a delicious meal. For the full recipe, check out the instructions above! First, grab a saucepan. Pour in 2 cups of vegetable broth or water. Bring it to a boil. Once boiling, add 1 cup of rolled oats. Stir the oats well. Lower the heat to a simmer. Cook for 5 to 7 minutes. Keep an eye on it. You want the oats creamy and fully absorbed. While the oats cook, take out a non-stick skillet. Heat 1 tablespoon of olive oil over medium heat. Add 2 cups of chopped spinach to the skillet. Sauté the spinach for about 2 to 3 minutes. It should wilt down nicely. Sprinkle in 1 teaspoon of garlic powder, salt, and pepper. Mix everything well. Next, make two small wells in the spinach. Crack 2 large eggs into these wells. Cover the skillet. Cook the eggs for 4 to 5 minutes. You want them cooked to your liking. Once the oatmeal is ready, you can add soy sauce if you like. Stir in a pinch of salt and pepper. Now, it’s time to serve! Spoon the oatmeal into bowls. Top each bowl with the spinach and an egg. For extra flavor, add red pepper flakes or grated Parmesan cheese if you want. Enjoy your savory oatmeal! For the full recipe, see the complete instructions above. To make your oatmeal creamy, use vegetable broth instead of water. This adds rich flavor. Cook the oats on low heat. Stir them often during cooking. This helps them absorb the broth well. If you want extra creaminess, add a splash of milk or a dollop of yogurt before serving. Cooking the eggs just right is key. For runny yolks, cover the skillet and cook for 4 minutes. If you prefer firmer yolks, cook for 5-6 minutes. Use a timer to avoid overcooking. You can also use a lid to trap steam, which helps the eggs cook evenly. Add depth to your savory oatmeal with simple extras. A splash of soy sauce gives a nice umami touch. You can also sprinkle red pepper flakes for heat. Fresh herbs like chives or parsley can brighten the dish. For a cheesy kick, try grated Parmesan cheese. Each of these adds its own unique flavor, making your meal even better. For the complete recipe, check out the Full Recipe section. {{image_2}} You can change up your savory oatmeal by adding other vegetables. Try using kale or Swiss chard for a twist. You can also add diced tomatoes or bell peppers for extra flavor. Mushrooms sautéed with garlic create a rich taste. Broccoli or zucchini can also enhance the dish. Just remember to adjust cooking times for firmer veggies like carrots or potatoes. If you want to switch out the eggs, there are great options. Tofu is an excellent choice for a plant-based protein. Just sauté it until golden and add it to your bowl. You can also use cooked chicken or turkey for more protein. If you're feeling adventurous, try adding chickpeas or lentils for a hearty touch. Each substitute will change the dish's flavor profile, so have fun experimenting! Herbs and spices can take your savory oatmeal to the next level. Fresh herbs like parsley or cilantro add brightness. You can also sprinkle in some basil or thyme for an earthy taste. For a spicy kick, consider adding cumin or smoked paprika. A dash of lemon juice can brighten the flavors, too. Mixing and matching these herbs and spices will make each bowl unique. For the full recipe, check out the section above. To store leftovers, let the savory oatmeal cool down first. Once cooled, transfer it to an airtight container. Make sure to keep it in the fridge. It will last for about 3 to 5 days. If you plan to eat it later, you might want to store the eggs separately. This keeps them from getting overcooked when you reheat the dish. When you're ready to eat, take the oatmeal out of the fridge. You can reheat it in a saucepan or microwave. If using a saucepan, add a splash of water or broth. Heat it over low heat, stirring often. This helps it warm evenly. If using a microwave, cover it with a lid or a wet paper towel. Heat in 30-second bursts until warm. Check the temperature to make sure it’s hot throughout. You can freeze this dish, but it’s best to freeze just the oatmeal. Cooked eggs don't freeze well. To freeze, use a freezer-safe container. Fill it with the oatmeal and leave some space at the top. This allows for expansion. Label the container with the date. The oatmeal can last in the freezer for about 2 to 3 months. When you want to eat it, just thaw it in the fridge overnight and reheat as described. For the full recipe, check out the detailed instructions above! Yes, you can use rolled oats. They add a nice texture. Instant oats cook faster but have less flavor. Rolled oats take about 5-7 minutes to cook. This gives them a creamier and heartier taste. Just follow the same instructions in the Full Recipe. For a crunchy texture, try adding nuts or seeds. Chopped almonds, walnuts, or pumpkin seeds work well. You can also sprinkle some crispy bacon bits or toasted breadcrumbs on top. These add a fun bite and contrast to the soft oatmeal. To meal prep, cook a big batch of oatmeal. Store it in airtight containers. You can prepare the spinach and eggs fresh each day. Reheat the oatmeal in the morning. Then, add the sautéed spinach and cooked eggs. This keeps the flavors fresh and delicious. This article shows you how to make a tasty oatmeal dish. We covered ingredients, cooking steps, and helpful tips. You learned about substitutions and storage for leftovers. Try adding your favorite vegetables or spices to change the flavor. Remember, you can freeze leftovers for a quick meal later. Feel free to ask questions and experiment. Enjoy your cooking!

Savory Oatmeal with Spinach and Eggs Quick Recipe

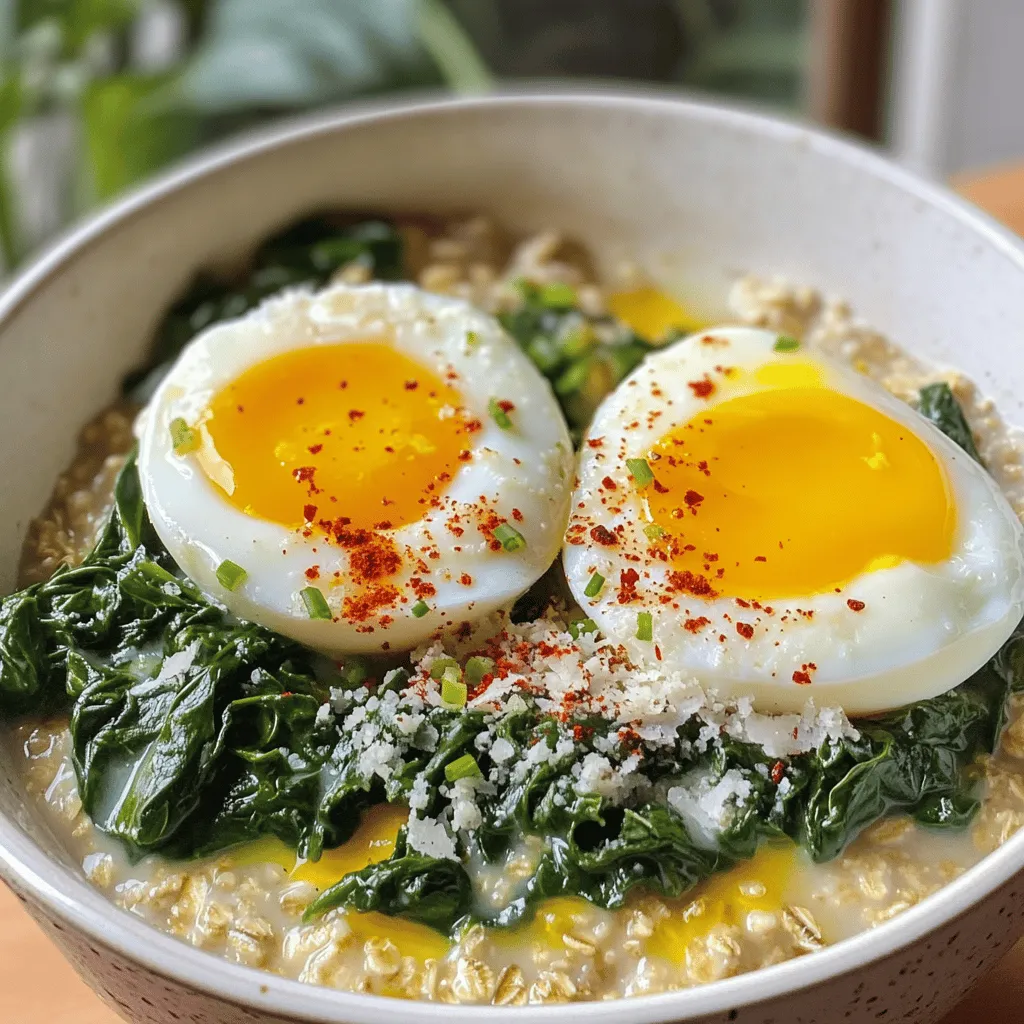
Looking for a quick breakfast that packs a punch? Savory oatmeal with spinach and eggs is your perfect solution! This

- 2 ripe avocados - 1/2 cup unsweetened cocoa powder - 1/4 cup pure maple syrup (or honey) - 1 teaspoon vanilla extract - 1/4 cup almond milk (or any milk of choice) - A pinch of salt The star of this mousse is the avocado. It gives the mousse a rich and creamy base. You want ripe avocados for the best flavor and texture. Just make sure they are soft but not brown inside. Next, we have unsweetened cocoa powder. This is where the chocolate magic happens. It adds intense chocolate flavor without extra sugar. You can choose high-quality cocoa for a richer taste. Maple syrup or honey sweetens the mousse. Depending on your preference, both work well. I love maple syrup for its unique taste, but honey is great too! Vanilla extract adds a warm note. It enhances the chocolate flavor and keeps the taste balanced. Almond milk helps to blend everything smoothly. You can use any milk you like. This keeps the mousse light and fluffy. Finally, a pinch of salt brings out all the flavors. It’s a secret ingredient that makes a big difference! - Cacao nibs - Shaved dark chocolate - Fresh berries - Whipped coconut cream Toppings add a fun twist to your mousse. Cacao nibs give a nice crunch. Shaved dark chocolate adds more chocolate flavor. Fresh berries brighten the dish and add freshness. Whipped coconut cream creates a delightful contrast to the rich mousse. For the full recipe, check out the detailed steps in the article. Enjoy making this delicious treat! - Slice avocados and remove the pit. - Scoop avocado flesh into a blender or food processor. To start, grab two ripe avocados. Cut them in half and remove the pit. This is the key first step. Next, scoop the creamy flesh into your blender. Make sure you get all of it; every bit counts! - Add cocoa powder, maple syrup, vanilla extract, almond milk, and salt. - Blend until smooth and creamy. Now, it's time to add the fun ingredients. Toss in a half cup of unsweetened cocoa powder. Then, add a quarter cup of pure maple syrup for sweetness. Don’t forget a teaspoon of vanilla extract for flavor! Pour in a quarter cup of almond milk, and sprinkle in a pinch of salt. Blend everything on high until it turns super smooth and creamy. If needed, stop and scrape down the sides. This helps mix everything well. - Adjust sweetness and chocolate flavor. - Transfer mousse to serving bowls and refrigerate. Taste your mousse! If you want it sweeter, add more maple syrup. For more chocolate flavor, add a bit more cocoa powder. Once it tastes just right, transfer the mousse to serving bowls. Pop them in the fridge for at least 30 minutes. This helps the mousse set and chill. For the full recipe, check out the details above. Enjoy your rich and creamy chocolate avocado mousse! To make the mousse creamy, blend well. Start with ripe avocados. They should feel soft when you press them. This means they will blend well. Cut the avocados in half, remove the pit, and scoop the flesh into the blender. Make sure to blend on high speed. Stop to scrape the sides. This helps mix everything evenly. If you notice lumps, blend a little longer. You want a smooth, velvety texture. This is key to a great mousse. You can adjust sweetness. If you like it sweeter, add more maple syrup. For a richer chocolate flavor, add more unsweetened cocoa powder. Start with a little, then taste. This way, you can find your perfect balance. You can also enhance flavors. Try adding a pinch of cinnamon for warmth. A dash of espresso powder gives it a mocha vibe. For something fresh, a hint of orange zest works wonders. To present the mousse, use small cups or bowls. This makes it look fancy. You can swirl a bit of whipped coconut cream on top. Add cacao nibs or shaved dark chocolate for a nice crunch. Fresh berries add color and a burst of flavor. Pair the mousse with fruit salads or cookies. It also goes great with a cup of coffee. For the full experience, serve it with a delicious dessert wine. Enjoy your rich and creamy chocolate avocado mousse! {{image_2}} You can sweeten your chocolate avocado mousse with different options. Maple syrup and honey are both great choices. Maple syrup gives a rich flavor, while honey adds a floral note. If you want to try natural sugar substitutes, consider stevia or agave. These options work well, but be careful with the amount. Each sweetener has a different level of sweetness. Want to switch things up? Try adding espresso for a mocha twist. This addition brings a deep coffee flavor that pairs well with chocolate. You can also infuse your mousse with mint or orange zest. These flavors add freshness and make your dessert stand out. Just a little zest goes a long way, so start small and taste as you go. If you have dietary needs, you can still enjoy this mousse. Use coconut milk instead of almond milk for a creamy texture. For sweeteners, choose agave or maple syrup to keep it vegan. You can also top your mousse with dairy-free whipped cream or fresh fruits. These options keep your dessert light and tasty. To store leftovers, place the mousse in an airtight container. This keeps it fresh and prevents it from absorbing other smells in the fridge. I recommend using glass containers. They are non-toxic and do not stain. Chocolate avocado mousse lasts about 3 to 5 days in the fridge. Always check for signs of spoilage before eating. If the mousse develops a strange smell, color, or texture, it’s best to toss it. Yes, you can freeze chocolate avocado mousse! To do this, scoop the mousse into a freezer-safe container. Leave some space at the top for expansion. When ready to enjoy, place it in the fridge overnight to thaw. Stir it well before serving to get the creamy texture back. For the full recipe, check out the Chocolate Avocado Mousse section above. Chocolate avocado mousse has a rich and creamy taste. You will enjoy a deep chocolate flavor, balanced by the smoothness of avocado. The texture is thick and velvety, making each bite a delight. The sweetness from maple syrup adds a nice touch. You will find it hard to believe this treat is made with avocado! Yes, there are many health benefits. Avocados are high in healthy fats, vitamins, and minerals. They support heart health and boost energy. Cocoa powder is full of antioxidants and can improve mood. Together, they make a nutritious dessert without guilt. You can enjoy this treat and feel good about it. Absolutely! You can prepare chocolate avocado mousse a day before serving. Just store it in the fridge. This allows the flavors to blend nicely. It also saves you time on the day of your event. Just remember to give it a good stir before serving. Yes, this dessert is perfect for both vegetarians and vegans. It has no animal products, making it a great choice. You can use maple syrup instead of honey for a vegan option. Check all your ingredients to ensure they meet your dietary needs. Enjoy this delicious dessert with peace of mind! This blog post showed you how to make a delicious chocolate avocado mousse. We covered the key ingredients and steps. You learned tips for a creamy texture and how to store it. Variations let you personalize the recipe for your taste. Enjoy this simple dessert that satisfies your sweet tooth. With healthy ingredients, it's a treat you can feel good about. Try it out and impress your friends and family!

Chocolate Avocado Mousse Rich and Creamy Delight

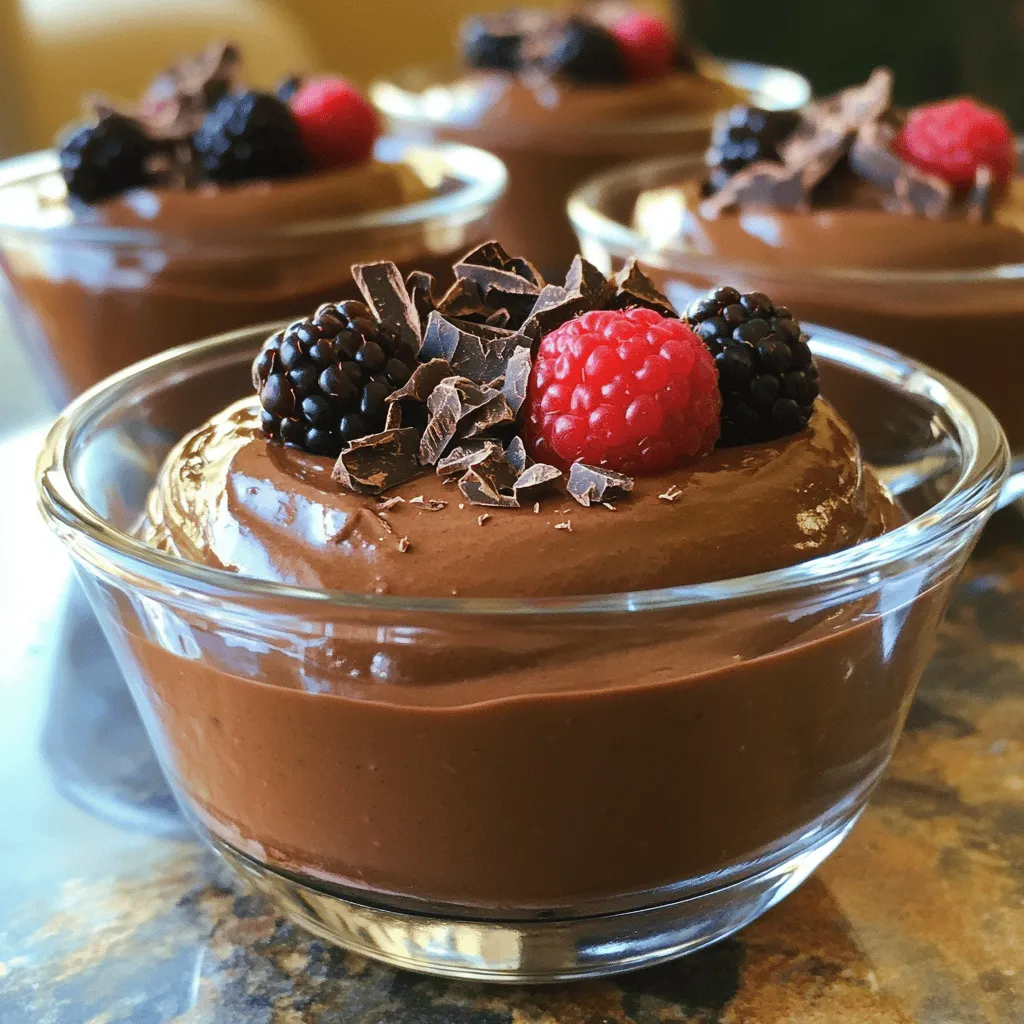
Craving a sweet treat that’s both rich and healthy? Let me introduce you to my Chocolate Avocado Mousse! This creamy

For this Lemon Garlic Butter Shrimp recipe, you will need: - 1 pound large shrimp, peeled and deveined - 3 tablespoons unsalted butter - 4 cloves garlic, minced - 1 lemon, zested and juiced - 1/4 teaspoon red pepper flakes (adjust for spice preference) - Salt and pepper to taste - 2 tablespoons fresh parsley, chopped (for garnish) - Lemon wedges, for serving You can add optional ingredients like a pinch of smoked paprika or fresh basil for extra flavor. When choosing shrimp, I recommend large shrimp. They cook evenly and look great on a plate. Look for shrimp that are firm, shiny, and smell fresh, not fishy. For lemons, pick ones that feel heavy for their size. This means they have plenty of juice. The skin should be bright and smooth. Fresh lemons add a zesty flavor that brightens the dish. 1. Start by gathering all your ingredients. This makes cooking easier and fun. 2. Melt 3 tablespoons of unsalted butter in a large skillet over medium heat. 3. Once the butter melts, add 4 minced garlic cloves and 1/4 teaspoon of red pepper flakes. 4. Sauté the garlic for about 1 minute. You want it fragrant but not brown. 5. Now, raise the heat to medium-high. Add 1 pound of peeled and deveined shrimp to the skillet. 6. Season with salt and pepper to taste. Sauté the shrimp for 2-3 minutes. They will turn pink and opaque. 7. Pour in the juice of 1 lemon and sprinkle the lemon zest over the shrimp. 8. Stir everything to combine well. Cook for an additional 1-2 minutes. This helps the flavors blend. 9. Remove the skillet from heat and garnish with 2 tablespoons of chopped fresh parsley. 10. Serve your dish right away with lemon wedges on the side. To sauté shrimp perfectly, remember these tips: - Use medium heat to start melting the butter. This helps the garlic cook without burning. - Timing is key. Overcooking shrimp makes them rubbery. Watch them carefully as they change color. - Medium-high heat gives shrimp a nice sear. This adds great flavor and texture. With these steps and tips, you can create a delightful dish of Lemon Garlic Butter Shrimp. For the full recipe, check out the complete instructions above. To boost the taste of your lemon garlic butter shrimp, try adding fresh herbs. You can use parsley, cilantro, or basil. Each herb brings a unique twist. A pinch of paprika can also add depth. For cooking techniques, use high heat. This helps the shrimp cook fast and keeps them tender. Sauté shrimp in a hot skillet to get a nice sear. This searing locks in flavors and adds a beautiful golden color. One common error is overcooking the shrimp. Shrimp cooks quickly. If they turn tough and rubbery, you have cooked them too long. Always watch for the color change. Shrimp should be pink and opaque when done. Another mistake is not seasoning early. Adding salt and pepper at the start helps flavor the shrimp better. Make sure to taste as you go. Adjust seasoning to your liking for the best results. {{image_2}} You can swap butter for olive oil. This change makes the dish dairy-free. If you want a spicy kick, try using cayenne pepper instead of red pepper flakes. For shrimp, you can use scallops or even chicken. These options bring different flavors but keep the dish tasty. Lemon Garlic Butter Shrimp pairs well with rice or pasta. A fresh green salad or steamed veggies also work nicely. For drinks, a crisp white wine like Sauvignon Blanc is a great choice. If you prefer non-alcoholic options, try sparkling water with lemon. For the full recipe, check out the details above. To keep your Lemon Garlic Butter Shrimp fresh, store it in an airtight container. Place it in the fridge if you plan to eat it soon. It can last for 2 to 3 days this way. If you want to save it for longer, you can freeze it. Make sure to freeze it in a good container. It will stay fresh for about 1 to 2 months in the freezer. When it’s time to eat your leftovers, you can reheat shrimp safely. The best way is to use a skillet. Heat it on low and add a little butter or oil. This helps keep the shrimp moist. You can also use the microwave. Just cover the shrimp and heat it in short bursts. Make sure to stir it often. This helps the shrimp stay tender and not rubbery. How to tell when shrimp is fully cooked? You can tell shrimp is cooked when it turns pink and opaque. Use a timer to check. It usually takes about 2-3 minutes of cooking. If you overcook shrimp, it becomes rubbery. Can this recipe be made in advance? You can prepare the shrimp ahead of time, but cook it just before serving. If you make it early, store it in the fridge for up to two days. Just reheat gently to avoid overcooking. Can I use frozen shrimp for this recipe? Yes, you can use frozen shrimp. Just thaw it first. Place the shrimp in cold water for about 15-20 minutes. Pat them dry before cooking. This helps the seasonings stick better. How to scale the recipe for more or fewer servings? To adjust the servings, simply multiply or divide the ingredients. For example, if you want to serve eight, use 2 pounds of shrimp. Keep the same cooking time, but check shrimp for doneness. This article covered the key ingredients and steps for making Lemon Garlic Butter Shrimp. You learned about selecting the best shrimp and picking fresh lemons. I also shared cooking techniques and common mistakes to avoid. Remember, timing is key for perfect shrimp. Add your own twist with seasonings or variations. Don’t forget storage tips for leftovers. Enjoy this tasty dish that can impress anyone. With practice, you can make it even better each time!

Lemon Garlic Butter Shrimp Simple and Flavorful Dish

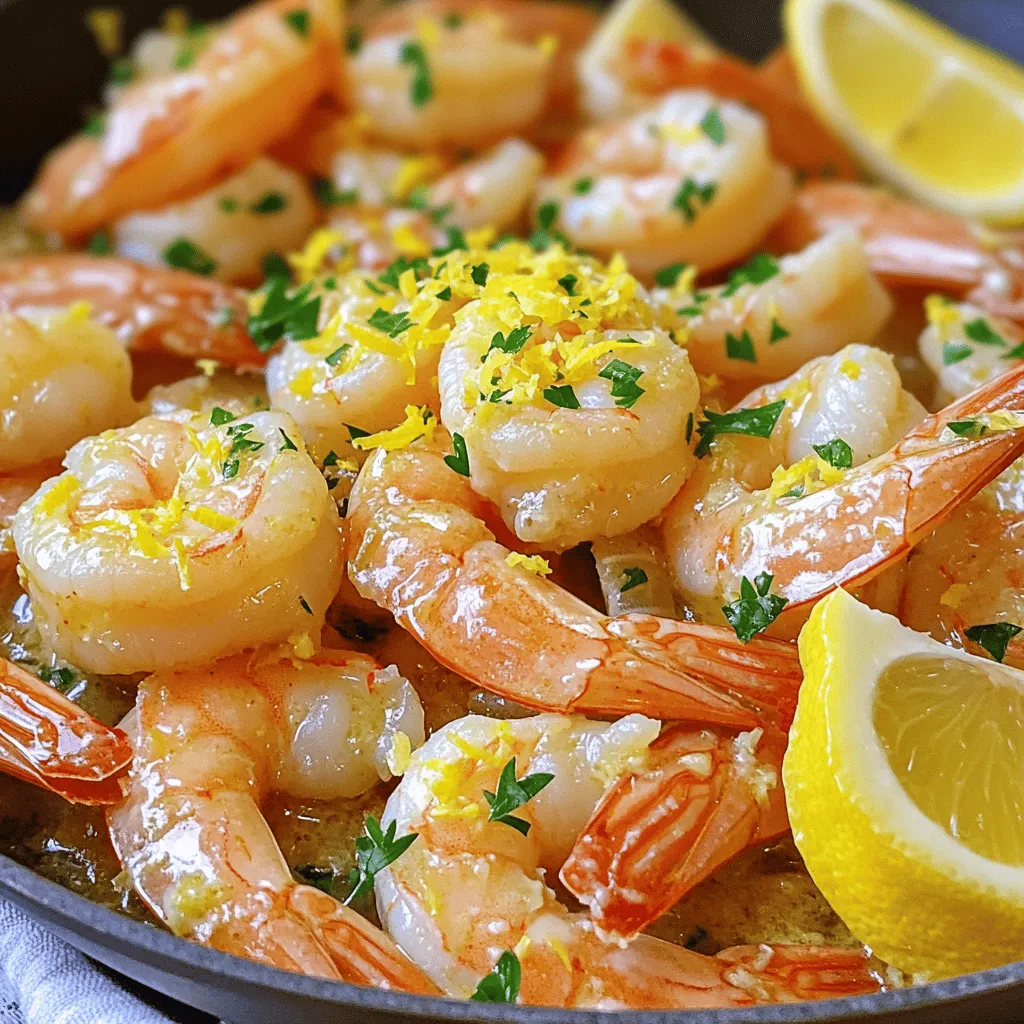
Are you ready to impress your family and friends with a dish that bursts with flavor? My Lemon Garlic Butter

Older posts
Newer posts
← Previous Page1 … Page34 Page35 Page36 … Page63 Next →

dsad

© 2025 Recipes Pursuit • Built with GeneratePress

Our Policies

  • Copyright Policy
  • Cookie Policy
  • GDPR Policy
  • Privacy Policy
  • Disclaimer
  • Terms Of Use

More Information

  • Home
  • About
  • Contact
  • Appetizers
  • Dessert
  • Dinner
  • Drinks
©2025, Recipes Pursuit About Back To Top