Skip to content
DisclaimerTerms Of UseGDPR PolicyCookie Policy

Recipes Pursuit

  • Home
  • Drinks
  • Appetizers
  • Dinner
  • Dessert
  • About
  • Contact
  • Privacy Policy
DisclaimerTerms Of UseGDPR PolicyCookie Policy

Emma Smith

For this smoky paprika chicken thighs dish, you will need: - 4 chicken thighs, skin-on and bone-in - 2 tablespoons smoked paprika - 1 tablespoon garlic powder - 1 teaspoon onion powder - 1 teaspoon cumin - 1 teaspoon salt - 1/2 teaspoon black pepper - 1/4 teaspoon cayenne pepper (adjust for spice preference) - 2 tablespoons olive oil - 1 tablespoon apple cider vinegar - Fresh parsley, chopped (for garnish) You can add more flavor by using these optional ingredients: - Lemon zest for brightness - A splash of honey for sweetness - Fresh herbs like thyme or rosemary for freshness To make this dish, gather these tools: - A large mixing bowl - An oven-safe skillet - A meat thermometer for checking doneness - Tongs for flipping the chicken These ingredients and tools will help you create a flavorful meal. Enjoy the process and make it your own! For the full recipe, check out the details above. For the best smoky paprika chicken thighs, start by mixing your spices. In a large bowl, combine: - 2 tablespoons smoked paprika - 1 tablespoon garlic powder - 1 teaspoon onion powder - 1 teaspoon cumin - 1 teaspoon salt - 1/2 teaspoon black pepper - 1/4 teaspoon cayenne pepper Next, add the chicken thighs to the bowl. Drizzle with: - 2 tablespoons olive oil - 1 tablespoon apple cider vinegar Toss the chicken until it is well coated. Make sure the spices get under the skin for great taste. Now, preheat your oven to 400°F (200°C). This step is key to crisp skin. While the oven heats, grab an oven-safe skillet. Heat it over medium-high heat until hot. Place the chicken thighs in the skillet skin-side down. Sear them for 5-7 minutes. You want the skin to be crispy and golden. After searing, flip the chicken thighs over. Transfer the skillet to the preheated oven. Bake for 25-30 minutes. Check the internal temperature; it should reach 165°F (75°C). Once done, remove the skillet from the oven. Let the chicken rest for 5 minutes. This helps keep the juices locked in. Before serving, garnish with fresh parsley. For the full recipe, check out the section above. Serve with roasted veggies for a nice touch! To get the skin nice and crispy, start with dry chicken thighs. Pat them with paper towels before seasoning. The drier the skin, the better it will crisp up. Use a hot skillet to sear the thighs skin-side down. This helps lock in moisture while creating that golden finish. Don't rush this step; let the chicken sizzle for about 5-7 minutes. You can play around with the spices. Try adding lemon zest for a fresh kick. If you like heat, toss in more cayenne pepper or even chili powder. For a smoky twist, consider adding chipotle powder. If you want a touch of sweetness, a dash of brown sugar works well too. Always adjust the seasoning to suit your taste. The key to juicy chicken is cooking at the right temperature. Roast the chicken thighs at 400°F (200°C). This temp allows the skin to crisp while cooking the meat through. Use a meat thermometer to check for doneness. The internal temperature should reach 165°F (75°C). Let the chicken rest for a few minutes before serving. This helps keep the juices locked in. For more details, check the Full Recipe. {{image_2}} You can switch up the flavor of your smoky paprika chicken thighs with other spice blends. Here are a few ideas: - Cajun Spice: Add a mix of cayenne, oregano, and thyme for a kick. - Herb Mix: Try rosemary, thyme, and basil for a fresh taste. - Curry Powder: A warm blend of turmeric, cumin, and coriander adds a unique twist. These blends can make your dish exciting and new every time you cook. Pair your smoky paprika chicken thighs with tasty sides that complement the dish. Some great options include: - Roasted Vegetables: Carrots, potatoes, and bell peppers bring color and flavor. - Quinoa Salad: A light salad with lemon and herbs balances the richness. - Garlic Bread: Crunchy bread adds a nice touch and soaks up juices. These sides will make your meal feel complete and satisfying. Both oven and grill methods work well for this chicken dish. Here’s a closer look: - Oven: It gives even cooking and keeps the chicken moist. Use a skillet for a crispy skin. - Grill: This method adds a smoky flavor and nice char marks. Just be careful not to overcook the chicken. Choosing between these two depends on your taste and cooking style. Enjoy experimenting! For the full recipe, check the details above. To keep your smoky paprika chicken thighs fresh, let them cool first. Place the chicken in an airtight container. Store it in the fridge for up to three days. For best flavor, use it within two days. You can also wrap each thigh tightly in plastic wrap. This helps prevent drying out. When ready to enjoy leftovers, preheat your oven to 350°F (175°C). Place the chicken thighs on a baking sheet. Cover them with foil to keep them moist. Heat for 15-20 minutes. If you want crispy skin, remove the foil for the last 5 minutes. You can also use a microwave, but it won’t keep the skin crispy. Heat on medium power for 2-3 minutes, checking often. If you want to save chicken thighs for later, freezing is a great option. Wrap each thigh tightly in plastic wrap. Then, place them in a freezer-safe bag. Label the bag with the date. You can freeze for up to three months. To thaw, move the chicken to the fridge for 24 hours. If you need it fast, use the microwave on the defrost setting. After thawing, cook it right away for safety. For more details, check the Full Recipe. The best way to season chicken thighs is to use bold flavors. I love using smoked paprika, garlic powder, and cumin. These spices create a rich taste. A good mix of salt and pepper is also key. Always rub the seasonings on the skin and under it. This method ensures full flavor in every bite. You can get creative with herbs, too. Fresh parsley adds a nice boost. Yes, you can use skinless chicken thighs. However, they may not be as crispy. The skin helps lock in moisture and adds crunch. If you use skinless thighs, adjust the cooking time slightly. Check the internal temperature to ensure they cook safely. Use the same seasoning mix for great flavor. You might want to add a bit more oil to keep them juicy. To tell when chicken thighs are fully cooked, use a meat thermometer. Insert it into the thickest part of the thigh. It should read at least 165°F (75°C). If you don’t have a thermometer, cut into the thigh. The juices should run clear, not pink. Another sign is the meat pulling away from the bone. Always check these signs to ensure safety. Enjoy your Smoky Paprika Chicken Thighs with confidence! For the full recipe, check the details above. In this blog post, we explored the ingredients needed for tasty chicken thighs. You learned how to customize flavors and the best tools for cooking. I shared a step-by-step guide, from pre-heating your skillet to achieving that crisp skin. Tips for seasoning and cooking methods helped you make the best dish possible. Finally, we covered storage options and answered common questions. With this knowledge, you can create delicious chicken thighs every time. Enjoy your cooking adventure!

105. Smoky Paprika Chicken Thighs Flavorful Dish

Ready to spice up your dinner? Dive into my Smoky Paprika Chicken Thighs recipe! This flavorful dish is easy to

To make Garlic Lemon Grilled Shrimp, you will need: - 1 pound large shrimp, peeled and deveined - 4 cloves garlic, minced - 1/4 cup olive oil - Zest and juice of 1 lemon - 1 teaspoon smoked paprika - 1 teaspoon red pepper flakes (adjust for spice preference) - Salt and pepper to taste - Fresh parsley, chopped (for garnish) - Lemon wedges (for serving) If you lack any ingredient, here are some swaps: - Use shallots instead of garlic for a milder taste. - Swap olive oil with avocado oil for a different flavor. - Lemon juice can be replaced with lime juice for a zesty twist. - Use cayenne pepper instead of red pepper flakes for extra heat. You can use fresh or frozen shrimp for this recipe. Fresh shrimp tastes great, but frozen shrimp works well too. If you choose frozen shrimp, make sure to thaw it first. You can thaw shrimp overnight in the fridge or place it in cold water for about 30 minutes. When buying shrimp, check for a clean smell and firm texture. Fresh shrimp should be pink and shiny. Both types will yield delicious results in your Garlic Lemon Grilled Shrimp dish. For the full recipe, check the details above. To start, gather your ingredients. You will need garlic, olive oil, lemon, smoked paprika, red pepper flakes, salt, and pepper. In a large bowl, mix the minced garlic with olive oil, lemon zest, and lemon juice. Add smoked paprika and red pepper flakes next. Season with salt and pepper to taste. Whisk this mixture until it's well combined. This marinade is the key to great flavor in your shrimp. Now, add the shrimp to the bowl with the marinade. Make sure every shrimp is coated well. Cover the bowl with plastic wrap and place it in the fridge. Let the shrimp marinate for at least 30 minutes. If you have time, you can let them sit for up to an hour. This will help infuse all those tasty flavors into the shrimp. Preheat your grill to medium-high heat. Lightly oil the grill grates to prevent sticking. Now, it's time to skewer your shrimp. You can use metal or bamboo skewers. If you choose bamboo, soak them in water for 30 minutes first. This step keeps them from burning. Place the skewers on the grill and cook for 2-3 minutes on each side. Watch closely! The shrimp should turn pink and opaque. Avoid overcooking them. Once done, remove the skewers and garnish with fresh parsley. Serve with lemon wedges. Enjoy this delightful summer meal! For the full recipe, check out the details above. When picking shrimp, look for fresh and firm ones. You want shrimp that smell like the sea, not fishy. The shells should be shiny and smooth. If you choose frozen shrimp, make sure they are thawed properly. Always check for large shrimp; they hold flavor better. Overcooked shrimp can be tough and rubbery. To avoid this, keep a close eye on the grill. Cook shrimp for about 2-3 minutes on each side. They should turn pink and opaque when done. If they curl up tightly, they are overcooked. Timing is key for the best results. Preheat your grill to medium-high heat for even cooking. Oil the grates lightly to prevent sticking. Use metal or soaked bamboo skewers for easy flipping. If using bamboo, soak them for 30 minutes. This helps avoid burning. Keep the shrimp on the heat just long enough for a nice char. For extra flavor, try adding lemon slices on the grill. For the complete recipe, check out the full recipe above. {{image_2}} If you love heat, add more red pepper flakes. Use up to 2 teaspoons for a real kick. You can also mix in fresh jalapeños. Just chop them finely and add them to the marinade. This adds a zesty flavor that pairs well with the shrimp. You can also try a splash of hot sauce for more spice. It gives the dish a fun twist! Adding fresh herbs can make your garlic lemon grilled shrimp even tastier. Try adding chopped basil, cilantro, or dill with the marinade. Each herb brings its own unique flavor. You can also use dried herbs, like oregano or thyme. They still add a nice touch. Mix and match to find your favorite herb combination. This way, you can personalize the dish to your liking. While skewers are easy, you can grill shrimp without them. Use a grill basket for easy cooking. A grill basket keeps the shrimp from falling through the grates. If you want to try something different, grill them on a flat surface. A cast iron pan works great. Just preheat your pan and add the shrimp. This method gives a nice sear and keeps all the juices in. For the full recipe, check out the full recipe section above. After enjoying your Garlic Lemon Grilled Shrimp, store any leftovers in an airtight container. Keep it in the fridge for up to three days. Make sure the shrimp cool down before sealing. This keeps them fresh and prevents sogginess. To reheat, you can use a skillet or the microwave. For the skillet, warm it on low heat. Add a splash of water or olive oil to keep the shrimp moist. Stir gently for a few minutes. If using the microwave, place the shrimp in a microwave-safe dish. Heat in short bursts, about 30 seconds each, until warm. If you want to save your shrimp for later, freezing is a great option. Place the cooled shrimp in a freezer-safe bag. Remove as much air as possible before sealing. They can last for up to three months in the freezer. To enjoy later, thaw in the fridge overnight before reheating. To add heat, use more red pepper flakes. You can also mix in chopped fresh chili peppers. Hot sauce is another great choice. Make sure to adjust based on your taste. Adding spice can change the flavor, so be careful. Always taste the marinade before adding more heat. A little goes a long way. You want to enjoy the shrimp's flavor too. Yes, a grill pan works well for cooking shrimp. It gives nice grill marks and flavor. Just heat the pan over medium-high heat. Add some oil to keep the shrimp from sticking. Follow the same cooking times as you would on an outdoor grill. Cook the shrimp for about 2-3 minutes per side. This method is great for indoor cooking. Shrimp turn pink and opaque when cooked. They should also curl into a C shape. If they're still gray or transparent, they need more time. Avoid overcooking, as this makes them tough. Use a meat thermometer if you want to be sure. The internal temperature should reach 120°F. This ensures they are safe to eat and tasty. Enjoy your garlic lemon grilled shrimp! For the full recipe, check out the details above. This post covers how to make garlic lemon grilled shrimp. You learned about ingredients, their swaps, and the best shrimp types. I shared easy steps to prepare, marinate, and grill shrimp without burning them. We explored variations and how to store leftovers too. Grilling shrimp can be simple and fun. Use these tips to impress at your next meal! Enjoy the fresh taste of shrimp today and try your own twists. Grilling opens a world of flavor just waiting for you.

104. Garlic Lemon Grilled Shrimp Delightful Summer Meal

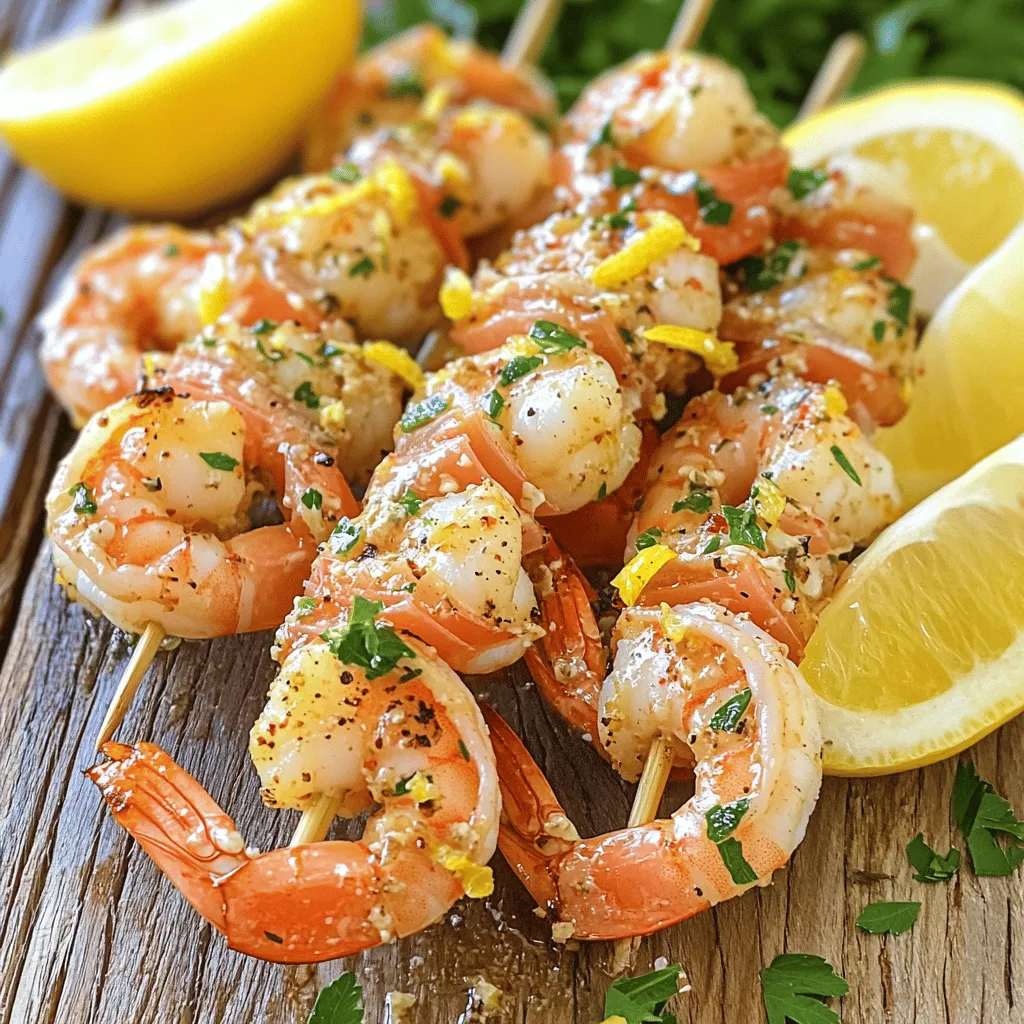
Looking for a perfect dish for summer? My Garlic Lemon Grilled Shrimp is a delightful option! This meal bursts with

To make these tasty raspberry lemonade bars, gather these key ingredients: - 1 cup all-purpose flour - 1/2 cup powdered sugar - 1/4 teaspoon salt - 1/2 cup unsalted butter, softened - 2 large eggs - 1 cup granulated sugar - 1/2 cup fresh lemon juice (about 2-3 lemons) - 1 teaspoon lemon zest - 1/2 cup fresh raspberries (plus extra for garnish) - 1/4 teaspoon baking powder - Extra powdered sugar for dusting These ingredients create a perfect balance of sweet and tart flavors. The lemon juice gives a refreshing zing. The raspberries add a lovely burst of color and taste. You will need some basic tools to prepare your bars: - Mixing bowls - Whisk - Measuring cups and spoons - 9x9-inch baking pan - Parchment paper - Oven Having the right tools makes cooking easier and more fun. For a beautiful finish, use these garnishing items: - Fresh raspberries - Extra powdered sugar These extras not only add visual appeal but also enhance the flavors of your bars. Enjoy making and sharing these delightful treats! First, preheat your oven to 350°F (175°C). This step is key for even baking. Grease a 9x9-inch baking pan. Line it with parchment paper. Leave some paper hanging over the sides. This helps with easy removal later. In a bowl, mix together the flour, powdered sugar, and salt. Add the softened butter and blend until it looks like fine crumbs. Press this mixture firmly into the bottom of your prepared pan. Bake it for about 15 minutes. You want it to be lightly golden. In a separate bowl, whisk the eggs and granulated sugar together until well mixed. Stir in the fresh lemon juice and zest. Add the raspberries gently, so they don't break apart. Finally, mix in the baking powder until just combined. After the crust is done, pour the raspberry lemon filling over the hot crust. Spread it evenly with a spatula. Return the pan to the oven and bake for 20-25 minutes. Check if the center is set by inserting a toothpick. It should come out clean. Once done, let the bars cool at room temperature for about 30 minutes. Chill them in the fridge for at least one hour. Lift the bars out using the parchment paper and cut them into squares. Dust with extra powdered sugar and add fresh raspberries for a lovely look. For the complete process, refer to the Full Recipe. To get the best flavor in your raspberry lemonade bars, use fresh ingredients. Fresh lemons give a bright taste. Fresh raspberries add a deep, fruity note. Mix the lemon juice and zest well for a strong burst of flavor. Whisk the eggs and sugar until smooth. This helps the filling blend nicely. For a tangy twist, add a pinch of salt. It enhances the sweet-tart balance. Avoid using old or frozen raspberries. They lack the vibrant taste of fresh ones. Don’t overmix the filling; it can make your bars tough. Also, make sure your oven is preheated. A cold oven can lead to uneven baking. Remember to let the bars cool completely before cutting. Cutting too soon can lead to messy squares. To make your bars pop, use bright raspberries on top. Dust the bars with powdered sugar for a snowy look. Adding lemon zest on top gives a nice touch. You can also serve them on a colorful plate. Consider adding mint leaves for a fresh green contrast. A little creativity goes a long way in making these bars look appealing. For the full recipe, check the recipe section above! {{image_2}} You can change the fruit in these bars to fit your taste. Try blueberries for a sweet twist. They give a nice color too. Cherries work well and add a lovely tart flavor. If you want a tropical vibe, use mango. It pairs nicely with lemon. If you need a gluten-free crust, swap the all-purpose flour for almond flour. This will give a nutty flavor. You can also use a gluten-free baking mix. Just make sure it has a good texture. Add a bit more butter if needed to keep it moist. To change the sweetness, add more or less sugar. Taste the filling before baking. If you want it less tart, use more sugar. For a bolder lemon flavor, add an extra tablespoon of lemon juice. You can even mix in some lemon zest to boost the taste. For the full recipe, check out the details above. To keep your Raspberry Lemonade Bars fresh, store them in an airtight container. This helps keep moisture out and flavor in. You can place parchment paper between layers to prevent sticking. For best results, store them in the fridge. The cool air will keep them firm and tasty. You can freeze Raspberry Lemonade Bars if you want to save some for later. First, cut the bars into squares. Then, wrap each square tightly in plastic wrap. Place the wrapped bars in a freezer bag or container. Make sure to label the bag with the date. They will last up to three months in the freezer. When you're ready to enjoy, let them thaw in the fridge overnight. Raspberry Lemonade Bars will stay fresh in the fridge for about five days. After that, they may lose some of their flavor and texture. To keep them at their best, avoid leaving them out at room temperature for too long. Always check for changes in color or smell before eating. For the best taste, enjoy them within the first few days after making. For the complete recipe, refer to the [Full Recipe]. Yes, you can use frozen raspberries. Just make sure to thaw and drain them first. This helps avoid extra moisture in your bars. Frozen berries can work well and still taste great. You’ll know the bars are done when the center is set. Insert a toothpick into the center. If it comes out clean, your bars are ready. They may still jiggle slightly, but that's okay. They will firm up as they cool. If you don’t have lemon juice, try using lime juice. Lime gives a nice tangy flavor. You can also use vinegar, but it may change the taste a bit. Citrus zest from oranges can work too, for a sweeter flavor. Yes, you can make a vegan version! Replace eggs with flax eggs or applesauce. Use a plant-based butter for the crust. For the filling, keep the fresh raspberries and adjust the sugar. You can find a full recipe online for guidance. You learned how to make tasty raspberry lemonade bars. We covered ingredients, tools, and tips. I shared step-by-step instructions for a smooth process. You can play with flavors and make variations too. Don't forget the best ways to store your bars for freshness. Enjoy making and sharing these delicious treats. They are sure to impress your friends and family. Happy baking!

80 Raspberry Lemonade Bars Tangy and Refreshing Treat

Looking for a sweet and tangy treat? Let me introduce you to Raspberry Lemonade Bars! These delicious bars are perfect

- 1 large eggplant, diced - 1 can (15 oz) chickpeas, drained and rinsed - 1 medium onion, chopped - 2 cloves garlic, minced - 1 red bell pepper, diced - 1 yellow bell pepper, diced Eggplant and chickpeas are the stars of this dish. The eggplant adds a rich, creamy texture, while the chickpeas provide protein and heartiness. Use a large eggplant for this recipe to ensure you have enough for a filling stew. Canned chickpeas save time and give you that delicious bean flavor without the fuss. - 2 teaspoons ground cumin - 1 teaspoon smoked paprika - ½ teaspoon cinnamon Spices bring this stew to life. Ground cumin gives a warm, earthy flavor. Smoked paprika adds a hint of smokiness that pairs well with the eggplant. A touch of cinnamon adds depth and warmth, making each bite comforting and rich. - 1 can (14 oz) diced tomatoes - 2 cups vegetable broth - Fresh parsley for garnish Diced tomatoes add acidity and brightness to balance the rich flavors. Vegetable broth keeps the dish light and enhances the overall taste. Fresh parsley adds a pop of color and freshness on top, making your stew not just tasty but also beautiful. For the full recipe, check out the Full Recipe link. Dicing and chopping are key steps. They help cook the veggies evenly. I like to cut the eggplant into small cubes. This makes it cook faster and blend better with other flavors. When chopping onions and garlic, use a sharp knife for clean cuts. Draining chickpeas is also important. Rinse them under cold water to remove the canning liquid. This helps reduce sodium and improves flavor. Pat them dry with a towel to avoid excess moisture in the stew. To start cooking, heat olive oil in a large pot on medium heat. Add the chopped onion and minced garlic. Sauté them for about five minutes until the onion looks clear. Next, stir in the diced eggplant and bell peppers. Cook these for about seven to eight minutes, stirring often until they soften. Now, it’s time to add spices. Stir in the ground cumin, smoked paprika, and cinnamon. This will coat the veggies in a warm spice mix. Pour in the diced tomatoes and vegetable broth. Bring this mix to a gentle boil. Once boiling, reduce the heat to low. Add the drained chickpeas and season with salt and pepper. Cover the pot and let it simmer for thirty minutes. Stir occasionally, so nothing sticks to the bottom. Garnishing your stew makes it pop! I recommend using fresh chopped parsley for a bright touch. Serve the stew hot for the best flavor. It tastes great as a main dish or with a side of rice or bread. Enjoy sharing this hearty meal with friends and family! For the full recipe, check out the details above. To make your eggplant and chickpea stew shine, use fresh herbs. Fresh parsley adds a bright note. You can also try fresh thyme or basil. Dried herbs work, but they lack the same punch. Fresh ingredients give your dish a vibrant taste. Adjusting seasoning is key. Taste as you go. Salt enhances flavors, while pepper adds warmth. If you want a kick, consider adding a pinch of chili flakes. Personalize to fit your taste. Cooking should be fun, so don’t be afraid to experiment! Getting the right texture is important. Aim for a thick, hearty stew. Simmering helps the flavors blend. If you like a smoother stew, mash some chickpeas with a fork. This thickens the dish and adds creaminess. Cooking time matters too. If you want softer veggies, let it simmer longer. For crunch, reduce cooking time. Keep an eye on your stew. Adjusting cooking time helps you achieve the texture you love. Use the right tools for a great stew. A large pot is essential for cooking. It allows for even heating and ample space. A wooden spoon works well for stirring. It helps prevent scratching your pot. For serving, a ladle is best. It makes dishing out the stew easy. Consider a large bowl for serving. This way, everyone can enjoy this hearty dish. Check out the Full Recipe for more details on these kitchen essentials! {{image_2}} You can change the eggplant and chickpeas if you want. Try zucchini or bell peppers instead of eggplant. For chickpeas, you can use lentils or black beans. These swaps keep the stew tasty while adding new textures. Spices can change the flavor of your stew. For a Moroccan twist, add coriander and turmeric. If you want an Italian taste, use basil and oregano. You can also add proteins like chicken or tofu. They make the dish heartier and more filling. You can make this stew gluten-free by checking your broth. Use a gluten-free vegetable broth. For a vegan option, ensure all ingredients are plant-based. To lower sodium, use low-sodium broth and skip added salt. This way, everyone can enjoy this dish. For the full recipe, check the recipe section above. After cooking, let the stew cool before storing. Place it in an airtight container. This keeps the flavors fresh. I recommend using glass or BPA-free plastic containers. They seal well and help prevent spills. You can store it in the fridge for up to four days. Make sure to label the container with the date. To freeze the stew, let it cool completely first. Then, transfer it to freezer-safe bags or containers. Remove as much air as possible to prevent freezer burn. You can freeze the stew for up to three months. When ready to eat, thaw it in the fridge overnight. Reheat it on the stove over medium heat. Stir occasionally for even warming. In the fridge, the stew lasts about four days. In the freezer, it stays good for three months. Always check for signs of spoilage. If you see mold, off smells, or changes in color, discard it. Fresh flavors are key for a tasty meal! How can I make this stew spicy? You can add red pepper flakes or chopped jalapeños. Mix them in while cooking. You can also use spicy paprika or add a dash of hot sauce before serving. Adjust the heat to your taste. Can I omit the chickpeas for a lighter version? Yes, you can skip the chickpeas. This will make the dish lighter. You can also add other veggies like zucchini or spinach for more flavor and texture. What if my stew is too thick? If your stew is thick, add more vegetable broth. Stir well and let it simmer on low. This will help balance the texture without losing flavor. How do I fix over-seasoning? To fix over-seasoning, add more vegetables or broth. This can dilute the strong flavors. Taste as you go to find the right balance. What are the health benefits of this dish? This stew is rich in fiber and protein. The eggplant adds vitamins and minerals. The chickpeas support heart health and digestion. Is this stew suitable for meal prep? Yes, this stew is great for meal prep. It stores well in the fridge for up to five days. You can also freeze it for future meals. Just reheat when you're ready to enjoy! For the complete recipe, check out the Full Recipe. Eggplant and chickpea stew blends simple ingredients for great flavor. You’ve learned about the key components, cooking steps, and tips for a perfect dish. Remember to adapt recipes to your taste and dietary needs. Storage tips help keep leftovers fresh. Whether you enjoy it as a meal or share it, this stew will please your palate. Embrace your creativity and make it yours. Happy cooking!

79. Eggplant and Chickpea Stew Flavorful and Hearty Dish

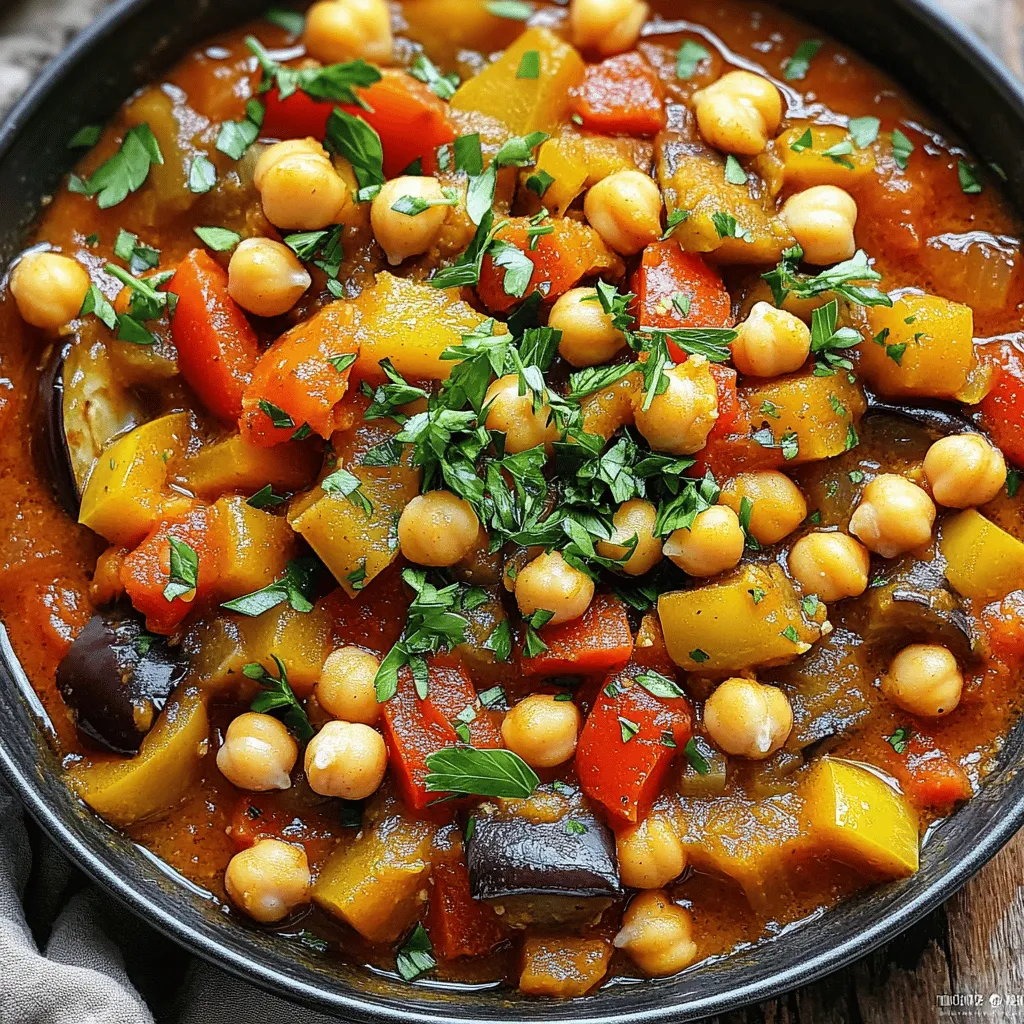
Are you ready for a delicious, wholesome meal? My Eggplant and Chickpea Stew is flavorful and hearty, perfect for any

For this recipe, use 4 ears of fresh corn. Husk them well to remove all the silk. Fresh corn adds a sweet and juicy flavor to the salad. Grilling the corn gives it a nice char, which enhances its taste. You will need several vegetables to add color and crunch. Gather these: - 1 red bell pepper, diced - 1 green bell pepper, diced - 1 small red onion, finely chopped - 1 cup cherry tomatoes, halved - 1 avocado, diced - 1 cup black beans, rinsed and drained - ½ cup fresh cilantro, chopped These vegetables bring bright colors and fresh flavors. The avocado adds creaminess, while the black beans add protein and texture. The dressing ties everything together. You will need: - 2 tablespoons olive oil - 2 tablespoons lime juice - 1 teaspoon chili powder - Salt and pepper to taste This dressing is simple but full of flavor. The lime juice adds a zesty kick, while the chili powder gives it a little heat. Mix these ingredients well to coat the salad perfectly. For the full recipe, check out the detailed instructions. First, heat your grill to medium-high. Place the husked corn directly on the grill. Grill the corn for about 10-15 minutes. Turn it occasionally until you see slight char marks. This adds a nice smoky flavor. Once done, take the corn off the grill and let it cool. Use a sharp knife to cut the kernels off the cobs into a large bowl. Now, you can prepare the salad. Add the diced red bell pepper, green bell pepper, and finely chopped red onion to the bowl with the corn. Next, toss in the halved cherry tomatoes and diced avocado. Don't forget to add the rinsed black beans and chopped cilantro. These ingredients make the salad colorful and fresh. In a small bowl, it's time to make the dressing. Whisk together the olive oil and lime juice. Add the chili powder, salt, and pepper to the mix. This simple dressing will bring all the flavors together. Pour the dressing over the salad mixture. Gently toss everything together until well combined. Taste your salad and adjust the seasoning if needed. Serve it right away or chill it for 30 minutes. Chilling helps the flavors meld together. For a vibrant look, serve in a large bowl with extra cilantro and lime wedges on the side. You can find the full recipe [here](#). For a great grilled corn salad, always pick fresh corn. Look for ears with bright green husks. The silk should be golden and slightly sticky. Press your thumb on a kernel; it should feel firm and juicy. Sweet corn is the best choice for flavor and texture. If you can, buy it the same day you plan to grill it. Fresh corn makes a big difference in taste. To boost the flavor of your salad, try roasting the peppers and onion. This adds a nice smoky taste. You can also add spices like cumin or smoked paprika for depth. A touch of honey in the dressing can balance the lime juice's tartness. Experiment with herbs like basil or parsley for a fresh twist. Each change can make your salad unique and fun. Presentation matters! Serve your salad in a big, colorful bowl. Garnish with extra cilantro and lime wedges. This adds a bright touch and invites people to dig in. You can also serve it in small cups for parties. This way, everyone gets their own serving. Adding a drizzle of olive oil on top just before serving makes it look fancy. A good presentation makes the dish more appealing. {{image_2}} You can easily add protein to your grilled corn salad. This boosts flavor and makes it heartier. Here are some tasty options: - Grilled Chicken: Dice cooked chicken breast and mix it in. - Shrimp: Grill shrimp with some spices for a seafood twist. - Tofu: Use cubed, grilled tofu for a plant-based option. - Cheese: Feta cheese crumbles or cotija add a creamy touch. Each choice pairs well with the fresh flavors in the salad. If you love heat, try making a spicy version. Adding jalapeños can bring a nice kick. Here’s how to spice it up: - Fresh Jalapeños: Dice them finely and mix them in. - Hot Sauce: Drizzle your favorite hot sauce over the salad. - Cayenne Pepper: Sprinkle a bit of cayenne into the dressing. These additions will make your salad exciting and fun to eat. You can change the veggies based on what’s fresh. This keeps your salad interesting year-round. Here are some ideas: - Zucchini: Grate it or dice it for a nice crunch. - Radishes: Add sliced radishes for a peppery bite. - Carrots: Shredded carrots bring sweetness and color. Feel free to mix and match. Experiment with what you have on hand. For the full recipe, check out the detailed instructions above. You can store leftover grilled corn salad in the fridge. Place it in an airtight container. It stays fresh for about 3 days. The flavors meld nicely, but some veggies may soften. If you want crunch, eat it sooner. Freezing this salad is not the best choice. The texture of corn and fresh veggies changes when frozen. If you have too much, consider freezing just the corn. Cooked corn can freeze well for about 6 months. To keep your salad fresh, store it properly. Use a clean container, and keep it covered. If you prepare it ahead of time, add avocado just before serving. This keeps it green and tasty. For the best flavor, enjoy the salad within a few days. For the full recipe, check out the detailed steps above. Yes, you can make grilled corn salad ahead of time. I recommend preparing it up to a day in advance. Just keep it in the fridge. The flavors will mix nicely as it sits. If you prepare it early, wait to add the avocado until just before serving. This keeps it fresh and green. If you don't have black beans, try using pinto beans or kidney beans. They both work well in this salad. You can also use corn for extra crunch. Chickpeas are another great option. They add a nice texture and flavor. Yes, you can grill corn without a grill. You can use a stovetop grill pan or even broil it in your oven. Just preheat your pan or oven. Place the corn on the heat source and watch it carefully. Turn it often for even cooking. This gives you that charred flavor, just like on a grill. In this blog post, we explored how to make a fresh and tasty grilled corn salad. We covered key ingredients like corn, veggies, and dressings, plus easy steps for preparation. I shared tips to choose the best corn and enhance flavors. You can easily swap in proteins or spices for a fun twist. Finally, I discussed storage to keep your salad fresh. Enjoy this dish, and have fun experimenting with flavors!

78. Grilled Corn Salad Fresh and Flavorful Recipe

Summer calls for fresh flavors, and nothing beats a Grilled Corn Salad! In this blog, I’ll share my favorite recipe

- 1 cup creamy peanut butter - 1/2 cup brown sugar - 1/4 cup granulated sugar - 1 large egg - 1 teaspoon vanilla extract - 1 teaspoon baking soda - 1/2 cup chocolate chips (milk or dark) - 1/4 teaspoon salt - Alternative sweeteners: You can try honey or maple syrup instead of brown sugar. - Nut butter variations: Almond butter or cashew butter work well too. - Gluten-free options: Use gluten-free flour or almond flour to keep it safe for all. Peanut butter chocolate chip cookies shine with their rich, nutty flavor. Each ingredient plays a key role. The creamy peanut butter gives the cookies their base and flavor. Brown sugar adds moisture and a deep sweetness. Granulated sugar balances the mix with a bit more sweetness. One egg binds everything together while adding richness. Vanilla extract brings warmth to the final taste. Baking soda helps them rise, creating a nice texture. Finally, chocolate chips add that beloved chocolatey touch. If you want to make changes, feel free! Use different sweeteners or nut butters. You can even make these cookies gluten-free. The best part? They will still taste great. For the full recipe, refer to the details above. Enjoy baking! Start by preheating your oven to 350°F (175°C). This helps the cookies bake evenly. While the oven heats, line a baking sheet with parchment paper. This keeps the cookies from sticking. Next, grab a large mixing bowl. In it, combine the creamy peanut butter, brown sugar, and granulated sugar. Mix until everything is smooth and well combined. This step is key for a great texture. Now, add the large egg and vanilla extract. Stir these in until they blend fully. Gradually sprinkle in the baking soda and salt. Mix again until combined. Finally, fold in the chocolate chips. Ensure they spread evenly throughout the dough. Using a tablespoon, scoop small portions of dough onto the prepared baking sheet. Place them about 2 inches apart. This gives them room to spread. Then, flatten each cookie slightly with the back of a fork. Create a crisscross pattern on top. Bake the cookies in your preheated oven for 10-12 minutes. Look for lightly golden edges. This means they are done. Once baked, remove the cookies from the oven. Let them cool on the baking sheet for a few minutes. This helps them set properly. After that, transfer the cookies to a wire rack. Allow them to cool completely there. Avoid common pitfalls like moving the cookies too soon. This can cause them to fall apart. Enjoy the perfect cookies once they are cool! To get the right cookie texture, you can make a few changes. For thick cookies, use more peanut butter. This will add richness and keep them soft. If you want thin cookies, reduce the peanut butter a bit. Be careful not to overmix the dough when blending the ingredients. Mixing too much can make the cookies tough. Stop mixing as soon as everything combines. This keeps your cookies soft and chewy. You can boost the flavor of your cookies by using different types of chocolate. Milk chocolate offers a sweet taste, while dark chocolate adds a rich flavor. Try mixing both for a fun twist! Adding spices or extracts can change the game too. A pinch of cinnamon or nutmeg can bring warmth. You can also use almond extract for a nutty touch that pairs well with peanut butter. Batch baking can save you time and effort. Make a double or triple batch and bake them all at once. This way, you have cookies ready for snacks or parties. Freezing cookies is another great idea. You can freeze the dough before baking. Just scoop the dough onto a sheet and freeze it. Once frozen, transfer the dough balls to a bag. When you want fresh cookies, just bake them straight from the freezer! For the complete recipe, check the Full Recipe section. {{image_2}} You can make your peanut butter chocolate chip cookies even more exciting. Try adding nuts or dried fruits. Chopped walnuts or pecans give a nice crunch. Dried cranberries or raisins add sweetness. Mixing in these ingredients adds layers of flavor. You can also swap chocolate chips for other mix-ins. White chocolate or butterscotch chips create a delicious twist. You can even try chunks of a favorite candy bar. Be creative and make each batch unique. If you want a vegan version, use a flax egg instead of a real egg. Mix one tablespoon of ground flaxseed with three tablespoons of water. Let it sit for five minutes to thicken. This acts as a great binder. For low-sugar options, you can use alternative sweeteners. Stevia or monk fruit sweetener works well. Just remember to adjust the amount based on the type you choose. These swaps keep the flavor while reducing sugar. You can find inspiration in many cultures. For a tropical twist, add coconut flakes. This gives a fun, chewy texture. Or try adding spices like cinnamon or nutmeg for warmth. You can also create unique twists on classic recipes. For example, add a hint of espresso to deepen the chocolate flavor. This makes each bite rich and satisfying. With these variations, your cookies will always surprise and delight. To keep your peanut butter chocolate chip cookies fresh, store them in an airtight container. This method helps maintain their soft texture. Place parchment paper between layers to avoid sticking. You can also use a cookie jar with a tight lid. Avoid leaving cookies out in the open, as air can make them hard. To freeze your cookies, let them cool completely first. Place them in a single layer on a baking sheet for about an hour. Once firm, transfer them to a freezer-safe bag or container. Be sure to remove as much air as possible. When you're ready to enjoy, take out the desired number of cookies. Let them thaw at room temperature for about 30 minutes. For a warm treat, pop them in the oven at 350°F (175°C) for a few minutes. At room temperature, your cookies will last about one week. Keep them stored well to ensure they stay tasty. Signs of spoilage include a dry or hard texture and an off smell. If you notice these signs, it’s best to toss them out. Enjoy your cookies while they are fresh for the best taste and texture! For the full recipe, check out the section above. Can I make these cookies without eggs? Yes, you can make these cookies without eggs. Use a flaxseed meal or applesauce instead. Mix one tablespoon of flaxseed with three tablespoons of water. Let it sit for a few minutes to thicken. For applesauce, use a quarter cup to replace one egg. What should I do if my dough is too sticky? If your dough is sticky, add a bit more flour or sugar. Start by adding one tablespoon at a time. Mix well after each addition until the dough firms up. This helps shape the cookies better. Are peanut butter chocolate chip cookies healthy? Peanut butter chocolate chip cookies can be a treat, but they have some health benefits. Peanut butter adds protein and healthy fats. However, they are still high in sugar and fat. Enjoy them in moderation for a balanced diet. Can I substitute peanut butter with other nut butters? Yes, you can use other nut butters like almond or cashew. Just keep in mind that the flavor will change slightly. Make sure the nut butter is creamy for the best texture. Why are my cookies spreading too much? Cookies can spread too much if the dough is too warm. Chill the dough for 30 minutes before baking. Also, ensure your butter is softened, not melted, before mixing. This prevents excessive spreading. How to fix crumbly cookie dough? If your cookie dough is crumbly, add a bit of water or milk. Use one tablespoon at a time until the dough holds together. Mixing well helps incorporate the liquid and fix the texture. To make these peanut butter chocolate chip cookies, start by mixing the wet ingredients. Combine creamy peanut butter, brown sugar, and granulated sugar until smooth. Next, add the egg and vanilla extract, stirring well. Then, mix in baking soda and salt before folding in chocolate chips. Scoop the dough onto a lined baking sheet, flattening each cookie with a fork. Bake until golden for a delightful treat. Here’s a quick reference for the ingredients and baking time: - 1 cup creamy peanut butter - 1/2 cup brown sugar - 1/4 cup granulated sugar - 1 large egg - 1 teaspoon vanilla extract - 1 teaspoon baking soda - 1/2 cup chocolate chips (milk or dark) - 1/4 teaspoon salt - Baking time: 10-12 minutes I love pairing these cookies with a cold glass of milk. The creamy peanut butter and sweet chocolate make a perfect match. You can also serve them warm with a scoop of ice cream on top. They are great for birthday parties, family gatherings, or just a cozy night in. Imagine sharing these cookies with friends while watching a movie! You will need about 15 minutes to prep. Baking takes around 10-12 minutes. So, the total time is just 25 minutes. This recipe yields 12 cookies, perfect for sharing or enjoying yourself. You’ve learned how to make delicious peanut butter chocolate chip cookies. We covered ingredients, each step in the process, and helpful tips to get the perfect texture. Don’t forget to experiment with flavors and variations. Store your cookies well to keep them fresh. Whether baking for fun or a special occasion, these cookies are sure to impress. Enjoy every bite and share with friends!

77. Peanut Butter Chocolate Chip Cookies Delightful Treat

Indulge your sweet tooth with my easy Peanut Butter Chocolate Chip Cookies! These delightful treats combine the creamy taste of

- 1 sheet of puff pastry, thawed - 3 large onions, thinly sliced - 2 tablespoons olive oil - 2 tablespoons unsalted butter - 4 oz goat cheese, crumbled - 1 tablespoon fresh thyme leaves (or 1 teaspoon dried thyme) - Salt and pepper to taste - 1 egg, beaten (for egg wash) - Optional: balsamic glaze for drizzling - Large skillet - Baking sheet - Parchment paper - Rolling pin - Fork - Knife - Mixing bowl When measuring, use standard measuring cups and spoons for accuracy. For dry ingredients, spoon them into the cup and level off with a knife. This method prevents packing and ensures the right amount. For liquids, use a clear measuring cup. Pour until you reach the desired line. Always remember to read the recipe carefully. This helps you gather all your ingredients and tools before you start cooking. Having everything ready makes the process smoother and more fun. Enjoy preparing this caramelized onion and goat cheese tart! For the full recipe, check the link above. First, preheat your oven to 400°F (200°C). This helps the tart cook evenly. While the oven heats, grab your puff pastry. Roll it out on a floured surface into a rectangle, about 12x9 inches. Place the pastry on a baking sheet lined with parchment paper to avoid sticking. To caramelize the onions, heat 2 tablespoons of olive oil and 2 tablespoons of butter in a large skillet over medium heat. Add 3 thinly sliced onions and a sprinkle of salt. Stir the onions often. Cook them for about 25 to 30 minutes until they turn golden brown. This slow cooking brings out the sweet flavor of the onions. After they are caramelized, mix in 1 tablespoon of fresh thyme and season with salt and pepper to taste. Let them cool slightly before adding to the tart. Now, it’s time to assemble! Score a border around the edge of the puff pastry, about 1 inch in. This border will rise and create a nice crust. Use a fork to prick the center of the pastry. This helps it stay flat while baking. Spread the caramelized onions evenly across the center of the pastry. Crumble 4 oz of goat cheese on top of the onions. Brush the edges of the pastry with a beaten egg for a golden finish. Now, bake in the preheated oven for 20 to 25 minutes. The pastry should puff and turn golden brown. Once out of the oven, you can drizzle with balsamic glaze if you like. Serve warm or at room temperature. For the complete recipe, check the Full Recipe. To get sweet, golden onions, slice them thin. Use a mix of olive oil and butter for flavor. Cook on medium heat and stir often. This helps them cook evenly. It may take 25 to 30 minutes. Patience is key! Add salt early to draw out moisture. For extra depth, sprinkle in some sugar halfway through cooking. When working with puff pastry, keep it cold. Thaw it in the fridge, not on the counter. Roll it on a lightly floured surface to avoid sticking. Score a border to form a crust, but don’t cut all the way through. Prick the center to prevent puffing too much. This helps keep your tart flat and even. For a beautiful finish, drizzle balsamic glaze over the tart before serving. It adds a nice shine and flavor contrast. Cut the tart into even squares for easy serving. Garnish with a sprinkle of fresh thyme to enhance the look. Serve it warm or at room temperature for the best taste. Enjoy the compliments! {{image_2}} You can switch up the cheese for this tart. Feta adds a tangy kick. Cheddar gives a sharp taste. Cream cheese makes it rich and smooth. Each cheese brings a unique flavor, so try what you like best. You can also change the toppings based on the season. In spring, add fresh asparagus for crunch. In summer, try diced tomatoes for sweetness. In fall, roasted pumpkin pairs well with the onions. Each season offers fresh ideas to keep this dish exciting. This tart pairs well with many sides. A green salad with vinaigrette adds freshness. Serve it with roasted veggies for heartiness. A light soup can make it a full meal. Feel free to mix and match for a delightful dining experience. Store any tart leftovers in an airtight container. This keeps the flavors fresh. Place it in the fridge. Enjoy it within three days for the best taste. To reheat, use an oven. Preheat it to 350°F (175°C). Place the tart on a baking sheet. Heat for about 10-15 minutes. This helps to keep the pastry crisp. You can also use a microwave. However, the crust may become soft. You can freeze the tart before baking. Wrap it tightly in plastic wrap and foil. Store it in the freezer for up to three months. When ready to bake, thaw it in the fridge overnight. Then, bake as per the Full Recipe instructions. Enjoy a delicious meal anytime! You will know the onions are caramelized when they turn golden brown and soft. Their sweet smell will fill the kitchen. This process takes about 25-30 minutes over medium heat. Stir the onions often to prevent burning. Look for a rich, deep color. Yes, you can use frozen puff pastry. Just make sure to thaw it before use. Place it in the fridge overnight or on the counter for about 30 minutes. This helps it roll out easily. Frozen pastry works well for this tart and saves time. If you don't have goat cheese, try cream cheese or ricotta. Feta cheese is another great option. Each cheese adds a different flavor and texture. You can even mix them for more depth. Just remember to adjust the amount based on your taste. For the full recipe, check out the details above! This blog post covered key steps to make a delicious tart. We explored essential ingredients, gear needed, and measuring tips. I shared how to caramelize onions and assemble the tart perfectly. You learned tips for handling puff pastry and how to present your dish nicely. We also discussed variations, storage methods, and answered common questions. With practice, you'll impress anyone with your tart. Enjoy your cooking journey!

76. Caramelized Onion and Goat Cheese Tart Delight

Welcome to my kitchen! Today, we’re making a savory Caramelized Onion and Goat Cheese Tart that’s sure to impress. With

- 1 lb pork tenderloin - 3 tablespoons fresh rosemary, chopped - 2 tablespoons fresh thyme, chopped - 2 tablespoons fresh parsley, chopped - 4 cloves garlic, minced - 2 tablespoons Dijon mustard - 3 tablespoons olive oil - Salt and pepper to taste - 1 teaspoon lemon zest - 1 teaspoon honey To make the herb-crusted pork tenderloin, you need fresh herbs. I love using rosemary, thyme, and parsley. They add a bright, fresh taste that pairs well with the pork. The garlic gives it a nice kick, while Dijon mustard adds depth. Olive oil keeps the meat moist and helps the herbs stick. Lemon zest adds a hint of brightness. Honey brings a touch of sweetness that balances the flavors nicely. Salt and pepper are key to making everything pop. You can find the full recipe for this dish as it guides you through each step. This meal is simple yet elegant. It works for both a weeknight dinner and a special occasion. Enjoy your cooking! - Preheat oven to 400°F (200°C). This step helps the pork cook evenly. - Create the herb paste by mixing rosemary, thyme, parsley, garlic, Dijon mustard, olive oil, lemon zest, honey, salt, and pepper in a bowl. This mix adds great flavor. - Pat the pork tenderloin dry with paper towels. Place it in a baking dish. Dry meat helps the herb paste stick better. - Rub the herb mixture all over the tenderloin. Make sure it is coated well for the best taste. - Roast the tenderloin in the preheated oven for about 25-30 minutes. You want it to reach 145°F (63°C) inside. This ensures it's safe to eat and juicy. - Rest the tenderloin for 5-10 minutes after roasting. This lets the juices spread throughout the meat. - Slice the tenderloin into medallions and arrange them on a platter. It looks nice and is easy to serve. For a detailed look at the steps, check out the Full Recipe. - Best practices for seasoning: Start with a dry pork tenderloin. This helps the herb paste stick well. Use a mix of salt, pepper, and fresh herbs. I love rosemary, thyme, and parsley. They add depth to the dish. Rub the herb paste evenly onto all sides of the meat. This ensures every bite is full of flavor. - Resting meat for optimal tenderness: After cooking, let the tenderloin rest. Resting for 5-10 minutes helps the juices settle. This makes your pork tender and juicy. If you slice it right away, the juices run out. Always slice after resting for the best results. - Garnishing ideas: Add a touch of color with fresh herbs. Sprinkle chopped parsley on top. Lemon wedges also add brightness. They give a nice pop of color and flavor. - Side dish suggestions: Pair your herb-crusted pork with roasted veggies. Carrots, potatoes, and green beans work well. A light salad can balance the meal. Choose a simple vinaigrette to keep it fresh. For the complete recipe, check out the Full Recipe link! {{image_2}} You can play with different herbs in this dish. Try using fresh sage or dill for a unique taste. Each herb brings its own flavor. Mix and match to find what you like best. Marinades can also change the dish. A honey and soy sauce mix adds sweetness and depth. Or, try a citrus marinade with orange juice and zest. This gives a bright and fresh flavor. You can cook this pork tenderloin in different ways. Grilling gives a smoky taste. It also adds nice grill marks. Preheat your grill and cook the tenderloin for about 20 minutes. Make sure to turn it for even cooking. Baking is another easy method. It keeps the pork juicy and flavorful. Just follow the steps in the Full Recipe for oven cooking. If you want a hands-off option, try a slow cooker. Season the pork and place it in the cooker. Add some broth for moisture. Cook on low for 6-8 hours. This makes the meat tender and full of flavor. To store leftover pork tenderloin, let it cool first. Once cooled, slice it into pieces. Place the slices in an airtight container. You can also wrap the whole tenderloin in plastic wrap. This keeps it fresh. Store it in the fridge for up to three days. If you want to keep it longer, freeze it. Use freezer-safe bags or containers for freezing. It can last up to three months in the freezer. The best methods for reheating tenderloin are the oven or stovetop. For the oven, preheat it to 350°F (175°C). Place the tenderloin in a baking dish and cover it with foil. Heat for about 15-20 minutes. For the stovetop, slice the tenderloin and warm it in a skillet over low heat. Add a bit of broth or water to keep it moist. Stir it occasionally, so it heats evenly. This way, you maintain the flavor and moisture of the pork tenderloin. How can I tell if pork tenderloin is cooked? To check if your pork tenderloin is cooked, use a meat thermometer. The center should reach 145°F (63°C). This ensures the pork is safe to eat and still juicy. If you don’t have a thermometer, cut into the thickest part. The meat should be light pink and the juices should run clear. Can I use dried herbs instead of fresh? Yes, you can use dried herbs. They are handy when fresh ones aren't available. Use one-third of the amount of dried herbs as you would fresh. For example, if the recipe calls for three tablespoons of fresh rosemary, use just one tablespoon of dried rosemary. Dried herbs have a stronger flavor, so start small and adjust to taste. What should I serve with herb-crusted pork tenderloin? Herb-crusted pork tenderloin pairs well with many sides. Consider roasted vegetables like carrots, potatoes, or Brussels sprouts. A light salad with mixed greens and a tangy vinaigrette also complements the dish. For a heartier option, you might serve it with creamy mashed potatoes or a grain like quinoa. Explore options based on your taste and the season. For the full recipe, check out the Herb-Infused Roasted Tenderloin section. This blog post guides you through making a delicious herb-crusted pork tenderloin. You learned about the key ingredients, preparation steps, and cooking techniques to enhance flavor. I shared tips for serving and storing leftover pork, along with variations to try. Remember, cooking is about experimenting and enjoying the process. Use fresh herbs for the best taste, and don’t hesitate to try new methods. Embrace your culinary journey with this recipe, and make it your own!

75. Herb-Crusted Pork Tenderloin Flavorful Dinner Recipe

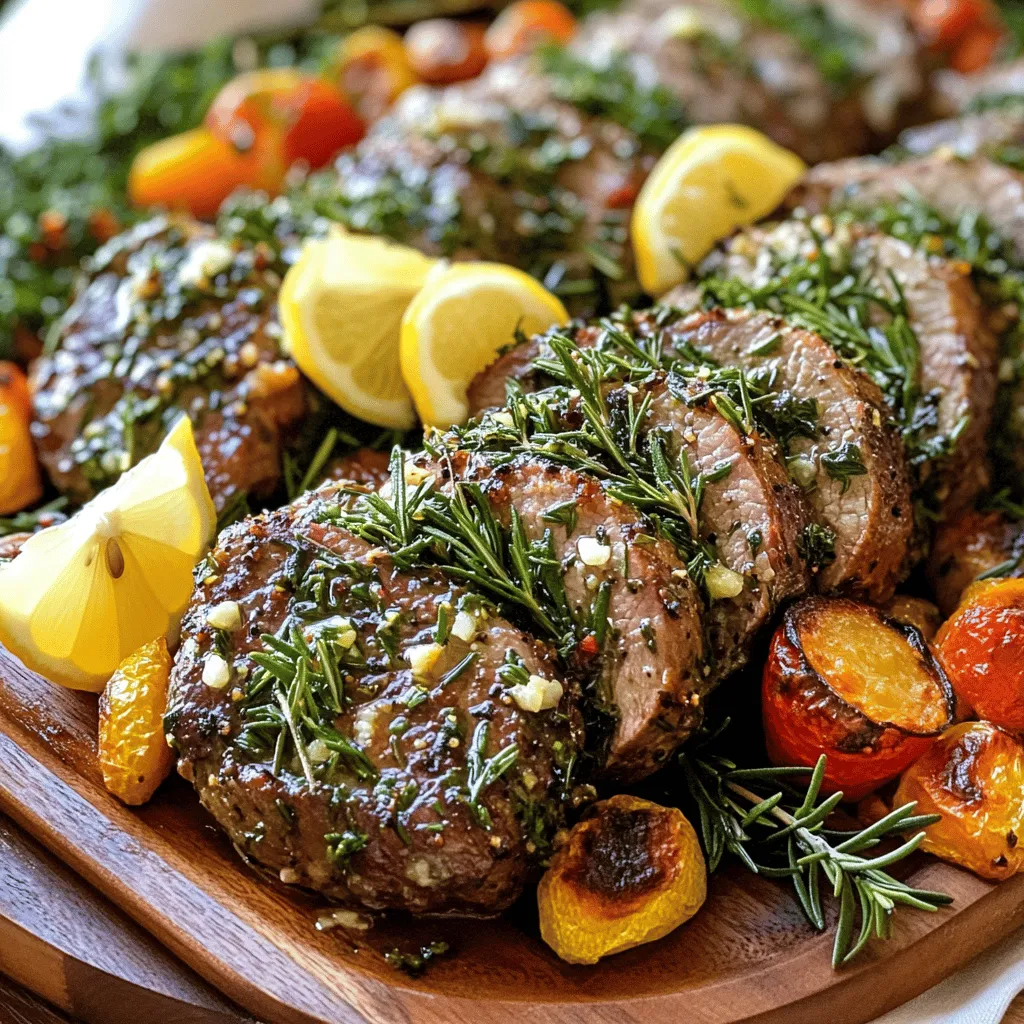
Ready to impress at your next dinner? This Herb-Crusted Pork Tenderloin recipe packs a burst of flavor that everyone will

- Sushi-grade tuna - Sushi rice - Fresh vegetables and garnishes To create a spicy tuna poke bowl, you need fresh and high-quality ingredients. Sushi-grade tuna is key for the best flavor and safety. Look for bright red, firm tuna. Sushi rice is sticky and helps hold the bowl together. Fresh vegetables add color and crunch. I like to use avocado, cucumber, and radish for variety. These ingredients make the bowl look and taste amazing. - Rice vinegar - Soy sauce - Sesame oil - Sriracha These pantry staples bring the poke bowl to life. Rice vinegar adds a tangy taste and balances the flavors. Soy sauce gives a savory depth that complements the tuna. Sesame oil adds a nutty richness, making every bite special. Sriracha gives a spicy kick. Adjust the sriracha to match your taste. This mix of flavors is what makes the poke bowl unforgettable. - Nori sheets - Pickled ginger - Sesame seeds Optional toppings can elevate your poke bowl. Nori sheets are a fun way to add sea flavor. Cut them into strips and place them around the bowl. Pickled ginger adds a zesty bite and helps cleanse the palate. Sesame seeds give a nutty crunch and look great sprinkled on top. Feel free to use any or all of these for extra flair. For the full recipe, check out the [Full Recipe]. To start, rinse the sushi rice under cold water. Do this until the water runs clear. This step removes excess starch and helps the rice cook better. Next, combine the rinsed rice with water in a medium saucepan. Bring the mixture to a boil over high heat. Once boiling, reduce the heat to low. Cover the pot and let it simmer for about 18 minutes. The rice will absorb the water and become tender. After cooking, remove it from the heat and let it sit, covered, for 10 minutes. This resting time allows the rice to finish cooking perfectly. After it rests, mix rice vinegar, sesame oil, and a pinch of salt in a small bowl. Fluff the rice with a fork and gently stir in the vinegar mixture. This step adds flavor and makes the rice shine. Let it cool to room temperature. While the rice cools, it’s time to prepare the spicy tuna. In a medium bowl, mix the diced sushi-grade tuna with soy sauce and sriracha. The sriracha gives it that spicy kick. Adjust the amount of sriracha based on how spicy you want it. Taste as you mix to ensure it suits your preference. Make sure the tuna is coated evenly with the sauces. This will help the flavor spread throughout each bite. Now comes the fun part: assembling your poke bowl! Start by placing a generous serving of sushi rice in the bottom of your bowl. This will be the base. Next, arrange the spicy tuna on top of the rice. Add slices of avocado, cucumber, and radish around the tuna. This adds colorful layers and fresh flavors. For a finishing touch, sprinkle chopped green onion and sesame seeds over the top. These add crunch and beauty to your dish. Place nori strips around the bowl for garnish. To serve, add a side of pickled ginger. This adds a nice touch and balances the flavors. For a more elegant look, consider adding edible flowers or microgreens. This simple step takes your poke bowl from good to great! For the full recipe, check the section above. Enjoy your delicious creation! Choosing high-quality tuna is key for a great poke bowl. Look for sushi-grade tuna. This type of fish is fresh and safe to eat raw. It should have a bright color and a clean smell. Ask your fishmonger for recommendations. If possible, buy it the same day you plan to use it. Sushi rice is equally important. It has a unique sticky texture. This helps the rice hold together in your bowl. Rinse the rice well before cooking. This removes extra starch and improves texture. The right sauce makes your poke bowl stand out. Start with soy sauce as the base. Add rice vinegar for tanginess. Then, include sesame oil for richness. Mix in sriracha for heat. You can adjust the sriracha based on your taste. If you like it spicy, add more. If you prefer mild, use less. Balance is key! Pair your poke bowl with light side dishes. A simple seaweed salad or edamame complements the flavors. You can also serve it with a small bowl of miso soup. These sides add variety and freshness. For serving, choose bowls that show off your ingredients. A wide, shallow bowl works best. This way, the colorful toppings are visible. Arrange everything neatly. Add garnishes like nori strips or microgreens for a nice touch. For the full recipe, check the section above. Enjoy crafting your spicy tuna poke bowl! {{image_2}} You can switch out the tuna for salmon. Salmon poke bowls are just as tasty. The rich flavor of salmon pairs nicely with the same ingredients. If you prefer a plant-based option, consider using tofu. Firm tofu absorbs flavors well and adds protein. For a fun twist, try adding fruits like mango or pineapple. These fruits bring sweetness that balances the spice. You can also experiment with different sauces for your poke bowl. Consider teriyaki or spicy mayo for new flavor profiles. To make this dish gluten-free, use tamari instead of soy sauce. This simple swap keeps the flavor while meeting dietary needs. For those on a low-carb or keto diet, replace sushi rice with cauliflower rice. It’s a great way to enjoy the bowl without the carbs. For the full recipe, check the section above. To keep your spicy tuna poke bowl fresh, store leftovers in an airtight container. Layer the rice and toppings separately. This helps maintain the rice's texture and the toppings' crunch. Use the poke bowl within two days for the best flavor. Make sure your fridge is at 40°F or colder to keep everything safe. When reheating the rice, use a microwave or a stovetop. For the microwave, add a splash of water and cover the bowl. Heat in short bursts, checking often. On the stovetop, add the rice to a pan with a little water. Stir gently over low heat until warm. Avoid cooking the rice too long. This keeps it fluffy and soft. For the toppings, serve them cold. They add a nice contrast to the warm rice. In the fridge, sushi-grade tuna stays fresh for about two days. Sushi rice lasts a bit longer, around three to four days. Look for signs of spoilage in both. For tuna, check for a dull color or an off smell. For rice, a sour scent or slimy texture means it’s time to toss it. Always trust your senses when it comes to food safety. Use sushi-grade tuna for your poke bowl. This grade means it is safe to eat raw. Look for bright red color and a fresh smell. Ask your fishmonger for recommendations. They can help you find the best quality. Yes, you can prepare poke bowls in advance. Cook the rice and store it in the fridge. Keep the spicy tuna separate until you’re ready to eat. This helps maintain freshness and taste. You can also slice your veggies ahead of time. Just store them in airtight containers. If you can’t find sushi rice, try other grains. Quinoa or brown rice work well. Both have good textures and can hold up with toppings. Rinse them before cooking to improve taste and texture. Spicy tuna poke can be as mild or hot as you like. Start with a little sriracha and add more if needed. Taste as you mix to find your perfect heat level. You can also swap sriracha for a milder sauce if you prefer. You can freeze spicy tuna, but it is best fresh. If you freeze it, wrap it tightly to avoid freezer burn. Thaw it in the fridge overnight before eating. Never refreeze fish that has been thawed; it can affect quality and safety. For a full recipe on how to put together a Spicy Tuna Poke Bowl, check the [Full Recipe]. You now have all the details to make a great spicy tuna poke bowl. Remember the main ingredients: fresh sushi-grade tuna, sushi rice, and vibrant veggies. Use pantry staples like soy sauce and sesame oil to boost flavor. Don’t forget optional toppings for extra flair. Experiment with variations for different tastes. You can even store leftovers correctly to enjoy later. Keep these tips in mind, and you'll impress everyone with your poke bowl skills. Enjoy your culinary adventure!

74. Spicy Tuna Poke Bowl Flavorful and Fresh Delight

If you love fresh, tasty meals, you’ll adore my Spicy Tuna Poke Bowl! This dish combines sushi-grade tuna, perfect rice,

To create a delicious creamy tomato and spinach pasta, you need some key ingredients. Here's a helpful list to guide you: - Pasta options: - 12 oz penne or fettuccine works well - Sauce components: - 2 tablespoons olive oil - 4 cloves garlic, minced - 1 can (14 oz) crushed tomatoes - 1 cup heavy cream (or coconut cream for a vegan option) - Seasonings and garnishes: - 4 cups fresh spinach - 1 teaspoon Italian seasoning - Salt and pepper to taste - Grated Parmesan cheese for serving (or nutritional yeast for a vegan option) - Fresh basil leaves for garnish Each ingredient plays a role in making this dish rich and tasty. The pasta will hold the sauce well, while the garlic adds a nice kick. Crushed tomatoes provide a sweet base. Heavy cream enhances the richness, while spinach offers color and nutrients. Seasonings bring everything together, making each bite a flavorful delight. You can find the full recipe to help guide you through the cooking process. 1. Cooking the Pasta: Start by boiling salted water in a large pot. Once the water bubbles, add 12 oz of your favorite pasta, like penne or fettuccine. Cook it until it is al dente, which usually takes about 8-10 minutes. Drain the pasta and set it aside. 2. Sautéing Garlic: In a large skillet, heat 2 tablespoons of olive oil over medium heat. Add 4 minced garlic cloves and sauté them for about 1 minute. You want to smell the garlic's rich aroma, but be careful not to let it burn. 3. Adding Crushed Tomatoes: Now, pour in a 14 oz can of crushed tomatoes. Mix in 1 teaspoon of Italian seasoning. Let the mixture simmer for about 5 minutes. This helps the flavors blend together nicely. 1. Incorporating Cream: Lower the heat and add 1 cup of heavy cream to the skillet. Stir well to combine it with the tomatoes. Let it cook for another 3-4 minutes. You will notice the sauce thickening slightly. 2. Adding Spinach: Next, fold in 4 cups of fresh spinach. Stir until the spinach wilts and blends into the sauce, which should take about 2-3 minutes. This adds a nice pop of color and nutrients. 3. Combining Pasta with Sauce: Finally, add the drained pasta to your skillet. Toss everything together until the pasta is well coated with the creamy tomato and spinach sauce. Season with salt and pepper to taste. This dish is a flavorful delight. If you want the full recipe, check it out in the earlier section. - Cooking pasta al dente: Cook the pasta just until it is firm to the bite. This keeps it from becoming mushy. Follow package timings closely, but check a minute early. Drain it right away to stop cooking. - Avoiding burnt garlic: Garlic can burn quickly and turn bitter. Cook it on medium heat for just one minute. Stir often and watch for that lovely golden color. If it starts to brown too fast, lower the heat. - Balancing flavors in the sauce: To create a rich tomato flavor, let the crushed tomatoes simmer. This brings out their natural sweetness. Add salt and pepper in small amounts. Taste often to get the right balance. - Cheese options for garnishing: Grated Parmesan cheese adds a savory touch. If you want a vegan option, use nutritional yeast. Both choices will enhance the dish's flavor. - Pairing with side dishes: A simple green salad goes well with this pasta. Garlic bread is another great choice. Both sides complement the creamy sauce nicely. - Adding protein options: You can add cooked chicken or shrimp for extra protein. They mix well with the sauce. For a vegetarian option, try chickpeas or white beans. {{image_2}} You can easily make creamy tomato and spinach pasta vegan. Here are some simple swaps: - Coconut cream instead of heavy cream: This gives a rich, creamy texture. - Nutritional yeast as a cheese alternative: It adds a cheesy flavor without dairy. - Gluten-free pasta options: Use rice or corn pasta for a gluten-free meal. These adjustments keep the dish delicious while meeting dietary needs. Want to spice up your creamy tomato and spinach pasta? Here are some ideas: - Additional herbs and spices: Try adding fresh basil or crushed red pepper for extra kick. - Incorporating vegetables: Bell peppers, mushrooms, or zucchini can add color and nutrients. - Protein add-ins: Toss in cooked chicken, shrimp, or even chickpeas for a heartier meal. These enhancements will elevate your dish and excite your taste buds. For the full recipe, check the earlier sections! To keep your creamy tomato and spinach pasta fresh, store it in airtight containers. This method prevents air exposure, helping the pasta stay tasty longer. In the fridge, it lasts up to three days. Make sure it cools down before sealing the container. This simple step helps maintain the best texture and flavor. If you want to save some for later, freezing is a great option. Start by letting the pasta cool completely. Then, transfer it to freezer-safe bags or containers. Label them with the date for easy tracking. It will stay good in the freezer for about two months. When you're ready to enjoy your pasta again, thaw it in the fridge overnight. Reheat it in a skillet over low heat. Add a splash of milk or cream to loosen the sauce. Stir gently until it’s hot throughout. This way, you’ll have a delicious meal ready to savor anytime. For the full recipe, check out Creamy Tomato and Spinach Pasta. How to make creamy tomato and spinach pasta from scratch? To make creamy tomato and spinach pasta, follow these steps: 1. Cook your pasta until al dente. 2. Sauté minced garlic in olive oil. 3. Add crushed tomatoes and Italian seasoning. 4. Stir in heavy cream and let it thicken. 5. Fold in fresh spinach until it wilts. 6. Combine the pasta with the sauce. 7. Top with cheese and serve. You can find the full recipe above. Can I use frozen spinach? Yes, you can use frozen spinach. Just thaw it first and drain excess water. This saves time but may alter the texture slightly. What is a good wine pairing for this dish? A light red wine, like Pinot Noir, pairs well. It complements the tomato flavor nicely. A crisp white, like Sauvignon Blanc, also works well with creamy sauces. How do I thicken the sauce further? To thicken the sauce, simmer it longer on low heat. You can also add more cream or a bit of grated cheese. Is this dish kid-friendly? Yes, this dish is kid-friendly. The creamy sauce and pasta make it tasty for all ages. Nutritional information per serving Each serving has about 500 calories. It includes healthy fats, carbs, and protein. The dish offers vitamins from spinach and tomatoes too. How to adjust serving sizes for different occasions You can easily adjust the recipe. For a smaller meal, halve the ingredients. To serve more, simply double them. This dish is versatile for any gathering. In this blog post, we explored making creamy tomato and spinach pasta. We covered ingredients, cooking steps, and expert tips. You now know how to cook pasta perfectly and balance flavors. We also discussed vegan options and storage tips for leftovers. Remember, this dish is versatile and easy to adjust. Try your favorite add-ins and enjoy! Your perfect pasta dish awaits.

Creamy Tomato and Spinach Pasta Flavorful Delight

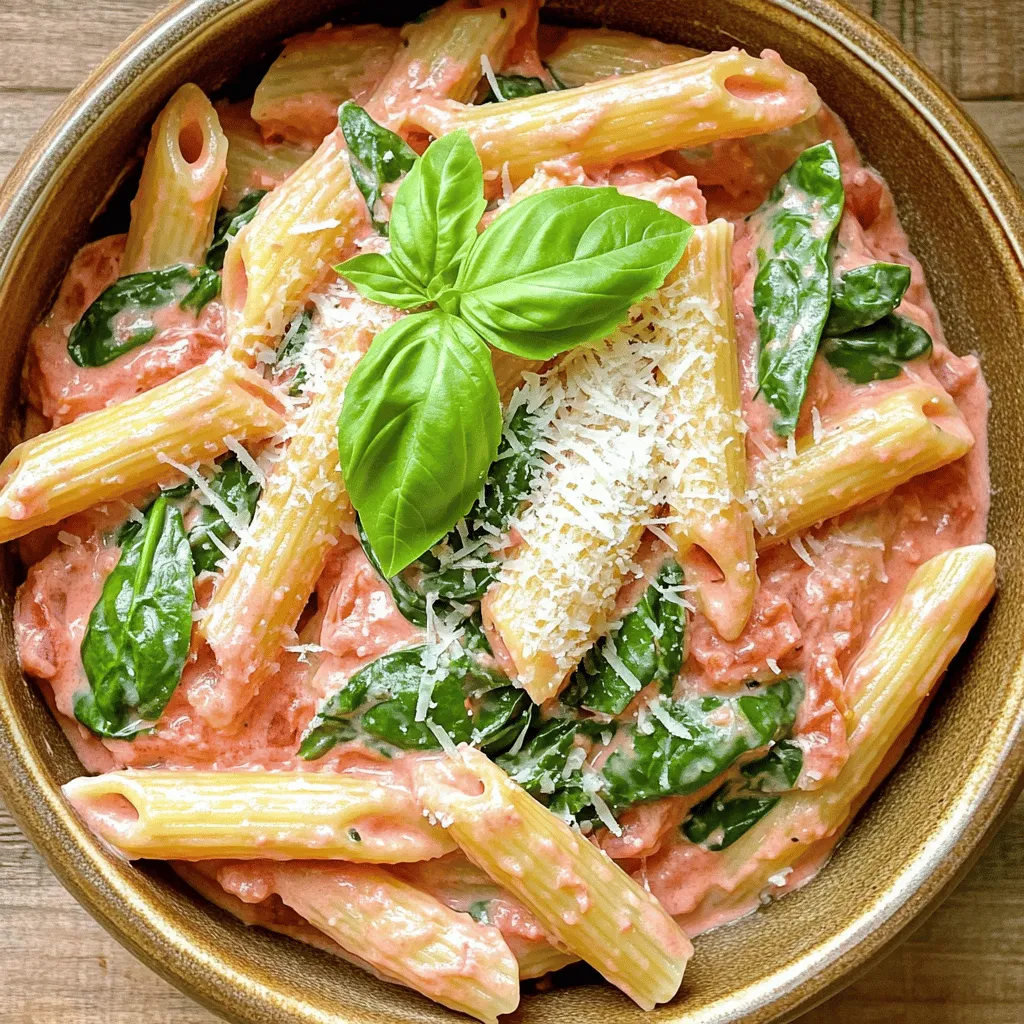
Craving a quick but tasty meal? You’ve come to the right place! My Creamy Tomato and Spinach Pasta is bursting

Older posts
Newer posts
← Previous Page1 … Page31 Page32 Page33 … Page63 Next →

dsad

© 2025 Recipes Pursuit • Built with GeneratePress

Our Policies

  • Copyright Policy
  • Cookie Policy
  • GDPR Policy
  • Privacy Policy
  • Disclaimer
  • Terms Of Use

More Information

  • Home
  • About
  • Contact
  • Appetizers
  • Dessert
  • Dinner
  • Drinks
©2025, Recipes Pursuit About Back To Top