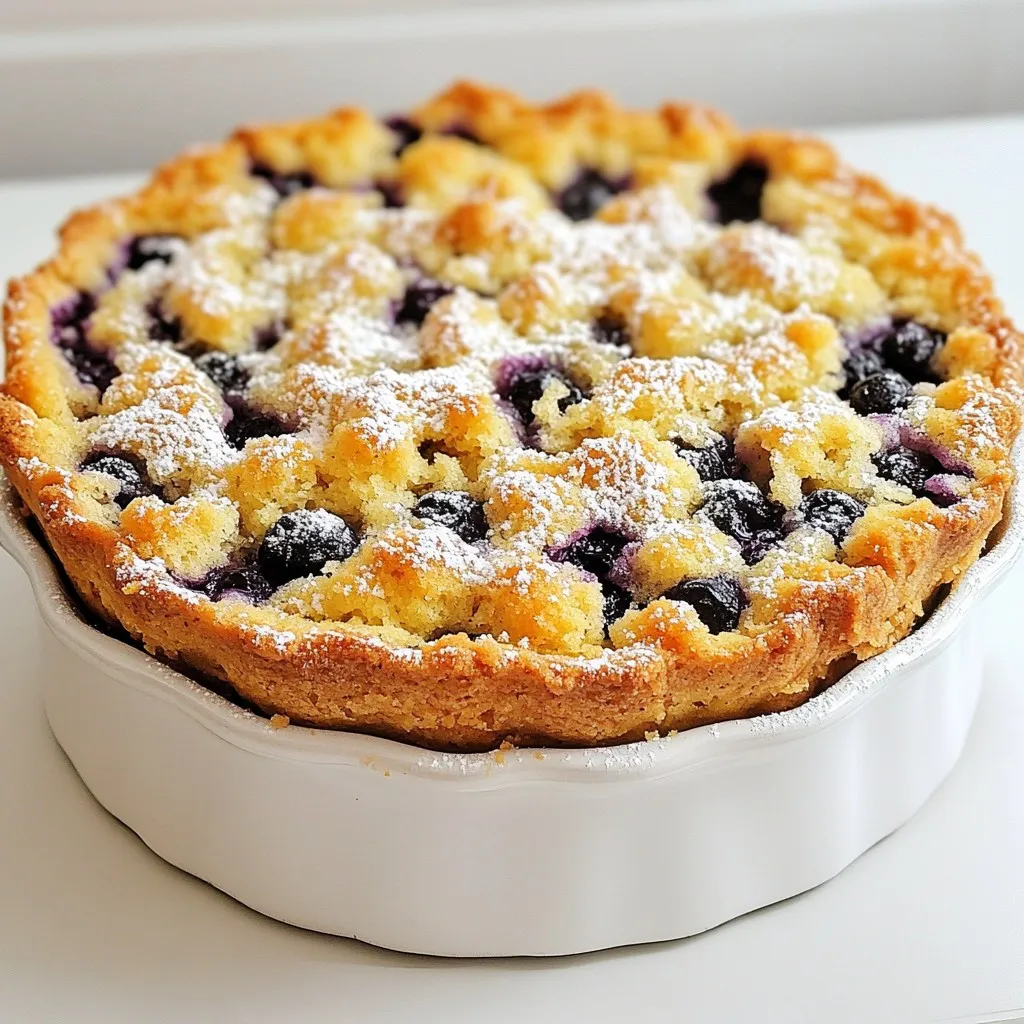
Lemon Blueberry Crumb Cake Pure and Simple Delight
Craving a sweet treat that bursts with flavor? Look no further! My Lemon Blueberry Crumb Cake is a pure delight.
Craving a sweet treat that bursts with flavor? Look no further! My Lemon Blueberry Crumb Cake is a pure delight.
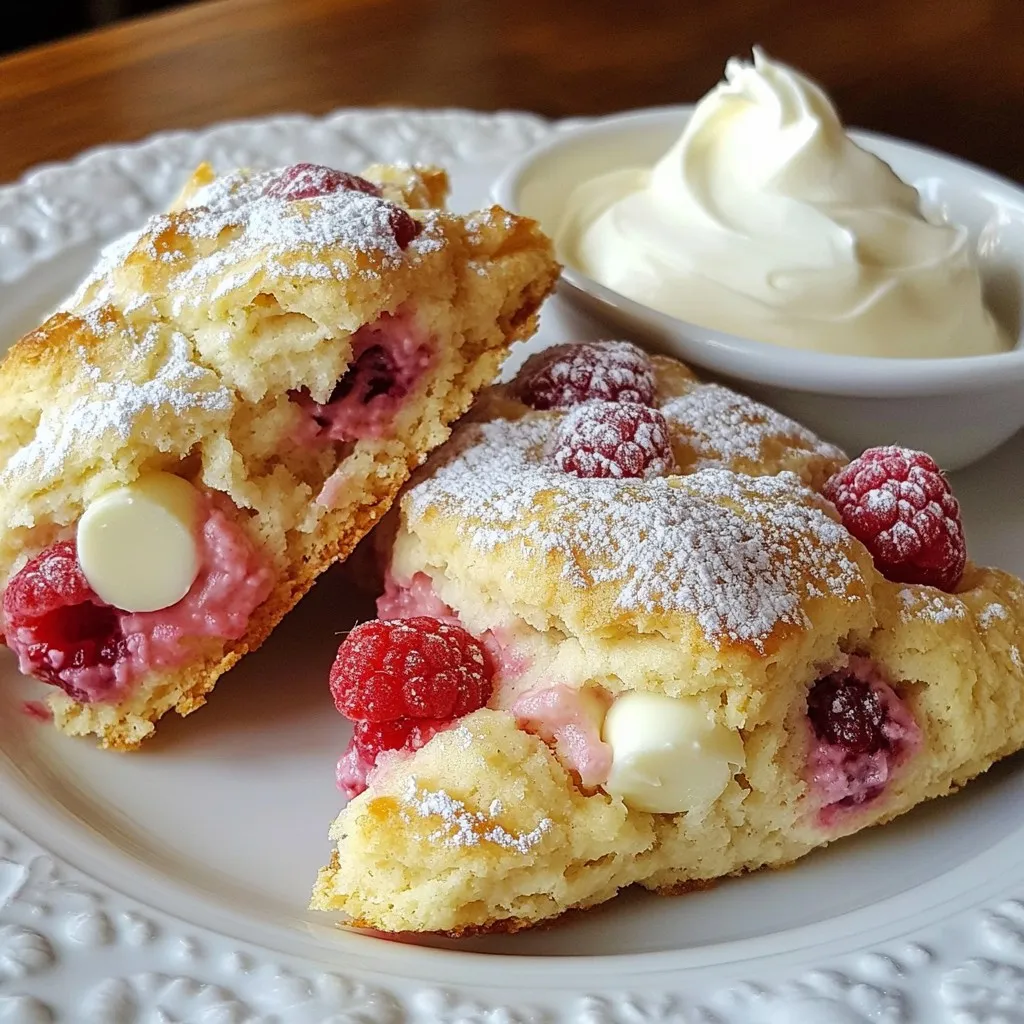
Ready to elevate your baking game? These Raspberry White Chocolate Scones are both tasty and easy to make. I’ll guide
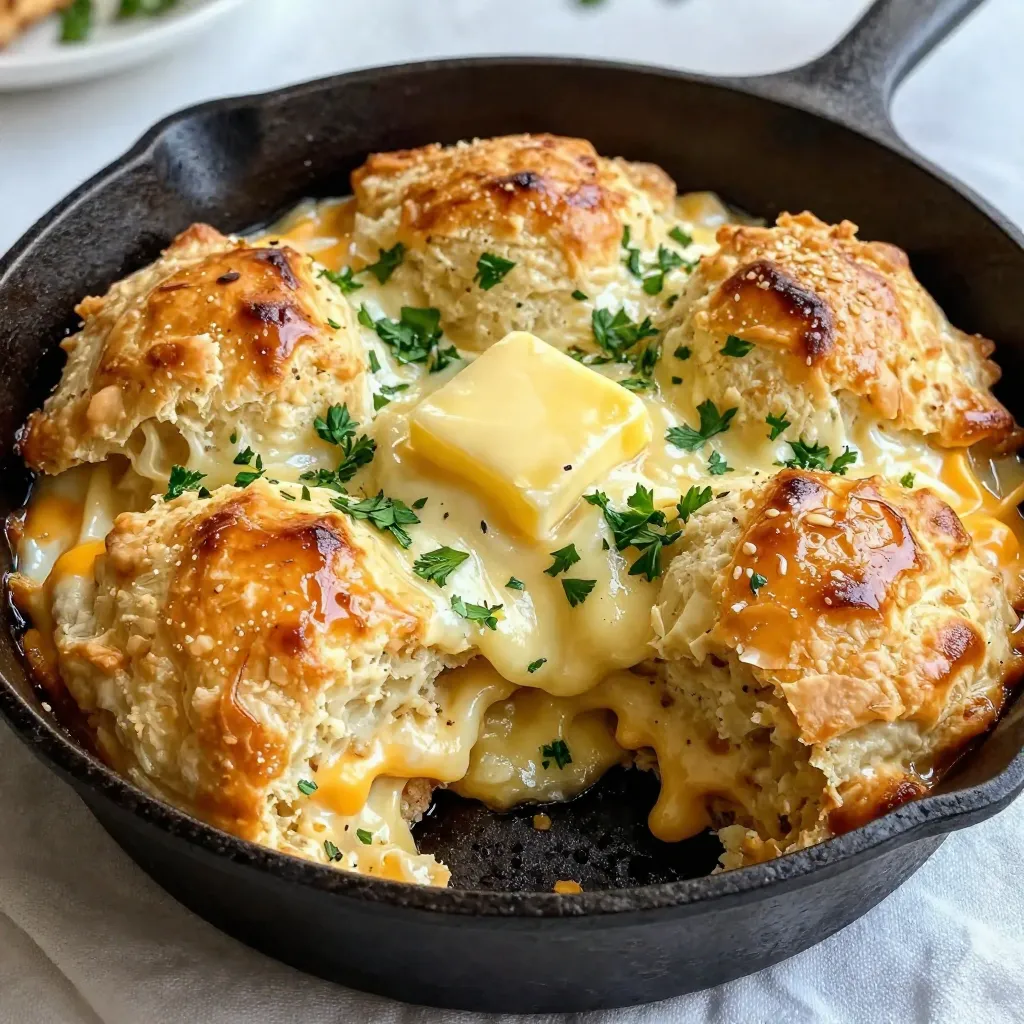
Are you ready to delight your taste buds with Cheesy Garlic Pull-Apart Biscuits? This simple recipe blends gooey cheese, savory
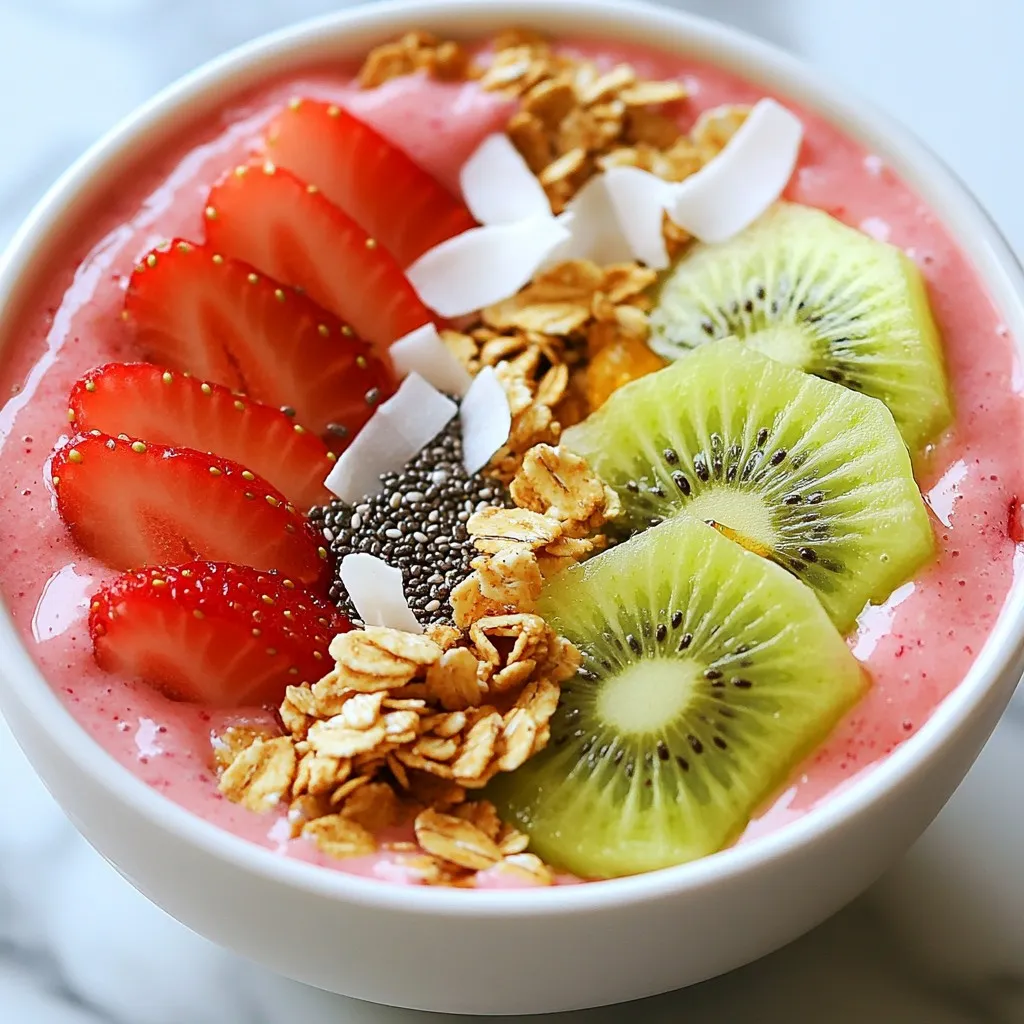
Looking for a healthy and refreshing treat? You’ll love this Strawberry Kiwi Smoothie Bowl! Packed with fresh fruits and creamy

If you’re looking for a quick and tasty dinner, try my Lemon Garlic Butter Cod! This dish is both savory
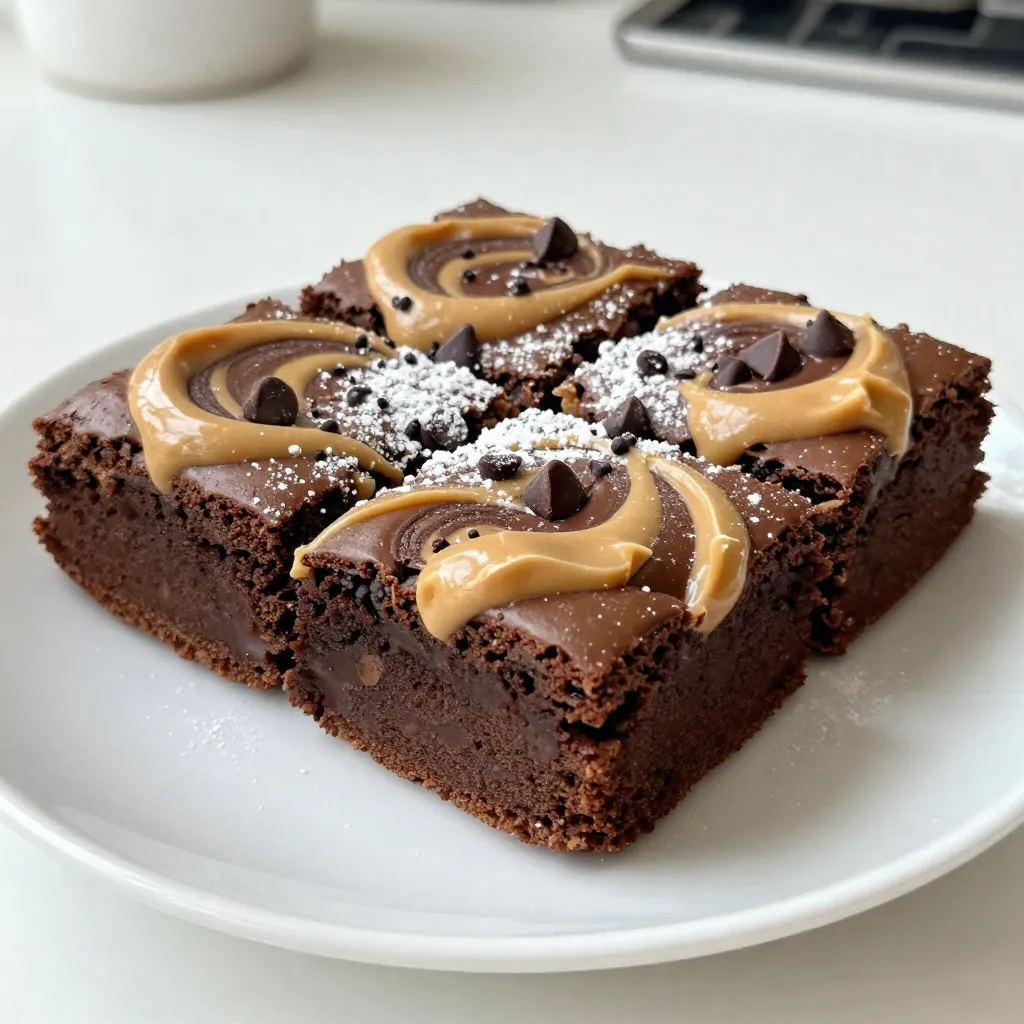
If you love chocolate and peanut butter, get ready for a treat! These Chocolate Peanut Butter Swirl Brownies are rich,
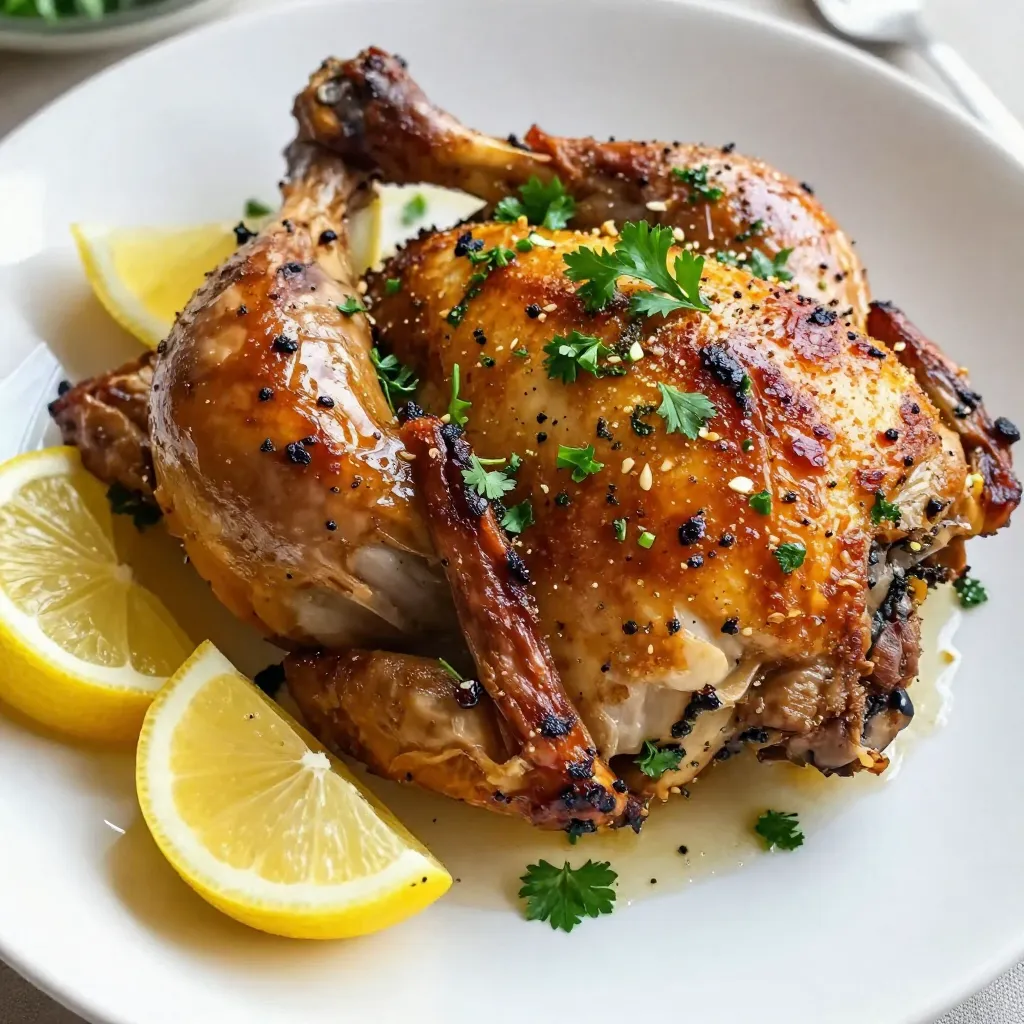
Welcome to a mouth-watering journey of flavors with my Garlic Herb Roasted Turkey Legs recipe! If you crave juicy, tender
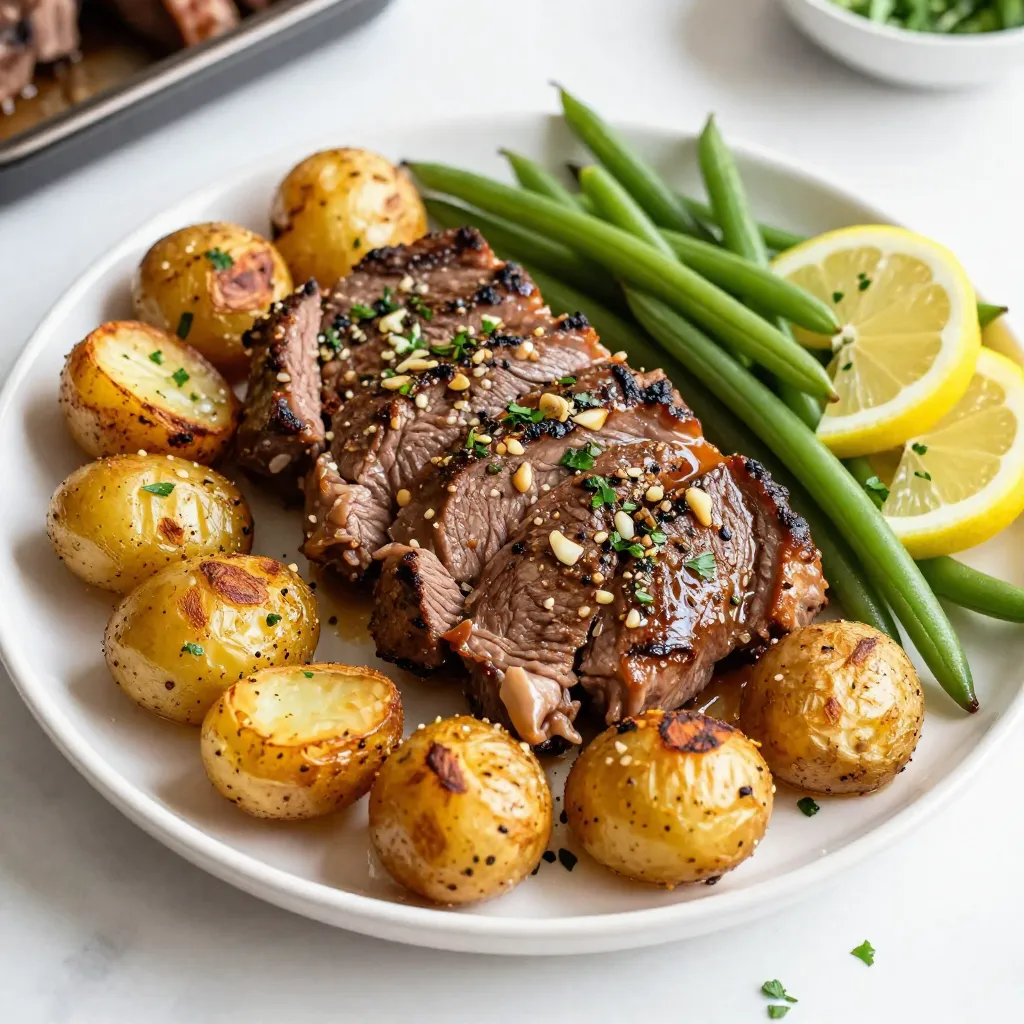
Are you ready for a quick dinner that bursts with flavor? My Garlic Herb Steak Sheet Pan Dinner combines tender
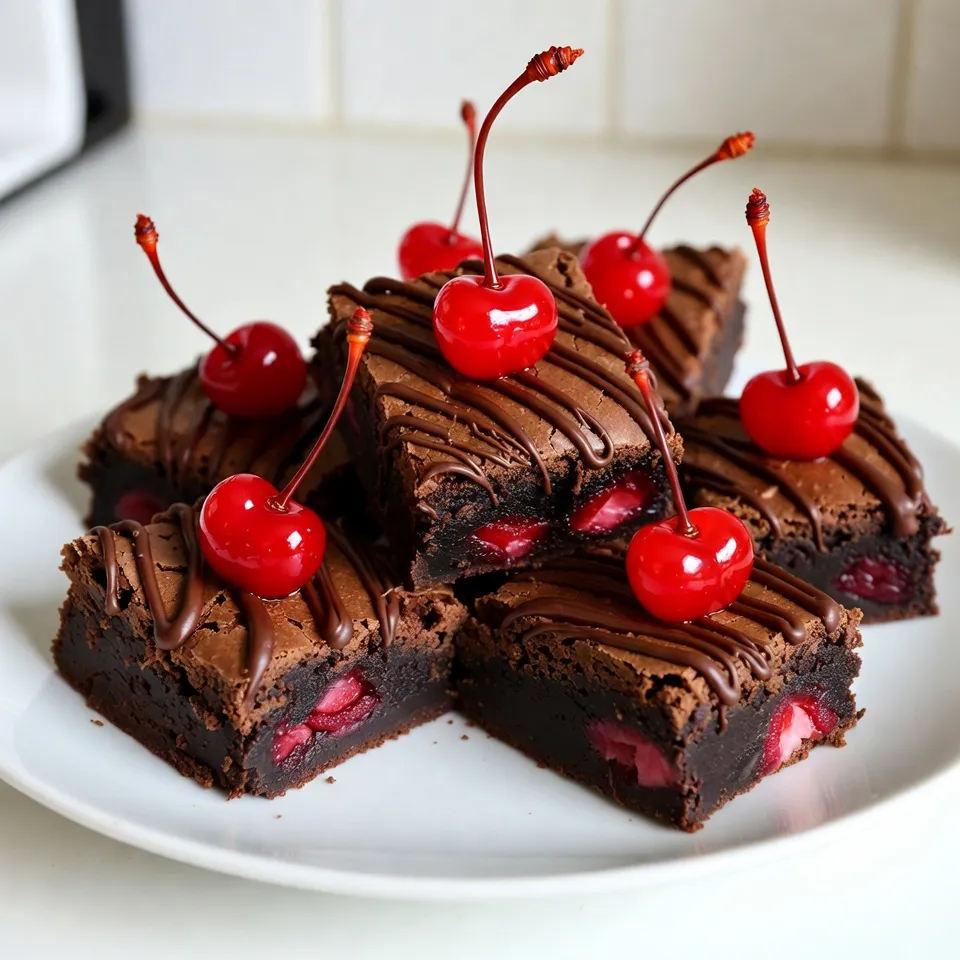
Indulging in Chocolate Covered Cherry Brownies is a sweet way to lift your spirits. These treats combine rich chocolate and
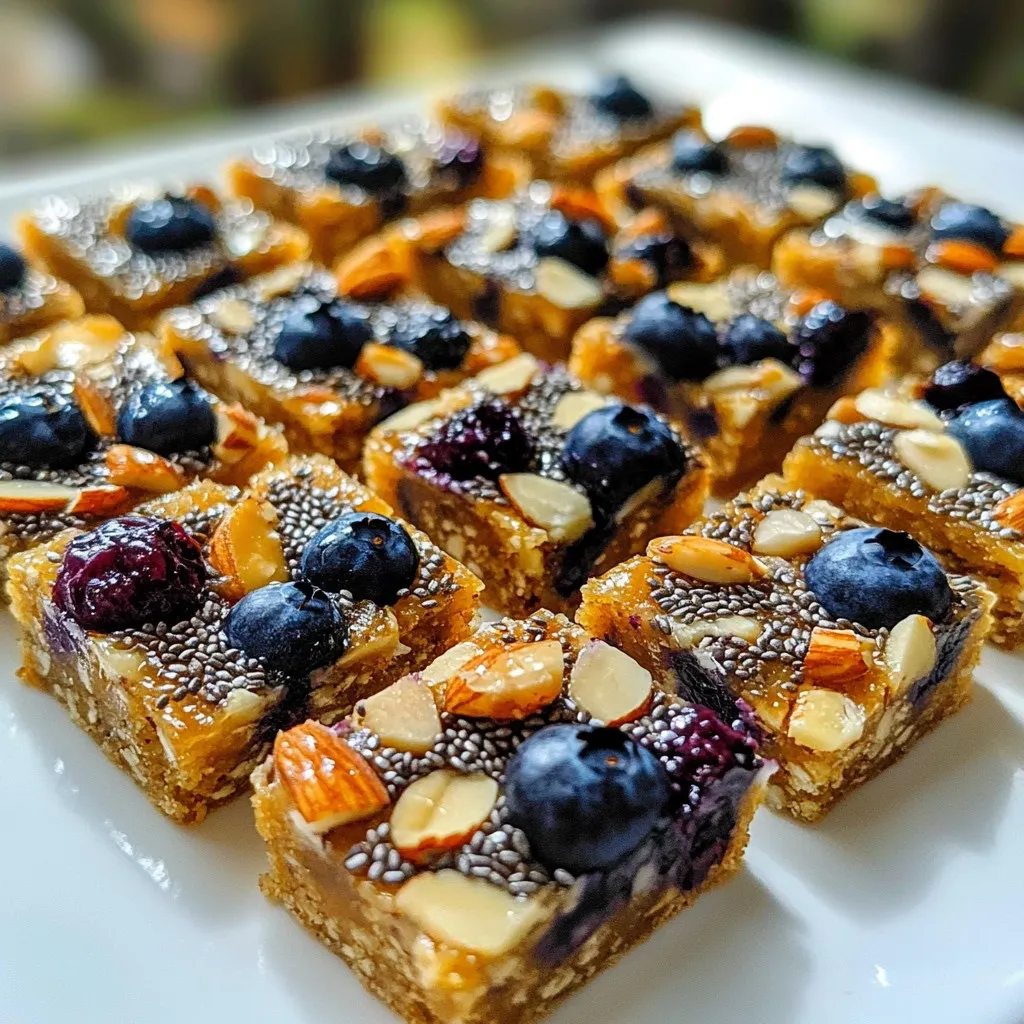
Are you looking for a quick snack that also gives you energy? Look no further! These Blueberry Almond Energy Bars
