Skip to content
DisclaimerTerms Of UseGDPR PolicyCookie Policy

Recipes Pursuit

  • Home
  • Drinks
  • Appetizers
  • Dinner
  • Dessert
  • About
  • Contact
  • Privacy Policy
DisclaimerTerms Of UseGDPR PolicyCookie Policy

Emma Smith

- 2 medium sweet potatoes, peeled and diced - 1 can (15 oz) black beans, drained and rinsed - 8 corn tortillas - 1 tablespoon olive oil - 1 teaspoon cumin - 1 teaspoon smoked paprika - 1/2 teaspoon garlic powder - 1/2 teaspoon chili powder - Salt and pepper to taste - 1 ripe avocado, sliced - 1/2 cup crumbled feta or cotija cheese (optional) - Fresh cilantro, chopped, for garnish - Lime wedges, for serving These ingredients create a colorful and tasty taco. Sweet potatoes give a nice sweetness. Black beans add protein and fiber. Corn tortillas hold everything together. For the seasonings, olive oil helps everything stick and adds flavor. Cumin and smoked paprika give a warm taste. Garlic and chili powder add depth. Don't forget salt and pepper to taste. Avocado slices add creaminess, while feta or cotija cheese brings a salty kick. Fresh cilantro adds brightness. Lime wedges are perfect for squeezing on top. For the full recipe, check the section where I guide you through the cooking steps. Enjoy cooking these tasty tacos! - Preheat the oven to 425°F (220°C). - Toss diced sweet potatoes with olive oil and seasonings. Start by peeling two medium sweet potatoes. Dice them into even cubes. This helps them roast evenly. In a large bowl, add the sweet potatoes, one tablespoon of olive oil, and the spices. You will need one teaspoon of cumin, one teaspoon of smoked paprika, half a teaspoon of garlic powder, and half a teaspoon of chili powder. Add salt and pepper to taste. Mix well to coat all the pieces. - Spread seasoned sweet potatoes on a baking sheet. - Roast for 25-30 minutes, tossing halfway through. Next, spread the sweet potatoes in a single layer on a lined baking sheet. Make sure they are not crowded. This helps them caramelize nicely. Roast them in the oven for 25 to 30 minutes. Toss them halfway through to ensure even cooking. You'll know they are done when they are tender and slightly golden. - Heat black beans in a saucepan. - Warm tortillas and assemble tacos with sweet potatoes, black beans, and toppings. While the sweet potatoes roast, heat one can of black beans in a small saucepan over medium heat. Stir them until warm. You can add a pinch of salt and pepper for flavor. Now, warm the corn tortillas. You can place them on a skillet for a few minutes or warm them in the oven for about two to three minutes. When everything is ready, it’s time to assemble the tacos. Take a warm tortilla and add a spoonful of roasted sweet potatoes. Next, add a scoop of black beans. You can top with sliced avocado, crumbled cheese, and fresh cilantro. Serve your tacos with lime wedges for a bright finish. This recipe is sure to please everyone! For the full recipe, check out the details above. To achieve perfect roasted sweet potatoes, start with the right size. Cut them into even cubes, about half an inch. This helps them cook evenly. Toss them in olive oil and spices until they are well coated. Spread them out on the baking sheet without crowding. This allows them to roast, not steam. For warming tortillas, you have a few easy options. You can use a skillet on medium heat. Place one tortilla in the pan for about 30 seconds on each side. This makes them soft and warm. Another method is to wrap a stack of tortillas in foil and place them in the oven for a few minutes. This warms them without making them dry. When presenting your taco platter, arrange the tacos in a circle on a large plate. This makes them look inviting. Add fresh cilantro on top for a pop of color. Serve lime wedges in a small bowl for squeezing over the tacos. For sides and drinks, consider pairing these tacos with a light salad or some chips and salsa. A refreshing drink like iced tea or lemonade complements the flavors well. You can also try a light beer for a fun twist. For the full recipe, check out the Sweet Potato Black Bean Tacos section above. {{image_2}} You can easily switch up the beans in this recipe. Try using pinto beans or kidney beans. They offer a different taste and texture. If you want protein, add grilled chicken or tofu. Both work well with sweet potatoes. For toppings, the options are endless. You can use shredded lettuce or diced tomatoes. If you want a kick, add jalapeños or hot sauce. For a creamy touch, try sour cream or yogurt. Each topping adds its own flavor to your tacos. These tacos can easily fit many diets. For a vegan version, skip the cheese and use plant-based toppings. You can also use avocado as a creamy option. Make sure to check that your tortillas are vegan. If you need gluten-free tacos, choose corn tortillas. They are naturally gluten-free and tasty. For a low-carb version, use lettuce wraps instead of tortillas. This keeps all the flavors while cutting carbs. You can store leftover tacos in the fridge. Place them in an airtight container. They stay fresh for about three days. For the best taste, keep the filling separate from the tortillas. If you want to freeze them, wrap the tacos in foil or plastic wrap. They can last for up to three months in the freezer. Just remember to thaw them overnight in the fridge before reheating. To reheat your tacos, use the oven for best results. Preheat to 350°F (175°C). Place the tacos on a baking sheet. Heat for about 10-15 minutes. This method keeps them crispy. You can also microwave them. Just place them on a microwave-safe plate. Heat for 1-2 minutes. But, this may make the tortillas soft. Preparing your ingredients ahead saves time. You can peel and dice the sweet potatoes a day before. Store them in cold water in the fridge. This keeps them fresh and ready to roast. You can also cook the black beans in advance. Store them in an airtight container in the fridge. For quick meals, try making taco bowls. Use the sweet potatoes and black beans over rice or quinoa. Add your favorite toppings like avocado or cheese. This way, you enjoy the same great flavors with less effort throughout the week. If you want more recipes, check out the Full Recipe for sweet potato black bean tacos. What can I use instead of corn tortillas? You can use flour tortillas or lettuce leaves. Both work well for holding the filling. Can I make these tacos ahead of time? Yes, you can prep the sweet potatoes and beans in advance. Store them in the fridge. Warm them up when you’re ready to eat. How spicy are sweet potato black bean tacos? These tacos are mildly spicy. Adjust the chili powder to your taste for more heat. What’s the best way to peel and dice sweet potatoes? To peel sweet potatoes, use a vegetable peeler. Cut off the ends first, then peel. For dicing, cut the sweet potato in half. Slice each half into planks, then cut them into small cubes. How do I know when my sweet potatoes are done roasting? Sweet potatoes are done when they feel soft and look slightly caramelized. You can test them by poking with a fork. If it goes in easily, they are ready. This blog shared a simple recipe for sweet potato black bean tacos. You learned about key ingredients, preparation steps, and great toppings. I highlighted tips for roasting sweet potatoes and warming tortillas perfectly. Plus, I provided ways to modify the recipe for different diets. As you make these tacos, remember to have fun with the process. Get creative with toppings and side dishes. Enjoy the flavors and share your creations. Happy cooking!

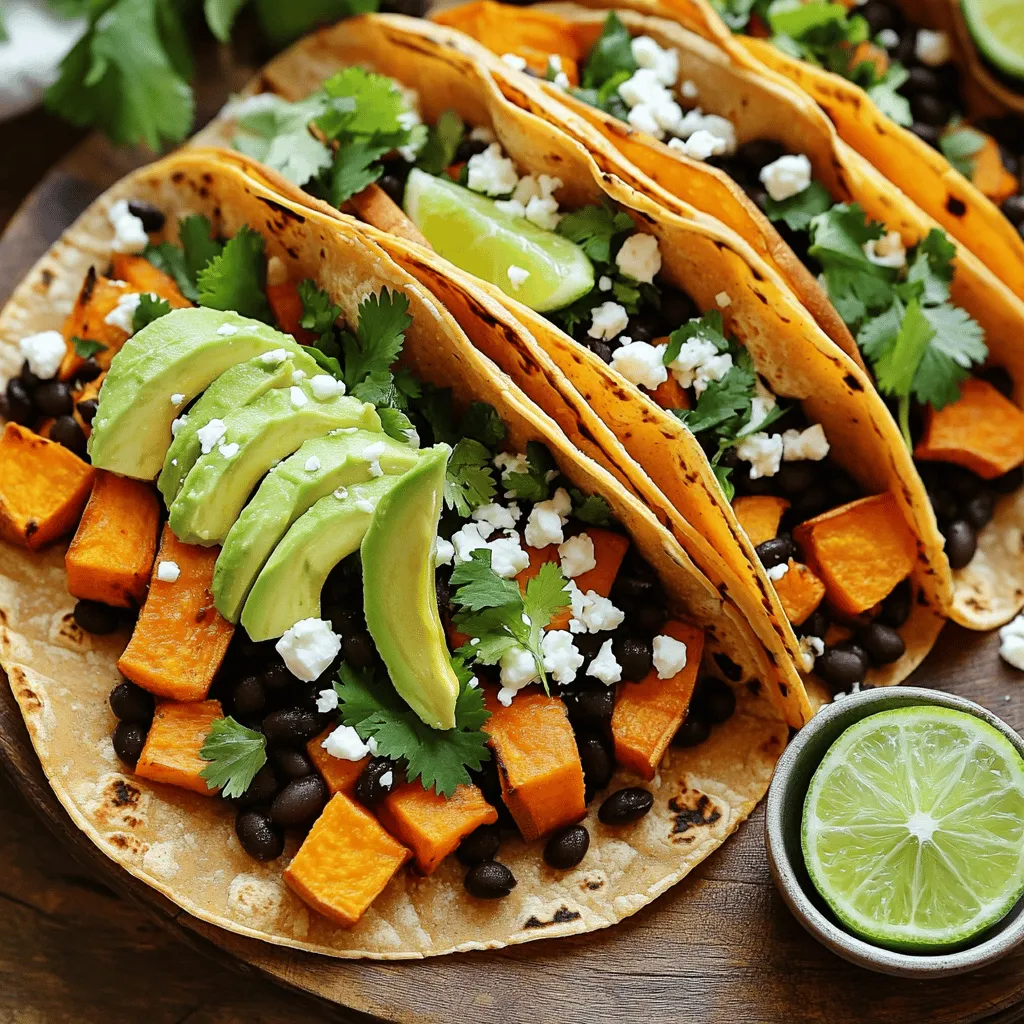
Savory Sweet Potato Black Bean Tacos Recipe

Are you ready to spice up taco night? My Savory Sweet Potato Black Bean Tacos bring flavor and fun to

- 2 cups rolled oats - 1 cup walnuts, chopped - 1/2 cup honey or maple syrup - 1/4 cup nut butter (almond or peanut) - 1/2 cup dried fruit (cranberries or raisins) - 1/4 teaspoon salt - 1/2 teaspoon cinnamon - 1/2 teaspoon vanilla extract Gathering the right ingredients is key to making delicious maple walnut granola bars. I love using rolled oats as my base. They give the bars great texture and hold everything together. Chopped walnuts add a wonderful crunch and rich flavor. You can choose honey or maple syrup as a sweetener. Both options work well. When I make these bars, I always include nut butter, either almond or peanut. This adds creaminess and helps bind the mixture. Dried fruit like cranberries or raisins adds sweetness and chewiness. A pinch of salt enhances the flavors, while cinnamon brings warmth and a hint of spice. Lastly, a touch of vanilla extract rounds out the taste, making the bars extra special. - Calories per serving: About 150 - Macronutrient breakdown: - Carbohydrates: 20g - Protein: 4g - Fat: 7g These granola bars are not just tasty; they offer health benefits too. Rolled oats provide fiber, which can help keep you full. Walnuts are rich in omega-3 fatty acids, good for heart health. Honey and maple syrup give you quick energy, perfect for a snack. Nut butter adds protein, making these bars great for an active day. Overall, these maple walnut granola bars are simple to make and pack a nutritious punch. For the full recipe, check out the link. Enjoy making your own at home! 1. Preheat your oven to 350°F (175°C). 2. Line an 8x8-inch baking dish with parchment paper. Leave a bit hanging over the sides for easy removal. 3. Gather all your ingredients and measure them out. This makes mixing easier. 1. In a large bowl, combine the rolled oats, chopped walnuts, salt, and cinnamon. Stir well to mix everything together. 2. In a small saucepan, melt the honey (or maple syrup) and nut butter over low heat. Stir until smooth. 3. Remove from heat and add the vanilla extract. Pour this mixture over the dry ingredients. 4. Add the dried fruit and mix until all the ingredients are coated. 5. Transfer the mixture to your prepared baking dish. Press it down firmly with a spatula or your hands. The more tightly packed, the better they will hold together. 6. Bake in the preheated oven for 20-25 minutes. Look for a golden brown edge. 1. After baking, let the granola cool in the pan for about 10 minutes. 2. Use the parchment paper to lift the granola out of the pan. 3. Place it on a cutting board and let it cool completely. 4. Once cool, cut it into bars or squares. Store in an airtight container for up to a week. For the full recipe, refer to the earlier section. Enjoy your delicious maple walnut granola bars! To get chewy bars, use more nut butter and syrup. For crunchier bars, add more oats and nuts. The key is also packing the mixture tightly. When you press it down firmly, it holds together better after baking. You can add spices like nutmeg or ginger for extra flavor. I often use a dash of vanilla extract too. If you want more crunch, try adding seeds like pumpkin or sunflower. You can also swap walnuts for almonds or pecans for a different taste. One common mistake is overmixing. This can make your bars too dense. On the other hand, undermixing can lead to uneven flavor. Always check your baking time. If you want chewy bars, take them out when they are lightly golden. For crunchier bars, leave them in a bit longer. For the full recipe of Maple Walnut Granola Bars, check out the recipe section. {{image_2}} You can easily change the flavor of your maple walnut granola bars. One fun idea is to add chocolate chips. They blend well with the maple and nuts. Just mix in about half a cup before baking. You can also switch up the dried fruits. Try using apricots, dates, or figs instead of cranberries or raisins. Each fruit offers a unique taste. If you need gluten-free options, choose certified gluten-free oats. This keeps the bars safe for those with gluten sensitivities. For vegan substitutions, replace honey with maple syrup. Use almond or cashew butter to keep it plant-based. These swaps make the bars fit many diets without losing flavor. You can customize the portions based on your needs. If you want smaller snacks, make mini bars or bites. Simply spread the mixture thinner in the baking pan. This way, you can cut them into bite-sized pieces. For meal prep, think about cutting larger bars. This helps with easy grab-and-go meals. You can store them in snack bags for a quick treat during the week. To keep your homemade granola bars fresh, store them in an airtight container. I recommend using a glass jar or a plastic container with a tight lid. This helps keep moisture out and maintains their crunch. Place the container in a cool, dark place, like a pantry or cupboard. Avoid storing them in places with high heat or direct sunlight. If stored correctly, your granola bars can last for about a week. After that, they may lose their texture and flavor. Signs of spoilage include a change in smell or taste, or if they feel soft instead of crunchy. Always check for any signs of mold before you eat them. You can also freeze granola bars for longer storage. To freeze, wrap each bar tightly in plastic wrap. Place them in a freezer-safe bag or container. This way, they won’t stick together. When you're ready to enjoy one, take it out and let it thaw at room temperature for about 30 minutes. You can also microwave it for a few seconds for a warm treat. Yes, you can make these bars without nuts. Use seeds instead, like pumpkin or sunflower seeds. This keeps the texture crunchy. You can also add more dried fruit or use coconut flakes for extra flavor. To substitute honey, use maple syrup or agave nectar. Both options provide sweetness without using animal products. They blend well with the other ingredients. Use the same amount as you would for honey. For chewy bars, bake them for 20 to 25 minutes. Watch for a golden edge. If you prefer crunchier bars, bake for a few extra minutes. Just be careful not to overbake, as they can dry out. You can find pre-made bars at most grocery stores. Look in the snack aisle or the health-food section. Many brands offer maple walnut flavors. However, homemade bars taste fresher and can be customized. To enhance flavor, try adding spices like nutmeg or ginger. You can also mix in chocolate chips or different dried fruits. Another great option is to add a bit of orange zest for freshness. Experiment with flavors to find your favorite combination. For the full recipe of Maple Walnut Granola Bars, check out the recipe section above. You learned how to make delicious maple walnut granola bars. We covered each step, from gathering ingredients to baking and storing. Remember, you can customize flavors or adjust for dietary needs. Making these bars lets you enjoy healthy snacks that fit your taste. Keep these tips handy to avoid mistakes and create the perfect texture. Enjoy your homemade treats; they make snacking fun and easy!

Maple Walnut Granola Bars Simple and Delightful Recipe

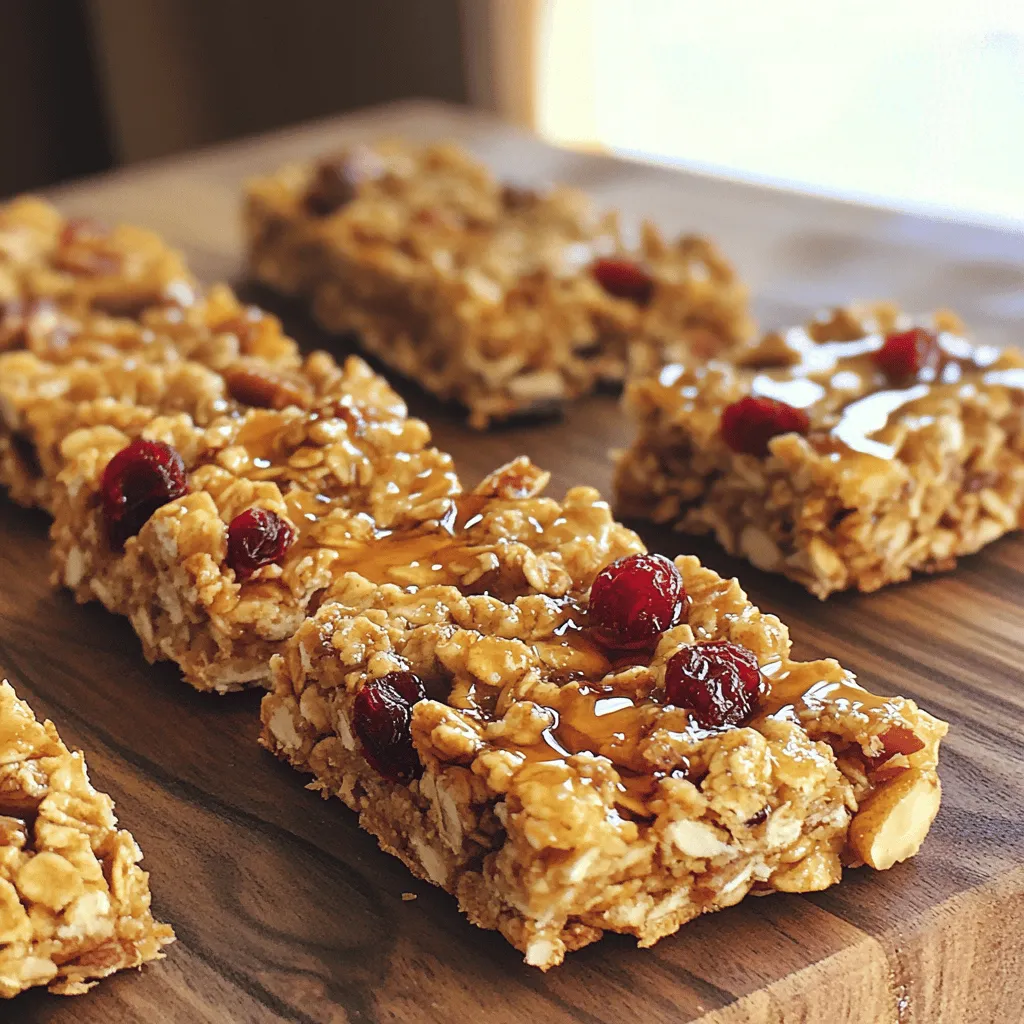
Looking for a tasty snack that’s easy to make? These Maple Walnut Granola Bars are the perfect choice! Packed with

To make Lemon Basil Pesto Pizza, gather these ingredients: - Pre-made pizza dough - Fresh basil leaves - Pine nuts - Grated Parmesan cheese - Olive oil - Lemon (zest and juice) - Garlic - Fresh mozzarella cheese - Cherry tomatoes - Salt and pepper These items create a fresh and zesty flavor. The basil and lemon combine well, making each bite a delight. You can easily swap some ingredients. For the pizza dough, use gluten-free dough or a cauliflower crust. If you want a dairy-free option, try cashew cheese or almond cheese. For nut-free pesto, replace pine nuts with sunflower seeds or omit nuts altogether. To add more flavor, consider these tips: - Mix herbs like oregano or thyme into the dough. - Top with fresh arugula or spinach for a peppery kick. - Try lime or orange zest for a different citrus twist. These simple changes can take your pizza to the next level. Enjoy exploring new flavors! - Preheat the oven: Set your oven to 475°F (245°C). This makes the pizza cook fast and evenly. - Make the lemon basil pesto: In a food processor, add the fresh basil leaves, toasted pine nuts, grated Parmesan cheese, minced garlic, lemon zest, and lemon juice. Pulse until the mix is finely chopped. - Add olive oil: While the processor runs, slowly drizzle in the olive oil. This will give your pesto a smooth and creamy texture. Taste it and add salt and pepper as needed. - Prepare the pizza dough: On a floured surface, roll out the pre-made pizza dough. Go for your favorite thickness. When done, transfer it to a baking sheet or pizza stone. - Spreading the pesto: Take the lemon basil pesto you made and spread it evenly over the pizza dough. Leave a small border around the edges for the crust. - Arranging the cheese and toppings: Place slices of fresh mozzarella cheese on top of the pesto. Then, add halved cherry tomatoes to give a sweet pop of flavor. - Baking times and temperature settings: Slide your pizza into the oven. Bake it for 12-15 minutes. Keep an eye on it until the crust turns golden brown and the cheese bubbles. - Tips on checking doneness: Look for a golden crust. If the cheese is melted and bubbly, your pizza is ready. - Serving suggestions: Take the pizza out and let it cool for a few minutes. For an extra touch, you can top it with fresh arugula before slicing. Serve it hot for the best taste. For the complete cooking process, check out the Full Recipe. To get the best crust, start with a hot oven at 475°F. This heat makes the crust crispy and golden. Roll your dough to about a quarter-inch thick. If you like a thicker crust, use less dough. Don’t forget to leave a border for the crust. Soggy pizza is a common issue. To prevent it, add toppings wisely. Use less sauce or pesto on wetter toppings. You can also pre-bake the crust for a few minutes before adding toppings. This helps the crust stay firm. Fresh basil is key for great pesto. Store basil in water, like a bouquet, to keep it fresh. Cover it loosely with a plastic bag. If you have extra basil, freeze it in ice cube trays with a bit of olive oil. This way, you’ll have fresh basil on hand later! When blending your pesto, pulse the ingredients first. This ensures everything mixes well without turning to mush. Slowly add the olive oil while blending. This gives your pesto a nice, creamy texture. Pair your Lemon Basil Pesto Pizza with a crisp white wine, like Sauvignon Blanc. It enhances the lemon and basil flavors. If you prefer non-alcoholic drinks, try sparkling water with a slice of lemon. For side dishes, a light salad works well. A simple mix of greens, cherry tomatoes, and a lemon vinaigrette is ideal. You can also serve garlic bread for a tasty addition. For the full recipe, check out the Lemon Basil Pesto Pizza section. {{image_2}} You can easily change the toppings on your lemon basil pesto pizza. Adding seasonal vegetables makes the dish fresh and exciting. Try using zucchini, bell peppers, or asparagus in spring. In the fall, add roasted butternut squash or caramelized onions for a sweet touch. Switching up the cheese is another great option. Instead of mozzarella, you could use goat cheese for a tangy flavor or feta for a salty kick. Each cheese gives a different taste and texture to your pizza. If you need gluten-free options, there are many great choices for pizza dough. Look for pre-made gluten-free crusts at your local store. Or, make your own using almond flour or cauliflower rice. For those who prefer vegan meals, you can still enjoy this pizza. Replace the cheese with a dairy-free alternative. Nutritional yeast is a tasty option to add a cheesy flavor. You can also use a vegan pesto made from nuts and nutritional yeast instead of cheese. To spice things up, try a spicy lemon basil pesto pizza. Add red pepper flakes to the pesto for heat. You can also top the pizza with spicy sausage or jalapeños. Another fun twist is to go Mediterranean with your toppings. Add artichokes, kalamata olives, or sun-dried tomatoes. These flavors pair well with lemon and basil, creating a vibrant dish. Feel free to explore these variations to create your perfect lemon basil pesto pizza. You can find the full recipe above to get started! To keep your leftover Lemon Basil Pesto Pizza fresh, store it properly. Place slices in an airtight container. Make sure each slice is separated by parchment paper. This helps prevent sticking and keeps the toppings intact. The best containers for storing pizza are glass or plastic with tight-fitting lids. These containers keep moisture out, so your pizza stays tasty. If you don’t have a container, wrap the pizza tightly in aluminum foil or plastic wrap. When reheating pizza, you have two main choices: the microwave or the oven. The microwave is quick but may make the crust soggy. For the best results, use the oven. Preheat the oven to 375°F (190°C). Place the pizza on a baking sheet and heat for about 10 minutes. To keep the crust crispy, place a baking sheet upside down in the oven. This method helps the crust heat evenly and stay crunchy. If you want a quick fix, use a skillet on the stovetop. Heat the skillet over medium heat and add the pizza. Cover it for a few minutes to warm the toppings while keeping the crust crispy. Freezing Lemon Basil Pesto Pizza is a great way to save leftovers. First, let the pizza cool completely. Then, slice it into wedges. Wrap each slice in plastic wrap, then place them in a freezer-safe bag. This method prevents freezer burn and keeps flavors intact. For best results, consume frozen pizza within two months. To thaw, place the pizza in the fridge overnight. If you're in a hurry, you can use the microwave. Heat on low power for a few minutes, checking often to avoid overcooking. The full recipe for Lemon Basil Pesto Pizza is a great starting point for this dish. How to make the dough from scratch? To make pizza dough from scratch, mix flour, water, yeast, and salt. Knead until smooth. Let it rise in a warm spot for about an hour. Roll it out when ready. Can I use store-bought pesto instead of homemade? Yes, store-bought pesto can save time. Look for a quality brand with fresh ingredients. This can still give you great flavor. What are the best toppings to pair with lemon basil pesto? Some tasty toppings include: - Fresh mozzarella cheese - Halved cherry tomatoes - Grilled chicken - Spinach - Arugula These add color and flavor to your pizza. Where to find fresh basil and quality olive oil? You can find fresh basil at farmers' markets or local grocery stores. Look for vibrant green leaves. For olive oil, choose extra virgin for the best flavor. Specialty stores often carry high-quality options. Can I buy Lemon Basil Pesto Pizza from local restaurants? Many restaurants offer unique pizzas. Check local menus for lemon basil pesto options. Call ahead to ask if they have it on the menu. How far in advance can I prep the pizza? You can prep the pizza dough one day ahead. Store it in the fridge. Assemble the pizza just before baking for the best taste. Can I assemble the pizza and bake later? Yes, you can assemble the pizza and store it in the fridge for a few hours. Bake it when you’re ready for a fresh, hot meal. In this article, you learned how to make a delicious lemon basil pesto pizza. We covered the key ingredients, substitutions, and seasoning tips. I shared step-by-step instructions for preparation, assembly, and baking. You also got tips for perfecting your pizza and ideas for variations. Remember to store leftovers correctly and consider reheating methods. Whether you’re making it for a special occasion or just for fun, enjoy the process. Now, you’re ready to impress with your homemade pizza!

Lemon Basil Pesto Pizza Fresh and Flavorful Delight

Ready to elevate your pizza night? Lemon Basil Pesto Pizza offers a burst of fresh, flavorful delight that will impress

To make Fresh Caprese Pasta, you need the following fresh ingredients: - 8 oz (225g) pasta of your choice (spaghetti, penne, or fusilli) - 2 cups cherry tomatoes, halved - 1 cup fresh mozzarella balls, halved - 1/2 cup fresh basil leaves, roughly torn - 3 tablespoons extra-virgin olive oil - 1 tablespoon balsamic glaze - 2 cloves garlic, minced - Salt and pepper to taste - Grated Parmesan cheese for garnish (optional) Each ingredient plays a key role in this dish. For the pasta, 8 ounces provides a hearty base. The 2 cups of halved cherry tomatoes add freshness and sweetness. Use 1 cup of mozzarella for that creamy texture. The 1/2 cup of basil gives your pasta that classic Caprese flavor. Three tablespoons of olive oil help bind everything together. One tablespoon of balsamic glaze adds a touch of tang. Finally, season with salt and pepper to enhance all the flavors. If you want to switch things up, consider adding some optional ingredients: - Crushed red pepper flakes for a spicy kick - Pine nuts for a crunchy texture - Spinach or arugula for extra greens - Black olives for a briny flavor These options can add depth and variety to your dish. Feel free to experiment and find your favorite mix! For the full recipe, refer to the instructions provided. To start, fill a large pot with water. Add salt to the water; this helps the pasta taste better. Bring the water to a boil. Once boiling, add 8 oz of pasta. Cook it according to the package directions until it is al dente. This usually takes about 8 to 10 minutes. Remember to stir the pasta to prevent sticking. Before draining, save 1/2 cup of the pasta water. This water is starchy and will help the sauce later. Drain the pasta and set it aside. Now, take a large skillet and add 3 tablespoons of extra-virgin olive oil. Heat it over medium heat. When the oil is hot, add 2 cloves of minced garlic. Sauté the garlic for about 1 minute. You want it fragrant but not burnt. Next, add 2 cups of halved cherry tomatoes to the skillet. Cook them for about 3 to 4 minutes. You want the tomatoes to soften and start to release their juices. Once the tomatoes are soft, reduce the heat to low. Now, add the cooked pasta to the skillet. Pour in the reserved pasta water. Toss everything together gently. This helps mix the flavors. Next, remove the skillet from the heat. Fold in 1 cup of halved mozzarella balls and 1/2 cup of roughly torn basil leaves. Season with salt and pepper to your taste. Finally, drizzle 1 tablespoon of balsamic glaze over the pasta and toss lightly again. Your Fresh Caprese Pasta is now ready to serve! For the full recipe, check out the detailed instructions above. To enhance the taste of your Fresh Caprese Pasta, focus on fresh ingredients. Use ripe cherry tomatoes for a sweet kick. Fresh mozzarella adds creaminess, while basil gives a fragrant touch. The extra-virgin olive oil brings richness. A drizzle of balsamic glaze adds a tangy finish. Experiment with the amount of each ingredient. Adjust to your taste preferences for the best flavor. One common mistake is overcooking the pasta. Always aim for al dente texture, as it holds up better. Another mistake is using low-quality cheese. Fresh mozzarella truly makes a difference. Avoid skipping the salt in the pasta water. It enhances flavor from the start. Lastly, don't skip the reserved pasta water. It helps bind the sauce and pasta together. Cook pasta in a large pot of boiling salted water. This ensures even cooking. Stir the pasta occasionally to prevent sticking. When it's nearly done, save some pasta water before draining. It’s a secret weapon for a silky sauce. After draining, toss the pasta immediately with the garlic and tomatoes. This keeps it warm and absorbs flavors well. {{image_2}} You can enhance your Fresh Caprese Pasta with a few simple additions. Try adding some cooked chicken or shrimp for protein. This will make the dish more filling. You can also sprinkle in some red pepper flakes for a mild heat. If you enjoy nuts, consider adding pine nuts or walnuts for a crunchy texture. Fresh lemon juice can brighten the flavors, too. A squeeze of lemon just before serving adds a nice twist. Feel free to swap ingredients to suit your taste. Instead of cherry tomatoes, you can use diced heirloom tomatoes. They bring a different taste and color. If you can’t find fresh mozzarella, try using burrata. It has a creamy center that melts beautifully into the pasta. For those who are vegan, replace mozzarella with a plant-based cheese. You can also use olive oil infused with garlic for extra flavor. While this recipe calls for spaghetti, you can use any pasta you like. Penne works well, as its shape holds the sauce nicely. Fusilli is another great option; its spirals capture the tomatoes and cheese. You can even try whole wheat or gluten-free pasta for a healthier choice. Each pasta type will change the texture of the dish, making it fun to experiment. Find what you love best! To keep your Fresh Caprese Pasta tasty, store it in an airtight container. This helps keep out air and moisture. Let the pasta cool down to room temperature before sealing it up. Store it in the fridge for up to three days. If you want to keep it longer, you can freeze it. Just remember to use a freezer-safe container. When you're ready to enjoy your leftovers, reheat them gently. You can use the microwave or a skillet. If using a microwave, heat in short bursts. Stir after each burst to heat evenly. If using a skillet, add a splash of water or olive oil to help it warm up. This keeps the pasta from drying out. Heat it just until warm, not too long! To keep your Caprese Pasta fresh, try not to mix in the cheese and basil until you're ready to eat. These ingredients taste best fresh. If you have leftovers with these mixed in, they might not taste as good the next day. So, it's best to keep them separate until serving. With these tips, your Fresh Caprese Pasta will stay delicious for as long as possible! For the full recipe, check earlier sections. To make Fresh Caprese Pasta, start by cooking 8 oz of pasta in salted water. While the pasta cooks, heat 3 tablespoons of olive oil in a skillet. Add 2 minced garlic cloves and sauté for about 1 minute. Then, toss in 2 cups of halved cherry tomatoes. Cook these for 3 to 4 minutes until soft. After draining the pasta, add it to the skillet with the tomatoes. Mix in 1 cup of halved mozzarella balls and 1/2 cup of torn basil leaves. Season with salt and pepper. Finish with 1 tablespoon of balsamic glaze. For a full recipe, check out the Full Recipe section. Yes, you can! If you don't have cherry tomatoes, use diced regular tomatoes. For cheese, any soft cheese will work in place of mozzarella. You can swap basil with spinach or arugula for a different taste. Olive oil can be replaced with any light oil if needed. Just remember to adjust the flavors as you mix. Serve Caprese Pasta warm in bowls. For a nice touch, garnish with extra mozzarella balls and a basil leaf. Drizzle a bit more balsamic glaze on top for added flavor. You can also serve it on a wooden board with a side of olive oil. This makes for a great presentation and a fun dining experience! You learned how to make delicious Caprese pasta with fresh ingredients and simple steps. Remember to cook your pasta just right and sauté your garlic and tomatoes for the best flavor. Use the tips to avoid common mistakes and customize your dish to your liking. Store any leftovers properly to keep them fresh. With these insights, you're set to impress anyone at your next meal. Enjoy your tasty creation and the smiles it brings!

Fresh Caprese Pasta Flavorful and Simple Recipe

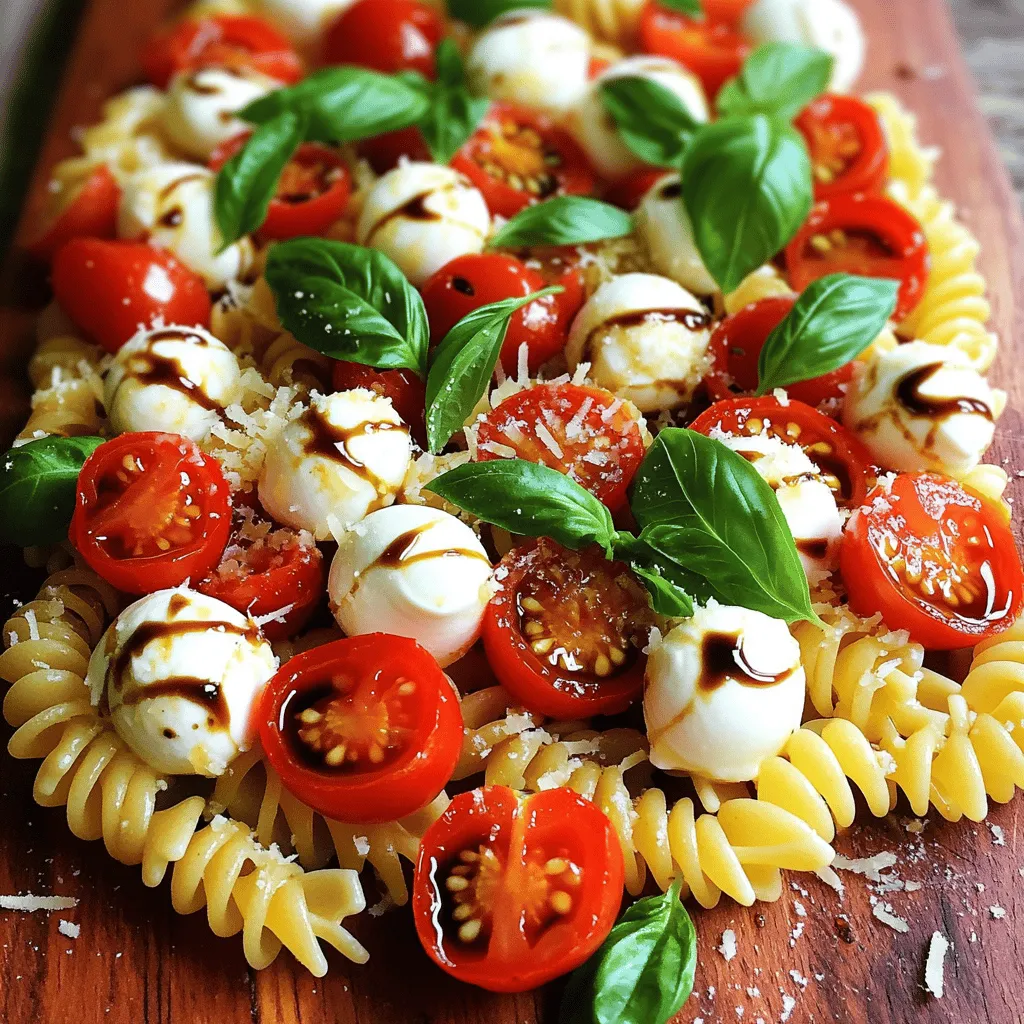
Are you ready to create a dish that bursts with flavor? My Fresh Caprese Pasta recipe is both simple and

For a great Tangy BBQ Pulled Pork, you need a few key ingredients. Here is what you will need: - 3 to 4 pounds of pork shoulder or pork butt - 1 cup of apple cider vinegar - 1 cup of chicken broth - 1 tablespoon of smoked paprika - 1 tablespoon of garlic powder - 1 tablespoon of onion powder - 2 teaspoons of salt - 1 teaspoon of black pepper - 1 teaspoon of cayenne pepper These ingredients make the base for the pulled pork. The pork shoulder is perfect for cooking low and slow, making it tender. The spices add flavor, while vinegar gives a nice tang. Choosing the right BBQ sauce is crucial. Here are some great options to enhance your dish: - Apple cider vinegar-based sauce for a tangy kick - Mustard-based sauce for a zesty flavor - Tomato-based sauce for a sweet and smoky profile Each sauce brings its own unique taste. I love mixing sauces to find my favorite blend. You can also try making your own sauce. It’s fun and easy! Want to jazz up your pulled pork? Here are some optional add-ins: - Sliced jalapeños for heat - Pineapple chunks for sweetness - Chopped onions for crunch These add-ins can change the taste and texture. Feel free to get creative! You can use the *Full Recipe* to explore more ideas and make the dish your own. First, gather your ingredients. You need: - 4 pounds of pork shoulder - 1 cup of tangy BBQ sauce - 1 tablespoon of smoked paprika - 1 tablespoon of garlic powder - 1 tablespoon of onion powder - 1 teaspoon of salt - 1 teaspoon of black pepper - 1/2 cup of apple cider vinegar Start by patting the pork shoulder dry with paper towels. This helps the seasoning stick better. Next, mix the smoked paprika, garlic powder, onion powder, salt, and pepper in a bowl. Rub this mix all over the pork. Make sure to coat every part evenly. Now, place the pork in a slow cooker or a roasting pan. Pour the apple cider vinegar around the meat. This adds flavor and moisture. If you use a slow cooker, set it on low for 8 hours. If you're using the oven, preheat it to 300 degrees Fahrenheit and cook for about 4 hours. Check the meat’s doneness with a fork. It should pull apart easily. The slow cooker is great for a hands-off approach. It keeps the pork moist and tender. You can set it and forget it. The oven gives a nice, crispy outer layer. It’s perfect if you want a bit of crunch. Both methods work well. Just adjust your cooking time. The slow cooker takes longer but requires less attention. The oven cooks faster but needs more checking. When the pork is done, let it rest for 15 minutes. This helps keep the juices in. To shred, use two forks. Hold one fork steady and use the other to pull the meat apart. It should come apart easily. For even finer shreds, use your hands. Be careful, as the meat will be hot. Once shredded, mix it with the tangy BBQ sauce from the recipe. This makes it extra flavorful. Serve it on buns, in tacos, or over rice. Enjoy your tasty creation! For the full recipe, check the [Full Recipe]. To get that great tangy taste, focus on the right ingredients. Use apple cider vinegar for a bright kick. A splash of citrus juice adds extra zest. Don’t forget your BBQ sauce! Look for one with a balance of sweet and tangy. This blend will make your pulled pork shine. You can also add a pinch of cayenne pepper for a hint of heat. Mix these flavors well. Taste as you go to find your perfect combo. Cooking time matters for tender pulled pork. I suggest cooking it low and slow. Aim for a temperature around 225°F to 250°F. This range helps break down the meat's fibers. Plan for about 1.5 to 2 hours per pound. Use a meat thermometer to check for doneness. You want it to reach 195°F to 205°F. This temp is perfect for shredding. If you rush this step, your pork might turn tough. Be patient! Common mistakes can ruin your pulled pork. First, don’t skip the searing step. Searing locks in juices and adds flavor. Also, avoid using too much liquid. Too much moisture can make your pork soggy. Instead, let the meat absorb the sauce. Finally, don’t forget to let it rest. Resting helps the juices redistribute throughout the meat. This step makes every bite juicy and flavorful. For a complete guide, check the Full Recipe. {{image_2}} You can make pulled pork spicy or sweet. If you love heat, add chili powder or cayenne pepper. These spices kick up the flavor and give it a nice punch. For a sweeter taste, use brown sugar or honey. These ingredients balance the tangy BBQ sauce. You can mix and match to find your perfect blend. Pulled pork is great, but you can use other meats, too. Beef brisket works well and offers a rich taste. Chicken is a lighter option and cooks faster. Each meat brings its own flavor to the dish. Just adjust your cooking times and sauces for the best results. Adding unique ingredients can make your pulled pork stand out. Try adding fruit, like pineapple or apples, for a fruity twist. You can also use different types of BBQ sauce. A mustard-based sauce or a vinegar-based sauce can change the whole dish. Herbs like thyme or rosemary can add freshness, too. For more ideas, check out the Full Recipe for inspiration! Store your leftover Tangy BBQ pulled pork in an airtight container. Make sure the pork cools down first. Place it in the fridge within two hours of cooking. This keeps it fresh and safe to eat. Use it within three to four days. If you want to enjoy it longer, consider freezing it. To reheat your pulled pork, use a skillet or microwave. If using a skillet, add a splash of water or broth. Heat on low and stir often. This keeps the pork moist. If using a microwave, place it in a bowl and cover it. Heat in short bursts, stirring in between. Make sure it warms evenly. You can freeze pulled pork for up to three months. Place it in a freezer-safe bag or container. Squeeze out as much air as possible. When ready to eat, thaw it in the fridge overnight. Reheat it gently to bring back the flavor. For the best taste, use it within three months. Check out the Full Recipe for more tips! Tangy BBQ pulled pork is a savory dish made from slow-cooked pork. I use pork shoulder for its rich flavor and tender texture. The meat cooks until it falls apart easily. I then mix it with a zesty barbecue sauce. This sauce has a perfect balance of sweet and tangy. It makes every bite burst with flavor. You can serve this dish on buns, tacos, or even over rice. It’s truly a crowd-pleaser. Cooking pulled pork takes time, but it’s worth the wait. In a slow cooker, it usually takes 8 to 10 hours on low heat. If you use an oven, it can take about 4 to 6 hours at a low temperature. The key is to cook it until the meat is tender. Always check the internal temperature, which should reach 190°F to 205°F. This range ensures the meat is juicy and easy to shred. Yes, you can make tangy BBQ pulled pork ahead of time. I often prepare it a day or two in advance. Just let it cool and store it in the fridge. When you’re ready to serve, reheat it gently. This method makes the flavors even better. You can find the full recipe and cooking tips to help with this preparation. This guide covered all you need for tangy BBQ pulled pork. We looked at key ingredients, cooking methods, and tips for perfect flavor. Remember to experiment with spices and sauces to find your ideal taste. Store leftovers properly and reheat them for best results. With these steps, you can enjoy tasty meals any time. Dive into this fun cooking adventure and savor every bite. Enjoy your flavorful pulled pork!

Tangy BBQ Pulled Pork Finger-Licking Delight

If you’re ready to savor a tangy BBQ pulled pork dish that will leave your taste buds dancing, you’re in

To make a rich and creamy risotto, you need a few key items. Here’s what you will need: - 1 cup Arborio rice - 4 cups vegetable broth - 2 cups mixed mushrooms (shiitake, cremini, and oyster), sliced - 1 small onion, finely chopped - 2 cloves garlic, minced - 1/2 cup Parmesan cheese, grated (or nutritional yeast for a vegan option) - 2 tablespoons olive oil - 1 tablespoon butter (or vegan butter) - Salt and pepper to taste - Fresh parsley, chopped (for garnish) - 1 teaspoon thyme (fresh or dried) - 1/2 cup frozen peas (optional, for color) These ingredients work together to create a wonderful blend of flavors and textures. Arborio rice is key as it absorbs liquid well and gives risotto its creamy texture. You can easily adjust this risotto to fit your taste. Here are some great options: - Cooked chicken or shrimp for added protein - Spinach or kale for extra greens - A splash of white wine for depth of flavor - A squeeze of lemon juice for brightness Feel free to mix and match these items. This makes the dish even more special. The right seasonings can elevate your risotto. Consider these: - Fresh basil adds a sweet hint. - Bay leaves infuse a warm aroma. - Red pepper flakes give a nice kick. - Lemon zest brightens the dish. Using these seasonings helps enhance the flavor of your savory mushroom risotto. Check out the Full Recipe for more details on how to combine these ingredients into a delicious meal. Start by heating vegetable broth in a saucepan. Use low heat to keep it warm. This step is key to cooking your risotto well. If you add cold broth, it will slow down the cooking. You want the broth hot as you mix it with the rice. Next, grab a large skillet and heat olive oil and butter on medium heat. Add the chopped onion first. Cook until soft and clear, which takes about 3-4 minutes. Then, toss in minced garlic and sliced mushrooms. Cook these until the mushrooms turn golden brown and soft, about 5-7 minutes. Season with salt, pepper, and thyme. This mix gives your risotto a deep flavor. Now it’s time for the star of the dish, the Arborio rice. Stir it into the skillet. Let it cook for 1-2 minutes to soak up the flavors. This step is important for building taste. After that, start adding your warm vegetable broth. Use one ladle at a time. Stir often and wait until most of the broth is gone before adding more. Repeat this until the rice becomes creamy and tender, which should take about 18-20 minutes. If you want, add frozen peas in the last few minutes for a pop of color. When the risotto is creamy, remove it from the heat. Mix in grated Parmesan cheese until it’s all melted. Adjust the seasoning with more salt and pepper if needed. For a complete recipe, check out the Full Recipe section. Choosing the right mushrooms is key for great flavor. I suggest using a mix of mushrooms. Shiitake, cremini, and oyster mushrooms work well together. Shiitake adds a rich taste. Cremini gives a nice texture. Oyster mushrooms bring a delicate touch. You can also try other types. Just ensure they are fresh. Fresh mushrooms have the best taste. To get that creamy texture, use Arborio rice. This rice has a high starch content. The starch helps make the risotto creamy. Always stir the rice while cooking. Stirring helps release the starch. Add broth slowly, one ladle at a time. Wait until the rice absorbs the liquid before adding more. This method makes the risotto smooth and rich. Using the right tools makes risotto easier. A wide skillet is best for even cooking. A wooden spoon helps stir the rice well. I also recommend a ladle for adding broth. Keep a saucepan on the stove to warm the broth. This keeps the cooking process steady. With these tools, you’ll create a delicious dish. For the full recipe, check the details above! {{image_2}} You can easily make a creamy vegan mushroom risotto. Simply replace the Parmesan cheese with nutritional yeast. This gives a cheesy flavor without using dairy. Use vegan butter instead of regular butter for a fully plant-based dish. You will still enjoy that rich, creamy texture. The mushrooms add depth and umami, making this dish satisfying and tasty. To boost flavor, try adding ingredients like white wine. It adds a nice acidity that complements the mushrooms. You can also mix in fresh herbs like basil or dill. They bring a fresh taste to the dish. For extra creaminess, consider adding a splash of coconut milk. This will enhance the risotto’s texture and flavor. Seasonal ingredients can change your risotto game. In spring, add asparagus or peas for a pop of color and taste. In autumn, use roasted butternut squash for sweetness. During winter, try adding sautéed kale or spinach for a hearty touch. Each season offers new ways to enjoy this dish. Be creative and use what is fresh and available. You can find the full recipe for savory mushroom risotto in the main article. To store leftover risotto, let it cool first. Place it in an airtight container. This keeps it fresh. You can store it in the fridge for up to three days. Make sure it’s sealed well to prevent drying out. When you want to eat your leftover risotto, use low heat. You can reheat it on the stove or in the microwave. If using the stove, add a splash of broth or water. Stir often to keep it creamy. In the microwave, cover it loosely. Heat in short bursts, stirring in between. This method helps it stay moist. You can freeze risotto if you have too much. Spoon it into freezer bags or containers. Remove as much air as you can. Label the bags with the date. It can last for up to three months in the freezer. When you’re ready to eat it, thaw it overnight in the fridge. Then, reheat it using the techniques mentioned above. Enjoy your creamy comfort meal anytime! For more details, check the Full Recipe. The best rice for risotto is Arborio rice. This rice has a high starch content. It gives risotto its creamy texture. You can also use Carnaroli or Vialone Nano rice. Both options work well, but Arborio is the most common. Yes, you can make this recipe gluten-free. Use gluten-free vegetable broth. Ensure that your Parmesan cheese or nutritional yeast is gluten-free too. This way, you can enjoy a creamy risotto without worry. You can make risotto ahead of time, but it may lose some creaminess. Cook the risotto, then cool it down quickly. Store it in an airtight container in the fridge. When ready to serve, heat it gently. Add a little broth or water to bring it back to life. My full recipe gives you step-by-step tips for perfect risotto. In this blog post, I covered how to make savory mushroom risotto. You learned about key ingredients, cooking steps, and useful tips. Experiment with flavors using optional ingredients and seasonal variations. Remember to store and reheat properly for the best taste. Risotto is flexible, so don't be afraid to try your own twist. Now, gather your supplies and enjoy creating this rich dish. Happy cooking!

Savory Mushroom Risotto Creamy and Comforting Meal

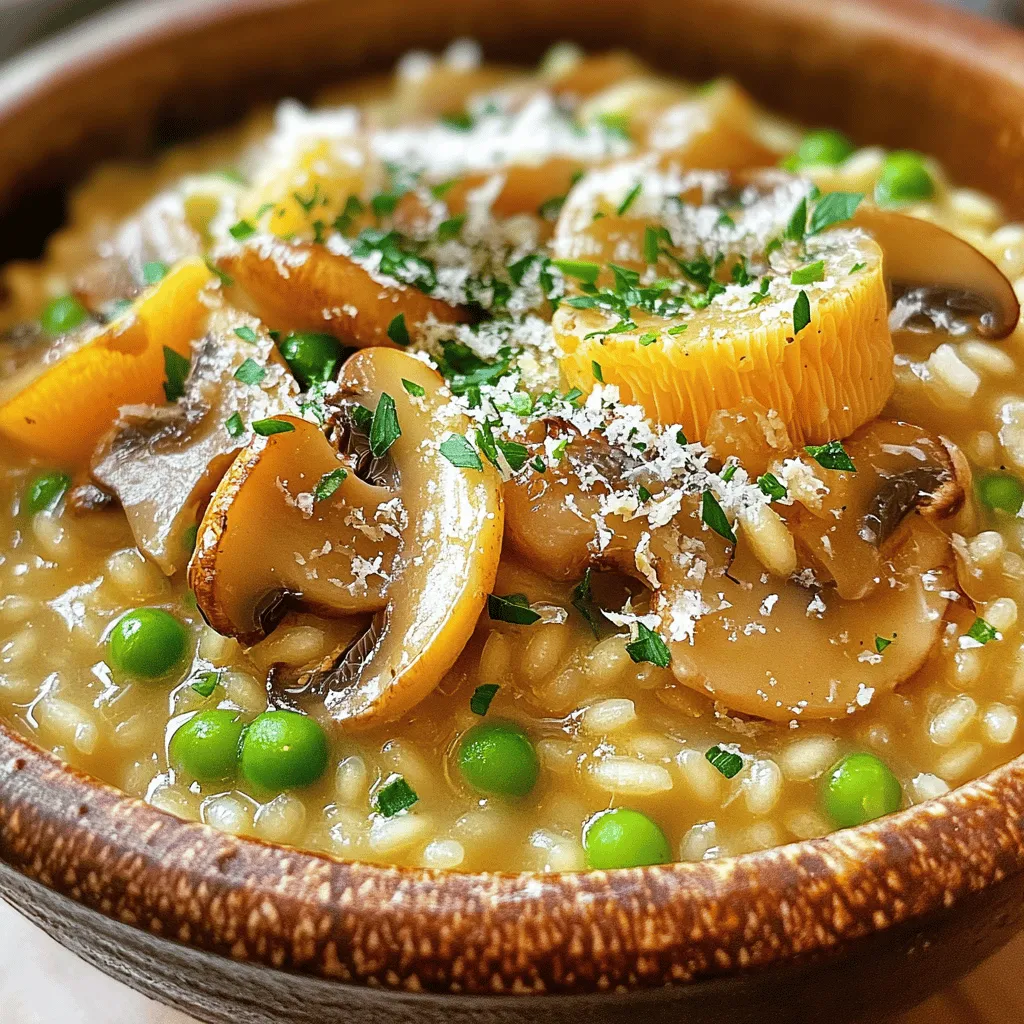
Craving a warm, creamy dish that feels like a big hug? Savory mushroom risotto is what you need! This comforting

To make a rich and tasty soup, you need: - 4 large ripe tomatoes, chopped - 1 cup vegetable broth - 1/2 cup heavy cream - 1 cup fresh basil leaves, packed Ripe tomatoes give the soup its sweet and tangy flavor. The fresh basil adds a lovely aroma. Heavy cream makes the soup creamy and smooth. Vegetable broth adds depth to the taste. For the perfect grilled cheese, gather: - 4 slices of artisan bread - 1 cup shredded mozzarella cheese - 2 tablespoons butter Artisan bread holds the cheese well and gives a nice crunch. Mozzarella melts beautifully and adds richness. Butter helps achieve a golden crust. For seasoning, you'll need: - Salt and pepper to taste - 1 tablespoon olive oil Salt and pepper enhance all the flavors. Olive oil is not just for cooking; it adds a hint of fruity taste to the soup. For the full recipe, check out Creamy Tomato Basil Bliss. First, I heat the olive oil in a large pot over medium heat. Next, I add the chopped onion. I sauté it for about 5 minutes until it turns soft and clear. Then, I mix in the minced garlic, cooking it for another 1-2 minutes. I watch closely to avoid burning it. After that, I add the chopped tomatoes and vegetable broth. I bring the mix to a simmer. I let it cook for 15-20 minutes. This helps the tomatoes soften and release their flavors. Once the soup is ready, I remove the pot from heat. I let it cool slightly before adding in the fresh basil leaves. Then, I use an immersion blender to blend the soup until smooth and creamy. If I don’t have an immersion blender, I can blend in batches using a regular blender. After blending, I return the soup to the pot. I stir in the heavy cream and season with salt and pepper. I heat it gently over low heat until warm. While the soup simmers, I prepare the grilled cheese sandwiches. First, I butter one side of each slice of artisan bread. Then, I place one slice, butter-side down, on a skillet over medium heat. I sprinkle half of the mozzarella cheese on top. I cover it with the second slice of bread, butter-side up. I grill the sandwich for about 3-4 minutes on each side. I aim for golden brown bread and melted cheese. After grilling, I slice the sandwich into triangles. I now have a comforting meal to enjoy with my soup. For the full recipe, check out the details above. To get that creamy texture in your soup, blend it well. I suggest using an immersion blender. It makes everything smooth right in the pot. If you don't have one, a regular blender works too. Just be careful with hot liquids. Blend small amounts at a time to avoid spills. For the best grilled cheese, use medium heat. This helps the bread toast evenly. Butter one side of the bread well. This gives you that golden crust you want. To keep cheese from sticking, use a non-stick skillet. Also, cover the pan with a lid while grilling. This keeps the heat in and melts the cheese fast. Garnishing your soup makes it more inviting. I like to add a few fresh basil leaves on top. A drizzle of olive oil adds flavor and looks nice too. For sides, a simple green salad pairs well. If you enjoy wine, a light white wine complements the soup's flavors perfectly. Try the full recipe for a delightful experience! {{image_2}} You can change the taste of your creamy tomato basil soup easily. Adding spices like paprika gives it a warm kick. If you like heat, sprinkle in red pepper flakes. They add a nice touch. You can also use different herbs. Thyme and oregano work well for a new flavor. These simple changes can brighten your soup. Grilled cheese can be just as fun to play with. Try mixing cheeses for a new twist. A blend of sharp cheddar and mozzarella will melt beautifully. You can also try vegan cheese if you want a dairy-free option. If you need gluten-free bread, there are many tasty options now. These changes let you enjoy grilled cheese in different ways. You can switch the broth in your soup for a new taste. If you prefer chicken broth, it adds a rich flavor. You can also make the soup dairy-free. Use coconut milk or almond milk instead of heavy cream. These swaps keep the soup creamy while changing the taste. Each option gives you a chance to explore new flavors. For the full recipe, check out Creamy Tomato Basil Bliss! To keep your creamy tomato basil soup fresh, follow these steps: - Let the soup cool to room temperature. - Pour it into an airtight container. - Store in the fridge for up to 4 days. - For longer storage, freeze it. - Use freezer-safe containers or bags. - It can last in the freezer for up to 3 months. You have two easy ways to reheat your soup: - Microwave: Pour the soup into a microwave-safe bowl. Cover it with a lid or a paper towel. Heat for 1-2 minutes, stirring halfway through. - Stovetop: Pour the soup into a pot. Heat over medium-low heat. Stir often until hot, about 5-7 minutes. Grilled cheese sandwiches can lose their crunch. Here’s how to store them: - Wrap each sandwich in foil or parchment paper. - Store in the fridge for up to 2 days. - For reheating, use a skillet over medium heat. - Heat each side for about 3-4 minutes. This keeps them crispy. - Avoid the microwave; it makes them soggy. This way, you can enjoy the creamy tomato basil soup and grilled cheese over a few days without losing their great taste. For the full recipe, check the section above! Creamy tomato basil soup lasts about 3 to 5 days in the fridge. Store it in an airtight container for best results. I always suggest labeling the container with the date to track freshness. Yes, you can make this soup ahead of time. It tastes even better the next day! Prepare the soup and cool it before storing. Reheat it gently on the stove before serving. I love serving this soup with grilled cheese sandwiches. You can also pair it with a simple salad or crusty bread. These sides add texture and balance to the meal. To make a vegan version, replace the heavy cream with coconut milk or cashew cream. Use vegetable broth as your base. For cheese, try vegan cheese or skip it altogether. The soup will still taste great! Absolutely! Canned tomatoes work well in this recipe. Choose whole or diced tomatoes for the best flavor. Drain excess liquid to keep the soup from getting too watery. You now have a complete guide to making creamy tomato basil soup and grilled cheese. First, we explored key ingredients and how they come together. Next, I shared step-by-step instructions for both dishes. I included tips for perfect texture and flavor variations for your taste. Storing your leftovers properly helps them stay fresh. Overall, these recipes are simple yet satisfying. Enjoy your comforting meal, and don’t hesitate to experiment!

Creamy Tomato Basil Soup with Grilled Cheese Delight

Are you ready to fall in love with a classic comfort food? This Creamy Tomato Basil Soup paired with a

To make chocolate chip banana bread, you'll need a few simple ingredients. Here’s your list: - 3 ripe bananas, mashed - 1/2 cup unsalted butter, softened - 3/4 cup brown sugar - 2 large eggs - 1 teaspoon vanilla extract - 1 teaspoon baking soda - 1/2 teaspoon salt - 1 1/2 cups all-purpose flour - 1 cup semi-sweet chocolate chips - 1/4 cup chopped walnuts (optional) These ingredients work together to create a moist, sweet, and chocolatey bread. The ripe bananas add natural sweetness and moisture, while the chocolate chips provide rich flavor. You can use walnuts for a nice crunch, but they are optional. The key to great banana bread is using ripe bananas. They should be speckled with brown spots. This means they are sweet and perfect for baking. I always recommend measuring your ingredients carefully. This makes sure your bread turns out just right. If you want to check out the full recipe, you can find it [here](#). Now that you have your ingredients ready, you're one step closer to enjoying this delicious treat! - Preheat your oven to 350°F (175°C). - Grease a 9x5 inch loaf pan or line it with parchment paper. - Cream together butter and brown sugar until light and fluffy. - Incorporate mashed bananas into the mixture. - Whisk together baking soda, salt, and flour in a separate bowl. - Gradually add this dry mixture to the banana mixture, stirring gently. - Fold in chocolate chips and walnuts if you want some crunch. - Pour the batter into the prepared loaf pan and smooth the top. - Bake for 55-65 minutes until a toothpick comes out clean. This process is simple and rewarding. You will enjoy the delicious smell while baking. For the full recipe, check the earlier section. - Avoid over-mixing for a lighter loaf. This keeps the bread fluffy and soft. - Use ripe bananas for better sweetness. They add moisture and flavor to the bread. - Adding spices such as cinnamon or nutmeg can boost taste. Just a pinch can change the game. - Substituting with different types of chocolate makes it fun. Try dark, milk, or even white chocolate chips. - Dust with powdered sugar for a pretty finish. It adds a nice touch to your loaf. - Serve with a dollop of whipped cream for extra delight. It’s a treat that everyone loves. These tips will help you create the best chocolate chip banana bread. For the full recipe, check out the [Full Recipe]. {{image_2}} You can make banana bread gluten-free by using almond flour or a gluten-free blend. Almond flour gives a nice nutty flavor and moist texture. If you use a gluten-free blend, check the package for any special instructions. You may need to adjust the baking time, as gluten-free batters can cook faster or slower. Keep an eye on the bread after 50 minutes. A toothpick should come out clean when it's ready. If you're looking to cut back on sugar, you can reduce the amount in the recipe. Try using half a cup of brown sugar instead of three-fourths. This change will still give you that sweet taste without being too rich. Another option is to replace butter with applesauce. This swap will keep your bread moist while lowering fat content. Use a half cup of unsweetened applesauce for the same effect. Want to mix it up? Adding peanut butter or Nutella can create a rich and creamy twist. Just swirl it into the batter before baking. You can also get fruity by incorporating blueberries or chopped strawberries. These fruits add a fresh burst of flavor and make your chocolate chip banana bread even more delightful. Feel free to experiment with your favorite flavors! After you bake the chocolate chip banana bread, let it cool. Place it in an airtight container. This helps keep the bread moist. You can store it at room temperature for up to three days. If you want it to last longer, refrigerate it. Just remember, refrigerating may change the texture a bit. To freeze the banana bread, wrap it tightly in plastic wrap. Make sure there are no air pockets. Then, place it in a freezer-safe bag. This way, the bread stays fresh for about three months. When you're ready to eat it, thaw it overnight in the fridge. For best quality, let it sit at room temperature for a few hours before slicing. At room temperature, your chocolate chip banana bread stays fresh for about three days. If you keep it in the fridge, it can last up to a week. In the freezer, it can remain good for up to three months. Just remember to wrap it well! For more details, check the Full Recipe. Yes, you can use frozen bananas! First, thaw them in the fridge or at room temperature. Once they are soft, mash them up. The texture should be great for your bread. Frozen bananas often taste sweeter, which is a plus. Just make sure to drain any excess liquid after thawing. If you want a vegan option, there are many choices to bind your bread. You can use 1/4 cup of applesauce for each egg. Mashed bananas work too; use 1/4 cup. Another option is ground flaxseed. Mix one tablespoon of flaxseed with three tablespoons of water. Let it sit for five minutes before adding it to your mix. To check if your bread is done, use a toothpick. Insert it into the center of the loaf. If it comes out clean or with a few crumbs, it’s ready. If it’s wet, bake it longer. You can also look for a golden-brown crust and a firm top. The bread should spring back when touched lightly. Absolutely! You can add nuts like walnuts or pecans for a nice crunch. Chocolate chips are a must, but you can also mix in dried fruit or coconut. Feel free to get creative! Just remember to fold in these extras gently to keep the batter light. We explored delicious banana bread, from ingredients to baking. You learned how to mix ripe bananas with brown sugar, butter, and eggs. Adding chocolate chips or nuts makes it even better. Remember, tips like using ripe fruit and avoiding over-mixing ensure a fluffy texture. Consider variations for gluten-free or healthier options too. Finally, store your leftovers right and enjoy them later. Now you’re set to bake an amazing banana bread that everyone will love!

30. Chocolate Chip Banana Bread Simple and Tasty Recipe

Are you ready to whip up a delightful treat? This Chocolate Chip Banana Bread recipe is simple and sure to

To make a tasty spinach and feta quiche, gather these ingredients: - 1 pre-made pie crust - 2 cups fresh spinach, chopped - 1 cup crumbled feta cheese - 4 large eggs - 1 cup milk (or plant-based milk) - 1/2 cup onion, finely chopped - 1 clove garlic, minced - 1/2 teaspoon nutmeg - Salt and pepper to taste - 1 tablespoon olive oil - Fresh parsley, for garnish (optional) These ingredients create a rich and savory quiche. Each item plays a key role in building flavor and texture. The spinach adds a fresh taste, while the feta brings a tangy kick. You can switch some ingredients if needed. Here are some ideas: - Pie Crust: Use a homemade crust or a gluten-free option. - Cheese: Swap feta for goat cheese or cheddar for a different flavor. - Milk: Use almond or oat milk for a dairy-free choice. - Spinach: Substitute with kale or Swiss chard for variety. - Onion: Green onions or shallots can work well too. These swaps let you customize the quiche to your taste or dietary needs. Spinach and feta quiche is not just delicious; it has health benefits too. Here's a quick look: - Spinach: High in iron and vitamins A and C. It boosts your immune system and helps maintain eye health. - Feta Cheese: Lower in fat than many other cheeses, it adds protein and calcium. - Eggs: A great source of protein and healthy fats, they support brain health. - Milk: Provides calcium and vitamin D, which are good for bones. This quiche is a balanced meal, perfect for breakfast, lunch, or dinner. You can find the full recipe above to start cooking! Start by gathering your ingredients. You need a pre-made pie crust, spinach, and feta cheese. The crumbled feta adds a salty flavor that pairs perfectly with spinach. Chop two cups of fresh spinach and set it aside. Next, finely chop half a cup of onion and mince one clove of garlic. Heat one tablespoon of olive oil in a skillet over medium heat. Add the onion and garlic, cooking until the onion turns soft and clear. This step brings out the sweet flavor of the onion. Once the onion is ready, add the spinach. Cook for about two to three minutes, just until the spinach wilts. After that, take it off the heat and let it cool for a moment. In a large bowl, whisk together four eggs and one cup of milk. This creates a creamy base for your quiche. Now, mix in the crumbled feta, nutmeg, and the spinach-onion blend. Don't forget to season with salt and pepper to taste. Now it’s time to bake! Preheat your oven to 375°F (190°C). Place the pre-made pie crust into a pie dish. Pour the spinach and feta mixture into the crust, smoothing it out with a spatula. This process ensures even cooking. Place the quiche in the oven and bake for 30 to 35 minutes. You want it to look golden on top and set in the middle. The smell will be amazing as it cooks! To check if your quiche is done, gently shake the pie dish. If the center jiggles slightly but is mostly firm, it’s ready. You can also insert a knife into the center. If it comes out clean, your quiche is perfect. Once baked, remove it from the oven and let it rest for about ten minutes. This resting time helps it set further and makes slicing easier. Enjoy your slice of spinach and feta quiche warm, maybe with a side salad for a full meal. For the complete recipe, check the Full Recipe section above! A flaky crust makes your quiche shine. To get it right, use cold butter. Cut it into small pieces and mix it with the flour. This helps create those nice layers. Don't over mix; a few lumps are okay. Use ice water to bind the dough. Chill the dough for at least 30 minutes before rolling it out. This step is key for flakiness. Mixing is where the magic happens. First, whisk the eggs and milk until smooth. This gets air into the mix, making your quiche light. Stir in the spinach and onion gently. You want a nice blend without breaking up the feta too much. Use a spatula to evenly distribute everything in the pie crust. Avoid common pitfalls for the best results. One big mistake is not letting the quiche cool. This step helps it set up well. Another is overbaking. Keep an eye on it; golden edges mean it’s ready. Lastly, don’t skip seasoning. A pinch of salt and pepper can elevate your dish. For more details, check the Full Recipe. {{image_2}} You can easily make a gluten-free version of this quiche. Swap the pre-made pie crust for a gluten-free option. Many stores now sell gluten-free crusts. You can also make your own using gluten-free flour. This way, everyone can enjoy this tasty dish without worry. Feel free to get creative with your quiche! You can add other veggies, like mushrooms or tomatoes. Sauté them with the onion and garlic for extra flavor. This will give your quiche a new twist. You can mix and match to suit your taste. For a vegetarian quiche, skip the feta cheese and use a mix of other cheeses. You can use ricotta or even a blend of mozzarella and cheddar. If you want a vegan option, replace the eggs with a mixture of silken tofu and nutritional yeast. Use plant-based milk as well. This way, you can enjoy the quiche without any animal products. For the complete recipe, check the Full Recipe section. To store leftover quiche, let it cool first. Wrap it tightly in plastic wrap or foil. You can also place it in an airtight container. This keeps the quiche fresh for up to three days in the fridge. Make sure to label the container with the date. This way, you’ll know when to use it. You can freeze quiche for longer storage. Slice it into individual pieces for easy use. Wrap each slice in plastic wrap, then place them in a freezer bag. Squeeze out as much air as possible. This helps avoid freezer burn. Frozen slices can last up to three months. When you want to enjoy it, just thaw in the fridge overnight. For the best flavor, reheat quiche in the oven. Preheat your oven to 350°F (175°C). Place the quiche on a baking sheet and cover it with foil. Heat for about 15-20 minutes or until warmed through. You can also microwave individual slices, but the oven keeps the crust crispy. Enjoy your delicious quiche just like when it was fresh! Yes, you can make Spinach and Feta Quiche ahead of time. Prepare the quiche, but do not bake it. Cover it and store it in the fridge for up to 24 hours. When you're ready to eat, just pop it in the oven. Bake it as instructed in the Full Recipe. This helps save time when you want a quick meal. Spinach and Feta Quiche lasts about 3 to 4 days in the fridge. Make sure to store it in an airtight container. This keeps it fresh and safe to eat. If you want to enjoy it later, consider freezing it, which makes it last longer. You can serve Spinach and Feta Quiche with a simple green salad. A light vinaigrette adds flavor and freshness. You might also enjoy it with roasted veggies or some crusty bread. For a special touch, pair it with a glass of white wine or sparkling water. Spinach and feta quiche is a tasty and healthy dish. We explored ingredients, substitutions, and health perks. I shared the step-by-step guide for perfect baking and tips for a flaky crust. We also discussed fun variations and proper storage methods. Remember, this dish can fit many diets and is easy to make. Try it for your next meal, and enjoy the flavors and benefits. With these tips, you can create a quiche that everyone will love. Happy cooking!

29. Spinach and Feta Quiche Flavorful Easy Recipe

Are you ready to whip up a delicious Spinach and Feta Quiche that’s both easy and flavorful? This mouthwatering dish

For the shrimp tacos, you need: - 1 pound large shrimp, peeled and deveined - 1 tablespoon olive oil - 1 teaspoon chili powder - 1 teaspoon cumin - 1/2 teaspoon garlic powder - Salt and pepper to taste - 8 corn tortillas These main ingredients bring flavor and texture to your tacos. The shrimp is the star, providing a juicy bite. The spices enhance its taste. Olive oil helps the shrimp cook evenly. For the mango salsa, gather: - 1 ripe mango, diced - 1/2 red onion, finely chopped - 1 jalapeño, minced (seeds removed for less heat) - Juice of 1 lime - 1/4 cup fresh cilantro, chopped This salsa adds freshness and a sweet kick. The ripe mango gives a tropical flavor. Red onion and jalapeño add crunch and spice. Lime juice brightens the mix, while cilantro adds herbaceous notes. You can also use: - Avocado slices, for topping - Sour cream or Greek yogurt, for serving (optional) These toppings enhance your tacos. Avocado adds creaminess. Sour cream or yogurt offers a cooling effect, balancing heat from the jalapeño. For the full recipe, check out the detailed instructions to create this dish. First, take your shrimp and place them in a bowl. Add olive oil, chili powder, cumin, garlic powder, salt, and pepper. Mix well so the shrimp are coated in the spices. This step is key for great flavor. Let them sit for a few minutes while you get ready to cook. Heat a large skillet over medium-high heat. Once it is hot, add the shrimp. Cook them for about 2 to 3 minutes on each side. You want them pink and opaque. Don’t overcrowd the pan; it’s best to cook them in batches if needed. When done, remove them from the heat and set aside. In a clean bowl, combine diced mango, finely chopped red onion, minced jalapeño, lime juice, and chopped cilantro. Gently mix everything together. Add a pinch of salt to enhance the flavors. Let it sit for a few minutes. This helps the taste blend well together. Use the same skillet from the shrimp to warm the corn tortillas. Lightly toast them for about 30 seconds on each side. This makes them warm and easy to fold. Don’t let them get too crispy, as you want them soft for the tacos. Take a warm tortilla and place a few shrimp on it. Spoon a generous amount of mango salsa on top. Add avocado slices for extra creaminess. If you like, add a dollop of sour cream or Greek yogurt. This adds a nice touch to the flavor. Serve the shrimp tacos right away while they are warm. You can pair them with a side of lime wedges for extra zing. These tacos are perfect for a fun family dinner or a casual get-together. For the full recipe, check out the complete details above. Enjoy every bite! To cook shrimp just right, start with fresh shrimp. Look for shrimp that are firm and smell like the ocean. Marinate them for just 15-20 minutes. This helps them soak up the flavors. When cooking, heat your skillet on medium-high. Add the shrimp and watch closely. They cook fast—about 2-3 minutes per side. They are done when they turn pink and opaque. Overcooking makes them tough. Mango salsa brings bright flavors to your shrimp tacos. Use a ripe mango for the best taste. A ripe mango is sweet and juicy. Mix in red onion and jalapeño for a nice crunch. The lime juice adds zest. Let the salsa sit for a few minutes. This helps the flavors blend together. You can customize it. Add more jalapeño for heat, or a pinch of salt to taste. Warming tortillas makes them soft and tasty. Use the same skillet you cooked the shrimp in. Heat it on medium. Place each tortilla in the skillet for about 30 seconds on each side. This warms them up and adds a bit of flavor. Don’t crowd the pan; warm them one at a time. Keep them warm in a clean cloth until you are ready to assemble your tacos. For the complete recipe, check the Full Recipe link. {{image_2}} You can easily swap shrimp for other proteins in this recipe. Chicken, fish, or tofu works great. For chicken, cut it into small pieces. Season it the same way as shrimp and cook until it's no longer pink. If you choose fish, use firm types like cod or tilapia. For tofu, press it to remove water, then cube and cook until golden. Each protein brings its own flavor, making the tacos unique. If you want a vegetarian option, try using grilled veggies or beans. Grilled bell peppers, zucchini, and corn add a great taste. For beans, black beans or pinto beans are perfect. Just heat them with spices to add flavor. You can also add some roasted sweet potatoes for sweetness and texture. Don’t forget to top with mango salsa for a fresh twist. Mango salsa is just one option. You can try pineapple salsa for a tropical vibe. Just swap mango for diced pineapple and add cilantro. For a spicy kick, make a tomatillo salsa. Blend tomatillos, jalapeños, and onions for a zesty flavor. You can also try a classic tomato salsa. Just mix diced tomatoes, onions, lime juice, and cilantro. Each salsa brings new flavors to your tacos. After enjoying your shrimp tacos, store any leftovers in an airtight container. Place the tacos in the fridge right away. They will stay fresh for up to two days. If possible, keep the shrimp and tortillas separate for better taste. This helps avoid sogginess. For the mango salsa, use a small container with a lid. It will keep well in the fridge for about three days. Storing it separately helps maintain the salsa’s crunch and bright flavors. If you notice the salsa getting watery, just drain the excess liquid before serving again. When it's time to enjoy your leftovers, reheat the shrimp in a skillet over medium heat. Heat for about one to two minutes, just until warm. If you prefer, you can microwave the shrimp for about 30 seconds. Avoid overcooking, as this can make the shrimp tough. Warm the tortillas briefly in a pan or microwave to keep them soft. For best taste, add fresh salsa and toppings right before serving. For the full recipe, check the link provided. Yes, you can make shrimp tacos in advance. Prepare the shrimp and salsa ahead of time. Store them separately in the fridge. Just warm the tortillas before serving. This keeps everything fresh and tasty. Shrimp is cooked when it turns pink and opaque. It should curl into a "C" shape. Cook shrimp for about 2-3 minutes on each side. Overcooking can make shrimp tough, so watch closely. If you can’t find mango, try using pineapple or peach. Both fruits add sweetness and flavor. You can also use avocado for a creamy texture. Just adjust the other ingredients to balance the taste. Shrimp tacos can be spicy depending on the salsa. The jalapeño adds heat, but you can remove the seeds for less spice. If you prefer mild flavors, skip the jalapeño or use bell pepper instead. Yes, you can use flour tortillas instead of corn. Flour tortillas are soft and easy to fold. However, corn tortillas add a nice flavor and texture. Choose what you like best for your tacos. For the full recipe, check out the details above. Shrimp tacos are easy and fun to make. We covered the main ingredients like shrimp and mango salsa. I shared how to cook shrimp and warm tortillas. You can customize your tacos with various toppings and condiments. Don't forget the tips for perfect shrimp and tasty salsa. You can even swap shrimp for other proteins or go vegetarian. Enjoy your fresh shrimp tacos, and don’t worry about leftovers—they store well! Try these steps, and I bet you’ll love making these delicious tacos again and again.

Mouthwatering 28. Shrimp Tacos with Mango Salsa Recipe

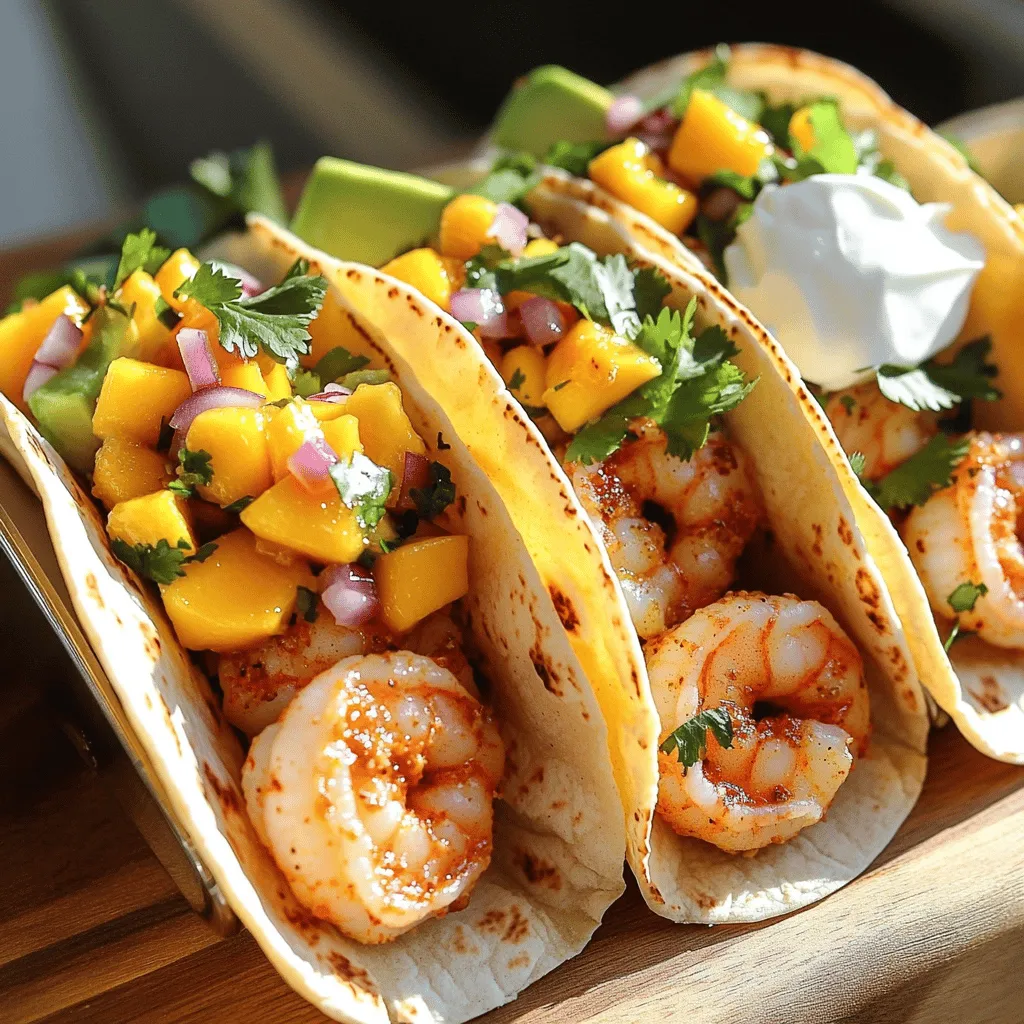
Get ready for a flavor explosion with my “Mouthwatering 28. Shrimp Tacos with Mango Salsa Recipe.” These vibrant tacos feature

Older posts
Newer posts
← Previous Page1 … Page27 Page28 Page29 … Page63 Next →

dsad

© 2025 Recipes Pursuit • Built with GeneratePress

Our Policies

  • Copyright Policy
  • Cookie Policy
  • GDPR Policy
  • Privacy Policy
  • Disclaimer
  • Terms Of Use

More Information

  • Home
  • About
  • Contact
  • Appetizers
  • Dessert
  • Dinner
  • Drinks
©2025, Recipes Pursuit About Back To Top