![- 2 cups cooked chicken, shredded - 1 can (15 oz) black beans, rinsed and drained - 1 can (15 oz) corn, drained - 1 can (10 oz) diced tomatoes with green chiles - 1 medium onion, diced - 2 cloves garlic, minced - 2 cups chicken broth - 1 packet taco seasoning - 1 teaspoon cumin - Salt and pepper to taste - Shredded cheese - Sour cream - Diced avocado - Chopped cilantro Gather these ingredients to create a rich and tasty soup. The chicken adds protein and flavor. Black beans and corn bring fiber and sweetness. Diced tomatoes with green chiles offer a spicy kick. Onion and garlic give depth to the dish. Next, use chicken broth to make the soup hearty. Taco seasoning and cumin enhance the flavor profile. Don't forget salt and pepper to season it to your taste. You can customize your bowl with optional toppings. Shredded cheese adds creaminess. Sour cream cools the heat. Diced avocado adds richness. Chopped cilantro gives a fresh touch. Follow the [Full Recipe] to bring these flavors together in just 30 minutes. Each step will help you create a delicious meal that everyone will love. Enjoy! - Heat olive oil in a large pot over medium heat. - Add the diced onion and sauté for about 5 minutes. - Cook until the onion is soft and translucent. - Add minced garlic and sauté for another minute. - The garlic should smell nice and fragrant. - Stir in the shredded chicken. - Add the black beans, corn, and diced tomatoes. - Pour in the chicken broth, taco seasoning, and cumin. - Mix everything well to combine. - Bring the soup to a simmer over medium heat. - Let it cook for 15-20 minutes. - Stir occasionally to help the flavors blend. - Season with salt and pepper to taste. - For the best flavor, adjust seasoning before serving. You can find the full recipe above and enjoy making this tasty dish! - Ensure chicken is shredded for quick mixing. This helps blend flavors well. - Adjust simmering time for thicker soup. A longer simmer can deepen flavors. - Add lime juice for brightness. It brings a fresh taste to the soup. - Incorporate additional spices like chili powder. This boosts the overall flavor. - Serve in colorful bowls. This makes the meal more appealing. - Arrange toppings attractively. A nice look makes the soup more inviting. For a full recipe, check out the Easy Chicken Taco Soup section. {{image_2}} You can easily change up the protein in this soup. Use ground turkey or beef instead of chicken. This swap gives you a new taste. You can also use canned vegetables. This makes cooking faster and easier. Just rinse and drain them before adding. Want to make it vegetarian? Just leave out the chicken. You can use beans for protein instead. For a healthier choice, use low-sodium broth. This keeps the flavors rich without too much salt. If you like heat, add jalapeños or extra peppers. This gives the soup a nice kick. You can also add chipotle seasoning. This adds a smoky flavor that pairs well with the other ingredients. After enjoying your Easy Chicken Taco Soup, store leftovers in an airtight container. This keeps the soup fresh. You can refrigerate it for up to 3 days. Make sure to let it cool a bit before sealing it up. This helps avoid any extra moisture from forming inside the container. If you want to save some for later, you can freeze the soup. It stays good for up to 3 months in the freezer. Use freezer-safe containers to prevent freezer burn. When you are ready to eat it, simply take it out and thaw it. Thaw the soup in the refrigerator before reheating. This helps it warm evenly. When reheating, do so gently on the stove. If the soup seems too thick, add a splash of broth. This keeps it creamy and delicious. Enjoy it hot and fresh! You can easily add heat by incorporating diced jalapeños or an extra packet of taco seasoning. This boosts the flavor and gives your soup a nice kick. If you want to go even further, try adding some crushed red pepper flakes. Yes, you can use raw chicken. Just make sure it is cooked thoroughly before serving. You can add the raw chicken to the pot at the start with the onions. Cook it until it’s no longer pink, then shred it. You have many options for sides. Consider serving with tortilla chips for crunch, cornbread for sweetness, or a fresh side salad for balance. Each of these pairs well and enhances the meal. Total time to make this soup is about 30 minutes. You’ll spend around 10 minutes on prep and 20 minutes cooking. It’s a quick dish, perfect for busy nights. Absolutely! You can double the recipe easily. Just increase all ingredients proportionally for larger servings. This is a great option for gatherings or meal prep. For the full recipe, check the section above. This blog post covered how to make Easy Chicken Taco Soup using simple ingredients and steps. You can create a tasty dish with cooked chicken, beans, corn, and spices. Remember the tips for storage and serving ideas to enjoy your soup for days. Don’t be afraid to try variations for added flavor or dietary needs. Simple cooking can lead to great meals. Enjoy making this comforting soup for you and your loved ones!](https://recipespursuit.com/wp-content/uploads/2025/06/b2fff3d9-fc5b-47e8-ac2a-eddfea132a5a.webp)
Easy Chicken Taco Soup Flavorful and Quick Recipe
Looking for a quick and tasty dinner option? This Easy Chicken Taco Soup is your answer! With simple ingredients and
Looking for a quick and tasty dinner option? This Easy Chicken Taco Soup is your answer! With simple ingredients and

Are you ready for a sweet adventure? These No-Bake Salted Caramel Bars are a real treat that requires no oven
![To make a great classic beef chili, you need the right base. Here are the must-have items: - 1 pound ground beef - 1 medium onion, diced - 3 cloves garlic, minced - 1 green bell pepper, diced - 1 can (14.5 oz) diced tomatoes, undrained - 1 can (15 oz) kidney beans, rinsed and drained - 1 can (8 oz) tomato sauce - 2 tablespoons chili powder - 1 teaspoon cumin - 1 teaspoon smoked paprika - 1/2 teaspoon cayenne pepper (adjust to taste) - Salt and pepper, to taste - 1 cup beef broth - 1 tablespoon olive oil These ingredients create a rich and hearty flavor that warms the soul. The ground beef gives it body, while the vegetables add sweetness and texture. The spices bring the chili to life. You can add extra ingredients to make your chili even better. Here are some ideas: - Fresh cilantro, for garnish - Grated cheese, for serving - Sour cream, for serving - Jalapeños, for added heat - Corn, for sweetness - Bell peppers of different colors, for color and flavor These options let you customize your chili. They can add freshness or extra spice. Feel free to experiment with what you have on hand. To cook your classic beef chili, you need some basic tools: - A large pot or Dutch oven - A wooden spoon or spatula - A knife for chopping - A cutting board Having the right equipment makes cooking easier and more fun. It helps you create a delicious meal without stress. Use these tools to get the most out of your cooking experience. For the full recipe, follow the steps outlined above. Start by heating olive oil in a large pot over medium heat. Add the diced onion and green bell pepper. Sauté them until soft, about 5 minutes. Next, add minced garlic to the pot. Sauté for one more minute until it smells great. Increase the heat to medium-high. Add the ground beef to the pot. Cook until it turns brown, breaking it up with a spoon. This takes about 7-8 minutes. If there is too much fat, drain some off. Now it’s time to add flavor. Stir in chili powder, cumin, smoked paprika, and cayenne pepper. Mix well to coat the meat and veggies. Next, pour in the diced tomatoes, tomato sauce, kidney beans, and beef broth. Give everything a good stir to mix it. Bring the chili to a simmer, then lower the heat. Cover the pot and let it cook for at least 30 minutes. Stir occasionally to stop sticking. For even better flavor, let it simmer for up to an hour. Taste your chili and adjust the seasoning if needed. Serve hot with fresh cilantro, grated cheese, and sour cream on top. For the full recipe, check out the complete details above. To get the best flavor in your chili, start with fresh ingredients. Use ripe tomatoes and good-quality beef. Always sauté the onion and bell pepper first. This step builds a strong base. Mix in the garlic for a fragrant kick. Don't rush the cooking time. Let your chili simmer for at least 30 minutes. This helps all the flavors blend well. For a richer taste, try adding a splash of beer or a bit of dark chocolate. These ingredients add depth and surprise. Many people make mistakes when cooking chili. One common error is adding too much liquid too soon. This can make your chili watery. Always start with less broth and add more as needed. Another mistake is not seasoning enough. Taste your chili while it cooks. Adjust the spices to make it just right. Lastly, don’t skip the simmering step. Cooking longer lets the flavors shine through. Want to change the heat level? Start with a small amount of cayenne pepper. You can always add more later. If your chili gets too spicy, add a bit of sugar or more beans to tone it down. Sour cream and cheese served on top also help balance the heat. Customize your chili to suit your taste. Enjoy the process of making it your own! {{image_2}} You can make a great chili without meat. Use lentils, black beans, or chickpeas. They add protein and texture. Add extra veggies like zucchini and mushrooms for more flavor. Use vegetable broth instead of beef broth. You can still enjoy rich flavors with spices like cumin and chili powder. Try my [Full Recipe] by swapping out the beef for your favorite plant-based protein. Spice level is all about personal taste. If you love heat, add more cayenne pepper or jalapeños. For milder chili, skip the cayenne and use less chili powder. You can also remove the seeds from peppers for less spice. This way, everyone can enjoy a bowl just how they like it. Feel free to get creative with your chili. Adding extra vegetables like corn, carrots, or bell peppers boosts nutrition. You can also mix in different beans, such as black beans or pinto beans. This adds variety in texture and flavor. Just be sure to adjust cooking time if you add more ingredients. The goal is to have a hearty and filling dish that suits your taste. After enjoying your delicious chili, let it cool down. Transfer it to an airtight container. Store it in the fridge for up to four days. Make sure to cover it well. This keeps the flavors fresh and tasty. When you want to eat your leftover chili, there are easy ways to reheat it. You can use the microwave or the stove. For the microwave, place the chili in a bowl. Heat it for 1-2 minutes. Stir halfway through to warm it evenly. If you prefer the stove, pour the chili into a pot. Heat it on medium-low, stirring often. This helps keep it smooth and warm. If you want to save chili for another day, freezing is a great option. Use a freezer-safe container or a heavy-duty freezer bag. Leave some space at the top for expansion. Chili can last up to three months in the freezer. To thaw, place it in the fridge overnight before reheating. This keeps the taste and texture just right. Check out the Full Recipe for more tips and details! The best meat for classic chili is ground beef. I prefer using 80/20 ground beef. This mix gives a nice balance of flavor and fat. Other options include chuck roast or stew meat, but they take longer to cook. Ground beef cooks fast and blends well with the spices. Yes, you can make classic beef chili in a slow cooker. Start by browning the ground beef in a pan. After that, put it in the slow cooker with the other ingredients. Cook on low for 6 to 8 hours or high for 3 to 4 hours. This method makes the chili rich and tasty. Classic beef chili lasts in the fridge for about 3 to 4 days. Be sure to store it in an airtight container. If you want to keep it longer, you can freeze it. Frozen chili lasts up to 3 months. Just thaw it in the fridge before reheating. For the full recipe, check out the Spicy Classic Beef Chili 🥩 section. Classic beef chili combines essential ingredients for a rich flavor. You can tweak the recipe with optional extras or adjust the spiciness to match your taste. Remember the key steps: prepare the base, cook the beef, and combine all ingredients. Avoid common mistakes for the best result. Feel free to explore vegetarian options or try different spice levels. Store your chili well and reheat it easily. With these tips and variations, you'll make great chili every time. Enjoy your cooking!](https://recipespursuit.com/wp-content/uploads/2025/06/3ad7fbf8-58f4-4793-bef1-ae94d1a37c85.webp)
Classic Beef Chili is a warm bowl of comfort. It’s hearty, flavorful, and perfect for any day. I will guide
![- 2 cups cooked chicken, shredded - 1 cup BBQ sauce - 1 cup shredded cheddar cheese - 1 cup shredded mozzarella cheese - 4 large flour tortillas - 1/2 cup red onion, thinly sliced - 1/4 cup fresh cilantro, chopped (for garnish) - Sour cream and salsa (for serving) For this recipe, I love using shredded chicken. You can use rotisserie chicken, too. It saves time and adds great flavor. Mix the shredded chicken with BBQ sauce in a bowl. This blend gives the quesadillas a rich, smoky taste. Next, I use two types of cheese: cheddar and mozzarella. Cheddar adds sharpness, while mozzarella melts beautifully. You can adjust the cheese types, but I find this combo perfect. Don’t forget the tortillas! Large flour tortillas work best. They hold the filling well and make for easy folding. If you want a gluten-free option, consider corn tortillas. For garnishes, I like adding sliced red onion and fresh cilantro. These add color and a nice crunch. Serve with sour cream and salsa for dipping. This recipe makes about four servings, which is great for sharing or meal prep. Check out the Full Recipe for all the details! In a medium bowl, combine shredded chicken and BBQ sauce. Mix well. Make sure the chicken is evenly coated. This mix gives the quesadillas their tasty flavor. You can use leftover chicken or rotisserie chicken for this step. It makes things quick and easy. Heat olive oil in a skillet over medium heat. Add the thinly sliced red onions. Sauté for 2-3 minutes. You want the onions to soften and become fragrant. This step adds a nice touch to the quesadilla filling. The sweet flavor of the cooked onions blends well with the BBQ chicken. Lay one tortilla flat in the skillet. On one half of the tortilla, layer 1/4 of the BBQ chicken mixture. Next, add 1/4 cup of shredded cheddar and 1/4 cup of shredded mozzarella cheese. Fold the tortilla over to cover the filling. Cook for 3-4 minutes until the bottom is golden brown. Carefully flip the quesadilla. Cook for another 3-4 minutes on the other side. This way, both sides become crispy, and the cheese melts perfectly. Remove the quesadilla from the skillet. Let it cool for a minute before cutting it into wedges. Repeat these steps with the remaining tortillas and filling. Serve warm and enjoy your tasty BBQ chicken quesadillas. For the full recipe, check out the [Full Recipe]. To get the best crispness in your quesadillas, follow these tips: - Use fresh tortillas for a soft bite. - Heat your skillet well before adding oil. This helps create a nice crust. - Add just enough filling. Too much can make them soggy. - Cook on medium heat. This prevents burning while the cheese melts. Pair your BBQ chicken quesadillas with these tasty sides: - Fresh guacamole adds creaminess. - Crunchy tortilla chips give a nice texture. - A simple green salad can balance the meal. - Serve with sour cream and salsa for dipping. To change the flavor of your quesadillas, try these ideas: - Add jalapeños for heat. - Swap BBQ sauce for hot sauce for a kick. - Mix in spices like cumin or garlic powder to enhance taste. - Experiment with different cheeses, like pepper jack, for added flavor. For the full recipe, check out the Easy BBQ Chicken Quesadillas section. {{image_2}} You can change up the proteins and cheeses in your BBQ chicken quesadillas. Try using pulled pork or beef instead of chicken. These options add a new twist to the flavor. For cheese, I like mixing gouda or pepper jack for a fun kick. You can even use a dairy-free cheese if you want a vegan option. This way, you can make it your own and keep things fresh. If you want a vegetarian twist on BBQ quesadillas, use grilled veggies. Bell peppers, zucchini, and mushrooms work great. Simply sauté them with a bit of olive oil and your favorite BBQ sauce. Spread the veggie mix on the tortillas and add cheese as usual. This makes a tasty and colorful dish that everyone will love. For those who like heat, add jalapeños to your quesadillas. You can use fresh slices or pickled ones for a tangy twist. If you want more spice, try adding chili powder or cayenne pepper to the BBQ sauce. Adjust the heat to your taste, and enjoy a spicy kick in every bite. To keep your BBQ chicken quesadillas fresh, store them in an airtight container. Make sure they cool down first. Place a piece of parchment paper between layers to prevent sticking. They can last in the fridge for about three days. When it's time to enjoy leftovers, reheating is key. Use a skillet over low heat. This helps to keep the quesadillas crispy. Heat for about 3-4 minutes on each side. You can also use a microwave, but it may make them soggy. For the best texture, stick to the skillet method. If you want to save some for later, freezing is easy. Before cooking, wrap each quesadilla in plastic wrap. Place them in a freezer bag or container. They can last up to three months. When you’re ready, thaw them in the fridge overnight. Cook as usual for a quick meal. You can make BBQ chicken quesadillas ahead of time with ease. First, prepare the chicken and BBQ sauce mixture. Store it in an airtight container in the fridge for up to three days. You can also assemble the quesadillas without cooking them. Place them on a baking sheet and cover them with plastic wrap. Keep them in the fridge for up to 24 hours. When you're ready to eat, just cook them in a skillet or bake them in the oven. Yes, you can use various tortillas for your BBQ chicken quesadillas. If you want a low-carb option, try using cauliflower or almond flour tortillas. For gluten-free diets, corn tortillas work great. You can also find whole wheat or spinach tortillas for a healthy twist. Just make sure the tortillas are large enough to hold all the tasty filling. Serving sides with BBQ chicken quesadillas can enhance your meal. Good options include: - Corn salad: A fresh mix of corn, tomatoes, and lime. - Guacamole: Creamy and rich, perfect for dipping. - Coleslaw: Crunchy and tangy, it adds texture to your plate. - Beans: Refried or black beans are hearty and filling. Also, don’t forget sour cream and salsa for dipping. They bring extra flavor and balance to the quesadillas. Enjoy these sides with the full recipe for a complete feast! To make BBQ chicken quesadillas, you need a few main ingredients and steps. Start with shredded chicken, BBQ sauce, and cheeses wrapped in tortillas. Sauté some onions for extra flavor, then assemble and cook. You can change the recipe to fit your taste by swapping ingredients or adding spices. In the end, these quesadillas are easy to customize and perfect for any meal. Enjoy making them with friends or family for a fun and tasty dish!](https://recipespursuit.com/wp-content/uploads/2025/06/51d744cf-0612-4376-b9f0-b0c6c8c2c725.webp)
Looking for a quick and tasty meal? Try my Easy BBQ Chicken Quesadillas! With just a few simple ingredients, you
![- Szechuan noodles or spaghetti - Fresh vegetables: - 3 cloves garlic, minced - 1 tablespoon ginger, grated - 2 green onions, chopped (plus extra for garnish) - 1 red bell pepper, sliced - 1 carrot, julienned - 1 cup snap peas For this dish, you can choose Szechuan noodles or spaghetti. Szechuan noodles have a unique chewiness that adds to the dish’s charm. Fresh vegetables bring color and crunch. Garlic and ginger give warmth, while green onions and bell peppers add brightness. - Szechuan peppercorns - Soy sauce - Chili paste - Rice vinegar - Sesame oil - Sugar Szechuan peppercorns are key to the flavor. They add a unique numbing spice. Soy sauce provides depth, while chili paste brings heat. Rice vinegar adds tanginess, and sesame oil gives a rich finish. A bit of sugar balances the flavors. - Sesame seeds - Extra green onions Garnishes make your dish pop! Sprinkle sesame seeds on top for crunch. Extra green onions add freshness and color. This simple touch can elevate your meal. For the full recipe, check out the [Full Recipe]. Each ingredient plays a role in making Spicy Szechuan Noodles a standout dish. First, boil a large pot of salted water. Use about one tablespoon of salt for every four quarts of water. Once the water boils, add the Szechuan noodles. Cook them according to the package instructions. I like to aim for al dente, which means they should be firm but cooked through. This usually takes about 6 to 8 minutes. Drain the noodles and set them aside. Next, get a large skillet or wok and heat two tablespoons of vegetable oil over medium-high heat. Add three cloves of minced garlic, one tablespoon of grated ginger, and two tablespoons of crushed Szechuan peppercorns. Sauté this mixture for about 30 seconds until it smells amazing. Then, toss in two chopped green onions, one sliced red bell pepper, one julienned carrot, and one cup of snap peas. Stir-fry these veggies for about 3 to 4 minutes. You want them to be tender but still crisp. Now it's time to make the sauce! In a small bowl, mix together three tablespoons of soy sauce, two tablespoons of chili paste, one tablespoon of rice vinegar, one tablespoon of sesame oil, and one teaspoon of sugar. Stir until everything is well combined. Add the cooked noodles to the skillet with the stir-fried veggies. Pour the sauce over the noodles and toss everything together. Make sure the noodles are evenly coated. Stir-fry for an additional 2 minutes to heat everything through. For the complete recipe, check out the [Full Recipe]. To cook perfect noodles, you need to start with boiling salted water. This adds flavor to the noodles. Cook the Szechuan noodles until they are al dente, which means they should still have a little bite. This gives them the right texture. After cooking, drain them quickly. To prevent sticking, toss the noodles in a little vegetable oil. This keeps them separate and ready for stir-frying. The spice level can change the whole dish. If you want it milder, use less chili paste. You can also add other spices to enhance the flavor. Garlic powder or onion powder can add depth. A pinch of sugar can balance the heat. Taste as you go to find the right mix for you. Plating your dish well makes it more inviting. Start by twirling the noodles onto the plate. Add the vegetables on top for a colorful look. For garnishing, sprinkle sesame seeds and chopped green onions. This adds texture and freshness. You want your Spicy Szechuan Noodles to look as good as they taste. For the full recipe, check back to the main section. {{image_2}} You can easily add protein to your spicy Szechuan noodles. Chicken, shrimp, and tofu all work great. For chicken, cut it into small pieces. Cook it first in the oil until golden. Then, add the garlic and ginger. For shrimp, toss them in right after the garlic. Cook until they turn pink. Tofu can be cubed and sautéed until crispy. Each protein brings a unique taste and texture. If you want a plant-based dish, substitute the noodles and other ingredients. Use rice noodles or even zucchini noodles. For protein, replace meat with firm tofu or tempeh. You can also add more veggies, like mushrooms or bell peppers. These swaps keep the dish hearty and tasty while making it vegan-friendly. While the classic sauce is delicious, you can explore other options. Try teriyaki sauce for a sweet twist. Mix it with some chili paste for heat. Sweet and sour sauce can add a tangy flavor. You can even use peanut sauce for a creamy texture. Each sauce gives a different vibe to your noodles. To keep your spicy Szechuan noodles fresh, store leftovers in an airtight container. This helps prevent drying and keeps flavors intact. Place the container in the fridge. They will stay good for about 3-4 days. When you're ready to eat, just give them a quick reheat. If you want to save your spicy Szechuan noodles for later, freezing is a great option. Start by letting the noodles cool completely. Then, place them in a freezer-safe bag or container. Remove as much air as possible before sealing. Frozen noodles can stay good for up to 3 months. When you’re ready to eat, defrost them in the fridge overnight. When it’s time to enjoy your noodles again, reheating is key to maintaining their texture. You can use a microwave or a skillet. If using a microwave, add a splash of water and cover the bowl to steam them. For a skillet, heat a little oil and toss the noodles until warm. This keeps them tasty and prevents them from drying out. Szechuan noodles come from the Szechuan region in China. They have a bold and spicy flavor. These noodles often use Szechuan peppercorns, which create a unique numbing sensation. The sauce typically includes soy sauce, chili paste, and garlic. Szechuan noodles are known for their bright colors and fresh vegetables. They are perfect for a quick meal or a tasty snack. Yes, you can use many types of noodles. If you can't find Szechuan noodles, spaghetti works well. Rice noodles or egg noodles are also good choices. Just make sure to cook them according to the package instructions. Each noodle type adds its own texture and taste. Experiment to find what you like best! Spicy Szechuan Noodles can be quite hot. The level of spice depends on the chili paste you use. If you want less heat, start with less chili paste. You can always add more later. Also, try adding sugar or rice vinegar to balance the spice. This dish can be as mild or spicy as you like! You learned how to make Spicy Szechuan Noodles step by step. First, you gather fresh ingredients. Then, you cook the noodles and stir-fry the veggies. Mixing the sauce makes a bold flavor. Remember to adjust the spice to your taste and plate it nicely. Keep these tips in mind for great results. Try adding proteins or experimenting with sauces. You can store leftovers for easy meals later. Enjoy crafting this dish, and share it with friends for a fun meal!](https://recipespursuit.com/wp-content/uploads/2025/06/a3dbbf52-c915-47ff-b207-cd826059f14b.webp)
Are you ready to turn up the heat in your kitchen? My Spicy Szechuan Noodles recipe is simple and bursting
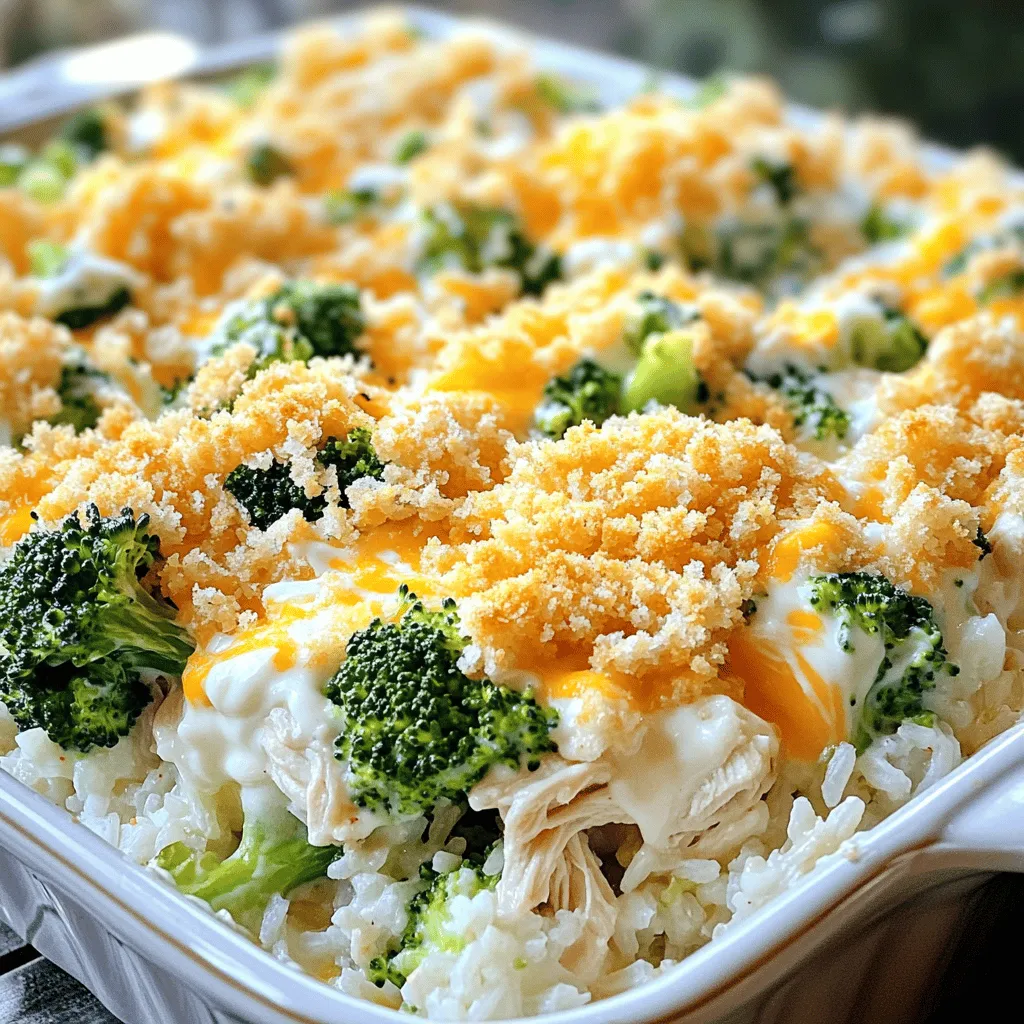
Welcome to your new favorite recipe! Classic Chicken Divan is a simple, flavorful dish anyone can make. Packed with tender
![- 4 medium sweet potatoes, peeled and cubed - 4 cloves garlic, minced - 3 tablespoons olive oil Sweet potatoes are the star of this dish. They bring a rich, sweet flavor that pairs well with garlic. I always choose firm, vibrant sweet potatoes for the best taste. Garlic adds a bold kick, enhancing the sweet potatoes' natural flavor. Using fresh garlic ensures a strong, aromatic taste. The olive oil helps to crisp up the sweet potatoes while roasting. It also adds a nice richness to the dish. - 1 tablespoon maple syrup - 1 teaspoon smoked paprika - ½ teaspoon ground cumin - Salt and pepper to taste - Fresh parsley, chopped (for garnish) For a touch of sweetness, I add maple syrup. It balances the savory garlic and spices. Smoked paprika gives a warm, smoky flavor, while cumin adds a hint of earthiness. Don’t forget salt and pepper; they enhance all the flavors. Fresh parsley not only looks great but adds a burst of freshness. - Baking sheet - Parchment paper - Mixing bowl You need a baking sheet to roast the sweet potatoes evenly. I always line it with parchment paper. It makes cleanup easy and prevents sticking. A mixing bowl is essential for combining all the ingredients. This step ensures every piece of sweet potato gets coated in flavor. For the full recipe, you can refer to the earlier section. Start by peeling the sweet potatoes. Use a sharp knife for safety. Cut them into even cubes. Aim for about one inch in size. This helps them cook evenly. Next, take your garlic cloves and mince them finely. You want them small to spread the flavor well. In a large mixing bowl, add your cubed sweet potatoes. Then, toss in the minced garlic. Drizzle in the olive oil and maple syrup. This will give the sweet potatoes a lovely glaze. Next, sprinkle the smoked paprika, ground cumin, salt, and pepper. Mix everything well. Make sure each piece is coated nicely. Preheat your oven to 425°F (220°C). It’s key for getting that nice caramelization. Line your baking sheet with parchment paper. Spread the sweet potato mixture in a single layer. This helps them roast better. Roast for 25-30 minutes. Flip the sweet potatoes halfway through. This ensures they brown evenly. Keep an eye on them. You want them tender and golden. After roasting, let them cool for a few minutes. Garnish with fresh parsley before serving. Enjoy the savory flavor boost from this simple dish! For the complete method, check out the Full Recipe. To get the best texture and flavor, set your oven to 425°F (220°C). This high heat helps the sweet potatoes become soft inside and crispy outside. Always use a baking sheet lined with parchment paper. It keeps them from sticking and makes clean-up easy. To avoid soggy sweet potatoes, make sure to cut them evenly. Smaller pieces cook faster and get crispier. Spread them out on the baking sheet. If they touch, they will steam instead of roast. Flip the sweet potatoes halfway through cooking to ensure even browning. You can add spices to boost flavor. Consider using chili powder for some heat or fresh herbs like rosemary. They pair well with the sweet taste of sweet potatoes. To balance sweetness, sprinkle a little salt. This brings out the natural flavors without making them taste salty. A splash of lemon juice can also add a nice tangy kick. Don’t be afraid to experiment with your favorite spices. Each one can change the flavor profile and make it unique. Garlic roasted sweet potatoes are great with many dishes. They pair well with grilled chicken or fish. Try serving them alongside a fresh salad for a balanced meal. For a stunning presentation, use fresh parsley as a garnish. It adds color and freshness. You can also add a drizzle of balsamic glaze for a gourmet touch. This small step will impress your guests. Ready to make these delicious garlic roasted sweet potatoes? Check out the [Full Recipe] for all the steps and tips! {{image_2}} You can change the taste of garlic roasted sweet potatoes easily. For a spicy kick, add chili powder. Just a teaspoon will bring heat. Mix it in with the garlic and spices for even flavor. If you prefer herbs, try rosemary or thyme. Both add a fresh taste that pairs well with sweet potatoes. You can chop fresh herbs and sprinkle them on before roasting. You have options for cooking methods, too. An air fryer can make sweet potatoes crisp. It can cut the cooking time, and you get a nice crunch. Just remember to adjust the time based on your air fryer’s settings. Oven-roasting gives a rich caramel flavor. You can also grill sweet potatoes for a smoky taste. Just slice them into thick rounds to keep them from falling through the grill grates. For those who follow a vegan diet, this recipe is already vegan-friendly. You can use vegetable oil instead of olive oil if you want. For gluten-free eaters, the recipe is safe as it has no gluten. Just ensure any additional seasonings you use are gluten-free too. You can enjoy this dish without worry. To find the full recipe and many more tips, check out the Full Recipe. After enjoying garlic roasted sweet potatoes, store any leftovers in the fridge. Place them in an airtight container. They will stay fresh for about 3 to 5 days. If you want to keep them longer, freezing is a great option. First, let the sweet potatoes cool down. Then, spread them on a baking sheet. Freeze them for about an hour before moving them to a freezer bag. This method helps to keep them from sticking together. When it’s time to enjoy your leftovers, the oven is the best way to reheat them. Preheat the oven to 350°F (175°C). Spread the sweet potatoes on a baking sheet and heat for about 10 to 15 minutes. This method helps retain that delicious flavor. You can also use the microwave if you're in a hurry. Place the sweet potatoes in a microwave-safe dish and cover them with a lid. Heat them for 1 to 2 minutes, stirring halfway through. This method is quick but might not keep the same crispiness. Stored garlic roasted sweet potatoes last about 3 to 5 days in the fridge. If they are frozen, they can last for up to 3 months. Always check for signs of spoilage. If you see mold, an off smell, or a slimy texture, throw them away. Eating spoiled food can make you sick, so when in doubt, toss it out. It usually takes about 25 to 30 minutes to cook garlic roasted sweet potatoes. Start by preheating your oven to 425°F (220°C). Cut the sweet potatoes into even cubes. This helps them cook evenly. After mixing them with garlic and seasonings, spread them on a baking sheet. Roast until they are tender and slightly caramelized. Check for doneness by piercing a piece with a fork. If it goes in easily, they are ready! Yes, you can use other types of potatoes. While sweet potatoes shine in this dish, regular potatoes work too. Red or Yukon gold potatoes add creamy texture. If you want a different flavor, try purple potatoes. Just remember to adjust the cooking time if you choose a different type of potato. Each type has its own cooking speed. Garlic roasted sweet potatoes pair well with many dishes. They go great with grilled chicken or fish. You can also serve them alongside roasted vegetables. A fresh salad adds a nice crunch too. If you want a hearty meal, try serving them with steak or a rich veggie stew. The sweet and savory flavors balance nicely with these options. Yes, you can prepare garlic roasted sweet potatoes ahead of time. You can cube the sweet potatoes and mix them with garlic and spices. Store this mixture in the fridge for up to 24 hours. When you're ready, roast them in the oven. If you have leftovers, store them in an airtight container. They will stay fresh for up to four days. Just reheat in the oven for the best flavor. For the full recipe, check the section above! Garlic roasted sweet potatoes are a tasty and healthy dish you can easily make. We covered the main ingredients, essential equipment, and step-by-step instructions to prepare them perfectly. I shared tips for texture and flavor, different variations, and how to store leftovers. This recipe is simple and adaptable for any meal. Try it out, and you’ll enjoy a tasty side that brightens up your plates!](https://recipespursuit.com/wp-content/uploads/2025/06/0244c473-09e3-4079-a063-78a70997a403.webp)
If you’re looking to elevate your side dish game, look no further! Garlic roasted sweet potatoes bring a savory punch

Are you craving a tasty meal that you can whip up in no time? Look no further than these Easy
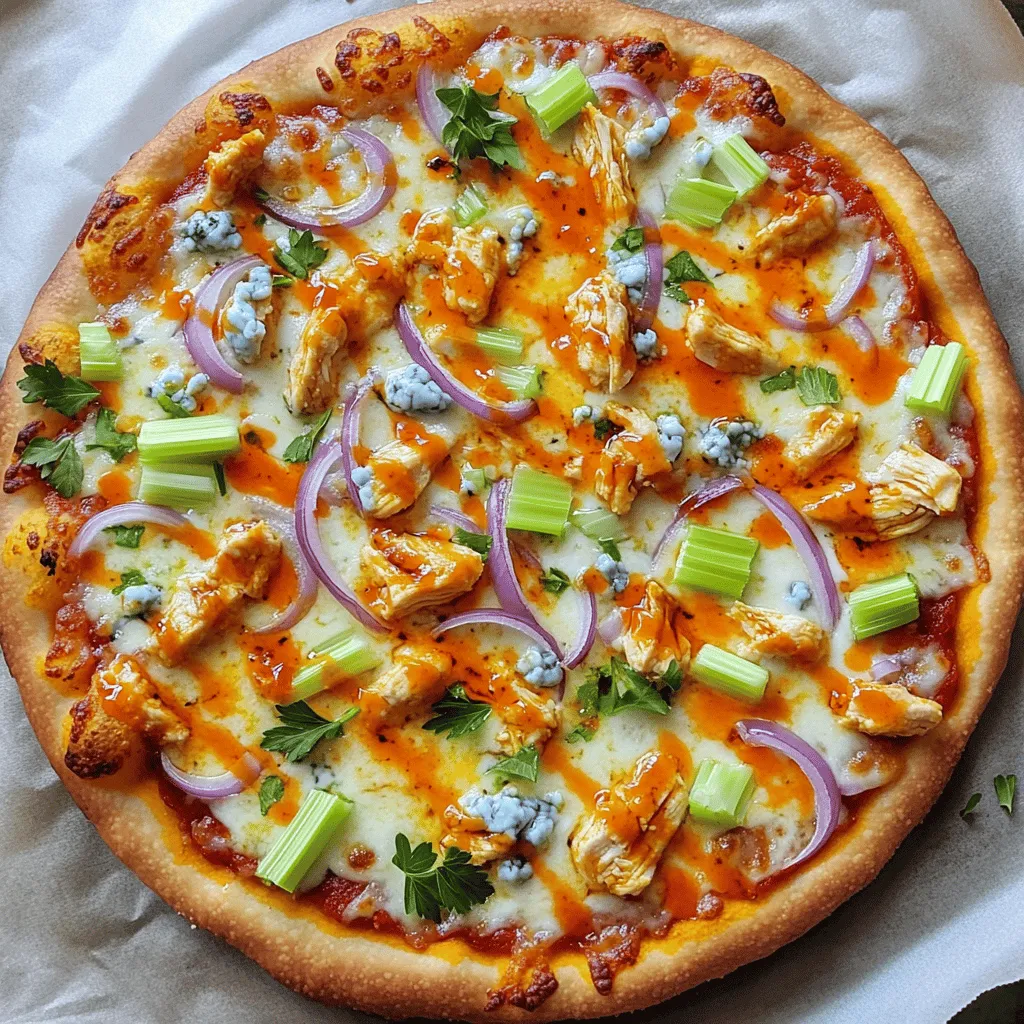
Are you ready to take your pizza night to the next level? Buffalo Chicken Pizza combines spicy, tangy flavors with
. This meal is not just easy to make; it's also packed with flavor, making it a family favorite for any night of the week! Preheat your oven to 400°F (200°C). This step is key for a crispy crust. Next, line a baking sheet with parchment paper. This makes cleaning up easier. In a shallow dish, mix one cup of grated Parmesan cheese and one cup of panko bread crumbs. Panko adds great crunch. Then, add two tablespoons of chopped parsley, one teaspoon of garlic powder, one teaspoon of onion powder, and half a teaspoon of paprika. Don’t forget to season with salt and pepper to taste. Stir to combine. This mixture gives your fish a tasty coat. First, pat your tilapia fillets dry with a paper towel. This helps the coating stick. Next, sprinkle lemon zest over each fillet and drizzle with lemon juice. This adds bright flavor. Now, dredge each fillet in a shallow dish with flour. Shake off any extra flour. Then, dip the floured fillet into the beaten eggs, making sure it is fully covered. Finally, press each side into the Parmesan-panko mixture until well-coated. Place the coated fillets on the baking sheet. Drizzle two tablespoons of olive oil over the top of the fillets. Bake in the preheated oven for 12-15 minutes. The tilapia should be cooked through and the crust should be golden-brown. After baking, let the fillets cool for a couple of minutes before serving. You can find the complete details in the Full Recipe. To get a great crust on your tilapia, you need an even coating. Start by mixing the Parmesan cheese and panko bread crumbs well. This mix gives the fish a tasty crunch. When you dredge the fillets, make sure to coat every part. Press the fish firmly into the crumbs. This helps the crust stick during cooking. For the best results, set your oven to 400°F (200°C). This high heat crisps the crust while cooking the fish through. Bake the tilapia for 12 to 15 minutes. Keep an eye on it. The fish should be opaque and flake easily with a fork. A golden-brown crust shows it's ready. When serving Parmesan crusted tilapia, think about color and balance. A light salad or steamed veggies pairs well. For a pop of flavor, add lemon wedges on the side. Garnish with fresh parsley for a beautiful look. This way, your dish is not just tasty but also a feast for the eyes. For the full recipe, check back to see all the steps. {{image_2}} You can mix in fresh herbs to boost flavor. Basil, thyme, or dill work great. Just chop them finely and add to the Parmesan and panko mix. This adds a fresh twist to your dish. You can even use dried herbs if fresh ones are not handy. While tilapia is tasty, you can use other fish too. Cod, haddock, or even salmon are good picks. Each fish brings its own flavor, but they all work well with the crust. Adjust cooking time based on the thickness of the fish. Thicker fillets may need a bit more time in the oven. If you need a gluten-free option, swap panko with gluten-free crumbs. Ground almonds or crushed rice cereal also work well. For the flour, use almond flour or coconut flour. This way, you can enjoy a delicious meal without worrying about gluten. You can still achieve that crunchy texture with these options. For the complete recipe, check out the Full Recipe section. To keep your Parmesan crusted tilapia fresh, let it cool first. Place leftovers in an airtight container. Store them in the fridge for up to three days. When you’re ready to eat, check for any odd smells or changes in texture. If you want to save tilapia for later, freezing works well. Wrap each piece tightly in plastic wrap. Then place them in a freezer bag. This helps prevent freezer burn. You can freeze the fish for up to three months. When reheating, I recommend using the oven. Preheat it to 350°F (175°C). Place the fillets on a baking sheet and cover with foil. This keeps them moist. Heat for about 15 minutes. You want the crust to stay crispy. Enjoy your flavorful dish just like the first time! Bake Parmesan crusted tilapia for 12-15 minutes. This time gives you a perfectly cooked fish. Check that the crust is golden-brown and the fish flakes easily with a fork. Remember, every oven varies a bit. It’s smart to keep an eye on it towards the end. Yes, you can use frozen tilapia. Just be sure to thaw it first. Place the frozen fillets in the fridge overnight. If you need to thaw faster, seal them in a bag and submerge in cold water. Once thawed, pat them dry before seasoning and coating. This will help the crust stick better. For a great meal, pair Parmesan crusted tilapia with light sides. A fresh salad with mixed greens works well. You might also enjoy steamed broccoli or asparagus. These sides add color and balance to the dish. If you want something heartier, try roasted potatoes seasoned with herbs. For the full recipe, check out the [Full Recipe]. In this post, I shared a simple recipe for Parmesan Crusted Tilapia. We covered key ingredients, like tilapia, Parmesan, and panko. You learned how to mix coatings, coat the fish, and perfect your crust. Remember, you can adjust flavors with herbs or choose different fish. Proper storage keeps leftovers tasty. With these tips, you can enjoy a delicious meal that impresses anyone. Happy cooking!](https://recipespursuit.com/wp-content/uploads/2025/06/acae50f6-506e-498f-b3cc-8166b6fb0c01.webp)
If you’re looking for a quick and tasty dinner, look no further! This Parmesan Crusted Tilapia recipe is simple and
