Skip to content
DisclaimerTerms Of UseGDPR PolicyCookie Policy

Recipes Pursuit

  • Home
  • Drinks
  • Appetizers
  • Dinner
  • Dessert
  • About
  • Contact
  • Privacy Policy
DisclaimerTerms Of UseGDPR PolicyCookie Policy

Emma Smith

- 1 pound large shrimp, peeled and deveined - 3 tablespoons honey - 2 tablespoons soy sauce or tamari - 3 cloves garlic, minced The main ingredients for honey garlic shrimp foil packs are simple yet full of flavor. Using large shrimp gives you a nice bite. The honey adds a sweet touch, while soy sauce brings depth. Fresh garlic gives a bold taste that makes the dish shine. - 1 bell pepper, sliced into strips - 1 cup snap peas, trimmed - Fresh cilantro or green onions for garnish Adding vegetables makes this dish colorful and healthy. I love using bell peppers for their crunch and sweetness. Snap peas add freshness, while cilantro or green onions give a final pop of flavor. - 2 tablespoons olive oil - 1 teaspoon sesame seeds (optional) - Salt and pepper to taste Olive oil helps the shrimp and veggies cook evenly. Seasoning with salt and pepper brings all the flavors together. Sesame seeds add a nice crunch if you choose to use them. - Preheat your grill or oven to 400°F (200°C). - Cut four large pieces of aluminum foil, about 12 inches each, and lay them flat. - In a small bowl, whisk together 3 tablespoons of honey, 2 tablespoons of soy sauce, 3 cloves of minced garlic, and 1 tablespoon of grated ginger. Mix until smooth. - In a medium bowl, toss 1 pound of peeled and deveined shrimp with 2 tablespoons of olive oil, salt, and pepper. - Divide the shrimp evenly onto the four pieces of foil. - Top each shrimp portion with sliced bell pepper and snap peas. - Spoon the honey garlic sauce over the shrimp and veggies in each pack. - Fold the sides of the foil over the shrimp and veggies, sealing the packs tightly. - Cook the foil packs on the grill or in the oven for 12-15 minutes. The shrimp should be pink and opaque, and the veggies tender. To cook shrimp just right, look for a few signs. Cooked shrimp turn pink and curl slightly. They should feel firm but not rubbery. For different shrimp sizes, adjust your cooking time. Larger shrimp take longer, while smaller shrimp cook faster. Aim for 12-15 minutes if you're using large shrimp. Always check to ensure they are fully cooked. To boost flavor, think about adding spices or herbs. Some great options include red pepper flakes or fresh basil. If you want a twist, try adding lime juice or chili paste. For those with dietary needs, substitute soy sauce with tamari for gluten-free. You can also use coconut aminos for a different taste. To prevent sticking, use enough olive oil in your pack. This helps the shrimp and veggies cook well. When sealing the foil, fold it tightly but gently. This keeps the steam inside and prevents tearing. For easy cleanup, line your baking tray with parchment paper. This way, any drips will not stick to your pan. {{image_2}} You can switch out shrimp for other proteins. Chicken is a great choice. Use boneless, skinless chicken breasts. Cut them into bite-sized pieces. Tofu is perfect for a vegetarian option. Use firm or extra-firm tofu for the best texture. Fish also works well; try salmon or tilapia. Just adjust cooking times based on the protein you choose. Want to mix things up? Try different sauces for unique flavors. Teriyaki sauce adds a sweet and savory taste. For a bright twist, use lemon garlic sauce. If you like heat, add some chili flakes or hot sauce. Each option gives the dish a fresh spin while keeping it easy. Seasonal veggies can elevate your foil packs. In spring, use asparagus and baby carrots. Summer is great for zucchini and corn. In autumn, add butternut squash or Brussels sprouts. Winter is perfect for hearty root vegetables like parsnips and sweet potatoes. Fresh ingredients not only taste better but also boost nutrition. To store leftover foil packs, let them cool first. Then, place them in an airtight container. You can also wrap them in plastic wrap or foil. Store them in the fridge for up to three days. When you are ready to enjoy them again, check for any signs of spoilage before heating. If you want to save the cooked shrimp, freezing is a great option. Allow the foil packs to cool completely. Then, transfer the shrimp and veggies to a freezer-safe bag. Remove as much air as possible before sealing. You can keep them frozen for up to three months. Label the bags with the date, so you know when to use them. To reheat your leftover meals, there are a few safe methods. You can use the microwave, oven, or stovetop. For the microwave, place the pack on a microwave-safe plate and heat for about 2-3 minutes. If using the oven, preheat it to 350°F (175°C) and heat for about 10 minutes. For the stovetop, add a little water to a pan, place the pack inside, and cover. Heat on low until warm. Always check that the shrimp are heated through before serving. Yes, you can cook Honey Garlic Shrimp Foil Packs in the oven. Preheat your oven to 400°F (200°C). Use aluminum foil to create your packs, just like on the grill. Place the sealed packs on a baking sheet for easy handling. Cook for about 12-15 minutes or until the shrimp turn pink and the veggies are tender. This method keeps the shrimp juicy and full of flavor. You can serve Honey Garlic Shrimp Foil Packs with a variety of tasty sides. Here are some great options: - Steamed rice or quinoa for a filling base - A fresh green salad for a light touch - Grilled corn on the cob for sweetness - Garlic bread for a comforting addition These sides balance the meal and add more textures and flavors. To check if the shrimp are cooked, look for a few signs. The shrimp should turn pink and opaque. They also curl into a C shape. If they are still gray or translucent, they need a bit more time. You can always cut one open to check; it should be white and firm. This way, you ensure the shrimp are delicious and safe to eat. This recipe for Honey Garlic Shrimp Foil Packs combines tasty shrimp and fresh veggies. You learned how to make it step-by-step, from preparation to cooking. I also shared storage tips and variations to suit your taste. These foil packs are easy to make and clean up. You can impress your friends and family with this dish. Remember, enjoy getting creative with the ingredients!

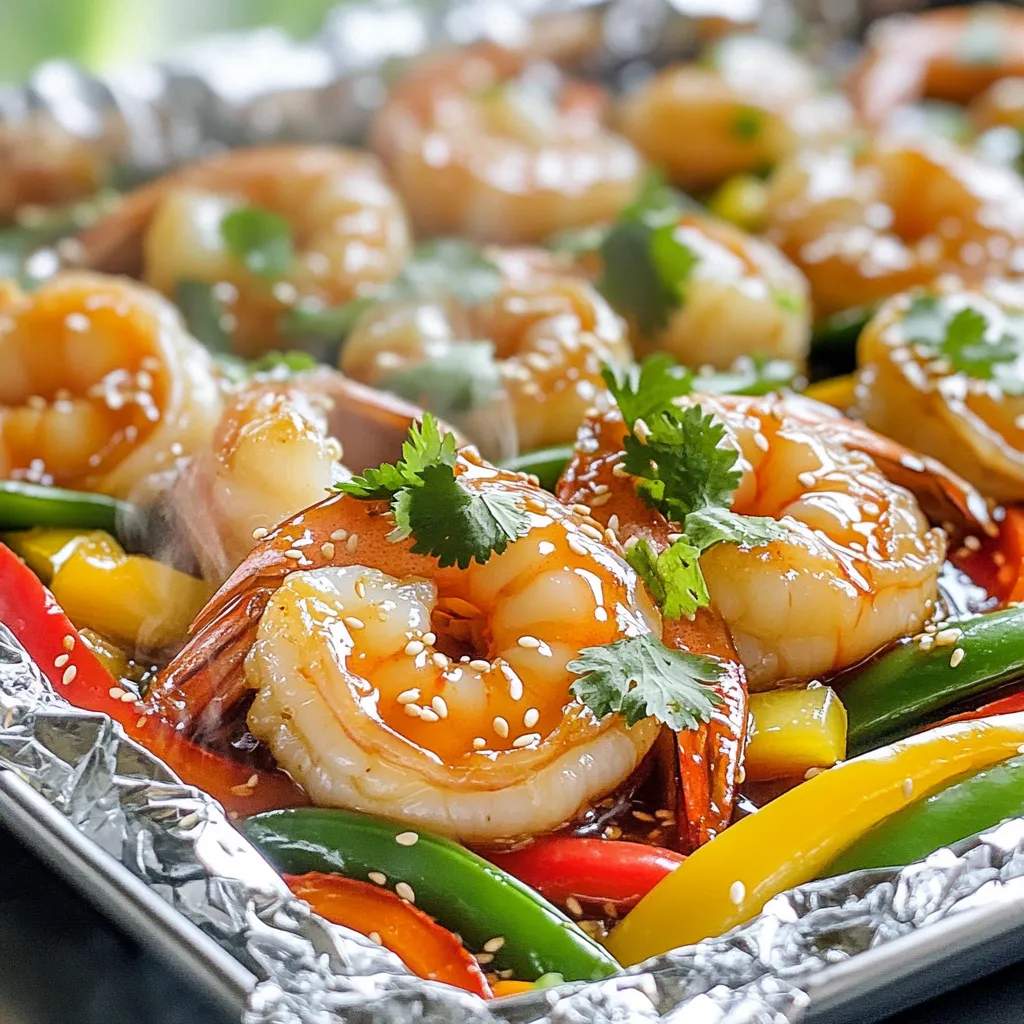
Honey Garlic Shrimp Foil Packs Flavorful and Easy Dish

Dive into a delightful cooking experience with my Honey Garlic Shrimp Foil Packs! This easy and flavorful dish combines succulent

- 1 cup unsweetened almond milk - 1 ripe banana - 1 tablespoon matcha green tea powder - 1 scoop vanilla protein powder (or plant-based protein) - 1 tablespoon almond butter - 1 tablespoon chia seeds These main ingredients make a smooth and tasty drink. The almond milk adds creaminess without dairy. The banana gives natural sweetness and a nice texture. Matcha green tea powder boosts the drink with antioxidants. The protein powder helps build muscle, while almond butter gives healthy fats. Chia seeds add fiber and a fun crunch. - 1 tablespoon honey or maple syrup (optional for sweetness) - Handful of spinach or kale (optional for extra greens) - Ice cubes (as needed) You can add honey or maple syrup if you want more sweetness. A handful of spinach or kale adds more vitamins and minerals. Ice cubes can chill your smoothie instantly, making it refreshing and perfect for warm days. If you don’t have almond milk, you can use oat milk or coconut milk. Any ripe fruit will work instead of banana, like mango or pineapple. You can skip the protein powder if you prefer a lighter smoothie. For added flavor, consider adding vanilla extract or a pinch of cinnamon. Each option lets you create your unique version of this smoothie! Start by gathering all your ingredients. You will need: - 1 cup unsweetened almond milk - 1 ripe banana - 1 tablespoon matcha green tea powder - 1 scoop vanilla protein powder - 1 tablespoon almond butter - 1 tablespoon chia seeds - 1 tablespoon honey or maple syrup (optional) - Handful of spinach or kale (optional) - Ice cubes (as needed) Make sure all your items are ready. This will make blending easy. In your blender, pour the almond milk first. This helps other ingredients blend better. Next, add the ripe banana, matcha powder, and protein powder. Blend these together on high speed. Then, add the almond butter and chia seeds. If you like it sweet, include honey or maple syrup now. For more greens, toss in spinach or kale. Blend again until it’s nice and smooth. If your smoothie feels too thick, add more almond milk. Blend again until you reach the right texture. If you want it cold, add ice cubes and blend until crushed. After blending, taste your smoothie. If you want it sweeter, add more honey or syrup. Pour it into a tall glass. For a nice touch, sprinkle some chia seeds on top. Enjoy your delicious high-protein matcha green smoothie! When picking a protein powder, focus on quality. A good option is whey or plant-based protein. Look for one with no added sugars. This keeps your smoothie healthy. Check the protein content per scoop. Aim for at least 20 grams. This helps you feel full longer. Try vanilla flavor for a nice taste with matcha. If you have extra smoothie, store it in an airtight jar. A glass jar works best. Leave some space at the top. Smoothies can expand when frozen. Keep it in the fridge for up to 24 hours. For longer storage, freeze it. Just remember to thaw it before you drink. You can boost the taste and nutrition easily. Add a pinch of cinnamon for warmth. A tablespoon of flaxseeds adds fiber and omega-3s. Consider fresh or frozen berries for extra flavor. They also add antioxidants. For a creamier texture, include avocado. It pairs well with matcha and banana. {{image_2}} You can easily make this smoothie dairy-free and vegan. Use unsweetened almond milk as the base. It’s creamy and delicious. For protein, choose a plant-based protein powder. This keeps it vegan while adding muscle-building benefits. Almond butter is a great choice, too! It gives a lovely nutty taste without any dairy. To boost your smoothie, try adding superfoods. Chia seeds are perfect as they pack fiber and omega-3s. You can also add flax seeds for extra nutrients. If you want more greens, toss in a handful of spinach or kale. These add vitamins without changing the flavor much. Feeling adventurous? Mix in a tablespoon of spirulina or acai powder. They add color and health benefits. You can change the flavor of your smoothie with fruits and seasonings. For a tropical twist, add pineapple or mango. These fruits bring sweetness and a fun vibe. If you want a berry blast, try blueberries or strawberries. They pair well with matcha. For a spiced kick, a pinch of cinnamon or ginger can be exciting. Experiment and find your favorite mix! To keep your smoothie ingredients fresh, store them properly. Place almond milk in a sealed container in your fridge. Use ripe bananas right away, or store them in the freezer for later. Matcha powder stays best in a cool, dark spot. Almond butter and chia seeds last long in a pantry. If you add greens, like spinach or kale, use them within a few days. Freezing smoothies is easy! Pour your blended smoothie into ice cube trays or freezer bags. Leave space at the top of the bag, as liquids expand when frozen. Label your bags with the date. When you want a quick drink, just blend the frozen cubes with some fresh almond milk. This keeps the flavor fresh and delicious. For best taste, enjoy your smoothie right after making it. If you have leftovers, keep them in the fridge. Shake or stir well before drinking. Smoothies do not reheat well, as heat changes the texture. If you want to serve it fancy, add chia seeds or a banana slice on top. Enjoy your smoothie cold for a refreshing snack! Matcha offers many health benefits. It is rich in antioxidants, which help fight free radicals. This green powder can boost your metabolism and aid in weight loss. Matcha also provides a calm alertness due to its caffeine content. It helps improve focus and mental clarity. The L-theanine in matcha can promote relaxation without drowsiness. Plus, matcha supports heart health and may lower cholesterol levels. Yes, you can make the smoothie ahead of time. I suggest storing it in an airtight container. Keep it in the fridge for up to 24 hours. However, the smoothie may separate as it sits. Just give it a good shake or stir before drinking. For the best flavor and texture, enjoy it fresh. This smoothie is great for post-workout recovery! It contains protein from the protein powder and almond butter. Protein helps repair muscles after exercise. The banana adds natural sugars to replenish your energy. Chia seeds provide healthy fats and fiber, which help with recovery. This smoothie is a balanced way to refuel after your workout. You can easily customize the sweetness of your smoothie. The recipe calls for honey or maple syrup, which you can adjust. Start with a small amount and taste as you blend. If you want it sweeter, add more. You could also use ripe fruits like dates or mangoes for natural sweetness. Just remember to balance flavors for the best taste. If you don’t have almond milk, don’t worry! You can use other milk options. Regular dairy milk works well in this recipe. Soy milk or oat milk are good choices too. Coconut milk adds a rich flavor, while rice milk is a lighter option. Choose whatever you have on hand to make this smoothie your own! High-protein matcha green smoothies are simple and fun to make. You learned about key ingredients and different variations to fit your taste. Steps for preparation and blending help you create a smooth, tasty drink. Tips on protein powder choice and storage enhance your experience. Remember, you can customize flavor and nutrition to suit your needs. Enjoy experimenting with different recipes and reap the benefits of matcha every day!

High-Protein Matcha Green Smoothie Simple and Tasty

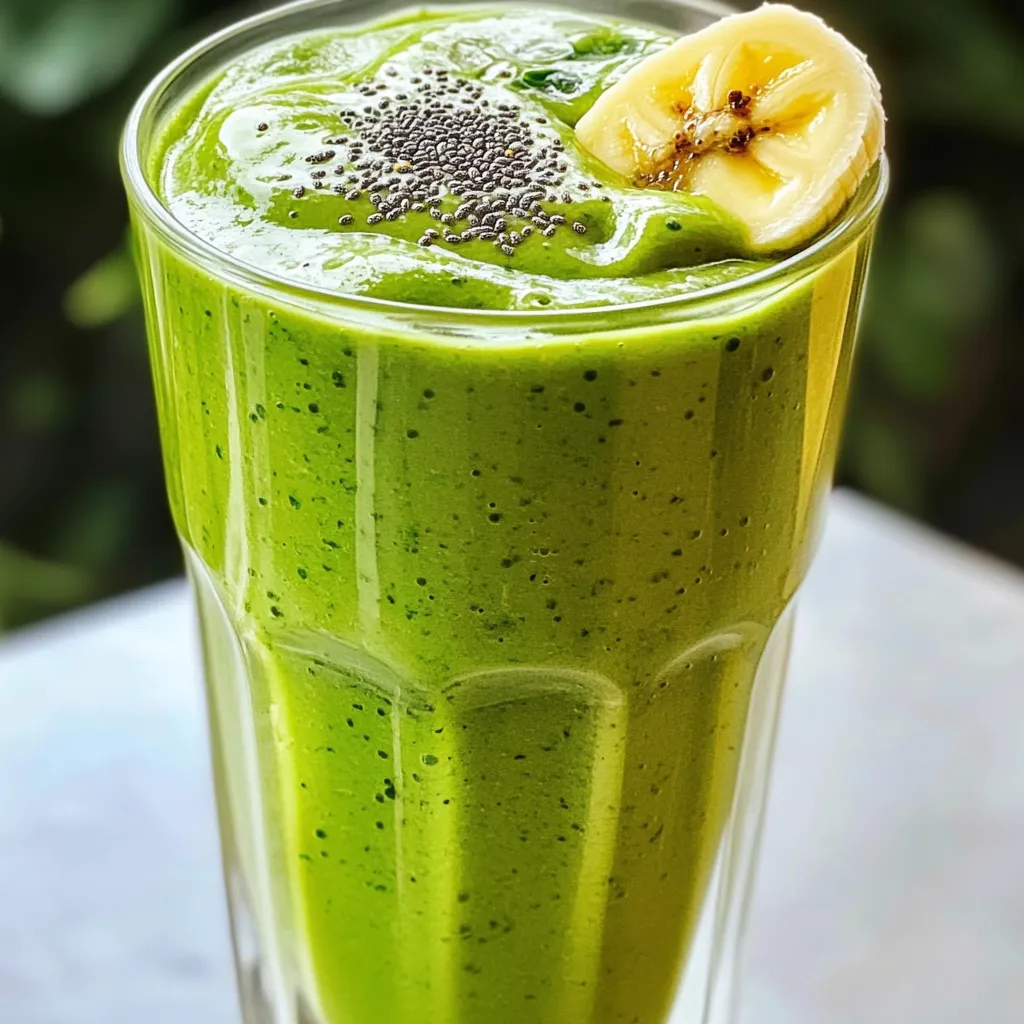
Looking for a delicious way to boost your protein intake? Try my High-Protein Matcha Green Smoothie! It’s simple, tasty, and

- 2 cups mini pretzels - 2 cups semi-sweet chocolate chips - 1/2 cup white chocolate chips - 1/4 cup finely chopped nuts (like pecans or almonds) - 1/4 cup sprinkles - Sea salt, for sprinkling - Baking sheet - Parchment paper - Microwave-safe bowls - Spatula and fork To make Chocolate Covered Pretzel Bark, you need simple yet tasty ingredients. First, grab 2 cups of mini pretzels. They add a nice crunch. Next, you will need 2 cups of semi-sweet chocolate chips. This chocolate gives the bark its rich flavor. Then, use 1/2 cup of white chocolate chips for a sweet drizzle that looks pretty. Add in 1/4 cup of chopped nuts, like pecans or almonds, for extra texture and taste. Some optional ingredients can make your bark even better. You might want to add 1/4 cup of sprinkles for fun colors. A sprinkle of sea salt can enhance the sweetness and make every bite pop. For tools, you will need a baking sheet to hold the bark. Line it with parchment paper for easy removal. Use microwave-safe bowls to melt the chocolate. A spatula helps to mix and spread the chocolate. A fork can help drizzle the white chocolate nicely. With these ingredients and tools, you are ready to create a sweet treat that everyone will love! - Line a large baking sheet with parchment paper. - Make sure the surface is flat to prevent sticking. - In a microwave-safe bowl, combine the semi-sweet chocolate chips. - Microwave in 30-second bursts, stirring in between. - Keep going until the chocolate is smooth, about 1-2 minutes. - Add the mini pretzels to the melted chocolate. - Stir gently until all the pretzels are coated. - Pour the chocolate-covered pretzels onto the prepared baking sheet. - Spread them out into an even layer. Use a spatula if needed. - In another bowl, melt the white chocolate chips the same way. - Drizzle the melted white chocolate over the pretzel layer. - Sprinkle the finely chopped nuts and optional sprinkles on top. - Lightly add sea salt to enhance the flavor. - Place the baking sheet in the fridge for about 1 hour. - Wait until the chocolate is completely set. - After chilling, remove the sheet from the fridge. - Carefully break the bark into pieces of your desired size. To avoid burned chocolate, use a microwave. Heat chocolate chips in short bursts of 30 seconds. Stir between each interval. This method helps prevent overheating. If you prefer, use a double boiler. Place a bowl over simmering water. Stir until melted and smooth. For even coating, mix gently. Stir the pretzels slowly in the melted chocolate. Make sure every pretzel gets covered. To avoid sticky bark, let it chill fully. It should be firm before breaking into pieces. For creative serving, use a decorative platter. Arrange the bark pieces in a fun pattern. Drizzle more melted chocolate on top for flair. If you want to gift it, wrap in cellophane. Tie with ribbons for a nice touch. {{image_2}} You can add fun flavors to your pretzel bark. One great option is peppermint extract. Just a few drops give it a minty twist. This works well during the holidays or anytime you crave something fresh. You can also mix in dried fruits, like cranberries or cherries. These fruits add color and a sweet bite that pairs well with chocolate. If you're vegan, try using dark chocolate chips that are dairy-free. They taste great and still melt beautifully. For gluten-free options, seek out gluten-free pretzels. Many brands offer these, so you can enjoy this treat without worry. Make your bark unique with different nuts. Try walnuts or cashews for a new texture. You can also choose seasonal sprinkles. Think about red and green for Christmas or pastel colors for Easter. These small details make your bark festive and fun! Store your chocolate covered pretzel bark in an airtight container. This keeps it fresh. You can use a cookie tin or a plastic container. If you leave it at room temperature, it lasts longer. But, if your home is warm, the fridge is better. Just remember to let it come back to room temp before eating. The bark stays fresh for about two weeks. After that, it may lose its crunch. Signs of spoilage include a dull surface or a change in smell. If you see white spots, it may be time to toss it. Always trust your senses! To freeze, wrap the bark well in plastic wrap. Place it in a freezer bag or container. This keeps out air and prevents freezer burn. To thaw, just leave it at room temp for a few hours. Avoid the microwave, as it can change the texture. For long-term storage, you can keep it frozen for up to three months. Enjoy your tasty treats anytime! The bark needs about one hour to chill. I recommend placing it in the refrigerator. This time allows the chocolate to harden fully. If you skip this step, the bark may not break apart well. Yes, you can mix things up! You can use milk chocolate or dark chocolate instead of semi-sweet. For the white chocolate, consider using yogurt chips for a twist. Each type will change the taste a bit but will still be tasty. If you're allergic to nuts, don't worry! You can skip them entirely. Instead, try adding some crushed pretzels for extra crunch. You could also use seeds like sunflower seeds for a nut-free option. These keep the texture fun without nuts. This guide covered everything you need to make chocolate-covered pretzel bark. We discussed essential and optional ingredients, the right tools, and steps for melting and coating. I shared tips for the perfect texture and presentation. Lastly, we explored variations and storage methods. Enjoy making this tasty treat! It’s a fun snack or gift. Don't hesitate to try your own twists. Remember, the best part is sharing it with others.

Chocolate Covered Pretzel Bark Irresistible Sweet Treat

Chocolate-covered pretzel bark is the perfect mix of sweet and salty. If you love easy treats, this recipe is for

- 2 pounds chicken wings - 1/2 cup teriyaki sauce (store-bought or homemade) - 2 tablespoons honey - 1 teaspoon garlic powder - 1 teaspoon ginger powder - 1/2 teaspoon black pepper - 1 tablespoon soy sauce - 1 teaspoon sesame oil - 1 tablespoon sesame seeds (for garnish) - 2 green onions, sliced (for garnish) I love making air fryer teriyaki chicken wings because they are easy and fun. The main ingredients are chicken wings, teriyaki sauce, and honey. You can use store-bought teriyaki sauce or make your own. I often choose homemade for a fresh taste. Honey adds a nice sweetness. The dry ingredients include garlic powder, ginger powder, and black pepper. These spices give the wings a great flavor. Garlic powder adds depth, while ginger gives a nice zing. Black pepper brings a little heat. For the additional ingredients, I use soy sauce and sesame oil. Soy sauce adds umami flavor, and sesame oil gives a nutty aroma. You can garnish with sesame seeds and green onions for extra crunch and color. The wings look and taste amazing with these toppings. By using these simple ingredients, you can create a tasty meal. The air fryer makes the wings crispy without extra oil. This recipe is a favorite for dinner or a party. To start, gather your mixing bowl. Combine the following in the bowl: - 1/2 cup teriyaki sauce - 2 tablespoons honey - 1 tablespoon soy sauce - 1 teaspoon garlic powder - 1 teaspoon ginger powder - 1 teaspoon sesame oil - 1/2 teaspoon black pepper Whisk these ingredients together until they blend well. The honey adds a nice sweetness, while the soy sauce gives it saltiness. The garlic and ginger bring depth to the flavor. Next, grab your chicken wings. Toss the wings in the marinade. Make sure every wing gets a good coating. Afterward, cover the bowl and put it in the fridge. Let them marinate for at least 30 minutes. For a stronger flavor, you can leave them overnight. Now, it’s time to cook. First, preheat your air fryer to 380°F (190°C) for about 5 minutes. Once it’s hot, arrange the marinated wings in the basket. Make sure they lie in a single layer. This step helps them cook evenly. Cook the wings for 25 to 30 minutes. Remember to shake the basket halfway through. This action helps the wings crisp up nicely. When done, check that the wings hit an internal temperature of 165°F (74°C). For extra flavor, you can brush more teriyaki sauce on them and cook for another 5 minutes. After cooking, let the wings rest for a few minutes. Garnish them with sesame seeds and sliced green onions. Now, they’re ready to enjoy! To make the best teriyaki chicken wings, avoid overcrowding the air fryer basket. If you pack too many wings in, they won’t cook evenly. Cook in batches if needed. I recommend setting your air fryer to 380°F (190°C). Cook the wings for 25 to 30 minutes. Shake the basket halfway through to help them cook evenly. For a burst of flavor, brush the wings with extra teriyaki sauce just before they finish cooking. This adds a nice glaze. You can also try adding optional spices. A touch of red pepper flakes or smoked paprika can give a nice kick and depth to your wings. To get that perfect crispy skin, try a few techniques. First, make sure to pat the wings dry before marinating. This removes moisture. Then, shake the basket every so often while cooking. This helps the hot air circulate and crisp up the skin. Enjoy those tasty, crunchy wings! {{image_2}} To add heat to your teriyaki wings, try adding chili sauce or red pepper flakes. Just mix a teaspoon or two into your marinade. This small change makes a big impact. You can control the spice level based on your taste. A bit more heat can take your wings to the next level! You can switch up the flavors by using different sauces. Try using sweet chili sauce or hoisin sauce instead of teriyaki. Both options will give your wings a unique twist. You can also add citrus juices for a fresh taste. Lemon or lime juice can brighten the flavor profile. When serving your teriyaki wings, think about pairing them with tasty side dishes. Rice or quinoa makes great companions. You can also serve them with a refreshing cucumber salad. For dipping, consider soy sauce or a spicy mayo. These sides enhance the meal and make it even more enjoyable. To store leftover wings, first let them cool down. Place them in an airtight container. You can keep them in the fridge for up to three days. For longer storage, freeze them. Wrap each wing in plastic wrap and place them in a freezer-safe bag. This method helps keep them fresh and tasty. When you are ready to eat those wings again, reheat them in the air fryer. Set it to 375°F (190°C) for about 10 minutes. This method keeps the wings crispy. Check them halfway through and shake the basket for even heat. You can also reheat them in an oven at 350°F (175°C) for about 15 minutes. Cooked chicken wings can stay fresh in the fridge for about three days. If you freeze them, they stay good for about three months. After that, they might lose flavor and texture. Always check for signs of spoilage before eating. I recommend marinating the wings for at least 30 minutes. If you have time, let them sit overnight. This helps the flavors soak in well. A longer marination gives a deeper taste. Yes, you can use frozen wings. Cook them straight from the freezer. Just add a few extra minutes to the cooking time. You will need about 30-35 minutes total at 380°F (190°C). Make sure to check the internal temperature before serving. The safe internal temperature for chicken wings is 165°F (74°C). Use a meat thermometer to check this. This ensures your wings are safe to eat and perfectly cooked. You've learned how to make tasty teriyaki chicken wings. We covered key ingredients, from chicken to spices. I showed you how to prepare, marinate, and cook them in an air fryer. Tips for crunch and flavor enhancements will help you impress your guests. Try different variations to keep things exciting, and don’t forget to store leftovers properly. These wings are delicious and easy to make. Enjoy your cooking and savor every bite.

Air Fryer Teriyaki Chicken Wings Flavorful Dinner Idea

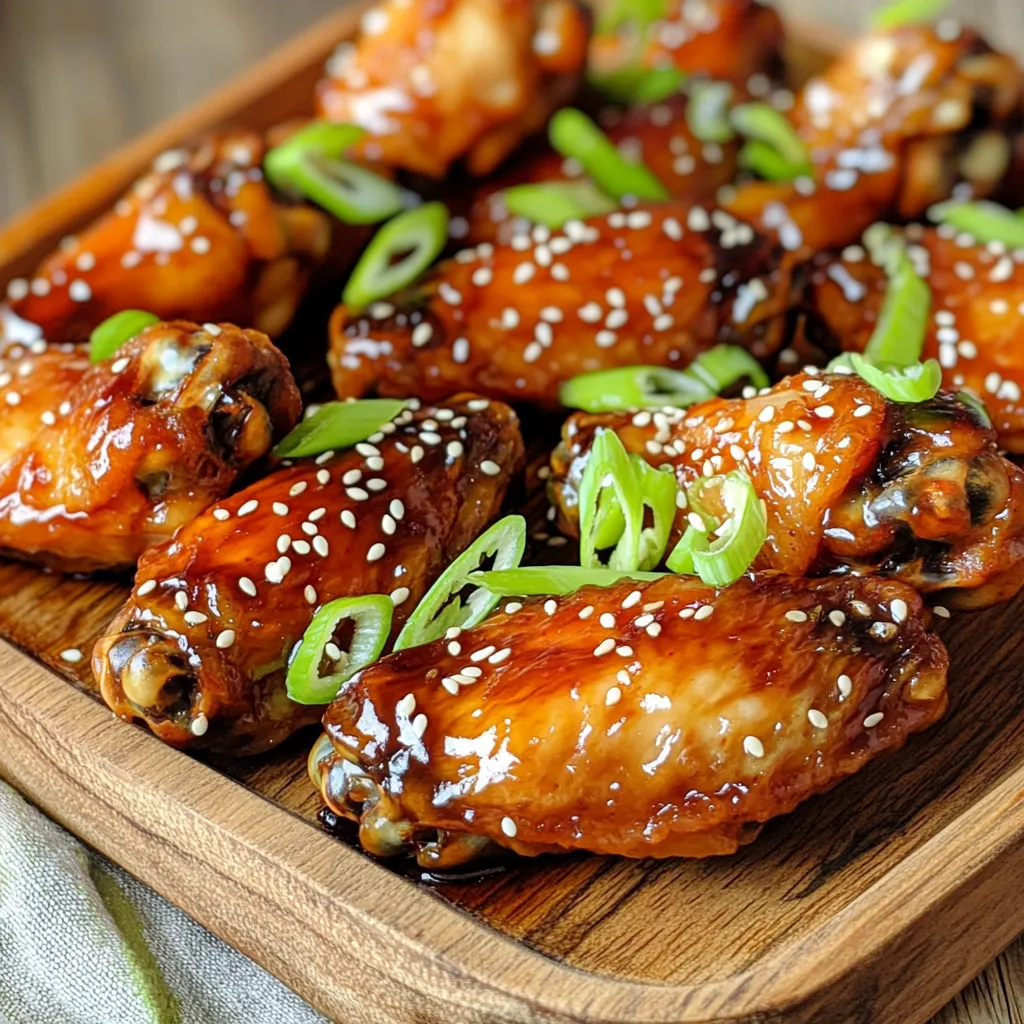
Ready to spice up your dinner? These Air Fryer Teriyaki Chicken Wings are tasty and easy to make! You’ll love

- 2 cups Greek yogurt (plain or vanilla) - 1 cup fresh blueberries - 1 lemon (juice and zest) - 2 tablespoons honey or maple syrup - 1 cup granola (your choice) - Fresh mint leaves for garnish (optional) - Greek yogurt: Use 2 cups. This gives a creamy base. - Blueberries: You need 1 cup. Fresh ones add great flavor. - Lemon: One lemon provides juice and zest. This adds brightness. - Honey or maple syrup: Just 2 tablespoons sweetens the yogurt. - Granola: One cup gives a crunchy layer. Choose your favorite kind. - Mint leaves: Use these as a garnish if desired. They add color. - You can add other fruits like strawberries or bananas. - Nut butter can give extra creaminess and flavor. - Use flavored yogurt instead of plain for a twist. - Consider coconut flakes for a tropical touch. - Chia seeds can offer added nutrients and texture. Start by mixing the Greek yogurt in a bowl. Add the zest of one lemon for a bright flavor. Next, squeeze in the juice from that lemon. This adds tartness and freshness. Sweeten your yogurt with honey or maple syrup. Stir everything together until it is smooth and creamy. This lemon yogurt is a key part of your parfait. Take clear glasses or jars for a beautiful view of your layers. Begin with about 2-3 tablespoons of the lemon yogurt at the bottom. This gives a nice base. Next, add a layer of fresh blueberries on top. Use about 2-3 tablespoons for each layer. Then, sprinkle about 2 tablespoons of granola over the blueberries. This adds a nice crunch. Repeat the layers, ending with lemon yogurt, blueberries, and granola on top. Garnish your parfaits with a fresh mint leaf for a pop of color. This small touch makes your dish look even better. Chill the parfaits in the fridge for at least 30 minutes. This helps the flavors blend together. Serve in clear glasses to show off the pretty layers. You can even add a lemon wedge or an extra blueberry on the rim for a fun touch. Enjoy your delicious and refreshing treat! To make the yogurt mixture smooth, use thick Greek yogurt. I like to mix in lemon juice and zest for a fresh flavor. This gives the yogurt a bright taste. Sweeten it with honey or maple syrup. Adjust the sweetness to your liking. Taste as you go. The goal is creamy and delicious yogurt. For the best look, use clear glasses or jars. Start with 2-3 tablespoons of yogurt at the bottom. This creates a nice base. Next, add 2-3 tablespoons of fresh blueberries. Then sprinkle about 2 tablespoons of granola for crunch. Repeat these layers until the glass is full. Finish with a dollop of yogurt, a few blueberries, and some granola on top. This makes each parfait look stunning. To impress your guests, garnish with a sprig of fresh mint. Add a lemon wedge or a blueberry on the rim for flair. Chill your parfaits for at least 30 minutes before serving. This helps the flavors blend. Serving in clear glasses shows off the layers, making it a feast for the eyes. {{image_2}} You can make this parfait even healthier. Try using sugar substitutes like stevia or monk fruit. These keep sweetness without extra calories. If you need a gluten-free option, use gluten-free granola. It tastes great and keeps the parfait crunchy. Want to change up the flavor? Add different fruits like raspberries, strawberries, or peaches. Each fruit brings its own taste and color. You can also mix in a splash of vanilla extract for a deeper flavor. This simple twist makes it fun and fresh. Seasonal fruits add a fun touch. In summer, use fresh peaches or cherries. In fall, try apples or pears. Each season brings new flavors. You can also switch the lemon for lime or orange for a different zing. This keeps your parfait exciting all year round. To store your parfaits, cover them tightly with plastic wrap or a lid. Keep them in the fridge. This will help keep them fresh and tasty. If you made them in clear jars, they look nice too! These parfaits last up to two days in the fridge. After that, the granola may get soggy. For best taste, eat them within this time. The fruit and yogurt stay fresh, but the texture changes over time. You don’t need to heat these parfaits. They taste best cold. If you notice the granola is soft, add a little more right before serving. This way, you keep that crunchy texture. Enjoy your parfaits chilled for the best flavor! Yes, you can use frozen blueberries. They work well in parfaits. Just remember to thaw them first. This helps keep the yogurt from getting too watery. Frozen blueberries may not be as firm as fresh ones. But they still add great flavor and color. To make this parfait dairy-free, swap Greek yogurt for a plant-based yogurt. You can use almond, coconut, or soy yogurt. These options provide a creamy texture. They also blend well with lemon juice and zest. Just make sure the plant-based yogurt is unsweetened. This keeps the parfait from becoming too sweet. You can sweeten the yogurt with honey or maple syrup. Both options add a nice flavor. Start with two tablespoons and taste. If you want it sweeter, add a bit more. For a sugar-free option, try agave syrup or a sugar substitute. In this article, we explored how to make tasty blueberry lemon yogurt parfaits. We went through the key ingredients, from the yogurt to the layers of fruit. I shared step-by-step tips for building the parfait and making it look great. You learned tricks for the best taste and texture, as well as fun variations. Remember to store your parfaits well to keep them fresh. Enjoy creating your own parfaits with these easy steps!

Blueberry Lemon Yogurt Parfaits Easy and Fresh Treat

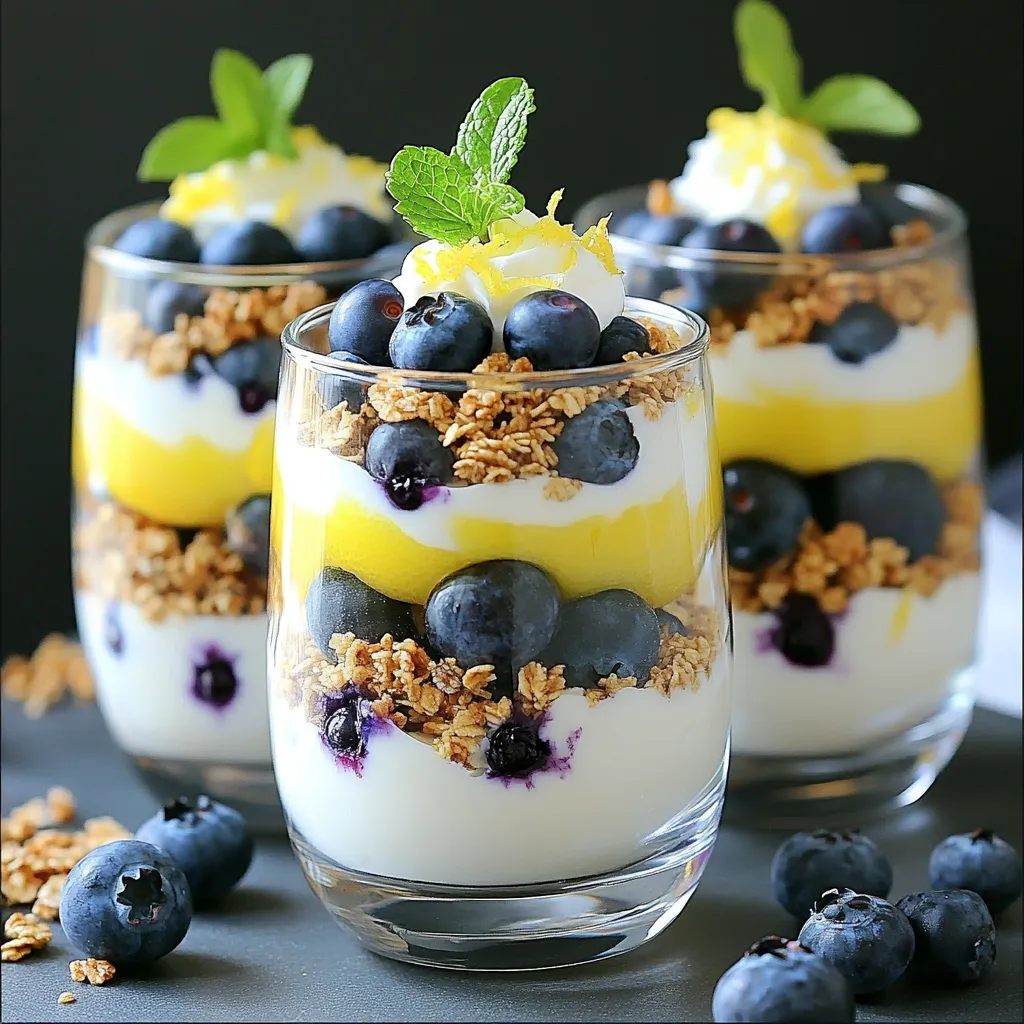
Looking for a refreshing treat? These Blueberry Lemon Yogurt Parfaits are the perfect solution! This easy recipe combines tangy lemon

To make a tasty Mediterranean quinoa salad, gather these main ingredients: - 1 cup quinoa, rinsed - 2 cups vegetable broth or water - 1 cup cherry tomatoes, halved - 1 cucumber, diced - 1/2 red onion, finely chopped - 1 bell pepper (red or yellow), diced - 1 cup Kalamata olives, pitted and halved - 1 cup feta cheese, crumbled - 1/4 cup fresh parsley, chopped - 2 tablespoons olive oil - 1 tablespoon lemon juice - 1 teaspoon dried oregano - Salt and pepper to taste These ingredients bring bright colors and fresh flavors. The quinoa adds protein and fiber. Feta cheese gives a creamy taste, while veggies create crunch and nutrition. You can customize your salad with these optional toppings and garnishes: - Avocado slices - Chopped nuts, like almonds or walnuts - Fresh herbs, such as mint or basil - Extra lemon zest for brightness These extras can make your salad unique and even more delicious. You can mix and match based on what you enjoy. Each serving of this salad offers: - Calories: 290 - Protein: 10g - Carbohydrates: 30g - Fiber: 6g - Fat: 15g This salad is a healthy choice. It is packed with nutrition and great for any meal. Eating it brings many benefits, like energy and health. To start, take 1 cup of rinsed quinoa. Place it in a medium saucepan. Pour in 2 cups of vegetable broth or water. Bring this mixture to a boil on medium-high heat. Once boiling, reduce the heat to low. Cover the saucepan and let it simmer for about 15 minutes. The quinoa will absorb the liquid and become fluffy. When it's done, remove it from the heat and let it cool. While the quinoa cools, grab a large bowl. In it, add 1 cup of halved cherry tomatoes, 1 diced cucumber, and 1/2 finely chopped red onion. Next, toss in 1 diced bell pepper, 1 cup of halved Kalamata olives, and 1 cup of crumbled feta cheese. This mix gives a great blend of colors and flavors. For the dressing, take a small bowl. Whisk together 2 tablespoons of olive oil, 1 tablespoon of lemon juice, and 1 teaspoon of dried oregano. Add salt and pepper to taste. This dressing ties all the flavors together. Once the quinoa has cooled, add it to the large bowl with the veggies and feta. Drizzle the dressing over the salad. Toss gently until everything is combined. Taste the salad and adjust the seasoning if needed. Chill it in the fridge for at least 30 minutes. This helps the flavors meld beautifully. To cook quinoa well, rinse it first. This removes the bitter taste. Use a medium saucepan. Combine one cup of rinsed quinoa with two cups of vegetable broth or water. Bring it to a boil over medium-high heat. Then lower the heat, cover, and simmer for 15 minutes. The quinoa should be fluffy when done. Let it cool before mixing it into the salad. Taste is very important. I like to add salt and pepper to my quinoa salad. Start with a pinch of salt. Add a bit of pepper, too. You can also adjust the lemon juice. More lemon juice gives a fresh zing. Don’t forget the oregano! It adds a nice Mediterranean flavor. Keep tasting until you find what you love. Serving is key to enjoying your salad. You can use a large bowl to make it look inviting. For a personal touch, serve it in individual plates. Sprinkle extra feta on top for a pretty look. A sprig of parsley adds a nice pop of color, too. This makes the dish feel special and ready for guests. {{image_2}} You can boost the protein in your Mediterranean quinoa salad easily. Try adding grilled chicken or shrimp. You can also use chickpeas for a plant-based option. Just toss them in when mixing the salad. This addition makes the dish more filling and nutritious. This salad is naturally vegetarian. To make it vegan, swap the feta cheese for a vegan version. You can use tofu or a mix of nuts for added texture. These changes keep the flavor while fitting your diet needs. If you want to mix things up, try different dressings. A balsamic vinaigrette adds a sweet touch. A yogurt-based dressing provides creaminess. Experiment with your favorite flavors to find the perfect match. Dressing choices can change the whole vibe of your salad! Store your Mediterranean quinoa salad in an airtight container. It keeps well in the fridge for up to three days. Make sure to cover it tightly. This helps keep the salad fresh and tasty. If you notice any liquid, just stir it back in. You can freeze the quinoa salad if you want to save some for later. Use a freezer-safe container. It’s best to freeze it without the feta cheese. This cheese does not freeze well and can become crumbly. The salad can last in the freezer for up to three months. When ready to eat, thaw it in the fridge overnight. Reheat only the quinoa if you want to warm it up. You can microwave it for about one minute. Stir it halfway to heat evenly. If you want, add fresh lemon juice or olive oil after reheating. This keeps the flavors bright and fresh. Avoid reheating the entire salad, as it can lose its crunchy texture. Yes, you can use cooked quinoa. Just make sure it is cool. If using cooked quinoa, reduce the cooking time. You want to mix it with fresh veggies and feta. This makes the salad quick and easy. If you want to swap feta, try goat cheese or cottage cheese. Both add a nice flavor. You can also use vegan cheese for a dairy-free option. Just choose a cheese that crumbles well. This keeps the salad tasty and fresh. This salad stays good for about three to five days. Store it in an airtight container. The flavors will meld and taste even better over time. Just be sure to check for freshness before eating. This blog post shared how to make a tasty Mediterranean quinoa salad. We covered ingredients, step-by-step cooking, and fun variations. You learned tips for perfect quinoa and fresh dressings. Remember, you can add proteins or change the dressing to suit your taste. Store leftovers well and enjoy them later. This salad is a healthy choice for any meal. Keep it simple and enjoy every bite!

Mediterranean Quinoa Salad with Feta Fresh Delight

If you’re craving a fresh and tasty meal, look no further than my Mediterranean Quinoa Salad with Feta. This vibrant

- 3 ripe bananas, mashed - 1/3 cup melted coconut oil (or vegetable oil) - 1/2 cup brown sugar - 1 large egg, beaten - 1 teaspoon vanilla extract - 1 teaspoon baking soda - Pinch of salt - 1 cup all-purpose flour - 1/2 cup chocolate chips (dark or semi-sweet) - Optional: 1/2 teaspoon cinnamon The key to great muffins lies in the ingredients. The ripe bananas give the muffins their rich flavor and moisture. Using coconut oil adds a hint of sweetness. Brown sugar enhances the taste with its depth. The egg binds the mix, while baking soda helps it rise. - Coconut oil alternatives: You can use vegetable oil or melted butter. Both work well. - Sugar substitutes: For a healthier option, try using honey or maple syrup. Adjust the liquid in your mix if using these. - Vegan alternatives for egg: Flaxseed meal mixed with water can replace the egg. Use 1 tablespoon of flaxseed meal with 2.5 tablespoons of water. Let it sit for a few minutes to thicken. These substitutions keep your muffins tasty, while allowing flexibility for your diet. Always feel free to experiment with what you have on hand! - Preheat your oven to 350°F (175°C). - Line a muffin tin with paper liners or grease it with oil. - In a large bowl, mash the ripe bananas. - Mix in the melted coconut oil until they blend well. - Add brown sugar, the beaten egg, and vanilla extract. Stir until smooth. - Sprinkle the baking soda and salt over this mixture. - Gently mix them in to avoid overmixing. - Gradually add the flour to the wet mix. - Fold in chocolate chips carefully. Make sure they spread evenly. - Divide the batter into your muffin tin. Fill each cup about 3/4 full. - Bake for 18-22 minutes. Use a toothpick to check if they are done. - If the toothpick comes out clean, they're ready! - Let the muffins cool in the tin for 5 minutes. - Finally, move them to a wire rack to cool completely. To make sure your muffins stay moist, always use ripe bananas. Ripe bananas have more sugar and flavor. They add natural sweetness and moisture. Aim for bananas with brown spots for the best taste. Mixing is key to texture. When you combine ingredients, do it gently. Overmixing can make muffins tough. Mix just until you see no flour. The batter should still be a bit lumpy. This keeps your muffins light and soft. To boost flavor, consider adding spices. A little cinnamon or nutmeg adds warmth. You only need half a teaspoon for a nice touch. These spices pair well with chocolate and bananas. Enhancing chocolate flavor is also fun. Try using dark chocolate chips for a richer taste. You can even fold in some cocoa powder. This will deepen the chocolate flavor in every bite. Serving your muffins well makes a big difference. Warm muffins taste best with coffee or tea. They create a cozy vibe. You can also sprinkle some extra chocolate chips on top. This adds a nice touch. For a pretty display, use a decorative cake stand. Arrange the muffins neatly. A dusting of powdered sugar can make them look fancy. These small details make your muffins even more inviting. {{image_2}} To make these muffins gluten-free, use a mix of flours. I suggest almond flour and coconut flour. You can also use gluten-free all-purpose flour. If you pick a gluten-free flour, you may need to change the liquid. Add a bit more milk or water to keep the muffins moist. For a vegan version, you will need a few changes. Replace the egg with 1/4 cup of unsweetened applesauce. You can also skip the egg and use a flax egg instead. To make a flax egg, mix one tablespoon of flaxseed meal with three tablespoons of water. Let it sit until it thickens. Baking time may change slightly, so check for doneness around 20 minutes. You can add nuts, like walnuts or pecans, for extra crunch. If you prefer fruit, try adding chopped apples or berries. You can also change the chocolate. Use white chocolate or milk chocolate for a different taste. Feel free to mix in spices like cinnamon or nutmeg for a warm kick. These twists will make your muffins even more fun! Store your muffins at room temperature. Place them in an airtight container. This keeps them soft and tasty. If you want to keep them longer, you can use the fridge. Just know that the fridge can dry them out. To keep your muffins fresh: - Wait until they cool completely before storage. - Use parchment paper to separate layers if stacking. - Add a slice of bread in the container. It helps keep muffins moist. Freezing your muffins is a great way to save them. First, let them cool down. Wrap each muffin in plastic wrap. Then, place them in a freezer bag. Make sure to squeeze out as much air as you can. This helps prevent freezer burn. For thawing and reheating: - Take a muffin out and let it sit at room temperature for about an hour. - You can also microwave it for 15-20 seconds to warm it up. - Enjoy them warm for the best taste. Yes, you can! Some great egg alternatives include: - Flaxseed meal: Mix 1 tablespoon of flaxseed meal with 2.5 tablespoons of water. Let it sit for 5 minutes. - Applesauce: Use 1/4 cup of unsweetened applesauce for each egg. - Mashed banana: You can mash another banana, about 1/4 cup, to replace one egg. These options keep your muffins moist and add flavor! To keep your muffins from sticking, follow these tips: - Grease the pan: Use a generous amount of coconut oil or vegetable oil to coat the muffin tins. - Use liners: Paper liners are a great option. They make clean-up easy and help prevent sticking. - Flour the pans: After greasing, lightly dust the pans with flour. This adds an extra barrier against sticking. These steps will help you enjoy every tasty bite! Overripe bananas are versatile! Here are some fun ideas: - Smoothies: Blend them into your favorite smoothie recipe for natural sweetness. - Pancakes: Mash and mix into pancake batter for a delicious twist. - Oatmeal: Stir them into hot oatmeal for added flavor and creaminess. These options keep your bananas from going to waste while adding taste to your meals! You now have a complete guide for chocolate chip banana muffins. From the right ingredients to mixing and baking, each step aids you in making tasty muffins. Remember the tips for moistness and flavor. Consider trying variations to keep things exciting. You'll find great joy in baking and sharing these muffins with friends and family. Store them well, and they'll stay fresh for longer. Enjoy your baking journey!

Chocolate Chip Banana Bread Muffins Moist and Tasty

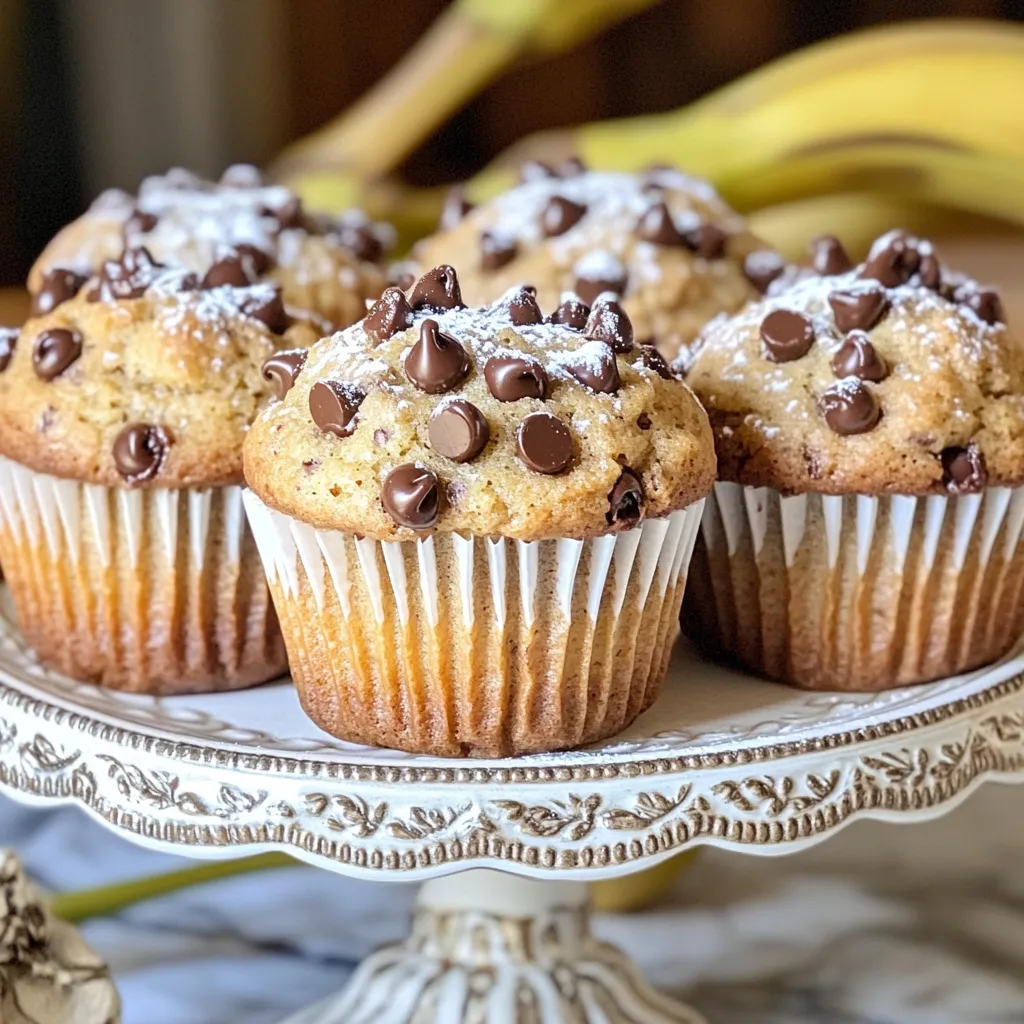
Are you ready to bake the most delicious Chocolate Chip Banana Bread Muffins? These muffins are soft, moist, and packed

To make Sparkling Cranberry Orange Punch, you need the following fresh and vibrant ingredients: - 4 cups cranberry juice - 2 cups orange juice (freshly squeezed for best flavor) - 1 liter sparkling water or club soda - 1/2 cup simple syrup (or to taste) - 1 orange, sliced - 1 cup fresh cranberries (frozen is fine if fresh are unavailable) - Mint leaves for garnish These ingredients come together to create a delightful drink. The cranberry juice gives a tart flavor. The orange juice adds sweetness and brightness. Together, they make a perfect base. The sparkling water or club soda adds a fun fizz. I love using freshly squeezed orange juice. It makes the punch taste fresh and lively. You can adjust the sweetness with simple syrup. Just taste as you mix. The orange slices and cranberries not only taste great, but they also look beautiful in the punch. They float and add color. Finally, mint leaves on top give a refreshing aroma. This punch is perfect for gatherings. Enjoy every sip! - Combine cranberry juice and orange juice: Start by pouring 4 cups of cranberry juice into a large punch bowl. Then, add 2 cups of freshly squeezed orange juice. This mix brings a bright and tangy flavor. - Stir in simple syrup and taste for sweetness: Next, add 1/2 cup of simple syrup. Mix well and taste the punch. Adjust the syrup to fit your sweetness level. This step makes the punch just right for you. - Add sliced orange and fresh cranberries: Now, slice one orange and add the slices to the bowl. Toss in 1 cup of fresh cranberries. They add color and a burst of flavor to your drink. - Pour in sparkling water or club soda before serving: Just before serving, slowly pour in 1 liter of sparkling water or club soda. This keeps the fizz alive, making your punch refreshing. - Gently stir and serve over ice: Finally, gently stir to mix all the ingredients. Be careful not to lose the bubbles! Serve the punch in glasses filled with ice. Enjoy the festive taste and beautiful look of your sparkling cranberry orange punch! To modify the simple syrup, start small. Add a little syrup, then taste. If it’s not sweet enough, add more. You can also use honey or agave syrup. These can add a different flavor. For a no-calorie option, try stevia or monk fruit sweeteners. They blend well and keep the punch light. Pour the sparkling water slowly. This helps keep the fizz alive. If you pour too fast, it will lose bubbles. Serve the punch immediately after mixing. This keeps it fresh and sparkling. If you wait too long, the fizz will fade. Garnish your punch bowl with orange slices and cranberries. This makes it look festive and inviting. You can also add mint leaves for a pop of color. For serving glasses, use clear ones to show off the punch. Fun glassware adds charm to your drink. Try mason jars or tall cocktail glasses for a unique touch. {{image_2}} You can easily change the flavor of your punch. Try adding other juices, like pineapple or grape. These juices add a sweet twist. You can also infuse your punch with herbs. Rosemary or basil gives it a fresh taste. Just add a few sprigs while mixing. If you want an adult drink, add some spirits. Vodka blends well and keeps the punch light. Champagne adds a nice bubbly touch. Just pour in the desired amount before serving. This makes for a fun party drink. Seasonal edits can make your punch more festive. For winter holidays, add a pinch of cinnamon. It brings warmth and spice to the drink. You can also use pomegranate for a pop of color. This change makes the punch not only tasty but also beautiful. You can prepare this punch in advance. Start by mixing the cranberry juice and orange juice in a large bowl. Add the simple syrup, tasting as you go. You can slice the orange and add the fresh cranberries. Cover the bowl tightly and store it in the fridge. This way, the flavors blend well. Just before serving, add the sparkling water for fizz. If you have leftover punch, store it in an airtight container. This keeps it fresh and prevents spills. The punch can last up to three days in the fridge. However, the longer it sits, the less fizzy it gets. If you notice it losing bubbles, just add more sparkling water. You can freeze some components of your punch. Freeze the fresh cranberries in a single layer on a baking sheet. Once frozen, transfer them to a bag or container. You can also freeze orange juice in ice cube trays. When ready to use, just thaw them in the fridge. This adds a cool twist to your punch when serving! Sparkling Cranberry Orange Punch is a fun drink for any party. It blends tart cranberry juice with sweet orange juice. The mix gives a bright red color and a refreshing taste. People love to serve this punch at holidays, brunches, or gatherings. You can enjoy it with or without alcohol. The fizzy water adds a nice sparkle, making it festive. Yes, you can prepare this punch a day in advance. Just mix the cranberry juice, orange juice, and simple syrup. Add the sliced orange and cranberries. Store the mix in the fridge. When you are ready to serve, pour in the sparkling water. This keeps the fizz fresh and bubbly. If you need a substitute for cranberry juice, you can try pomegranate juice. It has a similar tart flavor. Another option is cherry juice for a sweeter taste. You can also mix apple juice with a bit of lemon juice. This creates a nice balance of sweet and tangy flavors. For other beverage ideas, try sparkling lemonade or ginger ale to add fizz and flavor. This blog post shared how to create a tasty Sparkling Cranberry Orange Punch. You learned about the ingredients, preparation steps, and tips for sweetness, fizz, and presentation. I also introduced variations and storage ideas. In making this punch, you can customize flavors and even add a kick with alcohol. Enjoy making this drink for friends and family, and feel free to get creative! Your next gathering can be even more special with this refreshing punch.

Sparkling Cranberry Orange Punch Festive and Refreshing

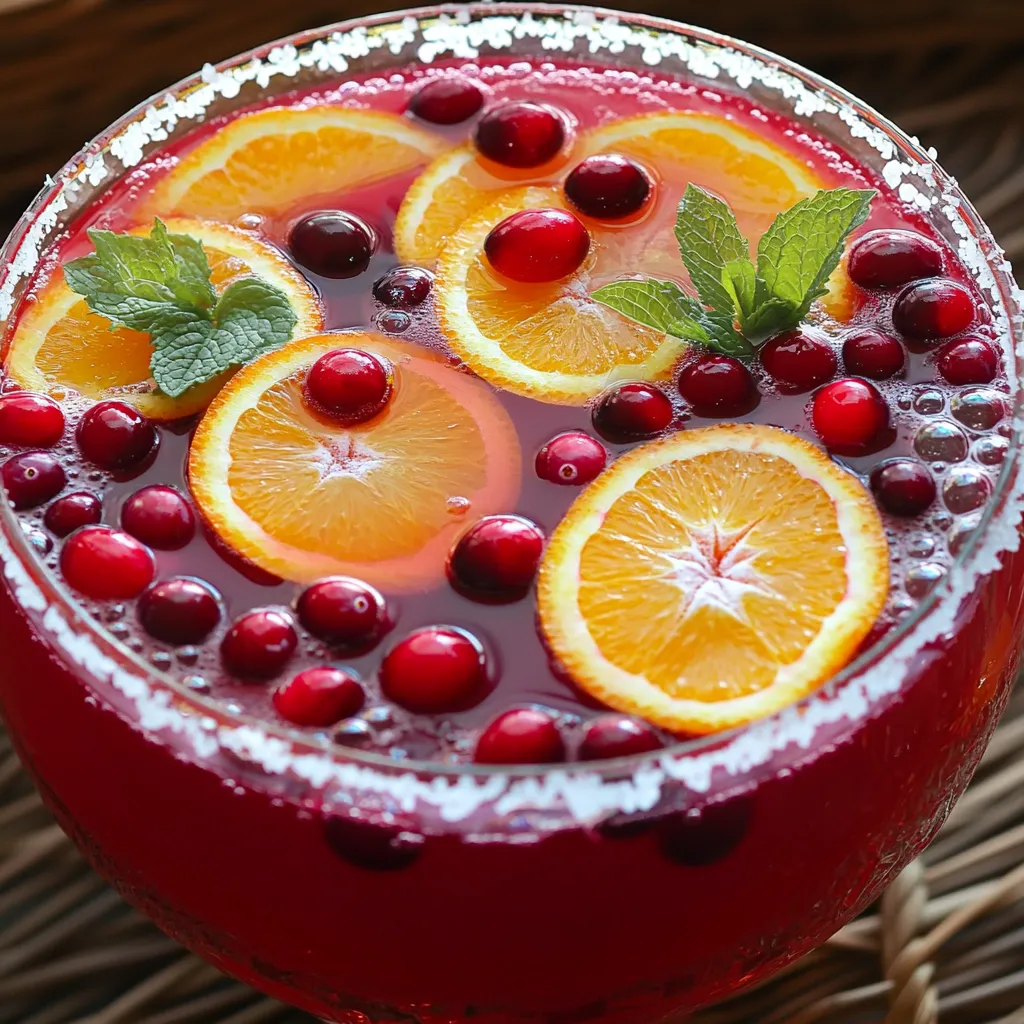
Looking for a festive drink that will wow your guests? Sparkling Cranberry Orange Punch is the perfect blend of sweet

- 1 cup coconut milk (canned or carton) - 1/4 cup chia seeds - 2 tablespoons honey or maple syrup - 1 ripe mango, diced - 1 teaspoon vanilla extract - Pinch of salt - Toasted coconut flakes (for garnish) - Fresh mint leaves (for garnish) This recipe shines with simple yet powerful ingredients. First, coconut milk adds creaminess. You can use either canned or carton milk. Both work well. Next, chia seeds are the magic that thickens the pudding. They soak up liquid and create a nice texture. For sweetness, pick honey or maple syrup. I suggest starting with two tablespoons. You can add more if you like it sweeter. A ripe mango gives a bright flavor and a lovely color. Dice it into small pieces for easy layering. You’ll also need vanilla extract. It adds depth to the pudding. A pinch of salt balances the sweetness. For a special touch, use toasted coconut flakes on top for crunch. Fresh mint leaves add a pop of color and flavor. Gather these ingredients, and you are ready to make a refreshing treat! Start by grabbing a medium bowl. Pour in 1 cup of coconut milk. Next, add 1/4 cup of chia seeds. These tiny seeds will help give the pudding its unique texture. Now, sweeten the mix with 2 tablespoons of honey or maple syrup. You can adjust the amount based on how sweet you like it. Then, add 1 teaspoon of vanilla extract for flavor and a pinch of salt to enhance the taste. Whisk everything together until it is well combined. After mixing, let the chia blend sit for about 10 minutes. This step is key to preventing clumping. Give it another good whisk to mix the seeds evenly. Cover the bowl with plastic wrap or a lid. Place it in the fridge for at least 4 hours, or overnight if you can wait. This waiting period allows the chia seeds to absorb the coconut milk and turn the mix into a pudding-like texture. When the pudding is ready, stir it well. If it seems too thick, you can add a little extra coconut milk. Now comes the fun part—layering! Take small cups and start with a layer of chia pudding. Then add a layer of diced mango. Repeat these layers until the cups are full. To finish, sprinkle some toasted coconut flakes on top. Add a few fresh mint leaves for color and a burst of flavor. Enjoy your beautiful and tasty dessert! Whisking is key to making smooth chia pudding. When you first mix the coconut milk and chia seeds, whisk well. This helps spread the seeds evenly. If you don’t whisk enough, the seeds clump together. After letting the mix sit for ten minutes, whisk again. This step breaks up any clumps that may form. To adjust the thickness of your pudding, simply stir in more coconut milk. You can keep adding until you reach your desired texture. Remember, some like it thick, while others prefer it a bit runny. Customizing sweetness is easy with this recipe. You can add more honey or maple syrup if you like it sweeter. Taste the mixture before it sets to find your perfect balance. If you want alternatives to honey or maple syrup, consider using agave syrup or stevia. These options can give you the sweetness you want without extra calories. Presentation makes a big difference. Layer the chia pudding and diced mango in clear cups. This way, you can see the lovely colors. Start with a layer of pudding, then add a layer of mango. Repeat until the cups are full. For added flavor, sprinkle toasted coconut flakes on top. Fresh mint leaves also give a nice touch. They add color and a fresh flavor that brightens each bite. You can serve this pudding with a side of yogurt or fresh fruit for a balanced treat. {{image_2}} You can change the taste of your mango coconut chia pudding easily. Try adding other fruits like berries or bananas. They add color and flavor. Berries give a sweet-tart taste, while bananas add creaminess. You can also infuse flavors into your pudding. Consider adding lime juice or grated ginger. Lime gives a zesty kick, while ginger adds warmth. These simple swaps create exciting new tastes. This recipe can fit many diets. To keep it vegan, use maple syrup instead of honey. This makes it plant-based and sweet. For gluten-free options, rest easy. All the main ingredients are naturally gluten-free. If you're watching carbs, you can reduce the honey or maple syrup. This keeps it low in sugar and carbs. Layering can make your pudding more fun. Besides mango, try using layers of other fruits or yogurt. For example, add a layer of fresh strawberries or kiwi. It creates a colorful and tasty dessert. You can also make a parfait-style dessert. Alternate layers of chia pudding and fruits in a tall glass. This adds a lovely look and makes it more exciting to eat. To keep your mango coconut chia pudding fresh, store it in air-tight containers. Use small jars or cups that seal well. This will prevent the pudding from absorbing odors in the fridge. The recommended shelf life is about 4 to 5 days. After that, the texture might change, and it may lose its flavor. You can freeze the pudding, but there are pros and cons. Freezing can extend its life for up to a month. However, the texture may change. When you thaw it, the pudding might become a bit grainy. To thaw, move it to the fridge for a few hours. Stir well before serving to improve the texture. If you have leftovers, get creative! You can use the pudding in smoothies. It adds creaminess and nutrition. Scoop some into a bowl and top with fresh fruit for a quick snack. You can also transform it into a parfait. Layer it with granola and more fruit for a delightful treat. Chia pudding can last up to five days in the fridge. To keep it fresh, store it in an airtight container. This helps prevent the pudding from absorbing other smells in your fridge. If you notice any changes in color or smell, it's best to toss it. Yes, you can use other milk types like almond, oat, or soy milk. Each milk will change the taste slightly. Almond milk gives a nutty flavor, while oat milk adds creaminess. Coconut milk makes it rich and tropical, but feel free to experiment. Just keep the same ratio of liquid to chia seeds. Chia pudding is very healthy. Chia seeds are high in fiber, protein, and omega-3 fatty acids. They help keep you full and support heart health. Coconut milk provides healthy fats and adds creaminess. This makes your dessert both tasty and nutritious. Enjoy this pudding as a smart snack or breakfast! Chia pudding is a fun and easy treat. You learned about tasty ingredients like coconut milk, chia seeds, and ripe mango. I shared steps to make it creamy and smooth. With tips on sweetness and variations, you can customize it to your taste. Remember, you can store your pudding for a week or freeze it for later. Enjoy experimenting with flavors and toppings. This dessert is not just delicious; it’s also healthy and satisfying. Make it your own, and savor every spoonful!

Mango Coconut Chia Pudding Cups Refreshing Delight

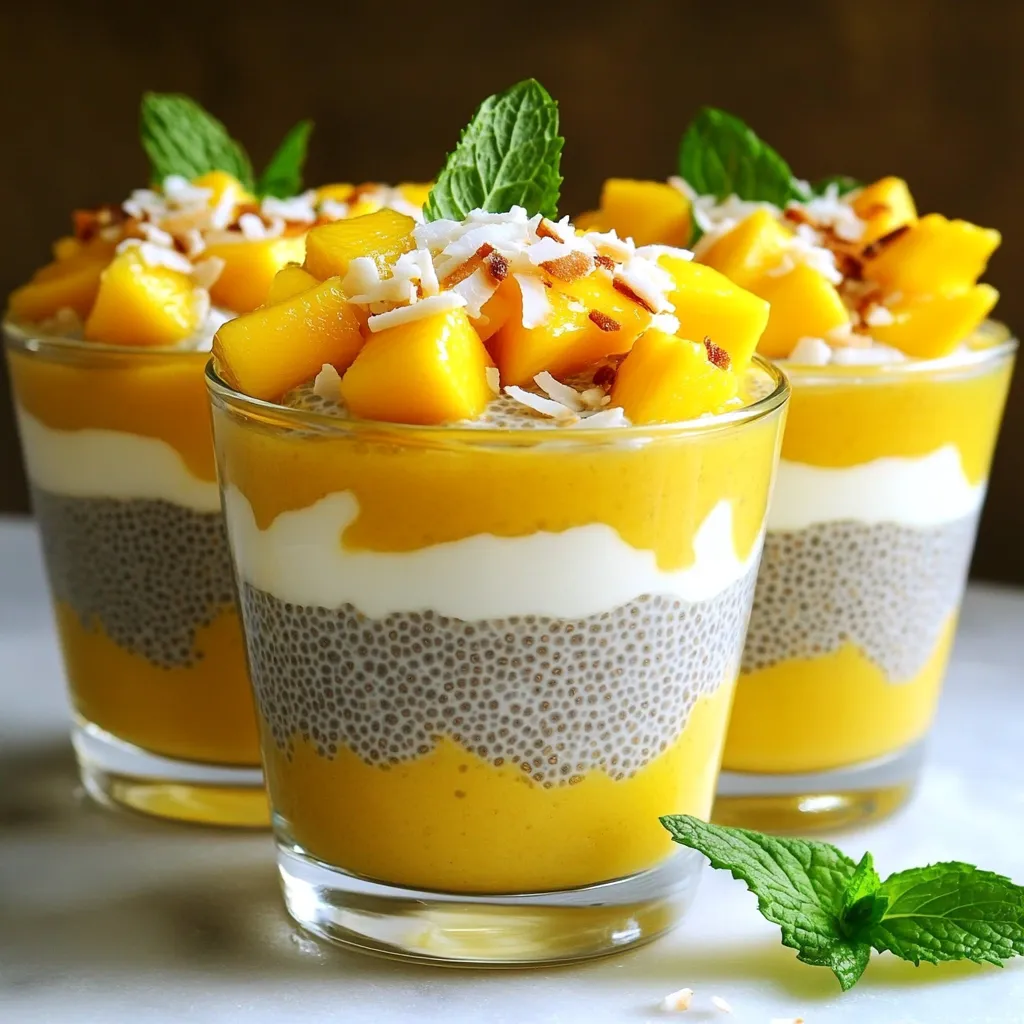
Are you ready to try a treat that’s both healthy and tasty? Mango Coconut Chia Pudding Cups are your answer!

- 2 slices of whole grain bread - 1 ripe avocado - 1 medium tomato, sliced - 1/4 cup fresh mozzarella balls (bocconcini) - Fresh basil leaves, a handful - 1 tablespoon balsamic glaze - 1 tablespoon extra virgin olive oil - Salt and pepper to taste For this Minute Caprese Avocado Toast, I gather a few simple yet fresh ingredients. First, I choose whole grain bread for a hearty base. Next, I pick a ripe avocado that feels soft when I press it gently. Fresh tomatoes add brightness, and I love the creaminess of mozzarella balls. Basil leaves bring a lovely aroma to the dish. I always look for fresh basil, as it makes a big difference. I drizzle balsamic glaze for a sweet touch. Extra virgin olive oil adds flavor and richness. Lastly, I sprinkle salt and pepper to enhance all the tastes. When I make this toast, each ingredient works together to create a quick and tasty meal. Start by toasting two slices of whole grain bread. Use a toaster or an oven. Toast until they turn golden brown and crisp. This takes about 3 to 5 minutes. Crispy bread holds the toppings well. While the bread toasts, grab a ripe avocado. Cut it in half and remove the pit. Scoop the flesh into a bowl. Mash it lightly with a fork. Leave it a bit chunky for great texture. Season the mashed avocado with salt and pepper. Add a drizzle of extra virgin olive oil. Mix everything well until combined. Now, take the toasted bread. Spread a layer of the seasoned avocado on each slice. Next, layer sliced tomatoes evenly over the avocado. Add fresh mozzarella balls on top of the tomatoes. Scatter fresh basil leaves for extra flavor. Finally, drizzle balsamic glaze over the assembled toast. Add a pinch of salt and pepper if desired. Enjoy your Minute Caprese Avocado Toast! Pick a ripe avocado for the best taste. A ripe avocado should feel slightly soft but not mushy. You can also check the color. A darker skin often means it is ripe. If you find a hard avocado, let it sit in a bowl with bananas. The bananas help it ripen faster. Toasting bread is simple but needs care. Use a toaster or a skillet. If using a toaster, set it to medium-high heat. Watch it closely to avoid burning. For a skillet, heat it on medium. Add a touch of olive oil for a crispier finish. Toast until golden brown. This will make your toast crunchy and tasty. You can serve your Minute Caprese Avocado Toast in many ways. Try adding a poached egg on top for extra protein. A sprinkle of red pepper flakes can add a nice kick. For a fresh twist, add sliced radishes or cucumber. Serve with a side salad for a light meal. Enjoy it as a quick breakfast or a healthy snack! {{image_2}} You can easily boost your Minute Caprese Avocado Toast with protein. Adding grilled chicken or shrimp works well. For a quick option, try sliced deli turkey or chicken. You can also use canned tuna for a tasty twist. These additions make the meal more filling and satisfying. If you want to make this dish vegan, it's simple! Swap the mozzarella for vegan cheese or leave it out entirely. You can add extra nuts or seeds for texture and protein. Try adding chickpeas or lentils for a hearty bite. This way, you keep the flavors while making it plant-based. To enhance the flavors, consider adding a few spices. A sprinkle of red pepper flakes gives heat. You can also try a dash of garlic powder for depth. Fresh herbs like oregano or thyme can add a new layer of taste. For a zesty kick, squeeze fresh lemon juice over the top. These tweaks keep your meal exciting every time you make it! If you have leftover avocado spread, store it in an airtight container. Press plastic wrap directly onto the spread to limit air exposure. This helps slow down browning. You can keep it in the fridge for up to two days. Remember, the fresher, the better! Assembled toast is best enjoyed fresh. If you must store it, wrap it loosely in foil. This keeps the toast from getting too soggy. You can store it in the fridge for one day. Just know it won’t taste as good as fresh. - Whole grain bread lasts about a week when stored properly. - A ripe avocado is best used within one to two days. - Fresh tomatoes can last up to a week in the fridge. - Mozzarella balls should be used within a week after opening. - Fresh basil stays good for about three days in the fridge. - Balsamic glaze lasts for months if kept in a cool, dark place. - Extra virgin olive oil has a shelf life of one to two years when stored away from light. By knowing how to store your ingredients, you can enjoy this tasty toast for longer! It takes about 10 minutes to make Minute Caprese Avocado Toast. You spend 5 minutes prepping and 5 minutes assembling. This quick meal fits perfectly into a busy day. You can enjoy it as breakfast, lunch, or a snack. Yes, you can use other types of bread. Sourdough, rye, or gluten-free bread work well too. Just make sure the bread is sturdy enough to hold the toppings. Toasting it gives it a nice crunch and flavor. You can use feta, goat cheese, or ricotta instead of mozzarella. Each cheese adds a different taste. Feta brings a tangy twist, while goat cheese adds creaminess. Choose what you like best to match your flavor. This blog post covered how to make Minute Caprese Avocado Toast. We reviewed the key ingredients, including whole grain bread and fresh basil. I shared step-by-step instructions for toasting, preparing, and assembling the dish. We discussed tips for selecting avocados and perfect toasting methods. I also shared variations, storage tips, and answered common questions. Enjoy your delicious toast! Experiment with flavors and make it your own.

Minute Caprese Avocado Toast Quick and Tasty Meal

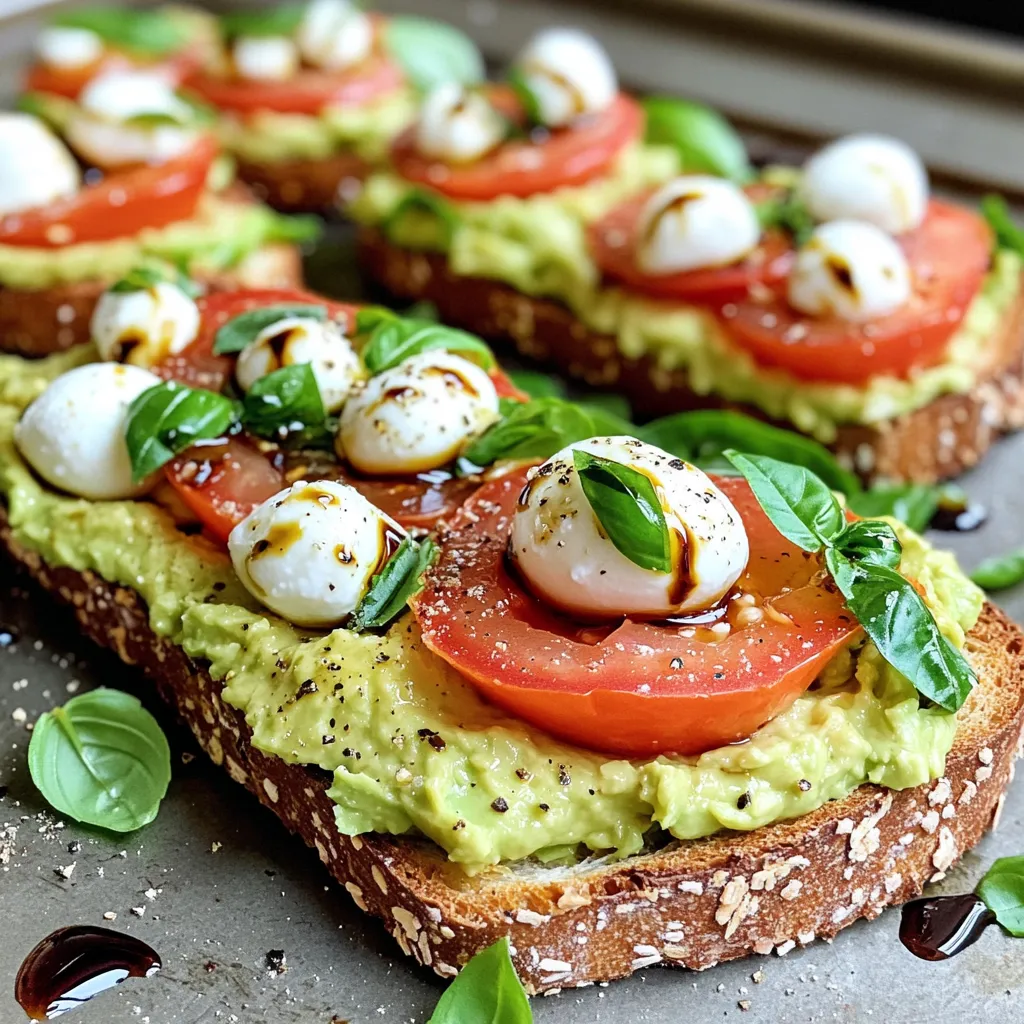
Are you hungry for a quick, tasty meal? Look no further! My Minute Caprese Avocado Toast is simple to make

Older posts
Newer posts
← Previous Page1 … Page13 Page14 Page15 … Page137 Next →

dsad

© 2025 Recipes Pursuit • Built with GeneratePress

Our Policies

  • Copyright Policy
  • Cookie Policy
  • GDPR Policy
  • Privacy Policy
  • Disclaimer
  • Terms Of Use

More Information

  • Home
  • About
  • Contact
  • Appetizers
  • Dessert
  • Dinner
  • Drinks
©2025, Recipes Pursuit About Back To Top