Skip to content
DisclaimerTerms Of UseGDPR PolicyCookie Policy

Recipes Pursuit

  • Home
  • Drinks
  • Appetizers
  • Dinner
  • Dessert
  • About
  • Contact
  • Privacy Policy
DisclaimerTerms Of UseGDPR PolicyCookie Policy

Emma Smith

- Mixed bell peppers (red, yellow, and green) - Zucchini - Red onion - Cherry tomatoes - Olive oil - Garlic powder - Smoked paprika - Salt and pepper - Whole wheat tortillas - Hummus (store-bought or homemade) - Fresh spinach or mixed greens - Crumbled feta cheese (optional) The main ingredients in this wrap are colorful and fresh. Mixed bell peppers bring sweetness and crunch. Zucchini adds a nice texture. Red onion gives a slight bite, and cherry tomatoes add juicy bursts of flavor. These veggies not only taste great, but they also pack a nutritious punch. For seasoning, I use olive oil to help the veggies roast nicely. Garlic powder adds depth, while smoked paprika gives a warm, smoky flavor. Salt and pepper enhance all the tastes, making each bite delicious. Whole wheat tortillas hold everything together. They are sturdy and healthy. Hummus acts as a creamy base. You can use store-bought or make your own. Fresh spinach or mixed greens provide a crisp layer. If you like, sprinkle crumbled feta cheese on top for a tangy finish. This wrap is colorful, healthy, and easy to make. Each ingredient adds something special to the dish. {{ingredient_image_1}} - Preheat the oven to 425°F (220°C). - In a large bowl, combine the sliced mixed bell peppers, zucchini, red onion, and cherry tomatoes. Season them well. Start by drizzling two tablespoons of olive oil over the veggies. Then, sprinkle one teaspoon of garlic powder and one teaspoon of smoked paprika. Add salt and pepper to taste. Toss the veggies until they are well coated in the oil and spices. This makes them full of flavor and ready for roasting. - Spread the seasoned vegetables on a baking sheet in a single layer. - Roast them in the oven for 20-25 minutes. Check the veggies halfway through and stir them for even cooking. You want them to be tender and slightly charred. This gives the wraps a nice depth of flavor and a pleasing texture. - Lay out the whole wheat tortillas on a clean surface. - Spread a generous layer of hummus over each tortilla, leaving a small border around the edges. Next, place a handful of fresh spinach or mixed greens over the hummus. Then add a layer of the roasted veggies on top. If you like, sprinkle some crumbled feta cheese over the veggies for an added kick. Carefully roll each tortilla up tightly, folding in the sides as you go. This helps keep all the tasty filling in. Finally, slice each wrap in half diagonally for easy eating. Enjoy your nutritious and easy meal! To know when your veggies are done, look for a few signs. They should be tender and have a slight char. This means they cooked well. Use a fork to poke them; if it goes in easily, they are ready. Even cooking is key to great roasted veggies. Spread them out on the baking sheet in a single layer. Make sure they don’t touch each other. This way, they roast evenly and get that tasty caramelization. Stir them halfway through cooking for the best results. Feel free to swap out vegetables based on what you like. Carrots, sweet potatoes, or broccoli also work well. You can mix and match for fun flavors. If you want a gluten-free option, use corn tortillas instead of whole wheat. They add a nice twist, and you will still enjoy the wrap. Presentation makes a big difference. Serve the wraps on a colorful platter. Add a small bowl of extra hummus for dipping. Garnish with fresh herbs like parsley or mint. This adds color and flavor! For dipping sauces, try tzatziki or a spicy yogurt sauce. These pair well with the roasted veggies and hummus. They add some zing to your meal! Pro Tips Fresh Veggies Matter: Always opt for fresh, seasonal vegetables for the best flavor and nutrition. Customize Your Hummus: Try different flavors of hummus, such as roasted red pepper or garlic, to add a twist to your wraps. Perfectly Rolled Wraps: To avoid filling spills, make sure to fold in the sides tightly while rolling. Leftover Love: Use any leftover roasted veggies in salads or grain bowls for a quick and delicious meal. {{image_2}} You can switch up the taste of your roasted veggie hummus wraps with different flavors. Try a Mediterranean twist. Add olives and sun-dried tomatoes to your wraps. These bring a salty and tangy flavor that pairs well with hummus. For a fun Southwest vibe, use black beans and corn. This mix adds protein and a nice crunch. You can also add some avocado for creaminess. Each variation makes your wrap unique and tasty. If you're looking for vegan-friendly options, you’re in luck! This recipe is already vegan. Just skip the feta cheese or use a dairy-free version. This keeps your wraps light and plant-based. For a low-calorie twist, use less hummus or a lighter variety. You can also add more veggies to bulk it up. Spinach and mixed greens not only add nutrients but can help keep calories lower too. Meal prepping these wraps makes lunch easy for the week. Store the wraps in airtight containers in the fridge. They stay fresh for a few days. You can make hummus in advance too. It keeps well in the fridge for a week. This way, you have everything ready to go when you want a quick meal. Just spread the hummus, add veggies, and roll up your wrap! To keep your Roasted Veggie Hummus Wraps fresh, wrap them tightly in plastic wrap. This helps keep air out and prevents sogginess. You can also place the wraps in an airtight container. Store them in the fridge for up to three days. If you have leftover roasted veggies, store them in a separate container, and they will last about four days. If you want to save some wraps for later, you can freeze them. Assemble the wraps without the fresh greens, as they do not freeze well. Wrap each one tightly in foil or plastic wrap, then place them in a freezer bag. They can stay frozen for up to three months. To thaw, simply place them in the fridge overnight. You can also microwave them for a quick meal, but check that they are heated through before eating. When stored properly, the roasted veggies last about four days in the fridge. Hummus can stay fresh for about a week, while whole wheat tortillas can last for a couple of weeks if kept sealed. Always check for signs of spoilage, like an off smell or mold, to ensure your food is safe to eat. You can use many spreads instead of hummus. Here are some options: - Guacamole: Creamy and rich flavor. - Tzatziki: A yogurt-based dip with cucumber and garlic. - Bean dip: Use black beans or white beans for a protein boost. - Avocado spread: Smooth and buttery, great for texture. - Cream cheese or vegan cream cheese: Adds a nice tang. Each of these spreads brings a unique taste. Feel free to mix and match based on your preference. Yes, Roasted Veggie Hummus Wraps are packed with nutrients. Here are their benefits: - Bell Peppers: High in vitamins A and C, good for skin and immunity. - Zucchini: Low in calories and high in water content, great for hydration. - Red Onion: Contains antioxidants that help fight inflammation. - Cherry Tomatoes: Rich in lycopene, which is good for heart health. - Whole Wheat Tortillas: Provide fiber, aiding in digestion. - Hummus: Offers protein and healthy fats, keeping you full longer. These wraps offer a balanced meal, rich in vitamins, fiber, and healthy fats. Yes, you can prepare these wraps in advance. Here are some tips: - Roast the vegetables ahead: Store them in an airtight container in the fridge. - Spread hummus on tortillas just before serving to keep them fresh. - Wrap tightly in foil or plastic wrap: This helps prevent them from drying out. - Use fresh greens last: Add spinach or mixed greens right before eating. Making these wraps ahead of time saves you effort and time during busy days. Enjoy the convenience! This blog post covered the tasty and healthy roasted veggie wraps. We looked at the main ingredients like mixed bell peppers, zucchini, and cherry tomatoes. Then, I shared easy steps for preparation and roasting. Don’t forget the customization options for flavor and nutrition. Finally, we explored tips on storing and meal prepping your wraps. Enjoy these wraps as a healthy snack or meal. You’re now ready to get creative in the kitchen!

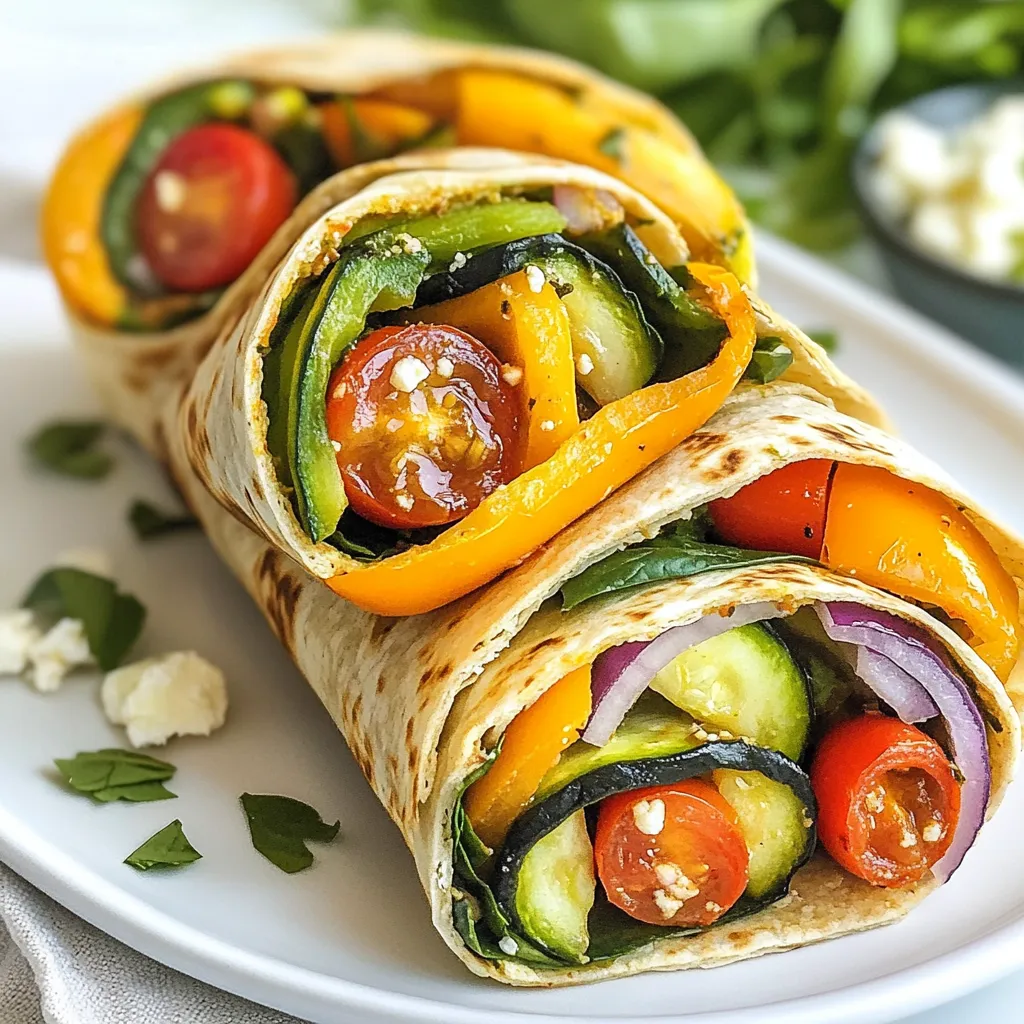
Roasted Veggie Hummus Wraps Nutritious Easy Meal

Looking for a quick and healthy meal? Roasted Veggie Hummus Wraps are the answer! Packed with colorful veggies and creamy

- 1 lb large shrimp, peeled and deveined - 8 oz linguine or spaghetti - 4 tablespoons unsalted butter - 3 tablespoons olive oil - 4 cloves garlic, minced - 1 teaspoon red pepper flakes - 1 lemon, juiced and zested - 1/4 cup fresh parsley, chopped - Salt and pepper to taste - Grated Parmesan cheese (optional, for serving) Gather these fresh ingredients for a tasty meal. Start with large shrimp. They add a sweet flavor and nice texture. Use linguine or spaghetti for the perfect pasta base. Unsalted butter gives a rich taste. Olive oil adds depth. Next, garlic brings a strong aroma and flavor. Red pepper flakes add just the right kick. Use a fresh lemon. Its juice brightens the dish, while zest adds more lemony goodness. Fresh parsley gives a lovely color and taste. Don’t forget salt and pepper to season. If you like, sprinkle Parmesan cheese on top. It melts well and adds creaminess. Each ingredient works together to create a delightful meal. {{ingredient_image_1}} - Bring a large pot of salted water to boil. - Add linguine or spaghetti and cook until al dente. - Reserve 1/2 cup of the pasta water, then drain and set aside. - In a large skillet, heat olive oil and 2 tablespoons of butter over medium heat. - Once the butter melts, add minced garlic and red pepper flakes. - Add the shrimp to the skillet. - Season the shrimp with salt and pepper. - Cook for about 2-3 minutes on each side until shrimp are pink and opaque. - Reduce heat to low. - Add lemon juice, lemon zest, and reserved pasta water to the skillet. - Stir to combine. - Add cooked pasta and remaining 2 tablespoons of butter. - Toss everything together until well combined and the butter melts. - Stir in chopped parsley. - Adjust seasoning if necessary. - Plate the shrimp scampi. - Garnish with additional parsley and Parmesan cheese if desired. To perfect the flavor, adjust the red pepper flakes based on your heat preference. Start with one teaspoon. If you like it spicy, add more. Fresh ingredients make a big difference too. Use fresh garlic and parsley for the best taste. Avoid overcooking shrimp. Cook them just until they turn pink and opaque, about 2-3 minutes on each side. For pasta, cook it until al dente. This means it should be firm to the bite. Reserve some pasta water before draining. It helps to make the sauce creamy. Pair shrimp scampi with a side salad or garlic bread. A fresh green salad balances the dish. As for wine, a crisp white wine works best. A Sauvignon Blanc or Pinot Grigio complements the flavors nicely. Enjoy your meal with these simple pairings for a complete experience. Pro Tips Use Fresh Shrimp: Fresh shrimp will enhance the flavor and texture of your dish. If using frozen shrimp, ensure they are fully thawed and patted dry before cooking. Perfect Pasta: To achieve al dente pasta, follow the package instructions closely and taste it a minute or two before the suggested cooking time is up. Adjust Heat Level: The red pepper flakes can be adjusted based on your heat preference. Start with a small amount, and add more if you like it spicier! Butter for Richness: Using both butter and olive oil gives you the best of both worlds—richness from the butter and a higher smoke point from the oil, preventing the butter from burning. {{image_2}} You can make this dish gluten-free. Simply swap the linguine or spaghetti for gluten-free pasta. Many brands offer great options. Look for ones made from rice, quinoa, or chickpeas. Cook them just like regular pasta. This way, everyone can enjoy the meal! Want to boost the dish's nutrition? Add some veggies! Spinach is an excellent choice. Toss in a handful during the last minute of cooking. It wilts quickly and adds color. Cherry tomatoes also work well. Halve them and add them when you cook the shrimp. They add a sweet burst of flavor. If you’re not in the mood for shrimp, no problem! You can use scallops instead. They cook quickly and have a nice, sweet taste. Chicken is another option. Just cut it into bite-sized pieces and cook until golden brown. Both choices will still match the garlic butter sauce perfectly! To store your leftover shrimp scampi, first let it cool to room temperature. Next, place it in an airtight container. This helps keep it fresh. You can store it in the fridge for up to three days. If you plan to eat it later, avoid leaving it out for too long. Keeping it chilled ensures safety and flavor. When reheating shrimp scampi, I recommend using a skillet. This method keeps the shrimp juicy. Heat the skillet over medium-low. Add a splash of water or broth to prevent sticking. Gently stir the shrimp for about five minutes. You can also use the microwave. If you choose this, cover the dish with a damp paper towel. Heat in short bursts, stirring in between, until warm. Yes, you can freeze shrimp scampi! To do this, let it cool completely. Then, place it in a freezer-safe container. Make sure to remove as much air as possible. It will keep well for up to three months. When ready to eat, thaw it overnight in the fridge. Reheat it gently on the stove or in the microwave. The shrimp may lose some texture, but the flavor will still be great. The best pasta for shrimp scampi is linguine or spaghetti. Both types hold sauce well and complement the shrimp. You can also use fettuccine or angel hair if you prefer. They all cook quickly and make a tasty dish. Yes, you can use frozen shrimp. Just make sure to thaw them first. You can soak them in cold water for about 15-20 minutes. Once thawed, peel and devein if needed. Using frozen shrimp saves time and works well in this recipe. Garlic butter shrimp scampi has a mild heat. The red pepper flakes add flavor without being too hot. You can adjust the spice by adding less or more flakes. For no heat, simply leave them out. You can serve shrimp scampi with a simple green salad or garlic bread. Both pair well with the rich flavors. Steamed vegetables or a light risotto also make great sides. They balance the meal and add freshness. This shrimp scampi recipe combines fresh ingredients for a quick, tasty meal. You learned how to cook shrimp perfectly, prepare pasta, and combine flavors. Don’t forget to adjust the heat to your liking. Adding veggies or trying different proteins can keep things exciting. Store leftovers right and you can enjoy it later. Follow these tips to impress family or guests. With practice, you can master this dish and make it your own. Enjoy the cooking journey!

Garlic Butter Shrimp Scampi Delightful and Easy Meal

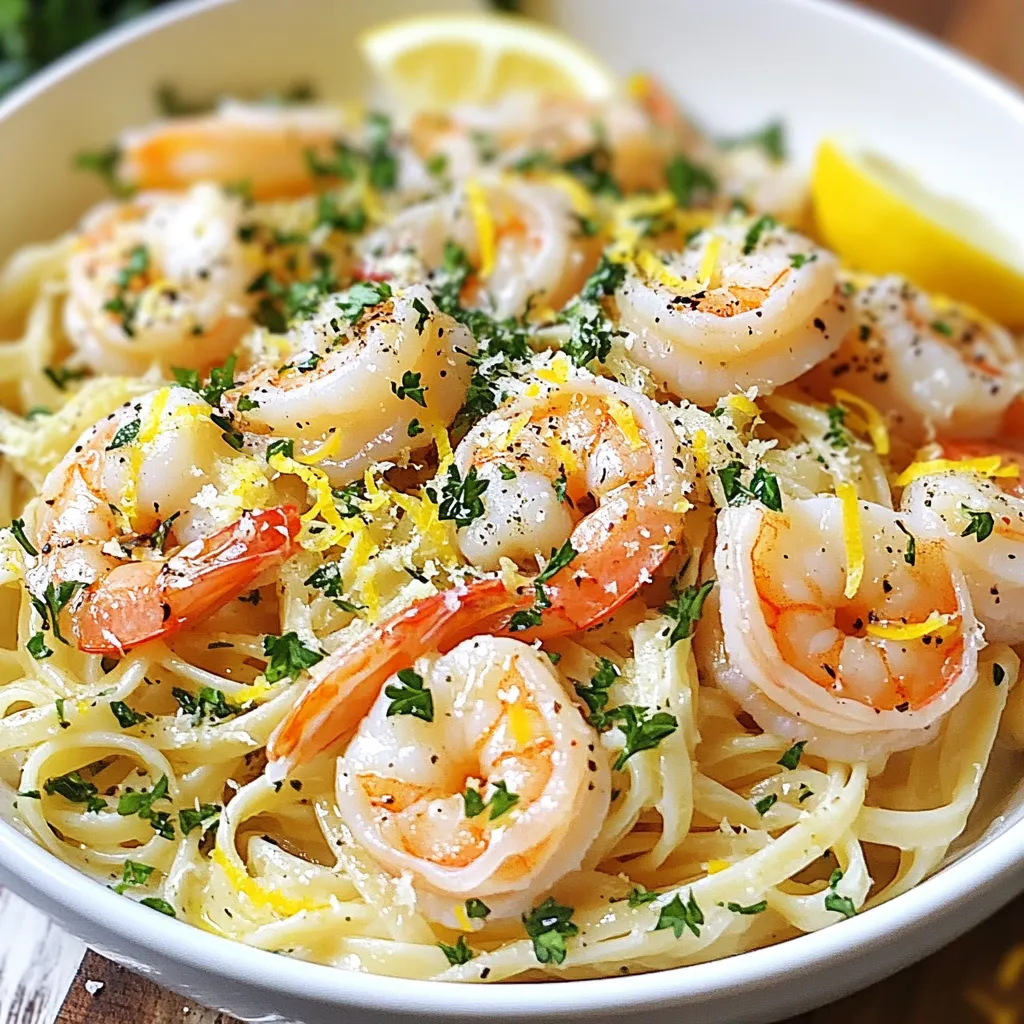
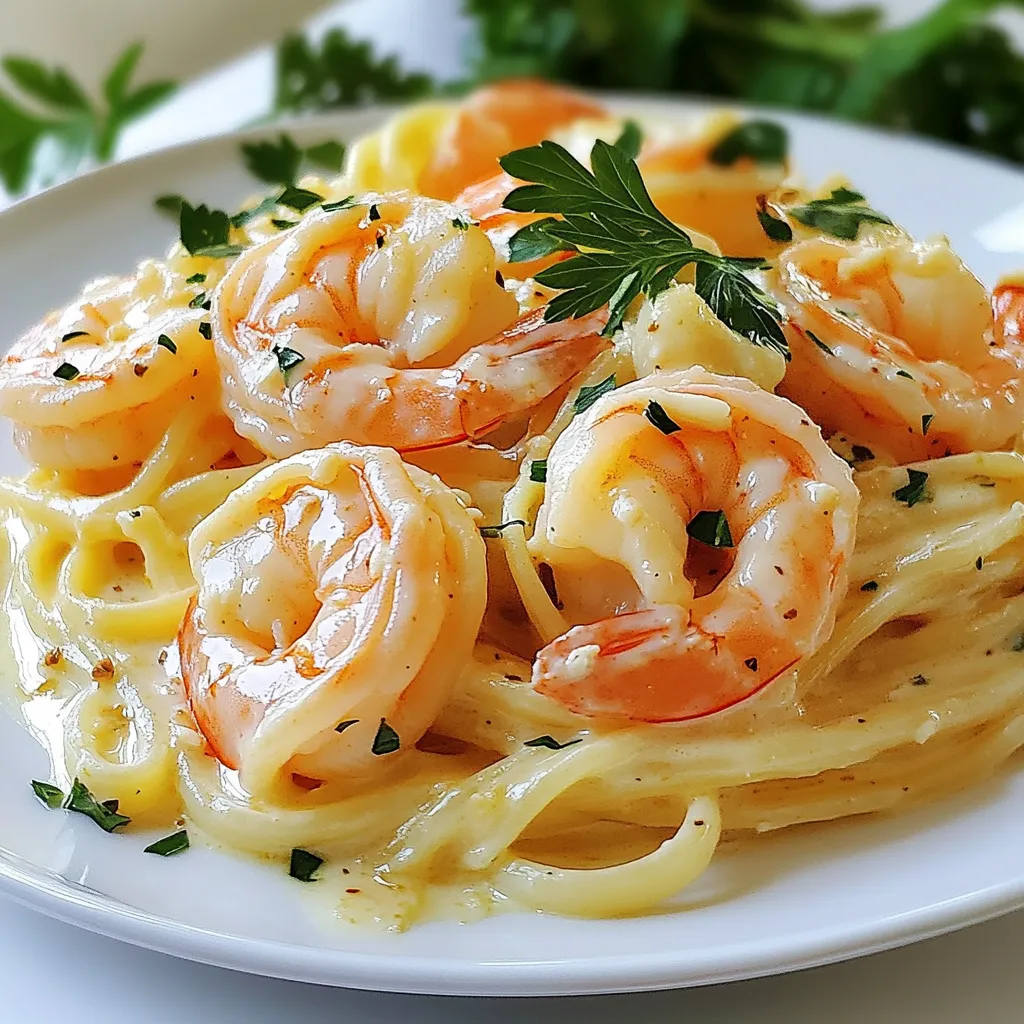
Are you ready to impress your family with a tasty meal? My Garlic Butter Shrimp Scampi is simple, quick, and

- 1 lb ground chicken - 3 cloves garlic, minced - 1/4 cup fresh parsley, chopped - 1/4 cup fresh basil, chopped - 1/4 cup grated Parmesan cheese - 1/2 cup breadcrumbs - 1 large egg - 1 teaspoon onion powder - 1 teaspoon dried oregano - Salt and pepper, to taste - 2 tablespoons olive oil (for cooking) - Marinara sauce (for serving) - 1/4 cup = 4 tablespoons - 1/2 cup = 8 tablespoons - 1 teaspoon = 1/3 tablespoon - Ground chicken: Look for lean options, like organic or free-range. - Garlic: Fresh garlic gives the best flavor. Avoid jarred garlic. - Fresh herbs: Use organic herbs for a brighter taste. - Parmesan cheese: Grated or shredded Parmigiano-Reggiano is ideal. - Breadcrumbs: Choose plain or Italian-style for added flavor. These ingredients come together to create a meal that is both simple and flavorful. The combination of fresh herbs and garlic makes every bite delicious. Plus, the meatballs are easy to prepare, making them a great option for any weeknight dinner. {{ingredient_image_1}} To start, gather all your ingredients. You will need: - 1 lb ground chicken - 3 cloves garlic, minced - 1/4 cup fresh parsley, chopped - 1/4 cup fresh basil, chopped - 1/4 cup grated Parmesan cheese - 1/2 cup breadcrumbs - 1 large egg - 1 teaspoon onion powder - 1 teaspoon dried oregano - Salt and pepper, to taste - 2 tablespoons olive oil (for cooking) - Marinara sauce (for serving) In a large bowl, add the ground chicken, minced garlic, and chopped herbs. Then mix in the Parmesan cheese, breadcrumbs, egg, onion powder, dried oregano, and salt and pepper. Use your hands to combine until everything is mixed well. Preheat your oven to 400°F (200°C). While the oven heats, form the chicken mixture into small meatballs. Aim for about 1 inch in size. Place the meatballs on a baking sheet lined with parchment paper. In a skillet, add olive oil and heat it over medium. Sear the meatballs for 2-3 minutes on each side. This step gives them a nice golden color. After searing, place the meatballs back on the baking sheet. Bake them in the oven for 15-20 minutes. To ensure your meatballs are safe to eat, check their internal temperature. You want them to reach 165°F (74°C). This is key for ground chicken to kill any harmful bacteria. Use a meat thermometer for accuracy. Once they are done, you can serve your meatballs with marinara sauce or on pasta. Enjoy the flavorful meal! To make meatballs that are all the same size, use a cookie scoop. This tool helps you get even portions. Aim for about one inch in diameter. Once you scoop, roll each ball gently in your hands. This helps them hold together while cooking. If the mixture feels too wet, add a bit more breadcrumbs. A few tools make this recipe easy. First, use a large mixing bowl for your ingredients. A sturdy skillet is great for searing meatballs. A baking sheet lined with parchment paper helps with clean-up. Lastly, a meat thermometer ensures your meatballs cook safely to 165°F (74°C). Fresh herbs make a big difference in taste. Use parsley and basil for a bright flavor. You can add oregano for warmth. Don't forget salt and pepper to enhance all the flavors. You can also try adding a pinch of red pepper flakes for heat. Experimenting with different herbs can lead to tasty surprises! Pro Tips Chill the Mixture: Refrigerate the meatball mixture for 30 minutes before forming them. This helps the meatballs hold their shape while cooking. Use Fresh Herbs: Fresh herbs greatly enhance the flavor. If possible, opt for fresh parsley and basil instead of dried for a more vibrant taste. Don’t Overmix: Mix the ingredients just until combined. Overmixing can lead to tough meatballs, so handle the mixture gently. Test for Flavor: Before baking all the meatballs, fry a small test meatball to check the seasoning. Adjust salt and pepper as needed. {{image_2}} You can swap the ground chicken for other proteins. Ground turkey works well and keeps it light. Ground beef adds a richer flavor. If you want a meat-free option, try lentils or chickpeas. These are great for a vegetarian twist. Each protein brings its own taste and texture. Adjust cooking times based on what you choose. Many herbs and spices can amp up your meatballs. Try adding thyme or rosemary for a woodsy flavor. Smoked paprika can add a nice kick. You can also experiment with cilantro or dill. These herbs give a fresh taste that brightens the dish. Mixing in some red pepper flakes adds heat. Be creative and make it your own! Garlic herb chicken meatballs are super versatile. Serve them over pasta with marinara sauce for a classic meal. They also shine in a fresh salad with greens and veggies. If you want something different, place them in a sub roll. Add cheese and marinara for a tasty meatball sub. You can even serve them as party bites with toothpicks. The options are endless! To store leftover meatballs, let them cool first. Place them in a clean, airtight container. You can keep them in the fridge for up to three days. If you want them to last longer, freezing is a great option. To freeze meatballs, arrange them in a single layer on a baking sheet. Freeze them for about one hour. Once they are firm, transfer the meatballs into freezer bags. Label the bags with the date. They can stay in the freezer for up to three months. To reheat your meatballs, you can use the oven or microwave. Preheat the oven to 350°F (175°C) and bake for about 10-15 minutes. If using the microwave, place them on a microwave-safe plate and heat for 1-2 minutes. Make sure they are hot all the way through before serving. Enjoy your flavorful meal! You can tell chicken meatballs are cooked by checking their color and temperature. When they turn golden brown outside, they are close to being done. Use a meat thermometer to check the inside temperature. It should reach 165°F (74°C). This ensures they are safe to eat. Yes, you can use dried herbs in place of fresh herbs. Dried herbs have a stronger flavor, so use less. A good rule is to use one-third of the amount. If a recipe calls for 1/4 cup of fresh herbs, use about 1 tablespoon of dried herbs. This helps keep the taste balanced. Garlic herb chicken meatballs go well with many sides. Here are some tasty options: - Pasta: Serve with marinara or a light olive oil sauce. - Salad: A fresh green salad adds crunch and freshness. - Rice: Fluffy rice can soak up the flavors. - Vegetables: Roasted or steamed veggies add color and nutrition. Pairing these sides makes for a complete and yummy meal. You now have all the tools to make great chicken meatballs. We covered the key ingredients, measurements, and brands. You learned step-by-step cooking methods, including safe temperatures. Helpful tips and tricks will help you shape and flavor your meatballs perfectly. We explored variations using different proteins and herbs for fun twists. Lastly, you know how to store, freeze, and reheat your tasty leftovers. Embrace your cooking journey. With these insights, you’ll create delicious meals for yourself and others. Enjoy this tasty adventure!

Garlic Herb Chicken Meatballs Simple and Flavorful Meal

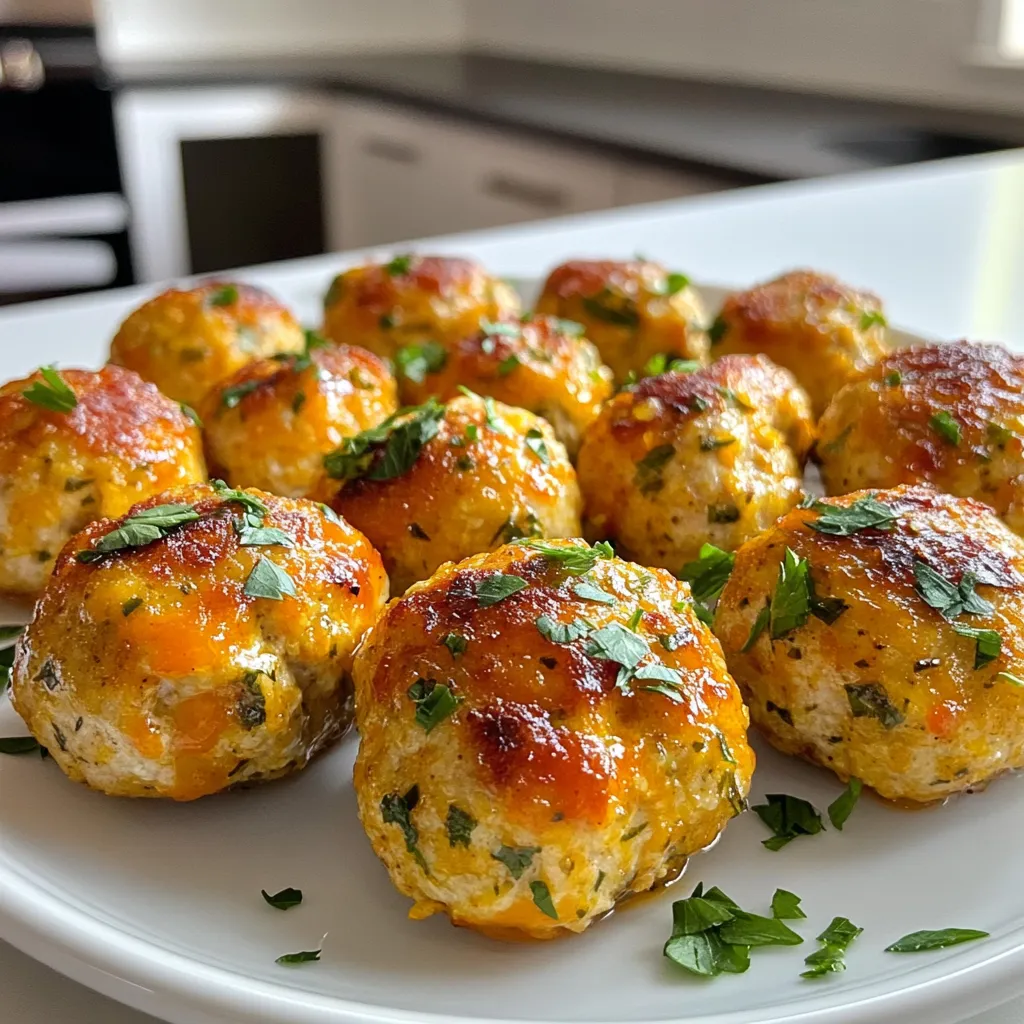
Looking for a simple and tasty meal? Garlic Herb Chicken Meatballs are your answer. These meatballs burst with flavor and

- 2 boneless, skinless chicken breasts - 4 cups chicken broth - 3 tablespoons teriyaki sauce - 1 tablespoon soy sauce - 2 teaspoons fresh ginger, grated - 2 cloves garlic, minced - 1 onion, sliced - 2 cups mixed vegetables (carrots, bok choy, bell peppers) - 150g rice noodles - 2 green onions, sliced (for garnish) - Sesame seeds (for garnish) - Salt and pepper to taste You can change a few items if you want. For a vegetarian version, use tofu. Instead of rice noodles, go with udon or egg noodles. You can also swap mixed veggies for what you have. Try peas, corn, or snap peas. If you prefer more heat, add chili flakes or fresh peppers. I like using Kikkoman teriyaki sauce. It has a well-balanced flavor and is easy to find. Another great option is Soy Vey, which has a nice sweetness. Choose a brand that you enjoy for best results. {{ingredient_image_1}} First, heat a tablespoon of oil in a pot over medium heat. Add the sliced onion and cook until it turns soft, about 3-4 minutes. Next, season the chicken breasts with salt and pepper. Place them in the pot and brown each side, around 4-5 minutes. When the chicken gets a nice color, add the minced garlic and grated ginger. Sauté them for one minute until you smell the lovely aroma. Pour in the chicken broth, teriyaki sauce, and soy sauce. Bring this mixture to a boil. Once it bubbles, turn the heat down and let it simmer for about 15 minutes. This simmering time ensures the chicken cooks through. After 15 minutes, take the chicken out of the pot. Use two forks to shred it into bite-sized pieces. Return the shredded chicken back into the pot. Now it’s time to add the fun part! Toss in the mixed vegetables and simmer for an extra 5 minutes. This keeps the veggies bright and crunchy. Taste the soup and adjust the seasoning with more salt, pepper, or teriyaki sauce if you like. To serve, place cooked rice noodles in bowls and ladle the hot soup over them. Finish with sliced green onions and a sprinkle of sesame seeds for a touch of flair. Enjoy your colorful and tasty teriyaki chicken noodle soup! To get the best shredded chicken, start with fresh, high-quality meat. Cook the chicken until it is just done. This keeps it moist and tender. After cooking, let it rest for a few minutes. This helps it stay juicy. Use two forks to shred it gently. Shredding when it is warm makes it easier. For perfect rice noodles, follow the package directions. Don’t overcook them. They should be al dente, or slightly firm. Rinse them in cold water after cooking. This stops the cooking process and keeps them from sticking. Add them to the soup right before serving to keep them fresh. Fresh herbs and veggies boost the taste of your soup. Use fresh ginger and garlic for a strong flavor. Choose bright, colorful vegetables for a healthy twist. Green onions and sesame seeds add a nice crunch and visual appeal. A squeeze of lime adds zest and brightens the dish. These small touches make a big difference in taste. Pro Tips Use Fresh Ingredients: Fresh vegetables and high-quality chicken will enhance the flavor and nutrition of your soup. Customize Your Veggies: Feel free to swap in your favorite vegetables or whatever you have on hand for a personal touch. Adjust the Broth: If you prefer a stronger flavor, let the soup simmer longer or add more teriyaki sauce to taste. Serve Immediately: Enjoy the soup hot for the best taste and texture, especially right after cooking. {{image_2}} You can make a tasty vegetarian version of this soup. Just swap the chicken for tofu. Use firm tofu for the best texture. Cut it into cubes and sauté until golden. Add the tofu at the same time as the mixed vegetables. You can still use the same broth and sauces. This option keeps the soup rich and flavorful. For a gluten-free soup, choose gluten-free soy sauce. Many brands offer this option. You can also check the teriyaki sauce. Make sure it is gluten-free. Use rice noodles, as they are naturally gluten-free. This way, you get a comforting bowl without gluten. If you like heat, spice up your soup! Add sliced fresh chili peppers or a dash of chili sauce. You can also sprinkle in some red pepper flakes while cooking. This gives the soup an exciting kick. Adjust the spice level to fit your taste. Enjoy a warm bowl with a spicy twist! After you finish your teriyaki chicken noodle soup, let it cool. Pour leftovers into an airtight container. This helps keep it fresh. You can store it in the fridge for up to three days. If you want to keep it longer, freezing is a good option. To reheat, pour the soup into a pot. Heat over medium heat until warm. Stir it occasionally to help it heat evenly. You can also use the microwave. Just put the soup in a microwave-safe bowl and heat it for 2-3 minutes. Stir halfway through to ensure it heats well. If you want to freeze the soup, do it right after cooking. Make sure it has cooled. Pour it into freezer-safe bags or containers. Leave some space at the top, as the soup will expand. It can stay frozen for up to three months. When you want to eat it, thaw it in the fridge overnight and reheat. Yes, you can use different noodles. Rice noodles work well. You can also try egg noodles or udon. Each type gives a unique taste and texture. Just follow the package directions for cooking. To spice up your soup, add red pepper flakes. You can also use sriracha sauce or fresh chili. Start with a small amount. Taste and add more if you like it hotter. If you need a substitute, use vegetable broth. You can also use water with added seasoning. This keeps the flavor balanced. Just make sure to adjust your salt. You can store the soup in the fridge for up to 3 days. Keep it in an airtight container. Reheat before serving. The flavors will meld even more! Yes, teriyaki chicken noodle soup can be healthy. It has lean protein from chicken and vitamins from vegetables. You control the salt with your sauces. Make it even healthier by adding more veggies! This blog post covered all you need for teriyaki chicken noodle soup. We discussed key ingredients, helped you prepare delicious chicken, and shared tips for perfect noodles. We explored variations like vegetarian and gluten-free options too. Now you know how to store and reheat leftovers with ease. Enjoy crafting this meal and feel free to make it your own! This recipe is both fun and simple, so dive in and start cooking.

Teriyaki Chicken Noodle Soup Flavorful and Easy Recipe

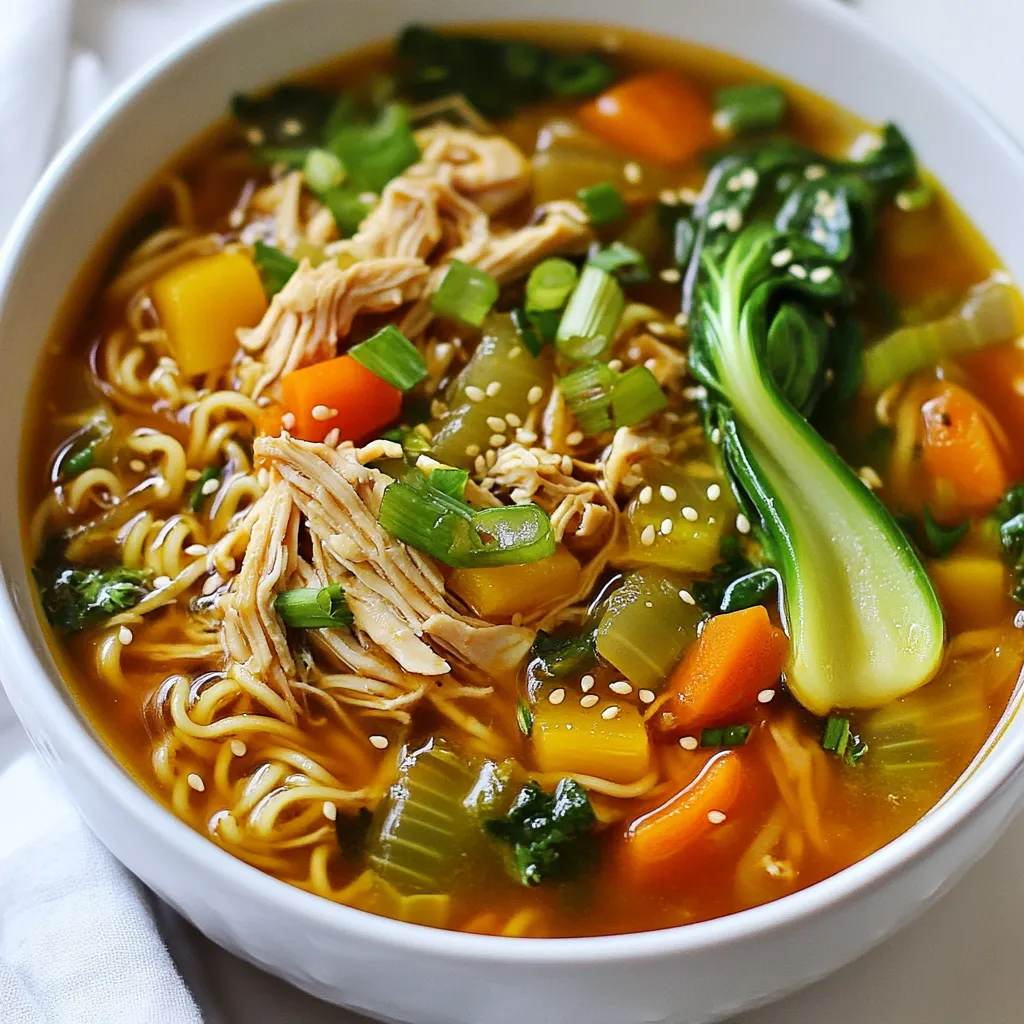
If you’re craving a warm, comforting bowl that bursts with flavor, you’re in the right place! My Teriyaki Chicken Noodle

To make Chocolate Chip Cookie Dough Bites, you need these key ingredients: - 1 cup almond flour - 1/4 cup coconut flour - 1/3 cup maple syrup - 1/4 cup coconut oil, melted - 1 teaspoon vanilla extract - 1/2 teaspoon baking soda - 1/4 teaspoon salt - 1/2 cup mini chocolate chips These ingredients create a soft, sweet, and chewy bite. Almond flour gives a nice texture. Coconut flour adds flavor and helps bind the mix. Maple syrup sweetens the dough naturally. Coconut oil makes it rich and smooth. Baking soda helps the bites rise slightly, while vanilla extract adds a lovely scent. Finally, mini chocolate chips bring that classic cookie taste. You can also add extra ingredients for fun variations: - 1/4 cup chopped walnuts (optional) Adding walnuts gives a nice crunch. You can also try different nuts like pecans or almonds. For a fun twist, mix in some dried fruit or other chocolate types. These changes let you customize the flavors to your liking. These bites are not just tasty; they also offer some health benefits. Each bite is made with wholesome ingredients. Almond flour is high in protein and fiber. Coconut flour helps with digestion. Maple syrup is a natural sweetener with minerals. Here’s a quick look at the benefits: - Almond flour: Low in carbs, high in healthy fats. - Coconut flour: Good source of fiber, supports gut health. - Maple syrup: Provides antioxidants, contains vitamins. These bites are a great snack choice, offering a good balance of nutrients. Enjoy them as a sweet treat without the guilt! {{ingredient_image_1}} Start by gathering your dry ingredients. You will need almond flour, coconut flour, baking soda, and salt. In a large mixing bowl, add 1 cup of almond flour and 1/4 cup of coconut flour. Next, sprinkle in 1/2 teaspoon of baking soda and 1/4 teaspoon of salt. Mix these well with a whisk or a spoon. This step helps avoid clumps in your dough. The blend of flours gives a great texture. Now, let’s move to the wet ingredients. In a separate bowl, measure out 1/4 cup of melted coconut oil. Add 1/3 cup of maple syrup and 1 teaspoon of vanilla extract. Whisk them together until well combined. This mixture adds sweetness and flavor to your bites. Coconut oil gives a nice richness to the dough. After mixing both bowls, pour the wet ingredients into the dry mix. Stir until a dough forms. This part is fun! Now fold in 1/2 cup of mini chocolate chips and 1/4 cup of chopped walnuts if you like. To shape the bites, use your hands to scoop small amounts of dough. Roll them into balls about 1 inch in size. Place these on a parchment-lined baking sheet. Once you finish, put them in the fridge for at least 30 minutes. Chilling firms them up and makes them easy to eat. Enjoy your tasty snacks! To get the right texture, use both almond and coconut flour. Almond flour keeps the bites soft. Coconut flour helps them hold shape. Make sure you mix the dry ingredients well. This avoids clumps and makes a smooth dough. When you roll the dough into balls, keep them about 1 inch wide. This size helps them chill evenly. You can swap almond flour for oat flour if needed. If you want a different sweetener, try honey instead of maple syrup. Coconut oil can be replaced with butter for a richer taste. If you want to skip nuts, leave out the walnuts. You can also add more chocolate chips or use dark chocolate ones for a twist. Avoid adding too much liquid to your dough. This can make the bites too sticky. If the dough feels too dry, add a teaspoon of coconut oil. Don't skip chilling the bites. This step helps them firm up and hold shape. Lastly, ensure you use mini chocolate chips. Regular chips can weigh down your bites and make them fall apart. Pro Tips Chilling the Dough: Refrigerating the dough for at least 30 minutes helps the bites hold their shape and enhances the flavors. Experiment with Flavors: Feel free to add different mix-ins like dried fruits, seeds, or other types of chocolate for variety. Perfect Portioning: Use a small cookie scoop to ensure all your bites are uniform in size for even chilling and presentation. Storage Tips: Store the bites in an airtight container in the refrigerator to keep them fresh and tasty for longer. {{image_2}} To make these bites vegan, you only need to swap a few ingredients. Use maple syrup as your sweetener. It is plant-based and works great. The coconut oil you need is already vegan. So, you are almost there! Just ensure that your chocolate chips are dairy-free. Many brands offer vegan options that taste just as good. These cookie dough bites are naturally gluten-free! The almond flour and coconut flour make a great base. Both flours are free from gluten and give a nice texture. Just double-check that your chocolate chips do not contain any gluten. This way, you can enjoy these bites worry-free. You can easily change the flavor of your cookie dough bites. Try adding spices like cinnamon or nutmeg for warmth. A dash of sea salt can enhance the sweetness, too. You can also stir in extracts like almond or maple for a twist. Another fun idea is adding a scoop of peanut butter for extra richness. The choices are endless, so get creative! Store your cookie dough bites in an airtight container. This keeps them fresh and tasty. Place them in the fridge for the best flavor and texture. They taste great cold! To freeze your cookie dough bites, first, place them on a baking sheet. Make sure they are not touching each other. Freeze them for about an hour. Once they are firm, transfer them to a freezer-safe bag. They will stay good for up to three months. In the fridge, your cookie dough bites will last about a week. If you freeze them, they can last much longer. Just remember to label your bag with the date. This way, you won’t forget how old they are! No, you cannot bake these cookie dough bites. They are meant to be eaten raw. Baking will change their texture and flavor. You’ll lose that soft, chewy goodness that makes them so fun. Enjoy them as a sweet treat straight from the fridge! Yes, these bites are safe to eat raw. We use heat-treated flours, which means they do not carry the risk of harmful bacteria. The almond flour and coconut flour are safe choices. Enjoy them without worry. The cookie dough bites are tasty and a great snack option. If you need a substitute for almond flour, try using oat flour. It has a similar texture and flavor. You can also use all-purpose flour, but it won't be gluten-free. Make sure to adjust the amount as needed. This will keep your cookie dough bites delicious and satisfying! In this article, we explored how to make chocolate chip cookie dough bites. We covered main and optional ingredients, plus their health benefits. I shared step-by-step instructions, tips for perfect texture, and common mistakes. We also discussed tasty variations, including vegan and gluten-free options. In conclusion, these bites are fun to make and enjoy. With the right tips, anyone can create tasty treats at home. Happy cooking!

Chocolate Chip Cookie Dough Bites Tasty Sweet Snack

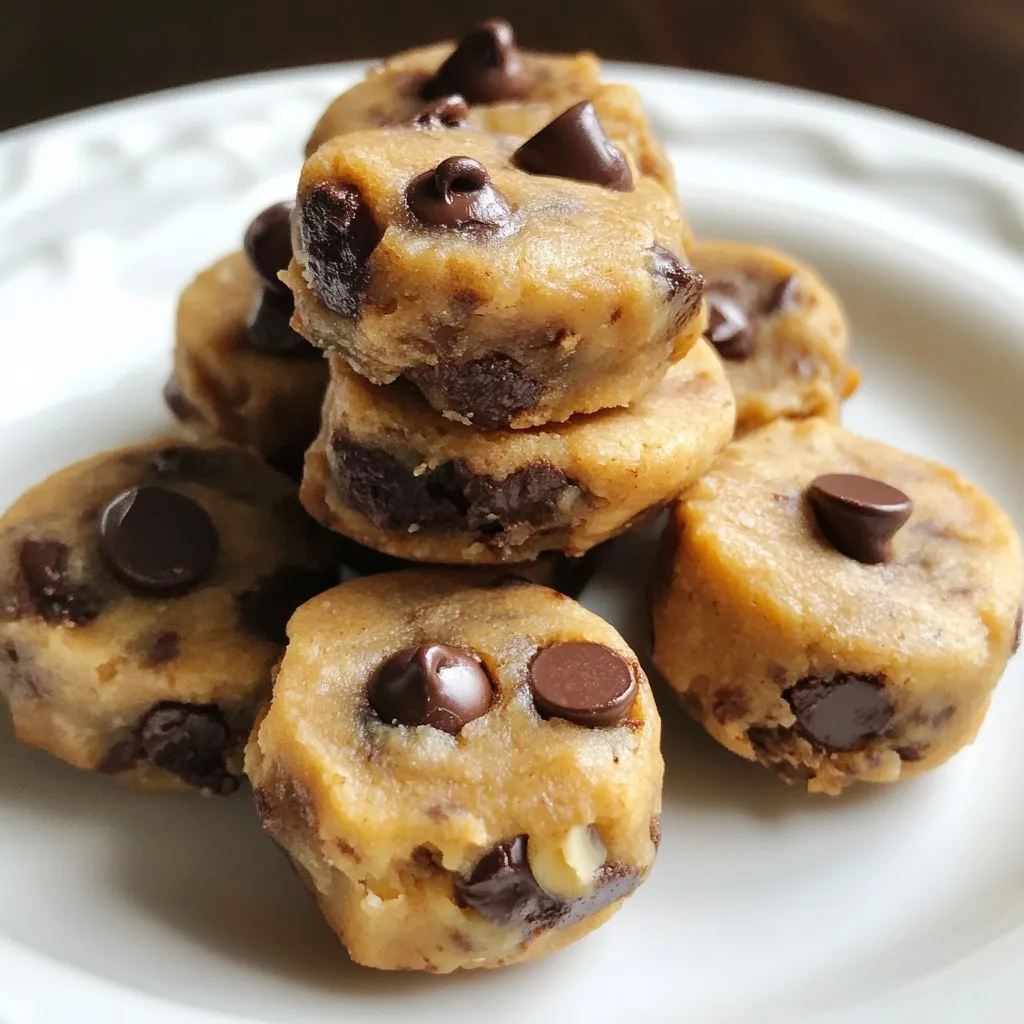
Are you ready to indulge in a sweet treat that satisfies your cravings? Chocolate chip cookie dough bites are the

To make this creamy tomato spinach tortellini soup, you need a few key items: - 1 tablespoon olive oil - 1 small onion, diced - 2 garlic cloves, minced - 1 can (28 oz) crushed tomatoes - 4 cups vegetable broth - 1 teaspoon dried basil - 1 teaspoon dried oregano - Salt and pepper to taste - 1 package (9 oz) refrigerated cheese tortellini - 2 cups fresh spinach, roughly chopped - 1 cup heavy cream (or coconut cream for dairy-free option) - Grated Parmesan cheese for serving (optional) - Fresh basil leaves for garnish (optional) When choosing ingredients, look for bright colors and good smells. - For fresh spinach, choose leaves that are vibrant and firm. - Select tomatoes that feel heavy for their size and have smooth skin. - Pick onions that are firm with no soft spots. - For garlic, choose bulbs that are dry and not sprouting. Fresh ingredients make your soup taste amazing! You can customize your soup to fit your taste. Here are some ideas: - Add sliced mushrooms for extra flavor. - Toss in cooked chicken or sausage for protein. - Use kale or Swiss chard instead of spinach. - Swap heavy cream for coconut cream for a dairy-free option. Feel free to mix and match to create your perfect bowl! {{ingredient_image_1}} 1. Start by heating one tablespoon of olive oil in a large pot over medium heat. 2. Add one small diced onion. Cook for about five minutes until it turns soft and clear. 3. Next, add two minced garlic cloves. Stir and cook for one minute. Do not let it brown. 4. Pour in one can of crushed tomatoes and four cups of vegetable broth. Stir well. 5. Add one teaspoon of dried basil, one teaspoon of dried oregano, and salt and pepper to taste. 6. Bring the mixture to a simmer. This means it should bubble gently. 7. Once it simmers, add one package of refrigerated cheese tortellini. Cook for four to five minutes. 8. The tortellini should be tender when done. 9. Stir in two cups of roughly chopped spinach and one cup of heavy cream. 10. Let the soup heat for two more minutes. Taste it and adjust the seasoning if needed. 11. Serve hot. You may add fresh basil leaves and grated Parmesan cheese if you wish. - Prep Time: 10 minutes - Cooking Time: 15 minutes - Total Time: 25 minutes This timing gives you a quick, tasty meal. Imagine a pot with a golden onion and garlic sizzling. Then, you will see a bright red sauce as you add the crushed tomatoes. When you add the tortellini, picture small pillows of joy floating in the broth. As you stir in the spinach, it will turn a lovely green, and the cream will make everything look rich and inviting. Finally, the soup will be ready to serve, looking warm and comforting. To get the creamiest soup, use heavy cream. This makes the soup rich and smooth. If you want a dairy-free option, coconut cream works well too. Add the cream at the end of cooking. This keeps it from curdling. Stir the cream gently into the soup. This helps it blend well with the other flavors. Seasoning is key to a tasty soup. Start with salt and pepper. Add them slowly and taste as you go. Use dried basil and oregano for great flavor. Fresh herbs can also add a lovely taste. If you like spice, consider adding red pepper flakes. This gives the soup a nice kick. Always taste before serving to adjust flavors. Don’t rush the cooking process. Cooking the onions and garlic slowly brings out their flavor. Avoid adding the tortellini too soon. If you do, they may become mushy. Watch the timing on the tortellini package. Lastly, don’t skip the spinach! It adds color and nutrition. Adding it too early can make it wilted and sad. Wait until the soup is almost done to add it in. Pro Tips Use Fresh Ingredients: Fresh spinach and high-quality tomatoes elevate the flavor of the soup, making it more vibrant and delicious. Customize Your Cream: For a lighter option, use half-and-half instead of heavy cream, or opt for coconut cream for a dairy-free version. Season to Taste: Always taste the soup before serving and adjust the seasoning with salt, pepper, or additional herbs to match your preference. Garnish for Presentation: A sprinkle of grated Parmesan and fresh basil not only adds flavor but also enhances the visual appeal of the dish. {{image_2}} To make this soup dairy-free, simply swap heavy cream with coconut cream. Coconut cream gives a creamy texture without dairy. It adds a slight sweetness, which balances well with the tomatoes. This option keeps the soup rich and comforting. You can also use almond milk or oat milk, but the flavor may shift slightly. If you want to add more protein, cooked chicken or sausage works great. Shredded rotisserie chicken adds flavor and saves time. For sausage, I recommend Italian sausage for a nice kick. Cook the sausage first, then add it when you add the tortellini. This way, the sausage flavors the soup beautifully. Feel free to change up the veggies as you like. Kale can replace spinach for a heartier bite. Zucchini or bell peppers add a nice crunch, too. If you want a bit of spice, try adding diced jalapeños. These changes keep the soup exciting and allow for seasonal ingredients. To store your creamy tomato spinach tortellini soup, let it cool first. Transfer it to an airtight container. This keeps it fresh longer. Refrigerate within two hours of cooking. The soup will last up to three days in the fridge. Make sure to seal it tight to avoid spills and drying out. When reheating, do it slowly to keep the flavors strong. Heat the soup on the stove over low heat. Stir often to avoid sticking. If the soup is too thick, add a splash of broth or water. You can also microwave it. Use a microwave-safe bowl and cover loosely. Heat in 30-second bursts, stirring in between. You can freeze this soup for later use. Let the soup cool completely. Pour it into freezer-safe containers, leaving some space at the top. This is important to allow for expansion. Label each container with the date. It will stay fresh for about three months. When ready to eat, thaw overnight in the fridge. Reheat gently for the best taste. Creamy Tomato Spinach Tortellini Soup can last about 3 to 4 days in the fridge. Store it in an airtight container. Make sure it cools down before you put it in the fridge. This soup tastes even better the next day as the flavors blend together. Yes, you can use frozen tortellini. Just add it straight to the pot. The cooking time may be a bit longer, around 1 to 2 extra minutes. Check the package for specific cooking times. Frozen tortellini will still give you that lovely texture and flavor. Serve this soup with warm crusty bread or garlic bread. A simple side salad goes well too. You can also add a sprinkle of grated Parmesan cheese on top. Fresh basil leaves make a great garnish. These add color and flavor, making your meal pop! Absolutely! Creamy Tomato Spinach Tortellini Soup is great for meal prep. You can make a big batch and store it for later. Just keep it in individual servings for easy reheating. This makes for a quick lunch or dinner option during busy days. To sum up, we explored the key ingredients for the creamy tomato spinach tortellini soup. I shared tips for selecting fresh items, step-by-step cooking instructions, and helpful storage tips. You learned how to customize the soup with variations, add protein, or make it dairy-free. Now, you can confidently make this soup. Remember to avoid common mistakes and embrace creativity. Enjoy each bowl and share it with friends and family for a cozy meal. Happy cooking!

Creamy Tomato Spinach Tortellini Soup Comfort Dish

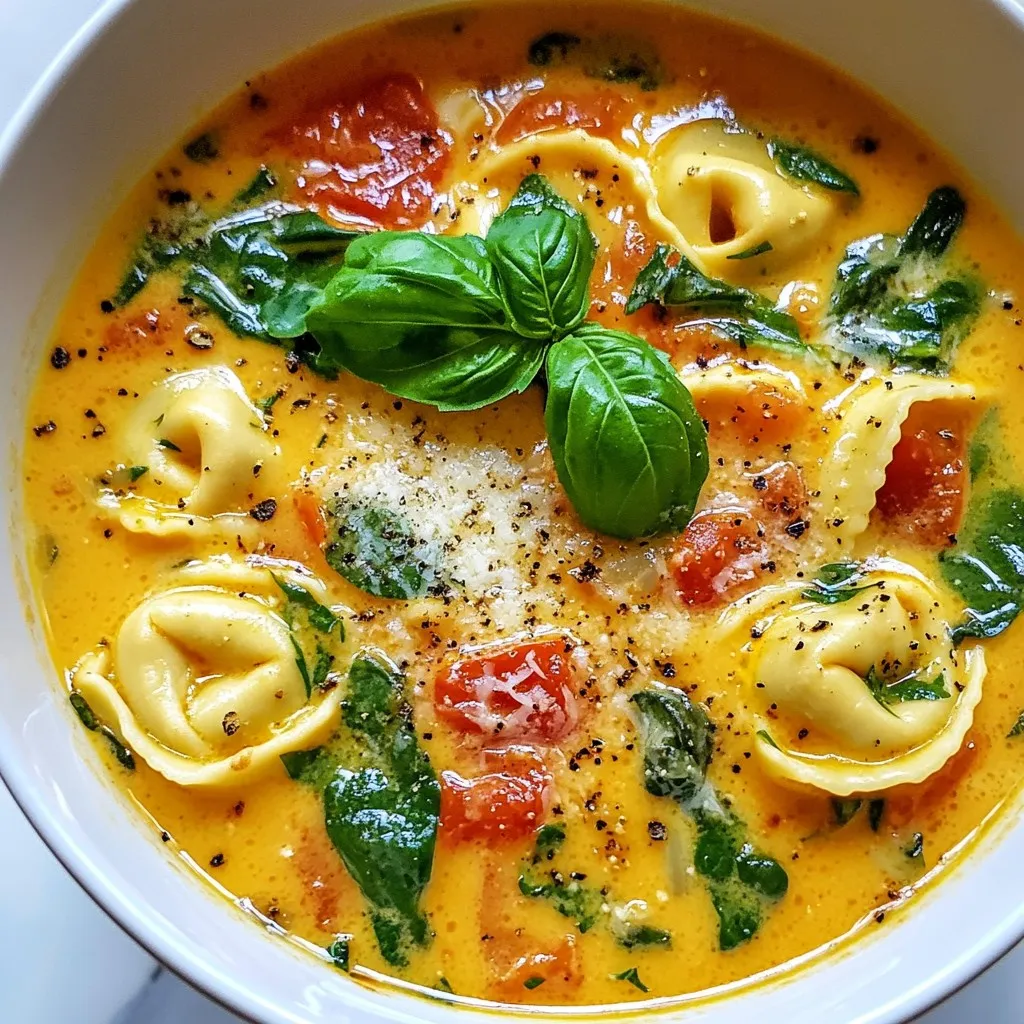
Imagine diving into a warm bowl of Creamy Tomato Spinach Tortellini Soup, the perfect comfort dish. I’ll show you how

To make the best mango avocado salsa, gather these fresh ingredients: - 1 ripe mango, diced - 2 ripe avocados, diced - 1/2 red onion, finely chopped - 1 red bell pepper, diced - 1 jalapeño, minced (seeds removed for less heat) - 1/4 cup fresh cilantro, chopped - Juice of 2 limes - 2 tablespoons olive oil - Salt and pepper to taste Choosing ripe avocados and mangoes is key. Ripe fruits are soft but not mushy. They should yield slightly to gentle pressure. This ensures a creamy texture in the salsa. A ripe mango brings sweetness and a rich flavor. Ripe avocados add creaminess that balances the other ingredients. If you use under ripe fruit, the salsa may taste bland and lack depth. You can boost flavors with these optional add-ins: - Chopped garlic for a sharp bite - Diced tomatoes for extra juiciness - A dash of cumin for warmth - Chopped green onions for a fresh crunch Try these to create your perfect mix! Customize your salsa based on your taste. The possibilities are endless, and you can make it your own. {{ingredient_image_1}} Start by gathering all your ingredients. You need: - 1 ripe mango, diced - 2 ripe avocados, diced - 1/2 red onion, finely chopped - 1 red bell pepper, diced - 1 jalapeño, minced (seeds removed for less heat) - 1/4 cup fresh cilantro, chopped - Juice of 2 limes - 2 tablespoons olive oil - Salt and pepper to taste First, peel and dice the mango. It should be sweet and juicy. Next, cut the avocados. Make sure they are ripe but firm. Then, finely chop the red onion. This adds a nice crunch and flavor. Dice the red bell pepper for color and taste. Finally, mince the jalapeño, but remove the seeds if you want less heat. In a large bowl, add the diced mango and avocados. Then, add the red onion, red bell pepper, and jalapeño. Toss in the chopped cilantro next. Gently mix everything together. Be careful not to mash the avocados. You want nice pieces for texture. This mix is bright and colorful. It looks great and smells fresh. In a small bowl, whisk together the lime juice, olive oil, salt, and pepper. This dressing brings all the flavors together. Once mixed, pour it over your salsa ingredients. Gently toss everything again. Taste the salsa and adjust seasoning if needed. If it needs more flavor, add a bit more salt or lime juice. After mixing, cover the bowl with plastic wrap. Let it sit for at least 15 minutes. This helps the flavors meld. Enjoy this tasty salsa with chips or on grilled fish! To cut a mango, start by slicing off the sides of the pit. Hold the mango upright. Cut down along the pit, making two long slices. You will have two large pieces and the middle part with the pit. Take each piece and score it in a grid pattern, then scoop out the cubes with a spoon. For avocados, cut them in half around the pit. Twist the halves to separate them. Carefully hit the pit with a knife to remove it. Use a spoon to scoop the flesh out of the skin. Dice the flesh into small pieces for your salsa. This method keeps the cubes nice and neat. Avocados brown quickly when exposed to air. To prevent this, use lime juice. The acid in lime slows down browning. Toss the diced avocado in lime juice right after cutting. This keeps it fresh and green. If you have leftovers, cover the salsa tightly with plastic wrap. Press the wrap directly onto the surface of the salsa. You can also store avocado halves with the pit still in them. This helps slow down the browning as well. Mango avocado salsa is great with tortilla chips. It adds a fresh bite to your favorite snacks. You can also use it as a topping for grilled fish or chicken. The flavors pair well with the smoky taste from grilling. For a fun twist, serve it on tacos or burrito bowls. You can even add it to salads for a burst of flavor. Garnish with extra lime wedges and cilantro for a bright look. This salsa brings color and taste to any meal! Pro Tips Choose Ripe Ingredients: Ensure that your mangoes and avocados are perfectly ripe for the best flavor and texture. A ripe mango should give slightly when pressed, and a ripe avocado should feel soft yet firm to the touch. Adjust Heat Level: If you prefer a milder salsa, be sure to remove all the seeds and membranes from the jalapeño. For those who enjoy a kick, leave some seeds in. Let it Rest: Allow the salsa to sit for at least 15 minutes before serving. This resting time helps the flavors to meld and develop a more cohesive taste. Serving Suggestions: This salsa pairs wonderfully with tortilla chips, but also makes an excellent topping for grilled fish, chicken, or tacos for added freshness. {{image_2}} To add some heat, include more jalapeño. You can also add diced serrano peppers. Just remember, the seeds hold most of the heat. If you like it spicy, keep them in. For a twist, try adding a pinch of cayenne pepper. It gives the salsa a nice kick. For a fun tropical twist, add fresh pineapple. Diced pineapple pairs well with mango and avocado. The sweet and tart flavors blend perfectly. Use about 1 cup of diced pineapple. Mix it in with the other ingredients. This version is great for summer barbecues. It brings a refreshing taste to your table. You can make this salsa even more filling. Try adding black beans or corn for extra texture. These ingredients boost protein and fiber. Chopped bell peppers can also add color and crunch. If you want a bit of tang, consider adding diced tomatoes. They enhance the flavor and make the salsa more vibrant. To store leftover mango avocado salsa, you need an airtight container. Place the salsa in the container and seal it tightly. This keeps the salsa fresh and prevents it from absorbing other fridge odors. Try to use it within a few days for the best taste. You can freeze mango avocado salsa, but it may change in texture. Start by placing the salsa in a freezer-safe container. Leave some room at the top for expansion. When you are ready to use it, thaw it in the fridge overnight. Use it within three months for the best flavor. Mango avocado salsa stays fresh in the fridge for about three days. After that, the avocado may brown and the flavors might fade. To keep it fresh longer, store the salsa without the avocado. Mix in the avocado just before serving. This keeps it bright and tasty. You can serve Mango Avocado Salsa with many dishes. It pairs well with tortilla chips. This salsa also shines on grilled fish or chicken. Try it with tacos for a fresh twist. It adds a burst of flavor to salads, too. You can even top your favorite nachos with it. The sweet mango and creamy avocado complement spicy foods perfectly. Yes, you can make this salsa ahead of time. Prepare it a few hours before serving. This allows the flavors to mix better. Just remember to cover it tightly. You can store it in the fridge until you’re ready to serve. However, if you prepare it too early, the avocados may brown. Mango Avocado Salsa lasts about 1-2 days in the fridge. After that, the avocados can turn brown and mushy. Make sure to store it in an airtight container. This helps keep it fresh longer. If you find it browning, you can mix it again. Just toss in a little lime juice to brighten it up. This blog post covered how to make a flavorful mango avocado salsa. We discussed the best fresh ingredients and their importance. I shared tips for preparation and serving, along with ways to enhance the flavors. We explored exciting variations and storage tips to keep it fresh. In closing, this salsa is a fun dish that adds zest to meals. I encourage you to try your own twist and enjoy!

Mango Avocado Salsa Fresh and Flavorful Delight

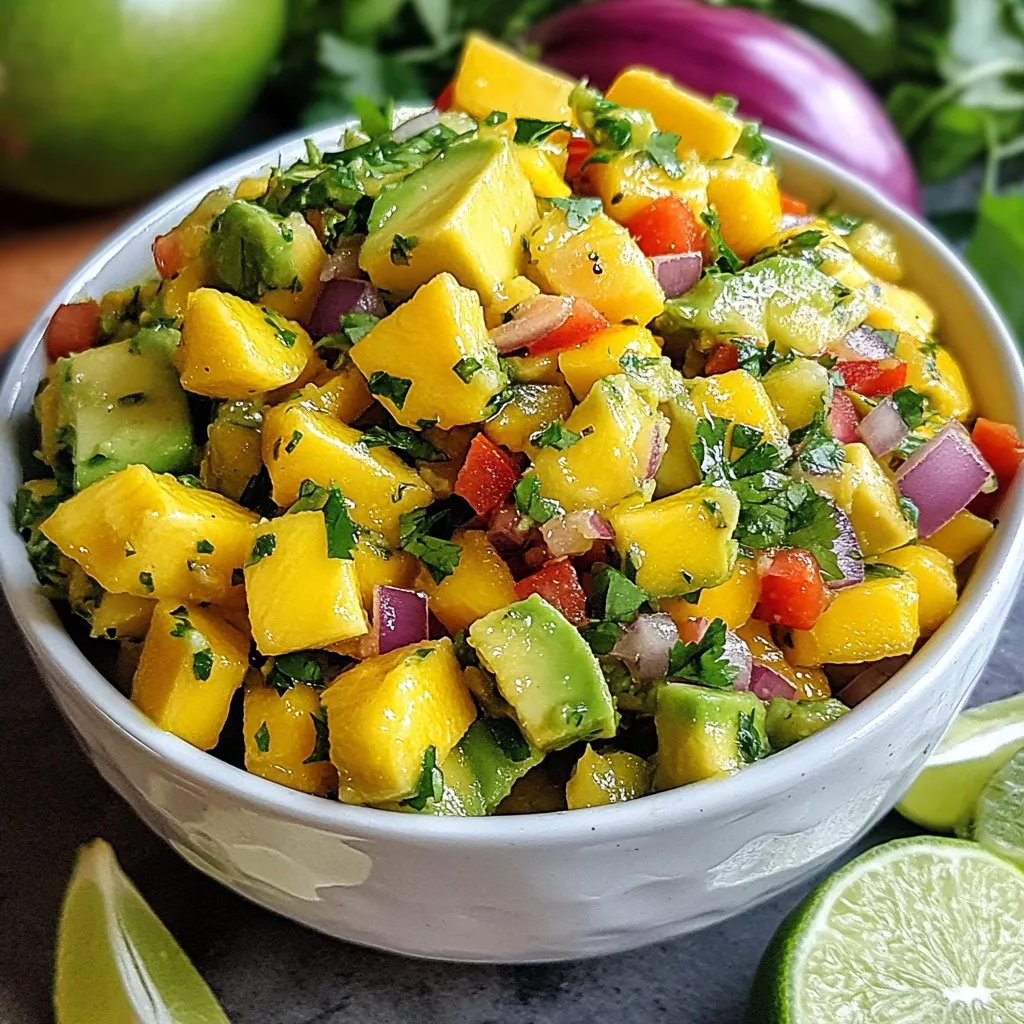
Get ready to enjoy a fresh and flavorful delight with Mango Avocado Salsa! This vibrant dish combines sweet mango and

- 4 boneless, skinless chicken breasts - Salt and pepper to taste - 2 tablespoons olive oil - 8 ounces cremini mushrooms, sliced - 4 cloves garlic, minced - 1 cup chicken broth - 1 cup heavy cream - 1 cup grated Parmesan cheese - 1 teaspoon dried thyme - 1 teaspoon Italian seasoning - Fresh parsley, chopped (for garnish) This dish starts with simple, fresh ingredients that make it flavorful. The chicken breasts provide the main protein. You can use any boneless chicken cut. Salt and pepper enhance the chicken's flavor. Using olive oil gives a nice base for cooking. Cremini mushrooms add a rich taste. Garlic adds depth to the dish. Chicken broth brings moisture and flavor to the sauce. Heavy cream makes the sauce rich and creamy. Parmesan cheese adds savory notes, while thyme and Italian seasoning bring warmth. Finally, fresh parsley adds a bright touch to your meal. Each ingredient works together. You get a dish that is creamy, savory, and full of taste. By gathering these ingredients, you set the stage for a dinner that is sure to impress. {{ingredient_image_1}} - First, season the chicken breasts with salt and pepper. Make sure to cover both sides well. This brings out the best flavor. - Next, take a large skillet and heat olive oil over medium-high heat. Once hot, add the chicken breasts. Cook for about 5-7 minutes on each side. You want them golden brown and fully cooked. When done, remove them from the skillet and set aside. - In the same skillet, add the sliced mushrooms. Make sure to spread them out evenly. Sauté for about 4-5 minutes. Cook until they turn golden and tender. - After that, add the minced garlic to the skillet with the mushrooms. Sauté for an additional minute. This step adds a lovely aroma to your dish. - Now, pour in the chicken broth. Scrape any bits from the bottom of the skillet. This adds great flavor to your sauce. Let it simmer for 2-3 minutes. - Lower the heat and stir in the heavy cream and grated Parmesan cheese. Mix until the cheese melts and the sauce becomes creamy. - Add the dried thyme and Italian seasoning. Stir to combine everything well. Return the cooked chicken to the skillet. Coat each piece in that delicious creamy sauce. - Let the chicken simmer in the sauce for about 5 minutes. This allows it to absorb all those tasty flavors. Taste and adjust the seasoning with salt and pepper as needed. - Adjusting seasoning for flavor: Taste is key. Always check your salt and pepper. Add more if needed. A good balance makes the dish shine. - Ensuring the right sauce consistency: You want the sauce thick but not too thick. If it’s too thin, simmer longer. If it’s too thick, add more chicken broth or cream. - Tips for cooking chicken perfectly: Use medium-high heat. This helps the chicken brown well. Cook until the internal temperature reaches 165°F. This keeps it juicy. - Suggestions for sautéing mushrooms: Start with a hot skillet. This helps the mushrooms get golden. Don’t crowd the pan; it makes them steam instead of sauté. - Serving suggestions and garnishing tips: Plate the chicken with sauce on top. Sprinkle fresh parsley for color. This makes your dish look fancy and inviting. - Pairing with side dishes: This dish pairs well with rice or pasta. A side of steamed veggies also works nicely. They add freshness to the meal. Pro Tips Let the Chicken Rest: After cooking, allow the chicken to rest for a few minutes before slicing. This helps retain its juices and keeps the meat tender. Use Fresh Herbs: Fresh thyme and parsley can elevate the dish's flavor significantly compared to dried herbs. If possible, opt for fresh. Adjust the Creaminess: For a lighter sauce, you can substitute half of the heavy cream with low-fat milk or broth while still maintaining a creamy texture. Perfecting the Sauce: If the sauce is too thick, add a splash of chicken broth or water to reach your desired consistency. Stir well to combine. {{image_2}} You can switch up the mushrooms in this dish. Try using button mushrooms or shiitake for a different taste. Each type gives a unique flavor profile. If you want to change the protein, use turkey instead of chicken. Tofu is also a great option for a meat-free meal. Just check that the tofu is firm to hold its shape in the sauce. Adding vegetables can boost nutrients and flavor. Consider spinach, broccoli, or bell peppers. Sauté them alongside the mushrooms for a healthy twist. You can also add fresh herbs like basil or rosemary. These will give your dish a fresh and vibrant taste. A pinch of red pepper flakes will add a nice kick if you enjoy some heat. To make this dish gluten-free, use gluten-free chicken broth. Check the label on your Parmesan cheese, as some brands may contain gluten. For a dairy-free version, replace heavy cream with coconut milk or a plant-based cream. Nutritional yeast can add a cheesy flavor without dairy. Ensure you enjoy every bite while keeping your dietary needs in mind. To store leftovers, let the chicken cool down. Place it in an airtight container. Make sure the container seals well. Leftovers can stay fresh for up to three days in the fridge. If you want to enjoy it later, keep the sauce separate to avoid sogginess. Use glass or plastic containers that seal tightly. I prefer glass as it helps keep the food fresh. You can also use reusable silicone bags for easy storage. Label each container with the date. This way, you know how long it has been stored. You can freeze the dish for later use. Let the chicken cool completely before freezing. Place it in freezer-safe containers. This dish can last up to three months in the freezer. Just remember to seal the containers well to prevent freezer burn. To reheat, take the chicken out of the freezer and move it to the fridge overnight. This helps it thaw safely. You can also use the microwave to reheat it. Warm it on medium power for a few minutes. Stir the sauce occasionally for even heating. If the sauce is too thick, add a splash of chicken broth or cream while reheating. This keeps everything creamy and delicious! Can I make Creamy Parmesan Mushroom Chicken ahead of time? Yes, you can make this dish ahead of time. Cook the chicken and sauce, then cool it down. Store it in the fridge for up to three days. When ready to serve, gently reheat it on the stove. How do I ensure the sauce is creamy? To keep the sauce creamy, use heavy cream and grated Parmesan cheese. Stir them in slowly over low heat. This helps the cheese melt and blend well, giving you that rich texture we love. What can I serve with this dish? I love serving this chicken with pasta, rice, or mashed potatoes. You can also add a fresh salad or steamed veggies for a balanced meal. The creamy sauce pairs well with all these sides. Can I use pre-cooked chicken for this recipe? Absolutely! Using pre-cooked chicken saves time. Just skip the cooking step and add the chicken to the sauce. Heat it through until it's warm and coated with that delicious sauce. You can create a delicious Creamy Parmesan Mushroom Chicken with simple steps and tasty ingredients. We talked about preparing the chicken, sautéing mushrooms, and making a creamy sauce. With tips for perfecting the dish and ideas for variations, this recipe can suit any taste. Remember, this meal stores well in the fridge or freezer. With different options, you can enjoy this dish in many ways. Cook, share, and enjoy!

Creamy Parmesan Mushroom Chicken Easy Dinner Recipe

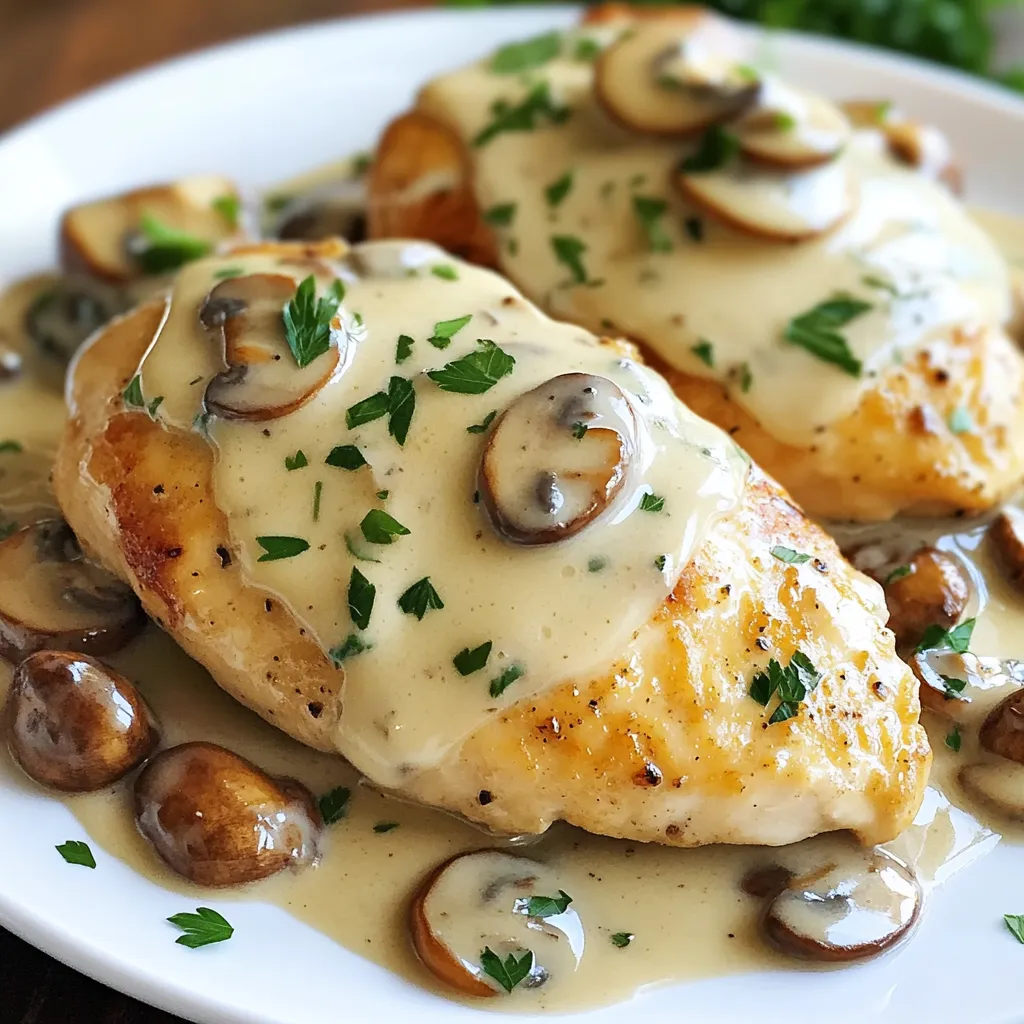
Are you ready to impress your family with a delicious meal? My Creamy Parmesan Mushroom Chicken is the ultimate easy

- 1 package of refrigerated pizza dough - 4 tablespoons unsalted butter, melted - 4 cloves garlic, minced - Salt to taste - 1 teaspoon dried oregano - 1 teaspoon dried parsley - 1/2 teaspoon red pepper flakes - Fresh parsley, chopped (for garnish) - Grated Parmesan cheese (for topping) These ingredients make your air fryer garlic knots simple yet full of flavor. The pizza dough serves as the base, creating a soft and chewy texture. The melted butter and minced garlic add richness and aroma. You can adjust the salt to match your taste. For extra flavor, you can use dried herbs like oregano and parsley. If you like a little heat, add red pepper flakes. Fresh parsley is perfect for garnish, and grated Parmesan cheese adds a nice touch on top. Once you have your ingredients ready, you will be just a few steps away from enjoying these tasty bites! {{ingredient_image_1}} First, preheat the air fryer to 350°F (175°C). This step ensures that the garlic knots cook evenly. Next, roll out the pizza dough on a floured surface. Cut the dough into strips about 1 inch wide. Once you have the strips, take each one and tie it into a knot. Tuck the ends under or into the knot for a tidy look. Now, let’s make the garlic butter mixture. In a medium bowl, combine the melted butter, minced garlic, dried oregano, and dried parsley. If you like heat, add red pepper flakes and a pinch of salt. Mix it all well until combined. Place the knots in the air fryer basket. Make sure they are in a single layer to cook well. You might need to cook them in batches. Cook the garlic knots for about 8-10 minutes. Check them until they turn golden brown and look cooked through. Once cooked, remove the knots from the air fryer. Brush them again with any leftover garlic butter mixture for extra flavor. Finally, garnish with freshly chopped parsley. You can also sprinkle some grated Parmesan cheese on top if you want to. Enjoy your tasty garlic knots! To get that nice crispy outside, do not skip preheating your air fryer. A hot air fryer helps form a great crust. Place the knots in a single layer. This step ensures even cooking. Avoid stacking them too high. For a soft inside, let them rise a bit after tying. This allows air to get in and keeps them fluffy. One big mistake is overcrowding the air fryer. When knots touch, they can steam instead of crisp. Cook in batches if needed. Another mistake is under-seasoning. Garlic knots need flavor! Use enough garlic butter and seasonings. Taste the garlic butter mix before brushing it on. Adjust salt and spices to your liking. Want to jazz up your knots? You can add herbs like basil or thyme to the butter. They will make the knots pop! For a twist, try sprinkling cheese on top before cooking. You can also use different toppings, like everything bagel seasoning or even sun-dried tomatoes. Explore different flavors to find your favorite! Pro Tips Use Fresh Ingredients: Fresh garlic and herbs will enhance the flavor of your garlic knots significantly compared to dried alternatives. Don’t Overcrowd the Air Fryer: Air needs to circulate around the knots for even cooking. Cook in batches if necessary to maintain the right spacing. Experiment with Toppings: Feel free to add other toppings like mozzarella cheese before air frying for a cheesy twist. Store Leftovers Properly: If you have any leftovers, store them in an airtight container in the fridge for up to 2 days. Reheat in the air fryer for best results. {{image_2}} Classic garlic knots are simple and delicious. You can stick closely to the original recipe. Use the basic ingredients: pizza dough, garlic, butter, and herbs. The magic lies in how you tie the knots and brush on the garlic mixture. This method gives you a soft inside and a crisp outside. The flavor is rich and buttery with garlic goodness. Want to add a twist? Try cheesy garlic knots! For this version, mix shredded cheese into the dough. Mozzarella works great, but you can use any cheese you like. Just sprinkle some cheese inside the knot before tying it. This addition makes them gooey and extra tasty. These knots are perfect for cheese lovers. If you like heat, spicy garlic knots are for you! Add extra spices to the garlic butter mixture. A pinch of cayenne or more red pepper flakes can give them a kick. You can also mix in chopped jalapeños for added flavor. The heat brings a fun twist to the classic taste. Enjoy these knots for a bold snack! To keep your garlic knots fresh, place them in an airtight container. This helps maintain their taste and texture. Store them in the fridge for up to three days. If you want to keep them longer, consider freezing them. To reheat your garlic knots, use your air fryer. Set it to 350°F (175°C) and heat for about three to five minutes. This method keeps them crispy outside and soft inside. You can also use an oven. Just wrap them in foil and warm them up at 350°F (175°C) for about ten minutes. If you want to freeze garlic knots, follow these steps: 1. Let the knots cool completely. 2. Place them in a single layer on a baking sheet. 3. Freeze them for about two hours. 4. Once frozen, transfer them to a freezer-safe bag or container. To thaw, simply leave them in the fridge overnight before reheating. This keeps them tasty and fluffy. Yes, you can use homemade pizza dough. Making your own dough is a great option. It allows you to control the ingredients. You can add your favorite herbs or spices to the dough. If you don't want to make it, there are many store-bought options available. Look for dough that is fresh and easy to work with. You can find it in the refrigerated section of most grocery stores. Garlic knots last about 3 to 4 days in the fridge. Store them in an airtight container. This helps keep them fresh and soft. If you notice any mold or a strange smell, it’s best to toss them. Always check before eating leftovers to ensure they are safe. Yes, you can make garlic knots in advance. You can prepare the knots and keep them in the fridge. Just cover them tightly. When ready to cook, let them sit at room temperature for about 30 minutes. This helps them rise a bit before cooking. You can also freeze them before cooking. Just make sure to thaw them in the fridge before air frying. This way, you can enjoy warm and tasty garlic knots anytime! In this article, we covered how to make delicious garlic knots using pizza dough. You learned about main and optional ingredients, plus step-by-step cooking instructions. We also went over tips for perfect texture and storage methods. To sum it up, these garlic knots are easy to make and perfect for sharing. Whether you stick to the classic recipe or try variations, you’ll enjoy tasty bites. Enjoy your cooking adventure!

Air Fryer Garlic Knots Simple and Tasty Recipe

If you love easy snacks that taste amazing, you’ll love my Air Fryer Garlic Knots recipe. With simple ingredients like

Here’s what you need for creamy garlic shrimp linguine: - 8 oz linguine pasta - 1 lb large shrimp, peeled and deveined - 4 cloves garlic, minced - 1 cup heavy cream - 1/2 cup grated Parmesan cheese - 2 tablespoons unsalted butter - 1 tablespoon olive oil - 1 teaspoon red pepper flakes (optional) - Salt and pepper to taste - Fresh parsley, chopped (for garnish) Each ingredient plays a role in making this dish rich and tasty. The linguine acts as a base, while the shrimp adds protein and flavor. Garlic brings warmth, and heavy cream provides that creamy texture we all love. Parmesan cheese adds a salty note, boosting the dish's overall flavor. Butter and olive oil combine to create a great cooking base. Red pepper flakes are optional, but they add a nice kick. Finally, fresh parsley offers color and freshness. With these ingredients, you can make a dish that feels fancy yet is simple to prepare. {{ingredient_image_1}} To cook the linguine, start by bringing a pot of water to a boil. Make sure to add a generous amount of salt to the water. This step helps flavor the pasta. Once boiling, add the linguine and cook it according to the package instructions. For the best texture, look for the “al dente” stage, which means the pasta is firm yet cooked. This usually takes about 8-10 minutes. When done, save half a cup of the pasta water for later. Drain the linguine and set it aside. In a large skillet, heat one tablespoon of olive oil and two tablespoons of unsalted butter over medium heat. Once the butter melts, add four cloves of minced garlic. Sauté the garlic for about one minute until it smells great. Be careful not to burn it, as burnt garlic can taste bitter. Next, add one pound of large shrimp that are peeled and deveined. Season the shrimp with salt, pepper, and optional red pepper flakes. Cook the shrimp for about two to three minutes on each side. They should turn pink and opaque. Remove the shrimp and set them aside. In the same skillet, pour in one cup of heavy cream. Bring it to a gentle simmer. Stir the cream as it heats up to avoid sticking. After it simmers, mix in half a cup of grated Parmesan cheese. This cheese adds a rich, creamy texture to the sauce. Keep stirring until the cheese melts completely and the sauce becomes smooth. Now it’s time to bring it all together. Add the cooked linguine to the skillet with the creamy sauce. Pour in the reserved pasta water to help combine everything. Toss the pasta, sauce, and shrimp together gently. Make sure the linguine is well coated in the creamy sauce. The pasta water will help achieve the right consistency. Taste the dish after combining everything. Adjust the seasonings with more salt, pepper, or red pepper flakes if you like it spicier. Then, serve the dish hot. For a fresh finish, sprinkle some chopped parsley on top as a garnish. This adds color and flavor to your creamy garlic shrimp linguine. To make great creamy garlic shrimp linguine, you need the right pasta. Use linguine and cook it until al dente. This means it should be firm but not hard. Why is pasta water important? It has starch that helps thicken your sauce. Always save about 1/2 cup of this water before draining the pasta. This simple step makes a huge difference in the final dish. Avoid overcooking the linguine. If you cook it too long, it can become mushy. Keep an eye on the timer and taste a strand at the end. To boost flavor, try different seasonings. You can add herbs like basil or thyme for a fresh taste. A dash of lemon juice can also brighten the dish. What about cheese? Parmesan is a classic, but you can swap it for creamy goat cheese or mozzarella for different flavors. Both will add a nice creaminess to your sauce. Always taste as you go to adjust the flavors to your liking. Shrimp cook quickly, so you need to watch them closely. Cook them for about 2-3 minutes on each side. How do you know when they are done? Look for a nice pink color and a firm texture. The shrimp should be opaque. If you see them curling tightly, they may be overcooked. Remove them from the skillet as soon as they are done to keep them juicy and tender. Pro Tips Use Fresh Garlic: Freshly minced garlic enhances the flavor of the dish significantly compared to pre-minced options. Don’t Overcook the Shrimp: Cook the shrimp just until they turn pink and opaque to avoid a rubbery texture. Adjust the Creaminess: If you prefer a lighter sauce, you can substitute half of the heavy cream with chicken broth. Garnish for Flavor: Fresh parsley not only adds color but also a burst of freshness that complements the creamy sauce. {{image_2}} You can add fun veggies to your creamy garlic shrimp linguine. Spinach and bell peppers work great. Spinach wilts down nicely and adds green color. Bell peppers give a sweet crunch. You can also use broccoli for extra nutrients. Broccoli brings fiber and vitamins to the dish. Just steam or sauté it before mixing it in. Want to take the flavor up a notch? Consider adding lemon juice or zest. The citrus brightens the dish and cuts through the creaminess. You can also use white wine for depth. A splash of dry white wine adds a nice touch. Just let it simmer with the shrimp for a rich taste. If you want a lighter dish, there are options for cream. You can use half-and-half or coconut milk for a twist. Both will make your sauce creamy without being too heavy. This way, you can enjoy the dish while keeping it light and fresh. To keep your creamy garlic shrimp linguine fresh, follow these tips: - Use airtight containers. This helps seal in moisture and flavor. - Cool the dish before storing. Let it sit at room temperature for about 30 minutes. - Refrigerate within two hours of cooking. This keeps it safe to eat. When stored properly, this dish lasts about 3 days in the fridge. After that, the shrimp may lose its texture. For reheating, you have a couple of options to keep the dish tasty: - Stovetop method: Place the leftover linguine in a skillet. Add a splash of cream or pasta water. Heat it on low, stirring often. This helps maintain the creamy texture. - Microwave method: Put the linguine in a microwave-safe dish. Add a bit of cream to keep it moist. Heat in short bursts, stirring in between. Both methods work well, but the stovetop usually gives better results. It helps the flavors blend back together nicely. Yes, you can use frozen shrimp! Just follow this simple guide: - Thaw the shrimp in the fridge overnight or under cold water for about 20 minutes. - Pat them dry before cooking. This helps the shrimp sear well. - Cook them the same way as fresh shrimp. They will taste great. If you need a substitute for heavy cream, here are some options: - Use half-and-half for a lighter sauce. - Coconut milk adds a nice flavor and is dairy-free. - Greek yogurt can work too; mix it with a bit of water to thin it out. These substitutes may change the dish's creaminess but will still taste good. Want to kick up the heat? Here are some tips: - Add more red pepper flakes to the shrimp. - Try a dash of hot sauce in the creamy sauce. - Mix in some diced jalapeños for extra spice. Always taste as you go to avoid overpowering the dish. Yes, this dish is great for meal prep! Here’s how: - Cook the shrimp and pasta, then toss them in the sauce. - Let it cool before storing in airtight containers. - It lasts in the fridge for up to three days. Reheat gently to keep the shrimp tender and the sauce creamy. This blog post explored how to make a creamy shrimp linguine dish. We covered key ingredients, like pasta, shrimp, and garlic. Next, you learned step-by-step cooking instructions, from boiling the linguine to making the creamy sauce. We also shared tips for perfecting flavors and variations for added nutrition. Finally, we discussed storage and reheating methods. Now, you can create a delicious meal with ease. Enjoy cooking, and share your results!

Creamy Garlic Shrimp Linguine Simple and Flavorful Dish

Are you ready to impress your family and friends with a delicious meal that’ll leave them craving more? This Creamy

Older posts
Newer posts
← Previous Page1 … Page131 Page132 Page133 … Page137 Next →

dsad

© 2025 Recipes Pursuit • Built with GeneratePress

Our Policies

  • Copyright Policy
  • Cookie Policy
  • GDPR Policy
  • Privacy Policy
  • Disclaimer
  • Terms Of Use

More Information

  • Home
  • About
  • Contact
  • Appetizers
  • Dessert
  • Dinner
  • Drinks
©2025, Recipes Pursuit About Back To Top