Skip to content
DisclaimerTerms Of UseGDPR PolicyCookie Policy

Recipes Pursuit

  • Home
  • Drinks
  • Appetizers
  • Dinner
  • Dessert
  • About
  • Contact
  • Privacy Policy
DisclaimerTerms Of UseGDPR PolicyCookie Policy

Emma Smith

- 1 pound large shrimp, peeled and deveined - 6 tablespoons unsalted butter - 4 cloves garlic, minced - 1 teaspoon crushed red pepper flakes (adjust to taste) - Zest of 1 lemon - Juice of 2 lemons - 1 cup low-sodium chicken broth - 1/2 cup grape tomatoes, halved - Salt and black pepper to taste - 8 ounces linguine or spaghetti - Fresh parsley, chopped, for garnish - Grated Parmesan cheese, for serving (optional) Each ingredient plays a key role in the dish. The shrimp gives it a nice texture. The butter adds richness, while garlic offers a strong flavor. Red pepper flakes add heat, and lemon brings brightness. Chicken broth adds depth, while tomatoes provide sweetness. Salt and pepper balance everything out, and fresh parsley adds color. Get creative with this dish! Here are some optional ingredients to enhance it: - Fresh basil for a different herb flavor - White wine for a touch of acidity - Capers for a briny bite - Spinach or arugula for extra greens - Lemon slices for added garnish Feel free to mix and match based on your taste. Sometimes you might not have everything on hand. Here are some substitutes: - Shrimp: Use scallops or chicken if you prefer. - Butter: Olive oil works well for a lighter option. - Garlic: Garlic powder can replace fresh garlic in a pinch. - Chicken broth: Vegetable broth is a good swap for a vegetarian version. - Pasta: Any long pasta like fettuccine or penne will work. These swaps can help you make the dish even if you're missing some ingredients. Enjoy the process and make it your own! {{ingredient_image_1}} Start by boiling water in a large pot. Add salt to the water. This helps flavor the pasta. Add 8 ounces of linguine or spaghetti. Cook until al dente, which takes about 8-10 minutes. Drain the pasta and set it aside. Remember to save 1/2 cup of the pasta water for later. Next, prepare the shrimp. You need 1 pound of large shrimp, peeled and deveined. Rinse them under cold water. Pat them dry with paper towels. This step helps the shrimp cook evenly. In a large skillet, melt 4 tablespoons of unsalted butter over medium heat. Once the butter is melted, add 4 cloves of minced garlic and 1 teaspoon of crushed red pepper flakes. Sauté for 1-2 minutes until fragrant, but don’t let the garlic burn. Now, add the shrimp to the skillet. Sprinkle with salt and black pepper. Cook for 2-3 minutes on one side until pink. Flip the shrimp and cook for another 2-3 minutes until fully cooked. After the shrimp is ready, add the zest of 1 lemon and the juice of 2 lemons. Pour in 1 cup of low-sodium chicken broth and 1/2 cup of halved grape tomatoes. Bring the sauce to a simmer. Let it reduce for about 3-4 minutes. This step builds great flavor. Next, it’s time to mix everything together. Add the cooked pasta to the skillet with the shrimp and sauce. Toss well to coat the noodles in all that delicious sauce. If the sauce seems thick, add the reserved pasta water a little at a time. Stir until you reach your desired consistency. Finally, remove the skillet from the heat. Stir in the remaining 2 tablespoons of butter until melted. This adds richness to the dish. Garnish with chopped fresh parsley and extra lemon zest if you like. Serve immediately, and don’t forget the grated Parmesan cheese on the side! Enjoy your meal! When picking shrimp, look for large, firm ones. Their shells should be smooth and shiny. Fresh shrimp have a slight ocean scent, not a strong fishy smell. If you buy frozen shrimp, ensure they are not stuck together. This means they thawed and refroze, which is not ideal. Always check the label to know if they are wild-caught or farmed. Wild-caught shrimp often taste better and have better texture. Cooking pasta al dente means it has a slight bite. Start by boiling water in a large pot. Add a good amount of salt; it should taste like the sea. Stir the pasta often to prevent sticking. Follow the package time, but check a minute early. Taste a piece; if it’s firm but cooked, it’s ready. Before draining, save some pasta water. This water can help your sauce stick better. One common mistake is overcooking the shrimp. Shrimp cook quickly, about 2-3 minutes per side. If they curl tightly, they are overdone. Another mistake is burning the garlic. Always sauté it over medium heat and watch it closely. Adding too much liquid too fast can also ruin your sauce. Start with less broth and adjust it as needed. Finally, don’t forget the pasta water! It can help make your dish creamy and rich. Pro Tips Fresh Ingredients: Using fresh shrimp and lemons will significantly enhance the flavor of your dish. Look for shrimp that smell like the ocean, not fishy. Adjust the Heat: If you prefer a milder dish, reduce the amount of crushed red pepper flakes. Alternatively, for more heat, add a pinch of cayenne pepper. Pasta Cooking Water: Don’t forget to reserve some pasta water! It helps to loosen the sauce and add flavor, creating a perfect consistency. Garnish for Flavor: Fresh parsley not only adds color but also freshness. Consider adding a bit of lemon zest on top for an extra burst of citrus flavor. {{image_2}} You can use many types of pasta for this dish. While linguine is a classic choice, spaghetti works well too. For a twist, try fettuccine or penne. Each type gives a unique texture and taste. If you prefer a lighter meal, you can use zucchini noodles or spaghetti squash. These options are tasty and add veggies to your plate. Adding more ingredients can boost the flavor of your scampi. You might want to toss in some fresh spinach or arugula. Their greens add color and nutrients. Sautéed bell peppers or snap peas bring a nice crunch. You can also sprinkle in fresh herbs, like basil or dill, for a fresh taste. If you like heat, add more crushed red pepper flakes. Each choice can change the dish and make it your own. If you're gluten-free, don't worry! There are great pasta alternatives. Look for gluten-free pasta made from rice or quinoa. These options cook well and taste great with the sauce. You can also skip the pasta altogether. Serve the shrimp over rice or cauliflower rice instead. This keeps the flavors while meeting your dietary needs. To store leftover shrimp scampi, place it in an airtight container. Let the dish cool down first. Then, cover it tightly and store it in the fridge. It will stay fresh for up to three days. Make sure to keep the shrimp and sauce together for the best flavor. When reheating shrimp scampi, the goal is to keep it moist. Use a skillet over low heat. Add a splash of chicken broth or water to the pan. This helps to prevent the dish from drying out. Stir gently to warm it through. You can also microwave it in short bursts. Cover it with a damp paper towel to keep it from getting tough. Heat until warm, but don’t overdo it! You can freeze shrimp scampi, but the texture may change. If you decide to freeze it, store it in a freezer-safe container. Use it within one month for the best taste. To thaw, place it in the fridge overnight. Reheat it gently on the stove, adding a bit of broth as needed. This will help revive the flavors. You can serve Lemon Garlic Shrimp Scampi with a few tasty sides. Here are some great ideas: - Garlic Bread: It soaks up the sauce well and adds a nice crunch. - Steamed Vegetables: Broccoli or asparagus work well. They add color and nutrients. - Salad: A fresh green salad with a light vinaigrette pairs perfectly. - Rice or Quinoa: These options are great for soaking up the delicious lemon sauce. These sides make your meal more balanced and flavorful. You can prepare some parts in advance. Cook the pasta and shrimp separately, then store them in the fridge. - Pasta: Cook it al dente, cool it, and toss with a bit of olive oil to prevent sticking. - Shrimp: Cook shrimp and let it cool. Store in an airtight container. When ready to eat, reheat everything together in a skillet. This keeps the flavors fresh. Cooked shrimp can last up to three days in the fridge. Make sure to store it in an airtight container. - If you see any changes in color or smell, it’s best to throw it out. - When in doubt, always check for freshness before eating. Storing it properly helps maintain its taste and safety. This blog post covered everything you need for Lemon Garlic Shrimp Scampi. We explored ingredients, cooking steps, and helpful tips. You learned how to avoid common mistakes and make it your own with variations. Remember to store leftovers properly for the best taste later. Enjoy making this dish your own and impressing your guests. Cooking can be fun and easy with the right guidance. Get creative and let your kitchen skills shine!

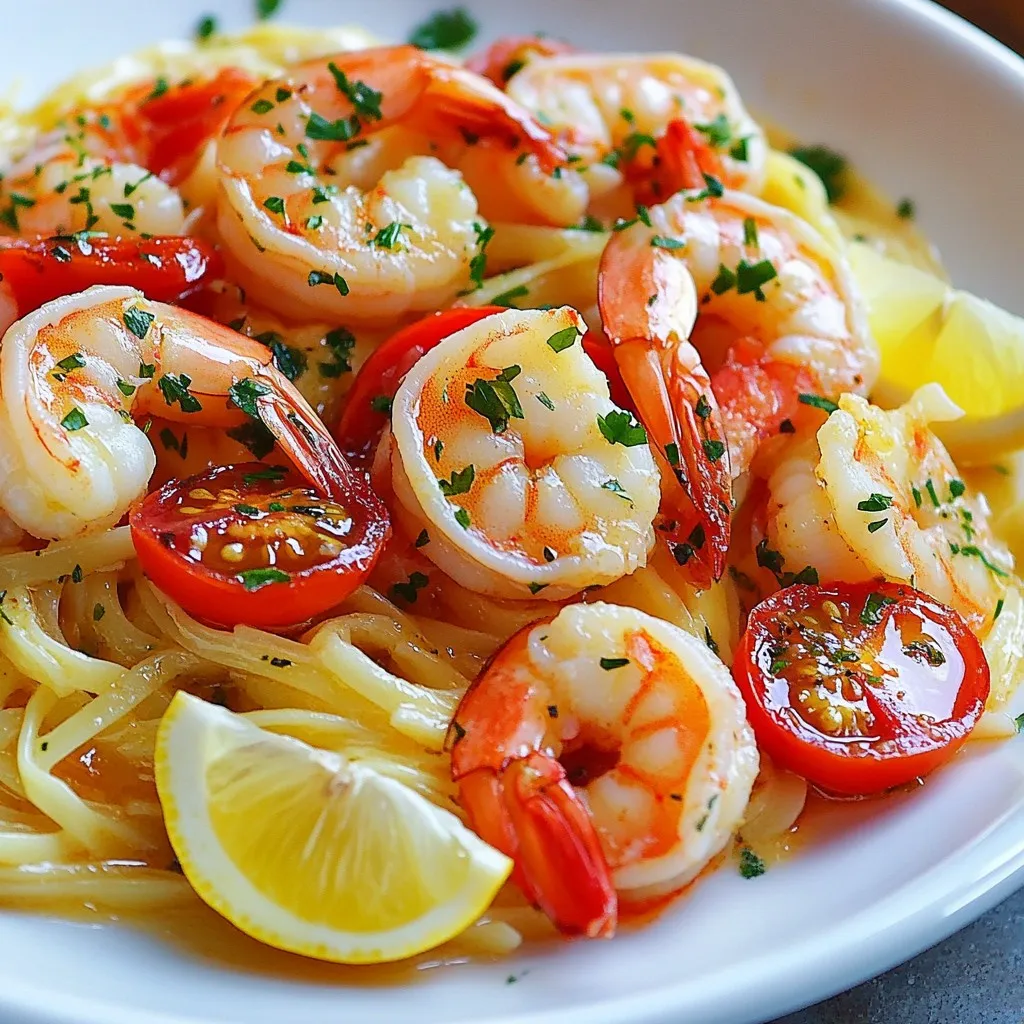
Lemon Garlic Shrimp Scampi Fresh and Flavorful Dish

If you crave bold, fresh flavors, Lemon Garlic Shrimp Scampi is for you! This dish combines juicy shrimp and al

- 4 bone-in chicken thighs, skin-on - 1 cup mushrooms (cremini or button), sliced - 1 cup heavy cream - 1 cup chicken broth - 2 tablespoons olive oil - 2 cloves garlic, minced - 1 onion, finely chopped - 1 teaspoon dried thyme - Salt and pepper to taste - Fresh parsley, chopped (for garnish) When you gather your ingredients, choose fresh items for the best flavor. Use bone-in, skin-on chicken thighs to keep the meat juicy and tender. The mushrooms add a rich, earthy taste. Heavy cream brings creaminess to the sauce and makes it oh-so-delicious. For the pantry staples, chicken broth is key. It adds depth to the sauce. Olive oil helps in searing the chicken for a nice crust. Garlic and onion give great aroma and flavor. Thyme adds a lovely herbal note. Don’t forget to season well with salt and pepper! Lastly, fresh parsley makes a great garnish. It adds a pop of color and freshness to your dish. Having these ingredients ready will make your cooking process smooth and enjoyable. {{ingredient_image_1}} First, take your four chicken thighs. Season both sides with salt and pepper. This step adds flavor. Make sure you coat them well. You want every bite to taste great. Next, grab a large skillet. Heat two tablespoons of olive oil over medium-high heat. When the oil is hot, add the chicken thighs, skin-side down. Sear them for 5-7 minutes. Look for a golden brown color on the skin. Once you flip the thighs, sear the other side for another 5 minutes. This adds a nice crust. After searing, take the chicken out and set it aside. In the same skillet, lower the heat to medium. Add a finely chopped onion. Cook for 3-4 minutes until it turns translucent. Then, add two cloves of minced garlic and one cup of sliced mushrooms. Cook everything together for about 5 minutes. The mushrooms should become tender and juicy. Now, it’s time to make the sauce. Pour in one cup of chicken broth. Scrape the bottom of the skillet to get all the tasty bits. Then stir in one cup of heavy cream and one teaspoon of dried thyme. Season with salt and pepper to taste. The sauce should look creamy and rich. Return the chicken thighs to the skillet, skin-side up. Make sure they are covered with the sauce. Bring it to a gentle simmer. Lower the heat and cover the skillet. Cook for 25-30 minutes. This slow cooking makes the chicken tender and juicy. Once the chicken is done, remove the skillet from heat. Let it sit for a minute. This helps the flavors settle. Before serving, sprinkle fresh chopped parsley on top. This adds color and freshness to your dish. Enjoy your creamy mushroom chicken thighs! To get crispy skin and juicy meat, start with bone-in, skin-on chicken thighs. Season them well with salt and pepper before cooking. Heat olive oil in a skillet over medium-high heat. Sear the chicken skin-side down for 5-7 minutes until golden brown. Flip the thighs and cook the other side for 5 minutes. This searing step adds flavor and texture. Remember to let the chicken rest after cooking to keep it juicy. You can adjust the sauce to your liking. If you want a thicker sauce, let it simmer longer. This reduces the liquid and concentrates the flavor. For a thinner sauce, add more chicken broth or a splash of water. Stir well to combine. You can also use a cornstarch slurry for quick thickening. Just mix cornstarch with cold water, then stir it into the sauce while it simmers. Add more depth to your dish with herbs and spices. Fresh thyme can brighten the flavors. Try rosemary or sage for a different twist. A pinch of red pepper flakes can add heat. For a rich taste, consider adding a splash of white wine before the broth. You can also mix in some grated Parmesan cheese for a cheesy twist. These simple enhancements can elevate your creamy mushroom chicken thighs to a new level. Pro Tips Use Fresh Herbs: Fresh thyme or parsley can elevate the flavor profile of your dish significantly compared to dried herbs. Check Chicken Temperature: Ensure the internal temperature of the chicken thighs reaches 165°F (75°C) for safe consumption. Thicken the Sauce: If you prefer a thicker sauce, let it simmer uncovered for the last few minutes of cooking. Pair with Sides: This dish pairs wonderfully with mashed potatoes or a fresh green salad for a complete meal. {{image_2}} You can use many types of mushrooms in this dish. Cremini mushrooms add a rich, earthy flavor. Button mushrooms give a mild taste and nice texture. Shiitake mushrooms bring a unique taste and aroma. Mix different types for a more complex flavor. Try to slice them evenly for even cooking. If you want a lighter version, use half-and-half instead of heavy cream. Coconut milk offers a dairy-free option with a hint of sweetness. You can also use Greek yogurt mixed with chicken broth for a creamy texture. These substitutes keep the dish tasty while reducing calories. Adding veggies can boost flavor and nutrition. Spinach cooks quickly and adds color. Broccoli is great for a crunchy texture. You can also try peppers or zucchini for a fresh touch. Just remember to adjust cooking times for different vegetables. This way, you get a colorful, healthy meal. To store leftovers, let the creamy mushroom chicken thighs cool first. Place them in an airtight container. Make sure to seal it tightly to keep out air. You can keep it in the fridge for up to three days. Always label the container with the date. This helps you remember when you made the dish. If you want to freeze the chicken, follow these steps. First, let the dish cool completely. Then, portion it into freezer-safe bags or containers. Remove as much air as possible to prevent freezer burn. You can freeze it for up to three months. Remember to label the bags with the date and contents. This way, you know what you have later. When it's time to reheat, you have a few options. The best way is to use the stovetop. Place the chicken and sauce in a skillet over low heat. Stir gently to warm it up. You can also use the microwave. Just cover the dish and heat in short bursts. Check often to avoid overcooking. This keeps the chicken tender and the sauce creamy. Yes, you can use boneless chicken thighs. They cook faster than bone-in thighs. To adjust, sear them for about 5 minutes on each side. Then, follow the same steps for making the sauce. Keep an eye on the cooking time. Boneless thighs usually take about 15-20 minutes to cook through. Creamy mushroom chicken thighs pair well with many sides. Here are some tasty options: - Rice or risotto - Mashed potatoes - Steamed vegetables - Garlic bread - A fresh green salad These sides complement the rich sauce and juicy chicken. Leftover creamy mushroom chicken thighs can last in the fridge for about 3-4 days. Store them in an airtight container. If you want to keep them longer, freeze them for up to 3 months. Just remember to thaw them in the fridge before reheating. For best results, reheat in a skillet or microwave until hot. This blog post covered how to make delicious creamy mushroom chicken thighs. We shared steps for preparing chicken, making a rich sauce, and tips for perfecting the dish. Remember to use nice, fresh mushrooms and season well! Explore variations to make the meal your own. Store leftovers properly to enjoy later. With these tips and tricks, you can create a dish that impresses everyone at your table. Happy cooking!

Creamy Mushroom Chicken Thighs Easy Dinner Recipe

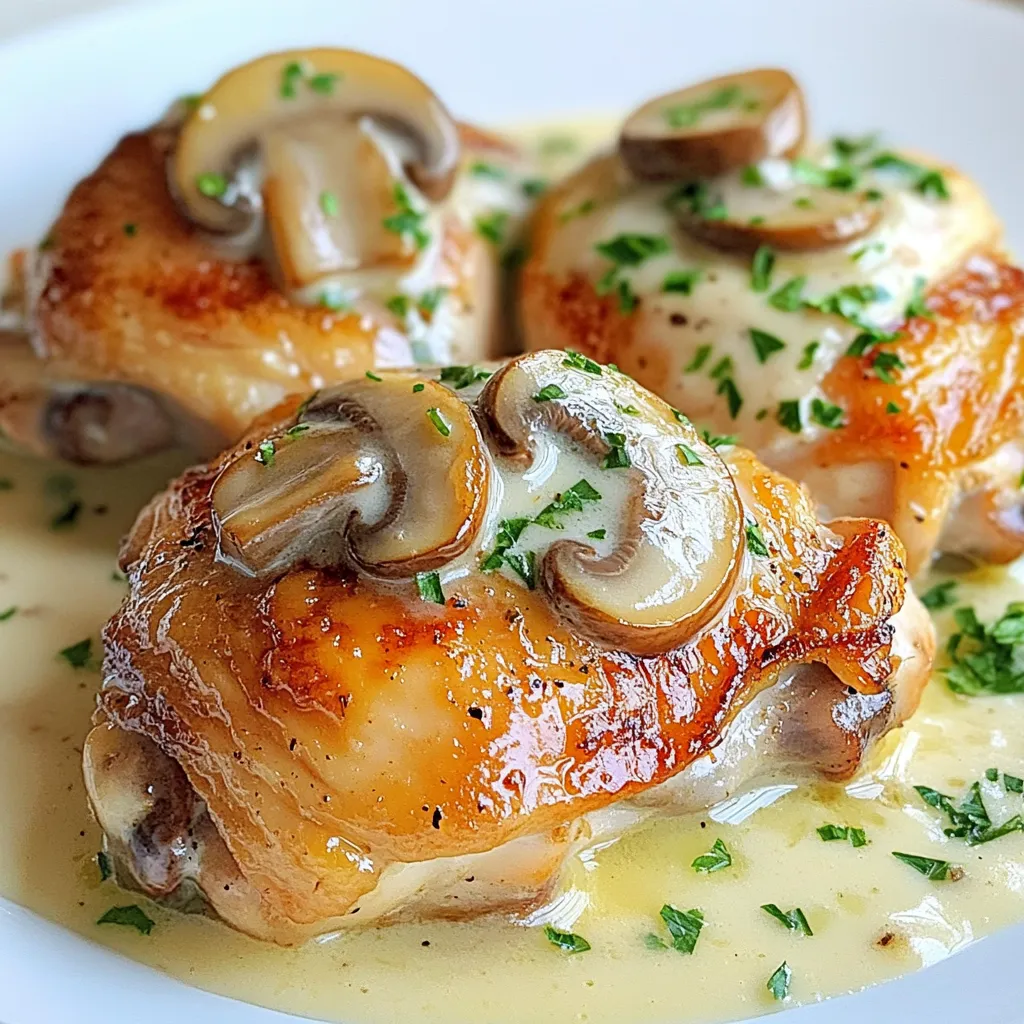
Looking for a simple and tasty dinner? You’ll love these creamy mushroom chicken thighs! This recipe uses juicy chicken, fresh

- 12 oz pasta (spaghetti or fettuccine) - 2 ripe avocados, pitted and scooped - 2 cloves garlic, minced - 1 lemon, juiced - ¼ cup olive oil - ½ cup fresh basil leaves - ¼ cup grated Parmesan cheese (or nutritional yeast for a vegan option) - Salt and pepper to taste - Red pepper flakes (optional, for heat) - Cherry tomatoes, halved (for garnish) - Extra basil leaves for garnish This creamy avocado pasta shines with fresh ingredients. You’ll want to choose your pasta type first. Spaghetti and fettuccine work well. I love the way fettuccine holds the sauce. Next, the star of the dish is the avocado. Use ripe avocados for that creamy texture. You’ll also need garlic for flavor. Fresh garlic adds a nice kick. Don’t forget the lemon juice! It brightens the dish and helps the avocado stay green. Olive oil adds richness and smoothness. Fresh basil leaves give depth and aroma. Grated Parmesan cheese enhances the taste. If you're vegan, swap it with nutritional yeast. You can spice things up with red pepper flakes if you like heat. Cherry tomatoes add a pop of color and sweetness. Extra basil leaves make the dish look fresh and appealing. Gather these ingredients, and you are ready to create a quick and tasty meal! {{ingredient_image_1}} 1. Start by bringing a large pot of salted water to a boil. This adds flavor to the pasta. 2. Add 12 ounces of your choice of pasta, like spaghetti or fettuccine. Cook it according to the package instructions. Aim for al dente, which means it should be firm but cooked through. 3. Once cooked, reserve 1 cup of that pasta water. This water is starchy and will help the sauce stick later. Drain the pasta and set it aside. 1. While the pasta cooks, grab your food processor. Add 2 ripe avocados, 2 minced garlic cloves, the juice of 1 lemon, ¼ cup olive oil, ½ cup fresh basil leaves, and ¼ cup grated Parmesan cheese. 2. Blend all these ingredients until the mixture is smooth and creamy. If it's too thick, slowly add some reserved pasta water, a tablespoon at a time, until you reach your desired consistency. 3. To ensure the sauce is silky, make sure to blend long enough. Scrape down the sides of the processor if needed. 1. Put the drained pasta back in the large pot. Pour the creamy avocado sauce over the pasta. 2. Gently toss the pasta and the sauce together. Use a spatula to coat all the noodles evenly. If the sauce feels too thick, add more reserved pasta water to loosen it. 3. Finally, season with salt, pepper, and red pepper flakes if you like a little heat. Mix well to combine all the flavors. To make your creamy avocado pasta look great, try these tips: - Plating Method: Serve the pasta in wide bowls. This gives a nice view of the dish. - Garnish Ideas: Top with halved cherry tomatoes for color. Add fresh basil leaves for a burst of flavor. Avocados are a powerhouse of nutrition. Here’s what you need to know: - Nutritional Profile: They are rich in healthy fats, fiber, and vitamins. One avocado has good fats that help your heart. - Diet Benefits: Adding avocados can improve skin health and aid digestion. They keep you full longer, which can help with weight management. Avoid these common pitfalls for the best results: - Overcooking Pasta: Be careful not to cook pasta too long. Aim for al dente to keep it firm and tasty. - Sauce Thickness: If your sauce is too thick, add some reserved pasta water. This helps it blend well with the pasta. Pro Tips Use Ripe Avocados: Ensure your avocados are perfectly ripe for the creamiest sauce. They should yield slightly to gentle pressure when squeezed. Reserve Pasta Water: Always save some pasta water before draining. This starchy water can help thin out your sauce and improve its adherence to the pasta. Add Freshness: For an extra burst of flavor, consider adding some lemon zest to the sauce for bright acidity and fragrance. Customize Your Greens: Feel free to mix in other herbs like parsley or cilantro along with the basil for a unique twist on the flavor profile. {{image_2}} You can easily make this dish vegan. To do this, replace the Parmesan cheese with nutritional yeast. Nutritional yeast adds a cheesy flavor without using dairy. You can also add ingredients like sun-dried tomatoes or olives. These will bring more depth to your dish. For gluten-free options, choose pasta made from rice or corn. Many brands offer great gluten-free spaghetti or fettuccine. When making the sauce, ensure all ingredients are gluten-free. This way, you can enjoy a creamy meal without worry. You can boost this pasta with protein. Adding chicken or shrimp makes it heartier. Cook these proteins separately and mix them in at the end. You can also add spices for more taste. Try fresh herbs like parsley or spices like paprika. These will take your dish to the next level. To keep creamy avocado pasta fresh, store it in the fridge. Use airtight containers. This helps keep flavors and textures intact. Make sure to seal them tightly to prevent air from getting in. Leftovers can last up to three days. Before eating, check for any signs of browning or off smells. When reheating, avoid drying out the pasta. You can use the microwave or stovetop. For microwave reheating, place pasta in a bowl. Add a splash of water to keep it moist. Heat in short bursts, stirring in between. For stovetop, add the pasta to a pan. Add a little olive oil or water, and heat over low until warm. Stir often to keep it creamy. You can freeze creamy avocado pasta, but it may change texture. If you want to freeze it, do so right after making. Use freezer-safe containers and leave space for expansion. When you are ready to eat, thaw overnight in the fridge. Reheat gently using the stovetop method to restore creaminess. Avoid refreezing once thawed. To keep your cut avocados fresh, store them in an airtight container. Press plastic wrap against the flesh to limit air exposure. You can also sprinkle a little salt on the cut side. This helps slow down browning. Lemon juice acts as a great preservative. The acid in lemon juice slows oxidation. Simply squeeze some juice over the exposed flesh before storing. This method works well for guacamole too. Yes, you can use frozen avocados. They work well in creamy dishes like this pasta. Thaw them overnight in the fridge or use the microwave for a quicker option. When using frozen avocados, make sure to remove the skin before freezing. This way, they blend smoothly into the sauce. You might need to adjust the amount of lemon juice or olive oil for flavor. To boost protein in your creamy avocado pasta, try adding tofu or beans. Cubed baked tofu adds a nice texture. White beans or chickpeas blend well with the sauce too. If you prefer meat, grilled chicken or shrimp are great options. They add flavor and make the dish heartier. You can also sprinkle some cooked bacon bits for extra crunch. This blog post covered how to make creamy avocado pasta. We discussed the ingredients, step-by-step instructions, and helpful tips. You learned to select the right pasta and avoid common mistakes. We explored variations, storage tips, and answers to FAQs. Try this recipe for a quick, healthy meal. Enjoy the creamy texture and delicious flavor of avocados, all while boosting your diet! Whether you're vegan or gluten-free, there's a tasty option for you. Get cooking and savor every bite!

Creamy Avocado Pasta Quick and Tasty Meal Idea

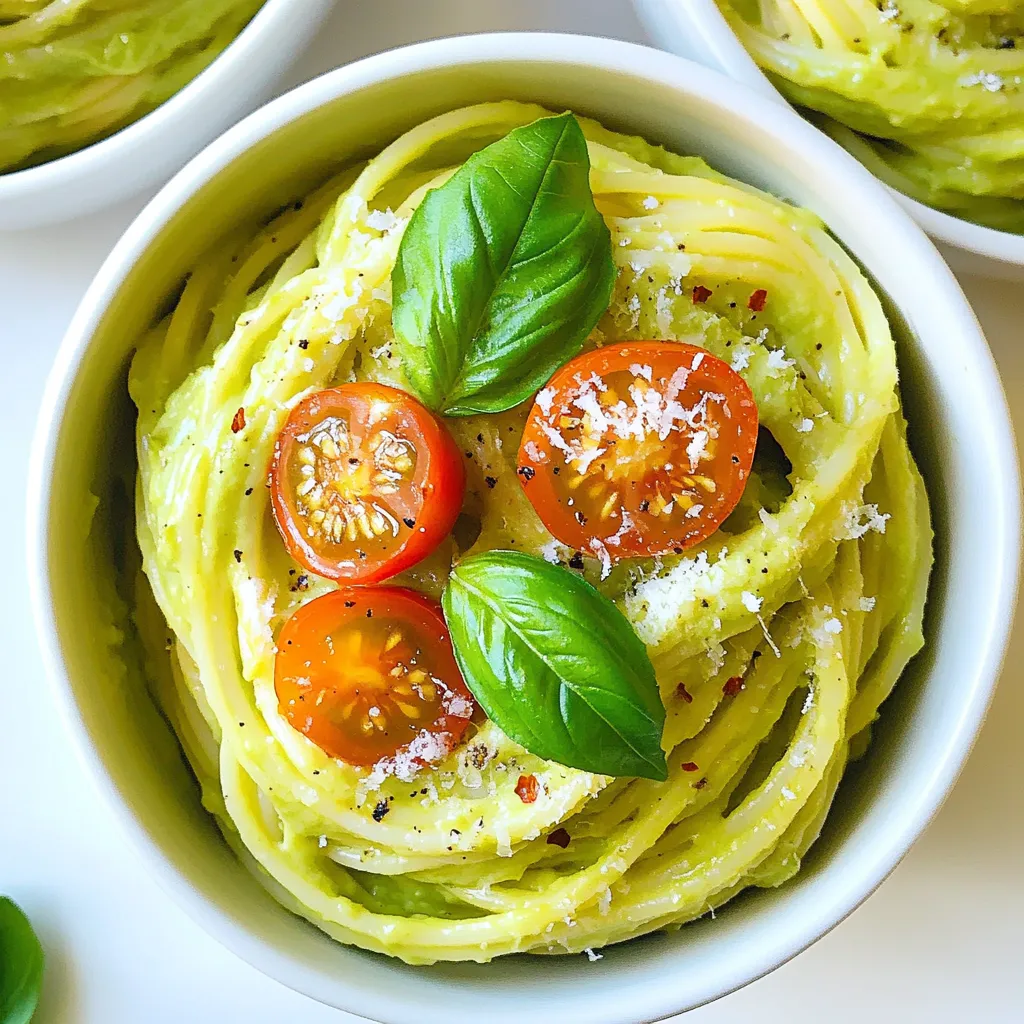
Looking for a quick and tasty meal that packs a punch? Creamy avocado pasta might be your new favorite dish!

- 4 boneless, skinless chicken breasts - 2 cups fresh spinach, washed and dried - 1 can (14 oz) diced tomatoes, undrained - 1 cup heavy cream - 1 small onion, finely chopped - 3 cloves garlic, minced - 1 tablespoon olive oil - 1 teaspoon Italian seasoning - Salt and pepper to taste - ½ cup grated Parmesan cheese - Fresh basil for garnish - Large skillet - Cutting board - Knife - Measuring cups and spoons - Wooden spoon or spatula - Lid for the skillet This dish needs simple items you can find easily. The fresh spinach adds a nice touch. You can skip the basil, but it looks pretty on top! Make sure you have all tools ready. A large skillet helps cook everything nicely. {{ingredient_image_1}} First, gather your chicken breasts. Make sure they are boneless and skinless. Season them with salt, pepper, and Italian seasoning. This adds great flavor! Next, heat one tablespoon of olive oil in a large skillet over medium heat. Once hot, add the finely chopped onion. Sauté for about three to four minutes until it looks translucent. This step builds a nice base for your dish. Now, add three minced garlic cloves to the skillet. Cook for one more minute. You want the garlic to smell good but not burn. Once the onions and garlic are ready, place the seasoned chicken breasts in the skillet. Sear each side for about four to five minutes until golden brown. This gives the chicken a nice color and flavor. After searing, pour in one can of diced tomatoes with their juice. Then, add one cup of heavy cream to the skillet. Stir everything together. This will create a creamy sauce that coats the chicken well. Bring the mixture to a gentle simmer. This means you want small bubbles, not a rolling boil. Lower the heat and cover the skillet. Let it cook for 15 to 20 minutes. Make sure the chicken reaches an internal temperature of 165°F. This ensures it’s safe to eat. Once the chicken is cooked, add two cups of fresh spinach. Stir in half a cup of grated Parmesan cheese. The spinach will wilt quickly, and the cheese will melt into the sauce. This adds creaminess and flavor. Taste your dish and adjust the seasoning with more salt or pepper if needed. Now, serve the chicken right away. Spoon the creamy sauce over it. If you like, garnish with fresh basil for a nice touch. Enjoy your delicious meal! To make your creamy tomato spinach chicken shine, focus on the seasoning. Use fresh herbs if you can. They bring a burst of flavor. Make sure to taste as you cook. Adjust salt and pepper to fit your taste. Let the chicken rest for a few minutes after cooking. This keeps it juicy. Serve this dish over pasta or rice for a complete meal. The creamy sauce works great with both. You can also pair it with a side salad or crusty bread. This adds crunch and freshness. For a pop of color, use fresh basil on top. It adds a nice touch and flavor. Avoid cooking the chicken at too high a heat. This can dry it out. Make sure to use a meat thermometer. The chicken should reach 165°F to be safe. Don’t skip the spinach—it's key for texture and nutrition. Lastly, don’t rush the simmering stage. Let the flavors blend for a rich sauce. Pro Tips Use Fresh Ingredients: Fresh spinach and high-quality tomatoes can greatly enhance the flavor of the dish. Look for vibrant greens and ripe tomatoes for the best results. Check Chicken Temperature: Always ensure your chicken reaches an internal temperature of 165°F for safety. Use a meat thermometer for accuracy. Customize the Seasoning: Feel free to adjust the Italian seasoning to your taste or add red pepper flakes for a bit of heat. Experimenting can lead to a more personalized dish. Let it Rest: After cooking, let the chicken rest for a few minutes before serving. This allows the juices to redistribute, making for a juicier bite. {{image_2}} You can make this dish healthier with a few easy swaps. Use low-fat cream instead of heavy cream. This change cuts calories while keeping the creaminess. You can also add more spinach. Spinach offers fiber and vitamins. Replace chicken breasts with boneless, skinless thighs for a juicier option. If you want, cut down on the cheese or use a lower-fat version. To boost the flavor, try adding more herbs. Fresh herbs like basil or parsley can brighten the dish. You can also mix in red pepper flakes for a spicy kick. A splash of lemon juice adds freshness and balances the creaminess. For a smoky taste, try adding a bit of smoked paprika. These simple tweaks can make the dish even more exciting! If chicken isn’t your thing, you have options! Shrimp works great in this recipe. Just cook it until it turns pink and tender. You could also use firm tofu for a plant-based version. Cut the tofu into cubes and sauté until golden. For a heartier dish, consider using turkey breast. It cooks similarly and gives you a tasty meal! After enjoying your creamy tomato spinach chicken, let it cool. Place leftovers in an airtight container. Make sure the container is clean. Store it in the fridge for up to three days. For longer storage, consider freezing. When you're ready to eat again, take the leftovers out of the fridge. You can reheat them in a skillet over low heat. Stir gently to avoid sticking. You can also microwave the dish in a safe bowl. Heat for one to two minutes, stirring halfway. This keeps the chicken moist and the sauce creamy. To freeze creamy tomato spinach chicken, use a freezer-safe container. Make sure to leave some space at the top for expansion. Label the container with the date. This meal can last up to three months in the freezer. To thaw, place it in the fridge overnight before reheating. This method helps keep the flavor and texture intact. You can use milk with cornstarch or a mix of milk and butter. This makes a creamy sauce without heavy cream. For a dairy-free option, try coconut milk or almond milk. Both choices add flavor and richness. Adjust the amount to get your desired creaminess in the sauce. Yes, you can use frozen spinach! Just thaw it first and squeeze out the extra water. This helps keep the sauce from becoming too watery. Frozen spinach is quick and easy, making your meal prep faster. Use about 1 cup of frozen spinach as a substitute for fresh. Check the internal temperature of the chicken. It should reach 165°F. You can also cut into the chicken; the juices should run clear, not pink. Cooking time varies, so use a meat thermometer for the best results. This ensures your chicken is safe and delicious. You learned about key ingredients and equipment needed for your dish. I shared step-by-step plans for cooking chicken, making the sauce, and finishing your meal. Tips helped you avoid mistakes and serve it well. I also covered variations for healthy eating and storing leftovers. Remember to experiment with flavors and enjoy your cooking journey. With these insights, you can create a delightful meal that suits your taste. Happy cooking!

Creamy Tomato Spinach Chicken Easy Weeknight Meal

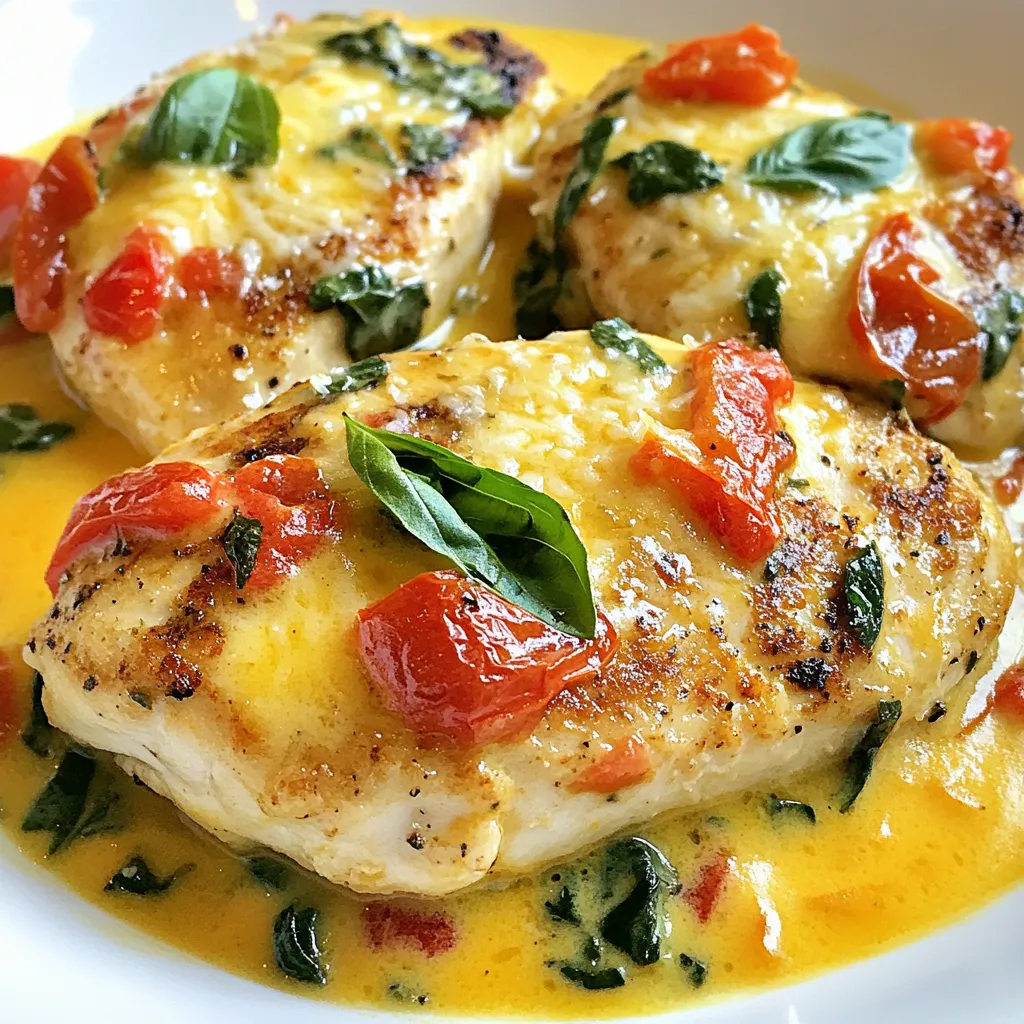
If you’re craving a quick and tasty dinner, you’re in the right place! This Creamy Tomato Spinach Chicken is an

For this Garlic Herb Baked Chicken Breasts recipe, you need simple and fresh items. Here’s a full list of what to gather: - 4 boneless, skinless chicken breasts - 4 cloves of garlic, minced - 2 tablespoons fresh parsley, chopped - 1 tablespoon fresh thyme, chopped - 1 tablespoon fresh rosemary, chopped - 1/4 cup olive oil - 2 teaspoons lemon juice - Salt and pepper to taste - Zest of 1 lemon These ingredients bring bold flavor to the chicken. Fresh herbs like parsley, thyme, and rosemary add brightness. The minced garlic gives it a rich taste. Olive oil helps keep the chicken moist. Lemon juice and zest add a tangy kick. Salt and pepper enhance all the flavors. It's key to use fresh herbs for maximum flavor. You can find them at local markets or grocery stores. Fresh herbs make a noticeable difference compared to dried ones. This dish is not just easy to make; it also tastes amazing. Make sure your chicken is thawed and at room temperature before marinating. This helps the herbs stick and infuse well. Enjoy the process and savor the delightful aromas as you cook! {{ingredient_image_1}} 1. Preheating the oven: Start by setting your oven to 425°F (220°C). This high heat helps to lock in flavor and keeps the chicken juicy. 2. Making the herb marinade: In a bowl, mix 4 minced garlic cloves, 2 tablespoons of chopped parsley, 1 tablespoon each of thyme and rosemary, and 1/4 cup olive oil. Add 2 teaspoons of lemon juice, the zest of 1 lemon, and some salt and pepper. Stir until well combined. This marinade is the key to tasty chicken. - How to ensure proper coating: To coat the chicken well, place the 4 chicken breasts in a large resealable bag or shallow dish. Pour the marinade over them. Make sure each piece is covered with the marinade. This step helps the chicken absorb all those great flavors. - Recommended marinating time: Seal the bag or cover the dish and put it in the fridge. Let the chicken marinate for at least 30 minutes. For even better taste, try to marinate for up to 2 hours. 1. Preparing the baking dish: Line a baking dish with parchment paper or lightly grease it with olive oil. This makes cleanup easier and helps prevent sticking. 2. Cooking time and checking for doneness: After marinating, take the chicken out of the fridge. Place the chicken in the prepared baking dish and throw away any leftover marinade. Bake for 25-30 minutes. Use a meat thermometer to check if the chicken is done. It should reach 165°F (74°C). Once done, take it out and let it rest for 5 minutes before slicing. This resting period keeps the chicken juicy. To get the best flavor with herbs, use fresh ones. Fresh herbs add a bright taste that dried ones can't match. I love using parsley, thyme, and rosemary. Chop them finely and mix them into your marinade. This helps the flavors blend well with the chicken. Resting the chicken after baking is very important. Let it rest for about five minutes. This step allows the juices to settle. When you slice the chicken too soon, the juices run out. This can make your chicken dry. Resting keeps it juicy and tender. When serving garlic herb chicken, presentation matters. Place the chicken on a nice platter. You can add lemon wedges and extra herbs around the chicken. This adds color and makes it look fancy. Garnishes can boost visual appeal. Fresh herbs or lemon slices on top add a nice touch. You can also drizzle some pan juices on the chicken. This not only looks great but adds more flavor too. Pro Tips Marinate for Maximum Flavor: Allow the chicken to marinate for at least 1 hour, or up to 2 hours, for a more intense flavor that penetrates the meat. Use a Meat Thermometer: To ensure the chicken is perfectly cooked, use a meat thermometer to check that the internal temperature reaches 165°F (74°C). Let It Rest: After baking, let the chicken rest for 5 minutes before slicing to allow the juices to redistribute, keeping the meat moist and flavorful. Customize Your Herbs: Feel free to substitute or add other fresh herbs like basil or oregano according to your taste preferences for a unique twist. {{image_2}} You can change herbs to suit your taste. Try using basil or oregano instead of thyme or rosemary. These herbs still pack a flavorful punch. If you want a kick, add some hot sauce or a spoon of mustard to the marinade. This adds a nice zest without overpowering the chicken. Grilling is a great way to get smoky flavors. Just marinate the chicken as usual and grill it over medium heat. Cook for about 6-8 minutes per side, checking for doneness. You can also pan-sear the chicken for a crispy outside. Heat olive oil in a skillet, then cook the chicken for 5-7 minutes on each side. If you prefer a hands-off method, try a slow cooker. Place the marinated chicken breasts in the slow cooker. Cook on low for 4-6 hours or high for 2-3 hours. This method keeps the chicken juicy and tender. To keep your Garlic Herb Baked Chicken Breasts fresh, use the right storage methods. First, let the chicken cool down to room temperature. Then, place it in an airtight container. This method keeps the chicken moist and flavorful. Store the container in the fridge. You should eat the leftovers within three to four days. If the chicken smells bad or looks off, throw it away. Always trust your senses. If you want to save the chicken for later, freezing is the way to go. First, cut the chicken into smaller pieces if you like. Place them in a freezer-safe bag or container. Squeeze out as much air as possible to prevent freezer burn. Label the bag or container with the date. You can freeze the chicken for up to three months. When you are ready to eat, thaw it safely. The best way to thaw is in the fridge overnight. If you're in a hurry, you can use cold water. Just remember to cook it right away after thawing. How long to bake garlic herb chicken? Bake garlic herb chicken for 25 to 30 minutes. Check that the internal temperature is 165°F (74°C). This ensures the chicken is safe to eat and very juicy. Can I use frozen chicken breasts? You can use frozen chicken breasts, but thaw them first. Thawing helps the marinade soak in better. It also cooks more evenly. What to serve with garlic herb chicken? Serve garlic herb chicken with roasted veggies or a fresh salad. Rice or mashed potatoes also pair well. These sides soak up the tasty juices! In this blog post, we explored how to make tasty garlic herb chicken. We covered the key ingredients and detailed steps to marinate and bake the chicken. I shared cooking and serving tips to enhance flavor and presentation. We also discussed variations and storage methods for leftovers. Whether you choose to grill or bake, you can enjoy this dish anytime. Remember, simple changes can add great flavor. Try this recipe for a meal that is easy, delicious, and satisfying. Dive in and enjoy your cooking adventure!

Garlic Herb Baked Chicken Breasts Flavorful Delight

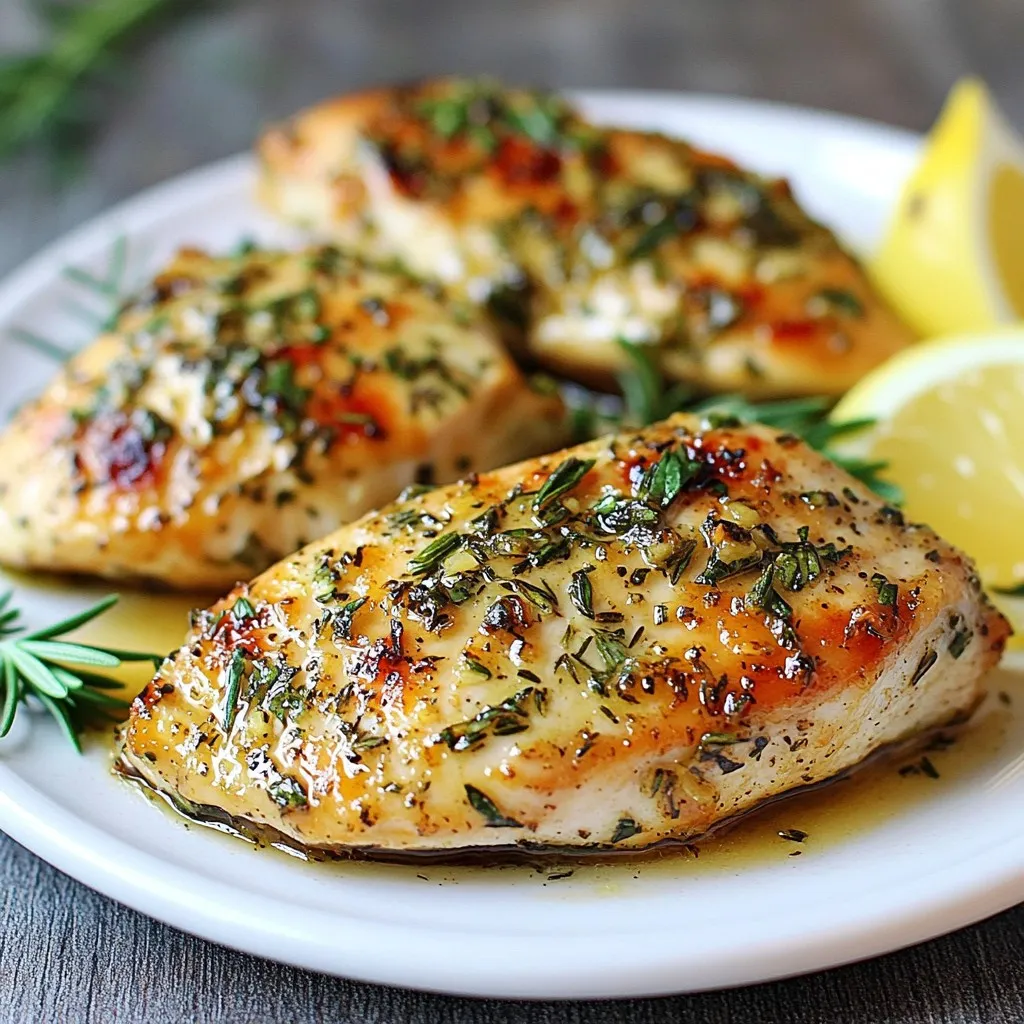
If you’re looking to spice up your dinner, you’ve come to the right place! I’m excited to share my Garlic

You need 2 cups of fresh strawberries. Make sure they are ripe and sweet. Hull and slice them into small pieces. This helps release their juices. The strawberries add a bright flavor to the bars. You will use 1 cup of heavy whipping cream. Whipping cream makes the bars creamy and rich. It forms stiff peaks when whipped well. This gives the bars a nice texture. You need 1 cup of crushed shortbread cookies. These cookies add crunch and sweetness. They mix well with the cream. You can use extra cookies for topping. - 1/4 cup granulated sugar - 1 cup sweetened condensed milk - 1 teaspoon vanilla extract - 1/2 cup white chocolate chips, melted - Pinch of salt The sugar helps sweeten the strawberries. Sweetened condensed milk makes the mixture creamy. Vanilla extract adds a warm flavor. Melted white chocolate gives a nice touch to the bars. A small pinch of salt balances the sweetness. {{ingredient_image_1}} To start, take 2 cups of fresh strawberries. Hull and slice them into small pieces. In a medium bowl, mix the strawberries with 2 tablespoons of granulated sugar. This helps the strawberries release their juices. Let them sit for about 15 minutes. You'll see them soften and become juicy. This sweet mix will add flavor to your bars. Next, grab a large mixing bowl. Pour in 1 cup of heavy whipping cream. Use a mixer to whip the cream until you see stiff peaks. This will take a few minutes. Once done, gently fold in 1 cup of sweetened condensed milk. Add 1 teaspoon of vanilla extract and a pinch of salt for taste. Mix well until everything blends smoothly. Now, fold in 1 cup of crushed shortbread cookies. This adds a nice crunch to your bars. For a fun twist, drizzle in some melted white chocolate. Fold gently to create a marbled look. Grab a rectangular dish lined with parchment paper. Spoon half of your cream mixture into the dish. Spread it evenly. Next, layer the juicy strawberries on top. Then, add the rest of the cream mixture over the strawberries. Cover the dish with plastic wrap. Place it in the freezer for at least 4 to 6 hours. This will help the bars set fully. When the bars are frozen, take them out of the dish. Cut them into bars. For a sweet finish, dip the top of each bar into melted white chocolate. Sprinkle extra crushed shortbread cookies on top for added crunch. Enjoy your delicious Strawberry Shortcake Ice Cream Bars right away. You can also store them in an airtight container in the freezer for later. When picking strawberries, look for bright red ones. They should feel firm and smell sweet. Avoid dull or mushy berries. Fresh strawberries will make your ice cream bars taste great. If you can, buy organic strawberries. They often have better flavor and fewer chemicals. To whip cream well, start with cold heavy cream. Use a clean bowl and beaters. Whip until stiff peaks form, but don’t overdo it. Over-whipped cream can turn grainy. Fold the whipped cream gently with the other ingredients. This keeps the mixture light and airy. To boost flavor, add a squeeze of lemon juice to the strawberries. This enhances their sweetness. Mix in a little extra vanilla extract in the cream for depth. You can also try adding a splash of almond extract. It adds a nice twist to the classic taste. Pro Tips Choose Ripe Strawberries: Make sure to select ripe, sweet strawberries for the best flavor in your ice cream bars. Whip Cream Properly: Whip the heavy cream until stiff peaks form to ensure a light and airy texture in the bars. Use Parchment Paper: Lining your dish with parchment paper will make it easier to remove the bars once frozen. Customize the Toppings: Feel free to add nuts or sprinkles as toppings along with the crushed cookies for extra texture and flavor. {{image_2}} You can swap strawberries for other fruits. Ripe peaches add a sweet twist. Fresh blueberries give a nice pop of color. Try raspberries for a tart bite. Each fruit brings its own flavor to the bars. Just make sure to adjust the sugar based on the fruit's sweetness. For a dairy-free version, use coconut cream instead of heavy cream. It still whips well and adds a light coconut flavor. Replace sweetened condensed milk with almond or oat milk. Use a dairy-free chocolate for a fun topping. These swaps make the dessert lighter and healthier. You can make your bars even more fun with toppings. Try crushed nuts for a crunchy bite. A drizzle of caramel sauce adds a sweet touch. You can also use sprinkles for a festive look. Mix in mini chocolate chips for extra sweetness. Let your imagination run wild! To keep your Strawberry Shortcake Ice Cream Bars fresh, use an airtight container. Wrap each bar in plastic wrap for extra protection. This step helps avoid freezer burn and keeps the flavor intact. Always store the bars in the coldest part of the freezer. Avoid placing them near the door, as the temperature can change often. Your bars will stay tasty for about three months in the freezer. After that, they may lose flavor and texture. To enjoy the best taste, try to eat them within this time frame. Mark the container with the date you made them to keep track of freshness. If your bars are too hard to eat, let them sit at room temperature for about five minutes. This time allows them to soften just enough without melting. Do not use a microwave, as it can ruin the texture. Enjoy your bars when they are creamy and delicious! Strawberry Shortcake Ice Cream Bars last about two months in the freezer. Make sure to store them in an airtight container. This helps keep them fresh and tasty. Yes, you can use frozen strawberries. Just thaw them first and drain excess juice. This keeps your bars from getting too watery. Fresh strawberries do give a better flavor, though. You can use coconut cream or full-fat Greek yogurt as a substitute. Both will give a creamy texture. If you want a lighter option, try low-fat milk, but the bars will be less rich. Yes, you can use gluten-free shortbread cookies. Many brands offer gluten-free cookies that are very tasty. Just check the label to ensure they fit your needs. To make these bars without condensed milk, use a mix of yogurt and sugar. Combine 1 cup of yogurt with 1/4 cup of sugar. This mix will keep the bars creamy and sweet. You learned about the key ingredients for Strawberry Shortcake Ice Cream Bars, including fresh strawberries and creamy components. I shared step-by-step instructions for making these tasty treats. Tips on choosing the best fruit and achieving perfect cream were also included. We explored fun variations for different diets and preferences. Proper storage info helps keep your bars fresh. Now, enjoy crafting this delicious dessert, knowing how to tweak it to fit your taste. Dive into your kitchen and get creative with your own bars!

Strawberry Shortcake Ice Cream Bars Simple and Tasty

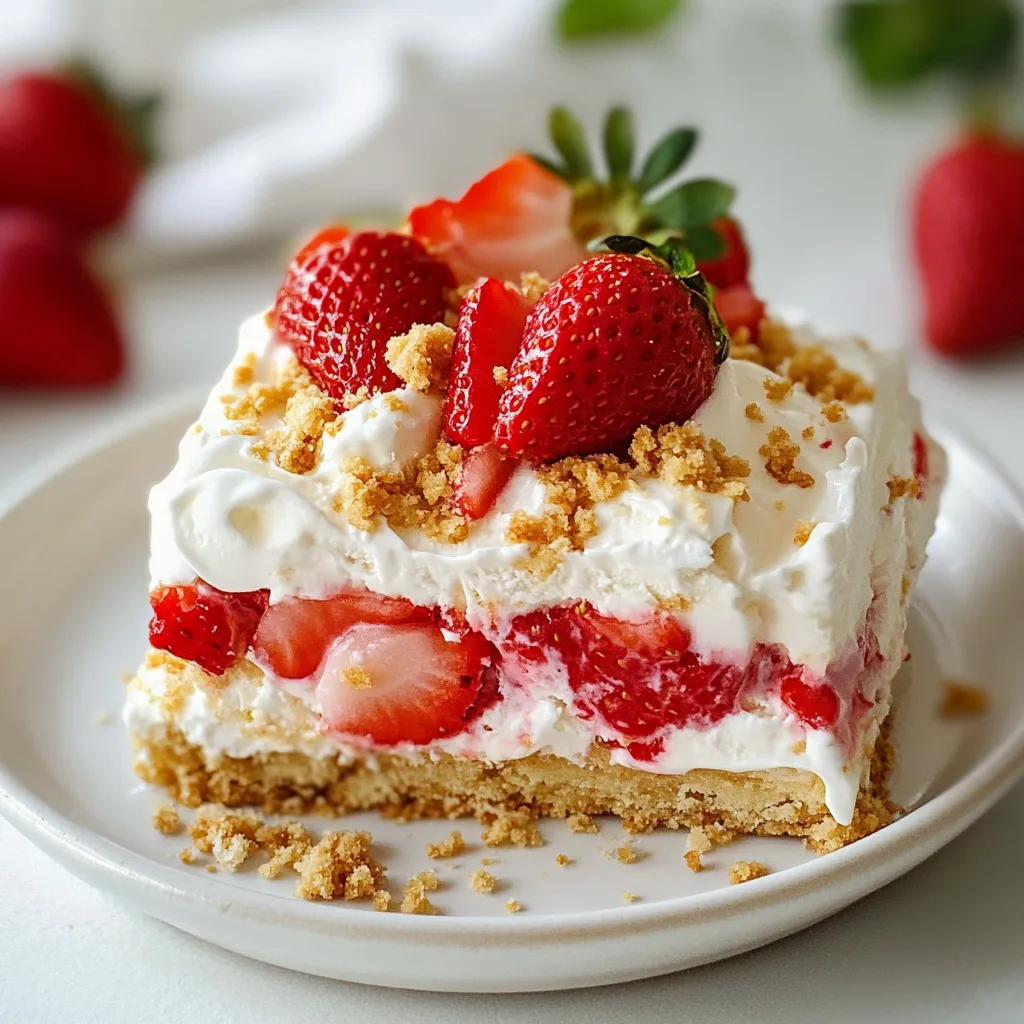
Craving a cool treat on a hot day? These Strawberry Shortcake Ice Cream Bars are the answer! With fresh strawberries,

- 1 lb ground chicken or turkey - 1/2 cup breadcrumbs - 1/4 cup grated coconut I love using ground chicken or turkey for these meatballs. They are lean and soak up flavors well. The breadcrumbs keep them juicy and help them hold shape. Grated coconut adds a sweet touch and a nice texture. Together, these ingredients form the base of a delicious dish. - 1 tablespoon curry powder - 1 tablespoon ginger, grated - 2 cloves garlic, minced - 1 teaspoon salt - 1/2 teaspoon black pepper Spices make this dish special. Curry powder gives the meatballs warmth and depth. Ginger and garlic add a punch of flavor that I can’t resist. Salt and black pepper enhance all the tastes. These spices blend perfectly to create a savory bite. - 1 can (14 oz) coconut milk - 2 tablespoons red curry paste - 1 tablespoon lime juice The sauce is where the magic happens! Coconut milk makes it creamy and rich. Red curry paste brings a kick of heat and flavor. Lime juice adds brightness and balances the dish. Together, these ingredients create a sauce that wraps around the meatballs, making every bite a delight. {{ingredient_image_1}} To start, gather all the ingredients in a big mixing bowl. You will need: - 1 lb ground chicken or turkey - 1/2 cup breadcrumbs - 1/4 cup grated coconut (unsweetened) - 1/4 cup finely chopped cilantro - 1 tablespoon ginger, grated - 2 cloves garlic, minced - 1 tablespoon curry powder - 1 teaspoon salt - 1/2 teaspoon black pepper Mix these ingredients well. Use your hands to combine them. This helps blend all the flavors. Once mixed, form small meatballs, about 1 inch in size. You should get about 20 meatballs. Next, heat 1 tablespoon of vegetable oil in a large skillet over medium heat. When the oil is hot, add the meatballs to the pan. Cook them for 5 to 7 minutes. Turn them often so they brown on all sides. They don’t need to be fully cooked yet. Once the meatballs are browned, it's time to make the sauce. In the same skillet, add 2 tablespoons of red curry paste. Stir it for about 1 minute. This step brings out the rich flavors. Next, pour in 1 can of coconut milk and add 1 tablespoon of lime juice. Stir until everything is well combined. Let the sauce come to a gentle simmer. Finally, return the browned meatballs to the skillet. Cover and let them simmer in the sauce for 10 to 15 minutes. This cooks the meatballs fully and infuses them with flavor. Taste the sauce and adjust if needed. You can add more salt or lime juice. Serve the meatballs over cooked rice and drizzle with the coconut curry sauce. Garnish with fresh cilantro and lime wedges for a beautiful touch. To get the best meatballs, mix the ingredients gently. Too much mixing makes them tough. Use your hands to combine the meat, breadcrumbs, and spices. Form the meatballs lightly. Aim for about 1 inch in size, so they cook evenly. For even browning, heat your skillet before adding the meatballs. Use medium heat to avoid burning. Turn them often for a nice color on all sides. It's okay if they aren't cooked through yet; they will finish in the sauce. Adjust the spice level to your taste. If you like it hot, add more red curry paste. For a milder dish, use less. Always taste the sauce before serving. This helps you find the right balance. Balancing sweetness and acidity is key. The coconut milk adds creaminess and sweetness. Lime juice brings brightness. If it feels too sweet, add a bit more lime juice. This will enhance the flavor and make it pop. Serve the meatballs over a bed of warm, fluffy rice. This adds texture and helps soak up the sauce. For garnish, sprinkle fresh cilantro on top. Add lime wedges on the side for a burst of flavor. These small touches make the dish look and taste amazing. Enjoy your beautiful meal! Pro Tips Use Fresh Ingredients: Fresh herbs and spices enhance the flavor of your meatballs and curry sauce, making the dish more vibrant and aromatic. Adjust Spiciness: If you prefer a spicier dish, add more red curry paste or a pinch of cayenne pepper to the sauce for an extra kick. Experiment with Proteins: Feel free to substitute ground chicken or turkey with ground beef, pork, or even plant-based alternatives for a different flavor profile. Perfectly Cooked Meatballs: To ensure even cooking, avoid overcrowding the skillet when browning the meatballs; cook in batches if necessary. {{image_2}} You can use different meats for these meatballs. Ground beef or pork gives a rich flavor. They also blend well with the coconut curry sauce. If you prefer a lighter option, try ground chicken or turkey. Both will keep the dish tasty and healthy. For a plant-based twist, use lentils or chickpeas. You can mash them and mix with breadcrumbs. This option is great for vegans and vegetarians. It keeps the dish full of flavor and texture. Coconut milk is a perfect choice for dairy. It gives a creamy texture without any dairy. If you want to add more creaminess, use coconut yogurt. It works well and keeps the dish dairy-free. For those needing gluten-free meals, use gluten-free breadcrumbs. They hold the meatballs together just as well. You can find these in most grocery stores. Always check the label to ensure they are gluten-free. Adding vegetables to the sauce can boost the flavor. Try bell peppers, carrots, or snap peas. They add color and nutrition. You can sauté them with the meatballs or stir them in later. Experimenting with spices can also change the taste. Add a pinch of cumin or coriander. You can even try different curry pastes. Each will give a unique flavor to your coconut curry meatballs. Don't be afraid to mix and match! After cooking, let the meatballs cool. Place them in a bowl and cover it. You can also use airtight containers. This keeps the meatballs fresh. Refrigerate them within two hours. They last about three to four days in the fridge. When reheating, use a skillet or microwave. If using a skillet, add a splash of water. This helps steam the meatballs. Heat on medium until warm. For the microwave, cover the bowl with a lid. Heat in short bursts, checking often. This keeps the meatballs juicy and soft. To freeze, let the meatballs cool completely. Arrange them in a single layer on a tray. Once frozen, transfer them to a freezer bag. Remove as much air as possible. For sauce, freeze in a separate container. To thaw, place in the fridge overnight. You can also cook from frozen. Just add extra time to the cooking process. Yes, you can make these meatballs ahead of time. Prepare the meatballs and cook them as directed. After cooking, let them cool completely. Store them in an airtight container in the fridge for up to three days. You can also freeze the cooked meatballs. Place them in a freezer-safe bag or container. They will stay good for about three months. When you’re ready to eat, thaw in the fridge overnight. Reheat gently in a skillet or microwave. These meatballs go great with several sides. Here are some ideas: - Steamed rice: Plain white or brown rice works well. - Coconut rice: Cook rice with coconut milk for extra flavor. - Noodles: Serve with rice noodles or soba for a twist. - Vegetables: Pair with steamed broccoli or sautéed greens. - Salad: A fresh cucumber salad balances the rich curry flavors. The spice level in these meatballs can be adjusted. The red curry paste adds heat, but it’s mild. If you want it spicier, you can add more red curry paste. You can also add chopped fresh chili peppers to the mix. For less spice, use less curry paste. If you prefer no heat, skip the paste altogether. The meatballs will still taste great! In this blog post, we explored how to make delicious Coconut Curry Meatballs. We covered key ingredients like ground chicken, coconut milk, and spices. I shared a step-by-step guide for cooking and tips for perfecting meatballs. You can also try variations with different proteins and flavors. In closing, this dish is versatile and full of taste. You can adapt it to your liking and enjoy it in many ways. Happy cooking!

Coconut Curry Meatballs Savory and Flavorful Dish

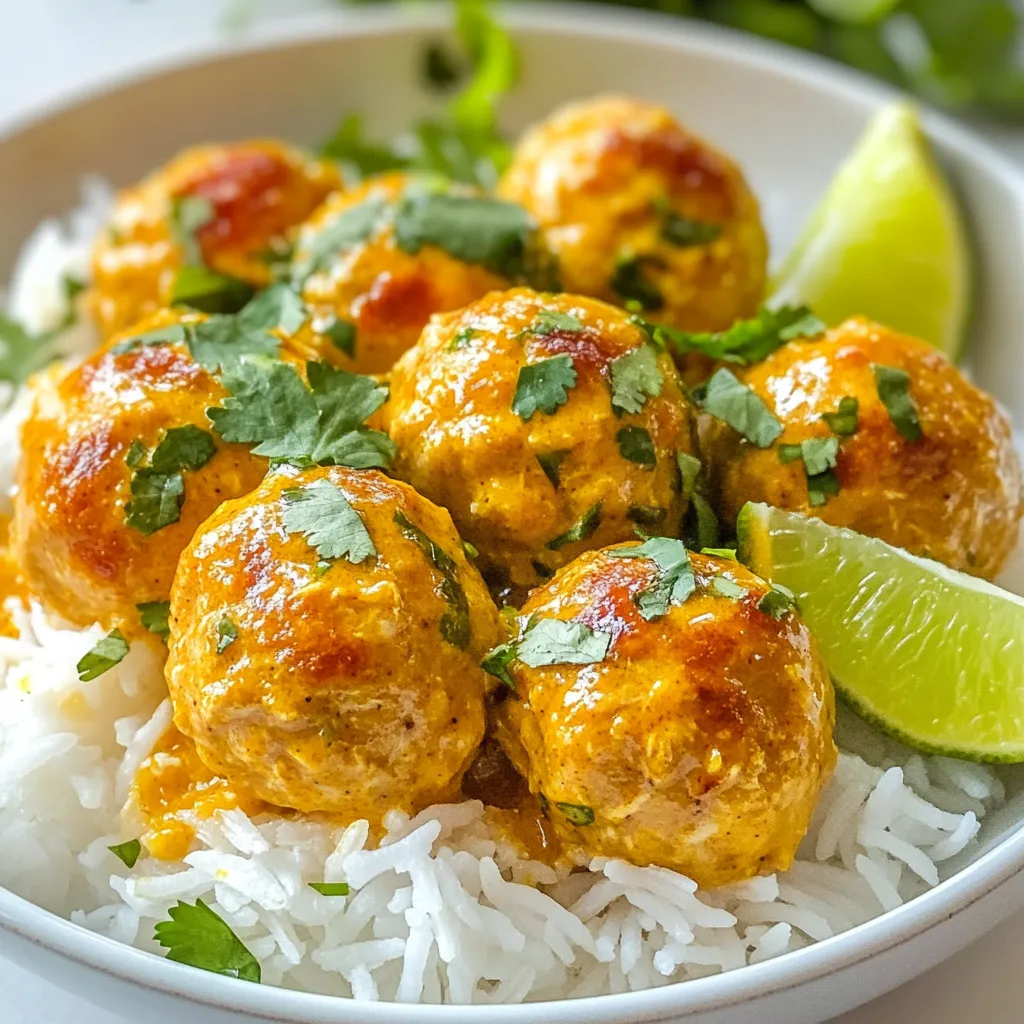
Welcome to a flavorful journey with my Coconut Curry Meatballs! This dish combines tender meatballs with a rich, creamy coconut

- 1 package (16 oz) potato gnocchi - 2 tablespoons olive oil - 3 cloves garlic, minced Potato gnocchi serves as the base of this dish. They are soft and pillowy, making every bite delightful. Olive oil adds richness and flavor. Garlic gives the dish a lovely aroma and taste. - 1 can (14 oz) crushed tomatoes - 1 cup heavy cream - 2 cups fresh spinach, chopped - 1 teaspoon Italian seasoning - Salt and pepper to taste - 1/2 cup grated Parmesan cheese - Fresh basil leaves for garnish Crushed tomatoes form the heart of our sauce, providing a rich, tangy base. Heavy cream adds smoothness and a creamy texture. Fresh spinach brings color and nutrients. Italian seasoning gives depth to the flavor. Salt and pepper enhance every taste. Parmesan cheese offers a salty finish, while fresh basil adds a bright touch. Each ingredient plays a key role in making creamy tomato spinach gnocchi a comfort meal. You can feel the love in every bite. {{ingredient_image_1}} Start by bringing a large pot of salted water to a boil. The salt helps add flavor to the gnocchi. Once the water is boiling, add the potato gnocchi. Cook them for about 2-3 minutes or until they float to the top. Floating means they are done! Carefully drain the gnocchi and set them aside. In a large skillet, heat the olive oil over medium heat. Add the minced garlic and sauté for 1-2 minutes. Keep an eye on it; you want it fragrant, not browned. Next, stir in the crushed tomatoes and Italian seasoning. Let it simmer for about 5 minutes. This step helps the flavors mix well. Reduce the heat to low and pour in the heavy cream. Stir until it blends nicely. Allow the sauce to simmer for another 2-3 minutes. It will get a bit thicker. Now, it’s time to add the chopped spinach to the skillet. Cook it for 2-3 minutes until the spinach wilts down. Gently fold the cooked gnocchi into the creamy tomato sauce. Make sure the gnocchi gets coated evenly. Taste and add salt and pepper if needed. Finally, sprinkle the grated Parmesan cheese over the top and stir to combine. Let everything warm through for a minute or two. Serve it hot and garnish with fresh basil leaves. Enjoy your creamy tomato spinach gnocchi! To ensure perfect gnocchi texture, follow these steps: - Cook gnocchi briefly: Boil gnocchi in salted water for just 2-3 minutes. They are done when they float to the top. Overcooking can make them mushy. - Drain well: After cooking, drain the gnocchi and let them sit for a minute. This helps keep them firm. To avoid overcooking spinach, keep these tips in mind: - Add spinach last: Stir in fresh spinach when the sauce is nearly done. This keeps its bright color and nutrients. - Cook briefly: Let the spinach wilt for just 2-3 minutes. This keeps it tender but not soggy. For garnishing options, consider these ideas: - Fresh basil: Add a few leaves on top for a burst of flavor and color. - Extra cheese: Sprinkle more grated Parmesan cheese before serving for a cheesy finish. When it comes to pairing with sides, think about these options: - Salads: A light green salad complements the richness of the gnocchi. - Garlic bread: Serve warm garlic bread on the side for a cozy meal. Feel free to mix and match these tips to make your creamy tomato spinach gnocchi even more delightful! Pro Tips Use Fresh Ingredients: Fresh spinach and high-quality canned tomatoes can elevate the dish's flavor significantly. Customize the Creaminess: For a lighter version, substitute half of the heavy cream with vegetable broth or use Greek yogurt for a tangy twist. Gnocchi Tips: Sauté the cooked gnocchi in the sauce for an additional minute to give them a slight crisp and enhance flavor absorption. Serving Suggestions: Pair with a side salad or garlic bread for a complete meal that balances the creamy texture with fresh flavors. {{image_2}} You can easily change a few ingredients in this recipe. For heavy cream, try using sour cream, yogurt, or coconut milk. These swaps add a nice twist and can fit your needs. Each option gives a different flavor and texture to the sauce. When it comes to cheese, feel free to mix it up. Instead of Parmesan, you might use mozzarella or goat cheese. These cheeses melt nicely and can add a unique taste. You can even try a mix of your favorites for more depth. Want to boost the meal? Adding protein can make it heartier. You can toss in cooked chicken or shrimp to the creamy sauce. Both options cook quickly and soak up the flavors well. This makes the dish more filling and adds extra nutrients. You can also add more vegetables to the mix. Try mushrooms or bell peppers for a colorful twist. These veggies bring in new textures and tastes. Slice them thin and sauté them with the garlic for a lovely base. This way, you can enjoy a rainbow of flavors in every bite. To keep your creamy tomato spinach gnocchi fresh, store leftovers in an airtight container. Place the container in the fridge. Your dish stays good for about three days. If you want to save it longer, consider freezing. For freezing, let the gnocchi cool completely before transferring it to a freezer-safe bag. It can last up to three months in the freezer. Just remember to label the bag with the date to keep track. When it's time to eat your leftovers, reheating properly is key. The best way to reheat gnocchi is on the stovetop. This method helps keep the texture nice and creamy. Just add a splash of water or broth to the pan to help it heat evenly. Stir often to avoid sticking. You can also use a microwave, but this might change the texture. Place the gnocchi in a microwave-safe bowl. Cover it to keep moisture in, and heat in short bursts of about 30 seconds. Stir between each burst to ensure even heating. Choose the method that works best for you, but the stovetop is my favorite! To make gnocchi from scratch, you need few simple items. Start with 2 cups of mashed potatoes. Mix in 1 cup of all-purpose flour and 1 egg. Blend until smooth. Roll the dough into long ropes. Cut them into small pieces, about an inch long. Use a fork to create ridges on each piece. This helps sauce stick better. Boil them in salted water until they float. This means they are ready! Yes, you can use frozen spinach. It saves time and is easy to use. Just thaw the spinach first. Squeeze out the excess water. This helps prevent a watery sauce. Be mindful that frozen spinach can be softer than fresh. You might want to adjust cooking time. Add it to the sauce later, so it warms up without losing too much texture. If you need a substitute for heavy cream, there are several options. You can use coconut milk for a dairy-free version. Another option is to blend 1 cup of milk with 2 tablespoons of butter. This mix gets close to the texture of heavy cream. You can also try using cashew cream or almond milk. Just remember these swaps can slightly change the flavor of your dish. In this blog post, we dived into making a tasty gnocchi dish. We explored the key ingredients and easy steps to prepare it. You learned how to combine gnocchi with a creamy sauce and fresh spinach. Remember, cooking is all about experimenting, so don’t hesitate to try different ingredients. Keep these tips in mind for great flavor and texture. Enjoy your cooking journey, and have fun making this delicious meal!

Creamy Tomato Spinach Gnocchi Flavorful Comfort Meal

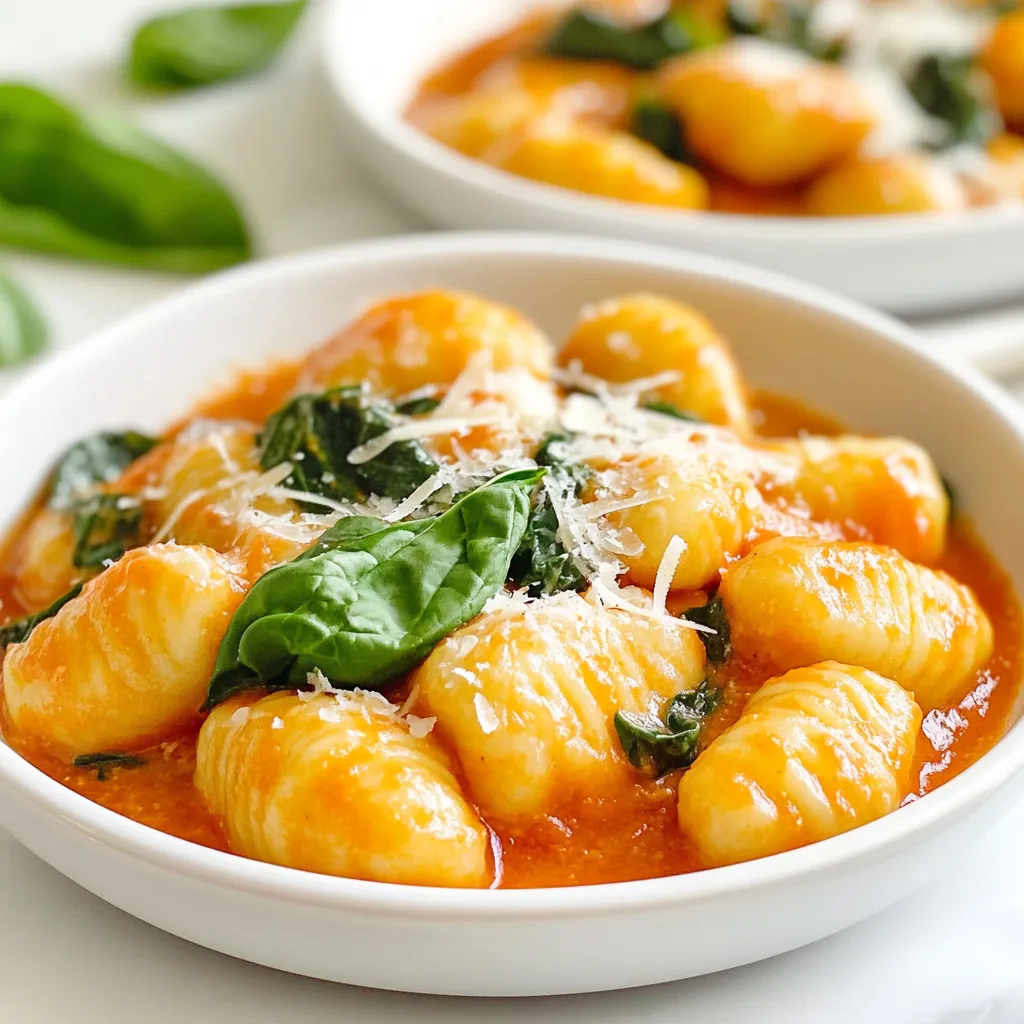
Are you ready to indulge in a bowl of pure comfort? This Creamy Tomato Spinach Gnocchi is a warm, cheesy

- 1 cup quinoa, rinsed - 2 cups vegetable broth - 1 can (15 oz) black beans, drained and rinsed - 1 cup corn (canned or frozen) - 1 red bell pepper, diced - 1 small red onion, diced - 1 avocado, diced - 1 cup cherry tomatoes, halved - 1 teaspoon cumin - 1 teaspoon paprika - 1/2 teaspoon cayenne pepper (optional for heat) - Juice of 1 lime - 2 tablespoons olive oil - Salt and pepper to taste - Fresh cilantro for garnish You will need these tools: - Medium saucepan - Large skillet - Measuring cups and spoons - Cutting board - Knife - Serving bowls You can swap ingredients easily. Here are some ideas: - Quinoa: Use brown rice or farro. - Black beans: Try kidney beans or pinto beans. - Corn: Fresh corn works well. - Red bell pepper: Use yellow or green peppers. - Avocado: Substitute with guacamole or omit for less fat. - Lime juice: Lemon juice can work in a pinch. - Olive oil: Use canola or avocado oil instead. {{ingredient_image_1}} First, grab a medium saucepan. Add 1 cup of rinsed quinoa and 2 cups of vegetable broth. Bring this mix to a boil over high heat. Once it boils, reduce the heat to low. Cover the pot and let it simmer for about 15 minutes. You will know it's done when the quinoa absorbs all the liquid and looks fluffy. Remove it from the heat and set it aside. Next, take a large skillet and heat 2 tablespoons of olive oil over medium heat. Add 1 small diced red onion and 1 diced red bell pepper. Sauté these for about 5 minutes until they get soft. Then, stir in 1 cup of corn, 1 can of drained and rinsed black beans, 1 teaspoon of cumin, 1 teaspoon of paprika, and 1/2 teaspoon of cayenne pepper if you like heat. Squeeze in the juice of 1 lime and add salt and pepper to taste. Cook this mixture for another 5 to 7 minutes. This step allows the flavors to blend nicely. Now, it’s time to put everything together. Start with a base of the fluffy quinoa in each bowl. Top it with the black bean and corn mixture. Then, add diced avocado and halved cherry tomatoes on top. For a finishing touch, sprinkle fresh cilantro over the bowls. If you like, add an extra squeeze of lime for more flavor. Enjoy your colorful and tasty Southwest Black Bean Quinoa Bowl! To make fluffy quinoa, start with rinsing it well. This removes bitterness. Use two cups of vegetable broth for one cup of quinoa. Bring it to a boil, then cover and reduce heat. Let it simmer for about 15 minutes. After cooking, let it sit for five minutes before fluffing with a fork. This step helps keep the grains separate and light. Spices make a big difference in your bowl. Use cumin and paprika for warmth. If you like heat, add cayenne pepper. These spices blend well with the black beans and corn. Don't forget to add lime juice at the end. This brightens the dish and adds freshness. Taste as you go and adjust the seasoning with salt and pepper. A well-presented bowl is more enjoyable. Start with a base of fluffy quinoa. Add the black bean and corn mixture on top. Next, layer diced avocado and cherry tomatoes for color. Fresh cilantro adds a pop of green and flavor. For a finishing touch, squeeze more lime on top. This makes your bowl look inviting and delicious! Pro Tips Rinse Your Quinoa: Always rinse quinoa before cooking to remove its natural coating, called saponin, which can give it a bitter taste. Customize Your Heat: Adjust the cayenne pepper to your taste preference. You can skip it entirely for a milder dish or add more for an extra kick! Fresh Ingredients Matter: Use fresh produce whenever possible, especially for the tomatoes and avocado, to enhance the flavors and textures in your bowl. Make It Ahead: This bowl keeps well in the refrigerator for up to 3 days, making it a great meal-prep option. Just store the components separately to maintain freshness. {{image_2}} You can add protein to your Southwest Black Bean Quinoa Bowl for more flavor and nutrition. Grilled chicken works well. Simply season it with lime juice and spices before cooking. You can also use tofu for a vegan twist. Press the tofu to remove moisture, then cube and sauté it with spices. This adds a nice texture and absorbs all the yummy flavors. Feel free to mix in extra vegetables. I love adding zucchini or spinach for more color and nutrients. You can also try roasted sweet potatoes or mushrooms. Just sauté them with the onions and bell peppers. This makes the dish even more filling and delicious. This recipe is already vegan and gluten-free, but you can enhance it. Use quinoa, which is naturally gluten-free, as your base. Ensure your vegetable broth is also gluten-free. If you want a creamier texture, add some cashew cream or coconut yogurt on top. This way, you keep it creamy while sticking to your diet. You can store the Southwest Black Bean Quinoa Bowl in the fridge for up to four days. Keep it in an airtight container. This helps keep the flavors fresh. Make sure the bowl has cooled down before you seal it. If you want to keep the avocado fresh, wait to add it until you serve. If you want to freeze this dish, it works well too. Place the quinoa and black bean mixture in a freezer-safe bag. Avoid freezing the fresh veggies like avocado and tomatoes. They do not freeze well. The bowl can last for up to three months in the freezer. When you are ready to eat, just thaw it in the fridge overnight. To reheat, use a microwave or a stovetop. If using a microwave, heat in 30-second bursts, stirring in between. For the stovetop, add a splash of water to keep it moist. Heat on low until warmed through. Always check that it is hot before serving. Enjoy your tasty bowl again! The Southwest Black Bean Quinoa Bowl lasts up to four days in the fridge. Store it in an airtight container. This helps keep it fresh and tasty. Always check for any signs of spoilage before eating. Yes, you can make this bowl ahead of time. Prepare the quinoa and black bean mixture, then store them separately. Assemble the bowl just before serving. This keeps all the textures nice and prevents sogginess. Common toppings include diced avocado, cherry tomatoes, and fresh cilantro. You can also add lime wedges for extra flavor. Other options are sliced jalapeños, shredded cheese, or a dollop of sour cream. These toppings enhance the taste and make it look colorful. This blog explored how to make a delicious Southwest Black Bean Quinoa Bowl. We went through ingredients, tools, and even substitutions. You learned to cook fluffy quinoa and create a tasty black bean mixture. I shared tips for seasoning and giving your bowl a beautiful look. As you experiment with variations, you can add proteins, more veggies, or keep it vegan. Storing leftovers is easy, and reheating is simple too. Enjoy trying out these ideas!

Savory Southwest Black Bean Quinoa Bowl Recipe

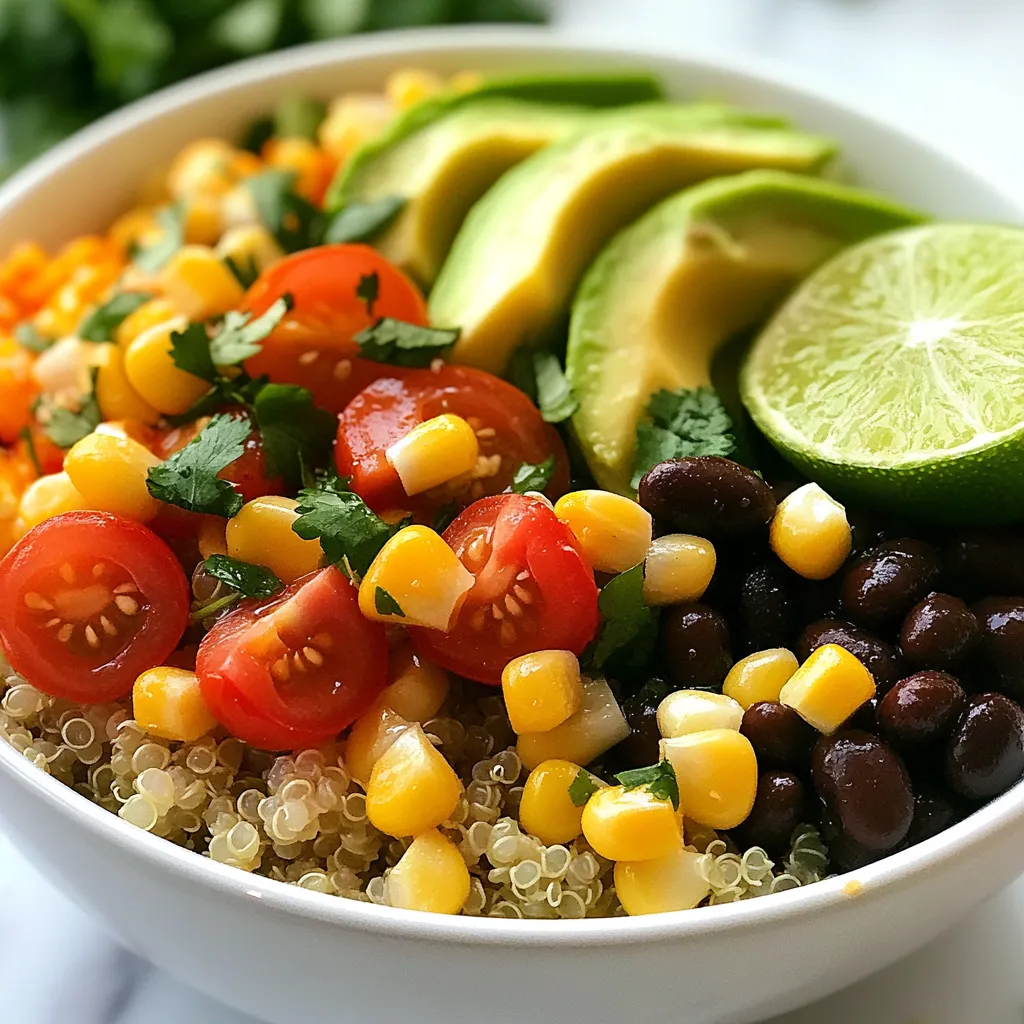
Looking for a delicious and healthy meal? You’ll love my Southwest Black Bean Quinoa Bowl! This quick recipe packs bold

To make delicious chili lime chicken tacos, gather these key items: - 2 large chicken breasts, boneless and skinless - 2 tablespoons olive oil - 2 tablespoons chili powder - 1 teaspoon cumin - 1 teaspoon garlic powder - 1 teaspoon onion powder - 1 teaspoon paprika - Juice of 2 limes - Zest of 1 lime - Salt and pepper to taste - 8 small corn tortillas - 1 cup shredded lettuce - 1 cup diced tomatoes - 1 avocado, sliced These ingredients create a tasty balance of flavors. The chicken absorbs the marinade well, and the lime adds a fresh kick. You can add these items for extra flavor and texture: - ½ cup crumbled feta cheese - Fresh cilantro for garnish These optional ingredients can elevate your tacos. The feta adds creaminess, and cilantro brings a burst of freshness. To prepare your tacos, you will need: - Mixing bowl - Grill pan or skillet - Knife - Cutting board - Tongs Having the right tools makes cooking easier. A grill pan gives your chicken nice grill marks, making it look great on your plate. {{ingredient_image_1}} Start by making the marinade. In a bowl, mix together olive oil, chili powder, cumin, garlic powder, onion powder, paprika, lime juice, lime zest, salt, and pepper. This mix creates bold flavors for the chicken. Add the chicken breasts to the bowl and coat them well. Cover the bowl and place it in the fridge. Let it marinate for at least 30 minutes. For even better taste, marinate overnight. Next, heat a grill pan or skillet over medium-high heat. Once hot, add the marinated chicken breasts. Cook each side for about 6 to 7 minutes. You want the chicken to be cooked through and have nice grill marks. Use a meat thermometer to check. The internal temperature should reach 165°F. When done, remove the chicken and let it rest for about 5 minutes. This helps keep it juicy. After resting, slice the chicken into thin strips. Now, it’s time to build your tacos. Warm the corn tortillas in the same pan. Heat each one for about 30 seconds on each side until warm and slightly charred. Lay out the tortillas on a plate. Add a good amount of sliced chicken to each one. Top with shredded lettuce, diced tomatoes, and avocado slices. If you like, sprinkle on some crumbled feta cheese. Finish with fresh cilantro and a squeeze of lime juice. Enjoy your tasty chili lime chicken tacos! To make your marinade shine, use fresh lime juice and zest. This adds a bright kick. Mix the olive oil, chili powder, cumin, garlic powder, onion powder, paprika, salt, and pepper in a bowl. Coat the chicken breasts well. Let them hang out in the fridge for at least 30 minutes. If you can wait longer, marinate overnight. This makes the chicken super tasty. Heat your grill pan or skillet over medium-high heat. A hot pan gives good grill marks. Cook the marinated chicken for 6-7 minutes on each side. Check that the chicken reaches 165°F (75°C) inside. This guarantees it is safe to eat. After cooking, let the chicken rest for 5 minutes. Resting helps keep the juices inside. Then, slice the chicken into thin strips. Warm your corn tortillas in the same pan for a bit. Just 30 seconds on each side works well. Assemble your tacos by placing sliced chicken on each tortilla. Add shredded lettuce, diced tomatoes, and avocado slices. If you like, sprinkle on crumbled feta cheese. Finish with fresh cilantro and a squeeze of lime juice. Serve right away with lime wedges on the side. Enjoy every flavorful bite! Pro Tips Marinate Longer for More Flavor: For the best flavor, marinate the chicken for at least 2 hours, or overnight if possible. This allows the spices to penetrate the meat, making it juicier and more flavorful. Use Fresh Lime Juice: Always opt for fresh lime juice over bottled for a brighter and more vibrant flavor. The zest also adds an aromatic quality that enhances the overall taste of the tacos. Keep Ingredients Balanced: When assembling your tacos, ensure a balanced ratio of chicken to toppings. This will help each bite be flavorful and satisfying, preventing them from becoming too overloaded. Customize Your Toppings: Feel free to get creative with your toppings! Add pickled red onions, jalapeños, or a dollop of sour cream for extra flavor and texture. {{image_2}} To make your tacos spicier, add sliced jalapeños or crushed red pepper. You can mix these into the marinade or sprinkle them on top. The heat pairs well with the lime flavor. This twist gives you a tasty kick that many will love! If you want a veggie version, swap the chicken for marinated tofu or jackfruit. Tofu absorbs flavors well. Use the same marinade for a great taste. Cook it just like the chicken. Jackfruit gives a shredded texture. Both options make delicious tacos! Toppings can change your taco game! Try adding fresh corn, black beans, or pickled onions. Each adds a new flavor and texture. You can also use different cheeses like queso fresco or cheddar. Don’t forget a squeeze of lime juice for extra zest! If you have leftover tacos, store them in an airtight container. Keep the chicken and toppings separate. This helps keep the tortillas from getting soggy. You can store them in the fridge for up to three days. When you want to eat them, just reheat the chicken and warm the tortillas again. To freeze the chicken, wrap it tightly in plastic wrap. Then, place it in a freezer bag. This way, it stays fresh. You can freeze it for up to three months. When you’re ready to use it, thaw it in the fridge overnight. This keeps the chicken safe and tasty. To reheat the chicken, use either a microwave or a skillet. If using a microwave, place it on a plate and cover it. Heat it in short bursts until hot. If using a skillet, warm it over medium heat for a few minutes. Make sure the chicken is heated through. Then, warm the tortillas in the skillet for a few seconds to bring back their softness. Enjoy your tasty tacos again! You should marinate the chicken for at least 30 minutes. If you have more time, let it sit overnight. This gives the chicken a deeper flavor and makes it juicier. The lime juice and spices will soak in well. Yes, you can use other proteins for these tacos. Shrimp, beef, or tofu work great. Just adjust the cooking time for each protein. Shrimp cooks fast, while beef may need longer. You can top your tacos with many ingredients. Here are some ideas: - Shredded lettuce - Diced tomatoes - Sliced avocado - Crumbled feta cheese (optional) - Fresh cilantro - Lime wedges for extra zest Feel free to mix and match your favorite toppings! This blog covered the key steps to make delicious Chili Lime Chicken Tacos. We looked at the necessary ingredients, cooking tools, and how to marinate and cook the chicken. You learned tips for perfect tacos and fun variations, like spicy options and vegetarian choices. Finally, we discussed how to store leftovers and answer common questions. Enjoy your cooking and have fun with different flavors and toppings. Tacos can be simple or gourmet; it’s all up to you!

Chili Lime Chicken Tacos Flavorful and Easy Recipe

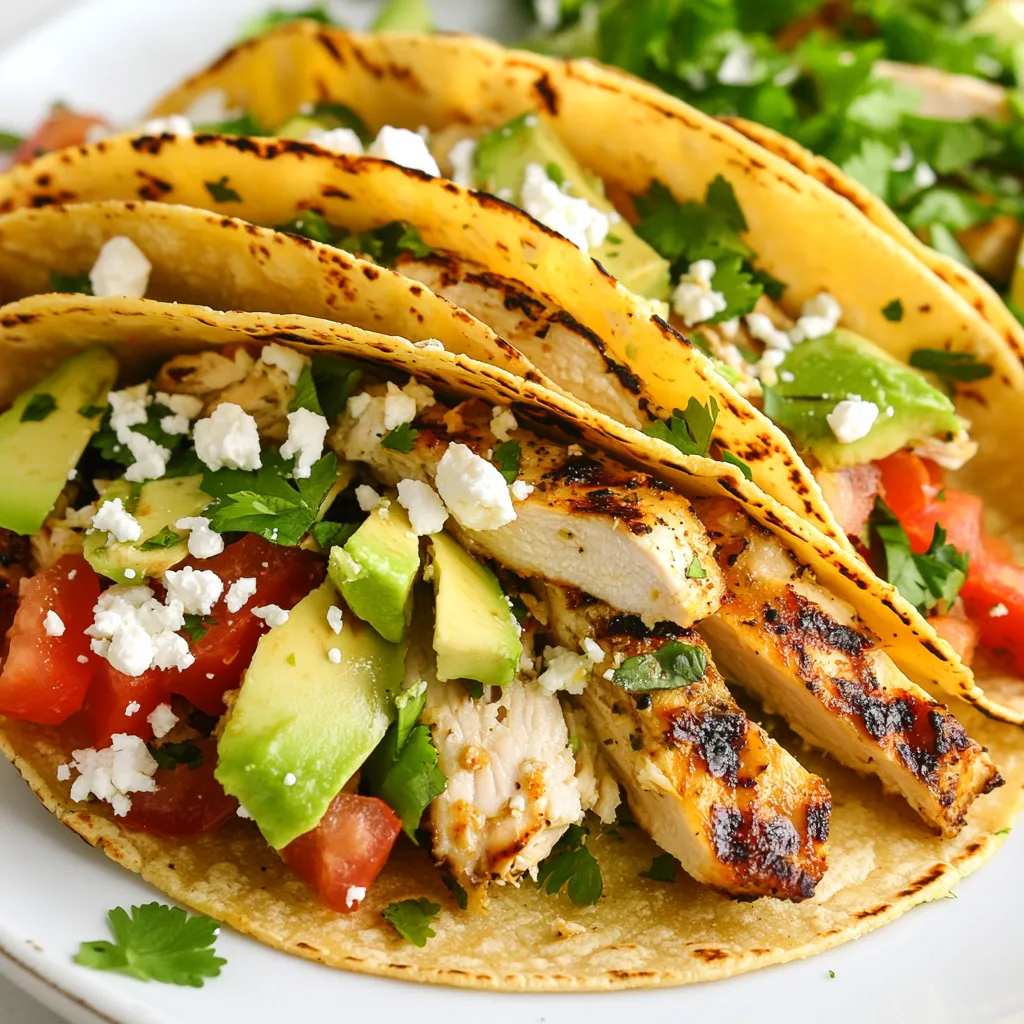
If you love simple, tasty meals, you’ll enjoy these Chili Lime Chicken Tacos. They burst with flavor and take only

Older posts
Newer posts
← Previous Page1 … Page126 Page127 Page128 … Page137 Next →

dsad

© 2025 Recipes Pursuit • Built with GeneratePress

Our Policies

  • Copyright Policy
  • Cookie Policy
  • GDPR Policy
  • Privacy Policy
  • Disclaimer
  • Terms Of Use

More Information

  • Home
  • About
  • Contact
  • Appetizers
  • Dessert
  • Dinner
  • Drinks
©2025, Recipes Pursuit About Back To Top