Skip to content
DisclaimerTerms Of UseGDPR PolicyCookie Policy

Recipes Pursuit

  • Home
  • Drinks
  • Appetizers
  • Dinner
  • Dessert
  • About
  • Contact
  • Privacy Policy
DisclaimerTerms Of UseGDPR PolicyCookie Policy

Emma Smith

To make a delicious Spring Hash Brown Crust Quiche, you need key ingredients. Here’s what you’ll need:

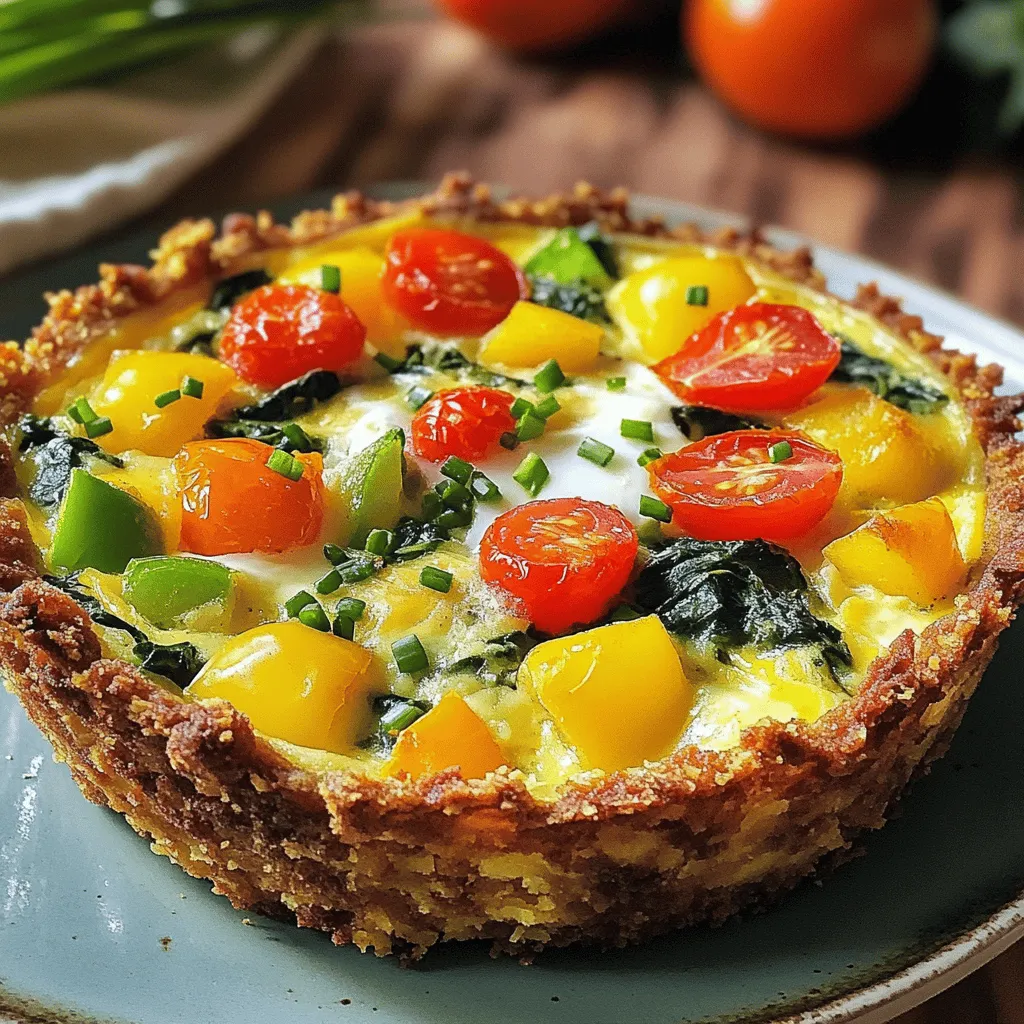
Spring Hash Brown Crust Quiche Fresh and Flavorful Recipe

Spring is here, and it’s the perfect time for a fresh and flavorful dish! Today, I’ll share my Spring Hash

To make this dish, gather the following items: - 4 boneless, skinless chicken breasts - 2 cups fresh spinach, chopped - 1 cup feta cheese, crumbled - 1/2 cup cream cheese, softened - 2 garlic cloves, minced - 1 teaspoon dried oregano - 1/2 teaspoon black pepper - 1/4 teaspoon salt - 1 tablespoon olive oil - Zest of 1 lemon - Juice of 1/2 lemon I prefer fresh spinach for this recipe. It gives a crisp flavor and bright color. Fresh spinach wilts nicely when cooked, mixing well with the cheese. If you only have frozen spinach, that works too. Just make sure to thaw and drain it well. Frozen spinach can be watery, which may make your filling too soggy. Always aim for a nice texture in the filling. Feta cheese adds a unique taste, but you can swap it if needed. Here are some alternatives: - Goat cheese gives a tangy flavor. - Ricotta cheese makes a creamy filling. - Cotija cheese offers a crumbly texture. Choose a cheese that matches your taste. Each option will change the final flavor a bit, but all can work well in this dish. {{ingredient_image_1}} To begin, take your chicken breasts. You need four boneless, skinless pieces. Place each breast on a cutting board. With a sharp knife, slice into the side of each breast. Make a pocket, but don't cut all the way through. This pocket will hold the tasty filling later. Next, grab a mixing bowl. Add two cups of fresh, chopped spinach. Then, add one cup of crumbled feta cheese. Toss in half a cup of softened cream cheese. Mince two garlic cloves and add them to the bowl. Sprinkle in one teaspoon of dried oregano, half a teaspoon of black pepper, and a quarter teaspoon of salt. Don’t forget the zest of one lemon and the juice of half a lemon. Mix everything well until it looks creamy and colorful. Now, heat one tablespoon of olive oil in a skillet over medium-high heat. Take your stuffed chicken breasts and place them in the hot skillet. Sear each side for about three to four minutes. You want them golden brown. After searing, transfer the chicken to a baking dish. Bake in the preheated oven at 375°F (190°C) for 20 to 25 minutes. Check for doneness; the chicken should not be pink inside. Let it rest for a few minutes before slicing. Enjoy your meal! To keep your chicken moist, start with fresh breasts. Always use a meat thermometer. Aim for an internal temperature of 165°F (74°C). This ensures safe cooking while keeping the meat juicy. You can also brine chicken in saltwater for a few hours before cooking. This step adds flavor and moisture. Searing your stuffed chicken is key. Heat olive oil in a skillet before adding the chicken. Sear each side for 3-4 minutes. This gives a nice golden crust. After searing, bake the chicken in the oven. Baking helps cook it evenly and keeps the filling warm. Use a sharp knife to slice the chicken. A meat thermometer is crucial for checking doneness. A large skillet is perfect for searing. You’ll also need a baking dish for the oven. Toothpicks help keep the filling inside while cooking. Lastly, have a mixing bowl ready for your filling. Pro Tips Use Fresh Spinach: Fresh spinach adds vibrant flavor and nutrition. If using frozen spinach, be sure to thaw and drain it completely to avoid excess moisture. Secure the Pocket: If the chicken pocket is large, use toothpicks to secure the opening after stuffing. This prevents the filling from leaking out during cooking. Check for Doneness: Ensure the chicken is fully cooked by using a meat thermometer; it should read 165°F (75°C) when done. Let It Rest: Allow the chicken to rest for a few minutes after baking. This helps the juices redistribute, keeping the meat moist and flavorful. {{image_2}} You can switch up the flavors by using different cheeses. Try goat cheese for a tangy kick. Mozzarella adds a nice stretch and creaminess. For a sharp taste, use aged cheddar. Mix and match according to what you love. Each cheese will give the dish a unique twist. If you want to change the greens, kale works well. You can also use Swiss chard or collard greens. These options have a similar texture but a different taste. Cooking them down will keep the filling moist and flavorful. Experiment with what you have on hand! Herbs and spices can bring your spinach feta stuffed chicken to life. Add fresh basil for a sweet aroma. A pinch of red pepper flakes gives some heat. Thyme or rosemary can add depth. Don’t be afraid to try new combinations. Each herb will create a new taste experience! To keep your Spinach Feta Stuffed Chicken fresh, store it in the fridge. Use an airtight container to prevent moisture loss and keep the chicken tasty. It can last for 3 to 4 days in the fridge. If you have leftovers, make sure they cool down before putting them in the fridge. You can freeze Spinach Feta Stuffed Chicken for up to 3 months. Wrap each piece tightly in plastic wrap and place them in a freezer-safe bag. This way, you can enjoy this meal later. To use, simply thaw in the fridge overnight before reheating. To reheat the stuffed chicken, place it in a preheated oven at 350°F (175°C). Heat for about 15-20 minutes or until warm. You can also use a microwave, but it may not keep the chicken crispy. Make sure to check that the chicken is heated all the way through before serving. Yes, you can prepare Spinach Feta Stuffed Chicken ahead of time. You can stuff the chicken breasts and then cover them. Keep them in the fridge for up to 24 hours. When you're ready to cook, just sear and bake them. This saves you time and adds flavor as the chicken sits with the filling. The internal temperature of stuffed chicken should reach 165°F (75°C). Use a meat thermometer to check the thickest part of the chicken. This ensures that it's safe to eat. If it's not at this temperature, return it to the oven until it is. Yes, you can grill Spinach Feta Stuffed Chicken. First, sear the chicken on a skillet for a few minutes. Then, move it to the grill. Cook on medium heat until the chicken reaches 165°F (75°C). Grilling adds a smoky flavor that pairs well with the filling. Enjoy the crispy outside and juicy inside! This guide covered ingredients, cooking steps, and tips for Spinach Feta Stuffed Chicken. Fresh versus frozen spinach and cheese substitutes can change the taste. You learned to keep chicken moist and explored various cooking tools. We discussed fun variations and how to store leftovers. Overall, this meal is easy and tasty. With the right steps, you can impress anyone. Enjoy your cooking, and don’t be afraid to try new flavors!

Spinach Feta Stuffed Chicken Delicious and Easy Recipe

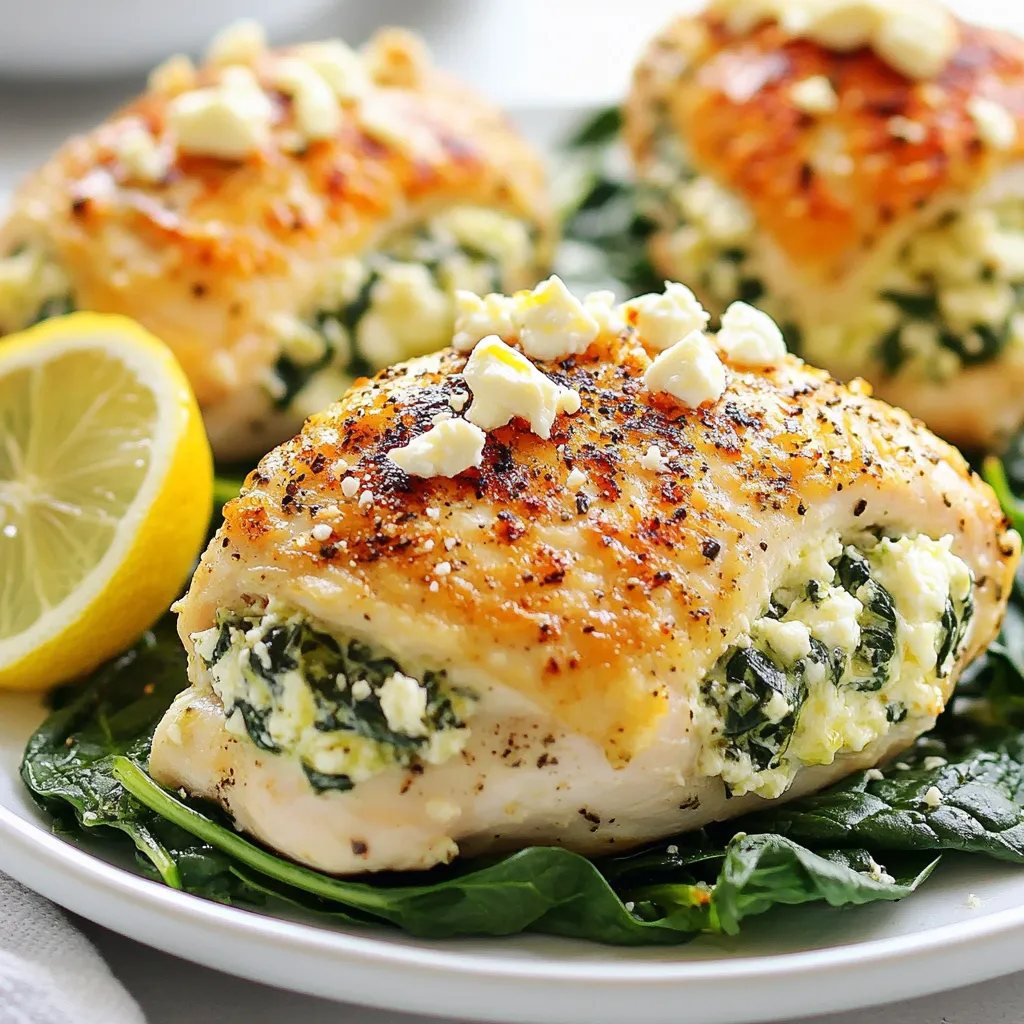
Looking for a tasty meal that’s easy to make? You’re in the right place! My Spinach Feta Stuffed Chicken recipe

To make a delicious Cinnamon Streusel Coffee Cake, you will need these simple ingredients: - 2 cups all-purpose flour - 1 cup granulated sugar - 1/2 cup unsalted butter, softened - 1 cup sour cream - 3 large eggs - 1 tsp vanilla extract - 1 tsp baking powder - 1/2 tsp baking soda - 1/2 tsp salt - 2 tsp ground cinnamon - 1/4 cup brown sugar, packed - 1/2 cup chopped walnuts or pecans (optional) Each ingredient plays a key role. The all-purpose flour gives the cake structure. The sugar adds sweetness. Butter keeps it moist and rich. Sour cream makes it tender and adds a bit of tang. Eggs help bind everything together. Vanilla extract adds depth of flavor. Baking powder and baking soda help it rise. Salt balances sweetness and enhances flavors. Ground cinnamon gives that warm, cozy taste. Brown sugar adds moisture and a slight caramel note. Nuts add crunch and extra flavor, if you choose to use them. Now, gather these ingredients. They will set the stage for a coffee cake that is simple yet tasty! {{ingredient_image_1}} First, you need to preheat your oven to 350°F (175°C). This step is key. It ensures your cake bakes evenly. While the oven heats up, you can prepare your pan. Grease and flour a 9x13 inch baking pan or line it with parchment paper. This helps with easy removal later. Next, grab a medium bowl. Combine 1 cup of all-purpose flour, 1/4 cup of brown sugar, and 2 teaspoons of ground cinnamon. If you like nuts, add 1/2 cup of chopped walnuts or pecans. Now, mix in 1/4 cup of softened butter. Use your hands or a fork to blend it until it looks crumbly. Set this aside for later. In a large bowl, cream together 1/2 cup of softened butter and 1 cup of granulated sugar. Mix it until light and fluffy. This may take a minute or two. Next, add 3 large eggs, one at a time. Beat well after each egg. Finally, stir in 1 teaspoon of vanilla extract. This adds a lovely flavor. Take another bowl and whisk together the remaining 2 cups of all-purpose flour, 1 teaspoon of baking powder, 1/2 teaspoon of baking soda, and 1/2 teaspoon of salt. This mix helps the cake rise and taste great. Now, it’s time to combine the wet and dry ingredients. Gradually add the dry mix to the wet mixture. Alternate with 1 cup of sour cream. Start and end with the dry mix. Stir until just combined. Be careful not to overmix. A few lumps are okay. Pour half of the batter into your prepared pan. Spread it evenly. Then, sprinkle half of the streusel topping on top. Pour the rest of the batter over this. Smooth it out, then add the remaining streusel. This will create a delicious topping. Place your cake in the preheated oven. Bake for 35-40 minutes. To check if it's done, insert a toothpick into the center. If it comes out clean, your cake is ready. Keep an eye on it near the end to avoid overbaking. After baking, let the cake cool in the pan for about 15 minutes. Then, transfer it to a wire rack to cool completely. For a nice touch, dust with powdered sugar before serving. Cut into squares and enjoy with a hot cup of coffee. To bake a perfect Cinnamon Streusel Coffee Cake, follow these tips: - Oven Temperature: Always preheat your oven to 350°F (175°C). This step ensures even baking. - Pan Prep: Grease and flour your baking pan well. This helps the cake come out easily. - Don’t Overmix: When blending the wet and dry ingredients, mix just until combined. Overmixing can make the cake tough. - Check for Doneness: Insert a toothpick in the center. If it comes out clean, your cake is ready. You can change up the flavor of your coffee cake: - Add More Cinnamon: If you love cinnamon, try using 3 teaspoons instead of 2. - Nutmeg: A pinch of nutmeg adds warmth and depth. Use it alongside cinnamon for a richer taste. - Cardamom: This spice gives an exotic twist. Use just a little, as it has a strong flavor. If you need to swap out some ingredients, here are options: - Sour Cream: Plain yogurt works well as a substitute. It keeps the cake moist and tangy. - Butter: You can use coconut oil for a dairy-free option. It adds a nice flavor. - Sugar: Try using brown sugar or coconut sugar for a different sweetness and deeper flavor. - Nuts: If you don’t have walnuts or pecans, try almonds or leave them out completely. These tips will help you create a tasty and unique Cinnamon Streusel Coffee Cake. Enjoy baking! Pro Tips Use Room Temperature Ingredients: Make sure your butter, eggs, and sour cream are at room temperature for a smoother batter and better rise. Don’t Overmix the Batter: Mix just until combined to avoid a dense cake; a few lumps are okay! Check for Doneness: Start checking your cake a few minutes before the recommended baking time to prevent overbaking. Customize Your Nuts: Feel free to substitute walnuts or pecans with your favorite nuts or even leave them out for a nut-free version. {{image_2}} To make a chocolate chip version, simply add 1 cup of semi-sweet chocolate chips to the batter. This gives a rich flavor and a nice texture. The sweet chocolate pairs well with the cinnamon. Mix the chocolate chips in before you add the dry ingredients. This variation is great for those who love chocolate! For a vegan twist, replace the eggs with flaxseed meal. Use 1 tablespoon of flaxseed mixed with 2.5 tablespoons of water for each egg. Swap the sour cream for a plant-based yogurt. Use vegan butter instead of regular butter. The cake remains moist, soft, and tasty, making it perfect for all diets. If you need a gluten-free cake, use 2 cups of gluten-free all-purpose flour. Make sure the blend contains xanthan gum for the right texture. You can follow the same steps in the recipe. The cake will still be delicious and perfect for breakfast or dessert. Enjoy your gluten-free treat without missing out! To keep your cake fresh, wrap it tightly in plastic wrap. You can also use a cake dome. Store it at room temperature for up to three days. If you want to keep it longer, the fridge is a good option. Just remember, it may dry out a bit. To freeze your coffee cake, first let it cool completely. Then, cut it into squares. Wrap each piece in plastic wrap. Put the wrapped pieces in a freezer bag. You can freeze it for up to three months. Label the bag with the date so you remember when you froze it. When you're ready to enjoy your cake, take it out of the freezer. Let it thaw in the fridge overnight. For a quick warm-up, you can microwave a slice for about 20-30 seconds. If you prefer, you can reheat it in the oven. Set your oven to 350°F (175°C) and warm it for about 10-15 minutes. Enjoy your cake warm! Serve Cinnamon Streusel Coffee Cake warm. Cut it into squares and dust with powdered sugar. Pair it with a hot cup of coffee for the best taste. This cake is perfect for breakfast or as an afternoon snack. You can also serve it with whipped cream or a scoop of ice cream. Yes, you can make this cake ahead of time. Bake it and let it cool completely. Wrap it tightly in plastic wrap or foil. Store it at room temperature for up to two days. For longer storage, keep it in the fridge for up to a week. You can also freeze it for up to three months. Just thaw it in the fridge before serving. If you don't have sour cream, you can use plain yogurt instead. Greek yogurt works well too. You can also use buttermilk or cottage cheese. Just blend cottage cheese until smooth before adding it to the mix. Each option will still keep the cake moist and tasty. To check if the cake is done, insert a toothpick into the center. If it comes out clean or with a few crumbs, the cake is ready. If it comes out wet or sticky, bake it a little longer. Keep an eye on it to avoid overbaking. Yes, you can use different nuts in the streusel. Walnuts and pecans are great options. You can also try almonds or hazelnuts for a twist. Just chop them coarsely before adding to the mixture. Each nut will add its unique flavor and crunch to the cake. This post guides you through making a delicious Cinnamon Streusel Coffee Cake. We looked at the key ingredients and the steps needed to bake it perfectly. I shared tips for great results and ways to customize your cake. You can also store, freeze, and reheat leftovers with ease. Enjoy baking this easy recipe. It’s great for sharing or keeping all to yourself!

Cinnamon Streusel Coffee Cake Simple and Tasty Treat

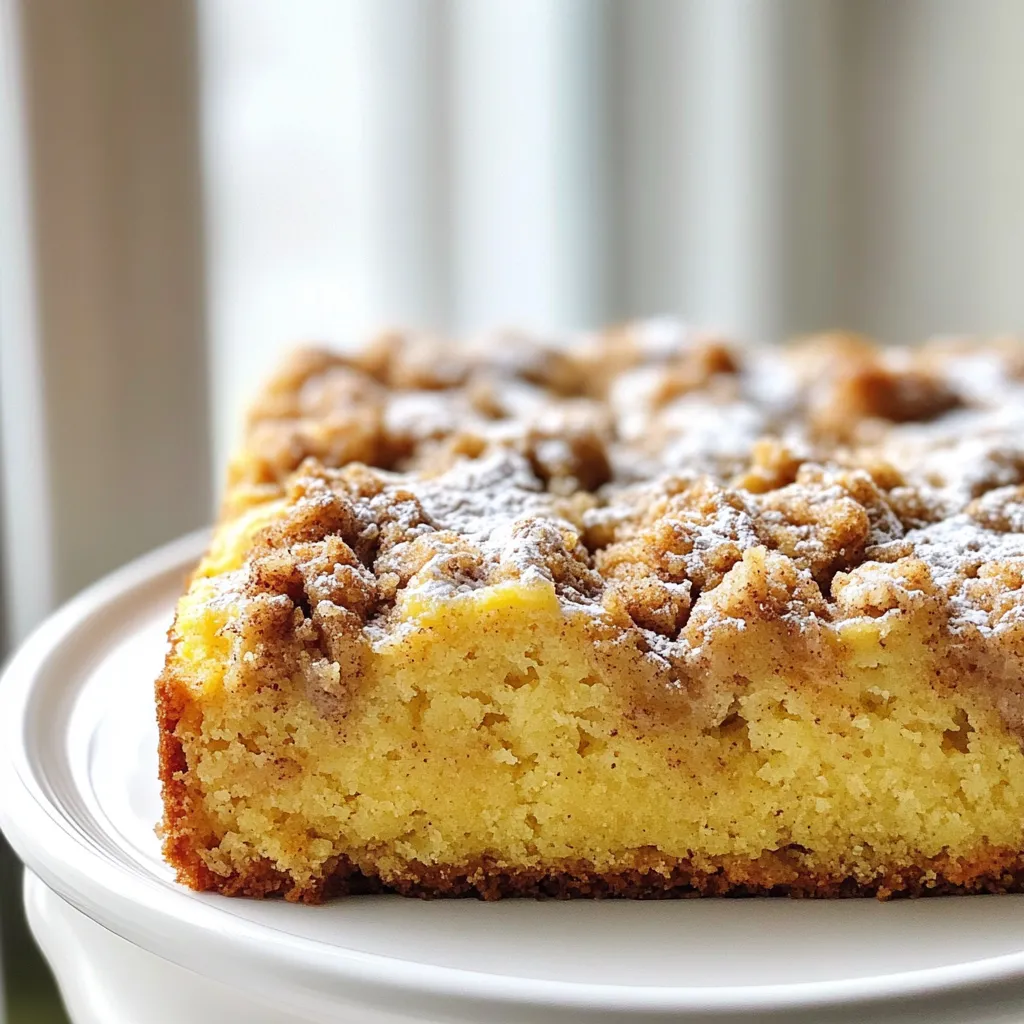
Welcome to your new favorite recipe: Cinnamon Streusel Coffee Cake! This simple treat is perfect for breakfast or dessert. I’ll

- 1 pound Brussels sprouts, trimmed and halved - 3 tablespoons olive oil - 3 tablespoons honey - 4 cloves garlic, minced - 1 tablespoon balsamic vinegar - Salt and pepper to taste - 1/4 teaspoon red pepper flakes (optional) - Chopped fresh parsley for garnish Brussels sprouts are the star here. Use fresh ones for the best flavor. Trim the ends, and cut them in half. This helps them cook evenly and soak up all the tasty flavors. Next, we need some good additives to boost flavor. Olive oil adds richness. Honey brings a sweet touch that balances the sprouts' natural bitterness. Garlic adds a savory kick. With balsamic vinegar, you get a nice tangy note. Seasoning is key to making these sprouts pop. Use salt and pepper to taste. If you want some heat, add red pepper flakes. They give a nice spicy kick that can wake up your taste buds. Finally, don't forget the garnish! Chopped parsley adds a fresh look and flavor. It makes the dish feel bright and lively. All these ingredients work together to create a delicious side dish that everyone will love. {{ingredient_image_1}} First, I trim the Brussels sprouts. I cut off the tough ends and remove any yellow leaves. Next, I slice each sprout in half. This helps them cook evenly. In a large bowl, I mix the halved sprouts with olive oil, honey, minced garlic, balsamic vinegar, salt, and pepper. I toss everything well. This step is key for great flavor. If you want a little heat, I suggest adding red pepper flakes. Just toss the mixture again to combine. I start by preheating the oven to 425°F (220°C). This high heat helps the sprouts get crispy. Then, I spread the Brussels sprouts in a single layer on a baking sheet lined with parchment paper. This keeps them from sticking. I roast them for about 20-25 minutes. I check for doneness by looking for a golden brown color. I like to stir them halfway through. This ensures even cooking. Once they are done roasting, I remove them from the oven and let them cool slightly. I love to garnish the dish with chopped fresh parsley. It adds a nice touch. For a sweeter finish, I drizzle a little more honey on top. This really enhances the flavor. Serve them warm for the best taste! To get crispy Brussels sprouts, start with dry sprouts. After washing, dry them well with a towel. Next, cut them in half to let heat reach the inside. Use a good amount of olive oil; it helps crisp them up. Toss the sprouts in oil, honey, garlic, and vinegar evenly. This makes sure every bite is tasty. Even seasoning is key. If you use too little salt or pepper, the flavor fades. Taste the mix before roasting. Adjust if needed. Adding the red pepper flakes gives a nice kick, but it's optional. To store leftovers, let the Brussels sprouts cool first. Place them in an airtight container. They stay fresh for about three days in the fridge. When you want to eat them again, reheat them in the oven. This keeps them crisp. Heat at 350°F (175°C) for about 10 minutes. You can also use a microwave, but they may lose some crunch. Pro Tips Choose Fresh Brussels Sprouts: Look for small, firm sprouts with bright green leaves for the best flavor and texture. Perfectly Balanced Sweetness: Adjust the amount of honey based on your sweetness preference, but remember to balance it with the acidity of balsamic vinegar. Even Roasting: To ensure even cooking, make sure the Brussels sprouts are spread out in a single layer on the baking sheet without overcrowding. Garnish for Flavor: Fresh parsley not only adds color but also enhances the dish's flavor. Feel free to add a squeeze of lemon for extra brightness. {{image_2}} To make your Honey Garlic Roasted Brussels Sprouts even more tasty, try adding herbs or spices. Fresh thyme or rosemary can add a nice touch. They bring out the natural flavor of the sprouts. For something different, try smoked paprika. It adds a warm, smoky taste that pairs well with honey. You can also switch up the sweetener. If you're out of honey, maple syrup works great. It brings a unique flavor and keeps the dish sweet. Agave nectar is another good choice. It blends well with the garlic and balsamic vinegar. These roasted Brussels sprouts are a great side dish. They go well with many meals. Try serving them with grilled chicken or salmon. The sweet and savory flavors complement these proteins nicely. For a vegetarian option, pair them with quinoa or a hearty grain salad. To make it a complete meal, add some roasted potatoes or a fresh green salad. The warmth of the sprouts and the crunch from the salad create a perfect balance. You can even toss them into a stir-fry for a fun twist. They add color and flavor to any dish! Can I use frozen Brussels sprouts? Yes, you can use frozen Brussels sprouts. They save time and are easy to find. Just remember to thaw them first. This step makes sure they roast well. Also, they may not get as crispy as fresh ones. How can I tell when the Brussels sprouts are done roasting? Brussels sprouts are done when they are tender and golden brown. You can poke them with a fork to check their softness. If they have a nice caramel color, they are ready to eat. Stir them halfway through roasting for even cooking. Are honey garlic Brussels sprouts healthy? Yes, honey garlic Brussels sprouts are healthy. They are low in calories and high in vitamins. This dish offers fiber and antioxidants, making it a smart choice for meals. The honey adds natural sweetness, while the garlic boosts flavor and health. What are the health benefits of Brussels sprouts? Brussels sprouts have many health benefits. They support heart health and help with digestion. They also contain vitamins C and K. Eating Brussels sprouts can strengthen your immune system and lower inflammation. Plus, they can help control blood sugar levels. This recipe takes about 10 minutes to prep and 25 minutes to cook. So, you can have these tasty Honey Garlic Roasted Brussels Sprouts ready in just 35 minutes. This recipe serves four people, making it perfect for a small gathering or a family dinner. For serving, I recommend using a rustic platter. Arrange the warm Brussels sprouts nicely on the dish. Drizzle some extra honey over them for a sweet touch. Sprinkle fresh chopped parsley on top for a bright color. This adds a lovely visual element that makes the dish more appealing. You can also serve these sprouts with toothpicks for easy eating at parties. The sweet and savory flavors will surely impress your guests! This blog covered everything you need to make tasty Brussels sprouts. We talked about the right ingredients, how to prepare and roast them, and tips for perfect flavor and texture. Remember, you can add different spices or sweeteners too. Whether you’re having them as a side dish or with a meal, these sprouts can shine on any table. Enjoy trying out your new skills, and don’t forget to share your delicious results!

Honey Garlic Roasted Brussels Sprouts Flavorful Side

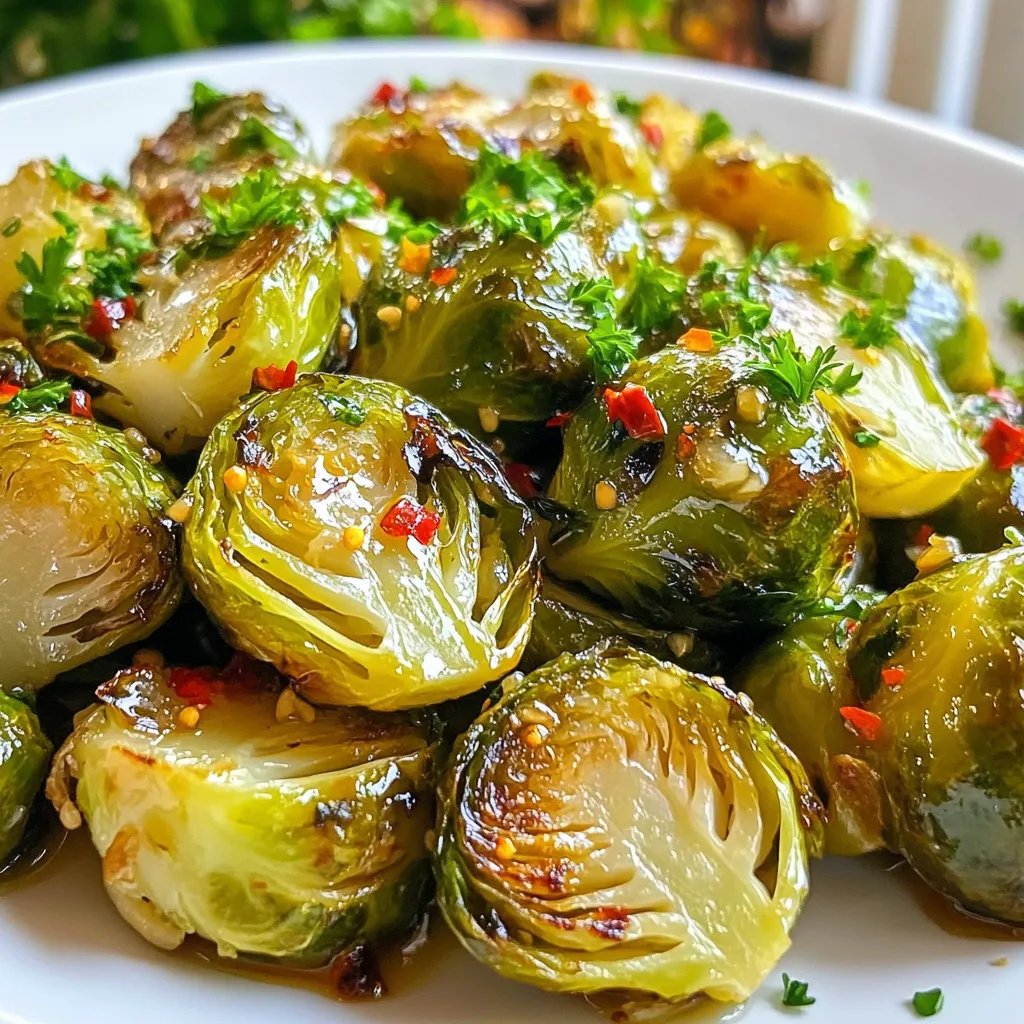
Welcome to the tasty world of Honey Garlic Roasted Brussels Sprouts! If you’re looking for a side dish that packs

To make Zesty Black Bean Corn Salad, gather these ingredients: - 1 can (15 oz) black beans, rinsed and drained - 1 cup fresh or frozen corn (thawed if frozen) - 1 red bell pepper, diced - 1 small red onion, finely chopped - 1 cup cherry tomatoes, halved - 1 avocado, diced - 1/4 cup cilantro, chopped - 1 jalapeño, finely chopped (optional for heat) - 3 tablespoons lime juice - 2 tablespoons olive oil - 1 teaspoon ground cumin - Salt and pepper to taste This salad is full of healthy ingredients. Each serving gives you a good mix of nutrients. It offers protein from black beans and healthy fats from avocado. You also get fiber from beans and corn. Plus, the veggies add vitamins and minerals. You can make this salad your own by adding more ingredients. Here are some fun ideas: - Diced cucumber for crunch - Chopped green onions for extra flavor - Crumbled feta cheese for creaminess - Chopped mango for a sweet twist - Black olives for a briny taste These add-ins will change the flavor and texture. Feel free to mix and match! {{ingredient_image_1}} Start by gathering all your ingredients. You will need black beans, corn, bell pepper, onion, cherry tomatoes, avocado, and cilantro. If you want heat, grab a jalapeño. Rinse and drain the black beans first. If you use frozen corn, make sure it is thawed. Dice the red bell pepper and chop the red onion finely. Then, cut the cherry tomatoes in half. Lastly, dice the avocado and chop the cilantro. In a small bowl, whisk together lime juice, olive oil, ground cumin, salt, and pepper. This dressing adds a zesty kick to the salad. Mix it until it is well combined. The lime juice brightens the flavors. The cumin brings warmth to the dish. Adjust the salt and pepper to your taste. In a large mixing bowl, combine the black beans, corn, red bell pepper, red onion, cherry tomatoes, and avocado. If you like spice, add the jalapeño now. Drizzle the dressing over the salad mixture. Gently toss everything together. Make sure all the ingredients are coated with the dressing. Finally, fold in the chopped cilantro. Taste the salad and add more salt or pepper if needed. Let it sit for at least 15 minutes. This allows all the flavors to come together. To boost the taste of your salad, try these ideas: - Add lime zest for a bright kick. - Mix in a dash of chili powder for warmth. - Use fresh herbs like parsley for extra flavor. - Swap black beans for pinto beans for a new twist. These simple changes can make your salad pop with flavor. How you serve the salad matters. Here are some ideas: - Use a large, colorful bowl to catch the eye. - Top with extra cilantro for a fresh look. - Add lime wedges on the side for a touch of flair. - Serve in individual cups for a fun twist at parties. A beautiful salad makes people want to eat! You can prepare parts of this salad ahead of time: - Chop veggies the day before to save time. - Mix the dressing and store it in the fridge. - Combine the salad items, but leave out the avocado until serving. This way, you keep everything fresh and tasty! Pro Tips Fresh Ingredients Are Key: Use the freshest produce you can find for maximum flavor and texture in your salad. Customize Your Heat Level: Adjust the amount of jalapeño to suit your spice preference, or omit it altogether for a milder salad. Let It Rest: Allowing the salad to sit for at least 15 minutes before serving enhances the flavors as they meld together. Perfect Pairing: This salad pairs wonderfully with grilled chicken or fish, making it a great side dish for summer barbecues. {{image_2}} You can switch up ingredients for a twist. Try using canned chickpeas instead of black beans. They add a nice texture. You can also use diced green bell pepper for a milder flavor. If you love spice, add more jalapeño or try serrano peppers. For a sweet touch, mix in diced mango or pineapple. Fresh herbs like parsley or basil can also brighten the dish. This salad is versatile. Serve it as a side dish with grilled chicken or fish. It also works well as a topping for tacos or burritos. You can even use it as a filling for wraps. For a quick lunch, enjoy it on its own or with tortilla chips. It makes a great addition to a picnic or barbecue. This salad fits many diets. It is vegan and gluten-free. If you are on a low-carb diet, skip the corn and use diced zucchini instead. You can also make it more hearty by adding quinoa or brown rice. For those avoiding oil, use a splash of vinegar instead of olive oil. Store your Zesty Black Bean Corn Salad in an airtight container. This keeps it fresh. Place it in the fridge right after serving. The cool temperature helps keep the flavors bright. If you add avocado, eat it within two days. The avocado can turn brown quickly. Freezing this salad is not recommended. The texture of the ingredients can change. Beans and corn may lose their crunch when thawed. If you want to save some, just freeze the beans and corn separately. You can use them later in other recipes. In the fridge, your Zesty Black Bean Corn Salad will last about three days. After that, the quality drops. If you see any brown spots or off smells, it’s best to toss it. Always trust your senses when deciding if food is still good. To add heat, use more jalapeño. You can also try adding diced serrano peppers. If you like a smoky flavor, add a pinch of smoked paprika. Hot sauce is another great choice to spice things up. Always taste as you go. This way, you can adjust the heat to your liking. Yes, you can make this salad ahead of time. I recommend making it a few hours before serving. This gives the flavors time to blend. Just keep it in the fridge until you’re ready to eat. If you add avocado, wait until serving time to mix it in. This keeps the avocado fresh and green. This salad pairs well with many dishes. Serve it with grilled chicken or fish for a healthy meal. It also goes great with tacos or burritos. For a light lunch, enjoy it with tortilla chips. You can even use it as a topping for nachos. The options are endless! You learned how to create a Zesty Black Bean Corn Salad with easy steps. We covered key ingredients, nutrition facts, and optional add-ins. I shared tips for flavor and presentation, along with variations for different diets. Lastly, I explained how to store and preserve your salad. Use this guide to make a fresh, tasty salad that fits your needs. Enjoy your cooking and impress your friends!

Zesty Black Bean Corn Salad Fresh and Flavorful Treat

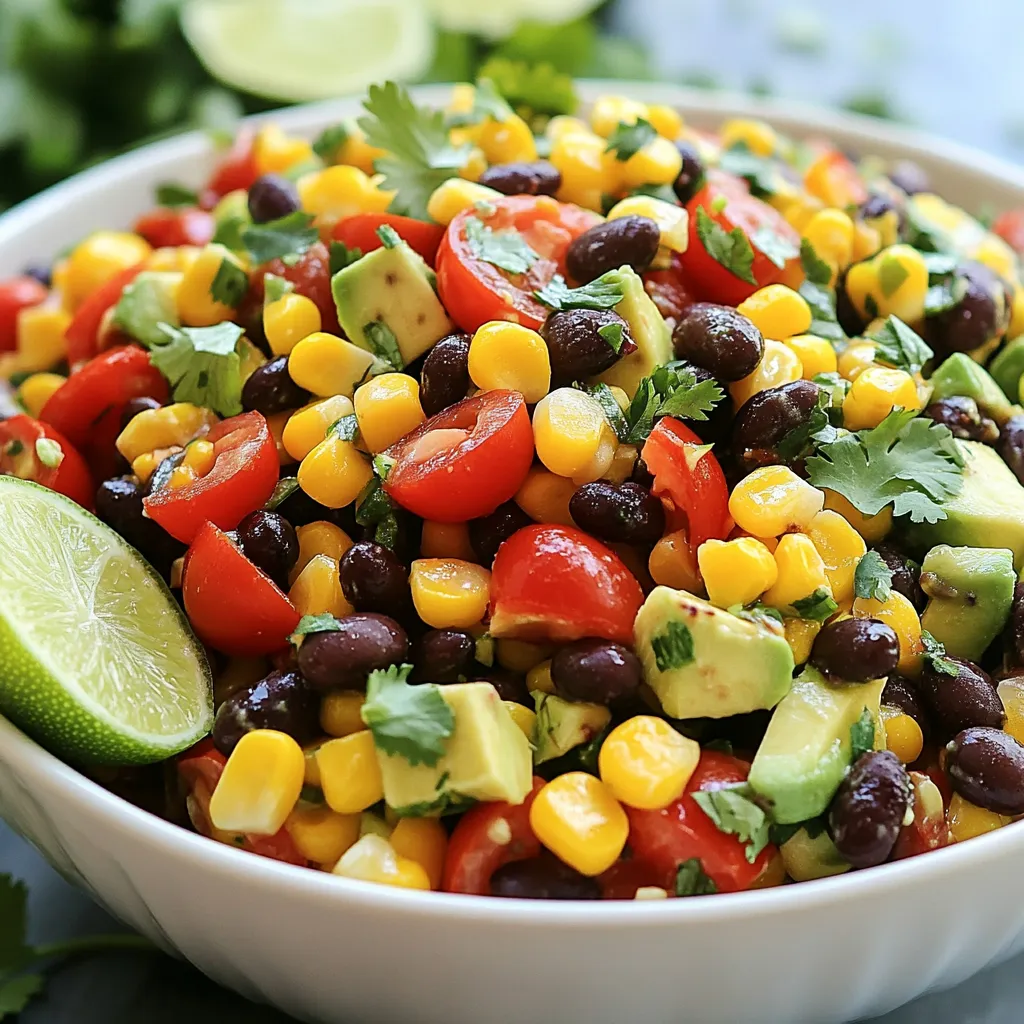
If you’re looking for a fresh and tasty dish, you’ll love this Zesty Black Bean Corn Salad! Packed with flavor

- 1 cup orzo pasta - 4 tablespoons unsalted butter - 4 cloves garlic, minced - 1 small onion, finely chopped - 3 cups vegetable broth - 1 cup cherry tomatoes, halved - 1 cup spinach, roughly chopped - 1 teaspoon dried oregano - 1/2 teaspoon red pepper flakes (optional) - Salt and pepper to taste - 1/4 cup grated Parmesan cheese (optional) - Fresh basil leaves for garnish You can add a pinch of red pepper flakes for heat. If you love cheese, mix in Parmesan for extra creaminess. Fresh basil adds a nice touch and bright flavor. If you don’t have orzo, try another small pasta like ditalini or couscous. Instead of butter, use olive oil for a lighter dish. Any broth works; chicken broth can add more flavor. If you want more greens, kale or arugula are good swaps for spinach. You can also leave out cheese for a vegan meal. {{ingredient_image_1}} To start, gather all your ingredients. You will need: - 1 cup orzo pasta - 4 tablespoons unsalted butter - 4 cloves garlic, minced - 1 small onion, finely chopped - 3 cups vegetable broth - 1 cup cherry tomatoes, halved - 1 cup spinach, roughly chopped - 1 teaspoon dried oregano - 1/2 teaspoon red pepper flakes (optional) - Salt and pepper to taste - 1/4 cup grated Parmesan cheese (optional) - Fresh basil leaves for garnish Make sure to have a large pot or deep skillet ready for cooking. First, melt the butter over medium heat in your pot. Once it melts, add the chopped onion and minced garlic. Sauté them for about 2-3 minutes. You want them to smell great and look soft. Next, add the orzo pasta to the pot. Toast it in the butter mixture for about 1-2 minutes. Stir constantly until the pasta turns a light golden color. This step adds a nice depth to the flavor. Now, pour in the vegetable broth along with the halved cherry tomatoes, dried oregano, and red pepper flakes if you like some heat. Season with salt and pepper. Bring the mixture to a boil. Then, reduce the heat to low, cover the pot, and let it simmer. Cook for about 10-12 minutes. The orzo should be tender and soak up most of the liquid. After that, stir in the chopped spinach. Cook for an additional 2-3 minutes until the spinach wilts. If you want a creamy touch, mix in the grated Parmesan cheese at this point. Once you remove the pot from heat, it’s time to make it pretty. Garnish your orzo with fresh basil leaves. If you like, add extra Parmesan cheese on top for a nice finish. For a beautiful display, serve the orzo in shallow bowls. A drizzle of olive oil adds a nice shine and extra flavor. Enjoy your tasty, one-pot meal! To make a great One Pot Garlic Butter Orzo, start by melting butter over medium heat. This helps release the garlic's flavor. Sauté the onion and garlic until they are soft and fragrant, about 2-3 minutes. Toast the orzo in this butter mix for 1-2 minutes. This adds a nice nutty flavor. When you add the broth, let it reach a boil before lowering the heat. Cover and simmer for 10-12 minutes. Stir in spinach last to keep its bright color. One common mistake is not toasting the orzo. This step adds depth to the dish. Avoid adding too much broth; it should be just enough for the orzo to absorb. If you skip seasoning, the dish may taste bland. Always taste and adjust salt and pepper. Lastly, don’t overcook the spinach. You want it wilted but still vibrant. To make your dish pop, consider adding lemon zest or juice. This brightens the flavors. Fresh herbs like parsley or dill also add freshness. If you like heat, increase the red pepper flakes. Mixing in roasted vegetables can add texture and taste. For a richer flavor, use chicken broth instead of vegetable broth. These small changes can elevate your One Pot Garlic Butter Orzo to new heights! Pro Tips Toasting the Orzo: Toasting the orzo in butter before adding the broth enhances its nutty flavor and gives it a delightful texture. Using Fresh Ingredients: For the best taste, use fresh garlic and seasonal cherry tomatoes. They will add a burst of flavor to the dish. Adjusting Creaminess: If you prefer a creamier orzo, feel free to add more Parmesan cheese or a splash of cream at the end of cooking. Storing Leftovers: Store any leftovers in an airtight container in the fridge for up to 3 days. Reheat with a splash of broth or water to keep it moist. {{image_2}} You can easily add protein to One Pot Garlic Butter Orzo. Try cooked chicken or shrimp. These options bring great flavor and texture. Simply sauté them after cooking the garlic and onion. For a quick meal, use rotisserie chicken. It saves time and adds a tasty touch. If you want a meatier dish, add diced sausage. Cook it until browned before adding the orzo. This way, the orzo absorbs the delicious juices. For a vegetarian version, skip the Parmesan cheese. Instead, use a plant-based cheese or nutritional yeast. This keeps the dish creamy while staying meat-free. If you want a vegan option, use olive oil instead of butter. It still adds richness and flavor. You can also include more veggies, like bell peppers or zucchini. This makes the dish colorful and nutritious. You can adjust ingredients based on the season. In spring, add asparagus or peas for a fresh twist. In summer, use corn or zucchini for a bright flavor. In fall, try butternut squash or kale for a cozy feel. Winter's best swaps are Brussels sprouts or hearty greens. These changes keep the dish exciting and in tune with the seasons. You can enjoy One Pot Garlic Butter Orzo all year round! You can store leftover One Pot Garlic Butter Orzo in the fridge. Use an airtight container. It stays fresh for up to three days. When ready to eat, check for any changes in smell or color. If you want to keep it longer, freeze the orzo. Place it in a freezer-safe container. It can last up to three months in the freezer. When you’re ready to eat it, thaw it in the fridge overnight. To reheat, use a pot on the stove over low heat. Add a splash of broth or water to keep it moist. Stir often until heated through. You can also use a microwave. Place it in a bowl, cover it, and heat in short bursts. Stir in between to heat evenly. You can make One Pot Garlic Butter Orzo ahead of time. Cook the dish as usual, then let it cool. Store it in an airtight container in the fridge for up to three days. When you’re ready to eat, reheat it on the stove. Add a splash of broth to help it warm evenly. Yes, you can use other types of pasta. Try small shapes like macaroni or ditalini. Just keep in mind that cooking times may vary. Check the pasta package for cooking times. Adjust the broth amount based on the pasta you choose. One Pot Garlic Butter Orzo pairs well with many sides. Serve it with a fresh salad for crunch. Grilled chicken or fish also makes a great match. You can even add crusty bread to soak up the flavors. For a light dessert, try a fruit salad. Each option will enhance your meal. This post covered the main ingredients and cooking steps for One Pot Garlic Butter Orzo. I shared tips to avoid mistakes and enhance flavors. You can try different proteins, vegetarian options, or seasonal ingredients for variety. Proper storage and reheating help keep your dish fresh. Remember, cooking is about fun and creativity. Feel free to adjust it to your taste!

One Pot Garlic Butter Orzo Quick and Flavorful Meal

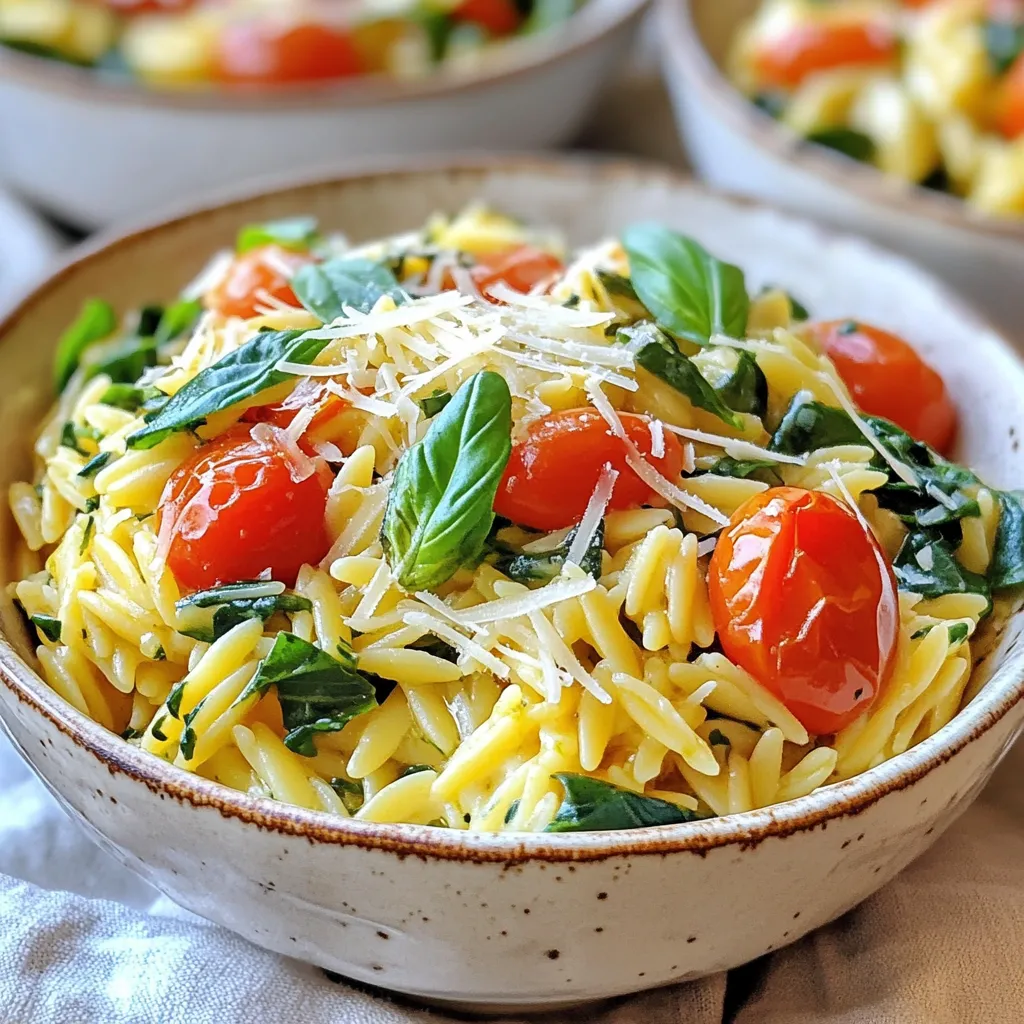
Looking for a quick, delicious meal that’s easy to make? One Pot Garlic Butter Orzo is your answer! In just

- 1 ½ cups graham cracker crumbs - ½ cup unsalted butter, melted - 1 cup cream cheese, softened - 1 cup Greek yogurt - ¾ cup granulated sugar - 2 large eggs - 1 tablespoon vanilla extract - Zest of 2 oranges - ½ cup fresh orange juice - 1 teaspoon orange extract - Pinch of salt To start, gather all your ingredients. The graham cracker crumbs create a tasty crust. Use unsalted butter to bind it all together. Cream cheese brings a rich, creamy texture. Greek yogurt adds a light touch and tang. Granulated sugar sweetens the cheesecake just right. Eggs help it set. Vanilla extract adds warmth. Zest of oranges gives a fresh pop. Fresh orange juice brings bright flavor. Lastly, orange extract boosts the citrus taste. Don’t forget a pinch of salt to balance the sweetness. - Whipped cream - Additional orange zest - Mint sprigs - Orange slices For garnishes, you can add whipped cream on top. It makes each slice look lovely. Extra orange zest adds a nice touch and flavor. A few mint sprigs bring freshness to the plate. Thin orange slices make the dessert feel special. These garnishes can turn your cheesecake into a showstopper! {{ingredient_image_1}} 1. Preheat the oven to 325°F (163°C). This helps the cheesecake bake evenly. 2. In a bowl, combine 1 ½ cups of graham cracker crumbs and ½ cup of melted unsalted butter. Mix well until all crumbs are coated. 3. Press the mixture firmly into the bottom of a greased 9-inch springform pan. This will be your crust. Bake for 10 minutes, then remove and let it cool. 1. In a large bowl, beat 1 cup of softened cream cheese until smooth. This creates a creamy base. 2. Gradually add ¾ cup of granulated sugar, mixing until it’s fluffy and well combined. 3. Next, add 1 cup of Greek yogurt and blend until it's mixed in well. 4. Add 2 large eggs, one at a time. Mix well after each egg. 5. Incorporate 1 tablespoon of vanilla extract, the zest of 2 oranges, ½ cup of fresh orange juice, and 1 teaspoon of orange extract. Mix until the batter is smooth and creamy. 1. Carefully pour the cheesecake batter over the cooled crust in the springform pan. 2. Bake in the preheated oven for about 50 to 60 minutes. Check if the center is set but still slightly jiggly. 3. Once baked, turn off the oven and leave the cheesecake inside for one more hour. This helps it cool evenly. 4. After an hour, remove the cheesecake from the oven and refrigerate for at least 4 hours, or overnight for best results. Using room temperature ingredients is key. When your cream cheese and eggs are at room temp, they mix better. This helps create a smooth batter. Smooth batter means a creamy cheesecake. If your cream cheese is cold, it can clump and affect texture. To prevent cracks in your cheesecake, watch the baking time. Don't overbake! The center should be slightly jiggly when you take it out. Cooling it slowly in the oven avoids sudden temperature changes. This slow cooling helps keep your cheesecake smooth and crack-free. For a lovely presentation, slice the cheesecake and place each piece on its own plate. Add a mint sprig for color. You can also garnish with orange slices or a drizzle of orange sauce. This adds freshness and brightens the dish. Pairing your cheesecake with fresh fruits works well too. Berries, such as strawberries or blueberries, add a nice contrast. You can also serve it with a scoop of vanilla ice cream for a fun twist! One common mistake is overmixing the batter. Mix just until smooth. Overmixing can incorporate too much air, which leads to cracks. Another mistake is not greasing the pan properly. Always grease your springform pan. This ensures easy release after baking. A well-greased pan helps keep your cheesecake intact when you remove the sides. Pro Tips Use Room Temperature Ingredients: Ensure your cream cheese and eggs are at room temperature for a smoother batter and better incorporation of ingredients. Prevent Cracking: To minimize cracks on the surface of the cheesecake, avoid overmixing and let it cool gradually in the oven after baking. Enhance Flavor: For a more intense orange flavor, consider adding a splash of orange liqueur to the batter. Perfect Slicing: Use a hot, dry knife to slice the cheesecake for clean edges. Wipe the knife with a damp cloth between cuts if needed. {{image_2}} You can easily switch things up with this cheesecake. Try a chocolate orange cheesecake by adding cocoa powder. Mix in about a third cup of cocoa with the cream cheese for a rich twist. For a fruity flair, swirl in fruit purees like raspberry or mango. This adds color and taste. You can also use flavored yogurt, such as vanilla or coconut, instead of Greek yogurt. This will change the flavor slightly but keeps it creamy. If you want a different crust, use crushed Oreo cookies. Simply replace the graham cracker crumbs with Oreos. Mix them with melted butter and press them into the pan. This gives a fun chocolate flavor. For those needing gluten-free options, use gluten-free graham crackers or almond flour. These alternatives keep the crust tasty and satisfying. You can easily make this cheesecake healthier. Use low-sugar substitutes like stevia or monk fruit for a sweet taste without extra sugar. If you want a vegan version, swap the cream cheese for a dairy-free cream cheese. Use silken tofu blended until smooth, and replace eggs with flax eggs. This way, you can enjoy a delicious treat that fits your needs. To store leftover cheesecake, wrap it tightly in plastic wrap. You can also use an airtight container. This keeps it fresh and tasty. Make sure the cheesecake cools completely before storing. The optimal chilling time is at least four hours. For the best flavor, let it chill overnight. To freeze cheesecake, first let it cool completely. Then, slice it into pieces. Wrap each slice in plastic wrap. Place the wrapped slices in a freezer bag or container. This helps avoid freezer burn. For best quality, eat within three months. To thaw, remove the cheesecake from the freezer. Place it in the fridge for several hours, or overnight. You can also thaw it at room temperature for about an hour. This keeps the texture smooth and creamy. Yes, you can make this cheesecake a day in advance. I often prepare it the night before a gathering. Just follow the steps and chill it overnight. This allows the flavors to blend well. It also helps the cheesecake to set properly. Remember to cover it well with plastic wrap. This keeps it fresh and prevents odors from the fridge. The Orange Creamsicle Cheesecake will last up to five days in the fridge. Store it in an airtight container for best results. After five days, it may lose its flavor and texture. If you can, enjoy it within the first three days for the best taste. You can use bottled orange juice, but fresh juice is best. Fresh juice gives the cheesecake a brighter flavor. Bottled juice often contains added sugars and preservatives. This can change how the cheesecake tastes. If you go for bottled juice, choose a high-quality brand. This helps keep the taste closer to fresh. This blog post has covered how to make a delightful Orange Creamsicle Cheesecake. We explored the key ingredients needed, including graham cracker crumbs, cream cheese, and fresh orange juice. I shared step-by-step instructions, plus tips to avoid common mistakes. We also discussed fun variations, storage methods, and answered frequent questions. Now you have the knowledge to create this tasty treat. Enjoy sharing your cheesecake with friends and family. Remember, fresh ingredients and careful preparation make all the difference in taste!

Orange Creamsicle Cheesecake Delightful and Easy Recipe

Are you ready for a dessert that tastes like summer in a slice? This Orange Creamsicle Cheesecake is not only

- 1 package (16 oz) potato gnocchi - 4 tablespoons unsalted butter - 4 cloves garlic, minced Potato gnocchi is the star of this dish. It has a soft, pillowy texture. I always choose the best quality for great flavor. Next, unsalted butter adds richness. It melts perfectly, bringing all flavors together. Minced garlic gives a strong, fragrant kick. Make sure not to burn it while cooking. - 1 cup heavy cream - 1 cup freshly grated Parmesan cheese Heavy cream makes the sauce incredibly smooth. It creates a rich base that coats the gnocchi well. Freshly grated Parmesan cheese adds depth. It melts nicely, giving a savory flavor. I recommend grating it fresh for the best taste. - 1 teaspoon Italian seasoning - Salt and pepper to taste - 1 cup fresh spinach, chopped (optional) - Fresh parsley, chopped for garnish Italian seasoning adds a blend of herbs. It enhances the dish's flavors without overpowering them. Salt and pepper are key for balancing taste. Feel free to adjust these to your liking. Fresh spinach is a great optional add-in. It wilts down and adds color. Finally, garnish with fresh parsley. It brightens the dish and makes it look appealing. {{ingredient_image_1}} To cook the gnocchi, first bring a large pot of salted water to a boil. This is important for flavor. Add the gnocchi to the boiling water. They will sink to the bottom at first. Watch closely; when they float to the top, they are ready. This usually takes about 2-3 minutes. Once they float, drain the gnocchi and set them aside. For proper cooking, do not overcrowd the pot. If you add too many gnocchi, they may stick together. You can cook them in batches if needed. Now, let’s make the sauce. In a large skillet, melt 4 tablespoons of unsalted butter over medium heat. This adds richness to the sauce. Add the minced garlic and sauté for 1-2 minutes. Watch carefully to avoid burning the garlic; burnt garlic can ruin the flavor. Next, pour in 1 cup of heavy cream. Bring the mixture to a gentle simmer. Stir occasionally for about 2-3 minutes. This helps the flavors blend. Slowly add 1 cup of freshly grated Parmesan cheese and 1 teaspoon of Italian seasoning. Stir continuously until the cheese melts and the sauce becomes creamy. Season with salt and pepper to taste. Once your sauce is ready, gently add the cooked gnocchi to the skillet. Stir to coat them well with the creamy sauce. If you want, add 1 cup of fresh chopped spinach at this stage. Stir until the spinach wilts and brightens the dish. For serving, use shallow bowls. This gives a nice look. Drizzle a bit of extra Parmesan on top and sprinkle fresh parsley for color. You can also add cracked black pepper for a little kick. Enjoy your creamy garlic Parmesan gnocchi! To get that perfect creamy sauce, focus on the cream’s temperature. Heat the heavy cream gently. If you boil it, the sauce can split. Stir often to keep it smooth. Burnt garlic can ruin your dish. Cook the minced garlic for just 1-2 minutes. Watch it closely. Once it smells good, it’s ready. If it turns dark, start over. To prevent your gnocchi from getting soggy, use a large pot. Boil plenty of salted water. This helps the gnocchi cook evenly. When they float, they are done. Drain them right away. For best results, cook gnocchi in batches. Don't overcrowd the pot. This will keep them light and fluffy. You can try different garnishes. Fresh basil or grated cheese can add flavor. Cracked black pepper adds a nice kick, too. To turn this dish into a fuller meal, serve with a side salad or garlic bread. This adds freshness and balance to your meal. Pro Tips Use Fresh Ingredients: Opt for fresh garlic and high-quality Parmesan cheese to enhance the flavor of your dish significantly. Don't Overcook Gnocchi: Keep an eye on the gnocchi while boiling; they are done as soon as they float to the surface to maintain their texture. Add a Touch of Acid: A splash of lemon juice or a sprinkle of lemon zest can brighten the creamy sauce and balance the richness. Customize Your Greens: Feel free to substitute or add other greens like kale or arugula for added nutrition and color. {{image_2}} You can easily make this dish your own. Try adding proteins like chicken or shrimp. Cook the chicken in the skillet before adding the garlic. For shrimp, add them to the sauce at the same time as the gnocchi. This adds great flavor and makes the dish heartier. You can also incorporate different vegetables. Fresh spinach adds color and nutrients. You can try peas, broccoli, or bell peppers too. Just add them in with the garlic to cook slightly. This adds a nice crunch and boosts the meal's nutrition. If you're looking for dairy-free options, there are great substitutes. Instead of heavy cream, use coconut cream or cashew cream. Both give you a rich feel without dairy. Just blend soaked cashews with water until smooth for a tasty option. For cheese, look for non-dairy cheese alternatives that melt well. Many brands offer products made from nuts or soy. Check the labels to find one that suits your taste. For gluten-free diets, use gluten-free gnocchi. These are often made from rice or potato flour. They cook just like regular gnocchi, so follow the package instructions. You can also swap out any other ingredients that contain gluten. Ensure your seasonings and any added sauces are gluten-free. This way, everyone can enjoy this creamy dish without worry. To store your creamy garlic parmesan gnocchi, first cool it to room temperature. Then, place it in an airtight container. This helps keep the flavors fresh. You can store it in the fridge for about three days. After this time, the texture may change. It’s best to eat it sooner rather than later. When you’re ready to enjoy leftovers, reheat slowly. You can use a skillet on low heat. Add a little cream or butter to help the sauce stay smooth. Stir often to keep everything from sticking. For best results, avoid the microwave. It can make the gnocchi tough and the sauce grainy. To freeze, separate the gnocchi from the sauce. Place each in freezer bags. This way, they stay fresh longer. The gnocchi can last up to three months in the freezer. The sauce can also be frozen, but it may separate when thawed. To use, thaw in the fridge overnight. Reheat gently, adding a splash of cream to restore the creaminess. To make gnocchi from scratch, you need just a few ingredients. Start with potatoes, flour, and egg. 1. Cook the Potatoes: Boil the potatoes until soft. 2. Mash the Potatoes: Once cool, mash them well. 3. Mix Ingredients: Add flour and egg to the mashed potatoes. 4. Knead the Dough: Gently knead until smooth. 5. Shape the Gnocchi: Roll the dough into ropes and cut into small pieces. 6. Form the Gnocchi: Use a fork to create ridges on each piece. This process takes longer but yields delicious, homemade gnocchi. You can make parts of this dish ahead. - Gnocchi: Prepare and store raw gnocchi in the fridge for a day. - Sauce: Make the sauce a day before and refrigerate it. When ready to serve, just cook the gnocchi and heat the sauce. This saves time during busy days. This dish pairs well with a variety of sides. - Salad: A fresh green salad complements the creamy gnocchi. - Vegetables: Roasted or steamed veggies add color and crunch. - Bread: Garlic bread or crusty rolls work well to soak up the sauce. These options will round out your meal beautifully. This blog post covered everything about creamy garlic parmesan gnocchi. We explored main ingredients like potato gnocchi, butter, and garlic. I provided steps for cooking and making the sauce. Tips for perfecting the dish and variations for different diets were also included. Remember, cooking is all about enjoying the process. Use these tips to make your gnocchi a hit every time. Enjoy experimenting with flavor and feel free to make it your own!

Creamy Garlic Parmesan Gnocchi Quick and Easy Dish

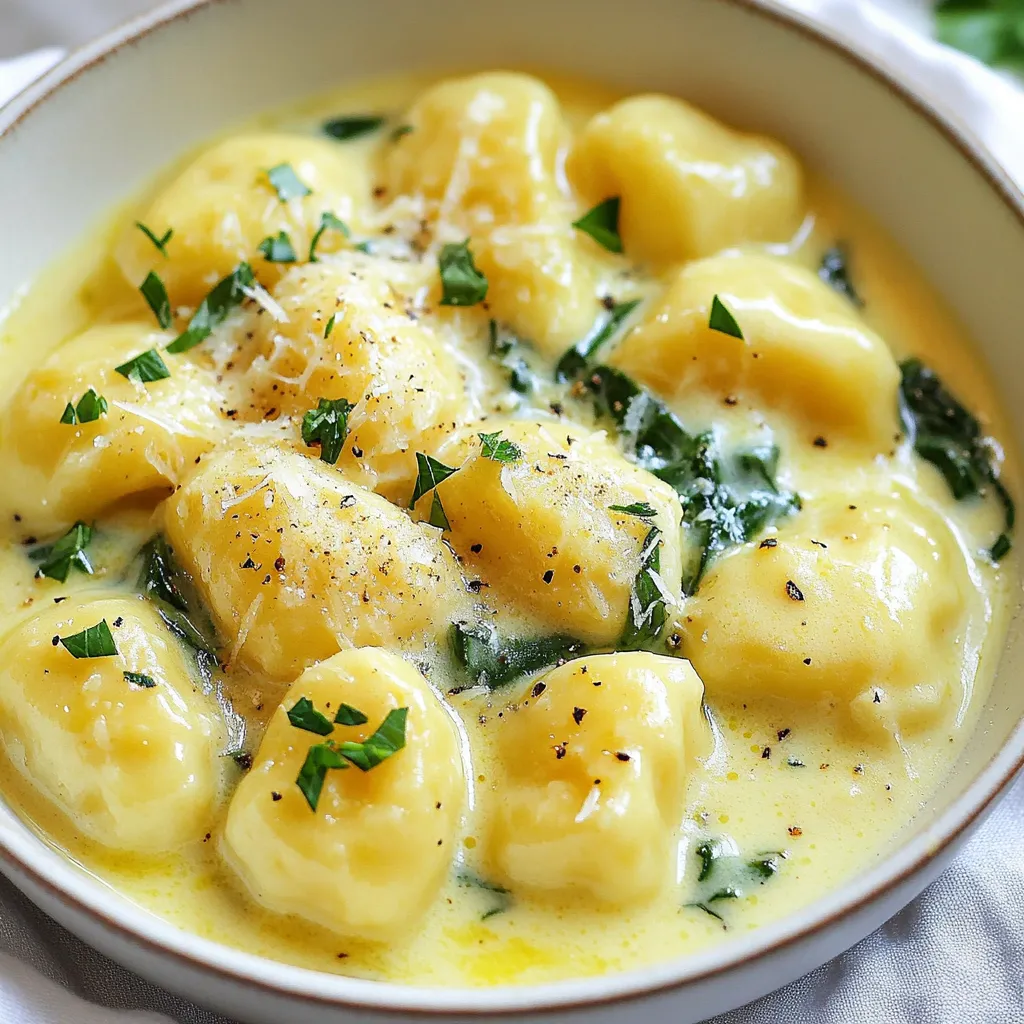
Are you craving a quick and creamy pasta dish that satisfies? Look no further. This Creamy Garlic Parmesan Gnocchi is

To make Cajun shrimp tacos, you need a few key ingredients: - 1 lb large shrimp, peeled and deveined - 2 tablespoons Cajun seasoning - 1 tablespoon olive oil - 8 small corn tortillas - 1 cup red cabbage, shredded - 1 avocado, sliced - ½ cup cilantro, chopped - 1 lime, cut into wedges - Salt to taste These ingredients form the base of your tasty tacos. The shrimp brings protein, while the Cajun seasoning adds that bold, spicy kick. You can customize your tacos with extra toppings: - ½ cup sour cream or Greek yogurt - Additional lime wedges - Hot sauce for a spicy kick These toppings enhance flavor and add creaminess. Feel free to mix and match based on what you like. Here are some tools that will help you make these tacos: - Large skillet for cooking shrimp - Bowl for mixing shrimp and seasoning - Tongs for flipping shrimp - Spatula for toasting tortillas - Cutting board and knife for chopping veggies Using the right tools makes cooking easier. It also helps ensure that your tacos are made perfectly! {{ingredient_image_1}} Start by washing the shrimp. Remove the shells and veins. In a bowl, add the shrimp with Cajun seasoning. Sprinkle in a pinch of salt. Toss the shrimp well to coat them. Make sure each shrimp has seasoning on it. This makes the flavor pop. Next, heat olive oil in a large skillet. Use medium-high heat for this. Once the oil is hot, add the seasoned shrimp. Cook them for 2-3 minutes on each side. You want them to turn pink and opaque. This means they are done. When finished, remove them from the heat and set them aside. While the shrimp cooks, toast the corn tortillas. You can use a separate skillet or a flame. If using a skillet, heat it over medium. Toast each tortilla for a few seconds on each side. They should be warm and soft. This step adds a nice flavor to the tacos. Now it’s time to put everything together. Take a warm tortilla and place a few shrimp inside. Add shredded red cabbage on top for crunch. Next, add sliced avocado for creaminess. Finish with chopped cilantro for freshness. Serve the tacos with lime wedges on the side. If you like, drizzle sour cream or Greek yogurt on top. To cook shrimp just right, start with fresh, peeled shrimp. Use Cajun seasoning to give them a bold taste. Heat olive oil in a pan over medium-high heat. Once the oil is hot, add the shrimp. Cook them for 2-3 minutes on each side. Shrimp should turn pink and opaque when done. Remove them from heat right away. Overcooking makes shrimp tough and chewy. Toasting tortillas adds flavor and texture. You can do this on a skillet or directly over a flame. If using a skillet, heat it on medium. Place the tortilla in the pan for a few seconds. Flip it over and toast the other side. For a flame, hold the tortilla with tongs. Toast for just a few seconds on each side. Aim for warm and pliable, not burnt. You can make your tacos even tastier. Consider adding sliced jalapeños for heat or diced tomatoes for freshness. A drizzle of lime juice brightens the flavors. If you like creaminess, add sour cream or Greek yogurt. Fresh herbs like cilantro boost the taste too. Mix and match to find your favorite combination. Enjoy the fun of creating your perfect taco! Pro Tips Tip for Freshness: Always use fresh shrimp for the best flavor and texture. Frozen shrimp can be used but make sure to thaw them properly before seasoning. Tip for Spice Level: Adjust the amount of Cajun seasoning based on your spice tolerance. Start with a little less if you're sensitive to heat, and add more if you like it spicy! Tip for Tortilla Texture: Lightly toasting the tortillas enhances their flavor and makes them more pliable for folding. Don't skip this step! Tip for a Tasty Topper: Experiment with toppings! Adding diced tomatoes, jalapeños, or a squeeze of extra lime can elevate the flavor of your tacos. {{image_2}} You can swap shrimp for other proteins. Chicken works great with Cajun spice. Use about 1 pound of boneless chicken thighs. Cook them the same way as shrimp. Fish, like tilapia or mahi-mahi, is also a good choice. Just season and cook until flaky. Tofu can be a nice option too. Press and cube it, then sauté with Cajun seasoning. Each protein brings a unique twist to your tacos. To make these tacos vegetarian, use black beans or lentils. They add protein and a hearty texture. Season them with Cajun spice for a kick. Grilled vegetables, like bell peppers and zucchini, also work well. Just toss them in olive oil and spices, then grill until tender. You can even use cauliflower. Roast it until golden, and it will absorb flavors well. Adjusting the heat is easy. If you want milder tacos, use less Cajun seasoning. You can also mix in some paprika for flavor without the heat. For those who love spice, add cayenne pepper or a splash of hot sauce. You can also serve with sliced jalapeños as a topping. This way, everyone can enjoy their tacos just how they like. To keep your leftover tacos fresh, store them in the fridge. Place the shrimp and toppings in separate airtight containers. This helps prevent sogginess from the tortillas. You can store the shrimp for up to three days. The tortillas should be kept with a paper towel to absorb moisture. When it's time to enjoy your leftovers, reheat the shrimp in a skillet. Heat it over medium heat for about two to three minutes. This helps keep the shrimp juicy. For the tortillas, you can warm them in a dry skillet for about 30 seconds on each side. This will make them soft and tasty again. The shrimp can last in the fridge for three days after cooking. Red cabbage stays fresh for about five to seven days. Keep the avocado in the fridge, but only slice it right before using. Avocado turns brown quickly. If you store your cilantro in a jar of water in the fridge, it can last up to two weeks. Always check your ingredients for freshness before cooking. Yes, you can use frozen shrimp for this dish. Just make sure to thaw the shrimp first. Place the shrimp in cold water for about 15-20 minutes. This helps them cook evenly. After thawing, peel and devein if needed. Then, coat them with Cajun seasoning as you would with fresh shrimp. Corn tortillas are the best choice for Cajun shrimp tacos. They add a nice flavor and texture. Plus, they hold the shrimp and toppings well. You can use small tortillas for easier eating. If you want a different option, try flour tortillas. They are soft and tasty too. Yes, you can prepare the shrimp ahead of time. Season the shrimp and keep them in the fridge for up to 24 hours. This saves time when you are ready to cook. Just remember to cook them right before serving. This keeps them fresh and tasty. Cajun shrimp tacos are a fun and tasty dish. We covered all the key parts: ingredients, step-by-step cooking, and tips. You learned about main ingredients, coatings, and cooking methods. The variations show you can switch things up easily. With our storage advice, leftovers are no problem. In the end, these tacos are a great meal for any day. They are easy to make and full of flavor. Enjoy your cooking and flavor adventure!

Cajun Shrimp Tacos Flavorful and Easy to Make Dish

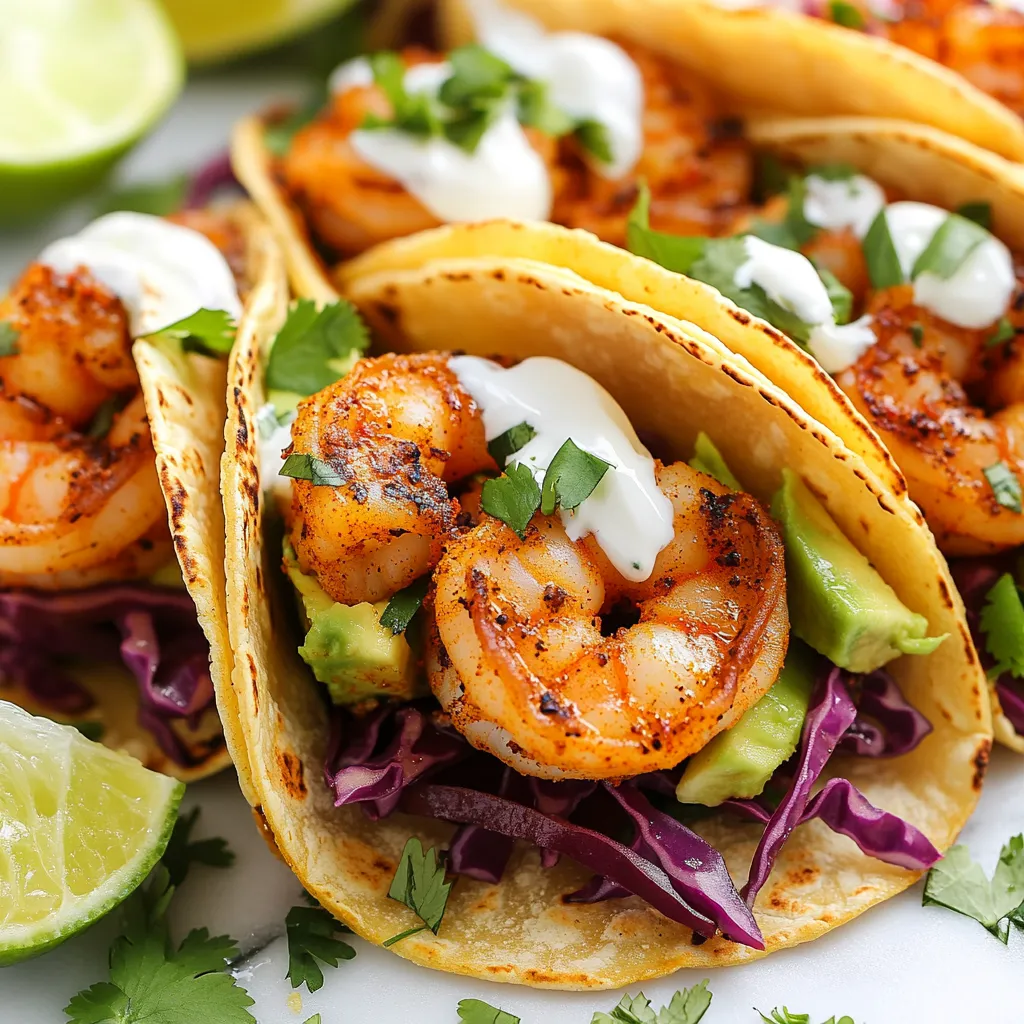
Are you ready to spice up your taco night? Cajun Shrimp Tacos are both flavorful and easy to make, perfect

To make delightful sesame teriyaki salmon bowls, gather these ingredients: - 2 salmon fillets (6 oz each) - 1/4 cup teriyaki sauce - 2 teaspoons sesame oil - 1 cup cooked brown rice - 1 cup mixed steamed vegetables (broccoli, carrots, snap peas) - 2 green onions, sliced - 1 tablespoon sesame seeds - Optional: 1 avocado, sliced - Salt and pepper to taste Salmon is rich in omega-3 fatty acids. These fats are great for your heart and brain health. Brown rice offers fiber, which helps with digestion. It also keeps you full longer. Mixed vegetables give you vitamins and minerals. They boost your immune system and support good health. Sesame seeds add calcium and antioxidants. The teriyaki sauce brings flavor, but check for sugar content. You can change your bowls to fit your taste. Try adding sliced avocado for creaminess. You can also use other veggies like bell peppers or zucchini. If you want more spice, add chili flakes or sriracha. For a nutty flavor, sprinkle some crushed nuts on top. Feel free to mix and match! {{ingredient_image_1}} First, gather your ingredients. You need: - 2 salmon fillets (6 oz each) - 1/4 cup teriyaki sauce - 2 teaspoons sesame oil - 1 cup cooked brown rice - 1 cup mixed steamed vegetables (like broccoli, carrots, and snap peas) - 2 green onions, sliced - 1 tablespoon sesame seeds - Optional: 1 avocado, sliced - Salt and pepper to taste Wash your vegetables and slice the green onions. If you want avocado, slice it too. Next, preheat your oven to 400°F (200°C). Line a baking sheet with parchment paper. Place the salmon fillets skin-side down on the sheet. In a small bowl, mix the teriyaki sauce and sesame oil. Brush this mix over the salmon. Save a little for later. Season with salt and pepper. Bake the salmon for 12-15 minutes. It's ready when it flakes easily with a fork. While the salmon bakes, steam your mixed vegetables for about 5-7 minutes. In each serving bowl, layer cooked brown rice at the bottom. Once the salmon is done, place a fillet on top of the rice. Add the steamed veggies beside the salmon. Drizzle the reserved teriyaki sauce on top. Finish with sliced green onions and sesame seeds. If you have avocado, add it as a fresh garnish. Enjoy your meal! To get the best salmon, start with fresh fillets. Look for bright color and no fishy smell. Always preheat your oven to 400°F (200°C) for even cooking. Lining your baking sheet with parchment paper helps prevent sticking. Brush the salmon with the teriyaki sauce mix for flavor. Bake it for 12-15 minutes until it flakes easily. A fork should glide through without much effort. This keeps the salmon juicy and tender. Steaming vegetables is simple. Use a pot with a steamer basket for best results. Fill the pot with water, but not too much. You want the water to touch the bottom of the basket. Bring the water to a boil, then add your mixed vegetables. Cover the pot and steam for about 5-7 minutes. Check for tenderness by piercing with a fork. They should be bright and crisp, not mushy. Steamed veggies keep their nutrients and taste fresh. You can mix it up with different flavors. Try adding garlic or ginger to the teriyaki sauce for a kick. A dash of lime juice brings a zesty twist. If you love spice, sprinkle some red pepper flakes on top. You can also switch out the vegetables. Bell peppers or zucchini work well, too. For a creamier addition, slice up some avocado on top. These tweaks can make your meal unique every time you cook it. Pro Tips Freshness Matters: Always choose fresh salmon for the best flavor and texture. Check for a bright color and firm texture when selecting your fillets. Customize Your Veggies: Feel free to swap in your favorite vegetables or whatever you have on hand. Bell peppers, zucchini, and spinach are great alternatives! Perfect Rice: For extra flavor, cook your brown rice in vegetable broth instead of water. This adds depth to your dish. Serving Suggestions: For a complete meal, serve with a side of miso soup or a simple cucumber salad to balance the flavors. {{image_2}} You can swap salmon for other fish. Try trout or cod for a lighter taste. Chicken works well too, just adjust the cooking time. Tofu is a great choice for a plant-based option. It soaks up flavors nicely. Brown rice brings a nutty flavor, but white rice is good too. Quinoa offers a protein boost and a unique texture. Cauliflower rice is perfect for a low-carb meal. It adds crunch and absorbs the sauce well. If you want something different, try soy sauce or miso. Spicy mayo adds a kick that some enjoy. A mix of ginger and garlic can enhance the dish's flavor. Experiment with honey or spicy chili sauce for sweetness or heat. After enjoying your sesame teriyaki salmon bowls, store leftovers in airtight containers. Keep the salmon, rice, and veggies separate when possible. This helps keep everything fresh. Place containers in the fridge. They will last for up to three days. To reheat, you can use a microwave or an oven. If using a microwave, place the salmon and rice on a microwave-safe plate. Cover it with a damp paper towel to keep moisture. Heat in short bursts of 30 seconds until warm. For the oven, preheat to 350°F (175°C). Place the salmon and rice in a baking dish, cover with foil, and heat for about 10-15 minutes. If you want to freeze the bowls, make sure to cool everything first. Place the salmon, rice, and veggies in freezer-safe containers. Label the containers with the date. You can freeze them for up to one month. When ready to eat, thaw them in the fridge overnight before reheating. Yes, you can use frozen salmon. Thaw it first in the fridge overnight. This way, it cooks evenly. Make sure to pat it dry before adding the teriyaki sauce. A dry surface helps the sauce stick well and gives a nice glaze. If you don't have teriyaki sauce, you can use soy sauce. Add a bit of honey or brown sugar to mimic the sweetness. You can also try a mix of soy sauce and rice vinegar. This will give a nice balance of salty and tangy flavors. Yes, this recipe works great for meal prep. You can cook multiple salmon fillets and store them. Keep the rice and veggies separate to avoid sogginess. Pack them in airtight containers for easy meals throughout the week. Just reheat before eating. This blog post covered how to make Sesame Teriyaki Salmon Bowls. We listed the key ingredients and their health benefits. You learned to bake salmon and assemble tasty bowls with rice and veggies. We also shared tips on cooking salmon perfectly and steaming veggies. Plus, there are options for substitutions and storage ideas. In the end, this dish is healthy, easy, and fun. You can mix and match to create your own version. Enjoy making these bowls and share them with others!

Savory Sesame Teriyaki Salmon Bowls Easy Recipe

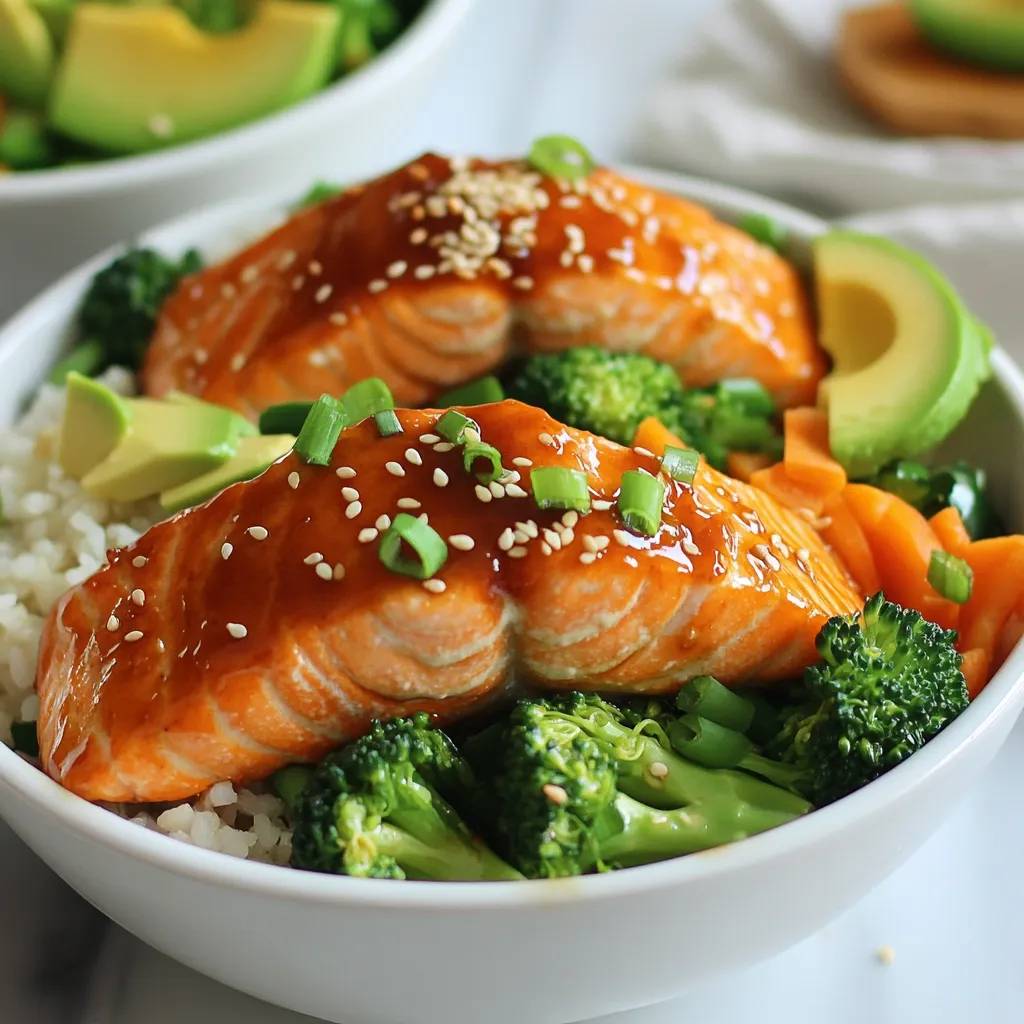
Craving a dinner that’s both tasty and simple? You’ll love these Savory Sesame Teriyaki Salmon Bowls! This easy recipe packs

Older posts
Newer posts
← Previous Page1 … Page123 Page124 Page125 … Page137 Next →

dsad

© 2025 Recipes Pursuit • Built with GeneratePress

Our Policies

  • Copyright Policy
  • Cookie Policy
  • GDPR Policy
  • Privacy Policy
  • Disclaimer
  • Terms Of Use

More Information

  • Home
  • About
  • Contact
  • Appetizers
  • Dessert
  • Dinner
  • Drinks
©2025, Recipes Pursuit About Back To Top