Skip to content
DisclaimerTerms Of UseGDPR PolicyCookie Policy

Recipes Pursuit

  • Home
  • Drinks
  • Appetizers
  • Dinner
  • Dessert
  • About
  • Contact
  • Privacy Policy
DisclaimerTerms Of UseGDPR PolicyCookie Policy

Emma Smith

- 12 oz spaghetti or linguine - 2 ripe avocados, pitted and peeled - 1 cup fresh cilantro leaves, packed - 2 garlic cloves, minced - 2 tablespoons lime juice - 1/4 cup olive oil - 1/2 teaspoon cumin - Salt and pepper to taste The main ingredients create a creamy and tasty dish. You start with pasta, either spaghetti or linguine. I love using ripe avocados because they make the sauce rich and smooth. Fresh cilantro adds a bright flavor that mixes well with the garlic. Lime juice gives it a nice tang. Olive oil helps blend everything together. Cumin adds a warm note, while salt and pepper enhance the taste. - 1/2 cup cherry tomatoes, halved (for garnish) - Grated Parmesan cheese (optional, for garnish) The optional ingredients can elevate your dish. Cherry tomatoes add a pop of color and sweetness. If you enjoy cheese, sprinkle some grated Parmesan on top for extra flavor. These additions make your creamy avocado cilantro pasta look and taste even better. {{ingredient_image_1}} - Bring a large pot of salted water to a boil. - Add 12 ounces of spaghetti or linguine. - Cook until al dente, as per package instructions. - Reserve one cup of pasta water before draining. - In a blender, add two ripe avocados, one cup of cilantro leaves, and two minced garlic cloves. - Pour in two tablespoons of lime juice, 1/4 cup of olive oil, and 1/2 teaspoon of cumin. - Add salt and pepper to taste. - Blend the mixture until smooth and creamy. - If the sauce is thick, add some reserved pasta water to reach the right consistency. - In a large mixing bowl, add the drained pasta. - Pour the creamy avocado sauce over the pasta. - Toss well to ensure even coating on all the pasta. - Taste the pasta and adjust seasoning as needed. - Choosing ripe avocados: Use soft, ripe avocados for the best flavor. A ripe avocado gives a creamy texture. Press gently; it should yield slightly. - Flavor adjustments with lime juice: Lime juice adds brightness. Start with two tablespoons and taste. You can always add more if needed. - Thick or thin sauce options: If your sauce is too thick, add reserved pasta water little by little. For a thicker sauce, blend in less water. - Timing for cooking pasta: Cook spaghetti or linguine until al dente. Follow package instructions for timing. This keeps the pasta firm and tasty. - Importance of reserving pasta water: Always save some pasta water before draining. This starchy water helps the sauce stick to the pasta. - Avoiding overcooking: Watch the pasta closely. Overcooked pasta becomes mushy. Test it a minute before the time is up. Pro Tips Ripe Avocados: Ensure your avocados are perfectly ripe for the best creamy texture and flavor. They should yield slightly to pressure when squeezed gently. Adjusting Consistency: If your avocado sauce is too thick, gradually add reserved pasta water until you achieve your desired creaminess. Fresh Ingredients: Use fresh cilantro and lime juice for a vibrant flavor. Fresh herbs make a significant difference in the overall taste of the dish. Serving Suggestions: This pasta can be served warm or at room temperature. It also pairs well with grilled chicken or shrimp for added protein. {{image_2}} You can easily make this dish vegan. Just skip the Parmesan cheese. The creamy sauce tastes great without it. For garnishes, try adding extra cilantro or some chopped green onions. These will add color and flavor to your meal. Want to spice things up? Add some chili flakes for a kick. You can also mix in other herbs. Basil or parsley work well in this dish. These herbs can give the pasta a fresh twist. If you need a gluten-free meal, swap regular pasta for gluten-free pasta. Rice or corn pasta are good choices. They cook well and still taste great with the avocado sauce. To keep your creamy avocado cilantro pasta fresh, store it in the fridge. Place any leftover pasta in an airtight container. This helps to lock in moisture and flavor. Make sure to eat the pasta within three days for the best taste. If you have extra avocado sauce, store it separately. This prevents the pasta from getting mushy. When it’s time to enjoy your leftovers, use gentle heat. The best methods are the stove or microwave. If using the stove, add a splash of water to the pan. Stir gently over low heat until warm. For the microwave, heat in short bursts. Stir in between to avoid hot spots. Adding a little extra olive oil helps keep the sauce creamy. Avoid high heat, or the pasta will dry out. Yes, you can make the avocado sauce ahead. Store it in an airtight container. Add a bit of lime juice to keep it fresh. You can store it in the fridge for about 1 to 2 days. If you don’t have lime juice, lemon juice works well. It gives a nice tang. You can also use vinegar, but it will change the flavor a bit. Yes, this recipe is great for meal prep. You can cook the pasta and sauce separately. Store them in the fridge. Just mix them together when you’re ready to eat. Leftover pasta can last about 3 to 5 days in the fridge. Keep it in an airtight container to stay fresh. Freezing the avocado sauce is not the best option. It may change texture when thawed. If you must freeze it, use a freezer-safe container. Use it within 1 month for best quality. To wrap it up, this avocado pasta recipe is simple and tasty. We covered important ingredients like ripe avocados, garlic, and lime juice. You learned how to cook pasta properly and prepare a creamy sauce. Don't skip the tips for perfecting your dish and exploring variations. This meal is great for everyone, including vegans and those needing gluten-free options. With proper storage, your leftovers can stay fresh. Enjoy making this dish, and share your own flavors, too!

Creamy Avocado Cilantro Pasta Healthy and Easy Meal

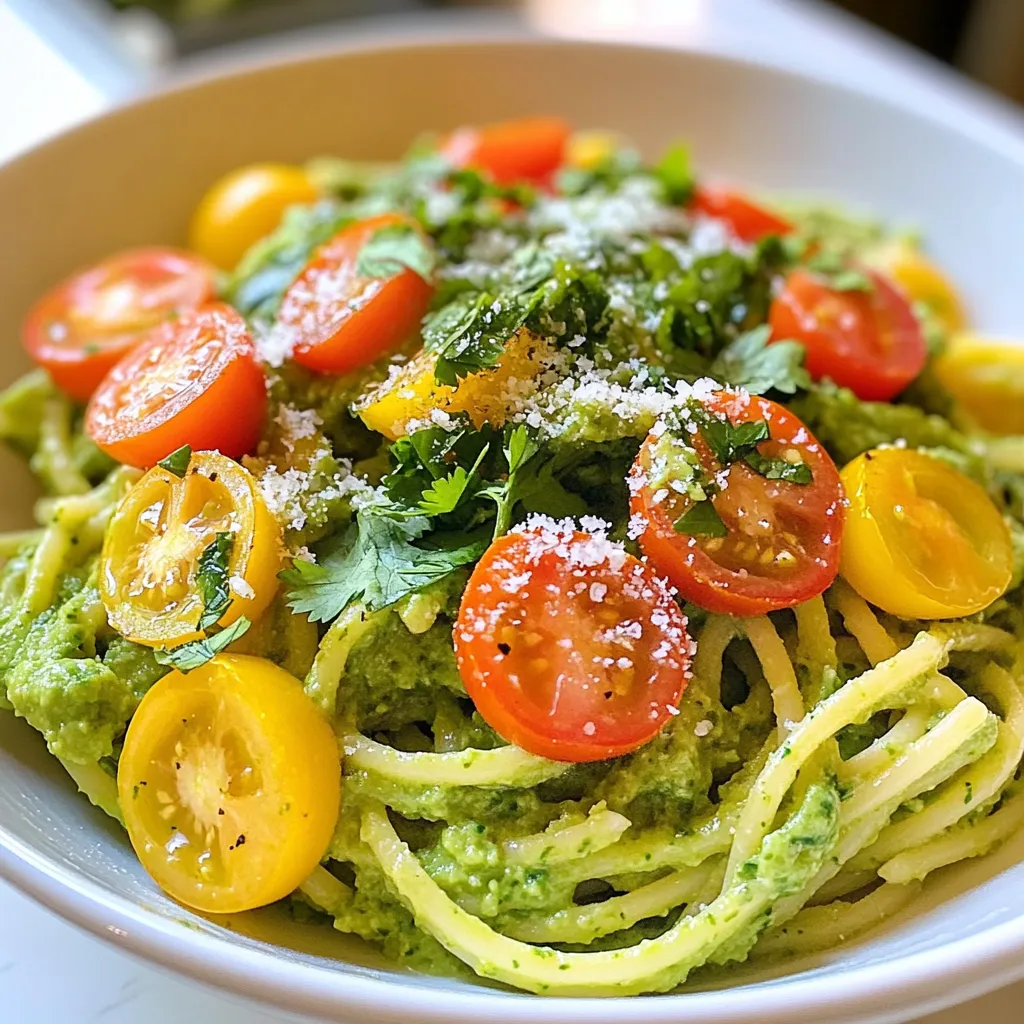
If you’re looking for a quick, healthy meal that dazzles your taste buds, you’ve found it! Creamy Avocado Cilantro Pasta

For a tasty Mediterranean stuffed eggplant, you will need: - 2 medium eggplants - 1 cup cooked quinoa - 1 cup cherry tomatoes, diced - 1/2 cup Kalamata olives, chopped - 1/2 cup feta cheese, crumbled - 1 small red onion, diced - 2 cloves garlic, minced - 1 teaspoon dried oregano - 1 teaspoon smoked paprika - 2 tablespoons olive oil - Salt and pepper to taste - Fresh parsley, chopped (for garnish) These ingredients blend well to create a healthy meal. The eggplants serve as a perfect vessel for the flavorful stuffing. You can swap some ingredients if needed: - Quinoa: Use brown rice or couscous for a different texture. - Feta cheese: Try goat cheese or omit it for a dairy-free option. - Kalamata olives: Green olives or capers work well too. - Cherry tomatoes: Diced bell peppers or zucchini can add freshness. These substitutions can help you tailor the dish to your taste or dietary needs. This dish is not only delicious but also nutritious: - Calories: About 250 per serving - Protein: Around 8 grams from quinoa and feta - Fiber: About 6 grams from eggplants and quinoa - Healthy fats: Olive oil and olives provide heart-healthy fats This meal is rich in flavors and nutrients, making it a balanced choice for lunch or dinner. Enjoy the health benefits while savoring the taste! {{ingredient_image_1}} 1. Start by preheating your oven to 375°F (190°C). This will help cook the eggplants evenly. 2. Take two medium eggplants and cut them in half lengthwise. Use a spoon to scoop out the flesh. Leave some around the edges to form a boat. 3. Dice the scooped-out flesh and keep it for later. This adds flavor to your filling. 4. In a large skillet, heat two tablespoons of olive oil over medium heat. Add one diced red onion and two minced garlic cloves. Sauté until they become soft and fragrant, about 3-4 minutes. 5. Now, add the diced eggplant flesh to the skillet. Sprinkle in one teaspoon of smoked paprika and one teaspoon of dried oregano. Cook this mixture for 5-7 minutes until the eggplant is tender. 6. Stir in one cup of cooked quinoa, one cup of diced cherry tomatoes, half a cup of chopped Kalamata olives, and half a cup of crumbled feta cheese. Season with salt and pepper to taste. Mix well until everything is heated through. 7. Spoon the mixture generously back into each eggplant half. Make sure they are well-filled for great flavor. 8. Place your stuffed eggplants on a baking sheet. Bake for 25-30 minutes. The eggplants should be tender and the tops golden. Once out of the oven, let them cool for a few minutes. Garnish your Mediterranean stuffed eggplants with fresh chopped parsley. This dish makes a great main course or a side. Pair it with a light salad or some crusty bread for a complete meal. Enjoy your tasty and healthy creation! To make great stuffed eggplant, choose firm and shiny eggplants. This helps with texture. Cut them in half and scoop out the flesh carefully. Leave some flesh for flavor and structure. Sauté the onion and garlic in olive oil until soft. This step adds depth to your filling. Mix in the eggplant flesh, spices, and other ingredients. Blend everything well for a tasty filling. Fill the eggplant halves generously. This ensures a great bite each time. Bake until the eggplants are tender and the tops are golden. This step makes the dish look appealing. One common mistake is not salting the eggplants before cooking. Salt draws out moisture and bitterness. Skipping this step can lead to soggy eggplant. Another mistake is overcooking the filling. Keep it slightly undercooked since it will bake further. Not using enough seasoning can make the dish bland. Taste the filling before you spoon it into the eggplant. Lastly, don’t skip the garnish. Fresh parsley adds color and a fresh taste. Use a sharp knife for cutting the eggplants. A sturdy spoon works best for scooping out the flesh. A large skillet is perfect for cooking the filling. A baking sheet will hold your stuffed eggplants while they bake. An oven mitt is a must for safe handling. Finally, have a small bowl for mixing and seasoning the filling. These tools will help you make this dish easy and fun. Pro Tips Choosing Eggplants: Opt for firm, shiny eggplants with a deep purple color. Avoid any that are soft or have blemishes for the best flavor and texture. Customize Your Filling: Feel free to add other ingredients like spinach, artichoke hearts, or different cheeses for a unique twist on the stuffing. Serve with Sauce: Consider drizzling a tahini or yogurt sauce over the stuffed eggplants before serving for added flavor and creaminess. Make Ahead: You can prep the stuffed eggplants a few hours in advance. Just cover them and refrigerate until you’re ready to bake. {{image_2}} If you want a vegan version, swap feta cheese for a plant-based cheese. You can also use nutritional yeast for a cheesy flavor. Replace the cooked quinoa with lentils for extra protein. This keeps the meal filling and delicious. This dish is already gluten-free! Quinoa is a great grain choice. You can also use brown rice or millet if you prefer. Just make sure any added ingredients, like olives or cheese, are gluten-free. To boost the flavor, add spices like cumin or cayenne. These spices give a nice kick. You can also mix in some chopped spinach or kale for extra greens. Try adding pine nuts for crunch or a squeeze of lemon for brightness. Each tweak makes this dish even better! To store your leftover Mediterranean stuffed eggplant, wait until it cools. Place each half in an airtight container. You can keep it in the fridge for up to three days. Ensure the lid is secure to lock in freshness. When you're ready to enjoy your leftovers, preheat your oven to 350°F (175°C). Place the stuffed eggplant halves on a baking sheet. Cover them with foil to keep them moist. Heat in the oven for about 15-20 minutes. You can also use a microwave. Just heat it on high for 2-3 minutes, checking to make sure it warms evenly. If you want to freeze the stuffed eggplant, it's best to do it before baking. Wrap each half tightly in plastic wrap, then place them in a freezer bag. Squeeze out as much air as possible. They can stay frozen for up to three months. When you're ready to bake, thaw them in the fridge overnight before cooking as directed. This way, you’ll have a delicious meal ready to enjoy any time! You can serve Mediterranean Stuffed Eggplant with a simple salad. A fresh Greek salad works well. Just mix cucumbers, tomatoes, and olives. Drizzle olive oil and add some herbs. You can also pair it with pita bread. It adds nice texture. A dollop of tzatziki on the side is tasty too. This creamy yogurt dip complements the dish. Yes, you can prepare Mediterranean Stuffed Eggplant in advance. You can stuff the eggplants a few hours ahead. Keep them in the fridge until you are ready to bake. This makes dinner prep easy. If you want to prepare it the day before, that works too! Just cover the stuffed eggplants tightly with plastic wrap. When you are ready, bake as usual. When choosing eggplants, look for firm ones. They should feel heavy for their size. The skin should be smooth and shiny, with no blemishes. A good eggplant has a deep purple color. If the eggplant feels soft or has brown spots, skip it. Press your thumb gently on the skin; it should spring back. This means it is fresh. We covered the key aspects of making Mediterranean stuffed eggplant. You learned the ingredients, cooking steps, and tips to avoid mistakes. You now know how to store leftovers and reheat them for the best taste. Consider trying variations like vegan or gluten-free versions to suit your needs. With this information, you can create a delicious and healthy dish. Enjoy experimenting and sharing it with friends and family!

Mediterranean Stuffed Eggplant Flavorful and Healthy Meal

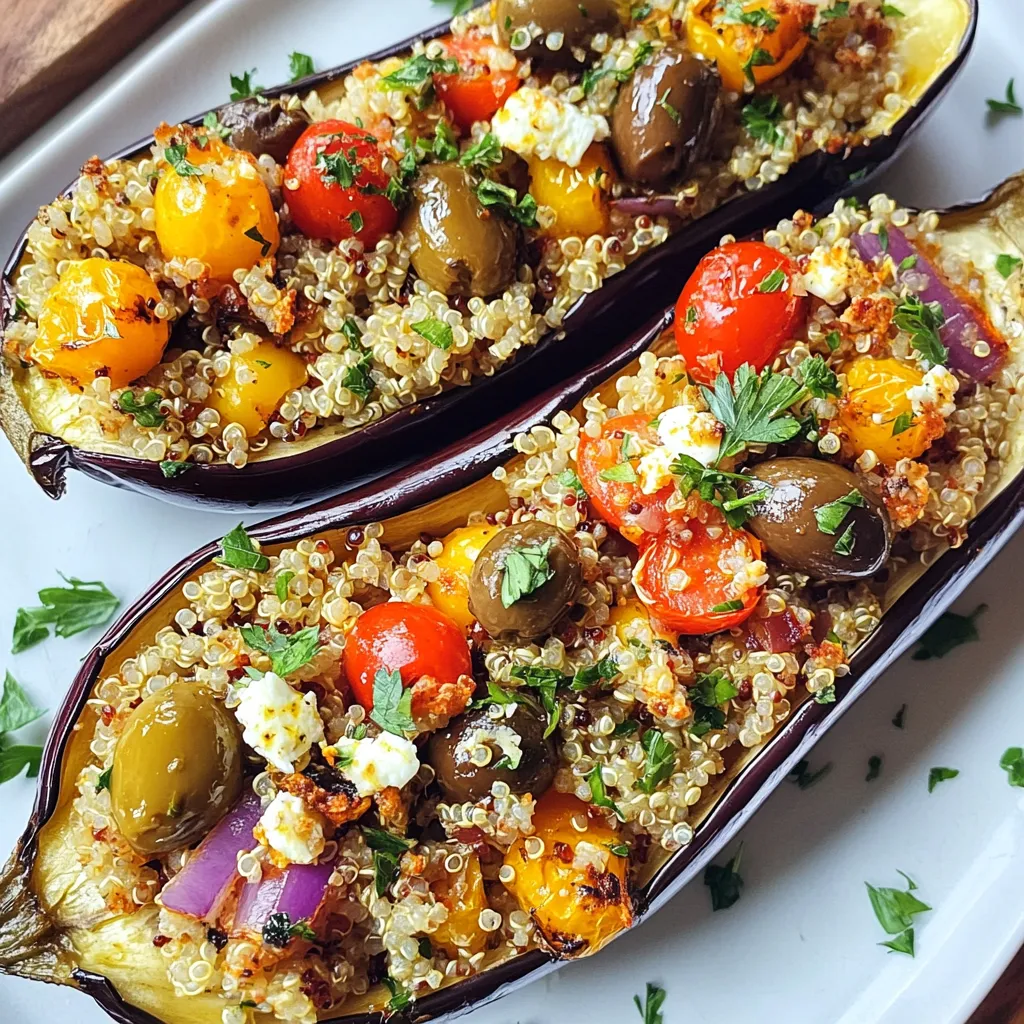
Looking for a meal that’s both tasty and healthy? You’ve found it! Mediterranean Stuffed Eggplant is packed with flavor and

- 1 can (15 oz) chickpeas, drained and rinsed - 1 cucumber, diced - 1 cup cherry tomatoes, halved - 1/2 red onion, finely chopped - 1 bell pepper (any color), diced - 1/4 cup Kalamata olives, pitted and sliced - 1/4 cup feta cheese, crumbled - 3 tablespoons fresh parsley, chopped - 2 tablespoons olive oil - 1 tablespoon red wine vinegar (or apple cider vinegar for a non-wine option) - 1 teaspoon dried oregano - Salt and pepper to taste Chickpeas form the base of this salad. They add protein and fiber. Using canned chickpeas makes prep easy. Just drain and rinse them. Fresh veggies bring crunch and vibrant color. Cucumbers add a cool bite, while cherry tomatoes burst with sweetness. Red onion gives a sharp taste, balancing the salad. Bell peppers add more color and crunch. Kalamata olives add a touch of brininess. Feta cheese provides creamy richness, making every bite delightful. Fresh parsley brightens the dish with color and flavor. Olive oil and vinegar create a simple dressing that ties everything together. Dried oregano enhances the Mediterranean flavor. This list of ingredients is key to a fresh and flavorful dish. Each ingredient plays a role in making this salad bright, tasty, and healthy. Check out the Full Recipe for all the details on how to prepare this dish! In a large mixing bowl, combine the drained chickpeas, diced cucumber, halved cherry tomatoes, chopped red onion, and diced bell pepper. This mix gives your salad a bright and colorful base. Next, add the sliced Kalamata olives and crumbled feta cheese to the bowl. The olives add a nice salty taste, while the feta brings creaminess to the salad. In a small bowl, whisk together the olive oil, vinegar, dried oregano, salt, and pepper. This dressing ties all the flavors together. Make sure to mix it well so the flavors blend. Pour the dressing over the salad mixture and gently toss everything together until well combined. Use a large spoon or spatula to ensure even coating. Sprinkle chopped parsley on top for added flavor and color. This step not only enhances the taste but also gives a fresh look to your dish. Let the salad sit for about 10-15 minutes to allow the flavors to meld before serving. This waiting time helps the ingredients soak up the dressing, making each bite delicious. For the full recipe, check the section above. Enjoy making this fresh and flavorful dish! To make your Mediterranean Chickpea Salad shine, let it sit for a bit before serving. This time allows the flavors to blend nicely. I often find that 10-15 minutes is perfect. Fresh herbs are a game changer, too. They add a crisp taste that dried herbs can’t match. I love using parsley or mint for a fresh kick. Always taste your salad before serving. Adjust the salt and pepper to fit your liking. This way, you ensure each bite is just right. Presentation matters when serving this salad. I recommend using a large bowl or individual plates. Drizzle a little olive oil on top for a glossy finish. A wedge of lemon on the side adds brightness and color. For a full meal, pair this salad with grilled chicken or fish. It works well with shrimp, too. You can also serve it with pita bread for a hearty touch. These simple steps will wow your guests and make your meal memorable. Want to dive deeper? Check out the Full Recipe for more ideas! {{image_2}} You can easily change up the chickpeas in this Mediterranean chickpea salad. Try using black beans or kidney beans instead. These swaps bring new tastes and textures. You can also switch the cheese. Go for creamy goat cheese or fresh mozzarella. Both will add a unique flavor twist. Want to add more crunch and creaminess? Toss in some diced avocado or thinly sliced radishes. These veggies brighten up the salad. You can also mix in grains like quinoa or couscous. They add a hearty feel and make the dish more filling. Enjoy the Full Recipe for more ideas! To keep your Mediterranean Chickpea Salad fresh, store it in a sealed container. This helps prevent any flavors from mixing and keeps it crisp. Place it in your fridge right after serving. This salad is best enjoyed within three days. After that, the veggies may lose their crunch. You can freeze some salad components, but not the whole salad. Freeze the chickpeas, diced cucumber, and bell pepper separately. Avoid freezing tomatoes and feta, as they change in texture when thawed. When you're ready to use them, thaw in the fridge overnight. Mix thawed ingredients fresh with some new veggies for a tasty salad. Can I make Mediterranean Chickpea Salad ahead of time? Yes, you can make this salad ahead of time. It tastes better after sitting for a while. Just keep it in the fridge. Is this salad vegan-friendly? Yes, Mediterranean Chickpea Salad is vegan if you skip the feta cheese. You can add vegan cheese if you like. What are some good side dishes to serve with Mediterranean Chickpea Salad? Great side dishes include pita bread, hummus, or grilled veggies. They complement the salad well. How can I increase the protein content of the salad? To boost protein, add more chickpeas or toss in some quinoa. You can also add nuts or seeds. What dressing alternatives can I use? You can use lemon juice or tahini for a different flavor. A yogurt-based dressing works well too. What are the nutritional benefits of chickpeas? Chickpeas are high in protein and fiber. They help keep you full and support digestion. Is Mediterranean Chickpea Salad low in calories? Yes, this salad is low in calories. It is packed with fresh ingredients that are healthy. How can I make this salad gluten-free? The salad is naturally gluten-free. Just ensure all ingredients, like vinegar, are gluten-free. This Mediterranean Chickpea Salad is easy and full of flavor. You saw how to mix fresh veggies, olives, and chickpeas. I shared tips on making it taste even better and how to store or freeze it. Remember, this salad is versatile. You can swap ingredients based on what you have. Enjoy making it your own. This dish is not just healthy; it’s fun to prepare and share. Dive into this delicious salad and savor every bite!

Mediterranean Chickpea Salad Fresh and Flavorful Dish

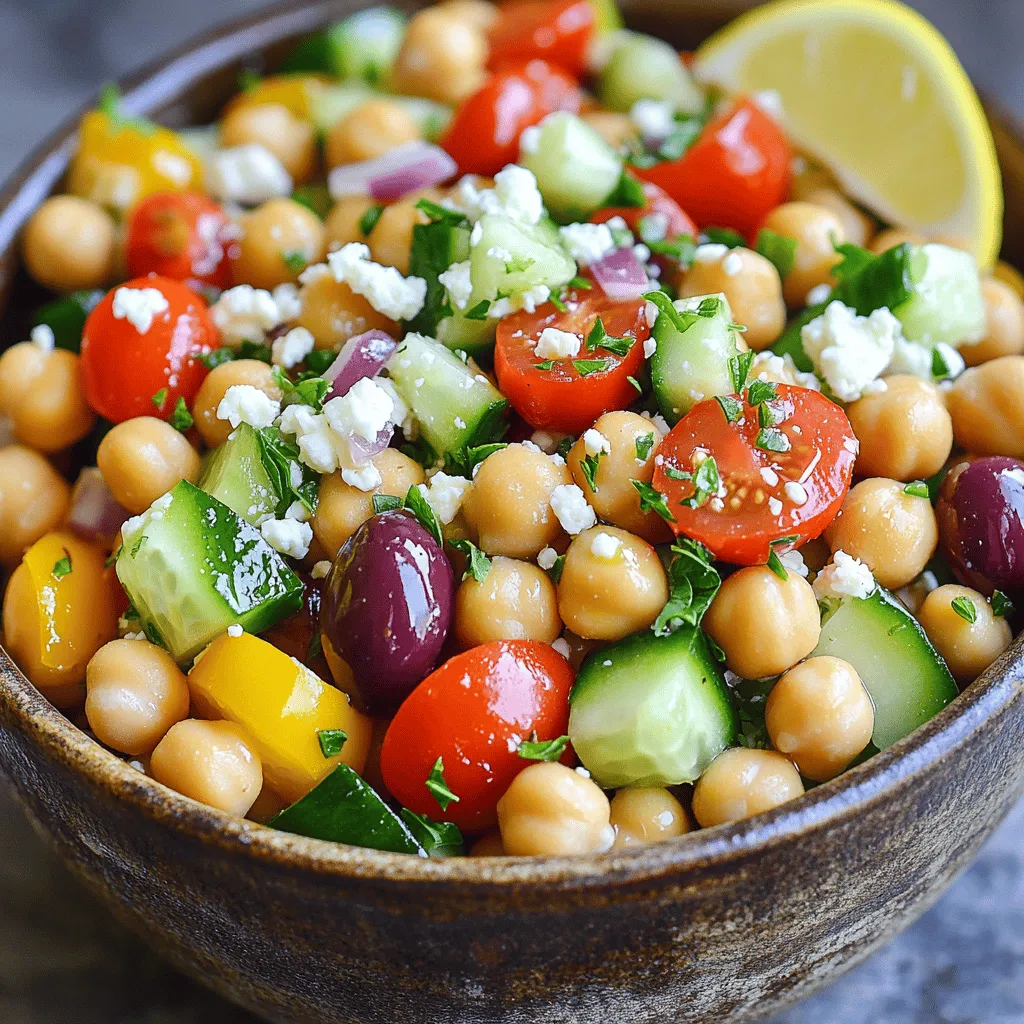
If you’re searching for a vibrant, healthy dish, look no further! Mediterranean Chickpea Salad bursts with fresh flavors and colors.

When making a healthy strawberry banana smoothie, fresh and quality ingredients are key. Here’s what you need: - Strawberries - Banana - Spinach Strawberries bring a sweet and tangy flavor. They are rich in vitamin C and antioxidants. Bananas add creaminess and natural sweetness. Plus, they provide potassium and energy. Spinach is a great way to sneak in some greens. It adds vitamins without changing the taste much. - Almond milk (or alternative) - Sweetener options (honey or maple syrup) Almond milk makes the smoothie creamy and light. You can also use oat milk or coconut milk if you prefer. For sweetness, you can add honey or maple syrup. You can skip this if your fruits are sweet enough. - Chia seeds - Ice cubes Chia seeds boost fiber and omega-3s. They help keep you full longer. Ice cubes make the smoothie thicker and colder. This is great for a hot day. For the full recipe, check out the link provided. 1. Start by rinsing the strawberries under cold water. This removes dirt and bacteria. 2. Hull the strawberries by cutting off the green tops. This step is easy and quick. 3. Take the ripe banana and slice it into small pieces. This helps it blend well. 1. In a blender, add the hulled strawberries, sliced banana, and fresh spinach. 2. Pour in the almond milk. This gives the smoothie a nice base. 3. If you like it sweeter, add honey or maple syrup now. Adjust it to your taste. 4. For extra nutrition, toss in chia seeds. If you want it thicker, add ice cubes. 5. Blend all ingredients on high speed for about 30-60 seconds. It should be smooth. 6. Taste the smoothie. If it needs more sweetness, add more honey or syrup. Blend again briefly. 1. Pour the smoothie into glasses or bowls. It’s great for breakfast or a snack! 2. For a nice touch, top with sliced strawberries or banana. You can also sprinkle chia seeds on top. This makes it look pretty and tasty! - Blend for about 30 to 60 seconds. This time gives a smooth texture. - For a creamier feel, add more banana or a dollop of yogurt. - Swap in mango or pineapple for a tropical twist. - Try coconut milk or oat milk if you want a dairy-free option. - Taste your smoothie before serving. Adjust sweetness as needed. - Use honey, maple syrup, or even dates for natural sweetness. By making these small changes, you can create a strawberry banana smoothie that fits your taste! For the full recipe, check out the Berrylicious Strawberry Banana Smoothie . {{image_2}} You can make your smoothie creamier by adding yogurt. Plain Greek yogurt works great. It adds protein and thickens the mix. You can also use flavored yogurt for extra taste. Another fun idea is to incorporate other berries. Blueberries, raspberries, or blackberries add new flavors. You can mix and match to find your favorite blend. For extra nutrition, add seeds and nuts. Flaxseeds or hemp seeds give healthy fats and fiber. Almonds or walnuts can add crunch and protein. You can also include protein powders. Whey or plant-based protein can make your smoothie a meal. This is great if you need energy for your day. To save time, prep ingredients ahead of time. Wash and slice your fruits and store them in the fridge. This way, your smoothie is ready to blend in minutes. You can also freeze smoothie packs. Put your fruits, spinach, and seeds in bags and freeze them. When you want a smoothie, just grab a pack and blend it with milk. This keeps the smoothie fresh and tasty. Try these variations to keep your strawberry banana smoothie exciting! You can find the full recipe above. After making your healthy strawberry banana smoothie, you may have some leftovers. To store them, pour the smoothie into an airtight container. This helps keep it fresh. Place it in the fridge right away. The smoothie stays good for about 1 to 2 days. After that, it may lose its taste and texture. If you want to keep the smoothie longer, freezing is a great option. Pour the smoothie into freezer-safe bags or containers. Leave some space at the top for expansion. When it's time to enjoy, take it out and thaw it. You can thaw it in the fridge overnight or place it in warm water for a quick thaw. You can get creative with leftover smoothie! Try using it in yogurt parfaits or oatmeal. You can also blend it into popsicles for a fun treat. Another idea is to mix it into pancakes or waffles for a fruity flavor. These options make the most of your healthy smoothie and reduce waste. A strawberry banana smoothie is packed with nutrients. Strawberries are high in vitamin C, which boosts your immune system. They also have antioxidants that help fight free radicals. Bananas provide potassium, which is good for heart health. Plus, they add natural sweetness and creaminess. The spinach adds iron and fiber, promoting healthy digestion. Together, these ingredients create a tasty drink that fuels your body and keeps you feeling great. Yes, you can make this smoothie without spinach. If you skip the spinach, you will lose some iron and fiber. However, the smoothie will still taste great. You can also add other greens like kale or Swiss chard if you prefer. This way, you can stick to your taste while still getting some green goodness. Fresh strawberries are great, but frozen strawberries work well too. Fresh berries give a brighter flavor. They also hold more nutrients. Frozen strawberries are convenient and make the smoothie cold and thick. If you use frozen, you might not need ice cubes. Both options are healthy; it just depends on what you have available. To make your smoothie thicker, add ice cubes or use frozen fruits. Chia seeds also help thicken the mix as they absorb liquid. If you want a creamier texture, use yogurt or a banana. Blend until it reaches the desired thickness. Adjust the liquid as needed to get the perfect consistency. Yes, you can add protein powder to boost your smoothie. It’s a great way to add extra nutrition, especially if you’re active. Choose a flavor that pairs well with strawberries and bananas, like vanilla or chocolate. Just be sure to mix well so the powder blends in smoothly. Enjoy your tasty and energizing drink! This blog post covered how to make a delicious strawberry banana smoothie. We explored fresh ingredients, liquid options, and fun add-ins. I shared step-by-step instructions for blending and serving. Tips for perfecting texture and controlling sweetness can make your smoothie shine. Remember, you can customize your smoothie with different fruits or extras. Enjoy experimenting with flavors and ingredients. Smoothies are tasty, easy, and healthy—perfect for any time of day!

Healthy Strawberry Banana Smoothie For Vitality Boost

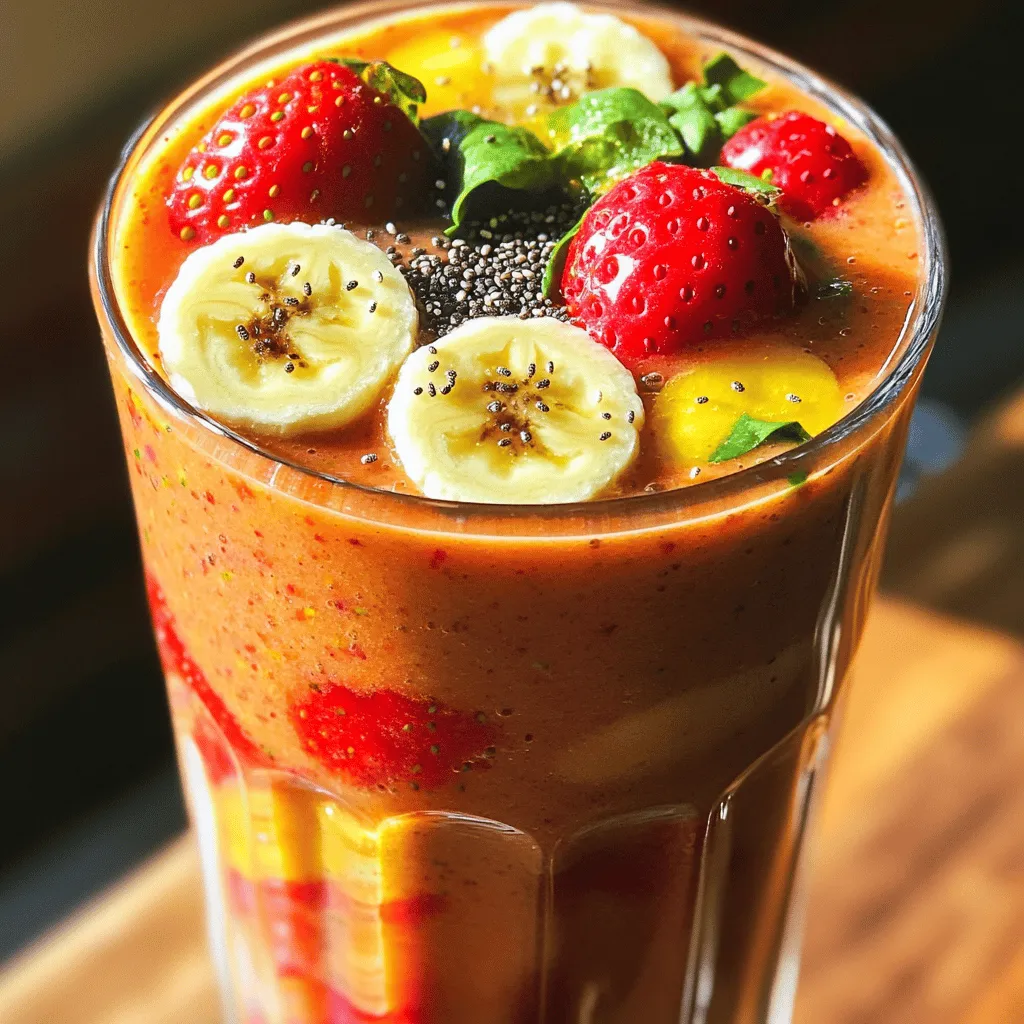
Looking for an easy way to boost your vitality? A Healthy Strawberry Banana Smoothie might be just what you need!

For a delicious serving of zucchini noodles with pesto, you'll need these items: - 3 medium zucchinis - 1 ripe avocado - 1 cup fresh basil leaves - 1/4 cup walnuts - 2 tablespoons lemon juice - 2 tablespoons olive oil - 1 clove garlic, minced - Salt and pepper to taste To enhance your dish, consider these toppings: - Cherry tomatoes, halved - Grated Parmesan cheese (optional) These garnishes add color and flavor that brighten up your meal. If you don't have certain items, here are some swaps: - Use pine nuts instead of walnuts for a different taste. - If you lack fresh basil, try spinach or arugula as alternatives. - For a nut-free option, use sunflower seeds in the pesto. - Instead of lemon juice, lime juice works well too. Feel free to mix and match based on what you have! The full recipe can guide you through this simple yet tasty dish. To start, grab three medium zucchinis. Using a spiralizer or a julienne peeler, turn those zucchinis into noodles. Place the noodles in a colander. Sprinkle them lightly with salt. This helps to draw out excess moisture. Let them sit for about 15 to 20 minutes. The salt will work its magic. After 20 minutes, rinse the noodles under cold water. Pat them dry with a paper towel. This step keeps your dish from being too watery. While the zucchini noodles drain, it's time to make the avocado pesto. Take one ripe avocado and scoop it into a food processor. Add one cup of fresh basil leaves, one-fourth cup of walnuts, and two tablespoons of lemon juice. Pour in two tablespoons of olive oil and add one clove of minced garlic. Blend everything until it's smooth. Taste the mixture and add salt and pepper as needed. If the pesto is too thick, add a bit more olive oil until you like the texture. This creamy pesto makes the dish sing. Once the zucchini noodles are dry, it's time to combine everything. In a large bowl, add the zucchini noodles and the avocado pesto. Toss gently until all the noodles are coated well. Now for the fun part—plating! Serve the noodles on a nice plate. Garnish with halved cherry tomatoes on top. If you like, sprinkle some grated Parmesan cheese for extra flavor. Serve immediately, and enjoy the fresh taste of this delightful dish. You can follow the [Full Recipe] for more details. To make perfect zucchini noodles, start with fresh, firm zucchinis. Use a spiralizer or julienne peeler. Spiralize the zucchinis directly into the bowl. Aim for long, thin strands. After spiralizing, place the noodles in a colander. Sprinkle them with salt to draw out the moisture. Let them sit for about 15 to 20 minutes. Rinse the noodles under cold water and pat them dry. This process helps keep your dish from becoming soggy. For the best pesto, use a food processor. Combine ripe avocado, fresh basil, walnuts, lemon juice, olive oil, and minced garlic. Blend until smooth, but don’t over-blend. You want a bit of texture in your pesto. If it’s too thick, add a little more olive oil. Taste and adjust with salt and pepper as needed. This balancing act is key to a bright, flavorful pesto that brings your dish to life. To make your zucchini noodles pop, add fresh ingredients. Halved cherry tomatoes add a nice touch. They bring sweetness and color to the dish. A sprinkle of grated Parmesan cheese can enhance the taste, too. For extra crunch, consider adding pine nuts or sunflower seeds. You could also serve the dish with a side of grilled chicken or shrimp for protein. These simple additions can elevate your meal without much effort. {{image_2}} Zucchini noodles fit well into both Paleo and Whole30 diets. These diets focus on whole foods. For a tasty twist, use nuts like pecans in your pesto. You can also swap olive oil for avocado oil for a different flavor. Make sure to skip any cheese to keep it compliant. For a vegan version, the avocado is your best friend. It adds creaminess without dairy. You can replace walnuts with sunflower seeds in the pesto. Sunflower seeds offer a nice crunch and a different taste. Consider adding nutritional yeast for a cheesy flavor without the dairy. If you want to make your dish heartier, add proteins. Grilled chicken or shrimp pairs well with this dish. You can toss cooked quinoa or chickpeas into the noodles for extra protein. For a vegetarian option, try adding tofu or tempeh. These options will keep your meal filling and satisfying. For the complete cooking experience, check the Full Recipe. To keep leftover zucchini noodles fresh, place them in an airtight container. You can store them in the fridge for up to two days. Avoid adding sauce until you're ready to eat. This keeps the noodles from getting too soggy. If you notice excess moisture, gently pat them dry with a paper towel before storing. Store your leftover pesto in a small jar or container. Make sure to cover the surface with a thin layer of olive oil. This helps prevent browning. You can keep it in the fridge for about a week. For longer storage, freeze it in ice cube trays. Once frozen, transfer the cubes to a freezer bag. This way, you can enjoy fresh pesto anytime. When reheating zucchini noodles, use a skillet over medium heat. Add a splash of olive oil to prevent sticking. Heat them for just a few minutes until warm. Avoid overcooking, as they can become mushy. For pesto, gently warm it in a small pan. Stir constantly to keep the texture smooth. Enjoy the fresh taste every time! Yes, you can use regular pasta in this dish. Zucchini noodles are a great low-carb option. They provide a fresh taste and unique texture. If you prefer pasta, choose your favorite type. Cook it according to the package instructions. Serve the pesto over the cooked pasta instead of zucchini noodles. Enjoy the same flavorful sauce with a different twist. Zucchini noodles last about 2 to 3 days in the fridge. Store them in an airtight container. Keep in mind, they may lose some crunch over time. To extend their life, avoid adding the pesto until you're ready to eat. If they get too soft, you can still use them in soups or stews. You can substitute walnuts with pine nuts or sunflower seeds. Both give a nice flavor and texture. If you want a nut-free option, try using hemp seeds. These options work well in the avocado pesto. Just blend them like you would with walnuts. This way, you keep the creamy texture and rich taste. For the full recipe, you can refer to the Zesty Zucchini Noodles with Avocado Pesto. This blog post covered everything you need for a delicious zucchini noodle dish. We explored the key ingredients, prepared the avocado pesto, and combined them to create a fresh meal. I shared tips for perfect noodles and clever serving ideas. You can even adapt the dish to fit your diet. Lastly, I explained how to store leftovers for another day. Use this knowledge to enjoy healthy eating with ease and creativity. Don’t hesitate to experiment and make this dish your own!

Zucchini Noodles with Pesto Flavorful and Healthy Dish

Looking for a healthy twist on pasta? Zucchini noodles with pesto are your answer! This dish is not only colorful

To make my spicy and flavorful cauliflower buffalo wings, you'll need a few simple ingredients. Here’s what you’ll need: - 1 large head of cauliflower, cut into bite-sized florets - 1 cup all-purpose flour (or gluten-free flour) - 1 cup water - 1 teaspoon garlic powder - 1 teaspoon onion powder - 1 teaspoon smoked paprika - ½ teaspoon cayenne pepper (adjust for spice preference) - Salt and pepper to taste - ½ cup buffalo sauce (store-bought or homemade) - 2 tablespoons melted coconut oil (or butter) - Fresh parsley for garnish (optional) These ingredients work together to create a tasty snack that packs a punch. The cauliflower acts as the perfect base, soaking up the flavors of the spices and buffalo sauce. The batter gives it that crispy crunch we love in traditional buffalo wings. You can always adjust the spices to suit your taste. If you love heat, add more cayenne pepper! For the full recipe with step-by-step instructions, check out the Full Recipe link. Start by preheating your oven to 450°F (230°C). This step helps the cauliflower get crispy. While the oven heats, line a baking sheet with parchment paper. This makes for easy cleanup later. In a large bowl, whisk together: - 1 cup all-purpose flour (or gluten-free flour) - 1 teaspoon garlic powder - 1 teaspoon onion powder - 1 teaspoon smoked paprika - ½ teaspoon cayenne pepper - Salt and pepper to taste Slowly add 1 cup of water while mixing. Keep stirring until the batter is smooth. The batter should not be too thick. Take each cauliflower floret and dip it into the batter. Make sure each piece is fully coated. Shake off any extra batter. Place the coated florets in a single layer on the baking sheet. Put the baking sheet in the oven. Bake the cauliflower for about 20 minutes. Flip the pieces halfway through. They should be golden and crispy by the end of this time. While the cauliflower is baking, it's time to make the buffalo sauce. In a small bowl, mix: - ½ cup buffalo sauce - 2 tablespoons melted coconut oil Stir well until combined. This will add a rich flavor to your wings. Once the cauliflower is done baking, remove it from the oven. Drizzle the buffalo sauce mixture over the florets. Toss them gently to coat each piece evenly. Return the sauced cauliflower to the oven. Bake for an additional 10 minutes. This step ensures the buffalo flavor sticks and adds extra crispiness. After the final bake, take the cauliflower out of the oven. Let it cool slightly. Transfer the wings to a serving platter. If you want, garnish with fresh chopped parsley for a pop of color. Enjoy your tasty snack! For the full recipe, check out the details above. When picking cauliflower, look for a large, firm head. The florets should be tightly packed and bright white. Avoid any with brown spots or soft parts. Freshness matters, as it ensures better taste and crispness. To get that perfect crunch, coat each floret well in the batter. The thicker the batter, the better. Preheating your oven to 450°F (230°C) is key. Bake them in a single layer to allow air to flow around. Flip them halfway through for even cooking. I love spicy food, but you can control the heat. Start with less cayenne pepper if you prefer mild. Taste as you go! You can always add more buffalo sauce later for extra kick. Serve these cauliflower wings with a side of ranch or blue cheese dressing for dipping. You can also pair them with fresh veggies like carrots and celery. For a fun twist, use them as a topping on salads or grain bowls. The flavors mix well with many dishes! For the full recipe, check out the ingredients and instructions above. {{image_2}} You can change the flavor of your cauliflower wings easily. Try using different sauces like barbecue, ranch, or teriyaki. Each sauce brings a new taste. For a twist, mix buffalo sauce with honey or maple syrup for a sweet kick. This keeps your snacks fun and fresh! If you need a gluten-free option, use gluten-free flour instead of regular flour. This small swap keeps the coating crispy. You can find gluten-free flour at most stores. Just follow the same steps in the recipe. You won't miss the gluten at all! Feel free to get creative with seasonings. Try adding cumin for a warm flavor or chili powder for extra heat. You can even mix in some Italian herbs for a new twist. Each spice adds its own unique touch. Experiment to find your favorite blend! If you own an air fryer, use it for a faster, healthier option. Coat the cauliflower the same way, but place it in the air fryer basket. Cook at 400°F (200°C) for about 15 minutes. Shake the basket halfway through for even cooking. The result? Extra crispy bites without all the oil! To keep your Cauliflower Buffalo Wings fresh, let them cool completely. Place them in an airtight container. You can store them in the fridge for up to three days. This way, they stay tasty and safe to eat. When you want to enjoy your leftovers, preheat your oven to 350°F (175°C). Spread the wings on a baking sheet. Bake for about 10-15 minutes until they’re hot and crispy again. You can also use an air fryer for a quicker option. Just heat them at 350°F (175°C) for about 5-7 minutes. If you want to freeze your wings, make sure they are totally cool first. Place them in a freezer-safe bag or container. They can last for up to three months in the freezer. To reheat frozen wings, you can bake them straight from the freezer. Just add a few extra minutes to your baking time. This method helps keep their crunch, so you still enjoy that perfect bite. For the full recipe, refer back to the Cauliflower Buffalo Wings section. Yes, you can make these wings ahead of time. Bake them as directed. Let them cool, then store in the fridge. When you're ready to eat, just reheat them in the oven. This keeps them crispy. To add more heat, increase the cayenne pepper. You can also add more buffalo sauce after baking. If you like it really spicy, try a hot sauce mix in the batter. Experiment with flavors to find your perfect spice level. These wings pair well with celery sticks and carrot sticks. A cool ranch or blue cheese dip makes a great side. You can also serve them with a fresh salad or some cheesy nachos for a fun meal. Yes, this recipe is vegan! It uses no animal products, making it a great choice for plant-based diets. The batter and sauce are full of flavor without any dairy or meat. Store leftovers in an airtight container in the fridge. They last about 3 to 5 days. For best results, reheat them in the oven to keep them crispy. Avoid microwaving, as it can make them soggy. Yes, you can use frozen cauliflower. Just thaw and drain it well before cooking. This ensures the batter sticks better. Keep in mind that frozen cauliflower may not get as crispy as fresh. You now have a simple and tasty recipe for Buffalo Cauliflower Wings. We covered all the steps, from choosing fresh cauliflower to creating the perfect batter. You learned tips for crispiness and spice levels too. Plus, I shared storage tips and variations for extra fun. These cauliflower wings are not just easy to make; they're also a great way to enjoy healthy snacks. So gather your ingredients, get cooking, and treat yourself to a delicious dish!

Cauliflower Buffalo Wings Spicy and Flavorful Snack

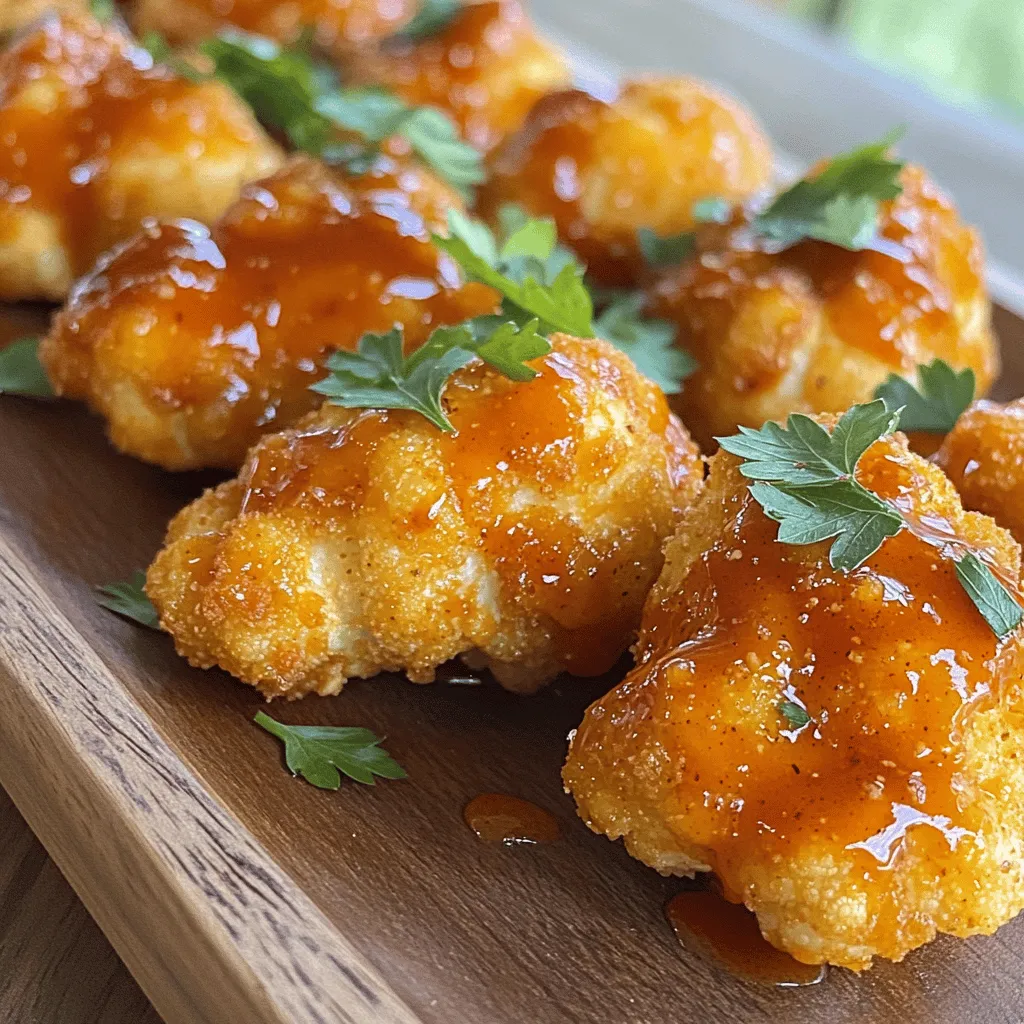
Are you ready to spice up your snack game? Cauliflower Buffalo Wings offer a tasty twist on the classic favorite.

- 4 boneless, skinless chicken thighs - 1 lemon (zested and juiced) - 3 tablespoons olive oil - 2 teaspoons dried oregano - 1 teaspoon dried thyme The chicken thighs give this dish a nice, juicy texture. I love using fresh lemon because it adds bright flavor. The olive oil helps the chicken stay moist as it cooks. Oregano and thyme bring warmth and depth to each bite. - 1 cup baby carrots, halved - 1 cup broccoli florets - 1 cup bell peppers (red and yellow), sliced I choose colorful veggies for this recipe. Baby carrots add sweetness and crunch. Broccoli florets offer great color and nutrition. Red and yellow bell peppers add a lovely visual appeal and a mild sweetness. - 1 teaspoon garlic powder - 1 teaspoon onion powder - Salt and pepper to taste Garlic powder and onion powder enhance the dish's flavor. Salt brings out the taste of all the ingredients. Pepper adds just the right amount of heat to balance the flavors. When you mix these together, you create a simple yet delicious seasoning blend. For the full recipe, check the detailed instructions so you can create this tasty dish with ease. To start, gather your mixing bowl. Combine the lemon zest, lemon juice, olive oil, oregano, thyme, garlic powder, onion powder, salt, and pepper. Whisk them together until you blend them well. This marinade gives your chicken and veggies a burst of flavor. Next, take your chicken thighs and place them in a zip-top bag or a shallow dish. Pour half of the marinade over the chicken. Make sure it coats each piece evenly. Seal the bag or cover the dish. Let the chicken marinate for at least 30 minutes. For more flavor, marinate it for up to 2 hours in the fridge. While the chicken marinates, prepare your veggies. Toss the baby carrots, broccoli florets, and sliced bell peppers in the remaining marinade. Make sure they are well coated too. Spread the veggies evenly on a sheet pan lined with parchment paper. This helps with easy cleanup later. Now it’s time to bake. Preheat your oven to 425°F (220°C). After marinating, take the chicken out of the fridge. Place it on the sheet pan with the veggies. Drizzle any leftover marinade over both. Bake for 25-30 minutes. To ensure it’s safe to eat, check the chicken's internal temperature with a meat thermometer. It needs to reach 165°F (75°C). If you want, broil for 2-3 minutes at the end for extra crispiness. Enjoy this easy and tasty dish! Marinating chicken adds deep flavor. I suggest marinating for at least 30 minutes. For the best taste, try overnight marinating. This allows the flavors to soak in well. The ideal internal temperature for chicken thighs is 165°F (75°C). Use a meat thermometer to check. This helps avoid undercooking or overcooking. To keep veggies crisp, check them a few minutes before the chicken is done. For a beautiful presentation, serve the chicken and veggies on a warm platter. Drizzle the pan juices over them. Add lemon wedges on the side for extra zest. Pair this dish with rice or a fresh salad for a complete meal. Check out the Full Recipe for more great ideas! {{image_2}} You can use chicken breasts or thighs for this dish. Chicken thighs stay juicy, while breasts are leaner. If you prefer a seafood option, use fish like salmon or tilapia. Tofu is a great choice for a vegetarian dish. Just make sure to press the tofu to remove excess moisture. This helps it absorb the marinade well. Feel free to switch up the veggies based on what's in season. Asparagus, zucchini, or Brussels sprouts work well. You can also use frozen vegetables if fresh ones aren’t available. Just be sure to thaw them first for even cooking. Want to spice things up? Try adding paprika or chili flakes to the marinade. These give the dish a nice kick. You can also mix in herbs like rosemary or sage. They add depth and a lovely aroma to the meal. Experimenting with flavors can lead to tasty surprises! To keep your Sheet Pan Lemon Herb Chicken and Veggies fresh, store leftovers in an airtight container. Make sure to let the dish cool before sealing it. This helps keep moisture in. In the fridge, your meal stays good for about 3 to 4 days. If you want to enjoy it longer, freezing is a great option. Freezing leftovers takes a few easy steps. First, let the chicken and veggies cool completely. Then, portion them into freezer-safe bags or containers. Squeeze out any air to prevent freezer burn. You can freeze the dish for up to 3 months. When you’re ready to eat, thaw it overnight in the fridge. To reheat, place the meal in the oven at 350°F (175°C) until hot. For busy weeks, make-ahead meals save time. You can marinate the chicken in advance and store it in the fridge for up to 2 days. This adds flavor and makes cooking easier. If you want to freeze individual portions, separate the chicken and veggies into smaller containers. This way, you can grab just what you need for a quick meal. You can enjoy a delicious dish anytime with these simple strategies! If you don’t have chicken thighs, you can use chicken breasts. They cook well and stay juicy. For a vegetarian option, try firm tofu or tempeh. Both absorb flavors nicely and provide protein. To make this dish gluten-free, check your ingredient labels. Use gluten-free soy sauce if you add it. Ensure your olive oil and spices are gluten-free. Most of the ingredients in this recipe are already gluten-free. Yes, you can prepare this meal in advance. Marinate the chicken the night before. Store it in the fridge. You can also chop the veggies ahead of time. Just keep them in a sealed container. If you lack fresh herbs, use dried ones. Use one-third the amount of dried herbs. For example, if the recipe calls for one tablespoon of fresh oregano, use one teaspoon of dried oregano. Dried herbs still add great flavor! You now know how to make sheet pan lemon herb chicken. You have the main ingredients, veggies, and seasonings outlined. Following simple steps, you can create a tasty meal. Remember to marinate for flavor and check the chicken’s temperature. Feel free to try different proteins and veggies to keep things fresh. Store leftovers wisely for future meals. This dish is easy to adapt and perfect for busy days. Enjoy cooking and sharing your tasty creation!

Sheet Pan Lemon Herb Chicken and Veggies Delight

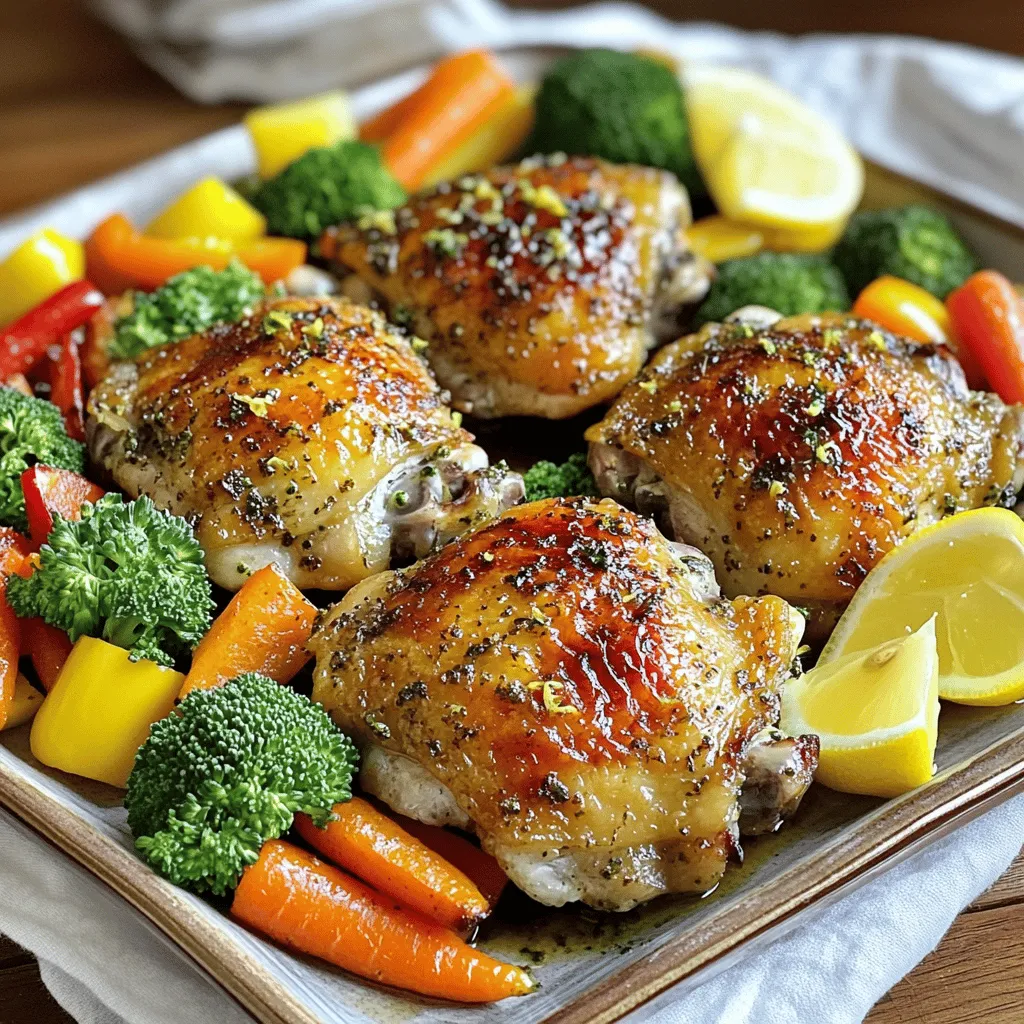
Welcome to a fresh, easy dinner idea that will brighten your week! My Sheet Pan Lemon Herb Chicken and Veggies

- 1 cup quinoa, rinsed - 2 cups water - 1 cup fresh parsley, finely chopped - 1/2 cup fresh mint, finely chopped - 2 medium tomatoes, diced - 1 cucumber, diced - 1/4 cup red onion, finely chopped - 1/4 cup olive oil - 1/4 cup lemon juice - Salt and pepper to taste - Feta cheese (for garnish) - Avocado (for creaminess) - Pomegranate seeds (for sweetness) Quinoa tabbouleh is fresh and packed with flavor. You need key ingredients for this salad. First, the quinoa gives it a hearty base. Rinse it well to remove any bitterness. Then, cook it with water. This makes the quinoa fluffy and light. Next, you need fresh herbs. Parsley and mint add a bright taste. Chop them finely to release their oils. They will mix well with the quinoa. You also need diced tomatoes and cucumber. These add a juicy crunch to the dish. The red onion gives a nice bite. For the dressing, olive oil and lemon juice create a zesty blend. Add salt and pepper to taste. This dressing ties all the flavors together. You can also customize your salad. Feta cheese adds creaminess. Avocado makes it smooth and rich. Pomegranate seeds give a sweet pop. You can find the full recipe [here](#). Enjoy making this healthy quinoa tabbouleh! - Combine rinsed quinoa and water in a medium saucepan. - Bring to a boil over high heat. - Reduce heat, cover, and simmer for 15 minutes. Cooking quinoa is simple. First, rinse your quinoa to remove any bitter taste. Place it in a medium saucepan with water. Heat it on high until it boils. Once boiling, turn down the heat, cover, and let it simmer for about 15 minutes. The quinoa will absorb all the water and become fluffy. - Chop parsley, mint, tomatoes, cucumber, and red onion. - Mix the chopped vegetables in a large bowl. While the quinoa cooks, chop your veggies. Use fresh parsley and mint for a bright flavor. Dice the tomatoes and cucumber into small pieces. Finely chop the red onion. Once everything is ready, mix the vegetables in a large bowl. This colorful mix will bring your salad to life! - Fluff quinoa and mix with vegetables. - Whisk dressing ingredients and combine with the salad. - Let sit in the refrigerator before serving. After 15 minutes, fluff the quinoa with a fork. Now, add it to the bowl of chopped vegetables. For the dressing, whisk olive oil, lemon juice, salt, and pepper in a small bowl. Drizzle the dressing over the quinoa and veggies. Toss gently until everything is well mixed. Let the salad chill in the refrigerator for at least 30 minutes. This helps the flavors blend beautifully. Enjoy your Healthy Quinoa Tabbouleh! For the full recipe, check the instructions above. To get the best quinoa, rinse it before cooking. This rinsing removes any bitterness. After cooking, let the quinoa cool completely. Mixing warm quinoa with the fresh veggies can make them soggy. Want more taste in your tabbouleh? Add minced garlic or sliced scallions. You can also play with spices. Cumin and paprika add nice warmth and depth. Just a pinch can change the whole dish. You can make this salad ahead of time. Store it in the fridge in a sealed container. This helps the flavors blend together. For meal prep, divide it into portions. This makes it easy to grab and go. Always add fresh herbs just before serving for the best flavor. {{image_2}} For a Mediterranean twist, you can enhance your quinoa tabbouleh with olives and roasted red peppers. These ingredients add a rich flavor and a touch of saltiness. You might also add chickpeas for added protein. This makes the salad heartier and more filling. You can swap in seasonal vegetables like bell peppers or zucchini. This keeps the salad fresh and exciting. You can also use different herbs like cilantro or basil based on what you have. Each choice will give the salad a unique taste. If you're looking for gluten-free options, try using alternative grains like millet or rice. They can replace quinoa if you prefer. To make it vegan, simply omit any dairy-based toppings. This keeps the dish light and plant-based. To keep your Healthy Quinoa Tabbouleh fresh, store it in airtight containers. This helps prevent moisture loss and keeps it crisp. Place the salad in the fridge. It will stay fresh for up to three days. Can you freeze quinoa tabbouleh? Yes, you can freeze it, but the texture may change. I recommend freezing the quinoa alone. This keeps it fluffy. For best results, thaw it in the fridge overnight. When you are ready, mix it back with the vegetables. Quinoa tabbouleh pairs well with many dishes. It complements grilled chicken or fish nicely. You can also serve it as a side with pita bread and hummus. At parties, place it in a big bowl for guests. This salad is colorful and draws attention. Quinoa tabbouleh is a twist on the classic tabbouleh salad. Traditional tabbouleh uses bulgur wheat as its base. In quinoa tabbouleh, we swap bulgur for quinoa, making it gluten-free. This change adds a nutty flavor and a unique texture. The rest of the ingredients remain the same, such as parsley, mint, tomatoes, and cucumber. This salad bursts with fresh taste and is colorful too. Yes, quinoa tabbouleh is great for making ahead. You can prepare it a day before your event. Just store it in the fridge. This salad tastes even better as it sits. The flavors meld nicely, creating a delicious dish. For weekly meal prep, you can also make it in advance. Portion it out in containers for easy lunches or snacks. Quinoa is a superfood packed with health benefits. It is high in protein, making it a great choice for meals. One cup of cooked quinoa has about 8 grams of protein. It is also rich in fiber, which is good for digestion. Quinoa provides essential amino acids that your body needs. Plus, it has vitamins and minerals like magnesium and iron. These nutrients help keep you healthy and energized. Quinoa tabbouleh can last about 3 to 5 days in the fridge. Keep it in an airtight container for the best freshness. Always check for signs of spoilage before eating. If it smells off or has an unusual texture, it’s best to discard it. Enjoy your healthy quinoa tabbouleh fresh for the best taste! For the full recipe, check the details included above. In this article, we explored how to make a fresh and tasty quinoa tabbouleh. We covered main ingredients, cooking steps, and helpful tips for the best texture and flavor. You can add different veggies or toppings to suit your taste. This dish is not only easy to prepare but also great for meal prep. Enjoy this healthy and vibrant salad anytime. It’s a perfect addition to your meals or gatherings!

Healthy Quinoa Tabbouleh Fresh and Flavorful Salad

Looking for a fresh, healthy twist on a classic dish? Try my Healthy Quinoa Tabbouleh! This vibrant salad combines protein-packed

- Ground chicken and aromatics - 1 pound ground chicken - 3 cloves garlic, minced - 1 tablespoon fresh ginger, minced - Sauces and seasonings - 2 tablespoons soy sauce - 1 tablespoon fish sauce - 1 tablespoon lime juice - 1 tablespoon brown sugar - 1 teaspoon red chili flakes (adjust to taste) - Vegetables and garnishes - 1 tablespoon vegetable oil - 1 red bell pepper, finely chopped - 1 cup water chestnuts, diced - 1 cup shredded carrots - 1/2 cup fresh cilantro, chopped - 1 head of butter lettuce or iceberg lettuce (for wraps) - Sliced green onions for garnish The ingredients create a bold and fresh flavor. The ground chicken pairs perfectly with garlic and ginger. The sauces add depth and a touch of sweetness. The crunch from water chestnuts and carrots keeps the wraps lively. Fresh cilantro and green onions bring brightness. Use butter lettuce for easy wraps. You can find the Full Recipe above for more details. 1. Cooking the aromatics in a skillet Start by heating 1 tablespoon of vegetable oil in a large skillet over medium heat. Once the oil is hot, add 3 cloves of minced garlic and 1 tablespoon of minced ginger. Sauté these for about 1 minute. You want to smell the great aroma. 2. Browning the ground chicken Now, add 1 pound of ground chicken to the skillet. Cook it for about 5 to 7 minutes. Use a spatula to break apart the chicken. You want it to turn brown all over. This step adds flavor. 3. Adding vegetables and sauce mixture Next, stir in 1 finely chopped red bell pepper and 1 cup of diced water chestnuts. Cook for another 3 minutes until the veggies soften. In a small bowl, whisk together 2 tablespoons of soy sauce, 1 tablespoon of fish sauce, 1 tablespoon of lime juice, 1 tablespoon of brown sugar, and 1 teaspoon of red chili flakes. Pour this sauce over the chicken mixture. Stir well and cook for another 2 to 3 minutes. 4. Finishing touches before serving Remove the skillet from the heat. Fold in 1 cup of shredded carrots and 1/2 cup of chopped cilantro. Mix until everything is well combined. Now, carefully separate the leaves of your lettuce. Wash and dry them. To serve, scoop a generous spoonful of the spicy chicken mixture into each lettuce leaf. Garnish with sliced green onions. For the full recipe, check out the details above! - Optimal cooking temperature and timing: Start by heating your skillet over medium heat. This helps the chicken cook evenly. Keep an eye on it for about 5 to 7 minutes. You want a nice golden color on the chicken. - Ensuring the chicken is browned perfectly: Break the chicken apart with a spatula as it cooks. This helps it brown better. Don’t rush this step! A good brown color adds flavor to the dish. - Balancing flavors for the sauce: Mix sauces in a bowl before adding them to the chicken. The soy sauce and fish sauce give a salty kick. The lime juice adds brightness, while brown sugar adds sweetness. Adjust the red chili flakes for your spice level. - Best ways to present lettuce wraps: Arrange the filled lettuce wraps on a nice platter. This makes them look appealing. You can add lime wedges beside them for a fresh touch. - Complementary side dishes or dips: Serve these wraps with a side of jasmine rice for a full meal. You can also offer extra sauce for dipping. This adds flavor and a fun element to the meal. - Garnishing options for added flavor: Top your wraps with sliced green onions and extra cilantro. These toppings add freshness and color. They make each bite even more delightful. For more details, check the Full Recipe. {{image_2}} You can easily change this recipe to suit your needs. Here are some ideas: - Alternative proteins: If you want a different taste, try using ground turkey or tofu instead of chicken. Both options work great. - Gluten-free options: For a gluten-free version, use coconut aminos in place of soy sauce. It adds a nice sweetness without gluten. - Vegetable variations: Feel free to add more greens, like spinach or kale. These veggies boost the nutrition and flavor. You can adjust the dish for special diets: - Low-carb or keto-friendly: Skip the brown sugar and use a keto-friendly sweetener. You can also serve the filling on a salad instead of lettuce wraps. - Adjusting spice level: If you have kids or sensitive eaters, reduce the red chili flakes. This makes the dish milder while still tasty. These variations make the Spicy Thai Chicken Lettuce Wraps fit for everyone. You can enjoy them no matter your dietary needs. For the complete recipe, check out the Full Recipe section. To keep your spicy Thai chicken lettuce wraps fresh, follow these steps. First, allow the filling to cool down. This prevents condensation in your storage container. Then, store the chicken filling in an airtight container. Place it in the fridge. It will stay good for up to three days. For the lettuce, keep the leaves in a separate container. This way, they remain crisp and fresh. If you want to store the filling for longer, consider freezing it. Portion the filling into freezer-safe bags. Remove as much air as possible before sealing. This helps prevent freezer burn. You can freeze the filling for up to three months. Just thaw it in the fridge before reheating. When you’re ready to eat your leftovers, here’s how to reheat them. For the best flavor and texture, use a skillet. Heat the filling over medium heat. Stir it often until warmed through. This takes about 5 minutes. You can also use a microwave if you’re in a hurry. Place the filling in a microwave-safe bowl. Cover it with a damp paper towel. Heat in 30-second intervals, stirring in between. Leftovers typically last about three days in the fridge. If frozen, they can last up to three months. Enjoy your spicy Thai chicken lettuce wraps again without losing any taste! For the full recipe, check out the section above. Can I prepare the filling ahead of time? Yes, you can make the filling in advance. Cook it, let it cool, and store it in the fridge. It stays fresh for a few days. This makes meal prep easy. Just reheat it when you're ready to eat. What lettuce is best for wraps? Butter lettuce and iceberg lettuce work well. They have a nice shape and crunch. Butter lettuce is soft and holds the filling well. Iceberg is crisp and refreshing. Choose what you like best for your wraps. Can I make this recipe vegetarian? Absolutely! You can swap the ground chicken for tofu or tempeh. Use the same spices and sauces. This keeps the dish flavorful and fun. You can enjoy tasty wraps without meat. Check out the Full Recipe for more details! We covered the key ingredients and steps for Spicy Thai Chicken Lettuce Wraps. The cooking tips help perfect your dish, while variations allow for creativity. You can easily adjust this recipe for different diets. Proper storage and reheating ensure your leftovers stay tasty. Try this recipe next time you want a fun meal. You'll impress everyone and enjoy great flavors. Keep exploring new ingredients and flavors to make it your own!

Spicy Thai Chicken Lettuce Wraps Flavorful and Fresh

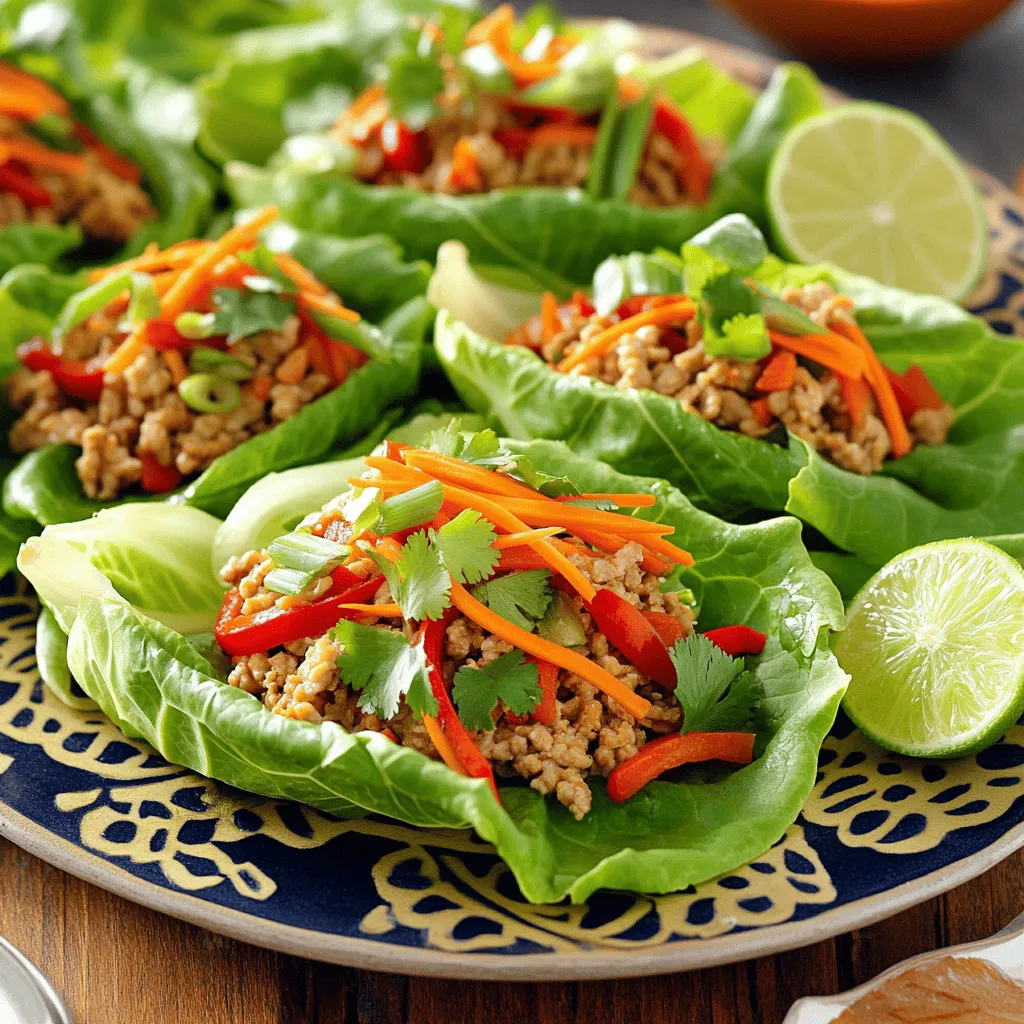
Are you ready to spice up your dinner routine? These Spicy Thai Chicken Lettuce Wraps are a perfect blend of

To make Mango Coconut Chia Pudding, you need a few key ingredients. Each one plays a vital role in flavor and texture. Here’s what you will need: - 1 cup coconut milk (canned or carton) - 1 cup fresh ripe mango, diced (plus extra for topping) - 1/4 cup chia seeds - 2 tablespoons honey or maple syrup (adjust based on sweetness preference) - 1/2 teaspoon vanilla extract - A pinch of salt - Toasted coconut flakes, for garnish - Fresh mint leaves, for garnish These ingredients blend together to create a creamy, fruity delight. Coconut milk adds richness, while mango brings natural sweetness. You can customize your pudding with optional ingredients. This allows you to cater to your taste. Here are some ideas: - A splash of lime juice for a tangy twist - A sprinkle of cinnamon for warmth - Additional fruits like berries or pineapple for layered flavors Feel free to mix and match. The pudding remains delicious with or without these extras. If you don’t have an ingredient, there are simple swaps. Here are some useful substitutions: - Use almond milk or oat milk instead of coconut milk for a different flavor. - Maple syrup can be swapped with agave nectar or sugar. - Fresh mango can be replaced with peach or banana for a similar texture. These substitutions keep your pudding tasty while fitting your pantry. You can check the Full Recipe for more details on making this delicious treat! First, grab a medium mixing bowl. Pour in 1 cup of coconut milk. You can use canned or carton coconut milk. Next, add 2 tablespoons of honey or maple syrup. This sweetens the pudding. Then, add 1/2 teaspoon of vanilla extract for flavor. Don't forget a pinch of salt. Whisk everything together until it blends well. Now it’s time for the chia seeds. Add 1/4 cup of chia seeds into the coconut milk mixture. Stir slowly to distribute the seeds evenly. Next, take 1 cup of fresh ripe mango. Dice it into small pieces. Gently fold the diced mango into the bowl. This adds a burst of flavor. Cover the bowl with plastic wrap. You can also use individual jars if you prefer. Put it in the fridge for at least 4 hours, or overnight if you can. This allows the chia seeds to swell and thicken the pudding. When you're ready to serve, give the pudding a good stir. If it seems too thick, add a splash of coconut milk. Spoon the pudding into bowls or jars. Top with extra diced mango, toasted coconut flakes, and fresh mint leaves for a bright finish. Enjoy your Mango Coconut Chia Pudding! You can find the full recipe above. To get the best texture in your pudding, use the right amount of chia seeds. A good rule is to use 1/4 cup of chia seeds for every cup of liquid. Mix well to avoid clumps. After stirring in the chia seeds, let the mixture sit for 5 minutes. This allows the seeds to absorb liquid. If the pudding seems too thick, add a little more coconut milk. It helps create a smooth, creamy feel. You can change the taste of your mango coconut chia pudding easily. Try adding different fruits. Pineapple or passion fruit pairs well with mango. You can also add a splash of lime juice for a zesty kick. For a spice twist, sprinkle in some cinnamon or nutmeg. If you like it sweeter, mix in more honey or maple syrup. Experimenting makes each serving unique. Make your pudding visually appealing with simple tricks. Layer the pudding in clear glasses. This shows off the bright yellow mango and creamy white chia mix. Top it with extra mango cubes and toasted coconut flakes. They add texture and color. Don’t forget fresh mint leaves for a pop of green. This makes your dish look fresh and inviting. For the full recipe, check the earlier section. {{image_2}} To make your mango coconut chia pudding even more exciting, try adding other fruits. Pineapple, kiwi, and passion fruit blend well. You can also mix in berries for a burst of color and flavor. Each fruit adds its own unique taste. This keeps your pudding fresh and fun. You can experiment with what you love! While coconut milk is creamy and rich, you can try other types of milk. Almond milk gives a nutty flavor. Oat milk offers a smooth texture. Cashew milk is also a great choice for creaminess. Each option changes the taste but keeps the pudding healthy. Choose what fits your diet or taste preference! If you want a vegan version, use maple syrup instead of honey. For sugar-free options, try using stevia or erythritol. They sweeten without added calories. You can still enjoy the delightful taste without sugar. This helps if you're watching your sugar intake. These swaps make this recipe fit your needs! For the full recipe, check the ingredients and instructions above. To keep your mango coconut chia pudding fresh, store it in airtight containers. Glass jars work great for this. Make sure the lids are tight to avoid any odors from your fridge. Avoid letting it sit out at room temperature for too long. This can spoil the pudding. Mango coconut chia pudding can last up to five days in the fridge. After making it, let it chill for at least four hours. The chia seeds will absorb liquid and thicken. Check for any changes in smell or texture before eating. If it looks or smells off, toss it out. Freezing is an option if you want to keep the pudding longer. Use freezer-safe containers or bags. Leave some space at the top, as the pudding may expand when frozen. You can keep it frozen for up to three months. When you want to eat it, thaw it in the fridge overnight. Stir well before serving, as it may separate. For the full recipe, refer to the section above. Chia seed pudding is a simple mix of chia seeds and liquid. You soak the seeds in milk or juice until they swell. This creates a thick, creamy texture. Chia seeds are tiny but packed with nutrients. They offer fiber, protein, and omega-3 fatty acids. You can flavor this pudding with fruits, like in Mango Coconut Chia Pudding. The result is a tasty, healthy treat. Yes, you can make Mango Coconut Chia Pudding ahead of time. In fact, it tastes better after a few hours in the fridge. I suggest making it the night before. This allows the chia seeds to fully absorb the liquid. You can enjoy it for breakfast or a snack the next day. Chia seeds are nutritious and good for you. They are high in fiber, which helps digestion. They also provide protein, keeping you full longer. Chia seeds are rich in antioxidants, which help fight free radicals. Plus, they contain omega-3 fatty acids, which are good for heart health. Adding them to your diet can boost your overall wellness. To make your pudding less sweet, reduce the honey or maple syrup. You can also skip sweeteners entirely if you prefer. The natural sweetness from fresh mango can add flavor. Adding a pinch of salt can enhance the taste without extra sugar. Always taste your mixture before chilling to get the right balance. Yes, frozen mango works well in this recipe. Just thaw the mango first to make it easier to mix. You can blend it into a puree or chop it into pieces. The flavor will still be sweet and tropical. Using frozen mango can be a great time-saver and still taste delicious. Mango Coconut Chia Pudding is perfect for meal prep. You can store it in jars in the fridge. It will last about five days. This makes it easy to grab for breakfast or a quick snack. Just add your favorite toppings like toasted coconut or fresh mint before serving. Enjoy your healthy and refreshing delight! Mango Coconut Chia Pudding is easy to make and enjoy. We covered essential and optional ingredients, along with useful substitutions. The step-by-step guide makes preparation simple. Tips help you perfect the pudding's texture and flavor. You can even personalize it with tropical fruit or alternative milks. In summary, this dish is versatile and fun to make. Enjoy your creamy creation and share it with friends!

Mango Coconut Chia Pudding Healthy and Refreshing Delight

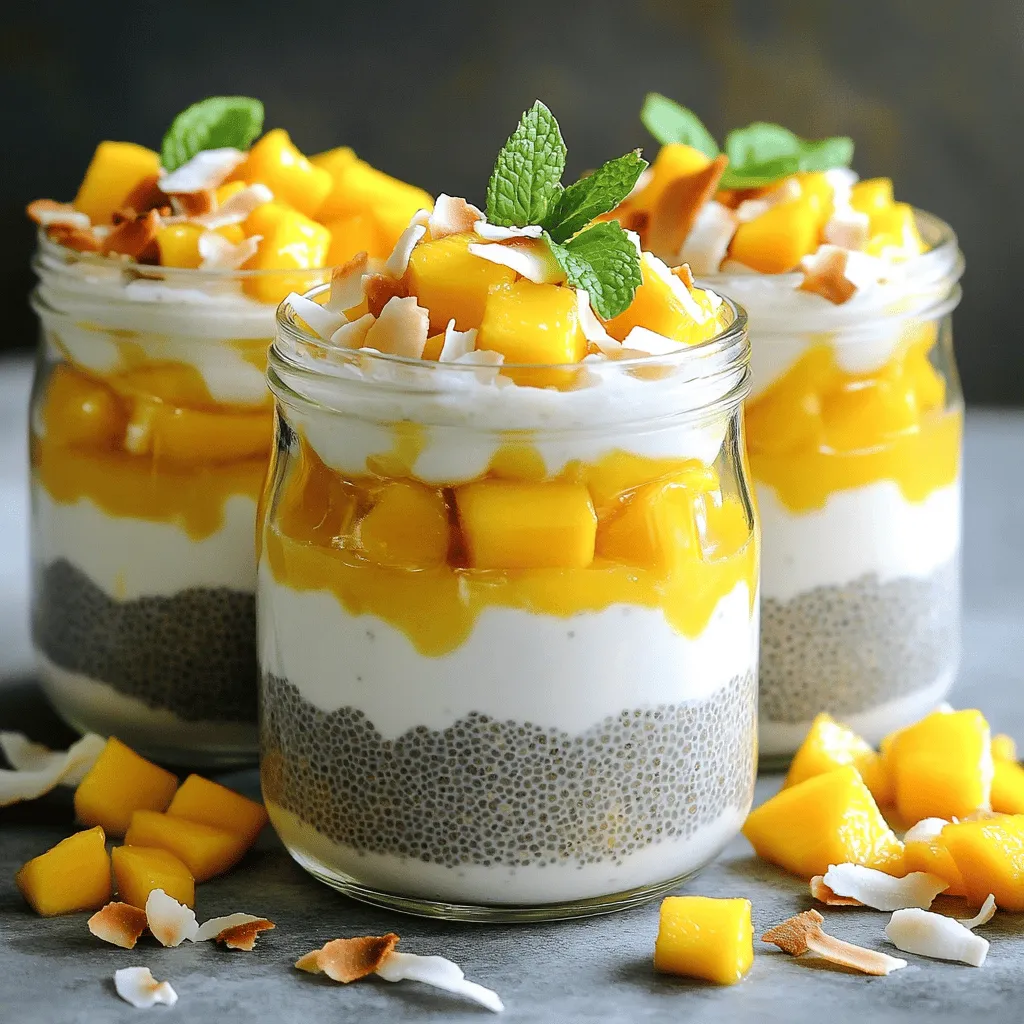
Are you ready to treat yourself to a healthy dessert? Mango Coconut Chia Pudding is a bright, tasty delight packed

Older posts
Newer posts
← Previous Page1 … Page115 Page116 Page117 … Page138 Next →

dsad

© 2025 Recipes Pursuit • Built with GeneratePress

Our Policies

  • Copyright Policy
  • Cookie Policy
  • GDPR Policy
  • Privacy Policy
  • Disclaimer
  • Terms Of Use

More Information

  • Home
  • About
  • Contact
  • Appetizers
  • Dessert
  • Dinner
  • Drinks
©2025, Recipes Pursuit About Back To Top