Skip to content
DisclaimerTerms Of UseGDPR PolicyCookie Policy

Recipes Pursuit

  • Home
  • Drinks
  • Appetizers
  • Dinner
  • Dessert
  • About
  • Contact
  • Privacy Policy
DisclaimerTerms Of UseGDPR PolicyCookie Policy

Emma Smith

The Vegan Buddha Bowl shines with colorful, wholesome ingredients. Each component adds flavor and nutrition to your meal. - Quinoa: This grain is a great source of protein. It has all nine essential amino acids. Quinoa also provides fiber, which helps with digestion. - Chickpeas: These legumes are high in protein and fiber. They can keep you full and satisfied. Chickpeas also have vitamins and minerals like iron and folate. - Sweet Potato: This root vegetable is rich in vitamins A and C. It adds sweetness and a creamy texture to your bowl. - Broccoli: Broccoli is a powerhouse of vitamins K and C. It supports immune health and is low in calories. - Bell Pepper: These colorful veggies add crunch and flavor. They are packed with antioxidants and vitamin C. - Avocado: Full of healthy fats, avocado is creamy and delicious. It also helps absorb nutrients from other ingredients. - Spinach: Spinach is loaded with iron, calcium, and vitamins A and K. It adds a fresh touch to your bowl. If you need alternatives for the Vegan Buddha Bowl, I have some great ideas. - Quinoa: You can use brown rice or farro instead. Both grains are tasty and filling. - Chickpeas: Black beans or lentils work well as substitutes. They also offer protein and fiber. - Sweet Potato: Butternut squash or regular potatoes can replace sweet potato. They add a similar texture and taste. - Broccoli: Cauliflower or green beans are good options. They will add crunch and nutrition. - Bell Pepper: Zucchini or carrots can be used in place of bell peppers. They bring different flavors and textures. For gluten-free options, make sure to choose certified gluten-free grains. For nut-free choices, avoid tahini and replace it with sunflower seed butter or leave it out entirely. To make perfect quinoa, start with rinsing 1 cup of quinoa in cold water. This step removes any bitter taste. Use a fine mesh strainer to get the best results. For cooking, you can choose two methods: the stove or a rice cooker. - Stove Method: Bring 2 cups of vegetable broth to a boil. Add the rinsed quinoa and reduce the heat to low. Cover and cook for about 15 minutes. Once the liquid is absorbed, let it sit for 5 minutes before fluffing with a fork. - Rice Cooker Method: Add rinsed quinoa and vegetable broth to the rice cooker. Turn it on and let it work its magic. Once done, let it sit for a few minutes before fluffing. Roasting brings out the best flavors in your veggies. Preheat your oven to 400°F (200°C). Chop your choice of seasonal vegetables like sweet potatoes, broccoli, and bell peppers. Toss the chopped veggies with olive oil, salt, and pepper. Spread them on a baking sheet in a single layer. Roast for 25-30 minutes until tender and slightly crispy. - Best Practices: Make sure to check your veggies halfway through cooking. Stir them for even roasting. Using seasonal vegetables adds variety and keeps your meal fresh. Now it’s time to layer your beautiful Buddha bowl. Start with the cooked quinoa at the bottom. This base holds everything together. Next, add your roasted vegetables evenly on top. - Layering Technique: For a colorful display, place each ingredient in sections. Add chickpeas, baby spinach, and sliced avocado. To finish, drizzle your tahini dressing over the top. Sprinkle sesame seeds for a delightful crunch. This layering makes your bowl not only tasty but also visually appealing. For the complete recipe, check out the Full Recipe. When life gets busy, you can still enjoy a tasty vegan Buddha bowl. Here are some make-ahead tips to help you. - Cook quinoa in advance: You can prepare quinoa a few days ahead. Just store it in the fridge. It stays fresh for up to five days. - Roast veggies early: Roast your sweet potatoes and other veggies on the weekend. Store them in airtight containers. This saves time on weeknights. - Prep chickpeas: You can use canned chickpeas for ease. Drain and rinse them, then store them in the fridge. - Keep components separate: For the best taste, store your ingredients separately. This keeps them fresh and crunchy. To make your Buddha bowl even better, consider these flavor tips. - Add fresh herbs: Try cilantro, parsley, or basil for added freshness. They brighten up your bowl. - Spice it up: Consider adding cumin, coriander, or turmeric. These spices add warmth and depth to your dish. - Try different dressings: While tahini is delicious, you can mix it up! Use a lemon-tahini dressing or a spicy peanut sauce. A simple olive oil and vinegar mix works too. These tips will help you create a vibrant and tasty Buddha bowl. For the complete recipe, check the Full Recipe section. {{image_2}} To make your vegan Buddha bowl even better, add protein. Legumes are a great choice. Try lentils, black beans, or kidney beans. They add flavor and help keep you full. Seeds are another option. Chia seeds, sunflower seeds, or pumpkin seeds bring crunch and nutrition. You can also toss in some tofu. Just cube it and sauté until golden. Tempeh is a tasty addition, too. It has a nutty flavor and is high in protein. Slice it thin and pan-fry for a crispy finish. Edamame is another fun choice. Just steam it and sprinkle over your bowl for a pop of color and protein. Your Buddha bowl can change with the seasons. In summer, use fresh veggies like tomatoes, cucumbers, and corn. These will keep your bowl light and refreshing. In the winter, focus on hearty vegetables. Roasted root veggies like carrots, parsnips, and beets work great. You can also add kale or Brussels sprouts for extra warmth. Mix and match based on what you find at the local market. This helps keep your meals fresh and exciting all year round. If you have food allergies, there are easy fixes. For gluten-free, swap quinoa for rice or millet. For nut allergies, skip the tahini and use sunflower seed butter for your dressing. You can also spice things up! Try Indian flavors with curry powder, or go Mediterranean with olives and lemon. For Asian flair, add soy sauce, ginger, or sesame oil. These adjustments help you enjoy your vegan Buddha bowl while meeting your dietary needs. The best part is you can always make it your own! To keep your Buddha bowls fresh, store them properly. First, let the bowl cool down. This helps prevent sogginess. Then, use airtight containers. Glass containers work well since they do not hold odors. You can also use BPA-free plastic containers. Keep the dressing separate from the bowl. This will help keep the vegetables crisp. If you have leftover avocado, sprinkle it with lemon juice to slow browning. Leftover Buddha bowls can last in the fridge for 3 to 4 days. Each ingredient has its own shelf life. - Quinoa: lasts about 5 days when cooked. - Roasted vegetables: best used within 3 days. - Chickpeas: can stay fresh for up to 4 days. Signs of spoilage include off smells and a slimy texture. If you see mold, throw it away right away. Enjoy your Vibrant Vegan Buddha Bowl fresh for the best taste! A Vegan Buddha Bowl is a healthy dish filled with grains, veggies, and protein. It often includes quinoa, sweet potatoes, and chickpeas. The name comes from the idea of a bowl filled to the brim, just like a Buddha's belly. Unlike non-vegan bowls, Vegan Buddha Bowls do not use meat or dairy. They focus on plant-based ingredients that give you energy and nutrition. Yes, you can meal prep Vegan Buddha Bowls! Here are some tips: - Portioning: Divide cooked grains and veggies into meal containers. - Storing: Keep the dressing separate to avoid sogginess. - Refrigeration: Store them in the fridge for up to four days. This makes it easy to grab a meal on busy days. Here are some simple homemade dressings to try: - Lemon-tahini: Mix tahini, lemon juice, and a pinch of salt. - Cilantro-lime: Blend cilantro, lime juice, and olive oil. - Balsamic vinaigrette: Combine balsamic vinegar, olive oil, and a dash of mustard. For store-bought options, look for: - Tahini dressings - Hummus-based dressings - Any vinaigrette that suits your taste You can find the detailed recipe for the Vibrant Vegan Buddha Bowl [here](#). Vegan Buddha bowls are a perfect combo of taste and health. We explored great ingredients and their benefits. You learned how to cook quinoa, roast veggies, and layer your bowl. Tips like meal prep and flavor boosts help on busy nights. Experiment with protein options and seasonal tweaks for variety. These bowls can fit any diet and offer easy storage tips. Enjoy crafting your flavorful, nutrient-rich meals!

Vegan Buddha Bowl Flavorful and Healthy Meal Guide

Looking for a healthy and tasty meal? Look no further! A Vegan Buddha Bowl packs vibrant flavors and wholesome ingredients,

- 1 cup unsalted butter, softened - 3/4 cup brown sugar, packed - 1/4 cup granulated sugar - 1 large egg - 1 teaspoon vanilla extract - 2 1/4 cups all-purpose flour - 1 teaspoon baking soda - 1/2 teaspoon salt - 1 cup semi-sweet chocolate chips - 1/2 cup chopped nuts (optional, like walnuts or pecans) - Vanilla ice cream (for serving) The main ingredients for this cookie skillet are simple but key. Each plays a role. The butter gives a rich taste. The sugars add sweetness and help with browning. The egg binds the dough and adds moisture. Flour creates the structure. Baking soda helps the cookie rise. Salt enhances the flavors. Chocolate chips are the star! They melt and create gooey pockets. Nuts add crunch if you choose to include them. - Different types of chocolate chips (milk, dark, or white) - Nuts other than walnuts or pecans - Sprinkles or additional toppings for serving You can switch things up with options. Use milk or dark chocolate chips for different sweetness. Try white chocolate for a unique twist. Other nuts work well too, like almonds or hazelnuts. For extra fun, add sprinkles on top. These choices let you customize your dessert and make it your own! For the Full Recipe, follow the steps to create this sweet treat. - Preheat the oven to 350°F (175°C). - Cream together the butter and sugars until smooth and fluffy. Start by preheating your oven. This helps your cookie bake evenly. While it's warming up, take a large mixing bowl. Add your softened butter, brown sugar, and granulated sugar. Use a mixer or a spoon to blend them. You want the mix to be light and fluffy. This step adds air, making your cookie soft. - Beat in the egg and vanilla extract. - Combine dry ingredients (flour, baking soda, and salt) in a separate bowl. Next, beat in one large egg and one teaspoon of vanilla extract. Mix until combined well. The egg adds moisture, and the vanilla gives it that great flavor. In a different bowl, whisk together your dry ingredients: flour, baking soda, and salt. This helps to distribute the baking soda evenly, ensuring your cookie rises well. - Gradually add the dry mixture to the wet ingredients. - Transfer the dough to a skillet and bake for 20-25 minutes. Now, slowly add your dry mixture to the wet ingredients. Mix gently until just combined. Over-mixing can make the cookie tough. Fold in one cup of semi-sweet chocolate chips and nuts if you like. Transfer your dough to a 10-inch cast-iron skillet. Spread it evenly and smooth the top. Place the skillet in the oven and bake for 20-25 minutes. The edges will turn golden brown while the center stays soft. After baking, let it cool for about 5-10 minutes. This cookie skillet is best warm. Enjoy with a scoop of vanilla ice cream on top! For the full recipe, check out the complete instructions. To get that perfect chewy center, slightly underbake your cookie. This means taking it out when the edges look golden but the center is still soft. It will firm up as it cools. Using room temperature ingredients also helps. This makes mixing easier and gives you a smoother dough. Serving this cookie directly from the skillet makes it feel extra special. The rustic look is charming and inviting. You can add toppings like chocolate syrup, whipped cream, or even a sprinkle of sea salt. A scoop of vanilla ice cream on top takes it to another level! Cleanup can be simple if you grease the skillet well. This helps prevent sticking. You can also use parchment paper for easy removal. Just line the bottom of your skillet before adding the dough. It makes cleanup a breeze! For the full recipe, check out the detailed steps provided. {{image_2}} You can make your chocolate chip cookie skillet even better with fun flavors. Try adding different extracts. Almond extract adds a nice touch. You can also mix in spices. A dash of cinnamon warms up the taste. Espresso powder brings a rich, bold flavor. Experimenting with these flavors can make each skillet unique! If you need a gluten-free option, swap regular flour with gluten-free flour. This change keeps the taste while catering to dietary needs. You can also make it vegan. Just use vegan chocolate chips instead of regular ones. This way, everyone can enjoy this treat without worries! Celebrate the seasons with fun toppings. In fall, add candy corn for a festive twist. During summer, fresh fruits like strawberries or bananas can brighten your skillet. These seasonal touches keep the dessert exciting and fresh. You can create new memories with each variation! The cookie skillet can last up to two days at room temperature. To keep it fresh, cover it with plastic wrap or foil. This helps prevent it from drying out. Make sure the skillet is completely cooled before covering. If you want to keep it longer, you can store it in the fridge. Place the cooled cookie skillet in an airtight container. It stays good for up to a week in the refrigerator. When you're ready to eat it, simply reheat in the oven at 350°F (175°C) for about 10 minutes. This brings back its warm, gooey texture. You can freeze the cookie dough before baking. Just scoop the dough into balls and place them on a baking sheet. Freeze until firm, then transfer to a zip-top bag. The dough lasts for up to three months in the freezer. To bake, just place the frozen dough in a skillet and add a few extra minutes to the baking time. If you have leftover baked cookie skillet, cool it completely before wrapping it tightly in plastic wrap. It can also freeze for about three months. Reheat it in the oven when you’re ready to enjoy it again. For the complete recipe, check the [Full Recipe]. Yes, you can prepare the cookie skillet ahead of time. To do this, mix your dough and place it in the skillet. Cover it tightly with plastic wrap. Store it in the fridge for up to 24 hours. This keeps the dough fresh. When you're ready, just bake it straight from the fridge. You might need to add a few extra minutes to the baking time. Look for a few signs to tell when your skillet cookie is done. The edges should be golden brown, while the center looks slightly soft. A toothpick inserted in the middle should come out with a few moist crumbs. If it comes out clean, it might be overbaked. Remember, the cookie will continue to cook a bit after you take it out. Serving your cookie skillet with a scoop of vanilla ice cream is a classic choice. The warm cookie and cold ice cream create a nice contrast. You can also drizzle chocolate syrup or caramel sauce on top. Fresh berries or whipped cream can add a fun touch too. For a twist, try serving it with peanut butter or a fruit compote for extra flavor. You can use other baking dishes if you don't have a skillet. A 9-inch round cake pan or a square baking dish works well. Just watch the baking time closely. The cookie may cook faster in a thinner dish. Check for doneness a few minutes earlier than the recipe suggests. Enjoy your cookie skillet from whatever dish you choose! Remember to check the [Full Recipe] for more details. This recipe outlines all you need for a delicious chocolate chip cookie skillet. You’ve learned about essential ingredients, preparation, and baking tips. Remember to enjoy variations that suit your taste, like different chocolates or nuts. Serve it warm and consider toppings for a tasty treat. Proper storage keeps leftovers fresh, and preparing ahead saves time. Whether you’re a beginner or a pro, this dish offers fun and flavor. Happy baking!

Chocolate Chip Cookie Skillet Irresistible Dessert Treat

Are you ready to indulge in a warm, gooey dessert that’s perfect for sharing? This Chocolate Chip Cookie Skillet is

To make a great Coconut Cream Pie, gather these simple items: - 1 ½ cups graham cracker crumbs - ½ cup unsweetened shredded coconut - ⅓ cup sugar - ½ cup unsalted butter, melted - 2 cups whole milk - ½ cup granulated sugar - 3 large egg yolks (lightly beaten) - ¼ cup cornstarch - 1 teaspoon vanilla extract - ½ cup coconut cream - Pinch of salt - 1 cup heavy whipping cream - 2 tablespoons powdered sugar - Toasted coconut flakes for garnish These ingredients create a creamy, dreamy filling with a crunchy crust. The graham cracker crumbs give a sweet base. Adding unsweetened coconut boosts the flavor. The butter helps the crust hold together. When making the filling, whole milk adds richness. The egg yolks provide a smooth texture, while cornstarch thickens the mixture. Vanilla extract and coconut cream give it a lovely flavor. Finally, whipped cream on top makes it extra special. The toasted coconut flakes add a nice touch. For the full recipe, check out the Tropical Bliss Coconut Cream Pie. 1. Preheat the oven. Set it to 350°F (175°C). 2. Mix the crust ingredients. In a bowl, combine: - 1 ½ cups graham cracker crumbs - ½ cup unsweetened shredded coconut - ⅓ cup sugar - ½ cup unsalted butter, melted Stir until everything blends well. 3. Press into pie dish. Take a 9-inch pie dish and press the mixture firmly into the bottom and sides. 4. Bake the crust. Place it in the oven for 8-10 minutes. Look for a light golden color. Remove it and let it cool completely. 1. Combine filling ingredients. In a medium saucepan, whisk together: - 2 cups whole milk - ½ cup granulated sugar - 3 large egg yolks (lightly beaten) - ¼ cup cornstarch - A pinch of salt Do this over medium heat. 2. Cook until thick. Stir constantly until it bubbles and thickens. This should take about 5-7 minutes. 3. Add flavorings. Remove it from heat. Stir in: - 1 teaspoon vanilla extract - ½ cup coconut cream Mix until it is smooth and well combined. 1. Pour filling into the crust. Carefully pour the filling into the cooled crust. Use a spatula to smooth the top. 2. Chill the pie. Cover it with plastic wrap, pressing it onto the filling to avoid a skin. Refrigerate for at least 2 hours. 3. Top with whipped cream. In a mixing bowl, beat: - 1 cup heavy whipping cream - 2 tablespoons powdered sugar Beat until soft peaks form, about 3-4 minutes. 4. Garnish the pie. Spread the whipped cream over the pie. Add toasted coconut flakes for a nice finish. Follow these steps for a delightful Coconut Cream Pie. For more details, check the Full Recipe. To create a great crust, use cold butter. Cold butter helps make the crust flaky and light. Cut the butter into small cubes before mixing it with the other ingredients. This keeps it cold and makes a big difference. Make sure not to over bake your crust. Bake just until it is lightly golden, about 8 to 10 minutes. If you bake it too long, it will become hard and dry. Keep an eye on it as it bakes. Stirring is key when making the filling. Constant stirring helps prevent lumps and ensures a smooth texture. Use a whisk to mix everything well as it cooks. This makes the filling creamy and rich. For extra flavor, add a pinch of salt. It enhances the sweetness of the coconut and balances the taste. You can also add a splash of rum for a fun twist. Experiment with flavors to make it your own. To get the right whipped cream, beat it until you see soft peaks. This usually takes about 3 to 4 minutes. Don’t over beat it; otherwise, it will turn grainy. Use a chilled bowl for the best results. When serving, gently spread the whipped cream on top of the pie. Use a spatula to create a smooth layer. For an extra touch, sprinkle toasted coconut flakes on top. It adds flavor and looks beautiful on the pie. Enjoy making your Coconut Cream Pie Delightful and Simple Recipe! For the [Full Recipe], check the earlier sections for steps. {{image_2}} You can switch up the crust for your coconut cream pie. A traditional pie crust works great. Just roll it out and fit it into your dish. Bake it until golden brown for a delicious base. If you prefer gluten-free options, use a gluten-free cookie or almond flour crust. It adds a unique flavor and texture. Both choices make the pie tasty and fun! Want to add some twist? Mix in chocolate for a rich flavor. Just melt some chocolate and stir it into the filling. You can also add lime zest for a fresh kick. This brightens up the taste and makes it more exciting. Try using different types of coconut too. Shredded coconut gives texture, while coconut milk adds creaminess. You can even use toasted coconut for a nutty flavor! Pair the pie with fresh tropical fruits like mango or pineapple. Their sweetness complements the pie well. You can also serve it with a scoop of vanilla ice cream for extra creaminess. When it comes to garnishes, get creative! Use whipped cream and sprinkle toasted coconut flakes on top. You could even add a few chocolate shavings. These little touches make your pie look and taste amazing! For the full recipe, check out the Tropical Bliss Coconut Cream Pie. To keep your coconut cream pie fresh, store it in the fridge right away. Use an airtight container or cover it with plastic wrap. This keeps out air and moisture. If you want to freeze it, wrap the pie tightly in plastic wrap and then in foil. This will help prevent freezer burn. In the fridge, your pie lasts about 3-4 days. Always check for freshness. Signs of spoilage include a sour smell or a change in texture. If you see any mold, it's time to toss it out. Most people enjoy coconut cream pie cold, but you can warm it up if you wish. To do this, place a slice in the microwave for about 10-15 seconds. Be careful not to overheat. This might make the filling too soft. Enjoy your tropical treat! For the full recipe, check out the Tropical Bliss Coconut Cream Pie above. Coconut cream pie has roots in American cuisine. It likely came from the mid-19th century. Cooks wanted to make sweet, creamy pies using coconut. These pies became popular in the South and on islands. They are a favorite at many gatherings and celebrations. Today, coconut cream pie is loved for its tropical taste and rich texture. Yes, you can make coconut cream pie in advance. This makes it easy for parties or special meals. Here are some tips: - Prepare the crust and filling a day ahead. - Store the crust in an airtight container. - Refrigerate the filling until ready to use. - Assemble the pie just before serving to keep it fresh. If your coconut cream filling did not set, there are common reasons. Here are some troubleshooting tips: - You may not have cooked it long enough. The mixture needs to thicken to bubble. - Not enough cornstarch can cause a runny filling. Make sure to measure correctly. - If you skip refrigerating, the filling won’t firm up. Chilling is key to setting. This delightful recipe will have you creating a creamy, coconut-filled treat that everyone will love. For the full recipe, check out the Tropical Bliss Coconut Cream Pie! You now know how to make a great Coconut Cream Pie. We covered the tasty ingredients, step-by-step instructions, and neat tips to help you succeed. You can even mix things up with different flavors or crusts. Remember, proper storage keeps your pie fresh longer, too. With this knowledge, you're ready to impress friends and family. Enjoy every bite of your delicious creation!

Coconut Cream Pie Delightful and Simple Recipe

Coconut cream pie is a sweet, tropical treat that’s easier to make than you think. With just a few simple

For a tasty zucchini noodle stir fry, you'll need fresh and vibrant ingredients. Here’s what you should gather: - Spiralized Zucchini Noodles - 2 medium zucchinis, spiralized into noodles - Vegetable Options for Stir Fry - 1 red bell pepper, sliced - 1 cup broccoli florets - 1 cup sugar snap peas - 1 carrot, julienned - Seasoning Essentials - 3 cloves garlic, minced - 1 tablespoon ginger, grated - 3 tablespoons soy sauce (or tamari for gluten-free) - 1 tablespoon sesame oil - 1 tablespoon olive oil - 2 green onions, sliced - Sesame seeds, for garnish - Salt and pepper, to taste These ingredients come together to create a quick and healthy meal. You’ll enjoy the crunch of fresh veggies and the flavor from the garlic and ginger. For the full recipe, refer back to the beginning. Spiralizing Zucchini To start, wash your zucchinis well. Use a spiralizer to turn them into noodles. This gives you fun and healthy "zoodles." If you don’t have a spiralizer, a vegetable peeler works too. Just slice the zucchini into thin strips. Chopping and Slicing Veggies Next, slice your red bell pepper into thin pieces. For the broccoli, chop it into small florets. Julienne the carrot by cutting it into thin matchstick shapes. Lastly, wash the sugar snap peas and set everything aside. Measuring Sauces Gather your sauces now. Measure out three tablespoons of soy sauce. If you need it gluten-free, swap it for tamari. Also, measure one tablespoon of sesame oil. Having these ready makes cooking faster. Heating the Oil and Aromatics Grab a large non-stick skillet or wok. Heat one tablespoon of olive oil over medium-high heat. When the oil is hot, add three minced garlic cloves and one tablespoon of grated ginger. Sauté them for about 30 seconds. This will make your kitchen smell amazing! Stir-Frying Vegetables Now, toss in the sliced bell pepper, chopped broccoli, sugar snap peas, and julienned carrot. Stir-fry these veggies for about 3 to 4 minutes. You want them tender but still crisp. This keeps the fresh taste and bright colors. Incorporating Zucchini Noodles Lower the heat to medium. Add your spiralized zucchini noodles to the pan. Pour the soy sauce and sesame oil over everything. Toss gently to combine all the flavors. Stir-fry for another 2 to 3 minutes. Be sure not to overcook the zucchini. You want them warm, not mushy. Seasoning the Dish Taste the stir fry and season it with salt and pepper to your liking. This is where you can adjust the flavors. Presentation Tips for Serving Serve your stir fry in a large bowl or plate. Arrange the zucchini noodles in a nest shape for a fun look. Finally, sprinkle some sliced green onions and sesame seeds on top. This makes the dish not only tasty but also pretty. For the full recipe, check the detailed instructions above. To get a great texture, focus on cooking times. Crisp vegetables taste best. Cook bell peppers and broccoli for about 3-4 minutes. They should be tender but still crunchy. Avoid mushy zucchini noodles by not overcooking them. After adding the zucchini, stir-fry for just 2-3 minutes. Remember, they only need to heat through. If they cook too long, they become soft and watery, which is not tasty. Adding spices can boost the dish's flavor. Try a pinch of red pepper flakes for heat. A dash of black pepper adds warmth, too. For fresh herbs, consider adding basil or cilantro at the end. They give a fresh taste to your dish. You can also sprinkle green onions for a mild onion flavor. Each of these tips makes your zucchini noodle stir fry even more delicious. If you want to explore more, check out the Full Recipe for additional tips and serving ideas. {{image_2}} Gluten-Free Options You can easily make this dish gluten-free. Just swap soy sauce for tamari. Tamari has the same rich flavor but is safe for those avoiding gluten. Always check labels to ensure they meet your dietary needs. Vegan Alternatives To make this stir fry vegan, replace any animal protein with tofu or tempeh. Tofu absorbs flavors well and adds protein. You can also skip any animal-based sauces. Use coconut aminos instead of soy sauce for a sweet, savory taste. Protein Additions Want to add protein? Try chicken, shrimp, or tofu. For chicken, use thin strips and cook them first. Shrimp cooks quickly and adds a sweet note. Tofu provides a great plant-based option. Press it to remove extra water for the best texture. Seasonal Vegetable Preferences Feel free to swap in your favorite veggies. Use bell peppers, carrots, or snap peas. Seasonal choices like asparagus or yellow squash also work well. Just make sure to adjust cooking times based on the veggies you choose. For the full recipe, check out the Zucchini Noodle Stir Fry. - Refrigeration Guidelines: Store any leftover zucchini noodle stir fry in an airtight container. Make sure to cool it to room temperature first. This dish stays fresh for up to three days in the fridge. The zucchini noodles may lose some crunch, but the flavors will still be great. - Freezing Instructions: If you want to keep it longer, freeze the stir fry. Place it in a freezer-safe container. It can last up to two months in the freezer. To avoid mushy noodles, consider freezing the veggies and sauce separately from the noodles. - Methods for Quick Reheating: To reheat, you can use a microwave or a skillet. In the microwave, heat for one to two minutes. Stir halfway for even heating. In a skillet, add a splash of water or oil. Warm over medium heat until heated through. - Maintaining Texture and Flavor: When reheating, avoid cooking too long. This keeps the veggies crisp and the noodles from turning mushy. If needed, add a little fresh soy sauce or sesame oil to boost the flavor. Enjoy your quick, tasty meal again! Can I use regular pasta instead of zucchini noodles? Yes, you can use regular pasta. However, zucchini noodles are low in carbs. They also bring a fresh taste. If you want to keep it healthy, stick to zucchini. How do I make zucchini noodles ahead of time? You can spiralize zucchini up to two days ahead. Store the noodles in a sealed bag in the fridge. This keeps them fresh and ready for your stir fry. What are the nutritional benefits of zucchini noodles? Zucchini noodles are low in calories and high in fiber. They provide vitamins A and C. They are also hydrating, as zucchini has high water content. How long does cooked zucchini noodle stir fry last in the fridge? Cooked zucchini noodle stir fry lasts about three to four days in the fridge. Store it in an airtight container. Reheat it gently to keep the noodles from getting mushy. You can find the full recipe [here](Full Recipe). We covered how to create a tasty zucchini noodle stir fry. You learned about the key ingredients, like spiralized zucchini and fresh veggies. I walked you through easy steps for prep and cooking. We also explored tips for perfect texture and flavor. You can even adjust the dish to fit dietary needs. Always remember to store it properly for later. Zucchini noodles are a fun and healthy choice! Enjoy your cooking journey!

Zucchini Noodle Stir Fry Flavorful and Quick Meal

Are you ready to spice up your dinner routine with a quick and tasty meal? My Zucchini Noodle Stir Fry

For this recipe, you can use fresh or canned peaches. Fresh peaches bring a sweet, juicy flavor. You’ll need about 4 cups, peeled and sliced. If you’re short on time, use 2 cans of peaches, drained well. Both choices give a tasty result. Next, you need 1 cup of granulated sugar. This adds sweetness to the dish. A teaspoon of cinnamon enhances the peach flavor. Together, they create a yummy, aromatic base. Mix them with the peaches to draw out their natural juices. For the cake layer, grab a box of butter cake mix, around 15.25 ounces. This makes it easy and quick. You will also need 1/2 cup of unsalted butter, melted. This gives the cake a nice, rich taste. When you mix these, it creates a delightful topping for the peaches. This recipe is simple and fun. You can find the full recipe above for all the details! Start by preheating your oven to 350°F (175°C). This step is key. A hot oven helps the cake bake evenly. It ensures that your dessert turns out golden brown and bubbly. Next, grab a large bowl. Add 4 cups of fresh peaches, sliced or 2 cans of peaches, drained. Mix in 1 cup of granulated sugar and 1 teaspoon of cinnamon. Stir it well and let it sit for about 10 minutes. This time allows the peaches to release their sweet juices. You want them to soak up the sugar and cinnamon flavors. Now, take a greased 9x13 inch baking dish. Pour the peach mixture into it, spreading it evenly. In a separate bowl, combine the cake mix (1 box) and rolled oats (1 cup, optional). Sprinkle this dry mix over the peaches. Then, drizzle 1/2 cup of melted butter over the cake mix. Make sure it covers the mix well. Finally, pour 1 cup of water and 1 teaspoon of vanilla extract over everything. Do not stir! This helps the ingredients blend together while baking. Bake the dish in your preheated oven for 45-50 minutes. Watch for a golden brown top and bubbly edges. Once done, let it cool for a few minutes before you serve. Enjoy your peach cobbler dump cake with whipped cream or vanilla ice cream for a delicious treat! For the full recipe, check out the detailed instructions. To make your peach cobbler dump cake shine, focus on the peaches. Fresh peaches offer a sweet and juicy taste. If you use canned peaches, choose a brand with no added sugar. Sugar enhances the natural sweetness, so adjust it based on your preferences. A sprinkle of cinnamon adds warmth. You can also try nutmeg or ginger for a twist. If you want an extra kick, splash in some lemon juice. It brightens the flavors and balances the sweetness. The texture of your cake is key for a great experience. Use a good butter cake mix as a base. This mix creates a soft and tender crumb. Adding rolled oats can give your dump cake a nice crunch. It also adds fiber, making the dessert a bit heartier. To ensure the top stays crisp, drizzle melted butter evenly over the dry mix. Do not stir the mixture before baking. Letting it meld in the oven creates a delightful contrast between the soft peaches and crunchy topping. Serving is as fun as making your cake. Enjoy it warm for the best flavor. A scoop of vanilla ice cream melts beautifully on top. Whipped cream is another tasty choice. To elevate the look, garnish with fresh peach slices and a sprinkle of cinnamon. This adds color and a touch of elegance. For the full recipe, check out the link. {{image_2}} You can switch up the fruit in your dump cake. Try using berries like blueberries or raspberries. Apples or cherries also work well. Just remember to adjust the sugar based on the fruit's sweetness. For example, tart cherries may need more sugar. Mixing fruits can create a fun flavor. Peaches combined with raspberries offer a sweet and tangy twist. You can make this recipe gluten-free. Use a gluten-free cake mix instead of regular cake mix. For a vegan option, swap out the butter for a plant-based butter. Use almond milk or coconut milk instead of water. You can also omit the oats or use gluten-free oats. These swaps make the dish friendly for various diets without losing taste. Toppings can enhance your peach cobbler dump cake. You can sprinkle nuts, like pecans or walnuts, on top before baking. This adds a nice crunch. You might also add shredded coconut for a tropical twist. For a richer flavor, drizzle caramel sauce after baking. Don't forget whipped cream or vanilla ice cream for serving. These toppings make each bite special and fun. Once your peach cobbler dump cake cools, cover it well. Use plastic wrap or a lid to keep it fresh. Store it in the fridge for up to four days. This helps keep the flavors bright and tasty. If you want to save some for later, freezing works great. Slice the cake into pieces and wrap each piece tightly. Use plastic wrap and then place them in a freezer bag. Label the bag with the date. The cake can stay fresh for up to three months in the freezer. To enjoy your leftover peach cobbler, reheat it in the oven. Preheat the oven to 350°F (175°C). Place a slice on a baking sheet and cover it with foil. Heat for about 10-15 minutes, or until warm. You can also use the microwave for a quick fix. Heat for 30 seconds, then check if it’s warm. Serve with whipped cream or vanilla ice cream for extra fun. For the full recipe, check out the Peach Cobbler Dump Cake section. Yes, you can use frozen peaches. They work well in this recipe. Just thaw them first. Drain any excess liquid to avoid a soggy cake. Frozen peaches will still taste great. Peach cobbler dump cake lasts for about 3 to 5 days in the fridge. Store it in an airtight container. You can also cover it with plastic wrap. If you want it to last longer, freeze it. It can stay good for up to 3 months in the freezer. A dump cake is a simple dessert. You "dump" the ingredients into a baking dish without mixing. It usually has fruit on the bottom and a cake mix on top. As it bakes, the cake mix forms a crust. This method makes it quick and easy to prepare. For more detailed instructions, check the Full Recipe. This blog post showed you how to make a peach cobbler dump cake. You learned about essential ingredients like peaches, sugar, and cake mix. I shared steps like preheating the oven and layering the mixture. You now have tips for flavor and texture, plus variations for different diets. Lastly, I covered storage and answered key questions. Now you can enjoy this easy and tasty dessert any time. Get baking and savor every bite!

Peach Cobbler Dump Cake Simple and Tasty Recipe

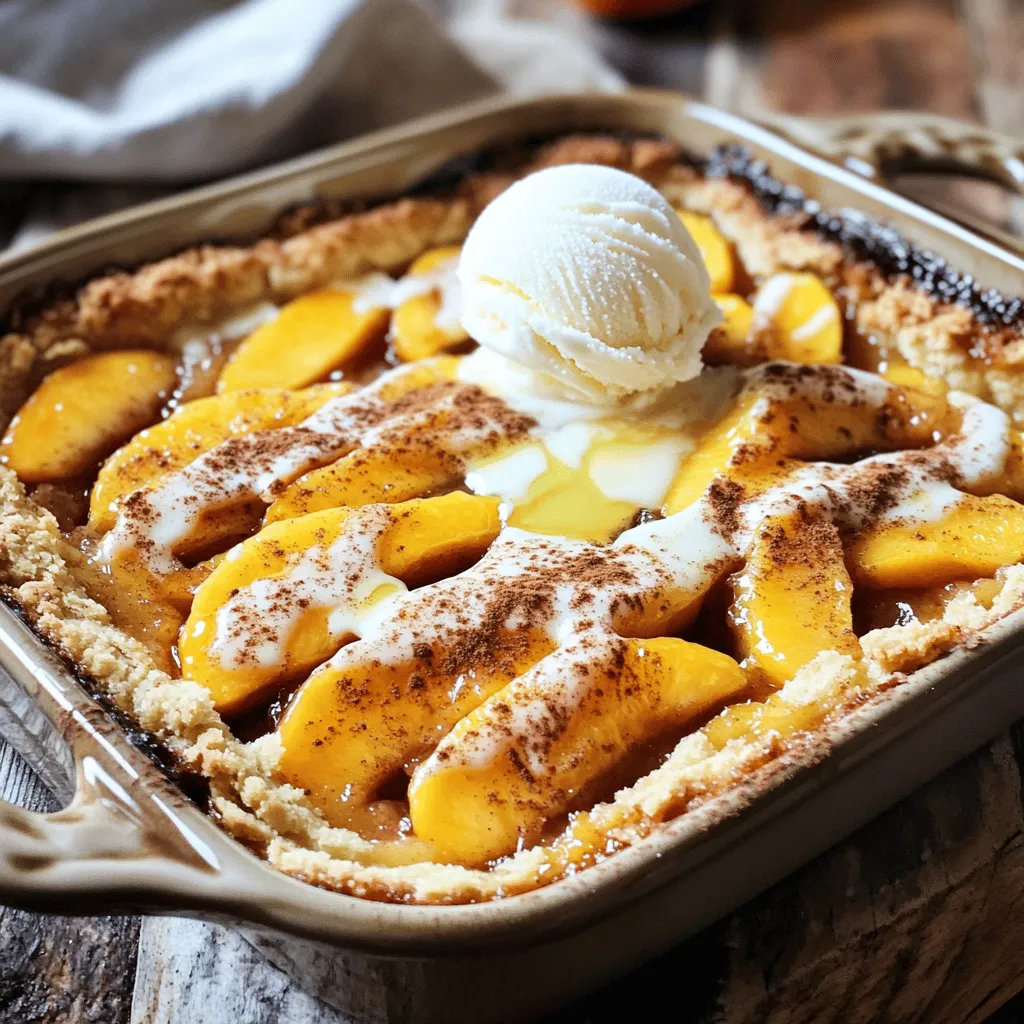
Are you craving a sweet and simple dessert? Look no further! This Peach Cobbler Dump Cake is delicious and easy

- 1 pound ground beef - 1 cup breadcrumbs - 1/2 cup grated Parmesan cheese - 1/4 cup fresh cilantro, chopped - 1 tablespoon taco seasoning - 1 teaspoon garlic powder - 1/2 teaspoon onion powder - 1/4 teaspoon cayenne pepper (optional) - 1 large egg - 1 can (8 oz) refrigerated crescent roll dough - 1 cup shredded cheddar cheese - 1/2 cup salsa - Sour cream and additional cilantro for garnish The main star here is ground beef. I love using it for meatballs. It’s juicy and flavorful. Breadcrumbs help bind the meatballs. They also give a nice texture. Parmesan cheese adds a salty, nutty taste. It makes the meatballs richer. Fresh cilantro gives a bright flavor. The taco seasoning adds that classic taco taste. The crescent roll dough is fun. It makes a tasty outer layer. When baked, it gets golden and flaky. Shredded cheddar cheese melts beautifully. It adds creaminess. Salsa gives a nice kick and moisture. You can switch it up! Add cayenne pepper for heat. If you like spice, toss in jalapeños. Want a twist? Use ground turkey instead of beef. You can even try different cheeses, like pepper jack. Consider adding black beans or corn for extra flavor and texture. The possibilities are endless! For the complete recipe, check out the Full Recipe. First, gather your ingredients. You need ground beef, breadcrumbs, cheese, and spices. I love using fresh cilantro. It adds a bright flavor. In a large bowl, mix the ground beef, breadcrumbs, and cheese. Add the cilantro, taco seasoning, and spices. Don’t forget the egg! This helps bind everything together. Mix well until you have a smooth mixture. Next, shape the mixture into golf ball-sized meatballs. Aim for about one inch in diameter. Place them on a plate as you go. You should have about 12-16 meatballs. Now, get your crescent roll dough. Unroll it and lay it flat on a baking sheet. Make a large circle, with the points of the triangles facing out. Overlap the dough a bit to form a nice ring shape. With your meatballs ready, place them around the outer edge of the dough ring. Leave some space between each meatball. Next, sprinkle the shredded cheddar cheese over the meatballs. This will melt and create a yummy layer. Drizzle salsa over the meatballs as well. It adds moisture and flavor. Now, fold the points of the crescent roll dough over the meatballs. Tuck them under the ring to seal everything inside. This helps keep the meatballs juicy. Preheat your oven to 375°F (190°C). Once heated, place the ring in the oven. Bake for 25-30 minutes. Look for a golden brown crust and cooked meatballs. The internal temperature should reach 160°F for safety. When it’s done, take it out and let it cool for a few minutes. Slice the Taco Meatball Ring carefully. Serve it on a large platter. Add sour cream and extra cilantro for garnish. This creates a beautiful and tasty meal. Enjoy! To make great meatballs, combine your ingredients well. Mix the ground beef, breadcrumbs, and seasonings in a bowl. Use your hands for this. This helps blend all the flavors. Make sure to form meatballs that are about one inch wide. This size cooks evenly and stays juicy. If you want a softer meatball, add a little milk to the mix. When using crescent roll dough, keep it cold. Cold dough is easier to handle. Unroll it gently to avoid tearing. Lay it out in a circle on your baking sheet. Overlap the triangles slightly to form a ring. This makes a nice base for your meatballs. For an extra crispy crust, brush the dough with a little melted butter before baking. Presentation is key to making your meal pop. Serve the Taco Meatball Ring on a big platter. Add dollops of sour cream on top of the meatballs. Sprinkle fresh cilantro around the dish. This adds color and freshness. You can also drizzle extra salsa for a fun touch. A well-presented dish makes every bite feel special. Check out the Full Recipe for more tips! {{image_2}} You can make a tasty vegetarian version of the Taco Meatball Ring. Use lentils, black beans, or chickpeas instead of meat. Mash them up and mix with breadcrumbs and cheese. Add taco seasoning for flavor. Form them into meatballs just like the original recipe. This way, you still enjoy the fun and flavor! If you like heat, spice up your meatballs! Add more cayenne pepper or some chopped jalapeños to the mix. You can also use spicy taco seasoning. For an extra kick, drizzle hot sauce over the finished ring. This adds bold flavor and makes every bite exciting. Cheese lovers can enjoy this dish even more. Try mixing different cheeses into the meatball mix. Use pepper jack for spice or mozzarella for a gooey texture. You can also add fresh herbs like oregano or parsley to the meat mixture. This will bring freshness and depth to the flavor. For the full recipe, check the details above! After you enjoy your Taco Meatball Ring, store any leftovers in the fridge. Place them in an airtight container. They will stay fresh for about three days. Make sure to let it cool down before sealing. This helps keep the flavors intact. If you want to save the Taco Meatball Ring for later, freezing is a great option. Wrap the whole ring tightly in plastic wrap. Then, place it in a freezer bag. It can last for up to three months in the freezer. When you're ready to eat it, just thaw overnight in the fridge. To reheat, preheat your oven to 350°F (175°C). Place the Taco Meatball Ring on a baking sheet. Cover it with foil to keep it moist. Heat for about 15-20 minutes, or until warm. If you prefer, you can use the microwave for a quick option. Just be careful not to overcook it, or the meatballs might dry out. Enjoy your meal again with all its tasty flavors! It takes about 25 to 30 minutes to cook the Taco Meatball Ring. Preheat the oven to 375°F (190°C) first. Then, bake until the dough is golden and the meatballs are done. An internal temperature of 160°F means they are safe to eat. Yes, you can use different types of meat. Ground turkey, chicken, or pork all work well. Each type of meat brings a unique taste. Just make sure to adjust cooking time if needed, as some meats may cook faster or slower. You can serve many sides with the Taco Meatball Ring. Try a fresh salad or some tortilla chips. Guacamole and salsa make great dips. You can also add some rice or beans for a heartier meal. This dish pairs well with sour cream and extra cilantro for flavor. For the full experience, check out the Full Recipe to get inspired! You now have a simple guide to make a tasty Taco Meatball Ring. We explored the key ingredients and how to customize them. I shared step-by-step instructions, tips to improve texture, and storage tricks. Feel free to try variations like vegetarian options or spicy flavors. Remember, cooking is fun! Enjoy your meal and share it with others. Your Taco Meatball Ring will impress. Happy cooking!

Taco Meatball Ring Flavorful and Fun Meal Idea

Looking for a fun and tasty meal idea? The Taco Meatball Ring is your answer! It’s easy to make, full

To make Air Fryer Lasagna Fritta, gather these main ingredients: - 8 lasagna noodles, cooked and chilled - 1 cup ricotta cheese - 1 cup shredded mozzarella cheese - 1/2 cup grated Parmesan cheese - 1 egg, beaten - 1 tablespoon fresh parsley, chopped - 1 teaspoon garlic powder - 1 teaspoon onion powder - 1 teaspoon Italian seasoning - Salt and pepper to taste - 1 cup marinara sauce (for dipping) - Cooking spray These ingredients create a delicious filling and crispy outside that you will love. You can enhance the flavor of your Air Fryer Lasagna Fritta with these optional ingredients: - Fresh basil for a burst of freshness - Crushed red pepper for heat - Spinach or kale for extra greens - Italian sausage for a meaty twist Adding any of these can take your dish to the next level. If you have dietary needs, here are some substitutes: - Use gluten-free lasagna noodles for a gluten-free option. - Swap ricotta with dairy-free cheese for a vegan dish. - Use egg replacements like flaxseed meal mixed with water for an egg-free option. These swaps ensure everyone can enjoy this tasty treat. For the full recipe, check out the details. To make the cheese filling, start by gathering your ingredients. In a bowl, mix the ricotta cheese, mozzarella cheese, and Parmesan cheese. Add the beaten egg, chopped parsley, garlic powder, onion powder, Italian seasoning, salt, and pepper. Use a fork or spoon to blend everything well. The mixture should be creamy and smooth. This filling is key to your lasagna fritta's flavor. If you want a richer taste, feel free to add more Parmesan cheese. Now it’s time to assemble your rolls. Take a cooked lasagna noodle and lay it flat on a clean surface. Spoon a generous amount of your cheese filling along one edge of the noodle. Roll it up tightly, like a burrito, to keep the filling inside. Make sure the seam is on the bottom to prevent unrolling. Repeat this for each noodle until you use all the filling. You will end up with delicious rolls ready for air frying. Preheat your air fryer to 375°F (190°C). This step ensures even cooking and crispiness. While it heats, spray the basket with cooking spray to avoid sticking. Place the rolls seam-side down in a single layer, making sure they don’t touch. Lightly spray the tops with more cooking spray for extra crunch. Cook them for 8 to 10 minutes. Watch closely as they turn golden brown and crispy. Once done, let them cool for a minute. Serve with marinara sauce for dipping. Enjoy your crispy and flavorful lasagna fritta! To get that perfect crispy texture, follow these steps: - Use cooked noodles. Cook the lasagna noodles until they are al dente. This keeps them firm. - Chill the noodles. Let the noodles cool after cooking. Chilling helps them hold their shape. - Don’t skip the spray. Lightly spray the tops of the rolls with cooking spray. This adds crunch as they fry. - Space them out. Place the rolls in a single layer in the air fryer. Give them room to breathe. - Check the time. Aim for 8-10 minutes at 375°F. Watch closely for that golden color. Here are some mistakes that can ruin your lasagna fritta: - Overstuffing the noodles. Don’t pack too much filling inside. Keep it light and even. - Skipping seasoning. Don’t forget to add salt and pepper to the filling. A little flavor goes a long way. - Not preheating the air fryer. Always preheat for even cooking. It helps achieve that crispy exterior. - Crowding the basket. Avoid putting too many rolls in at once. This can lead to soggy results. To keep your leftovers tasting great, follow these steps: - Air fry for best results. Preheat your air fryer to 375°F and cook for 3-5 minutes. This keeps them crispy. - Use a microwave if needed. If you're short on time, microwave in short bursts. This is quick but may lose crispiness. - Cover with a paper towel. If microwaving, cover the fritta with a paper towel. This helps absorb moisture and keeps them from getting soggy. For the complete recipe, check out the Full Recipe. Enjoy your crispy and flavorful delight! {{image_2}} To make a vegetarian Air Fryer Lasagna Fritta, swap out the meat for veggies. You can use spinach, mushrooms, or zucchini. Just chop them up and sauté them briefly. Mix these veggies into your cheese filling. This adds great flavor and color. Plus, it makes your dish healthier and lighter. You can still enjoy all those cheesy layers without the meat. For gluten-free Air Fryer Lasagna Fritta, choose gluten-free lasagna noodles. Many brands offer options that taste great. Ensure all your other ingredients are also gluten-free. Check the labels on cheese and sauces. With these swaps, you can enjoy the same crispy texture without the gluten. You can boost the taste of your Air Fryer Lasagna Fritta with some simple changes. Try adding fresh herbs like basil or oregano to the cheese mixture. You can even mix in some sun-dried tomatoes for a sweet touch. If you love heat, a pinch of red pepper flakes can bring the spice. These small tweaks create a unique dish every time, keeping it fresh and exciting. For the full recipe, click here. To store your Air Fryer Lasagna Fritta, wait until they cool down. Place them in an airtight container. They will stay fresh in the fridge for up to three days. Make sure to separate layers with parchment paper if you stack them. This keeps them from sticking together. You can freeze these tasty rolls for later. First, let them cool completely. Then, wrap each roll in plastic wrap. Place the wrapped rolls in a freezer-safe bag. They will last for up to two months. When you want to eat them, just take them out and thaw in the fridge overnight. Reheating is easy and quick. For the best results, use an air fryer. Set it to 350°F (175°C) and heat for about 5-7 minutes. You can also use an oven. Preheat it to 350°F (175°C) and bake for 10-15 minutes. This way, they stay crispy. Enjoy your delicious Air Fryer Lasagna Fritta again! For the complete recipe, check out the Full Recipe. Air Fryer Lasagna Fritta is a fun twist on classic lasagna. It features rolled lasagna noodles filled with creamy cheese. You cook these rolls in an air fryer, making them crispy and golden. The air fryer gives them a crunchy texture without deep frying. You can dip these bites in marinara sauce for added flavor. It’s a great way to enjoy lasagna in a new form. No, it's best to use cooked lasagna noodles. Uncooked noodles will not soften properly in the air fryer. They need to be boiled and chilled first for the right texture. Cooked noodles roll easily and hold the filling well. So, stick with cooked noodles for the best results. To add some heat, you can mix in red pepper flakes into the cheese filling. You can also use spicy Italian sausage instead of just cheese. Another option is to add jalapeños or hot sauce to the marinara dip. Adjust the spice to your liking for a tasty kick. These small changes can make your Air Fryer Lasagna Fritta exciting! Air Fryer Lasagna Fritta brings fun to your kitchen. You learned the ingredients, steps, and tips to make it right. Whether you want a crunchy texture or a spicy kick, you've got options. Always remember to store leftovers properly for later enjoyment. I hope this guide helps you make delicious meals your way. Enjoy your cooking adventure!

Air Fryer Lasagna Fritta Crispy and Flavorful Delight

Are you ready to take your taste buds on a crispy adventure? In this blog post, I’ll share my tried-and-true

For this tasty stuffed chicken, gather these simple ingredients: - 4 boneless, skinless chicken breasts - 2 cups mushrooms, finely chopped (button or cremini work well) - 1 small onion, finely chopped - 2 cloves garlic, minced - 1/2 cup spinach, finely chopped - 1/2 cup low-fat cream cheese, softened - 1/2 cup shredded mozzarella cheese - 1 teaspoon dried thyme - 1 teaspoon dried basil - Salt and pepper to taste - 1 tablespoon olive oil - Fresh parsley for garnish Each serving is not only delicious but also healthy. Here’s what you get per serving: - Calories: 290 - Protein: 32g - Carbohydrates: 6g - Dietary Fiber: 1g - Fat: 14g - Saturated Fat: 6g This dish packs protein from the chicken and cheese, plus vitamins from the mushrooms and spinach. You can easily swap ingredients for your own tastes or needs: - Chicken: Use turkey breasts for a lighter option. - Mushrooms: Try portobello for a meatier texture. - Cream Cheese: Greek yogurt works well for a tangy twist. - Cheese: Swap mozzarella for cheddar or feta for more flavor. - Herbs: Use fresh herbs if you have them; they add great taste. These changes keep the dish fresh and fun. Check the Full Recipe for more cooking tips! 1. Start by preheating your oven to 375°F (190°C). This step warms up the oven for even cooking. 2. In a skillet, pour in the olive oil and heat it over medium heat. 3. Add the finely chopped onion and minced garlic to the skillet. Cook until the onion is soft and clear, which takes about 3-4 minutes. 4. Next, toss in the finely chopped mushrooms. Cook them until they turn brown, which takes about 5-7 minutes. 5. Add the chopped spinach into the mix and stir. Cook until the spinach wilts, which should take about 2 minutes. 6. Season the mixture with thyme, basil, salt, and pepper to taste. Remove from heat and let it cool a bit. 7. In a bowl, combine the mushroom mixture with softened cream cheese and shredded mozzarella. Mix well until everything is blended. 8. Take each chicken breast and use a sharp knife to make a pocket. Cut horizontally, but do not slice all the way through. 9. Stuff each chicken breast with the mushroom filling. If needed, use toothpicks to keep the filling inside. 10. Place the stuffed chicken breasts in a greased baking dish. Sprinkle salt and pepper on top for added flavor. 11. Bake in the preheated oven for 25-30 minutes. Check that the chicken reaches an internal temperature of 165°F (74°C). 12. Once done, remove the chicken from the oven. Let it rest for 5 minutes before serving. 13. Garnish each stuffed chicken breast with fresh parsley for a touch of color. This adds a nice visual appeal to your dish. 14. Serve the healthy mushroom stuffed chicken with your favorite sides for a tasty weeknight meal. Enjoy the savory flavors and feel good about your healthy choice! 15. For the complete recipe, check out the Full Recipe section earlier in the article. To make stuffed chicken just right, focus on the filling. Use fresh ingredients for flavor. I love using mushrooms, spinach, and creamy cheese. This mix adds taste and keeps the chicken moist. When you cut the chicken, make sure to create a deep pocket. Not cutting all the way through helps hold the filling better. After stuffing, secure the opening with toothpicks if needed. This keeps the filling inside while it cooks. One big mistake is overcooking the chicken. This can make it dry and tough. Use a meat thermometer to check the internal temperature. It should reach 165°F (74°C) for safety. Another mistake is not seasoning enough. Don’t skip the salt and pepper. They enhance the taste of every bite. Lastly, be careful not to rush the cooling of the filling. Letting it cool a bit makes it easier to handle. For this recipe, a sharp knife is key. It helps you cut the chicken properly. I also recommend a large skillet for cooking the filling. A good baking dish ensures even cooking. You might want a meat thermometer for best results. It helps you know when the chicken is done. Lastly, having toothpicks on hand can help keep your filling snug. You can find all the details in the Full Recipe for a tasty way to enjoy this dish. {{image_2}} You can mix things up with your stuffing. Try adding some diced bell peppers for a sweet crunch. Chopped sun-dried tomatoes add a tangy flavor. You might also like to add nuts for a bit of crunch. Pine nuts or walnuts work well. Fresh herbs like parsley or chives boost the taste too. These additions will make your mushroom stuffing even more exciting. If you want to switch proteins, turkey works great. Turkey breasts are lean and tasty. You can also use pork tenderloin for a richer flavor. For a vegetarian option, try stuffed portobello mushrooms. They are meaty and absorb flavors well. This way, you can enjoy a filling meal without chicken. For a dairy-free version, substitute cream cheese with a plant-based cream. Nutritional yeast can add a cheesy flavor without dairy. If you need to keep it low-carb, use zucchini or eggplant instead of chicken. Both options can hold the stuffing nicely. For gluten-free diets, ensure all ingredients are certified gluten-free. These swaps make this dish fit various dietary needs while keeping it delicious. For the full recipe, check out the Savory Mushroom-Stuffed Chicken Delight. After enjoying your mushroom stuffed chicken, let it cool down. Place the leftovers in an airtight container. Store it in the fridge for up to three days. This keeps the chicken fresh and ready for a quick meal. When you're ready to eat your leftovers, preheat your oven to 350°F (175°C). Place the stuffed chicken in a baking dish. Cover it with foil to keep it moist. Heat for about 15-20 minutes, or until it's warm. You can also use the microwave for a quick option. Heat on medium power for 2-3 minutes, checking to avoid overcooking. You can freeze the mushroom stuffed chicken for longer storage. Wrap each piece in plastic wrap, then place it in a freezer bag. Be sure to remove as much air as possible. It will stay good for up to three months. When you're ready to eat, thaw it in the fridge overnight before reheating. For best flavor, enjoy it within a month. For the full recipe, refer to the detailed instructions above. The best mushrooms for stuffing chicken are button or cremini. Both have great flavor and texture. You can also try shiitake or portobello for a bolder taste. They add a nice earthiness to your dish. I like to finely chop them to blend well with the filling. This way, every bite is packed with yummy mushroom goodness. Yes, you can prepare this dish ahead of time. You can stuff the chicken breasts and then cover them in the fridge. Just make sure to cook them within 24 hours for the best taste and safety. When you're ready to cook, just take them out and bake. This makes dinner easy on busy weeknights! To check if the chicken is done, use a meat thermometer. The inside should reach 165°F (74°C). If you don't have a thermometer, you can cut into the thickest part. The juices should run clear, not pink. This ensures your meal is safe and delicious. Trust me, no one likes dry chicken, so avoid overcooking! For the detailed cooking method, you can refer to the Full Recipe. This blog post covered how to make stuffed chicken, from ingredients to storage. You learned about the key ingredients and their nutrition. I shared tips to perfect your dish and highlighted common mistakes to avoid. You can use various proteins and customize the stuffing. Remember to store leftovers properly and reheat them safely. With these steps, you can create a tasty meal every time. Enjoy your cooking journey and impress your friends and family!

Healthy Mushroom Stuffed Chicken Tasty Weeknight Meal

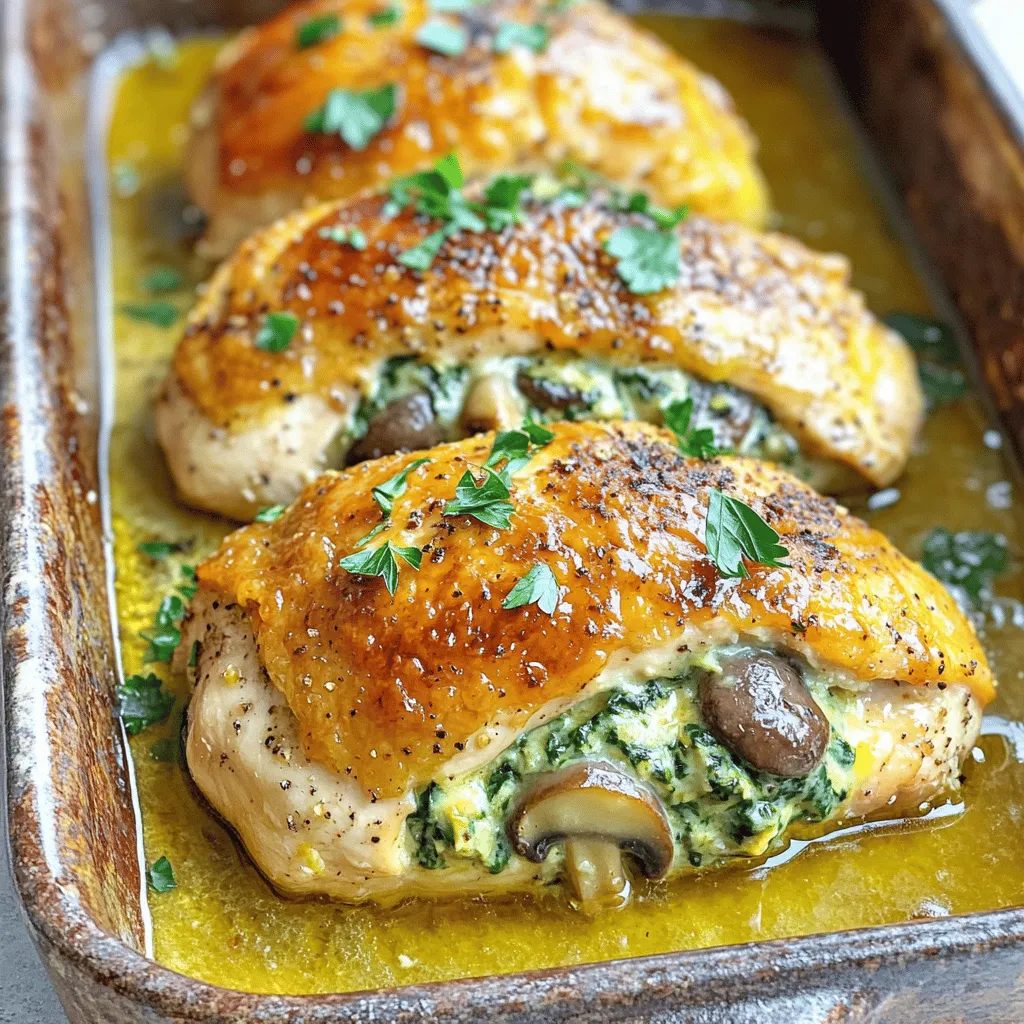
Are you ready to spice up your weeknight dinners? This Healthy Mushroom Stuffed Chicken is packed with flavor and nutrients.

To make a tasty taco soup, you will need some simple ingredients. Here’s what you need: - 1 lb ground beef or ground turkey - 1 medium onion, diced - 1 bell pepper, diced (any color) - 2 cloves garlic, minced - 1 can (15 oz) black beans, rinsed and drained - 1 can (15 oz) corn, drained - 1 can (14.5 oz) diced tomatoes with green chilies - 1 can (15 oz) tomato sauce - 2 cups beef or chicken broth - 1 packet taco seasoning - 1 teaspoon cumin - Salt and pepper to taste - Optional toppings: shredded cheese, sour cream, diced green onions, tortilla chips Each ingredient adds a layer of flavor. The ground meat gives it heartiness. The beans and corn add texture. The tomatoes and broth create a rich base. Taco seasoning and cumin bring that classic taco taste. For added fun, try different toppings. Shredded cheese melts beautifully on top. Sour cream adds creaminess. Fresh green onions give a nice crunch. Tortilla chips add a delightful crunch. This taco soup is not just easy; it’s also a crowd-pleaser. For the full recipe, you can check out the complete instructions. 1. Sauté vegetables for base flavor Start by heating a splash of olive oil in a large pot over medium heat. Add the diced onion and bell pepper. You want to cook them until they are soft and the onion looks clear. This should take about 5 minutes. 2. Brown the ground beef or turkey Next, add the minced garlic. Cook it for one more minute until it smells great. Then, add the ground beef or turkey. Break it apart with a spatula as it cooks. Make sure it is brown and no longer pink. This will take about 5 to 7 minutes. Drain any fat that is left in the pot. 3. Combine all ingredients in a pot Now, it’s time to mix in the fun stuff. Add the black beans, corn, diced tomatoes, tomato sauce, and broth to the pot. Don’t forget to add the taco seasoning and cumin. Stir everything well so it all blends together. 4. Simmer and adjust seasoning Bring the mixture to a boil. Once it’s bubbling, turn down the heat and let it simmer for 15 minutes. This helps all the flavors mix nicely. Taste the soup and add salt and pepper as needed. Enjoy your warm and tasty taco soup! For the full recipe, check out the section above. To make your taco soup burst with flavor, I suggest using homemade taco seasoning. The fresh spices really make a difference. You can mix chili powder, cumin, and paprika for a quick blend. Allowing the soup to sit for a while also helps. This way, the flavors can blend and deepen. If you can, let it chill overnight. You will taste the improvement. Taco soup is best served hot. A few garnishments can elevate your meal. I love adding shredded cheese and a dollop of sour cream. You can also sprinkle diced green onions on top for freshness. For sides, cornbread pairs well with the soup. Tortilla chips make a great crunchy addition too. You can dip the chips into the soup for extra fun! Using a slow cooker can make your life easier. Just throw in all the ingredients and let it simmer. It’s perfect for busy days. If you have leftovers, freezing is a smart choice. Cool the soup first, then store it in freezer-safe bags. When you want to enjoy it later, just thaw and reheat. This way, you have a quick meal ready anytime! For the complete recipe, don't forget to check out the [Full Recipe]. {{image_2}} You can easily change a few ingredients in taco soup. If you want a leaner meal, swap ground beef for ground turkey. This will cut down on fat but keep the taste rich. You can also change the beans. Use kidney beans, pinto beans, or even black-eyed peas. Each choice can add a new twist to the soup. For those who prefer no meat, a vegetarian option is simple. Just leave out the meat and add more beans or veggies. You can also use vegetable broth instead of beef or chicken broth. If you need it gluten-free, check your taco seasoning and use gluten-free broth. These small changes can help everyone enjoy this tasty meal. To keep your taco soup fresh, store it in the fridge. Use an airtight container to prevent spills and keep the soup tasty. It lasts about three to four days in the fridge. If you want to save it for longer, freezing is a great option. For freezing, let the soup cool to room temperature first. Then, pour it into freezer-safe bags or containers. Leave some space at the top, as the soup will expand when frozen. Taco soup can stay good for up to three months in the freezer. When you are ready to enjoy your taco soup again, I recommend reheating it on the stove. Pour the soup into a pot over medium heat. Stir often to heat evenly. You can also use the microwave. Place the soup in a microwave-safe bowl, then cover it loosely. Heat in short bursts, stirring in between, until hot. Avoid overcooking by watching the soup closely. If it starts to bubble too much, lower the heat or stop heating. This keeps the flavors bright and fresh. Enjoy your taco soup like it's the first time! Taco soup lasts for about three to four days in the fridge. Make sure to store it in an airtight container. This keeps it fresh and helps the flavors stay intact. If you want it to last longer, consider freezing it. Yes, you can make taco soup ahead of time. It tastes even better the next day! Just prepare it, let it cool, and store it in the fridge. When you are ready to eat, heat it up on the stove or in the microwave. Taco soup pairs well with several sides. You can serve it with cornbread or tortilla chips. A fresh salad or sliced avocado adds a nice touch too. For a fun twist, try adding some crushed tortilla chips right on top! Taco soup can be a healthy choice. It is packed with protein from the meat and fiber from the beans. You can also add your favorite veggies to boost the nutrition. Just watch your portion sizes and toppings for better health. Absolutely! You can control the spice in taco soup. If you like it mild, use less taco seasoning or skip the pepper. For more heat, add chopped jalapeños or extra chili powder. Taste as you go to find your perfect balance. For the complete recipe, check out the Full Recipe. This blog post covered how to make a tasty taco soup. You learned about key ingredients and simple steps for preparation. I shared tips for enhancing flavors and suggested how to serve it well. You can swap ingredients for different diets and store leftovers easily. Remember, taco soup is flexible and fun to make. Try your own twists on the recipe. Enjoy your cooking!

Quick & Easy Taco Soup Flavorful and Satisfying Meal

Looking for a meal that’s quick, easy, and full of flavor? My Quick & Easy Taco Soup checks all the

- 1 cup fresh spinach, chopped - 1 cup canned artichoke hearts, drained and chopped - ½ cup cream cheese, softened - ½ cup sour cream - 1 cup shredded mozzarella cheese - ¼ cup grated Parmesan cheese - 1 teaspoon garlic powder - ½ teaspoon salt - ¼ teaspoon black pepper - 1 package of phyllo pastry dough (about 16 sheets) - Olive oil spray or melted butter for brushing - Mixing bowl - Muffin tin - Knife or pizza cutter - Baking sheet I love how simple yet satisfying Spinach Artichoke Dip Bites are. You start with fresh spinach and canned artichoke hearts. These bring a bright flavor and great texture to the dish. The cream cheese and sour cream make the filling rich and creamy. Shredded mozzarella and grated Parmesan add a cheesy goodness that melts in your mouth. For seasoning, garlic powder, salt, and black pepper enhance the flavors. You can’t forget the phyllo pastry dough. It gives the bites a flaky and crispy crust. For brushing, you can use olive oil or melted butter. Both options add a nice golden color and flavor. You’ll need a mixing bowl to mix everything. A muffin tin helps shape the bites perfectly. A knife or pizza cutter is handy for cutting the dough. Finally, a baking sheet will catch any drips while baking. With these ingredients and tools ready, you’re set to make delicious Spinach Artichoke Dip Bites. Check out the Full Recipe for complete instructions! To start, gather your ingredients. Combine the chopped spinach, artichokes, cream cheese, sour cream, mozzarella, and Parmesan cheese in a mixing bowl. Make sure to mix well. You want all the flavors to blend. Next, season the mixture with garlic powder, salt, and black pepper. Stir until everything is evenly mixed. This filling is the heart of your bites. Now, preheat your oven to 375°F (190°C). While it heats, unroll the phyllo dough on a clean surface. Take one sheet of dough and lay it flat. Lightly brush it with olive oil or melted butter. Then, place a second sheet on top and repeat the brushing. This adds flavor and helps the layers stick together. With the dough ready, it's time to cut it. Use a sharp knife or pizza cutter to slice the phyllo into 3-inch squares. You should get about 12 squares from each set of two sheets. Now, gently press each square into a greased mini muffin tin. Let the edges hang over the sides. Once all squares are in the tin, fill each phyllo cup with the spinach-artichoke mixture. Spoon it generously, filling them to the brim. Finally, place the muffin tin in the oven and bake for 15-20 minutes. You want the phyllo to turn crispy and golden brown. Enjoy your delicious bites! For the complete recipe, check the Full Recipe section. Handling phyllo dough can be tricky. Here are some tips to make it easier: - Keep it covered: Always cover the phyllo sheets with a damp towel. This keeps them from drying out. - Use a light touch: When brushing with olive oil or butter, be gentle. You want to keep the layers intact. - Work quickly: Phyllo dough dries fast. Prepare your cups and fill them as soon as possible. For even filling distribution, follow these steps: - Spoon carefully: Use a small spoon to add the filling. This helps you control the amount. - Level it out: Smooth the filling to be even across each cup. This ensures all bites have the same great taste. For a stunning presentation, try these ideas: - Vibrant platter: Arrange the bites on a colorful platter. Add some fresh basil leaves for flair. - Garnish with cheese: A sprinkle of extra Parmesan adds a nice touch. When it comes to dips or sauces, consider these options: - Creamy ranch: This pairs well with the rich flavors of the bites. - Spicy sriracha: For those who like a kick, this adds great heat. To keep your Spinach Artichoke Dip Bites fresh, follow these storage tips: - Airtight container: Place the bites in an airtight container. This keeps them from getting soggy. - Refrigerate: Store them in the fridge for up to three days. For the best taste when reheating: - Oven method: Preheat your oven to 350°F (175°C). Bake for about 10 minutes. This keeps them crispy. - Microwave caution: If using a microwave, heat in short bursts. This may make them soft. Enjoy your delicious bites with these simple tips and tricks! For the full recipe, refer back to the main section. {{image_2}} You can switch up the cheeses to make it your own. Try adding feta for a tangy kick. Goat cheese also works well for a creamy texture. If you want a sharper taste, use cheddar cheese. You can also mix in different vegetables. Swap spinach for kale or Swiss chard. For a crunch, add diced bell peppers or mushrooms. These swaps keep the bites exciting and fresh. If you're gluten-free, use gluten-free phyllo dough. You can also try puff pastry as a substitute. Both options still give you that flaky texture. For a vegan version, replace cream cheese and sour cream with vegan alternatives. Use cashew cream or tofu for a creamy base. Make sure to choose a vegan cheese that melts well. This way, everyone can enjoy the dip bites. These bites shine at parties and gatherings. They are easy to grab and enjoy. Serve them warm on a colorful platter for a great look. For kids, make mini versions using smaller phyllo squares. You can also add fun shapes with cookie cutters. Serve with a side of marinara or ranch for dipping. These adaptations make the bites fun and appealing for all ages. Spinach Artichoke Dip Bites taste best fresh. You can store them in the fridge for about 3 days. Just keep them in an airtight container. The flavors may change a bit over time, but they will still be tasty. For the best experience, reheat them in the oven to restore the crispness. Yes, you can freeze Spinach Artichoke Dip Bites. Wrap them well in plastic wrap or foil. Place them in a freezer-safe bag. They can last up to 2 months in the freezer. To enjoy, thaw them in the fridge overnight. Reheat them in the oven to get that crispy crust back. You can serve many tasty things with Spinach Artichoke Dip Bites. Here are some ideas: - Fresh veggie sticks like carrots and celery - Crunchy pita chips or tortilla chips - A light salad with vinaigrette - Creamy ranch or yogurt dip These pairings create a fun and delicious spread for any gathering! Ingredients: - 1 cup fresh spinach, chopped - 1 cup canned artichoke hearts, drained and chopped - ½ cup cream cheese, softened - ½ cup sour cream - 1 cup shredded mozzarella cheese - ¼ cup grated Parmesan cheese - 1 teaspoon garlic powder - ½ teaspoon salt - ¼ teaspoon black pepper - 1 package of phyllo pastry dough (about 16 sheets) - Olive oil spray or melted butter for brushing Instructions: 1. Prep the Filling: In a bowl, mix the spinach, artichokes, cream cheese, sour cream, mozzarella, Parmesan, garlic powder, salt, and black pepper. Stir well to combine. 2. Prep the Phyllo Dough: Preheat your oven to 375°F (190°C). Unroll the phyllo dough. Place one sheet on a flat surface and brush it lightly with olive oil or melted butter. Add a second sheet on top and brush again. 3. Cut the Dough: Use a knife or pizza cutter to slice the phyllo into 3-inch squares. Each set of two sheets gives you about 12 squares. 4. Form the Cups: Press each square into a greased mini muffin tin, letting the edges hang over. Do this until all squares are used, making about 12 cups. 5. Fill the Cups: Spoon the spinach-artichoke mix into each phyllo cup, filling to the top. 6. Bake: Place the muffin tin in the oven. Bake for 15-20 minutes, until the phyllo is golden and crispy. 7. Cool and Serve: Once baked, take the bites out of the tin. Let them cool slightly before serving. This recipe is simple and fun. You can find the full recipe in the section above. Enjoy your tasty bites! In this article, we explored how to make delicious Spinach Artichoke Dip Bites from scratch. You learned about key ingredients, like fresh spinach and cream cheese, as well as how to handle phyllo dough. We discussed tips for perfect bites and some fun variations. Now, you have the tools and insights to create these tasty treats for any gathering. Get ready to impress your friends and family with your cooking skills! Enjoy the process and the tasty results.

Savory Spinach Artichoke Dip Bites Simple Recipe

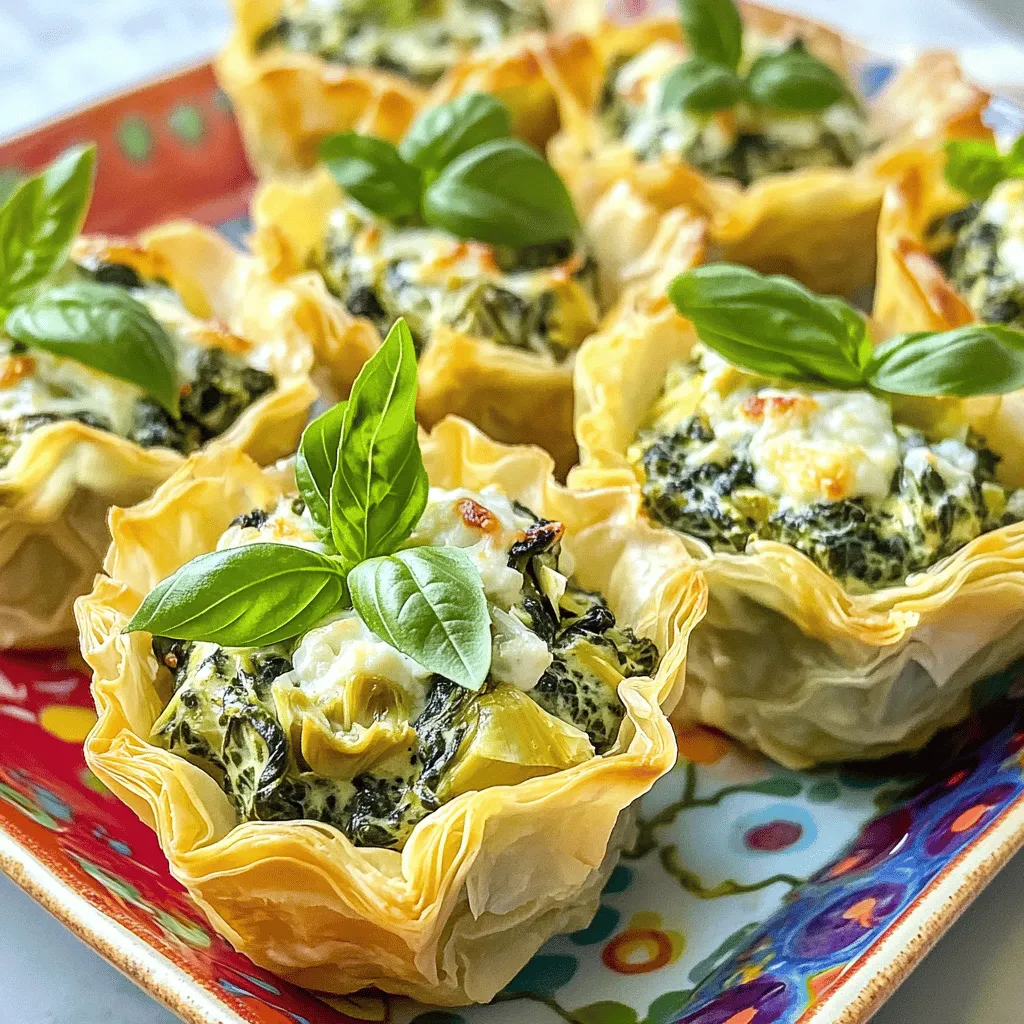
If you’re craving a tasty snack that dazzles at parties, look no further! These Savory Spinach Artichoke Dip Bites are

Older posts
Newer posts
← Previous Page1 … Page113 Page114 Page115 … Page138 Next →

dsad

© 2025 Recipes Pursuit • Built with GeneratePress

Our Policies

  • Copyright Policy
  • Cookie Policy
  • GDPR Policy
  • Privacy Policy
  • Disclaimer
  • Terms Of Use

More Information

  • Home
  • About
  • Contact
  • Appetizers
  • Dessert
  • Dinner
  • Drinks
©2025, Recipes Pursuit About Back To Top