Skip to content
DisclaimerTerms Of UseGDPR PolicyCookie Policy

Recipes Pursuit

  • Home
  • Drinks
  • Appetizers
  • Dinner
  • Dessert
  • About
  • Contact
  • Privacy Policy
DisclaimerTerms Of UseGDPR PolicyCookie Policy

Emma Smith

For the rainbow veggie sushi rolls, gather these fresh ingredients: - 2 cups sushi rice - 2 1/2 cups water - 1/4 cup rice vinegar - 1 tablespoon sugar - 1 teaspoon salt - 4 sheets nori (seaweed) - 1 small cucumber, julienned - 1 carrot, peeled and julienned - 1 bell pepper (any color), thinly sliced - 1 avocado, sliced - 1 cup purple cabbage, thinly sliced - 1/4 cup sesame seeds (for garnish) - Soy sauce and pickled ginger (for serving) Each veggie in your sushi roll offers great health perks: - Cucumber: Hydrating and low in calories, it supports digestion. - Carrot: Packed with beta-carotene, it helps your vision and skin. - Bell Pepper: Full of vitamin C, it boosts your immune system. - Avocado: Rich in healthy fats, it promotes heart health. - Purple Cabbage: High in antioxidants, it may reduce inflammation. You can swap ingredients based on taste or availability: - Sushi Rice: Use short-grain brown rice for a nutty flavor. - Nori: If you can’t find nori, use rice paper or lettuce wraps. - Vegetables: Feel free to add radishes, spinach, or zucchini. - Sesame Seeds: Substitute with chia seeds or sunflower seeds. - Soy Sauce: Use tamari for a gluten-free option. These substitutions let you customize your sushi while still keeping it colorful and tasty. For the full process, check the Full Recipe. To start, rinse the sushi rice in cold water. This step removes extra starch. When the water runs clear, you are good to go. Next, combine the rinsed rice and water in a pot. Bring this to a boil over medium heat. Once it boils, lower the heat. Cover the pot and let it simmer for 20 minutes. The rice will absorb the water and become fluffy. After cooking, let it sit covered for another 10 minutes. This extra time helps the rice finish cooking. In a small bowl, mix rice vinegar, sugar, and salt. Stir until everything dissolves. This is your sushi vinegar. After the rice rests, transfer it to a large bowl. Gently fold in the sushi vinegar. Allow the rice to cool to room temperature before you roll. Now, let’s roll! Place a bamboo sushi mat on a clean surface. Set a sheet of nori, shiny side down, on the mat. Wet your hands to stop the rice from sticking. Spread about 1/2 cup of sushi rice over the nori. Leave an inch at the top edge without rice. Next, layer some of each vegetable at the bottom edge of the rice. You can use cucumber, carrot, bell pepper, avocado, and cabbage. Starting at the bottom, roll the sushi tightly using the mat. Apply gentle pressure to keep it compact. Roll until you reach the uncovered edge. Use a bit of water to seal the roll. Take a sharp knife and slice the roll into 6-8 pieces. Wipe the knife between cuts for cleaner slices. Repeat this with the other nori sheets and fillings. Once finished, sprinkle sesame seeds on the sushi rolls. This adds flavor and a nice crunch. Serve the rainbow veggie sushi rolls on a platter. Add soy sauce and pickled ginger on the side for dipping. The colorful presentation makes this dish a treat for the eyes and the taste buds. For the full recipe, check the earlier section. Enjoy your sushi-making adventure! Rolling sushi takes a bit of practice, but it’s fun! Start with a clean surface. Use a bamboo sushi mat for the best results. Place the nori on the mat, shiny side down. Spread the rice evenly, leaving the top edge clear. This helps seal the roll later. Use gentle pressure when rolling. Tightly roll from the bottom while tucking the filling in. Wet the edge of the nori to help it stick. Finally, let it rest seam-side down for a moment. This makes slicing easier. To keep your sushi fresh, wrap each roll in plastic wrap. This keeps moisture in and prevents it from drying out. Store the wrapped sushi in the fridge. Eat it within 24 hours for the best taste. If you have leftover sushi rice, keep it in an airtight container. Avoid putting rice in the fridge, as it can dry out. Instead, use it within a day for best results. Gathering the right tools makes sushi-making easier. Here’s what you need: - Bamboo sushi mat - Sharp knife - Rice cooker or pot - Bowl for sushi rice - Plastic wrap - Measuring cups and spoons These tools help you create beautiful and tasty sushi rolls. With practice, you will impress friends and family! For the full recipe, please refer to the earlier section. {{image_2}} You can change the fillings in your rainbow veggie sushi rolls for new tastes. Try using different veggies. For a spicy kick, add jalapeños or radishes. If you want a sweet touch, use mango slices or roasted sweet potatoes. For a protein boost, add tofu or cooked shrimp. Mixing flavors keeps every roll exciting. Rainbow veggie sushi rolls are great for everyone. If you prefer vegetarian or vegan options, skip any animal products. Use tofu or tempeh for protein. You can also add marinated mushrooms for extra flavor. Always check your sauces. Soy sauce is usually vegan, but some may not be. Choose what fits your diet. Dipping sauces can change how your sushi tastes. Soy sauce is classic, but you can make it special. Mix soy sauce with wasabi for heat. Or try a sweet sauce with soy sauce and honey. For a fresh twist, mix sesame oil, lime juice, and chili flakes. Each sauce adds a fun layer to your meal. Explore more to find your favorite combinations. You can always refer to the Full Recipe for more ideas! Storing leftover rainbow veggie sushi rolls is simple. First, wrap each roll in plastic wrap. This keeps them fresh and prevents them from drying out. Place the wrapped sushi in an airtight container. Store it in the fridge for up to two days. If you want to enjoy them later, do not add soy sauce or pickled ginger until serving. Sushi is best enjoyed fresh, but you can reheat it if needed. First, remove any excess wrapping. Microwave the sushi for about 10 to 15 seconds on a low setting. Check to see if it is warm enough. Be careful not to overheat it, as this may make the rice tough. Sushi is still tasty when warm, but it won’t be the same as fresh. Freezing sushi rolls is a good option for long-term storage. Wrap each roll tightly in plastic wrap, then place them in a freezer bag. Label the bag with the date. You can freeze the rolls for about one month. To eat, thaw the rolls in the fridge overnight. Do not refreeze once thawed. Enjoy the fresh taste of your rainbow veggie sushi rolls again! For full instructions on making these rolls, be sure to check the Full Recipe. To make sushi rice fluffy, rinse it well. Use cold water and rinse until clear. This washes away extra starch. After cooking, let the rice sit for a bit. Cover it and let it rest for 10 minutes. Then, gently mix in the vinegar mixture. This adds flavor and keeps the rice light. Yes, you can use brown rice for sushi. It adds a nutty taste and is healthier. Brown rice takes longer to cook, so adjust the water and time. Aim for a softer texture. This makes it easier to roll. Keep in mind, it won't stick as much as white sushi rice. Common mistakes include overcooking the rice or using too much water. Also, don’t pack the rice too tightly when rolling. This can make the rolls fall apart. Another mistake is not using fresh ingredients. Fresh veggies and fish make a big difference. Finally, don’t forget to wet your knife when slicing the rolls. This helps create clean cuts. For more tips, check out the Full Recipe. This blog post shared a complete guide on making rainbow veggie sushi. We covered the key ingredients and their nutritional benefits. You learned step-by-step instructions and tips for perfect rolls. We also discussed various filling options and how to store leftovers. Creating sushi at home can be fun and rewarding. With practice, you can enjoy fresh sushi anytime. Remember to try different flavors and fillings. Your sushi adventure awaits!

Rainbow Veggie Sushi Rolls Colorful and Tasty Treat

Are you ready to roll with something vibrant and tasty? Rainbow Veggie Sushi Rolls pack a colorful punch of flavors

- 1 cup jasmine rice - 1 can (13.5 oz) coconut milk - 1 cup vegetable broth (or water) - Zest of 1 lime - 2 tablespoons lime juice In this recipe, jasmine rice is the star. It cooks up soft and fluffy. The coconut milk adds a creamy texture and rich flavor. You can use vegetable broth or water for the cooking liquid. I prefer the broth for extra taste. The lime zest and juice brighten the dish, making it fresh and zesty. - 1 tablespoon brown sugar - 1 teaspoon salt - Fresh cilantro, chopped (for garnish) - Lime wedges (for serving) For seasonings, brown sugar adds a hint of sweetness. It balances the tartness of the lime. Salt is key to enhancing the flavors. Fresh cilantro adds a pop of color and a fresh taste. Finally, serve lime wedges on the side for those who want more zing. This coconut lime rice is a delightful dish. It pairs well with many meals, making it a great side. Check out the Full Recipe for details. First, rinse the jasmine rice. Rinsing helps remove excess starch. This step keeps the rice fluffy. Run cold water over the rice until it runs clear. Next, grab a medium saucepan. Combine the rinsed rice with coconut milk, vegetable broth, lime zest, brown sugar, and salt. Stir everything together for an even mix. Now, bring the mixture to a boil. Set your heat to medium-high. Once it bubbles, reduce the heat to low. Cover the saucepan and let it simmer. Cooking time is about 15 to 18 minutes. The rice will absorb the liquid and become tender. After cooking, take the saucepan off the heat. Let it sit covered for five minutes. This steaming step is key for fluffy rice. After resting, fluff the rice gently with a fork. This separates the grains nicely. Now, mix in the lime juice for a zesty flavor. Taste the rice, and adjust the salt or lime juice if you want. Serve the coconut lime rice warm. Garnish with fresh cilantro and lime wedges on the side. This adds a bright touch to each bite. For the full recipe, check out the earlier section. Rinsing the rice is key. This step removes extra starch. Clean rice will be fluffy and light. Rinse under cold water until it runs clear. Adjusting the liquid is also important. If you want creamier rice, use more coconut milk. For a lighter texture, add more broth or water. Always check the rice for doneness. You can add spices or herbs for extra flavor. Try garlic powder for warmth or cumin for earthiness. Fresh herbs like cilantro brighten the dish. Want to switch it up? Go sweet or savory. Add diced mango for a sweet twist. For a savory note, mix in sautéed onions or peppers. Explore these flavor paths to make this dish your own. Enjoy the full recipe for more details! {{image_2}} You can change a few things in this recipe to suit your taste. First, try using different types of rice. While jasmine rice gives a nice aroma, basmati or brown rice can also work. Just note that cooking times will vary. Brown rice will take longer to cook, so adjust your time accordingly. Next, think about coconut milk alternatives. If you're looking for a lighter option, try using light coconut milk. You can even use almond milk or oat milk for a unique flavor. Just remember that using these alternatives may change the taste slightly. Want to make your coconut lime rice even more exciting? Try adding tropical fruits like mango or pineapple. These fruits add sweetness and color, making your dish pop. Chop them finely and mix them in before serving for a fresh burst of flavor. You can also experiment with different herbs. Fresh mint or parsley can brighten your rice. Just chop them finely and mix them in at the end. This twist adds a new layer of flavor that makes the dish even more appealing. For the complete process, check out the Full Recipe. To keep coconut lime rice fresh, store it in the fridge right away. Let it cool first. Place it in an airtight container. This helps keep out moisture and air. I recommend using glass or BPA-free plastic containers. They work great for storage and reheating. If you want to save your coconut lime rice for later, freezing is a good option. Pack the rice in freezer-safe bags. Press out as much air as possible before sealing. Label the bags with the date. You can freeze it for up to three months. To reheat, take the rice out of the freezer. Let it thaw in the fridge overnight. You can also use a microwave. Add a splash of water to keep it moist. Heat in short bursts, stirring in between. Enjoy your fluffy rice just like fresh! To make Coconut Lime Rice vegan, simply use vegetable broth. This replaces chicken broth, keeping it plant-based. The coconut milk is already vegan, so you're all set! You’ll enjoy the same creamy texture and flavor without any animal products. Yes, you can use brown rice instead of jasmine rice. However, remember that brown rice takes longer to cook. It needs more water, too. Adjust the cooking time to about 40-45 minutes. The flavor will change slightly, but it will still taste great! Coconut Lime Rice goes well with many dishes. Here are a few great pairings: - Grilled shrimp or fish - Spicy chicken or pork - Stir-fried vegetables - Tacos or burritos - Curry dishes Each of these dishes complements the rice's rich and tangy flavor. Enjoy mixing and matching! Absolutely! You can boost the flavor in many ways. Consider adding: - Minced garlic or shallots while cooking - Fresh herbs like mint or basil - Spices such as cumin or turmeric These additions will enhance the taste and make it even more delicious. Store leftover Coconut Lime Rice in an airtight container. It stays good in the fridge for 3-4 days. If you want to keep it longer, you can freeze it for up to a month. Just make sure to thaw it properly before reheating. Yes, you can reheat it easily! Use a microwave or a saucepan. Add a splash of water or broth to help it steam and stay fluffy. Heat it slowly, stirring occasionally. This keeps the rice moist, just like when it was freshly made. Yes, Coconut Lime Rice is gluten-free! All the ingredients are naturally free from gluten. You can enjoy this dish without worry. It's a perfect side for anyone avoiding gluten in their diet. Coconut Lime Rice is a simple, tasty dish. We covered its main ingredients, like jasmine rice and coconut milk, and how to cook it. Tips for adjusting flavors and storage give you extra help. You can even swap ingredients for fun twists. Making this dish opens doors to delicious meals. Enjoy trying different flavors and storing leftovers. Your kitchen will burst with taste and joy!

Coconut Lime Rice Delightfully Fluffy Side Dish

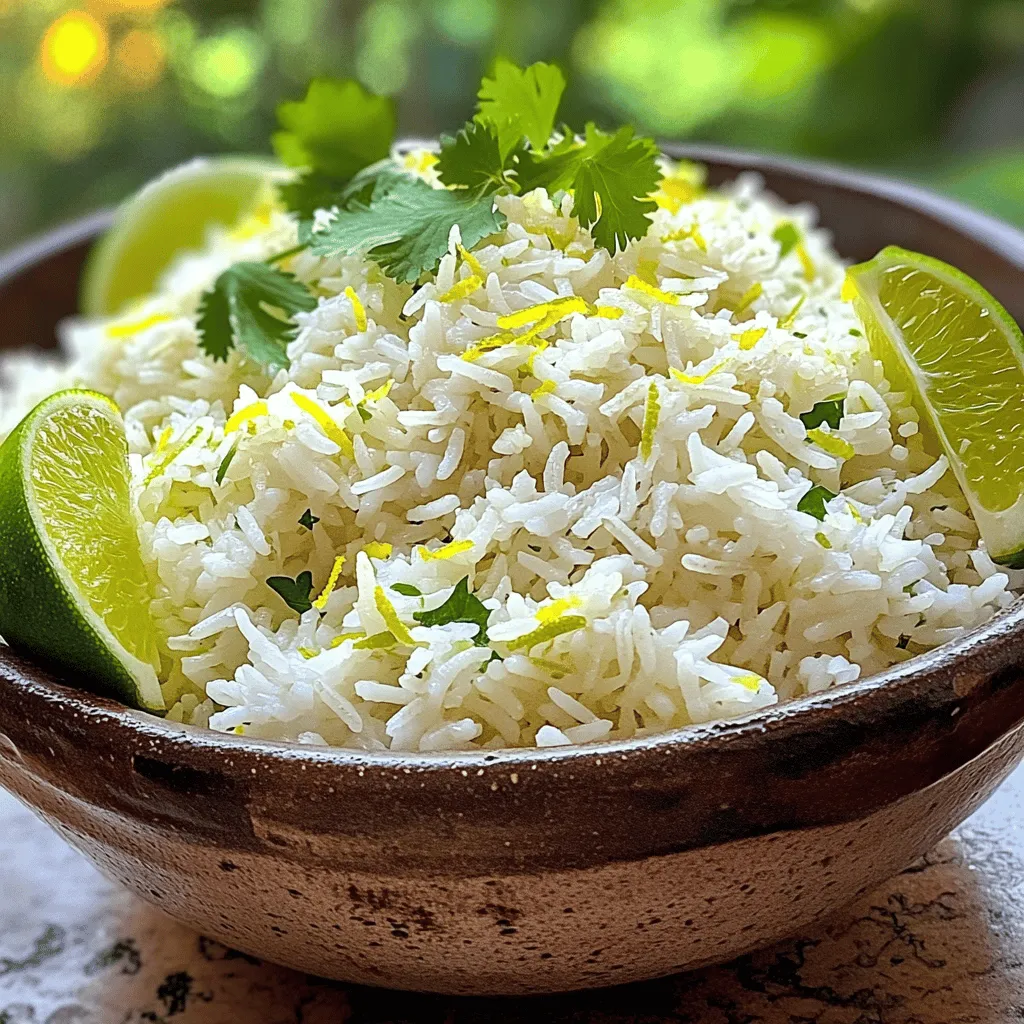
Coconut Lime Rice is a dish that brings sunshine to your table. With fluffy jasmine rice, creamy coconut milk, and

To make Healthy Spinach and Feta Wraps, gather the following items: - 4 large whole wheat tortillas - 2 cups fresh spinach, washed and roughly chopped - 1 cup feta cheese, crumbled - 1 red bell pepper, thinly sliced - 1/2 cucumber, thinly sliced - 1/4 red onion, finely minced - 1 avocado, sliced - 2 tablespoons hummus (plain or garlic flavor) - 1 tablespoon lemon juice - Salt and pepper to taste - 1/4 teaspoon garlic powder (optional) These ingredients come together to create a tasty and healthy meal. You can add a few extras to boost the taste of your wraps: - Fresh herbs like parsley or dill - A drizzle of olive oil - Sun-dried tomatoes for a tangy twist - Chopped olives for a salty kick Feel free to mix and match these items to suit your taste. Each wrap is packed with nutrients. Here’s a quick look at the nutrition values per serving: - Calories: 300 - Protein: 10g - Carbohydrates: 35g - Dietary Fiber: 8g - Sugars: 3g - Fat: 14g These wraps are not only delicious but also provide a balanced meal option. Enjoy making these wraps, and explore the [Full Recipe] for detailed instructions! To start, take your whole wheat tortillas. Place them flat on a clean surface. Spread 1/2 tablespoon of hummus on each tortilla. Leave a small space at the edges. This helps keep the filling from spilling out. In a medium bowl, combine the fresh spinach and crumbled feta cheese. Add in the sliced red bell pepper, cucumber, red onion, and avocado. Pour in the lemon juice. Season with salt and pepper. If you like, add garlic powder for more flavor. Gently mix all the ingredients together until they are well combined. Now, it's time to put it all together. Take a tortilla with hummus and place the filling on top. Spread it out evenly. Fold the sides of the tortilla inward. Then roll it up tightly from the bottom to the top. Make sure the filling stays inside as you roll. Slice the wrap in half diagonally for easy eating. You can serve it with extra hummus on the side. For the full recipe, check out the Healthy Spinach and Feta Wraps section. To make the best healthy spinach and feta wraps, choose fresh ingredients. Look for bright green spinach leaves. They should feel crisp and firm. The feta cheese should be soft and creamy. Check for a good smell. For the red bell pepper, pick one that is shiny and firm. A fresh cucumber will have a smooth skin. Soggy wraps ruin the fun of eating. To keep your wraps crisp, spread hummus on the tortillas, not too thick. Use less watery veggies, like cucumber. You can also layer ingredients wisely. Place dry ingredients first, and then add wetter ones. This keeps moisture away from the tortilla. A pretty wrap makes the meal feel special. Slice each wrap in half for easy eating. Arrange them on a bright platter. You can garnish with extra feta or lemon slices. This adds color and makes it more inviting. For extra flair, drizzle a little olive oil on top. This enhances the look and taste. You can find the full recipe to make these delicious wraps. Enjoy your cooking! {{image_2}} You can switch up the fillings in your spinach and feta wraps. Try adding grilled chicken or turkey for more protein. For a twist, use roasted vegetables like zucchini or eggplant. You can even add beans for fiber and a heartier meal. Mix and match your favorites to keep things fresh. These wraps are easy to make vegetarian or vegan. For a vegetarian option, keep the feta cheese. If you want a vegan wrap, swap the feta for avocado or a nut-based cheese. Hummus is already vegan, so you’re good there. This way, everyone can enjoy a tasty wrap! If you like a kick, add some heat to your wraps. Chopped jalapeños or a pinch of red pepper flakes can do the trick. You might also mix in a spicy hummus or a drizzle of sriracha. Just remember to taste as you go. You can always add more, but you can't take it out! Explore these variations to make your wraps exciting and full of flavor. For the complete recipe, check out the Full Recipe section. After making your healthy spinach and feta wraps, you may have some leftovers. To store them, wrap each one in plastic wrap or foil. This keeps the wraps fresh and helps prevent them from drying out. Place the wrapped wraps in an airtight container. You can keep them in the fridge for up to three days. If you notice any sogginess, eat them sooner. If you want to save your wraps for later, freezing is a great option. First, wrap each wrap tightly in plastic wrap. Then, place them in a freezer-safe bag or container. Make sure to label the bags with the date. These wraps can stay in the freezer for about one month. When you are ready to eat them, simply thaw in the fridge overnight. To enjoy your wraps again, you can reheat them easily. Unwrap the wrap from plastic or foil. Use a microwave for quick heating. Heat on high for about 30 seconds to one minute. If you prefer a crispy texture, warm them in a skillet over medium heat. Cook for about 2-3 minutes on each side. This way, the wraps stay tasty and fresh, just like when you first made them. For the full recipe, check out the ingredients and instructions above! You can use goat cheese, ricotta, or even cottage cheese. Each adds a unique taste. Goat cheese is creamy and tangy. Ricotta gives a light and fluffy feel. Cottage cheese is mild but still tasty. Try them out to see what you like best! Yes, you can! Just prepare the filling and store it in a sealed container. Spread the hummus on the tortillas when you are ready to eat. This keeps the wraps fresh and prevents them from getting soggy. They taste great even if made a few hours in advance. The wraps stay fresh for about two days in the fridge. Make sure to wrap them tightly in plastic wrap or foil. This helps keep them from drying out. If you notice any change in smell or texture, it’s best to throw them away. Enjoy your Healthy Spinach and Feta Wraps! For the full recipe, click here. In this article, we explored how to make tasty spinach and feta wraps. We focused on key ingredients, easy instructions, and creative variations to suit any taste. I shared tips for fresh veggies, preventing soggy wraps, and great ways to present your dish. We also covered storage and FAQs to help you enjoy your wraps longer. Now, it’s your turn to try these ideas in your kitchen. Enjoy making delicious wraps that everyone will love!

Healthy Spinach and Feta Wraps Tasty and Quick Meal

Are you looking for a quick meal that’s both tasty and healthy? You’re in the right place! My Healthy Spinach

- 2 ripe mangos, diced - 1 large red bell pepper, finely chopped - 1 small red onion, finely chopped - 1-2 habanero peppers, deseeded and minced (adjust for spice preference) - 1/4 cup fresh cilantro, chopped - Juice of 2 limes - Salt to taste Choosing ripe mangos is key. Look for fruit that gives slightly when pressed. They should smell sweet and fruity. Fresh cilantro adds bright flavor. Dried cilantro is not the same. For spice, you can adjust the habaneros. Start with one if you want mild heat. Taste as you go. This salsa is low in calories. A serving has about 50 calories. Mangos provide vitamin C and A. The red bell pepper adds more vitamin C. Habaneros have capsaicin, which may boost metabolism. Enjoy this salsa for a tasty, healthy treat! {{ingredient_image_1}} 1. Peeling and dicing mangos: Start with ripe mangos. Cut off the skin with a knife. Hold the mango steady. Slice the flesh off the seed. Dice the mango into small cubes. This gives a nice texture in your salsa. 2. Chopping bell pepper and onion: Take the red bell pepper. Cut it in half and remove the seeds. Chop it finely into small pieces. Next, do the same with the red onion. Finely chop it to mix well with the other ingredients. 3. Minced habanero handling tips: Habaneros are spicy. Wear gloves when you handle them. Remove the seeds for less heat. Mince them finely after removing the seeds. Be careful not to touch your face afterward. 1. Order of ingredient mixing: In a mixing bowl, add the diced mango first. Then, add the chopped bell pepper and onion. Finally, add the minced habanero. This order helps each flavor stand out. 2. How to avoid mashing the mango: Mix gently with a spoon. Use a folding motion, not stirring hard. This way, you keep the mango cubes intact. 3. Best practices for seasoning: After mixing, add fresh cilantro and lime juice. Then, sprinkle salt over the top. Taste the salsa and adjust the salt. You can also add more habanero if you like it spicier. 1. Importance of refrigeration: Cover the bowl and place it in the fridge. Let it chill for at least 30 minutes. This step is key for flavor development. 2. Description of flavor melding process: The cold allows the flavors to blend. The sweet mango, spicy habanero, and tangy lime mix beautifully. You’ll notice a richer taste after it sits. Enjoy the salsa with chips or on your favorite dish! - For chopping mangos, try using a large spoon. Scoop out the flesh easily. - Use a sharp knife to finely chop the red onion and bell pepper. - Fresh ingredients make the salsa pop! Choose ripe mangos and bright cilantro. - Serve this salsa with tortilla chips for a tasty snack. - Try it on grilled chicken or fish for added flavor. - Use it as a topping for tacos or nachos for a fresh twist. - Use a bright bowl to serve your salsa; it makes it eye-catching. - Garnish with extra cilantro and lime wedges for a fresh look. - Arrange colorful ingredients neatly for a fun display on the table. Pro Tips Choose the Right Mango: For the best flavor, select mangos that are slightly soft to the touch and have a sweet aroma. Ataulfo or Haden varieties are excellent choices for salsas. Control the Heat: If you prefer a milder salsa, make sure to remove all the seeds from the habanero peppers and start with just one. You can always add more later if needed! Let It Rest: Allowing the salsa to chill in the fridge for at least 30 minutes helps the flavors meld together beautifully, enhancing the overall taste. Experiment with Additions: Feel free to customize your salsa by adding diced avocado, pineapple, or even a splash of coconut water for a tropical twist! {{image_2}} To adjust the heat in your salsa, consider using jalapeños instead of habaneros. Jalapeños provide a milder spice that still adds flavor. They work well for those who want a kick without too much heat. You can also add spices like cumin or smoked paprika. These spices add depth and warmth, balancing the sweetness of the mango. You can get creative by adding fruits like pineapple or peach. These fruits bring a different sweetness that pairs well with the heat. Try mixing in black beans or corn for added texture. They give your salsa a hearty feel and make it more filling. For festive occasions, think about holiday-inspired flavors. You could add cranberry or pomegranate for a seasonal twist. If you want a tropical vibe, mix in coconut or lime zest. For a Tex-Mex twist, add corn and black beans, giving it a heartier flair. Each variation allows you to explore new tastes while keeping the fresh essence of your salsa. To keep your Mango Habanero Salsa fresh, use an airtight container. Glass or plastic containers work well. Make sure to seal it tightly to prevent air from getting in. Store your salsa in the fridge right after making it. It tastes best when chilled. Mango Habanero Salsa lasts about 3 to 5 days in the fridge. Check for signs that it has gone bad. If you see mold or a sour smell, it’s time to toss it. Fresh salsa should smell bright and fruity. You can freeze Mango Habanero Salsa for up to 3 months. Follow these steps: - Pour the salsa into a freezer-safe container, leaving room for expansion. - Seal the container tightly to avoid freezer burn. - Label and date the container for easy reference. When you’re ready to use it, thaw the salsa in the fridge overnight. Stir well before serving. The flavor will still be great, but the texture may change slightly. To lower the spice in your salsa, use fewer habanero peppers. Start with just one. You can also remove the seeds, which hold a lot of heat. Another way is to add more mango or red bell pepper. This will balance the spice with sweetness. If it’s still too hot, try adding avocado or sour cream. These creamy ingredients help cool down the heat. Yes, you can use canned mangos. They save time and are easy to use. However, fresh mangos taste better and have a better texture. Canned mangos are often softer and may change the salsa's crunch. When using canned mangos, drain them well to avoid extra liquid in your salsa. Mango Habanero Salsa is great with many dishes. Serve it with tortilla chips for a fun snack. It pairs best with grilled chicken or fish, adding a fresh kick. You can also use this salsa on tacos or burrito bowls. For a twist, try it on a salad or as a topping for burgers. Mango Habanero Salsa is a bright mix of ripe mangos, fresh veggies, and spices. Remember to choose ripe fruits and adjust spice levels to suit your taste. Preparation and storage play key roles in keeping your salsa fresh and tasty. Incorporate new ingredients or change up the heat for a fun twist. Enjoy this dish with your favorite meals or try unique serving ideas. The options are endless, and with these tips, your salsa will always shine. Enjoy creating your own fresh flavors!

Mango Habanero Salsa Flavorful and Fresh Delight

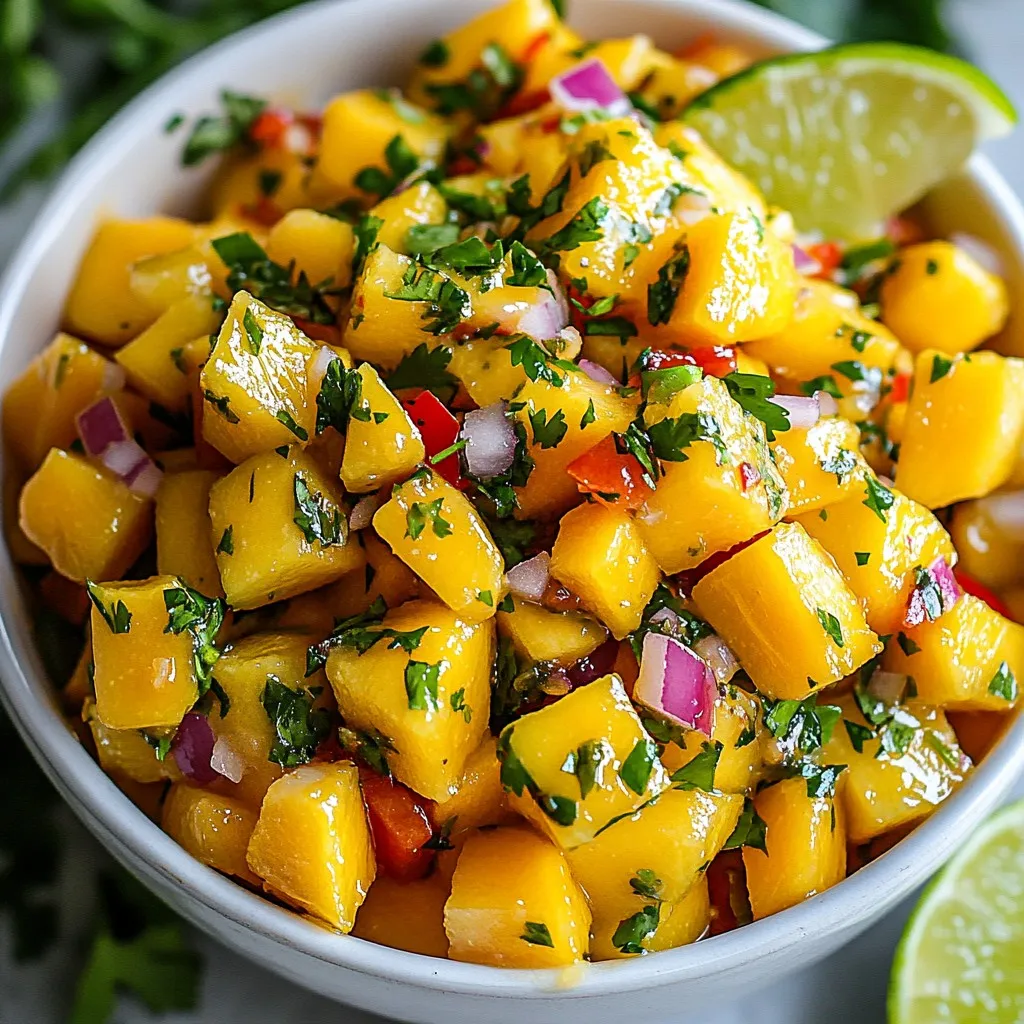
If you’re craving a burst of flavor, look no further than Mango Habanero Salsa. This fresh and zesty dish combines

To make a delicious creamy avocado pasta, you need fresh and simple ingredients. Here’s what you will need: - 2 ripe avocados - 2 cloves garlic, minced - 1 tablespoon lemon juice - 1/4 cup fresh basil leaves, packed - 1/2 cup Greek yogurt (or vegan alternative) - 3 tablespoons olive oil - Salt and pepper to taste - 12 oz spaghetti or your choice of pasta - 1/4 cup grated Parmesan cheese (optional) - Cherry tomatoes and extra basil for garnish Each ingredient plays a key role. The avocados give a smooth texture. Garlic adds flavor. Lemon juice brings brightness. The Greek yogurt makes it creamy. Olive oil adds richness. Salt and pepper enhance all the tastes. I always recommend using ripe avocados. They should feel soft but not mushy. Fresh basil adds a lovely smell and taste. If you want to make it vegan, swap Greek yogurt for a plant-based option. This creamy avocado pasta is a full meal. It’s quick to prepare, taking about 20 minutes. You can find the full recipe for step-by-step guidance. Enjoy creating this simple and tasty dish! - Start by boiling salted water in a large pot. - Add 12 oz of spaghetti and cook it as the package says. - Once done, reserve 1 cup of the pasta water before draining. - While the pasta cooks, scoop the flesh from 2 ripe avocados. - Put the avocado in a food processor. - Add 2 cloves of minced garlic, 1 tablespoon of lemon juice, and 1/4 cup of fresh basil. - Next, add 1/2 cup of Greek yogurt and 3 tablespoons of olive oil. - Blend everything until it becomes smooth and creamy. - If the sauce seems too thick, add some reserved pasta water to thin it out. - In a large mixing bowl, toss the cooked pasta with the creamy avocado sauce. - Mix gently to coat the pasta evenly. - If the sauce sticks, add more reserved pasta water to help it coat. For the full recipe, check out the complete details above. - Look for ripe avocados that yield slightly when pressed. - Avoid avocados with dark spots or blemishes. When I pick avocados, I gently press them. They should feel soft but not mushy. Ripe avocados are key to making creamy pasta. Dark spots mean they may be overripe, which can spoil your dish. - Experiment with additional herbs or spices like chili flakes. - Drizzle with balsamic glaze for a tangy finish. Adding flavors can make your dish pop. I love using fresh herbs like parsley or basil. A sprinkle of chili flakes adds warmth and spice. A drizzle of balsamic glaze gives a nice tang. It balances the creaminess and makes it special. - Add lemon juice to prevent browning of the avocado sauce. Lemon juice is a must for keeping the sauce fresh. It stops the avocado from turning brown. Just a tablespoon in the sauce works wonders. This way, your pasta stays vibrant and inviting. {{image_2}} You can make this dish vegan by swapping out the Greek yogurt. Use a plant-based yogurt instead. Nutritional yeast gives a cheesy flavor without dairy. It works perfectly with the creamy avocado. Want more protein? You can add grilled chicken or chickpeas. Grilled chicken adds a nice texture. Chickpeas are a great plant-based option. Both choices make the meal heartier and more filling. If you prefer gluten-free meals, no problem! Just use gluten-free pasta. There are many tasty options available now. This way, you can enjoy your creamy avocado pasta without worry. Keep any leftovers in an airtight container in the fridge for up to 2 days. This will help maintain the fresh taste and creamy texture. If you store it right away, it will taste just as good the next day. When you are ready to enjoy the pasta again, reheat it gently. Use a pan on low heat. Add a splash of water to the pan. This helps loosen the sauce so it does not dry out. Stir often to keep it creamy and warm. Freezing is not recommended for this dish. The texture of the avocado sauce changes when frozen. It may become grainy and lose its smoothness. For the best flavor and texture, enjoy it fresh! If you want to make it ahead, prepare the sauce separately and store it in the fridge. You can cook the pasta fresh when you are ready to eat. Simply substitute Greek yogurt with a vegan alternative and omit cheese. You can use cashew cream or silken tofu for creaminess. This change keeps the dish rich without dairy. Your pasta will still taste great! Yes, feel free to use any pasta of your choice, including gluten-free options. Spaghetti works well, but you can try penne or fusilli. Each type gives a unique twist to your creamy avocado pasta. Avocados are rich in healthy fats, vitamins, and antioxidants. They support heart health and provide fiber. Eating avocados may help lower cholesterol levels and keep you full longer. This makes them a great choice for a healthy meal. Best consumed within 2 days for optimal freshness and creaminess. The sauce may brown after a day, but lemon juice helps slow this down. Store it in an airtight container to keep it fresh longer. Enjoy your creamy avocado pasta while it’s at its best! This creamy avocado pasta is simple and delicious. You only need ripe avocados, fresh herbs, and Greek yogurt. Following the easy steps makes cooking fun. Remember to pick good avocados and adjust the sauce for the best taste. Trying different proteins or vegan options can make this dish even better. Store leftovers in the fridge for a quick meal. Enjoy your cooking and make it your own!

Creamy Avocado Pasta Delightfully Simple Meal

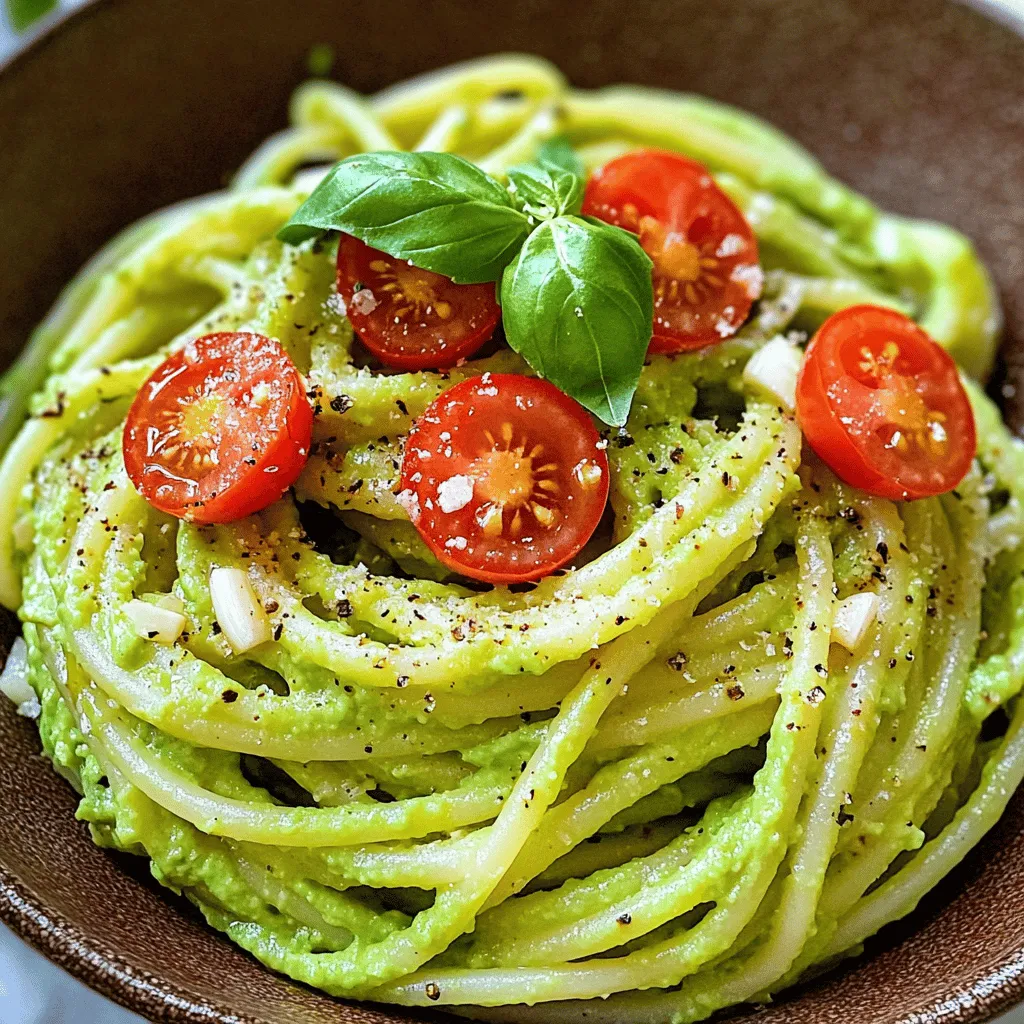
Looking for a quick and tasty meal? Creamy Avocado Pasta is your answer! This dish combines ripe avocados with fresh

- 1 can (15 oz) chickpeas - 2 tablespoons olive oil - 1 teaspoon smoked paprika - 1 teaspoon ground cumin - 1/2 teaspoon cayenne pepper - 1/2 teaspoon garlic powder - Salt and pepper to taste - 1 medium onion - 1 bell pepper - 1 teaspoon lime juice - 8 small corn or flour tortillas - Fresh cilantro, avocado slices For this spicy chickpea tacos recipe, you need simple yet tasty ingredients. Chickpeas are the star here. They bring protein and fiber to your meal. Olive oil adds richness. Smoked paprika and cumin give a warm, smoky flavor. If you like heat, cayenne pepper kicks it up a notch. Garlic powder adds depth, while salt and pepper balance everything out. Don't forget the veggies! A medium onion and a bell pepper add crunch and freshness. Lime juice adds a zesty touch. For the perfect taco, use small corn or flour tortillas. They hold everything together nicely. Top with fresh cilantro and avocado for extra taste and creaminess. You can check out the full recipe for all the details on how to prepare these delicious tacos! 1. Start by mixing the chickpeas in a bowl. 2. Add olive oil, smoked paprika, cumin, cayenne, garlic powder, salt, and pepper. 3. Toss them well until every chickpea is coated. 4. Heat a large skillet over medium heat. 5. Add the seasoned chickpeas and cook for 5-7 minutes. 6. Stir occasionally until they become crispy. 1. Next, add diced onion and bell pepper to the skillet. 2. Sauté the mixture for about 5 minutes. 3. Cook until the vegetables are soft and fragrant. 1. Warm your tortillas in a dry skillet or microwave. 2. Take each tortilla and fill it with the spicy chickpea mixture. 3. Top with fresh avocado slices and chopped cilantro. 4. Add salsa or hot sauce if you like more heat. 5. Serve the tacos right away for the best taste. For a detailed look at the recipe, check out the Full Recipe. - Adjusting spice levels for personal taste: Start with less cayenne pepper. You can always add more. Mix in some lime juice for extra zest and balance. - Ensuring even cooking of chickpeas: Make sure to stir your chickpeas often. This helps them cook evenly and get a nice crisp. - Serving suggestions for an appealing presentation: Use a large platter. Arrange the tacos neatly for a beautiful display. - Using colorful toppings: Add diced tomatoes, shredded cabbage, or bright radishes. This adds color and makes your meal fun to eat. - Prepping ingredients ahead of time: Chop veggies and measure spices before cooking. This keeps things quick and easy. - Quick heating methods for tortillas: Use a microwave or a dry skillet. Both methods warm tortillas fast, so you can serve your tacos right away. For the full recipe, check out the Spicy Chickpea Tacos section. {{image_2}} You can mix things up with different beans or legumes. Try black beans or lentils. They both work well and add a unique taste. If you want a fresh twist, swap tortillas for lettuce wraps. This makes the tacos lighter and adds a crunch. To change the heat, adjust the cayenne pepper. Start with less if you prefer mild tacos. You can also add spicy elements like jalapeños. Slice them thin and mix them in for extra heat. Different salsas can elevate your tacos. A mango salsa adds sweetness, while a tomatillo salsa gives a tangy kick. For side dishes, try a simple corn salad or rice. These pair well and help round out the meal. For the full recipe, check out the cooking instructions you can follow step by step. To store leftover chickpea filling, let it cool first. Place it in an airtight container. This keeps moisture in and prevents drying out. The chickpea filling lasts about 3 to 5 days in the fridge. Just make sure to check for any off smells before using. You can reheat the chickpea mix in a skillet over medium heat. Stir it often to keep it from sticking. You can also use a microwave for quick reheating. Just place it in a bowl and cover with a damp paper towel. This helps keep the filling moist and tasty. To freeze the filling, let it cool completely. Then, place it in a freezer-safe bag. Squeeze out as much air as possible before sealing. You can store it for up to 3 months. When ready to use, thaw it in the fridge overnight. Reheat as mentioned before for delicious tacos again. Enjoy your Spicy Chickpea Tacos anytime! For the full recipe, check the earlier section. It takes about 20 minutes to make Spicy Chickpea Tacos. You need 10 minutes to prep and another 10 minutes to cook. This quick meal is perfect for busy nights. Yes, you can prep these tacos ahead of time. Cook the chickpeas and veggies, then store them in the fridge. Warm them up when you are ready to serve. You can also chop the toppings in advance. One serving has about 300 calories. You’ll get around 10 grams of protein, plus fiber from the chickpeas. The tacos are also rich in vitamins from the veggies. This makes them a healthy choice. Absolutely! The Spicy Chickpea Tacos are vegan-friendly. All the ingredients, like chickpeas and veggies, are plant-based. You can enjoy a delicious meal without any animal products. For the full recipe, check out the main section. In this post, we explored how to make Spicy Chickpea Tacos. We discussed the key ingredients, such as chickpeas and spices. I shared step-by-step instructions for preparing and cooking. You learned tips for presentation and time-saving tricks. Lastly, I covered storage and variations to suit your taste. These tacos are easy, delicious, and perfect for everyone. Enjoy making them your own!

Spicy Chickpea Tacos Flavorful and Quick Meal Ideas

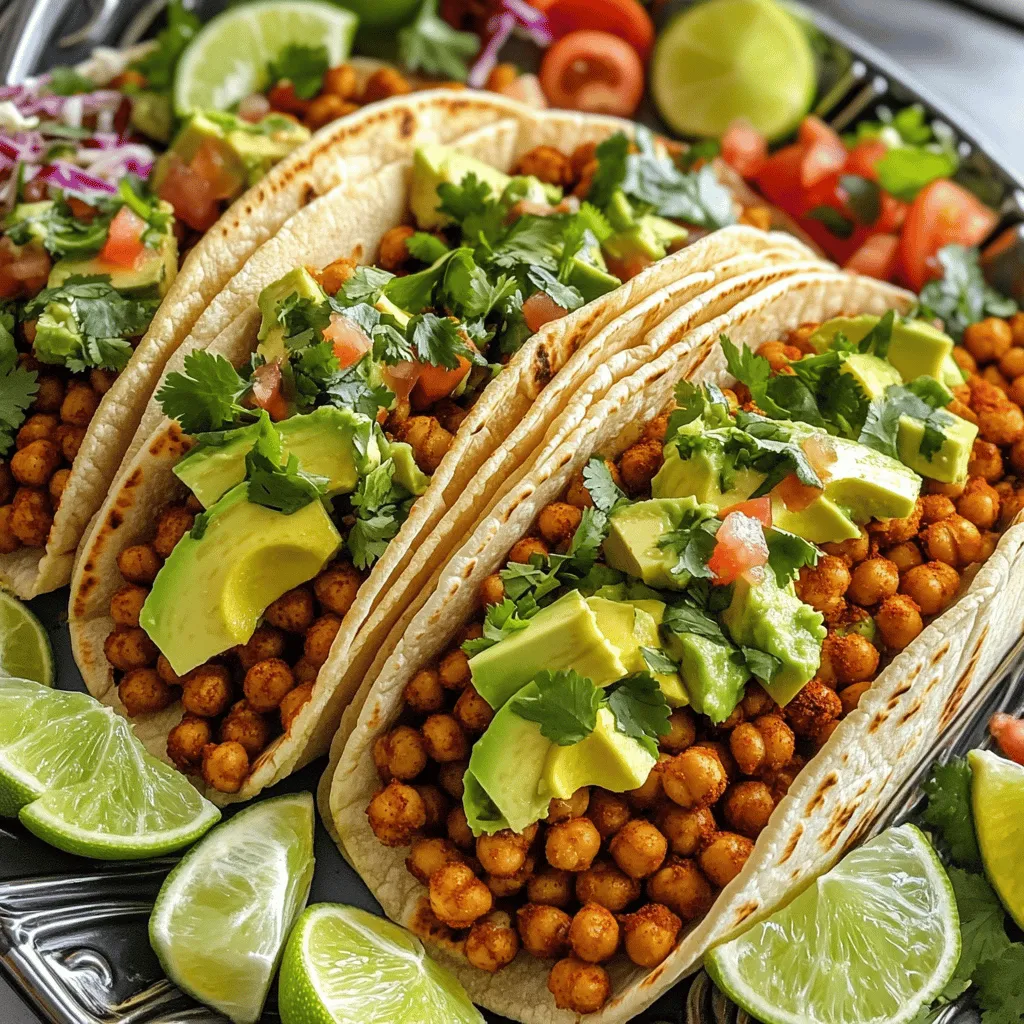
Looking for a quick and tasty meal? Try my Spicy Chickpea Tacos! Packed with flavor and ready in no time,

- 1 cup quinoa, rinsed - 2 cups vegetable broth (or water) - 1 cup cherry tomatoes, halved - 1 cucumber, diced - 1 bell pepper (any color), diced - 1 cup corn (fresh or frozen) - 1 carrot, grated - 1/4 cup red onion, finely chopped - 1/4 cup fresh parsley, chopped - 3 tablespoons olive oil - 2 tablespoons lemon juice - 1 teaspoon Dijon mustard - Salt and pepper to taste Quinoa serves as the base of this salad. It is light and fluffy. The assorted vegetables add color and texture. Each vegetable brings unique flavors. Cherry tomatoes burst with sweetness. Crunchy cucumbers offer freshness. Bell peppers add a sweet crunch. Corn brings a touch of sweetness too. Grated carrot adds a nice crunch, while the red onion adds a hint of sharpness. Fresh parsley ties everything together with its herbal note. - 1/4 cup feta cheese, crumbled (optional) - Additional herbs for flavor Feta cheese adds a creamy, salty kick. You can use any cheese you love. Fresh herbs, like basil or mint, offer more flavor. Feel free to mix and match to suit your taste. - Mixing bowls - Saucepan - Whisk You need a saucepan to cook the quinoa. Mixing bowls help combine the ingredients. A whisk is key for mixing the dressing smoothly. Having these tools ready makes cooking easier. For the full recipe, check the instructions above to guide you through this fun cooking journey. To start, you need to cook the quinoa. First, combine 1 cup of rinsed quinoa with 2 cups of vegetable broth or water in a medium saucepan. This will give your quinoa flavor. Bring it to a boil over high heat. Once it boils, reduce the heat to low. Cover the pot and let it simmer for about 15 minutes. The quinoa will be fluffy and the liquid will be absorbed when done. Remove it from heat and let it cool. While the quinoa cooks, it’s time to prep your vegetables. You want fresh veggies for the best taste. Begin with the cherry tomatoes. Cut them in half. Then, dice your cucumber and bell pepper into small pieces. Grate the carrot for a nice texture. Finally, finely chop the red onion and parsley. Keeping your cuts even makes the salad look great. Next, let’s make the dressing. In a small bowl, add 3 tablespoons of olive oil, 2 tablespoons of lemon juice, and 1 teaspoon of Dijon mustard. Use a whisk to mix these ingredients well. The goal is to blend them into a smooth dressing. Taste it and adjust the salt and pepper. You can add more lemon juice for zing if you like. Now, it’s time to assemble the salad. In a large mixing bowl, combine the cooled quinoa with the chopped veggies, grated carrot, and parsley. Gently toss everything together. This helps mix the flavors without crushing the ingredients. For the final touch, pour the dressing over the salad. Toss it again to make sure all the ingredients are well coated. If you want to add feta cheese, sprinkle it on top and mix gently. Now, taste the salad. Adjust the seasoning if needed. To enhance the flavors, chill the salad in the fridge for at least 30 minutes before serving. This step lets the flavors blend beautifully. You can find the Full Recipe for more details. - Gluten-Free Options Quinoa is naturally gluten-free. You can swap in rice or millet if you prefer. Both grains work well in this salad. - Vegan Alternatives For a vegan version, skip the feta cheese. You can use avocado for creaminess instead. Nutritional yeast adds a cheesy flavor too. - Best Pairings with the Salad This salad pairs well with grilled chicken or fish. It also goes nicely with a bowl of soup. A side of crusty bread makes a great addition. - Ideal Presentation Ideas Serve the salad in a colorful bowl for a vibrant look. Garnish with fresh herbs on top. A lemon wedge adds a bright touch. - Using Spices Experiment with spices like cumin or paprika. A pinch of chili powder can add a nice kick. Fresh herbs like basil or cilantro can boost flavor. - Adding Crunch Toss in some nuts or seeds for crunch. Almonds or pumpkin seeds are good choices. You can also add crispy chickpeas for extra texture. Feel free to check out the Full Recipe for more details! {{image_2}} Spring Variations In spring, use fresh veggies like asparagus, peas, and radishes. These add crunch and color. You can swap in arugula for spinach. This change brings a peppery flavor that brightens your salad. Fall Variations In fall, try roasted butternut squash, Brussels sprouts, or kale. Roasting adds a sweet, warm taste. Toss in some sliced apples or dried cranberries for a sweet touch. These flavors make the salad hearty and satisfying. Adding Grilled Chicken Grilled chicken adds protein and makes the salad filling. Slice the chicken thin and mix it in. This adds a nice smoky flavor that pairs well with the veggies. Plant-Based Proteins For a plant-based option, consider chickpeas or black beans. These add protein and fiber. They also soak up the dressing well, boosting the flavor of the salad. You can also use tofu or tempeh for extra protein. Mediterranean Twist For a Mediterranean version, add olives and sun-dried tomatoes. You can also toss in artichokes for a tangy bite. Use a dressing of olive oil and red wine vinegar for a zesty kick. Mexican-Style Salad For a fun twist, go Mexican! Add black beans, corn, and avocado. A sprinkle of lime juice gives it a fresh taste. You could also use cilantro in place of parsley for a vibrant touch. For the full recipe, check out the full recipe section! How long does vegetable quinoa salad last? It stays fresh for about 3 to 5 days in the fridge. Store it in an airtight container to keep it safe. This will help prevent it from drying out and losing flavor. What are the best storage containers? I recommend using glass containers with tight-fitting lids. They keep your salad fresh and allow you to see the colorful ingredients inside. Plastic containers can also work, but make sure they are BPA-free for safety. Can you freeze vegetable quinoa salad? Yes, you can freeze it, but keep in mind that some veggies may change texture. To freeze, place the salad in a freezer-safe container. Leave some space at the top for expansion. What are the thawing tips? When you're ready to eat, thaw the salad overnight in the fridge. This keeps it safe and helps maintain flavor. Avoid reheating the salad, as fresh veggies lose their crunch when heated. How do you keep ingredients crisp? Store the quinoa and veggies separately if possible. Mix them just before serving. This will help keep the vegetables crunchy and fresh. What about preparing in advance? You can cook quinoa ahead of time and store it in the fridge. Chop the veggies right before serving to maintain their color and taste. This makes meal prep easy while still enjoying fresh flavors. Quinoa is a tiny seed that cooks like a grain. It is a great source of protein. - Nutritional Benefits: - High in protein and fiber - Contains all nine essential amino acids - Gluten-free and rich in vitamins Quinoa is not only a grain but also a superfood. It has more protein than rice or pasta. This makes it a smart choice for meals. - Cooking vs. Other Grains: Quinoa cooks faster than brown rice. It takes about 15 minutes to cook. Other grains may take longer to prepare. Quinoa has a nice nutty flavor and fluffy texture. You can prep this salad in advance for easy meals. It stays fresh in the fridge for a few days. - Prep Steps for Meal Prep: - Cook quinoa and let it cool - Chop vegetables and store them separately - Mix dressing and keep it in a jar This way, you have all parts ready. Just combine them when you want to eat. - Shortcuts for Busy Schedules: Use canned or frozen veggies for quick prep. Pre-cooked quinoa is also a great option. This saves time and makes cooking easier. Absolutely! Customizing this salad is fun and easy. - Ideas for Customization: - Swap out veggies based on what you like - Add fruits like apples or berries for sweetness You can make the salad your own with your favorite flavors. - Popular Add-ins and Toppings: - Nuts and seeds for crunch - Avocado for creaminess - Grilled chicken or beans for protein Mix and match to create your perfect salad. This salad pairs well with many dishes. - Meal Pairing Ideas: - Serve with grilled chicken or fish - Pair with a warm soup for a cozy meal These options make the salad a great side dish. - Complementary Dishes: - A light vinaigrette or yogurt dressing enhances flavors - Serve with whole-grain bread for a complete meal Enjoy this salad as part of a balanced plate. You can find the full recipe online for more details. This blog post covered how to make a tasty quinoa salad. We discussed key ingredients, like quinoa and fresh veggies. You learned step-by-step instructions for cooking and assembling the salad. We also shared tips for storage and variations to fit your taste. Eating healthy can be simple and fun. Enjoy making this salad your own, and feel free to explore different flavors and ingredients. Your kitchen adventures can lead to tasty meals!

Vegetable Quinoa Salad Fresh and Flavorful Delight

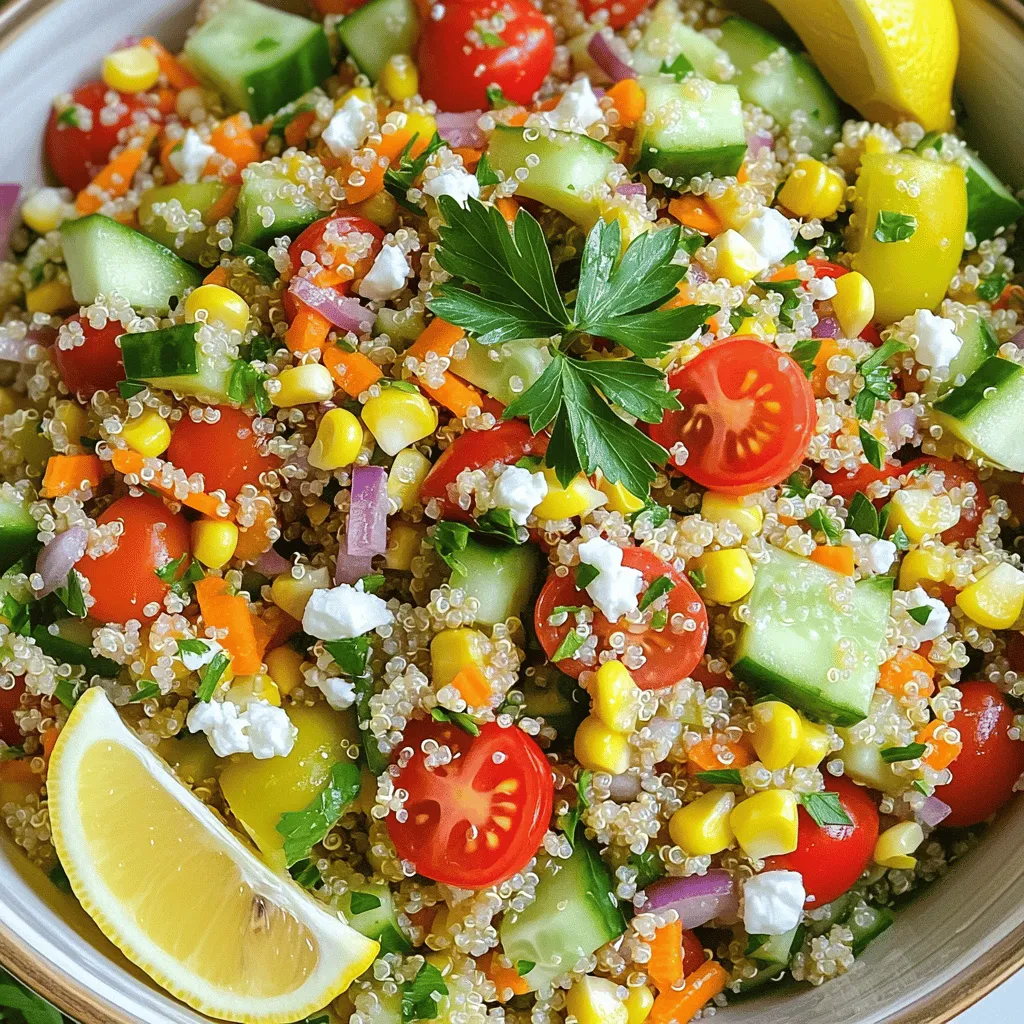
Are you looking for a fresh and easy meal? This Vegetable Quinoa Salad is a perfect choice! Packed with flavor

- 1 cup water - 2 tablespoons granulated sugar - 1/2 teaspoon salt - 1 cup all-purpose flour - 1 tablespoon vegetable oil (plus extra for frying) - 2 large eggs - 1 teaspoon vanilla extract - 1/2 cup granulated sugar (for coating) - 1 tablespoon ground cinnamon To make the perfect cinnamon sugar churros, you need simple ingredients. Water acts as the base. Sugar gives the dough a hint of sweetness. Salt enhances the flavors. All-purpose flour provides structure. Vegetable oil adds richness and helps with frying. Eggs bring moisture and help the churros rise. Vanilla extract adds a lovely aroma. The cinnamon sugar coating makes them irresistible. - Medium saucepan - Deep frying pan or pot - Piping bag with a star-shaped tip - Slotted spoon - Paper towels Having the right tools makes cooking much easier. A medium saucepan helps mix your dough. A deep frying pan or pot is needed for frying. A piping bag with a star-shaped tip shapes the churros just right. A slotted spoon helps you remove churros from the hot oil safely. Paper towels are great for draining excess oil. For the full recipe and step-by-step guide, check out the Full Recipe. - Combine 1 cup of water, 2 tablespoons of sugar, and 1/2 teaspoon of salt in a saucepan. - Bring this mixture to a boil over medium heat. - Remove the saucepan from heat and stir in 1 cup of all-purpose flour and 1 tablespoon of vegetable oil. - Mix until a smooth dough forms. - Let the dough cool for a few minutes. - Add 2 large eggs and 1 teaspoon of vanilla extract. - Stir until the mixture is fully combined and smooth. - Heat vegetable oil in a deep frying pan until it reaches 350°F (175°C). - Transfer the churro dough into a piping bag with a large star-shaped tip. - Squeeze out 6-inch lengths of the dough into the hot oil. - Use scissors to cut each churro as you pipe. - Fry the churros for about 2-3 minutes on each side. - Look for a golden brown color. - Use a slotted spoon to remove them and let them drain on paper towels. - In a bowl, mix 1/2 cup of granulated sugar and 1 tablespoon of ground cinnamon. - While the churros are still warm, roll them in the cinnamon sugar mixture. - Make sure they are fully coated for the best flavor. These steps will help you make crispy, sweet churros that everyone will love. For the complete recipe, check out the Full Recipe section. - The best frying temperature for churros is 350°F (175°C). This heat gives you a crispy outside and a soft inside. - To know when churros are done, look for a golden brown color. They should take about 2-3 minutes on each side. - You can add spices like nutmeg or cayenne pepper for an extra kick. These spices mix well with cinnamon and add a unique twist. - For dietary restrictions, use gluten-free flour instead of regular flour. This change lets more people enjoy churros. - The ideal dipping sauces are chocolate sauce and caramel sauce. These rich flavors pair well with churros. - For presentation, arrange churros on a long plate. Dust them with extra cinnamon sugar. Serve with small bowls of dipping sauce for a fun touch. Try this Full Recipe for a delicious and easy treat! {{image_2}} You can have fun with churro fillings. Here are some great ideas: - Chocolate: Use melted chocolate for a rich treat. - Cream Cheese: Mix cream cheese with sugar and vanilla for a sweet center. To fill churros, you need a pastry bag. After frying, insert the tip into the churro. Squeeze gently to fill it with your choice. This adds a tasty surprise in every bite! Switch up the sugar coating for more fun! You can try: - Vanilla Sugar: Mix vanilla extract into the sugar for a sweet twist. - Cocoa Sugar: Blend cocoa powder with sugar for a chocolatey flavor. For unique coatings, think about rolling churros in crushed nuts or sprinkles. This adds texture and color, making them even more appealing. If you prefer baking, you can make churros in the oven. Here’s how: 1. Preheat your oven to 400°F (200°C). 2. Pipe churros onto a lined baking sheet. 3. Bake for about 20 minutes or until golden. Baking has its pros and cons. Baking is healthier since it uses less oil. However, frying gives churros that perfect crispy texture. Choose what fits your taste best! To keep your churros fresh, store them at room temperature. Place them in an airtight container. Avoid stacking them, as this can make them soggy. If you want to save churros for longer, freeze them. Wrap each churro in plastic wrap, then put them in a freezer bag. This way, they stay fresh for up to two months. To bring back the crispiness, reheating is key. The best way is to use an oven. Preheat the oven to 350°F (175°C). Place churros on a baking sheet and bake for about 5-7 minutes. If you're in a hurry, you can use a microwave. However, they may lose some crunch. Heat churros in 10-second bursts until warm, but avoid overheating. Fresh churros taste best when eaten within a day. If stored properly, they can last for 2-3 days at room temperature. Look for signs of spoilage, like a stale smell or unusual texture. If they feel hard or dry, it's best to toss them. Always trust your senses when checking for freshness. Enjoy your churros, and savor every bite! Yes, you can make the churro dough ahead. Just follow these tips: - Cool the dough: After mixing, let it cool completely. - Store properly: Place in an airtight container. - Refrigerate: Keep it in the fridge for up to 24 hours. - Bring to room temp: Before frying, let the dough sit out for about 30 minutes. For frying churros, you want oil that has a high smoke point. Here are good options: - Vegetable oil: Common and affordable choice. - Canola oil: Neutral flavor and high smoke point. - Peanut oil: Great for flavor and frying at high heat. Churros can lose their crispiness for several reasons. Here are common mistakes: - Not enough heat: Make sure the oil is hot enough (350°F). - Overcrowding the pan: Fry in small batches to maintain temperature. - Under-frying: Fry until golden brown, about 2-3 minutes per side. - Cooling too long: Serve warm for the best texture. Churros have a rich history. They likely originated in Spain. They became popular in Latin America as well. They are often enjoyed for breakfast or as a snack. Churros are a symbol of comfort and tradition in many cultures. Yes, making gluten-free churros is easy! Here are some flour alternatives: - Almond flour: Adds a nutty flavor. - Coconut flour: Sweet and low in carbs. - Gluten-free all-purpose flour: Use a blend that contains xanthan gum for best results. For the full recipe, check the [Full Recipe]. In this blog post, we explored how to make delicious cinnamon sugar churros. We covered the main ingredients, the essential equipment, and step-by-step instructions for perfecting your churros. We also shared tips for texture, flavor, and presentation. With variations like filled churros and baking options, you can customize your treat. Finally, we discussed storage and reheating methods to keep your churros fresh. Enjoy making these tasty treats and impress your friends and family!

Cinnamon Sugar Churros Irresistible Sweet Treat Recipe

Are you ready to dive into a world of sweet, crispy goodness? In this post, I’ll show you how to

- 1 lb large shrimp, peeled and deveined - 4 tablespoons unsalted butter, melted - 4 cloves garlic, minced - 1 tablespoon lemon juice - 1 tablespoon fresh parsley, finely chopped - 1 teaspoon paprika - Salt and pepper to taste - Skewers (wooden or metal) Each ingredient plays a key role in making these garlic butter shrimp skewers shine. The shrimp should be fresh and large, so they stay juicy when cooked. I love to use unsalted butter for the perfect base. It melts seamlessly and lets the garlic flavor come through. Garlic is our star here, and I recommend using fresh cloves. Minced garlic blends well with the butter. Lemon juice adds a bright note that balances the richness. Fresh parsley gives a pop of color and a hint of earthiness. Paprika brings warmth and a touch of color. Don’t forget salt and pepper; they enhance all the flavors. For skewers, both wooden and metal work well. If you use wooden skewers, soak them first to prevent burning. - Mixing bowl - Grill or grill pan - Skewers - Basting brush (optional) Using a mixing bowl helps combine the garlic butter marinade perfectly. A grill or grill pan is essential for that lovely char and flavor. If you like, a basting brush can help apply extra butter during cooking for more flavor. For the full recipe, check the details in the [Full Recipe]. - Soak wooden skewers in water for 30 minutes. - Mix melted butter, minced garlic, lemon juice, parsley, paprika, salt, and pepper in a bowl. - Toss the shrimp in the marinade. - Let them sit for 15 minutes to soak up the flavor. - Preheat your grill or grill pan to medium-high heat. - Thread the shrimp onto the skewers. Make sure to leave space between each one. - Grill the skewers for 2-3 minutes on each side. They should turn pink and opaque when done. I love using this method because the shrimp cook quickly. They get a nice char and flavor from the grill. If you want extra sauce, drizzle some remaining garlic butter over the skewers after grilling. The Full Recipe gives you everything you need to create this tasty treat. To know when shrimp are done, watch for their color. They should turn pink and opaque. This change means they are ready to eat. Overcooking can make shrimp tough, so stay alert. For maintaining grill temperature, heat your grill to medium-high first. This will help the skewers cook evenly. If it gets too hot, the shrimp may char quickly. You can adjust the heat as needed while cooking. You can add spices or herbs to the marinade for more flavor. Try adding red pepper flakes for heat or Italian herbs for a touch of Italy. Fresh basil or thyme can work wonders too. If you want variation, consider using different oils like olive oil. You can also swap the shrimp for chicken or fish. Each choice brings a unique taste to your dish. The best sides to pair with garlic butter shrimp skewers include rice or a fresh salad. Grilled veggies also make a wonderful match. They add color and crunch to your meal. For presentation, arrange the skewers on a large platter. Add lemon wedges for squeezing and some fresh parsley for color. A bright and fresh look makes the dish even more inviting. {{image_2}} You can swap shrimp for chicken or fish. Chicken works well with the garlic butter sauce. Just cut it into bite-sized pieces. For fish, try firm types like salmon or swordfish. They hold up great on skewers. If you want a veggie option, use mushrooms, zucchini, or bell peppers. These add color and flavor, making the dish fun and tasty. Spice things up! Add chili flakes or jalapeños for heat. This makes each bite exciting. For a fresh twist, use citrus. Lime or orange juice brightens the garlic butter. You can even add zest for more flavor. These changes keep the dish lively and appealing. Give your skewers a Mediterranean twist. Use olive oil, oregano, and lemon for a new taste. This makes each skewer feel sunny and bright. Or, try an Asian-style marinade. Soy sauce, ginger, and sesame oil can create a rich flavor. These ideas add global flair to your garlic butter shrimp skewers. For the full recipe, check out the details provided! To store leftovers, let the skewers cool first. Place them in an airtight container. You can keep them in the fridge for up to three days. Use glass or plastic containers with tight lids. This helps keep the shrimp fresh and tasty. For reheating shrimp skewers, use a microwave or a skillet. If you use a microwave, heat them in short bursts. This helps avoid overcooking. If using a skillet, add a little butter over low heat. Stir gently until heated through. Always check for warmth to keep them juicy. Yes, you can freeze garlic butter shrimp skewers! Wrap them tightly in plastic wrap or foil. Then, place them in a freezer bag. They can stay in the freezer for up to three months. When ready to eat, thaw them in the fridge overnight. Cook them as normal after thawing to enjoy the flavors. To stop shrimp from sticking, oil the grill grates. Use a paper towel dipped in oil and wipe the grates right before grilling. You can also brush the shrimp with some oil before grilling. This makes them slide off easily. If using wooden skewers, soak them in water first. This helps to avoid burning. Yes, you can prep shrimp ahead of time. Marinate them in the garlic butter mix and store in the fridge for up to two hours. If you want to make them even earlier, you can prepare the marinade and keep it in the fridge. When you are ready, just add the shrimp, let it sit, and grill. This saves you time and lets the shrimp soak up more flavor. These skewers pair well with many sides. Consider serving them with rice or a fresh salad. You can also serve garlic bread or grilled veggies on the side. For a light touch, add a lemon wedge for squeezing. This adds a nice zing that complements the shrimp well. Making garlic butter shrimp skewers is easy and tasty. You learned about essential ingredients, tools needed, and step-by-step instructions. I shared tips to enhance flavors and variations with different proteins. Proper storage and reheating methods keep your shrimp fresh. This dish is perfect for gatherings or a weeknight meal. Enjoy experimenting with flavors to make it your own! Happy grilling!

Garlic Butter Shrimp Skewers Tasty Simple Treat

Looking for a quick and tasty dish? Garlic Butter Shrimp Skewers are simple and delicious! With just a few ingredients,

To make the perfect avocado toast with poached egg, gather these simple ingredients: - Whole-grain bread - Ripe avocado - Large egg - Olive oil - Lemon juice - Salt and pepper - Red pepper flakes (optional) - Fresh herbs for garnish Using fresh and quality ingredients makes a big difference. Whole-grain bread gives a hearty base, while ripe avocado ensures a creamy spread. Opt for a large egg to get that delicious poached effect. A splash of olive oil and lemon juice adds flavor and brightness. Don’t forget the salt and pepper for seasoning. If you like a little heat, red pepper flakes can spice things up. Fresh herbs will not only enhance the taste but also make your dish look beautiful. For the full details, check out the Full Recipe. To begin, toast your whole-grain bread. Set your toaster to medium heat. Toast your bread for about 3-4 minutes until it is golden brown and crispy. This creates a strong base for your toppings. If you want a change, consider using sourdough or rye bread. Both options add unique flavors. Next, let’s prepare the avocado spread. Cut the ripe avocado in half and remove the pit. Scoop out the flesh into a bowl. Using a fork, mash the avocado to your desired smoothness. You can leave it chunky or make it creamy. Add one tablespoon of olive oil, half a teaspoon of lemon juice, and a pinch of salt and pepper to enhance the flavor. For a kick, try mixing in red pepper flakes. Now it’s time to poach the egg. In a small saucepan, bring water to a gentle simmer over medium heat. If you want, add a splash of vinegar to help the egg set. Use a spoon to stir the water, creating a whirlpool. Crack the egg into a small cup and gently slide it into the center. Let it poach for about 3-4 minutes, until the white is set but the yolk is still runny. Avoid stirring the water after adding the egg to keep the shape intact. Once the bread is toasted, it’s time to assemble your toast. Spread a generous layer of the avocado mixture on each slice. Carefully place the poached egg on top of each slice. For the finishing touch, sprinkle with extra salt, pepper, and red pepper flakes if you like spice. Add fresh herbs, like cilantro or chives, for a pop of color and flavor. This step makes your dish visually appealing and tasty. You can find the full recipe for this dish to enjoy at home. To get the best poached egg, focus on water temperature and timing. Use a medium heat to bring water to a gentle simmer. If boiling too hard, the egg whites will spread. Aim for 3-4 minutes for a runny yolk. Adding vinegar can help the egg white set faster. It keeps the egg's shape. But, use just a splash. Too much vinegar can change the taste. Experiment to find what you like best. You can add extra toppings to your avocado toast for more flavor. Try crumbled feta cheese or sliced tomatoes. Both add creaminess and freshness. Herbs like cilantro or chives can also elevate the dish. Pairing flavors is key. A sprinkle of red pepper flakes adds heat. A squeeze of lemon brings brightness. These small changes can make a big difference. Serve your avocado toast with a side for a full meal. Fresh fruit or a green salad works well. They add color and variety to your plate. For extra protein, add a slice of smoked salmon or turkey. This not only boosts nutrition but makes it more filling. You can also serve it with Greek yogurt for a creamy touch. For the full recipe, check out the Avocado Delight Toast with Poached Egg details above. Enjoy your cooking! {{image_2}} You can use many bread types for your avocado toast. Whole-grain bread is a classic choice, but there are more options. Try sourdough for a tangy flavor. For a lighter bite, use ciabatta or baguette. If you need gluten-free, look for options made from almond or coconut flour. These will still give you that crunchy texture while being gluten-free. Avocado toast is a blank canvas. You can mix flavors to suit your taste. For a sweet twist, add sliced strawberries or honey. For savory, top with crumbled feta or cherry tomatoes. A unique option is smoked salmon. It adds richness and pairs well with the creamy avocado. Don't forget about spices! A sprinkle of everything bagel seasoning can elevate your dish. Make your avocado toast shine with seasonal toppings. In spring, add fresh radishes or peas for a pop of color. Summer is great for juicy tomatoes or basil. In fall, consider roasted pumpkin seeds or apple slices. For winter holidays, use pomegranate seeds or a dash of cinnamon. Each season can bring new life to your avocado toast. For the detailed recipe, check out the Full Recipe. To keep your leftover avocado fresh, store it in an airtight container. You can also sprinkle some lemon juice on it. This helps slow down browning. For eggs, keep them in their original carton in the fridge. They stay fresh longer this way. For bread, place it in a paper bag at room temperature. This helps maintain texture. If you want to keep it for a longer time, freeze the slices. Just wrap them in plastic wrap first, then place them in a freezer bag. When reheating toast, the oven is best for keeping it crispy. Preheat your oven to 350°F (175°C). Place the toast directly on the rack for about 5-7 minutes. This makes it nice and crunchy again. If you use a microwave, the toast will become soft. Place a paper towel under the toast to absorb moisture. Heat for about 15-20 seconds. But remember, the toast won’t be as crispy. To save time, you can prep ingredients in advance. Mash the avocado and keep it in the fridge for up to one day. Store it in an airtight container with lemon juice to keep it fresh. For eggs, you can poach them in advance too. Just cool them in cold water, then store them in the fridge in a covered container. Use within 2 days for best taste. Whole-grain bread can last in the fridge for a week. However, if you freeze it, it can last up to 3 months. Always check for any off smells or mold before use. For the full recipe, see the detailed instructions above. You can use many gluten-free or low-carb substitutes for bread. Try using: - Cauliflower rice cakes - Sweet potato slices - Zucchini rounds - Portobello mushrooms These options give you the same tasty base. They also add unique flavors and textures to your dish. To get that perfect runny yolk, focus on timing and temperature. Here are key techniques: - Use fresh eggs for better shape and texture. - Keep the water at a gentle simmer, not a rolling boil. - Add a splash of vinegar to help the egg white set quickly. - Cook the egg for 3-4 minutes. This lets the white firm up while keeping the yolk runny. Timing is vital. A minute too long can turn your yolk solid. You can prep some parts ahead of time, but be careful. Here are a few tips: - Toast the bread fresh to keep it crispy. - You can mash the avocado and store it in an airtight container. Add lemon juice to slow browning. - Poach your egg right before serving for the best texture. Meal prepping can save time, but fresh is always best for taste! For the full recipe, check here. This blog post covered how to make perfect avocado toast. We explored ingredients, like whole-grain bread and ripe avocado, and detailed step-by-step instructions for toasting bread, preparing the spread, and poaching eggs. I shared tips for perfecting the dish, variations to keep it fresh, and storage information for leftovers. Overall, avocado toast is versatile and easy to enjoy. With a few simple tweaks, you can make it your own. So grab your ingredients and get creative with this tasty dish!

Avocado Toast with Poached Egg Flavorful Breakfast Dish

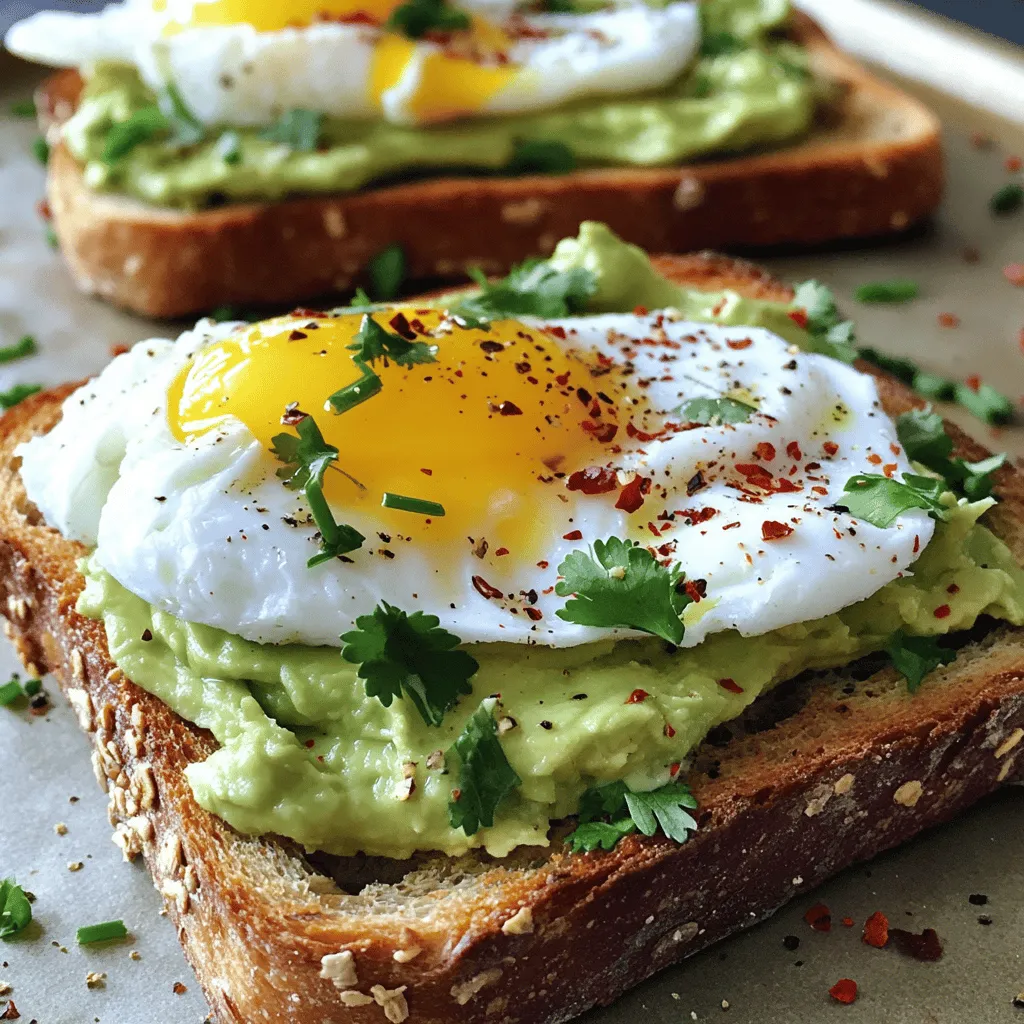
If you’re looking for a tasty, healthy breakfast, you’ve found it! Avocado toast with a poached egg is not just

Older posts
Newer posts
← Previous Page1 … Page112 Page113 Page114 … Page138 Next →

dsad

© 2025 Recipes Pursuit • Built with GeneratePress

Our Policies

  • Copyright Policy
  • Cookie Policy
  • GDPR Policy
  • Privacy Policy
  • Disclaimer
  • Terms Of Use

More Information

  • Home
  • About
  • Contact
  • Appetizers
  • Dessert
  • Dinner
  • Drinks
©2025, Recipes Pursuit About Back To Top