![To make a delicious cinnamon roll casserole, you'll need a few simple ingredients. - 2 cans of refrigerated cinnamon rolls (16-count each), cut into quarters - 4 large eggs - 1 cup milk - 1/2 cup heavy cream - 1 teaspoon ground cinnamon - 1/2 teaspoon vanilla extract - 1/4 cup maple syrup - 1/2 cup chopped pecans (optional) - Cream cheese icing (from the cinnamon rolls or homemade) Each ingredient plays a role in creating that warm, sweet flavor and soft texture. The refrigerated cinnamon rolls form the base, while the eggs and dairy add richness. Ground cinnamon and vanilla provide that classic flavor we love. The maple syrup gives a nice sweetness, and the pecans add a delightful crunch. You can find the full recipe [Full Recipe]. This will guide you through every step to ensure success. If you want to change things up, consider adding fruits or different nuts. The options are endless, making this dish fun and customizable! First, turn on your oven. Set it to 350°F (175°C). This is the perfect temperature for baking. While the oven heats up, grab a 9x13-inch baking dish. Lightly grease it with butter or cooking spray. This step helps prevent the casserole from sticking. Next, take a large mixing bowl. Add four large eggs, one cup of milk, and half a cup of heavy cream. Now, sprinkle in one teaspoon of ground cinnamon and half a teaspoon of vanilla extract. Pour in a quarter cup of maple syrup for sweetness. Whisk everything together until it looks smooth and well mixed. Now for the fun part! Open two cans of refrigerated cinnamon rolls. Cut each roll into quarters. Carefully fold these pieces into your egg mixture. Make sure every piece is coated well. If you want, add half a cup of chopped pecans for some crunch and flavor. Gently mix them in too. Pour the mixture into your greased baking dish. Spread the cinnamon roll pieces out evenly. Place the dish in your preheated oven. Bake for 25 to 30 minutes. Keep an eye on it! The top should turn golden brown, and the center must be set. To check, insert a toothpick into the center. If it comes out clean, it’s done! Once baked, remove the casserole from the oven. Let it cool for about 5-10 minutes. Drizzle the cream cheese icing over the top while it’s warm. Enjoy your tasty breakfast treat! For the full recipe, check out the details above. To get the right texture, cut the cinnamon rolls into small quarters. This helps them soak up the egg mixture. Make sure to mix gently so they stay fluffy. Use a mix of milk and cream to get a rich taste without making it too heavy. To prevent sogginess, do not let the mixture sit too long before baking. If you wait too long, the bread can absorb too much liquid. Bake the casserole until the top turns golden brown. This shows that it is cooked well. Serve your cinnamon roll casserole warm for the best taste. Pair it with fresh fruit or crispy bacon for a balanced meal. Drizzle cream cheese icing over the top for added sweetness. You can also sprinkle some chopped pecans for crunch. For extra flair, dust the top with powdered sugar. A dollop of whipped cream on the side makes this breakfast even more special. For the complete recipe, check out the [Full Recipe]. {{image_2}} You can easily make this casserole your own. First, consider adding different spices. Nutmeg or cardamom can lift the flavor. A pinch of ginger gives it a warm twist. Try mixing in a bit of cocoa powder for a chocolatey touch. Next, you can use flavored syrups. Instead of maple syrup, try vanilla or hazelnut. This small swap can change the whole dish. It adds depth and excitement to each bite. If you want a dairy-free option, you can use almond milk or oat milk. These milks work well in the egg mixture. They keep the casserole moist without losing flavor. You also don’t have to stick to regular cinnamon rolls. You can try using chocolate or pumpkin spice rolls. These fun alternatives will create a new taste experience. Each variation brings its own charm to the dish. For the full recipe, check out [Full Recipe]. After you enjoy your cinnamon roll casserole, let it cool down. Place it on the counter for about 10 to 15 minutes. Once it is cool, cover it tightly. You can use plastic wrap or aluminum foil. This helps keep the casserole fresh and moist. For storage, choose the right container. I recommend a glass or plastic airtight container. These containers keep out air and moisture. You can also use a baking dish with a lid. It’s important to store it in the fridge. It can last for about 3 to 5 days. When you want to enjoy your leftovers, you can reheat them in several ways. One method is to use the oven. Preheat your oven to 350°F (175°C). Place the casserole in an oven-safe dish. Cover it with foil to keep it from drying out. Heat for about 15 to 20 minutes or until warm. Another option is the microwave. Cut a piece of the casserole and place it on a microwave-safe plate. Heat it in 30-second intervals. This helps you get the perfect temperature. Keep an eye on it to avoid overheating. Reheating properly makes a big difference. You want to keep the flavors rich and the texture soft. Whether you use the oven or microwave, both methods work great for keeping your cinnamon roll casserole delicious. Can I make it ahead of time? Yes, you can prepare the casserole a day in advance. Just mix the ingredients, place them in the baking dish, and cover it with plastic wrap. Store it in the fridge overnight. In the morning, take it out and bake it. This helps save time on busy mornings. How long does it last in the fridge? Cinnamon roll casserole stays fresh in the fridge for about three to four days. Just store it in an airtight container. When you're ready to eat it, you can reheat individual portions in the microwave. Can I freeze it? Yes, you can freeze the casserole. Allow it to cool completely, then cut it into portions. Wrap each piece tightly in plastic wrap, then place them in a freezer-safe bag. It will keep well for up to three months. To enjoy, thaw in the fridge overnight and reheat. What are some topping ideas? There are many fun toppings for your casserole! Try adding fresh fruit like berries or bananas. A sprinkle of powdered sugar adds sweetness. You can also drizzle extra maple syrup or honey for more flavor. For a nutty crunch, add more chopped pecans or walnuts on top. These toppings make your casserole even more special! For the full recipe, check out [Full Recipe]. This blog post covered how to make a delicious cinnamon roll casserole. We explored the key ingredients, like cinnamon rolls and eggs. I shared step-by-step instructions for preparation and baking. You learned tips to improve texture and prevent sogginess. For those who love sweet breakfasts, this dish is a winner. Feel free to customize flavors and toppings to suit your taste. Enjoy this tasty treat warm, and share it with friends and family.](https://recipespursuit.com/wp-content/uploads/2025/05/dc114b68-23f2-42ad-aa4a-d2aa773348f0.webp)
Cinnamon Roll Casserole Irresistible Breakfast Delight
Imagine waking up to the sweet aroma of cinnamon rolls wafting through your kitchen. With my Cinnamon Roll Casserole recipe,
Imagine waking up to the sweet aroma of cinnamon rolls wafting through your kitchen. With my Cinnamon Roll Casserole recipe,
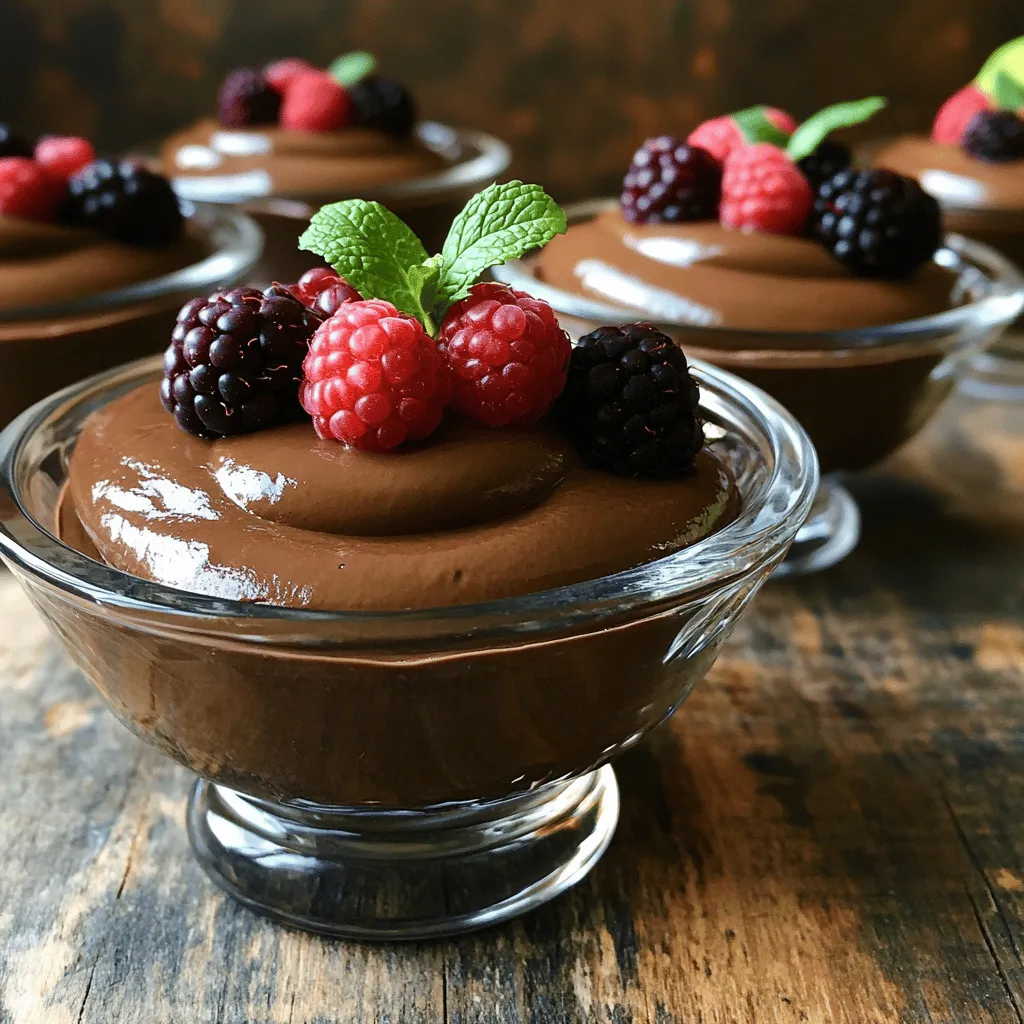
Are you ready for a dessert that’s both rich and healthy? This Vegan Chocolate Avocado Mousse offers a creamy delight
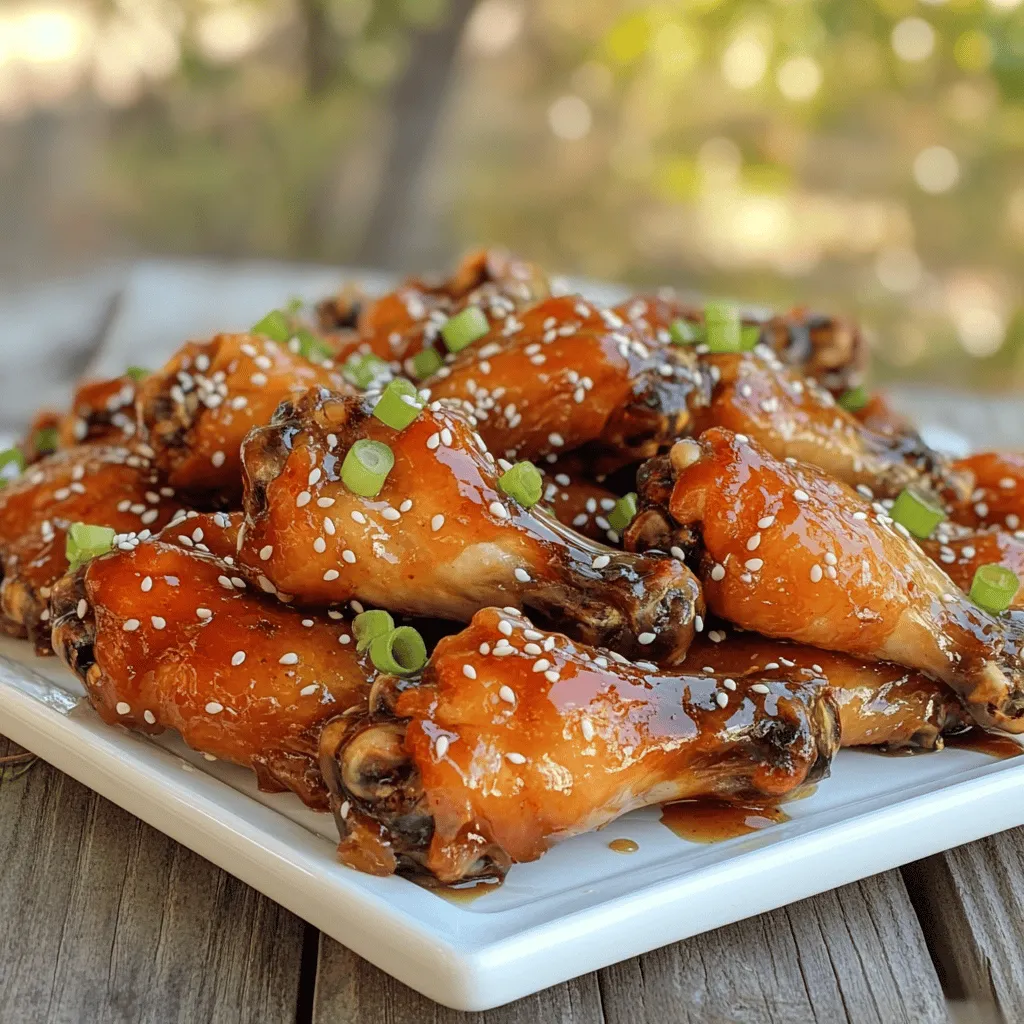
Get ready for a flavor blast! My sweet and spicy chicken wings recipe combines honey’s sweetness with sriracha’s heat. These
![To make creamy avocado pasta, gather these essential ingredients: - 2 ripe avocados, pitted and peeled - 2 cloves garlic, minced - 1/4 cup fresh basil leaves, plus extra for garnish - 2 tablespoons lemon juice - 1/4 teaspoon red pepper flakes (optional) - 1/2 cup Greek yogurt or dairy-free yogurt - Salt and black pepper to taste - 8 oz whole wheat or gluten-free spaghetti - 1/4 cup cherry tomatoes, halved (for garnish) - Grated Parmesan cheese or nutritional yeast (for topping) These ingredients create a rich and creamy sauce. The avocados provide healthy fats, while the yogurt adds creaminess. You can enhance your dish with these optional garnishes: - Extra basil leaves for freshness - Cherry tomatoes for a pop of color - Grated Parmesan cheese for a salty kick - Nutritional yeast for a vegan option These toppings add flavor and make the dish visually appealing. Feel free to mix and match based on your taste! If you have special dietary needs, here are some swaps: - Use gluten-free pasta for a gluten-free option. - Swap Greek yogurt with silken tofu for a vegan alternative. - Replace lemon juice with lime juice for a twist. These substitutions keep the dish delicious while fitting your dietary needs. You can find the full recipe to guide you through the cooking process. Start by boiling a large pot of salted water. Add 8 ounces of whole wheat or gluten-free spaghetti. Cook the pasta until it is al dente, about 8 to 10 minutes. Make sure to check the package for exact times. Once cooked, reserve 1/2 cup of pasta water. This water will help make the sauce creamy. Drain the pasta and set it aside. While the pasta cooks, it’s time to whip up the creamy avocado sauce. Grab a food processor and add two ripe avocados, two minced garlic cloves, and 1/4 cup of fresh basil leaves. Pour in 2 tablespoons of lemon juice and add 1/2 cup of Greek yogurt. If you like a little heat, toss in 1/4 teaspoon of red pepper flakes. Blend this mixture until it is smooth and creamy. If the sauce feels too thick, slowly add some of the reserved pasta water. Blend again until you reach the right consistency. Season with salt and black pepper to taste. In a large mixing bowl, combine the drained spaghetti with the avocado sauce. Toss it well to coat every strand of pasta. You want the sauce to hug the spaghetti. Serve the pasta right away in bowls. For a pretty finish, garnish with halved cherry tomatoes, more basil leaves, and a sprinkle of grated Parmesan cheese or nutritional yeast. This dish is best enjoyed fresh, so dig in! For the full recipe, check above. To pick the best avocados, look for ones that feel soft but firm. Gently squeeze the fruit in your palm. If it gives slightly, it is ripe. Avoid avocados that feel mushy or have dark spots. These signs mean they are overripe. If you find hard avocados, leave them on the counter for a few days to ripen. The key to creamy avocado pasta is using ripe avocados. They should blend smoothly. For extra creaminess, add Greek yogurt. It makes the sauce rich without overpowering the avocado flavor. If the sauce is too thick, add some reserved pasta water, a little at a time. This helps you reach your desired texture. If you have leftovers, store them in an airtight container. Cover the surface of the sauce with plastic wrap to limit air exposure. This helps prevent browning. You can keep it in the fridge for up to two days. When ready to eat, mix it well again. You might need to add a splash of water or lemon juice to revive the creaminess. Enjoy this quick and flavorful meal anytime! {{image_2}} To make your creamy avocado pasta heartier, you can add protein. Grilled chicken is a great choice. Just slice it and mix it in with the pasta. Shrimp also works well. Cook them in a pan with a bit of olive oil before adding. For a plant-based option, try chickpeas or lentils. They add both protein and fiber. Simply stir them into the pasta for a filling meal. If you need a gluten-free meal, use gluten-free spaghetti. It cooks just like regular pasta. For vegan adaptations, swap Greek yogurt for cashew cream or silken tofu. Both options keep the dish creamy. You can also skip the cheese or use nutritional yeast for a cheesy flavor. These changes make the dish suitable for many diets. You can easily boost the flavor of your creamy avocado pasta. Adding fresh lemon zest brightens the dish. A sprinkle of fresh herbs like parsley or cilantro can add freshness. For a kick, mix in more red pepper flakes or a dash of hot sauce. If you love umami, try adding sun-dried tomatoes. They pair well with the creamy sauce. These simple changes can make your meal even more delightful. Feel free to explore the [Full Recipe] for a delicious experience! Creamy Avocado Pasta is a tasty choice for meals. A serving has about 400-500 calories. The calories come mainly from the pasta and avocados. Whole wheat pasta adds fiber, while avocados are healthy fats. - Avocados: Packed with vitamins E, K, and C, avocados support heart health. They also have fiber, which helps digestion. - Greek Yogurt: This adds creaminess and protein. It is good for gut health thanks to probiotics. - Garlic: Garlic is great for your immune system. It may lower blood pressure and improve heart health. - Basil: This herb has antioxidants. It adds flavor and may help with inflammation. Pair this pasta with a green salad for extra vitamins. Add grilled chicken or chickpeas for protein. For a complete meal, serve it with roasted vegetables. This adds fiber and more nutrients. To make this dish vegan, swap Greek yogurt for dairy-free yogurt. You can also skip any cheese. Just use nutritional yeast for a cheesy flavor. This keeps the creaminess while being plant-based. Yes, you can prepare the sauce ahead of time. Store it in the fridge for up to two days. Add a splash of lemon juice to keep it fresh. Cook the pasta right before serving for the best taste. You can use silken tofu or cashew cream instead of Greek yogurt. Both options offer a smooth texture. They also add creaminess to your dish without dairy. Absolutely! You can pick any pasta you like. Whole wheat, gluten-free, or even zoodles work great. Just adjust the cooking time based on the pasta you choose. Add more red pepper flakes or a pinch of cayenne pepper. You can also include fresh jalapeños for a kick. Start with a small amount and taste as you go. For toppings, try cherry tomatoes, fresh basil, or crushed nuts. Grated Parmesan or nutritional yeast adds a nice touch too. These add color and extra flavor to your dish. Store leftovers in an airtight container in the fridge. Keep the pasta and sauce separate if possible. This helps maintain the creaminess. Consume within two days for the best flavor. Freezing this dish is not ideal. The avocado sauce may change texture when thawed. It's best enjoyed fresh or stored in the fridge for a few days. This meal takes about 20 minutes from start to finish. It’s quick and easy, perfect for busy days. You can enjoy a delicious meal without much fuss. For the full recipe, check out the detailed instructions above. In this blog post, I shared how to make creamy avocado pasta. We covered the key ingredients, step-by-step instructions, and helpful tips. I also highlighted variations and nutritional information. Remember, ripe avocados are key for the best flavor and texture. Feel free to swap ingredients to meet your needs. Enjoy customizing your dish with your favorite toppings and proteins. This pasta is not just tasty; it's also healthy. Dive into this fresh and creamy dish whenever you need a quick meal. Your taste buds will thank you!](https://recipespursuit.com/wp-content/uploads/2025/05/0b160989-6bdd-4a5e-b7dc-87380eebd384.webp)
Looking for a quick and tasty meal? Creamy avocado pasta is your answer! This dish is not only easy to
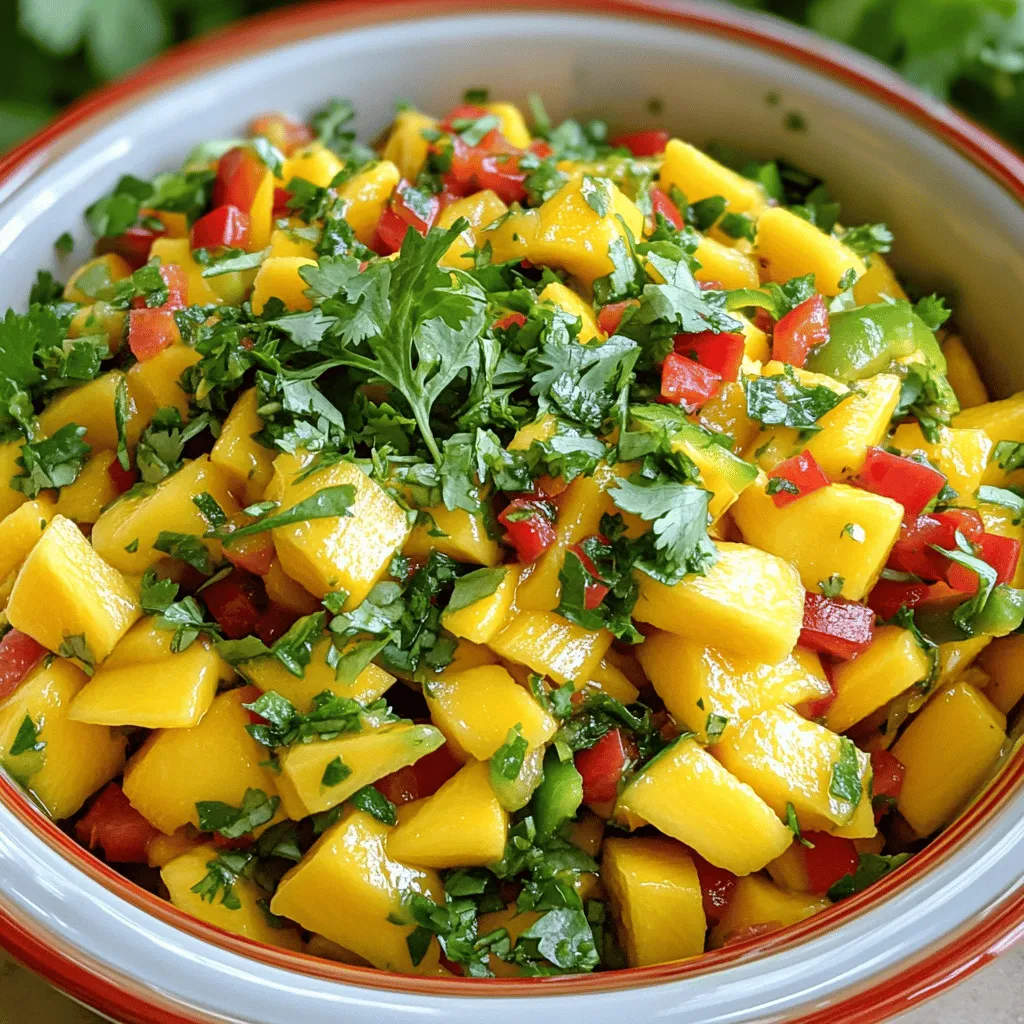
Get ready to brighten up your meals with my Tropical Mango Salsa! Bursting with fresh flavors, this salsa combines ripe
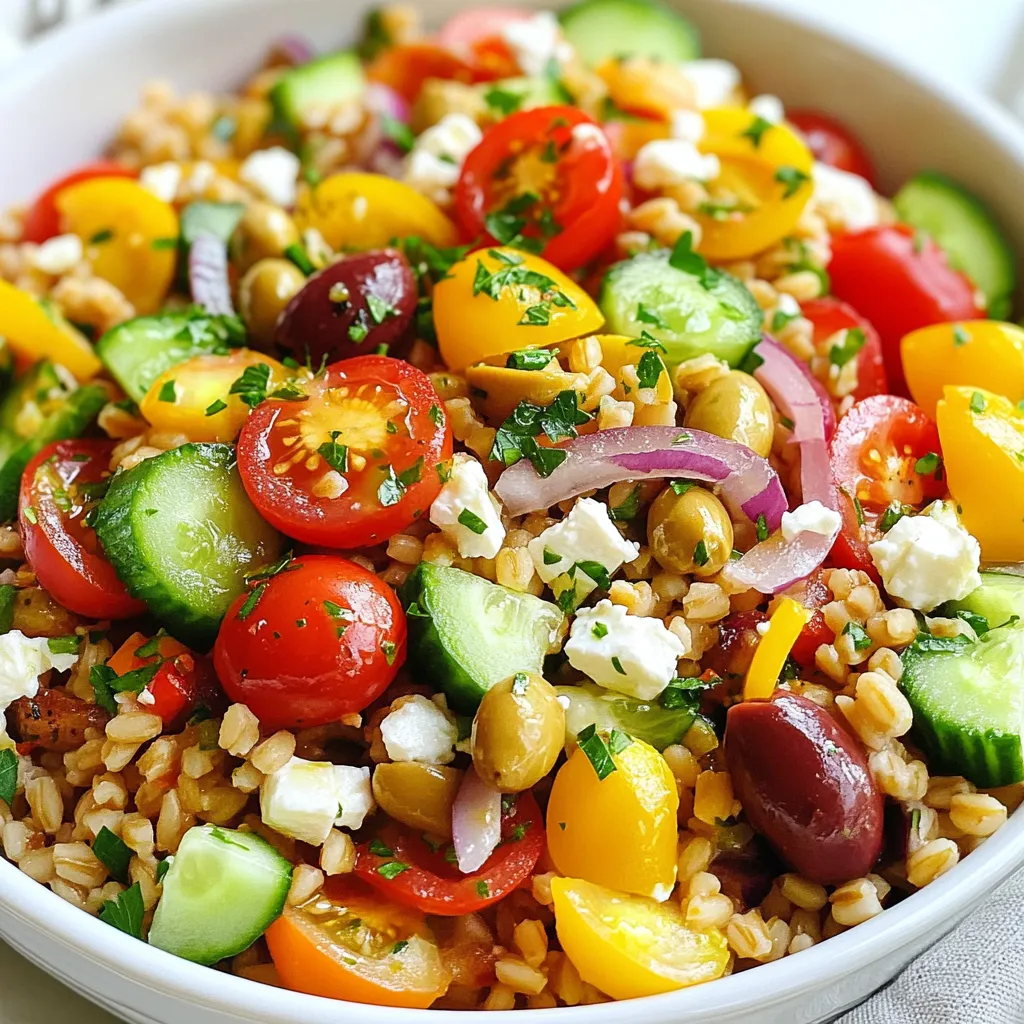
Looking for a dish that’s packed with flavor and nutrition? Let’s dive into the Mediterranean Farro Salad! This fresh and
![To make perfect cinnamon sugar churros, you need a few key items. Here’s what you will need: - 1 cup water - 2 tablespoons sugar - ½ teaspoon salt - 2 tablespoons vegetable oil - 1 cup all-purpose flour - 2 large eggs - 1 teaspoon vanilla extract - ½ cup granulated sugar (for coating) - 2 teaspoons ground cinnamon - Oil for frying (enough for about 2 inches in a heavy pot) These ingredients create a delicious dough that fries up crispy and golden. While churros are tasty on their own, a good dip makes them even better. Here are some popular choices: - Chocolate sauce - Dulce de leche - Caramel sauce These dips add rich flavors that complement the sweet, cinnamon-covered churros. Using high-quality ingredients makes a big difference. Here are some tips for selecting the best items: - Water: Use filtered water for the best taste. - Sugar: Choose pure cane sugar for a clean sweetness. - Flour: All-purpose flour should be fresh and free of lumps. - Eggs: Use large, farm-fresh eggs for rich flavor and color. - Oil: Pick a neutral oil, like vegetable or canola, for frying. Always check expiration dates to ensure freshness. Quality ingredients lead to better results in your churros. For the full recipe, you can refer to the details above. To start, gather your ingredients. You need water, sugar, salt, vegetable oil, flour, eggs, and vanilla extract. In a medium saucepan, mix the water, 2 tablespoons of sugar, salt, and vegetable oil. Heat this mixture over medium heat until it boils. Once boiling, take it off the heat. Now, stir in the flour until a smooth dough forms. This step is key to your churros' texture. Let the dough cool for about 10 minutes. This cooling helps when adding the eggs. Mix in the eggs one at a time, blending well after each addition. Finally, add the vanilla extract and stir until your dough is smooth. Next, prepare to fry the churros. Take a heavy pot and fill it with enough oil to be about 2 inches deep. Heat the oil over medium heat until it reaches 350°F (175°C). Use a kitchen thermometer to check the temperature. This step is crucial for getting crispy churros. If the oil is too hot, the churros will burn. If it’s too cool, they will soak up too much oil. Patience is important here; the right heat makes all the difference. Now, it’s time for the fun part! Prepare a piping bag with a star tip. Fill the bag with your churro dough. Pipe 6-inch strips of dough into the hot oil, cutting them with scissors or a knife. Fry the churros for about 2-3 minutes on each side. You want them golden brown and crispy. Use a slotted spoon to turn them over. Once they are done, move them to a plate lined with paper towels. This will help drain any extra oil. While the churros are still warm, mix the remaining ½ cup of sugar with the cinnamon in a small bowl. This mix adds that sweet touch we all love. Roll each churro in the cinnamon-sugar mixture until they are fully coated. This step makes them even more delicious! Serve them hot, and consider pairing them with chocolate sauce or dulce de leche for dipping. Enjoy your homemade cinnamon sugar churros! For the complete recipe, check out the Full Recipe section. To get the best churros, focus on the dough. The dough should be thick but smooth. If it’s too wet, your churros will fall apart. If it’s too dry, they will not puff up. Always let the dough cool before adding the eggs. This keeps the eggs from cooking too fast. Mix the dough well until it is shiny. One big mistake is not heating the oil enough. If the oil is too cold, churros will soak up too much fat. If it’s too hot, they will burn outside but stay raw inside. Use a thermometer to check the oil. Another mistake is overcooking or undercooking. Fry them until they are golden brown and crispy. To keep churros crispy, avoid stacking them. Place them on a wire rack instead. This allows air to flow around them. If you need to store them, keep them in a single layer. For extra crunch, bake them for a few minutes before serving. This will revive that crispy texture. Enjoy your churros fresh and warm for the best taste! {{image_2}} You can take your churros to the next level by adding a chocolate filling. To do this, use a piping bag with a narrow tip. After frying the churros, insert the tip into one end and fill them with melted chocolate. You can use dark, milk, or white chocolate. This sweet surprise adds a rich flavor and makes each bite even more special. Want to try something different? Add nutmeg or cardamom to your churros for a unique twist. Simply mix one teaspoon of either spice into the dough. This will give your churros an exciting flavor that pairs well with the cinnamon sugar coating. You can even mix spices for a blend that suits your taste. If you need a gluten-free option, you can swap out the all-purpose flour. Use a gluten-free flour blend instead. Ensure that the blend you choose can hold moisture and create a nice dough. Follow the same steps as the full recipe for texture and taste. Your gluten-free churros will be just as crispy and delicious as the traditional ones. For the complete recipe, check the [Full Recipe]. To keep your churros fresh, place them in an airtight container. Make sure they cool completely before sealing. This helps prevent sogginess. Store the container in the pantry for up to two days. If you want to keep them longer, use the freezer. Reheat churros in the oven for the best results. Preheat your oven to 350°F (175°C). Place the churros on a baking sheet. Heat them for about 5-7 minutes. This keeps them crispy. You can also use an air fryer for about 3 minutes at a similar temperature. To freeze churros, first let them cool completely. Then, place them in a single layer on a baking sheet. Freeze for about an hour until firm. After that, transfer them to a freezer bag. They can last up to two months. When you're ready to eat, just reheat as described above. You can enjoy delicious churros anytime! For the full recipe, check out the instructions above. To make churros from scratch, follow these steps: 1. Boil water, sugar, salt, and oil in a saucepan. 2. Stir in flour until a smooth dough forms. 3. After cooling, mix in eggs and vanilla. 4. Heat oil in a pot to about 350°F (175°C). 5. Pipe strips of dough into hot oil and fry until golden. 6. Coat the warm churros in a mix of sugar and cinnamon. For the detailed process, check the Full Recipe. The best oil for frying churros is vegetable oil. It has a high smoke point, making it ideal for deep frying. Other options include canola oil or peanut oil. These oils can help achieve that crispy texture we love. Yes, you can bake churros instead of frying! Preheat your oven to 375°F (190°C). Pipe the dough onto a baking sheet lined with parchment paper. Bake for about 20 minutes or until golden brown. While baking gives a healthier option, frying adds that classic crunch. To find the best churros, check local dessert shops, fairs, or food trucks. Websites like Yelp or Google Maps can offer great suggestions. Don't forget to ask friends for their favorite spots! You learned about making cinnamon sugar churros from scratch. We covered essential and optional ingredients, tips for the best texture, and how to store leftovers. Remember, using quality ingredients and avoiding common mistakes will yield tasty results. Don't forget to try fun variations like chocolate-filled churros. Enjoy your churros fresh or stored for later. Now, you can impress anyone with your churro skills. Happy frying!](https://recipespursuit.com/wp-content/uploads/2025/05/402ae791-a6d5-445a-b28e-f702a8f02455.webp)
If you crave a crispy, sweet treat, Cinnamon Sugar Churros are for you! With just a few simple ingredients, you

Are you ready to whip up a breakfast that’s both healthy and delicious? Meet my Banana Oatmeal Pancakes! They’re easy
 for perfect results. - Simmering the balsamic vinegar Start by pouring one cup of balsamic vinegar into a small saucepan. Heat it over medium heat until it starts to simmer. Once it simmers, reduce the heat to low. Let it cook gently for about 15 to 20 minutes. Stir it occasionally. You want it to thicken and reduce by half. This step is key for flavor. - Cooling the reduction After the reduction thickens, remove it from the heat. Set it aside and allow it to cool to room temperature. This cooling process is important. It helps the flavors meld together. Plus, it ensures it won’t wilt your salad when you drizzle it on. - Layering the tomatoes and mozzarella Grab a large serving platter or individual plates. Start by laying down the slices of ripe tomato. Alternate these with slices of fresh mozzarella cheese. The colors should pop! This layering creates a beautiful visual and keeps the flavors balanced. - Adding basil leaves between layers Place a fresh basil leaf between each layer of tomato and mozzarella. This adds freshness and aroma. The basil is essential for that classic Caprese taste. Make sure to use whole leaves for the best look and flavor. - Drizzling with olive oil and balsamic reduction Once your salad is layered, it’s time to dress it. Drizzle two tablespoons of extra virgin olive oil over the top. Then, carefully drizzle your balsamic reduction over the entire salad. This step adds a rich, tangy finish. - Seasoning with salt, pepper, and optional spice Finally, season your salad with sea salt and freshly cracked black pepper to taste. If you enjoy a little heat, sprinkle some crushed red pepper flakes on top. This gives a nice kick and enhances the overall flavor of the salad. For the complete recipe, check out the Full Recipe. Enjoy creating your delicious Caprese salad! Selecting ripe tomatoes Look for large, ripe tomatoes. They should feel heavy for their size. A good tomato has smooth skin and vibrant color. When you smell the stem end, it should have a strong, fresh aroma. This smell tells you the tomato is ripe and ready to eat. Picking high-quality mozzarella Choose fresh mozzarella, not the pre-packaged kind. The best mozzarella feels soft and moist. It should come packed in water or brine. This keeps it fresh and flavorful. When you slice it, it should have a creamy texture. A good cheese will melt in your mouth, enhancing your salad. Presentation ideas Serve your salad on a large platter. Alternate the tomato and mozzarella slices in a spiral pattern. This looks stunning and invites guests to take a closer look. Add fresh basil leaves on top for color. Drizzle extra balsamic reduction over the finished dish for a beautiful touch. Pairing with other dishes or drinks Caprese salad pairs well with grilled chicken or fish. You can also serve it with crusty bread. For drinks, a crisp white wine complements the flavors nicely. A sparkling lemonade or iced tea could also refresh the palate. Enjoy your meal with friends or family for a delightful experience. {{image_2}} You can make your Caprese salad more interesting by adding mixed greens. Mixing in some arugula or spinach adds a nice crunch. It also brings more texture and flavor to the dish. Another fun option is to use different cheeses. Burrata is a rich choice that melts in your mouth. This creamy cheese pairs beautifully with the fresh tomatoes and basil. You can also try goat cheese for a tangy twist. Infusing the balsamic reduction can elevate the flavor. Try adding garlic, rosemary, or thyme while it simmers. These herbs give a new depth to the sweet and tangy sauce. You can also experiment with herbs and spices in the salad. Adding a pinch of oregano or a dash of chili flakes can bring a kick. Fresh herbs like parsley or chives can also brighten the dish. For more ideas, check out the Full Recipe to explore more variations! To keep your Caprese salad fresh, store any leftovers right away. Place the salad in a clean container. Make sure it has a tight lid. This helps keep air out and prevents wilting. If you can, separate the tomatoes and mozzarella. This keeps them from getting soggy. You can use glass or BPA-free plastic containers. These options work best for storing food safely. After making the balsamic reduction, let it cool completely. Once cool, pour it into a clean jar. Seal it tightly with a lid. Store it in the fridge to keep it fresh. The reduction lasts about a week in the refrigerator. Make sure to check for any changes in smell or color before using. If it seems off, it’s best to toss it. To layer a Caprese salad, start with a large platter. Place a slice of tomato down first, then add a slice of mozzarella. Keep repeating this until you run out of ingredients. Put a basil leaf between each layer. This not only looks great but adds fresh flavor too. Yes, you can make the balsamic reduction in advance. Just simmer it as directed, then let it cool. Once cooled, store it in a jar in the fridge. It will be good for about a week. Just reheat it slightly before using. Using fresh basil is important for a classic Caprese salad. Dried basil won’t give the same fresh taste or aroma. Fresh basil adds a bright flavor that complements the tomatoes and mozzarella. If you can’t find fresh basil, consider using another herb, but it will change the flavor. I recommend using ripe heirloom or vine-ripened tomatoes. These types have great flavor and texture. Look for tomatoes that are firm but slightly soft to the touch. Avoid using tomatoes that are too hard or have blemishes. You can use other soft cheeses if you like. Burrata is a great option and adds creaminess. Feta cheese can also work, but it has a stronger flavor. Just keep in mind that it changes the classic taste of the salad. To make your Caprese salad more filling, add some protein. Grilled chicken or shrimp pairs well. You could also serve it with crusty bread or over a bed of mixed greens for extra texture and taste. Caprese salad pairs nicely with grilled meats or as part of an Italian meal. It also goes well with pasta dishes and light white wines. For a simple meal, serve it with a good loaf of bread and a glass of wine. Absolutely! You can add avocado slices for creaminess or olives for a salty kick. Roasted peppers or arugula can also enhance the flavor. Just remember to keep the fresh and light theme of the salad intact. If you have leftover salad, keep it in an airtight container. Store the salad in the fridge but avoid adding the balsamic reduction until you're ready to eat. This keeps everything fresh and crispy. To make a delicious Caprese salad, start with fresh ingredients like ripe tomatoes and mozzarella. We learned how to prepare a balsamic reduction, layer the salad, and add tasty dressings. Choosing the right ingredients and trying variations can elevate your dish. Don’t forget to store leftovers properly for the best taste. Enjoy making your salad and have fun experimenting with new flavors! With these tips, you can impress anyone at your next meal. Happy cooking!](https://recipespursuit.com/wp-content/uploads/2025/05/3b0f00b6-c7ae-49bc-8605-0d41b13a5a4b.webp)
Are you ready to elevate your salad game? In this post, I’ll share my Classic Caprese Salad with Balsamic Reduction
![To make Sriracha Honey Cauliflower Bites, you need: - 1 medium cauliflower, cut into bite-sized florets - 1 cup all-purpose flour (or a gluten-free alternative) - 1 cup unsweetened almond milk (or any preferred milk) - 1 teaspoon garlic powder - 1 teaspoon onion powder - 1/2 teaspoon salt - 1/4 teaspoon black pepper - 1 teaspoon smoked paprika - 1/4 cup Sriracha sauce (adjust for spiciness) - 1/4 cup honey (or agave syrup for a vegan option) - 1 tablespoon soy sauce (or tamari for gluten-free) - Sesame seeds for garnish (optional) - Fresh cilantro for garnish (optional) You can swap some ingredients for other options. If you're gluten-free, use a gluten-free flour blend. For a dairy-free option, almond milk works great. If you want a vegan recipe, use agave syrup instead of honey. Feel free to adjust the Sriracha to control the heat. You can also use lime juice for a zesty twist instead of soy sauce. This recipe can fit many diets. It’s vegetarian and can be made vegan. If you choose a gluten-free flour, it becomes gluten-free too. Always check labels on sauces and other ingredients for allergens. This snack is a tasty way to enjoy veggies while keeping them healthy! 1. Preheat the oven to 425°F (220°C). This helps the cauliflower become crispy. 2. Prepare the baking sheet. Line it with parchment paper. This makes cleanup easy. 3. Make the batter. In a large bowl, mix the flour, garlic powder, onion powder, salt, black pepper, and smoked paprika. 4. Add almond milk slowly while stirring. Keep mixing until it becomes smooth. 5. Coat the cauliflower florets. Dip each piece in the batter. Make sure every floret is covered. Shake off extra batter. 6. Place on the baking sheet in a single layer. This ensures even cooking. 7. Bake the cauliflower for 20-25 minutes. Flip them halfway through. Look for a golden color and crisp texture. 8. Check for doneness. The bites should be cooked through and crispy when done. 9. Make the sauce while the cauliflower is baking. In a small pan, mix Sriracha, honey, and soy sauce over medium heat. 10. Stir continuously until everything is well mixed and warm. This helps blend the flavors. 11. Remove from heat. Set the sauce aside until the cauliflower is ready. 12. Toss the baked cauliflower in the sauce. Make sure each floret is covered well. 13. Return to the baking sheet for another 10 minutes. This adds extra crispiness. 14. Garnish and serve. After cooling, sprinkle sesame seeds and cilantro on top. Enjoy this tasty snack! 15. For the complete recipe, check the Full Recipe section above. To make your Sriracha honey cauliflower bites crispy, follow these steps: - Ensure you coat the florets well in the batter. - Use a parchment-lined baking sheet. This helps them crisp without sticking. - Bake at a high temperature of 425°F (220°C). This creates a nice crunch. - Flip the cauliflower halfway through baking. This ensures even cooking on all sides. - For extra crispiness, bake them a little longer after coating with sauce. Getting the sauce just right is key. Here’s how: - Use fresh Sriracha for a bold taste. Adjust the amount to match your spice level. - Mix honey with Sriracha for a sweet heat. You can swap honey for agave syrup if you prefer. - Heat the sauce gently on medium. Stir it well to blend the flavors. - Toss the hot cauliflower in the sauce right after baking. This ensures every bite is flavorful. Present your cauliflower bites in a fun way: - Serve them in a large bowl or on a colorful platter. - Garnish with sesame seeds and fresh cilantro for a pop of color. - Pair with a cooling dip like ranch or yogurt sauce. This balances the heat from the Sriracha. - Enjoy these bites warm as a snack or appetizer. They are perfect for sharing. For more details, check out the Full Recipe. {{image_2}} To make Sriracha honey cauliflower bites vegan, swap honey for agave syrup. This sweet change keeps the flavor but makes it plant-based. Use almond milk or another non-dairy milk, like oat or soy. These options keep the bites creamy and delicious without dairy. You can adjust the spice level based on your taste. If you like heat, add more Sriracha. Start with a tablespoon and taste as you go. For a milder version, decrease the Sriracha. You can also mix in some sweet chili sauce for a sweet and spicy combo. This adds a different layer of flavor without too much heat. If you want to try different flours, you can! Use almond flour for a nutty flavor or chickpea flour for a protein boost. Gluten-free options like rice flour or a gluten-free blend work well too. Each flour will give the bites a unique taste and texture. Adjust the liquid in the batter to get the right consistency. These variations help you customize the bites to fit your taste and diet. For the full recipe, check out the complete guide above! After enjoying your Sriracha honey cauliflower bites, store any leftovers in an airtight container. Keep them in the fridge for up to three days. Make sure they cool down first to avoid moisture buildup. To reheat, preheat your oven to 375°F (190°C). Place the cauliflower bites on a baking sheet. Heat for about 10-15 minutes until warm and crispy again. This method helps keep them crunchy. You can also use an air fryer for a quick reheating option. If you want to freeze these bites, do so before baking. Prepare the cauliflower and coat it with the batter, then place the florets on a baking sheet. Freeze them for about an hour, then transfer to a freezer bag. They can stay frozen for up to three months. When ready to bake, cook them from frozen, adding a few extra minutes to the baking time. You can follow the [Full Recipe] for details on preparation. Yes, you can make Sriracha Honey Cauliflower Bites ahead of time. Prepare the bites and bake them. Let them cool completely before storing. You can keep them in an airtight container in your fridge for up to three days. When ready to serve, reheat them in the oven for best results. This keeps them crispy and tasty. These bites pair well with many foods. Here are some ideas: - A cool ranch dip - A tangy yogurt sauce - Fresh vegetable sticks - A side of rice or quinoa - A light salad These options will add color and flavor to your snack table. Yes, there are gluten-free options for Sriracha Honey Cauliflower Bites. Use gluten-free flour instead of all-purpose flour. Also, choose tamari instead of soy sauce. This way, you can enjoy a tasty snack without gluten. Check labels on all ingredients to ensure they are gluten-free. This way, everyone can savor this delicious treat! This blog post shared all you need to know about Sriracha Honey Cauliflower Bites. We covered the ingredients, cooking steps, and storage tips. You learned ingredient substitutions and dietary options, making it easier for you to enjoy this dish. Remember, you can adjust the spice level and choose vegan or gluten-free options. Keep experimenting with variations and serving ideas. Enjoy the deliciousness of your cauliflower bites, whether as an appetizer or snack!](https://recipespursuit.com/wp-content/uploads/2025/05/dd35b0c9-77ba-4f17-b8ff-89fa060f32d7.webp)
Looking for a fun, easy snack? You’ve found it with Sriracha Honey Cauliflower Bites! This tasty treat is spicy, sweet,
