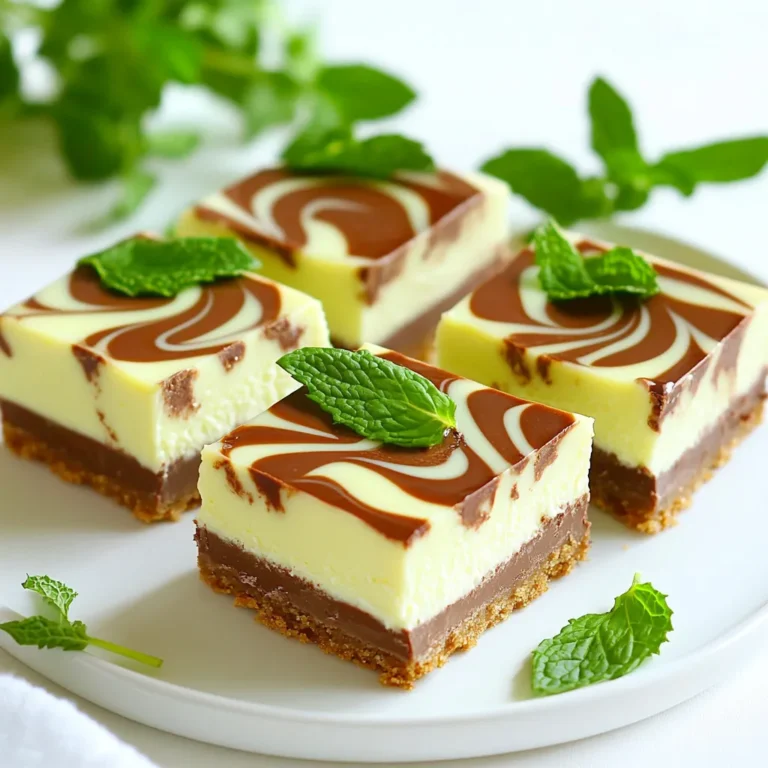
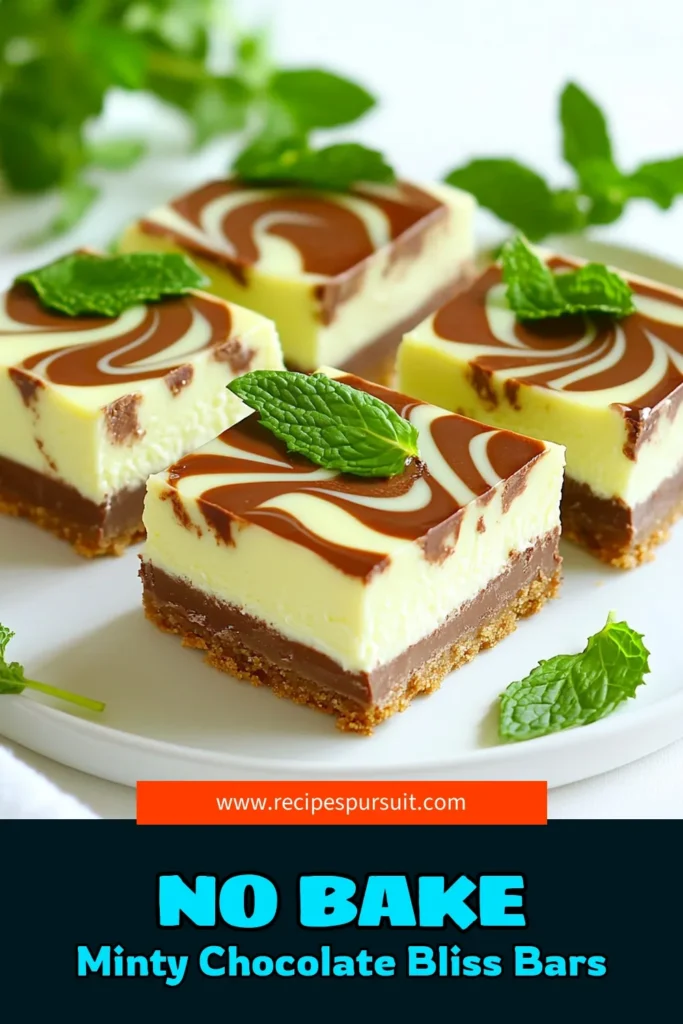
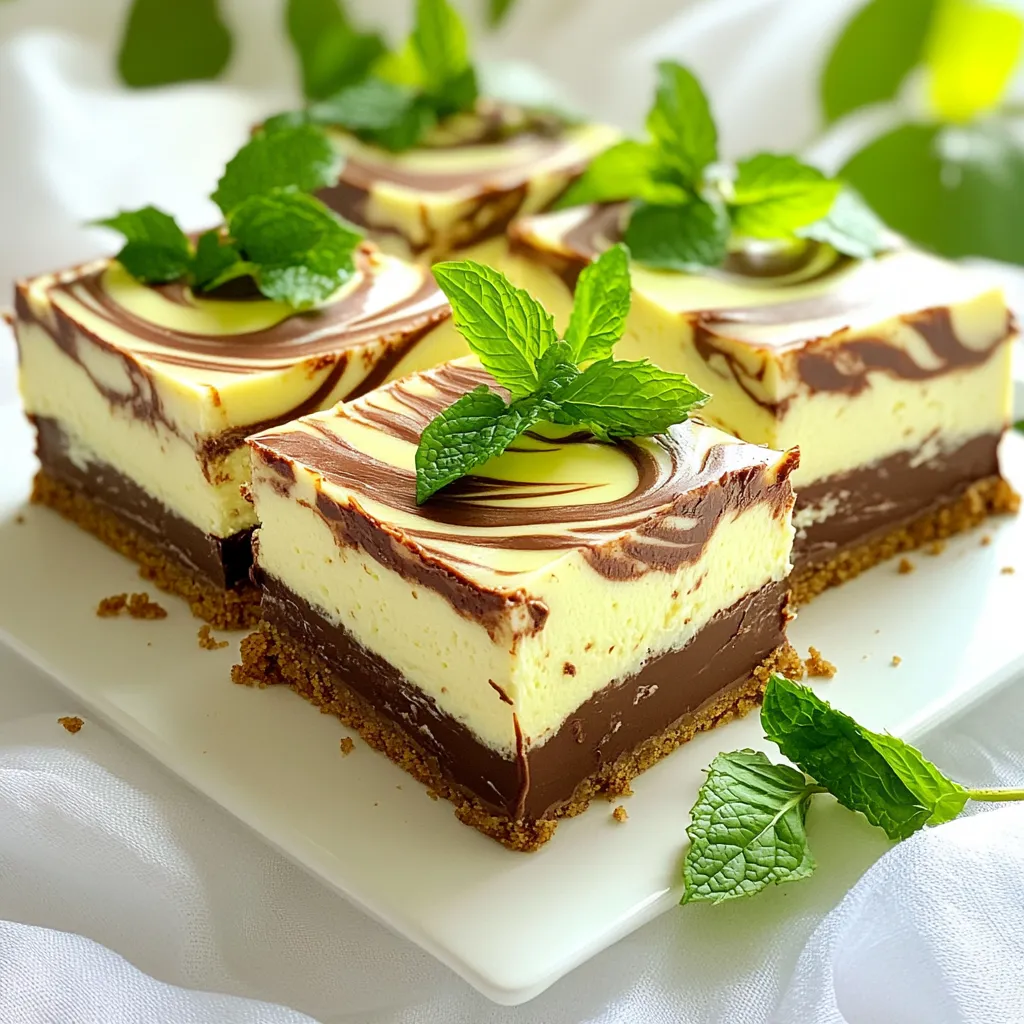
Are you ready to whip up a dessert that’s both easy and delicious? These No Bake Chocolate Mint Cheesecake Bars are a perfect treat! They are creamy, rich, and full of minty goodness. Plus, you don’t need an oven! In this guide, I’ll share all you need to know about the ingredients, steps, and tips to make these bars a hit. Let’s dive in and start creating your new favorite dessert!
Ingredients
List of Ingredients for No Bake Chocolate Mint Cheesecake Bars
To make these bars, you need the following ingredients:
– 1 ½ cups crushed graham crackers
– ½ cup unsalted butter, melted
– 2 tablespoons granulated sugar
– 16 oz cream cheese, softened
– 1 cup powdered sugar
– 1 teaspoon peppermint extract
– 2 cups whipped cream (store-bought or homemade)
– ½ cup semi-sweet chocolate chips
– Fresh mint leaves for garnish (optional)
These ingredients come together to create a creamy, minty delight. The crust gives a nice crunch. The filling is smooth and rich, with a lovely mint flavor.
Alternative Ingredients for Special Diets
If you have special diet needs, you can make some swaps:
– Use gluten-free graham crackers instead of regular ones.
– For a dairy-free option, use a non-dairy cream cheese.
– You can use coconut whipped cream instead of regular whipped cream.
– If you want a low-sugar version, try using a sugar substitute for the powdered sugar.
These alternatives still keep the bars tasty and enjoyable for everyone.
Recommended Brands and Products
I often use specific brands for the best results:
– For graham crackers, I like Honey Maid or Kinnikinnick for gluten-free.
– Use Kerry Gold unsalted butter for rich flavor.
– For cream cheese, Philadelphia is a classic choice.
– I recommend Ghirardelli for semi-sweet chocolate chips.
Using quality ingredients makes a big difference in taste. Choose what you like best, and enjoy!
Step-by-Step Instructions
Detailed Recipe Steps for Preparing the Bars
1. Start by mixing the crushed graham crackers, melted butter, and granulated sugar in a medium bowl.
2. Press this mixture firmly into the bottom of a 9×9 inch baking pan. This forms a strong crust.
3. In a large bowl, beat the softened cream cheese and powdered sugar until smooth and creamy.
4. Next, add the peppermint extract and mix until just combined. The mint flavor is key here.
5. Gently fold in the whipped cream. Do this slowly to keep the mixture light and airy.
6. Spread the mint cheesecake mixture evenly over the crust in the baking pan.
7. For the chocolate drizzle, melt the semi-sweet chocolate chips in the microwave. Use 30-second intervals and stir until smooth.
8. Drizzle the melted chocolate over the cheesecake layer.
9. Use a knife or toothpick to swirl the chocolate into the cheesecake. This creates a beautiful marbled effect.
10. Cover the pan with plastic wrap and place it in the fridge for at least 4 hours. This helps the bars set.
11. Once set, cut into bars and serve chilled. Add fresh mint leaves on top for a nice touch.
Tips for Accurately Measuring Ingredients
– Use dry measuring cups for solids like graham crackers and sugar.
– For sticky ingredients like butter, use a liquid measuring cup.
– Level off with a straight edge for precise measurements. This keeps the balance in your bars.
– If you use powdered sugar, sift it first to avoid clumps. This keeps your filling smooth.
Additional Techniques for Achieving the Perfect Texture
– Make sure your cream cheese is at room temperature. This helps it blend easily.
– Be gentle when folding in the whipped cream to keep the air in. This gives a light texture.
– Don’t overmix after adding the whipped cream. This can deflate your mixture.
– Let the bars chill long enough. This ensures they set properly and hold their shape.
Tips & Tricks
Common Mistakes to Avoid
When making No Bake Chocolate Mint Cheesecake Bars, avoid overmixing the cream cheese. This can lead to a dense texture. Also, be careful not to skip chilling the bars long enough. They need time to set properly. If you rush this step, the bars might be too soft. Lastly, ensure your whipped cream is fully folded in. This keeps your cheesecake light and fluffy.
How to Achieve a Rich Chocolate Drizzle
To get a rich chocolate drizzle, melt the chocolate chips slowly. Use a microwave in 30-second bursts, stirring often. This helps prevent burning the chocolate. Once melted, drizzle it using a spoon or a piping bag. For a nice touch, swirl the chocolate into the cheesecake layer. It creates a beautiful marbled look.
Suggestions for a Fluffier Cheesecake Layer
For a fluffier cheesecake layer, start with room-temperature cream cheese. This mixes in smoothly and incorporates air. Use cold whipped cream for a lighter texture. Gently fold it in, making sure not to deflate it. Also, consider adding a bit more whipped cream if you want extra fluffiness. This will give your bars a nice lift and creamy feel.
Variations
Mint Chocolate Chip Version
You can make a mint chocolate chip version of these bars. Just add ½ cup of mini chocolate chips to the cheesecake mix. This gives a great crunch and extra flavor. You can also sprinkle some on top for a nice look. Kids love this twist!
Vegan and Dairy-Free Alternatives
If you want a vegan version, swap cream cheese for a plant-based cream cheese. Use coconut cream instead of whipped cream. For the crust, you can use vegan butter. This way, you still get a rich taste without dairy.
Adding Extras like Nuts or Fruit
You can customize these bars with nuts or fruit. Chopped walnuts or pecans add a nice crunch. You can also fold in some crushed raspberries for a fruity flavor. They look pretty too! Just be sure not to add too much.
Storage Info
Best Ways to Store Leftover Cheesecake Bars
To keep your No Bake Chocolate Mint Cheesecake Bars fresh, wrap them tightly. Use plastic wrap or aluminum foil. You can also store them in an airtight container. This helps prevent any unwanted odors or moisture. If you have a lot left, cut them into bars first. This makes it easier to grab a treat later.
How Long Do They Last in the Fridge or Freezer?
These bars can last in the fridge for about 5 days. Just make sure they are well covered. If you want to keep them longer, freeze them. They can last up to 2 months in the freezer. To freeze, wrap each bar individually. This makes it easy to enjoy later without thawing the whole batch.
Tips for Reheating or Serving After Storage
When you’re ready to enjoy, take the bars out of the fridge or freezer. If frozen, let them thaw in the fridge overnight. You can serve them cold straight from the fridge. If you prefer, warm them slightly in the microwave. Just heat for a few seconds. This can soften the chocolate drizzle, making it extra tasty.
FAQs
Can I make these bars ahead of time?
Yes, you can make these bars ahead of time. They taste even better after resting. I suggest making them a day before. This gives the flavors time to blend well. Just cover them tightly and keep them in the fridge.
What can I substitute for cream cheese?
If you can’t use cream cheese, try using Greek yogurt. It gives a nice tang. You can also use soft tofu for a vegan option. Just blend it until smooth. This way, you still get a creamy texture without the cheese.
How can I adjust the sweetness of the bars?
To adjust sweetness, change the amount of powdered sugar. Start with less and taste the mix. You can always add more later. If you want less sugar, use a sugar substitute. Just check how it measures against regular sugar.
Can I use different types of chocolate for the drizzle?
Absolutely! You can use milk chocolate, white chocolate, or dark chocolate. Each type brings a new taste. Just melt the chocolate the same way. The process stays easy, and you can create fun flavors.
You’ve learned how to make No Bake Chocolate Mint Cheesecake Bars from scratch. We discussed the ingredients, steps, and tips to avoid mistakes. You can enjoy different variations based on your diet, from vegan to mint chocolate chip. Remember to store leftovers correctly for the best taste. These bars are a great treat for any occasion. Now, you are ready to impress your friends and family with a delicious dessert. Enjoy your baking adventure!

