No-Bake Chocolate Chip Cookie Dough Bars Delight

WANT TO SAVE THIS RECIPE?

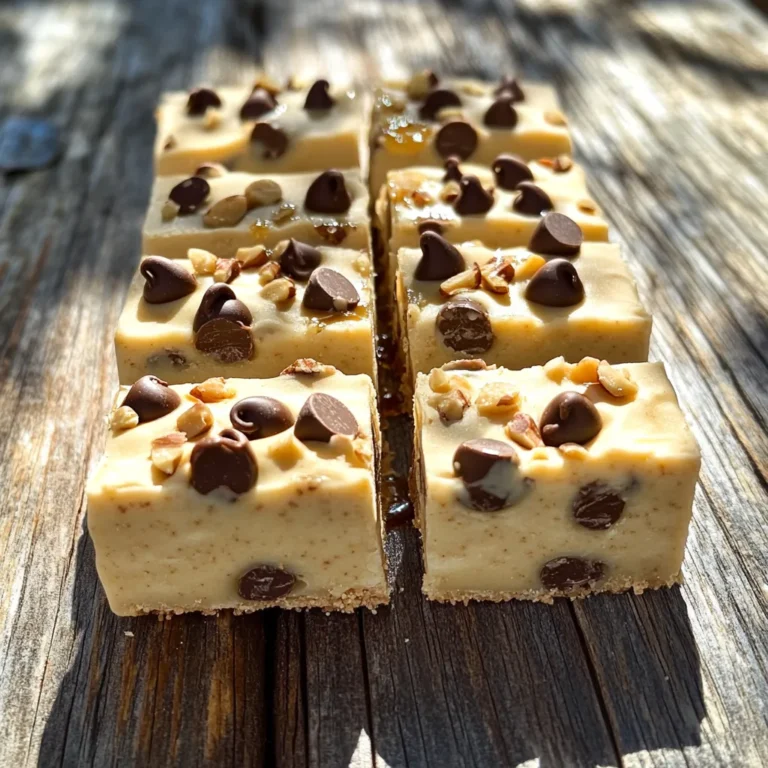
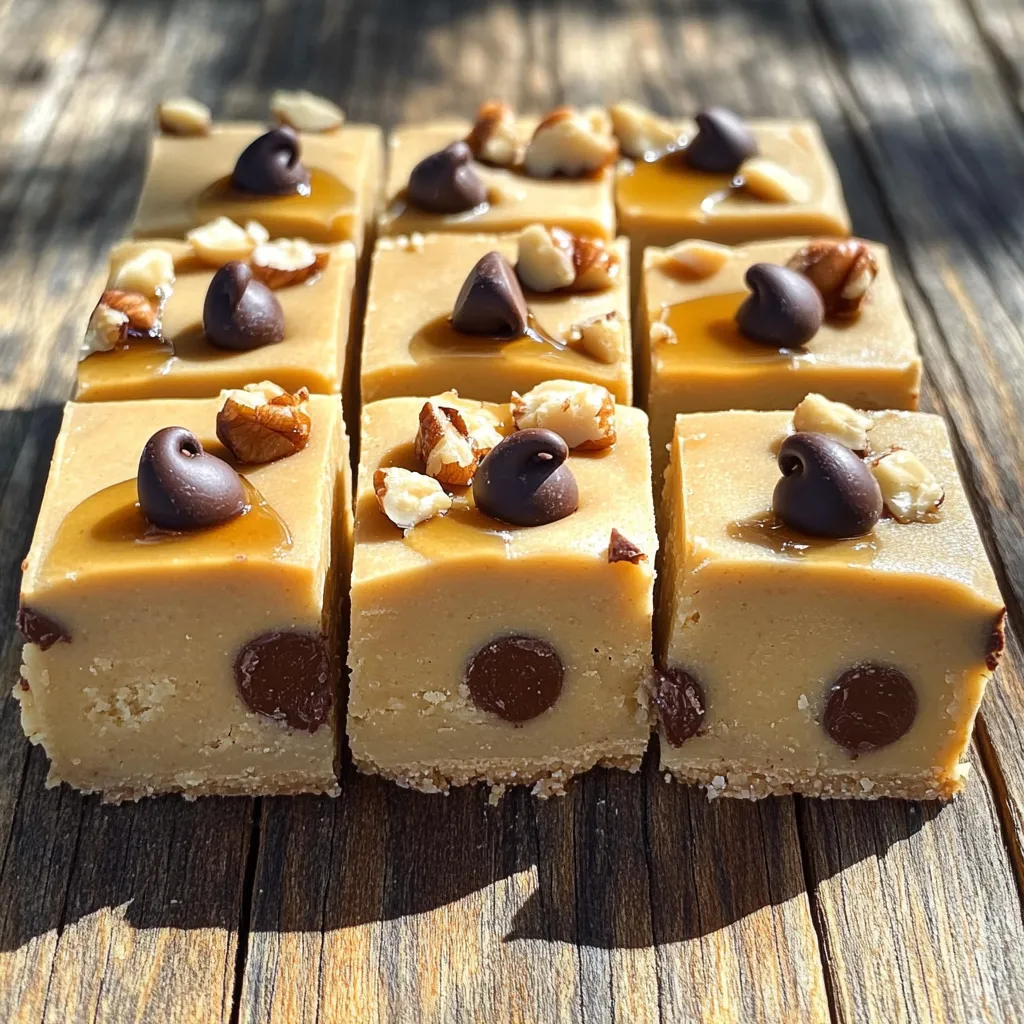
Are you craving a sweet treat that’s easy to make and requires no baking? Look no further! These No-Bake Chocolate Chip Cookie Dough Bars are the perfect solution. You only need a few simple ingredients. Whether you’re baking for yourself or sharing with friends, these bars will bring joy to any dessert table. Let’s dive into how you can whip up this delightful recipe quickly and easily!

Ingredients

Here’s what you need to make these tasty no-bake chocolate chip cookie dough bars:

– 1 cup almond flour

– 1/2 cup rolled oats

– 1/4 cup maple syrup

– 1/4 cup peanut butter (or almond butter)

– 1/2 teaspoon vanilla extract

– 1/4 teaspoon salt

– 1/2 cup mini chocolate chips

– 1/4 cup chopped nuts (optional)

Each ingredient plays a key role. Almond flour gives a rich base. Rolled oats add texture and heartiness. Maple syrup provides natural sweetness. Peanut butter adds creaminess and flavor. Vanilla extract enhances the overall taste. A pinch of salt balances the sweetness. Mini chocolate chips bring that classic cookie vibe. Chopped nuts can add crunch if you like.

You can mix and match these ingredients to suit your taste. Substitute almond flour with another flour if needed. Just remember, it may change the taste and texture a bit. Enjoy experimenting!

Step-by-Step Instructions

Mixing Dry Ingredients

First, grab a mixing bowl. Combine 1 cup of almond flour and 1/2 cup of rolled oats. Stir well until mixed. This blend gives your bars a nice texture.

Mixing Wet Ingredients

Next, add your wet ingredients. Pour in 1/4 cup of maple syrup, 1/4 cup of peanut butter, 1/2 teaspoon of vanilla extract, and 1/4 teaspoon of salt. Mix these together until the mixture is smooth. This helps bind the dry ingredients.

Forming the Dough

Now, mix until a sticky dough forms. You want it to hold together well. Then, fold in 1/2 cup of mini chocolate chips and 1/4 cup of chopped nuts if you like. Make sure they are evenly spread throughout the dough.

Preparing the Baking Dish

Take an 8×8 inch baking dish and line it with parchment paper. Leave some paper hanging over the sides. This will help you lift the bars out later. Press the dough firmly into the dish using a spatula or your hands. Make sure it is even.

Chilling the Bars

Put the dish in the refrigerator for at least 30 minutes. This step is key. It helps the bars set and makes them easier to cut.

Cutting and Storing

Once chilled, lift the bars out using the parchment paper overhang. Cut them into squares or rectangles. Store your bars in an airtight container in the refrigerator. They will stay fresh for up to a week. Enjoy your tasty treats!

Tips & Tricks

Making the Bars Extra Chewy

To make your bars extra chewy, I suggest adding more peanut butter. Use 1/3 cup instead of 1/4 cup. This small change gives the bars a richer texture. You can also add an extra tablespoon of maple syrup. This keeps the bars moist and delicious.

Best Peanut Butter Alternatives

If you want to switch things up, try almond butter or cashew butter. Both options work great in this recipe. They add a unique flavor while keeping the texture smooth. If you need a nut-free option, go for sunflower seed butter. It gives a nice taste too!

Achieving the Perfect Consistency

Mix your ingredients well to get the right consistency. It should be sticky but not too wet. If your dough feels dry, add a little more maple syrup. After mixing, press the dough firmly into your dish. Refrigerate it for at least 30 minutes. This helps the bars set properly and makes them easier to cut.

Variations

Flavor Add-ins

You can change the flavor of your bars easily. Try adding different extracts or spices. Here are some ideas:

– Use almond extract for a nutty flavor.

– Add a pinch of cinnamon for warmth.

– Mix in cocoa powder for a chocolate twist.

– Try a splash of coffee extract for depth.

These small changes can make your bars unique and exciting. Experiment and find your favorite mix!

Healthier Substitutions

Want to make these bars a bit lighter? You can swap some ingredients for healthier options. Here are a few ideas:

– Use a sugar-free maple syrup for fewer calories.

– Replace peanut butter with a low-fat nut butter.

– Try using a sugar substitute like stevia or monk fruit.

– Use unsweetened applesauce to cut down on sugar.

These swaps can help you enjoy your treats without the guilt.

Topping Suggestions

Toppings add fun and flavor to your bars. Here are some tasty options:

– Drizzle melted dark chocolate on top.

– Sprinkle sea salt for a sweet-salty combo.

– Add crushed nuts or seeds for crunch.

– Top with shredded coconut for a tropical twist.

These toppings can really enhance your no-bake cookie dough bars. Get creative and have fun!

Storage Info

Best Storage Practices

To keep your No-Bake Chocolate Chip Cookie Dough Bars fresh, use an airtight container. This helps prevent moisture from making them soggy. Place the bars in the fridge right after cutting them. If you stack the bars, put parchment paper between layers. This keeps them from sticking together.

Freezing Options

You can freeze these bars for later. First, cut them into squares. Wrap each square with plastic wrap. Then, place them in a freezer bag or container. They can stay in the freezer for up to three months. When you’re ready to eat, take out a square and let it thaw at room temperature for about 30 minutes. You can also microwave it for 10-15 seconds if you want it warm.

Shelf Life

In the fridge, these bars last for about one week. After a week, they may lose some flavor and texture. If you notice any odd smells or changes in color, it’s best to toss them out. Enjoy these sweet treats while they are fresh!

FAQs

Can I use regular flour instead of almond flour?

Yes, you can use regular flour. However, the texture will change. Almond flour gives a nutty flavor and softer texture. Regular flour may make the bars denser. If you use all-purpose flour, you might need to adjust the liquid. The bars could end up too dry, so keep an eye on the mixture.

How do I make these bars vegan?

To make these bars vegan, swap the peanut butter with a vegan option. Use almond butter if you like. For sweeteners, stick to maple syrup or agave syrup. Make sure the chocolate chips are dairy-free. These simple swaps keep the bars tasty and friendly for all diets.

What can I substitute for maple syrup?

If you need a substitute for maple syrup, try agave syrup or honey. Both add sweetness and moisture. You can also use brown rice syrup, but it’s thicker. Adjust the amount slightly based on the sweetness you want. Each option brings a unique flavor, so choose what you prefer!

This post covered how to make tasty snack bars using simple ingredients. We mixed dry and wet items, formed the dough, and chilled it. You saw tips for making your bars chewy and healthy. I shared fun variations and storage tips to keep them fresh. With this guide, you can easily create your own delicious bars. Enjoy experimenting in your kitchen!

Here’s what you need to make these tasty no-bake chocolate chip cookie dough bars: - 1 cup almond flour - 1/2 cup rolled oats - 1/4 cup maple syrup - 1/4 cup peanut butter (or almond butter) - 1/2 teaspoon vanilla extract - 1/4 teaspoon salt - 1/2 cup mini chocolate chips - 1/4 cup chopped nuts (optional) Each ingredient plays a key role. Almond flour gives a rich base. Rolled oats add texture and heartiness. Maple syrup provides natural sweetness. Peanut butter adds creaminess and flavor. Vanilla extract enhances the overall taste. A pinch of salt balances the sweetness. Mini chocolate chips bring that classic cookie vibe. Chopped nuts can add crunch if you like. You can mix and match these ingredients to suit your taste. Substitute almond flour with another flour if needed. Just remember, it may change the taste and texture a bit. Enjoy experimenting! First, grab a mixing bowl. Combine 1 cup of almond flour and 1/2 cup of rolled oats. Stir well until mixed. This blend gives your bars a nice texture. Next, add your wet ingredients. Pour in 1/4 cup of maple syrup, 1/4 cup of peanut butter, 1/2 teaspoon of vanilla extract, and 1/4 teaspoon of salt. Mix these together until the mixture is smooth. This helps bind the dry ingredients. Now, mix until a sticky dough forms. You want it to hold together well. Then, fold in 1/2 cup of mini chocolate chips and 1/4 cup of chopped nuts if you like. Make sure they are evenly spread throughout the dough. Take an 8x8 inch baking dish and line it with parchment paper. Leave some paper hanging over the sides. This will help you lift the bars out later. Press the dough firmly into the dish using a spatula or your hands. Make sure it is even. Put the dish in the refrigerator for at least 30 minutes. This step is key. It helps the bars set and makes them easier to cut. Once chilled, lift the bars out using the parchment paper overhang. Cut them into squares or rectangles. Store your bars in an airtight container in the refrigerator. They will stay fresh for up to a week. Enjoy your tasty treats! To make your bars extra chewy, I suggest adding more peanut butter. Use 1/3 cup instead of 1/4 cup. This small change gives the bars a richer texture. You can also add an extra tablespoon of maple syrup. This keeps the bars moist and delicious. If you want to switch things up, try almond butter or cashew butter. Both options work great in this recipe. They add a unique flavor while keeping the texture smooth. If you need a nut-free option, go for sunflower seed butter. It gives a nice taste too! Mix your ingredients well to get the right consistency. It should be sticky but not too wet. If your dough feels dry, add a little more maple syrup. After mixing, press the dough firmly into your dish. Refrigerate it for at least 30 minutes. This helps the bars set properly and makes them easier to cut. {{image_2}} You can change the flavor of your bars easily. Try adding different extracts or spices. Here are some ideas: - Use almond extract for a nutty flavor. - Add a pinch of cinnamon for warmth. - Mix in cocoa powder for a chocolate twist. - Try a splash of coffee extract for depth. These small changes can make your bars unique and exciting. Experiment and find your favorite mix! Want to make these bars a bit lighter? You can swap some ingredients for healthier options. Here are a few ideas: - Use a sugar-free maple syrup for fewer calories. - Replace peanut butter with a low-fat nut butter. - Try using a sugar substitute like stevia or monk fruit. - Use unsweetened applesauce to cut down on sugar. These swaps can help you enjoy your treats without the guilt. Toppings add fun and flavor to your bars. Here are some tasty options: - Drizzle melted dark chocolate on top. - Sprinkle sea salt for a sweet-salty combo. - Add crushed nuts or seeds for crunch. - Top with shredded coconut for a tropical twist. These toppings can really enhance your no-bake cookie dough bars. Get creative and have fun! To keep your No-Bake Chocolate Chip Cookie Dough Bars fresh, use an airtight container. This helps prevent moisture from making them soggy. Place the bars in the fridge right after cutting them. If you stack the bars, put parchment paper between layers. This keeps them from sticking together. You can freeze these bars for later. First, cut them into squares. Wrap each square with plastic wrap. Then, place them in a freezer bag or container. They can stay in the freezer for up to three months. When you're ready to eat, take out a square and let it thaw at room temperature for about 30 minutes. You can also microwave it for 10-15 seconds if you want it warm. In the fridge, these bars last for about one week. After a week, they may lose some flavor and texture. If you notice any odd smells or changes in color, it's best to toss them out. Enjoy these sweet treats while they are fresh! Yes, you can use regular flour. However, the texture will change. Almond flour gives a nutty flavor and softer texture. Regular flour may make the bars denser. If you use all-purpose flour, you might need to adjust the liquid. The bars could end up too dry, so keep an eye on the mixture. To make these bars vegan, swap the peanut butter with a vegan option. Use almond butter if you like. For sweeteners, stick to maple syrup or agave syrup. Make sure the chocolate chips are dairy-free. These simple swaps keep the bars tasty and friendly for all diets. If you need a substitute for maple syrup, try agave syrup or honey. Both add sweetness and moisture. You can also use brown rice syrup, but it’s thicker. Adjust the amount slightly based on the sweetness you want. Each option brings a unique flavor, so choose what you prefer! This post covered how to make tasty snack bars using simple ingredients. We mixed dry and wet items, formed the dough, and chilled it. You saw tips for making your bars chewy and healthy. I shared fun variations and storage tips to keep them fresh. With this guide, you can easily create your own delicious bars. Enjoy experimenting in your kitchen!

No-Bake Chocolate Chip Cookie Dough Bars

Indulge in the ultimate treat with these No-Bake Chocolate Chip Cookie Dough Bars! Perfectly chewy and filled with delicious ingredients like almond flour, maple syrup, and creamy peanut butter, this easy recipe is ready in just 40 minutes. Whether you're craving a sweet snack or a dessert for any occasion, these bars are a must-try. Click through to discover how to whip up this scrumptious no-bake delight today!

Ingredients
  

1 cup almond flour

1/2 cup rolled oats

1/4 cup maple syrup

1/4 cup peanut butter (or almond butter)

1/2 teaspoon vanilla extract

1/4 teaspoon salt

1/2 cup mini chocolate chips

1/4 cup chopped nuts (optional)

Instructions
 

In a mixing bowl, combine the almond flour and rolled oats, stirring well to combine.

    Add the maple syrup, peanut butter, vanilla extract, and salt to the dry ingredients. Mix until a sticky dough forms.

      Fold in the mini chocolate chips and chopped nuts, if using, until evenly distributed.

        Line an 8x8 inch baking dish with parchment paper, allowing some overhang for easy removal.

          Press the dough firmly into the prepared dish in an even layer using a spatula or your hands.

            Refrigerate the bars for at least 30 minutes to allow them to firm up.

              Once chilled, lift the bars out of the dish using the parchment overhang and cut into squares or rectangles.

                Store the bars in an airtight container in the refrigerator for up to one week.

                  Prep Time: 10 minutes | Total Time: 40 minutes | Servings: 12 bars

                    WANT TO SAVE THIS RECIPE?

                    Leave a Comment

                    Recipe Rating