. To start, you need to create the crust. First, take 24 Oreo cookies and finely crush them using a food processor. You want them to look like sand. Next, combine the crushed cookies with 4 tablespoons of melted butter in a bowl. Mix until all the crumbs are coated with butter. Now, press this mixture into the bottom of a 9-inch springform pan. Use the back of a measuring cup to pack it tightly. Once done, chill the crust in the refrigerator while you prepare the filling. Now it’s time to make the filling. In a large mixing bowl, beat 16 oz of softened cream cheese until it’s smooth. Gradually add 1 cup of powdered sugar and 1 teaspoon of vanilla extract while mixing. Keep going until it’s fully combined and creamy. In a separate bowl, whip 1 cup of heavy cream until soft peaks form. This step is key for a light filling. Gently fold the whipped cream into the cream cheese mixture. Be careful not to deflate the whipped cream; you want it fluffy! Now, let’s bring it all together. First, chop a few extra Oreos into small chunks and fold them into the filling mixture. This adds a nice texture. Then, pour the cheesecake filling into the prepared cookie crust. Smooth the top with a spatula, and tap the pan on the counter to remove any air bubbles. Finally, cover the cheesecake with plastic wrap and refrigerate for at least 4 hours, or until it sets. Once it’s ready, you can garnish it with crushed Oreo cookies or chocolate chips if you like. Enjoy your no-bake Oreo cheesecake! For more detailed steps, check the Full Recipe. To make your cheesecake smooth, always start with softened cream cheese. This helps you mix it easily. If it's too cold, it will be lumpy. When you whip the cream, aim for soft peaks. Then, fold the whipped cream into the cream cheese gently. This keeps your cheesecake light and fluffy. If you mix too hard, you will lose air. When it's time to serve, add a dollop of whipped cream on each slice. This makes it look pretty and adds flavor. You can also place a mini Oreo on top for fun. For extra flair, sprinkle chocolate shavings on each slice. This gives a nice touch that everyone will love. One big mistake is not chilling the cheesecake long enough. It needs at least 4 hours to set well. If you cut it too soon, it might fall apart. Another mistake is overmixing the cream cheese mixture. This can make it too dense. Focus on gentle mixing to keep it creamy. {{image_2}} You can easily change the flavor of your cheesecake. Adding peanut butter gives it a richer taste. Simply mix in half a cup of creamy peanut butter when you beat the cream cheese. This twist makes it even more delightful. You can also add fresh fruit. Chopped strawberries or raspberries bring bright flavors. Just fold them into the filling before you pour it into the crust. This adds a fun pop of color and taste. If you need a gluten-free option, use gluten-free Oreos. They taste just as good and make the dessert safe for those with gluten allergies. Your guests will not even notice the difference. For a dairy-free version, swap the cream cheese with a dairy-free alternative. Many brands offer great cream cheese substitutes. Make sure to check the texture for the best results. You can adjust the recipe for smaller gatherings or parties. Just cut the ingredients in half for a smaller cheesecake. This way, you can serve fewer people without waste. If you want to make mini cheesecakes, use small cups. Fill them with the cheesecake mixture and set them in the fridge. They are perfect for parties and easy to grab! For serving, just add a mini Oreo on top for extra fun. To keep your No Bake Oreo Cheesecake fresh, refrigerate it covered. It stays good for up to 5 days. If you want to save it longer, you can freeze it. It will last up to 3 months in the freezer. When freezing, wrap the cheesecake tightly. Use both plastic wrap and aluminum foil to seal it well. This helps prevent freezer burn. When you’re ready to enjoy it, thaw it in the refrigerator. This way, it stays creamy and delicious. You do not need to reheat this cheesecake. Just serve it cold straight from the fridge. It tastes best chilled, so enjoy it as is! For the full recipe, check the linked instructions. It typically sets in about 4 hours in the refrigerator. This time allows the filling to firm up nicely. I always suggest checking it after 4 hours. If it feels soft, you can leave it a bit longer. Yes, using chocolate wafers or graham crackers can work well. Both options give a nice base. Feel free to experiment for different flavors. You might find a new favorite! Yes, it’s a kid-friendly recipe that’s easy to make! Kids love the taste and texture. Plus, they can help with mixing and crushing cookies. It’s a fun family activity. Ensure you chilled it long enough; if it’s still soft, consider adding more cream cheese next time. This will help firm up the filling. Always check the cream cheese is well mixed for the best result. This No Bake Oreo Cheesecake is simple and delicious. You learned about the key ingredients and how to prepare them. We discussed tips for the perfect texture and ways to customize your dessert. Don’t forget to chill your cheesecake long enough to set properly. This treat is perfect for kids and gatherings. Try it with different flavors or toppings. You'll impress everyone with this easy recipe. Enjoy your cheesecake, and have fun making it!](https://recipespursuit.com/wp-content/uploads/2025/07/3f9f475f-3e37-4994-b6be-704990fa8912-768x768.webp)
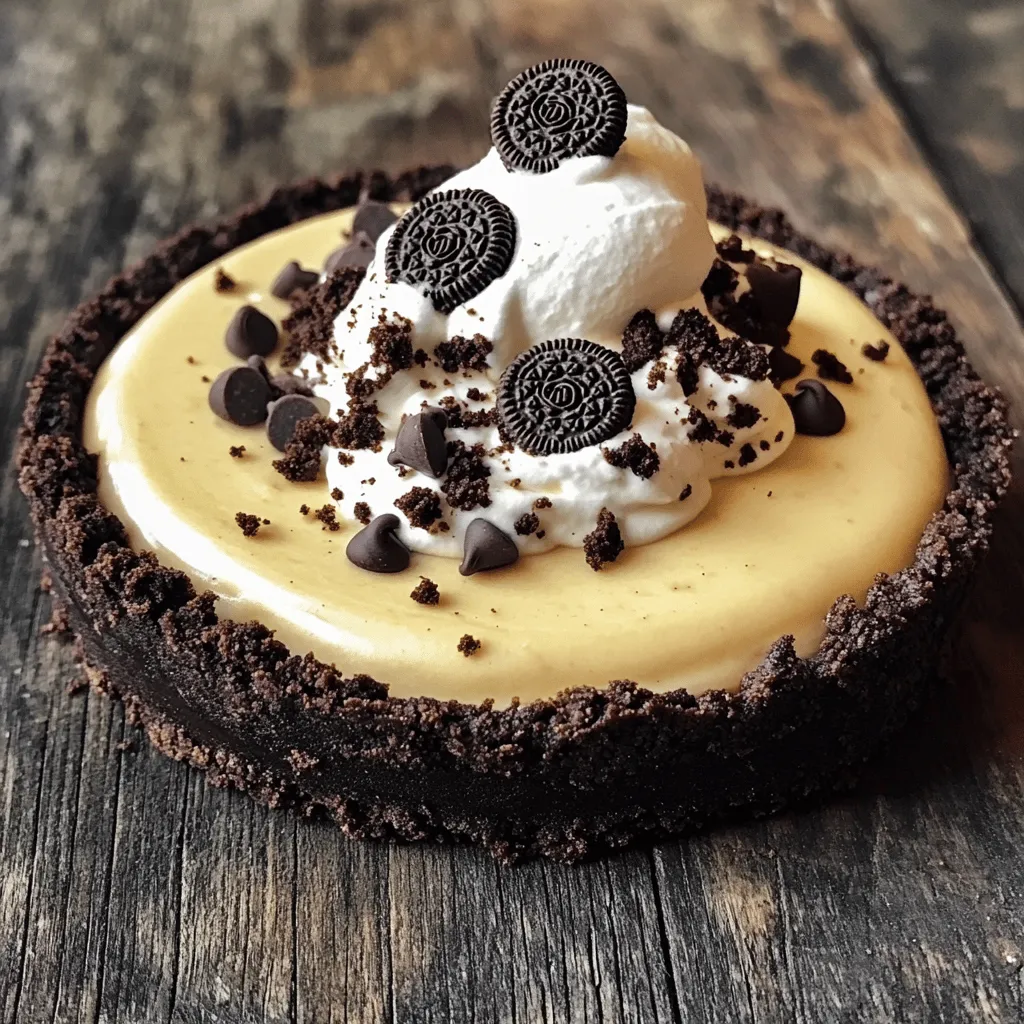
Are you ready to indulge in a creamy, chocolatey treat that’s a breeze to whip up? This No Bake Oreo Cheesecake is delightfully simple and perfect for any occasion! With just a handful of ingredients like Oreos, cream cheese, and whipped cream, you can create a dessert everyone will love. Join me as I share my easy recipe and tips to make this decadent cheesecake a hit in your kitchen!
Ingredients for No Bake Oreo Cheesecake
Essential Ingredients
To make a No Bake Oreo Cheesecake, you will need:
– 24 Oreo cookies (plus extra for topping)
– 4 tablespoons unsalted butter, melted
– 16 oz cream cheese, softened
– 1 cup powdered sugar
– 1 teaspoon vanilla extract
– 1 cup heavy whipping cream
– 1/2 cup chocolate chips (optional for garnish)
These ingredients create a rich, creamy cheesecake with a crunchy cookie crust. The Oreos give great flavor and texture. The cream cheese adds a smooth, creamy base. The heavy cream helps make the filling light and fluffy. You can even add chocolate chips on top for extra fun.
Kitchen Tools Needed
To prepare this delightful cheesecake, gather these tools:
– Food processor
– Mixing bowls
– Springform pan
– Measuring cups and spoons
A food processor is key for crushing the Oreos. Mixing bowls help combine your filling ingredients. A springform pan allows for easy removal of the cheesecake. Measuring cups and spoons ensure you add the right amounts. Each tool makes the process simple and enjoyable.
Step-by-Step Instructions
Preparing the Crust
To start, you need to create the crust. First, take 24 Oreo cookies and finely crush them using a food processor. You want them to look like sand. Next, combine the crushed cookies with 4 tablespoons of melted butter in a bowl. Mix until all the crumbs are coated with butter. Now, press this mixture into the bottom of a 9-inch springform pan. Use the back of a measuring cup to pack it tightly. Once done, chill the crust in the refrigerator while you prepare the filling.
Making the Filling
Now it’s time to make the filling. In a large mixing bowl, beat 16 oz of softened cream cheese until it’s smooth. Gradually add 1 cup of powdered sugar and 1 teaspoon of vanilla extract while mixing. Keep going until it’s fully combined and creamy. In a separate bowl, whip 1 cup of heavy cream until soft peaks form. This step is key for a light filling. Gently fold the whipped cream into the cream cheese mixture. Be careful not to deflate the whipped cream; you want it fluffy!
Assembling the Cheesecake
Now, let’s bring it all together. First, chop a few extra Oreos into small chunks and fold them into the filling mixture. This adds a nice texture. Then, pour the cheesecake filling into the prepared cookie crust. Smooth the top with a spatula, and tap the pan on the counter to remove any air bubbles. Finally, cover the cheesecake with plastic wrap and refrigerate for at least 4 hours, or until it sets. Once it’s ready, you can garnish it with crushed Oreo cookies or chocolate chips if you like. Enjoy your no-bake Oreo cheesecake!
Tips & Tricks
Achieving the Perfect Consistency
To make your cheesecake smooth, always start with softened cream cheese. This helps you mix it easily. If it’s too cold, it will be lumpy. When you whip the cream, aim for soft peaks. Then, fold the whipped cream into the cream cheese gently. This keeps your cheesecake light and fluffy. If you mix too hard, you will lose air.
Serving Suggestions
When it’s time to serve, add a dollop of whipped cream on each slice. This makes it look pretty and adds flavor. You can also place a mini Oreo on top for fun. For extra flair, sprinkle chocolate shavings on each slice. This gives a nice touch that everyone will love.
Common Mistakes to Avoid
One big mistake is not chilling the cheesecake long enough. It needs at least 4 hours to set well. If you cut it too soon, it might fall apart. Another mistake is overmixing the cream cheese mixture. This can make it too dense. Focus on gentle mixing to keep it creamy.
Variations
Flavor Variations
You can easily change the flavor of your cheesecake. Adding peanut butter gives it a richer taste. Simply mix in half a cup of creamy peanut butter when you beat the cream cheese. This twist makes it even more delightful.
You can also add fresh fruit. Chopped strawberries or raspberries bring bright flavors. Just fold them into the filling before you pour it into the crust. This adds a fun pop of color and taste.
Dietary Modifications
If you need a gluten-free option, use gluten-free Oreos. They taste just as good and make the dessert safe for those with gluten allergies. Your guests will not even notice the difference.
For a dairy-free version, swap the cream cheese with a dairy-free alternative. Many brands offer great cream cheese substitutes. Make sure to check the texture for the best results.
Serving Size Options
You can adjust the recipe for smaller gatherings or parties. Just cut the ingredients in half for a smaller cheesecake. This way, you can serve fewer people without waste.
If you want to make mini cheesecakes, use small cups. Fill them with the cheesecake mixture and set them in the fridge. They are perfect for parties and easy to grab! For serving, just add a mini Oreo on top for extra fun.
Storage Info
How to Store Leftovers
To keep your No Bake Oreo Cheesecake fresh, refrigerate it covered. It stays good for up to 5 days. If you want to save it longer, you can freeze it. It will last up to 3 months in the freezer.
How to Freeze No Bake Cheesecake
When freezing, wrap the cheesecake tightly. Use both plastic wrap and aluminum foil to seal it well. This helps prevent freezer burn. When you’re ready to enjoy it, thaw it in the refrigerator. This way, it stays creamy and delicious.
Best Practices for Reheating (if applicable)
You do not need to reheat this cheesecake. Just serve it cold straight from the fridge. It tastes best chilled, so enjoy it as is!
FAQs
How long does No Bake Oreo Cheesecake take to set?
It typically sets in about 4 hours in the refrigerator. This time allows the filling to firm up nicely. I always suggest checking it after 4 hours. If it feels soft, you can leave it a bit longer.
Can I use other cookies instead of Oreos?
Yes, using chocolate wafers or graham crackers can work well. Both options give a nice base. Feel free to experiment for different flavors. You might find a new favorite!
Is No Bake Oreo Cheesecake suitable for kids?
Yes, it’s a kid-friendly recipe that’s easy to make! Kids love the taste and texture. Plus, they can help with mixing and crushing cookies. It’s a fun family activity.
What should I do if the cheesecake doesn’t set?
Ensure you chilled it long enough; if it’s still soft, consider adding more cream cheese next time. This will help firm up the filling. Always check the cream cheese is well mixed for the best result.
This No Bake Oreo Cheesecake is simple and delicious. You learned about the key ingredients and how to prepare them. We discussed tips for the perfect texture and ways to customize your dessert. Don’t forget to chill your cheesecake long enough to set properly. This treat is perfect for kids and gatherings. Try it with different flavors or toppings. You’ll impress everyone with this easy recipe. Enjoy your cheesecake, and have fun making it!
. To start, you need to create the crust. First, take 24 Oreo cookies and finely crush them using a food processor. You want them to look like sand. Next, combine the crushed cookies with 4 tablespoons of melted butter in a bowl. Mix until all the crumbs are coated with butter. Now, press this mixture into the bottom of a 9-inch springform pan. Use the back of a measuring cup to pack it tightly. Once done, chill the crust in the refrigerator while you prepare the filling. Now it’s time to make the filling. In a large mixing bowl, beat 16 oz of softened cream cheese until it’s smooth. Gradually add 1 cup of powdered sugar and 1 teaspoon of vanilla extract while mixing. Keep going until it’s fully combined and creamy. In a separate bowl, whip 1 cup of heavy cream until soft peaks form. This step is key for a light filling. Gently fold the whipped cream into the cream cheese mixture. Be careful not to deflate the whipped cream; you want it fluffy! Now, let’s bring it all together. First, chop a few extra Oreos into small chunks and fold them into the filling mixture. This adds a nice texture. Then, pour the cheesecake filling into the prepared cookie crust. Smooth the top with a spatula, and tap the pan on the counter to remove any air bubbles. Finally, cover the cheesecake with plastic wrap and refrigerate for at least 4 hours, or until it sets. Once it’s ready, you can garnish it with crushed Oreo cookies or chocolate chips if you like. Enjoy your no-bake Oreo cheesecake! For more detailed steps, check the Full Recipe. To make your cheesecake smooth, always start with softened cream cheese. This helps you mix it easily. If it's too cold, it will be lumpy. When you whip the cream, aim for soft peaks. Then, fold the whipped cream into the cream cheese gently. This keeps your cheesecake light and fluffy. If you mix too hard, you will lose air. When it's time to serve, add a dollop of whipped cream on each slice. This makes it look pretty and adds flavor. You can also place a mini Oreo on top for fun. For extra flair, sprinkle chocolate shavings on each slice. This gives a nice touch that everyone will love. One big mistake is not chilling the cheesecake long enough. It needs at least 4 hours to set well. If you cut it too soon, it might fall apart. Another mistake is overmixing the cream cheese mixture. This can make it too dense. Focus on gentle mixing to keep it creamy. {{image_2}} You can easily change the flavor of your cheesecake. Adding peanut butter gives it a richer taste. Simply mix in half a cup of creamy peanut butter when you beat the cream cheese. This twist makes it even more delightful. You can also add fresh fruit. Chopped strawberries or raspberries bring bright flavors. Just fold them into the filling before you pour it into the crust. This adds a fun pop of color and taste. If you need a gluten-free option, use gluten-free Oreos. They taste just as good and make the dessert safe for those with gluten allergies. Your guests will not even notice the difference. For a dairy-free version, swap the cream cheese with a dairy-free alternative. Many brands offer great cream cheese substitutes. Make sure to check the texture for the best results. You can adjust the recipe for smaller gatherings or parties. Just cut the ingredients in half for a smaller cheesecake. This way, you can serve fewer people without waste. If you want to make mini cheesecakes, use small cups. Fill them with the cheesecake mixture and set them in the fridge. They are perfect for parties and easy to grab! For serving, just add a mini Oreo on top for extra fun. To keep your No Bake Oreo Cheesecake fresh, refrigerate it covered. It stays good for up to 5 days. If you want to save it longer, you can freeze it. It will last up to 3 months in the freezer. When freezing, wrap the cheesecake tightly. Use both plastic wrap and aluminum foil to seal it well. This helps prevent freezer burn. When you’re ready to enjoy it, thaw it in the refrigerator. This way, it stays creamy and delicious. You do not need to reheat this cheesecake. Just serve it cold straight from the fridge. It tastes best chilled, so enjoy it as is! For the full recipe, check the linked instructions. It typically sets in about 4 hours in the refrigerator. This time allows the filling to firm up nicely. I always suggest checking it after 4 hours. If it feels soft, you can leave it a bit longer. Yes, using chocolate wafers or graham crackers can work well. Both options give a nice base. Feel free to experiment for different flavors. You might find a new favorite! Yes, it’s a kid-friendly recipe that’s easy to make! Kids love the taste and texture. Plus, they can help with mixing and crushing cookies. It’s a fun family activity. Ensure you chilled it long enough; if it’s still soft, consider adding more cream cheese next time. This will help firm up the filling. Always check the cream cheese is well mixed for the best result. This No Bake Oreo Cheesecake is simple and delicious. You learned about the key ingredients and how to prepare them. We discussed tips for the perfect texture and ways to customize your dessert. Don’t forget to chill your cheesecake long enough to set properly. This treat is perfect for kids and gatherings. Try it with different flavors or toppings. You'll impress everyone with this easy recipe. Enjoy your cheesecake, and have fun making it!](https://recipespursuit.com/wp-content/uploads/2025/07/3f9f475f-3e37-4994-b6be-704990fa8912-250x250.webp)
