Do you crave rich, fudgy brownies that are simple to make? Look no further! In this post, I’ll share my favorite homemade fudgy brownies recipe. With just a few key ingredients, you can create a gooey treat everyone will love. From mixing to baking, I will guide you through each step. Plus, I’ll share tips, variations, and storage secrets to elevate your brownie game. Let’s dive in and satisfy that sweet tooth!
Ingredients
Detailed Ingredient List
– 1 cup (225g) unsalted butter, melted
– 2 cups (400g) granulated sugar
– 4 large eggs
– 1 teaspoon vanilla extract
– 1 cup (125g) all-purpose flour
– 1 cup (90g) unsweetened cocoa powder
– 1/2 teaspoon baking powder
– 1/4 teaspoon salt
– 1 cup (175g) semi-sweet chocolate chips
– 1/2 cup (120ml) brewed coffee (optional)
– Sea salt flakes for sprinkling (optional)
Each ingredient plays a key role. The butter gives the brownies their rich flavor. Granulated sugar sweetens and helps create a nice crust.
Eggs provide moisture and help the brownies rise. Vanilla adds depth to the flavor. All-purpose flour gives structure. The cocoa powder is what makes them chocolatey.
Baking powder helps them rise slightly. Salt balances the sweetness. Chocolate chips add gooey goodness. If you use brewed coffee, it enhances the chocolate taste.
Substitutions and Add-Ins
– Healthier ingredient swaps: Use applesauce instead of butter for a lower-fat option.
– Nut options: Add walnuts or pecans for a crunchy texture.
– Alternative sweeteners: Try using coconut sugar or honey for a natural sweet taste.
These swaps can keep the brownies tasty. You can mix and match to suit your needs. Each choice can change the flavor and texture just enough to make it special.
Step-by-Step Instructions
Preparation Steps
1. Preheat your oven to 350°F (175°C). Grease a 9×13 inch baking pan or line it with parchment paper. This makes for easy removal later.
2. In a large bowl, mix the wet ingredients. Whisk together 1 cup of melted butter and 2 cups of granulated sugar. Mix until it looks glossy. Add 4 eggs, one at a time. Stir well after each addition. Finally, add 1 teaspoon of vanilla extract.
3. Now, let’s integrate the dry ingredients. In a separate bowl, sift together 1 cup of all-purpose flour, 1 cup of cocoa powder, 1/2 teaspoon of baking powder, and 1/4 teaspoon of salt. Gradually fold this dry mix into the wet mix with a spatula. Be gentle; overmixing can ruin the texture.
Baking Process
1. Pour the batter into the prepared pan. Spread it out evenly with a spatula to ensure even baking.
2. Bake in the preheated oven for 25-30 minutes. The brownies are done when a toothpick inserted into the center comes out mostly clean, with a few moist crumbs.
Cooling & Serving
1. Let the brownies cool properly. Once done, remove them from the oven. Place the pan on a wire rack to cool.
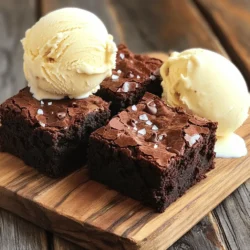
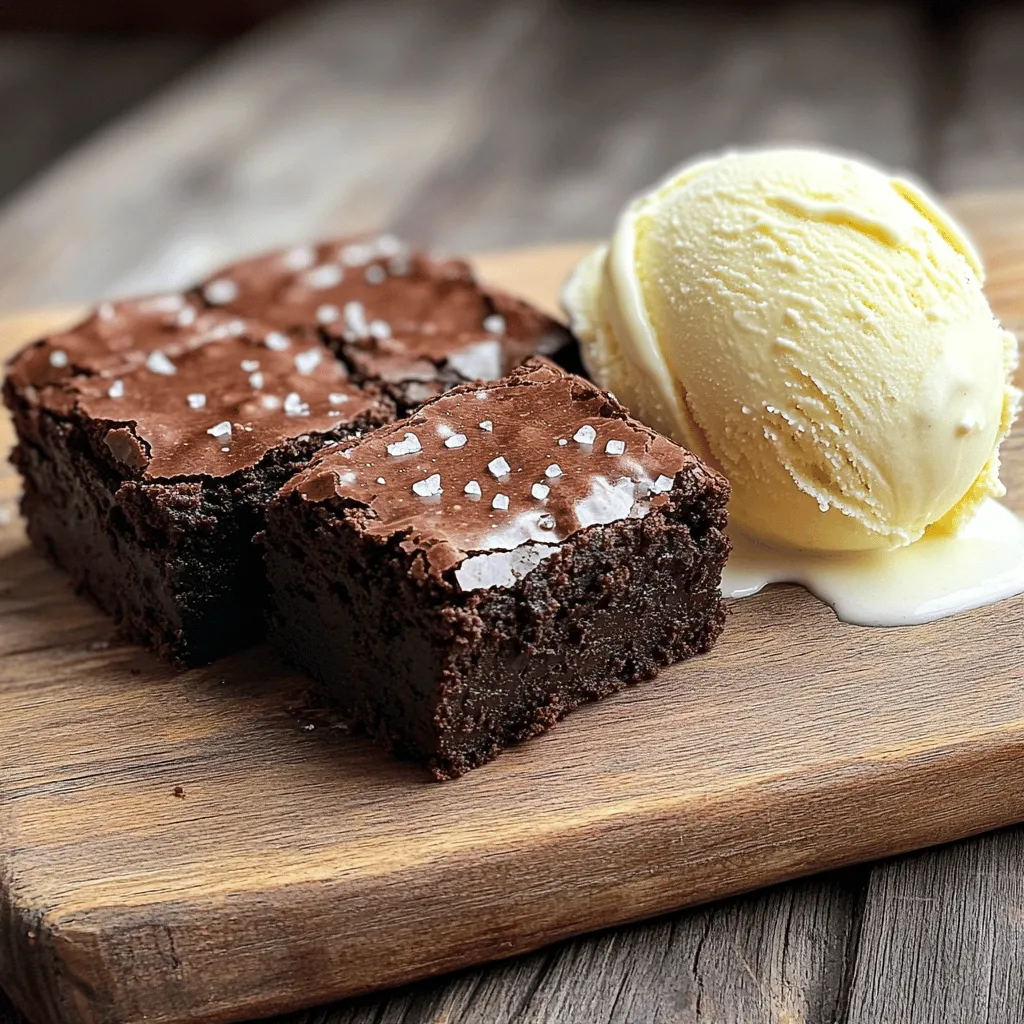
2. Cut and present the brownies. Once cooled, cut them into squares. For a nice touch, serve them on a rustic wooden board or a decorative plate. A scoop of vanilla ice cream and a drizzle of chocolate sauce can make them even better!
3. Enjoying fresh vs. storing for later. Fresh brownies taste amazing, but you can store extras. Keep them in an airtight container. They last a few days, but I bet they won’t last that long!
Tips & Tricks
Achieving the Perfect Fudgy Texture
To get that rich, fudgy texture, you must not overmix the batter. Overmixing can add air to the mixture and make the brownies cakey. Mix just until the dry ingredients blend in. Adjust your baking time based on your oven. If your brownies look too wet, add a few more minutes. Just watch them closely.
Enhancements for Flavor
Want to boost the flavor? Try adding a bit of espresso. It deepens the chocolate taste and makes them even richer. You can also switch up your chocolate chips. Use flavored ones like mint or caramel for an extra kick. These small changes can make a big difference.
Common Mistakes to Avoid
One mistake to steer clear of is using cold ingredients. Cold eggs or butter can shock the batter. Always use room temperature items for better mixing. Another big mistake is overbaking. If you bake too long, your brownies will dry out. Aim for a toothpick test that leaves a few moist crumbs for the best fudgy result.
Variations
Flavor Variations
You can easily mix up the flavor of your brownies. Try mint chocolate brownies by adding mint extract. Just a teaspoon gives the brownies a fresh twist. Another fun option is peanut butter swirl brownies. Drop spoonfuls of peanut butter into the batter and swirl it around before baking. This gives you a sweet and salty treat.
Dietary Adjustments
Do you need gluten-free brownies? You can substitute all-purpose flour with almond or coconut flour. These options keep the brownies soft and tasty. If you want vegan brownies, use flax eggs instead of regular eggs. Just mix one tablespoon of ground flaxseed with three tablespoons of water. Let it sit for a few minutes until it thickens.
Toppings and Serving Suggestions
Toppings can take your brownies to the next level. A scoop of vanilla ice cream pairs perfectly with warm brownies. You can also drizzle chocolate sauce or caramel on top. For a rich finish, try whipped cream or chocolate ganache. Just warm some cream and mix it with chocolate. Pour it over the brownies for a decadent touch.
Storage Info
Proper Storage Techniques
To keep your homemade fudgy brownies fresh, you need the right storage. Place them in an airtight container. This keeps moisture out and helps maintain their rich texture. If you don’t have one, wrap them tightly in plastic wrap. Avoid leaving them exposed to air.
Storing brownies at room temperature works well for a few days. This makes them easy to grab for a sweet snack. If you want them to last longer, refrigeration is an option. However, this can change their texture, making them a bit more firm.
Freezing Brownies
Freezing is a great way to save brownies for later enjoyment. Start by cutting them into squares. Wrap each square in plastic wrap. Then, place them in a freezer bag or container. Make sure to label the bag with the date.
To thaw, simply take out a square and let it sit at room temperature for about 30 minutes. You can also heat them in the microwave for a few seconds. This brings back their fudgy goodness. Enjoy your frozen treats anytime!
FAQs
What makes brownies fudgy?
Fudgy brownies come from a mix of key ingredients. The melted butter adds richness. Eggs create moisture. Cocoa powder gives deep chocolate flavor. Using less flour also helps. This keeps the texture dense and chewy.
Can I use cocoa powder instead of chocolate?
Yes, you can use cocoa powder in place of chocolate. For every ounce of chocolate, use 3 tablespoons of cocoa powder. Add one tablespoon of fat, like butter or oil, to balance. This swap keeps your brownies rich and tasty.
How do I know when brownies are done baking?
Look for a few signs to check if brownies are ready. The edges should look firm, while the center stays slightly soft. If you insert a toothpick, it should have some moist crumbs. A clean toothpick means they are overbaked.
How long do homemade brownies last?
Homemade brownies can last about 3 to 4 days at room temperature. Store them in an airtight container to keep them fresh. If you want them to last longer, consider freezing them. They can stay good in the freezer for up to 3 months.
Can I add more chocolate chips?
Absolutely! You can add more chocolate chips for extra flavor. I recommend using up to 1 ½ cups. Be careful, as too many can make the brownies too soft. Balance is key to keep that fudgy texture.
To make great brownies, start with quality ingredients. Follow the step-by-step guide for perfect results. Avoid common mistakes like overmixing or using cold ingredients. Try fun variations like mint or peanut butter swirl. Store them properly to keep them fresh. Brownies can be a tasty treat any time. Using this guide, you can wow your friends with your baking skills. Enjoy every bite and share them with loved ones!