Are you ready to whip up a dessert that’s easy and delicious? This No-Bake Chocolate Cheesecake is perfect for any occasion. With simple ingredients and no oven needed, you can impress your friends and family in no time. I’ll guide you step by step to create a rich and creamy treat. Let’s explore how to make this delightful cheesecake that everyone will love!
Ingredients
To make a no-bake chocolate cheesecake, you need the right ingredients. Each one plays a key role in creating a rich and creamy dessert. Here’s the list of ingredients you’ll need:
– 1 ½ cups chocolate cookie crumbs
– ½ cup unsalted butter, melted
– 16 oz cream cheese, softened
– 1 cup powdered sugar
– 1 cup heavy cream
– 1 teaspoon vanilla extract
– 8 oz semi-sweet chocolate, melted and slightly cooled
– ¼ cup cocoa powder
– 1 pinch sea salt
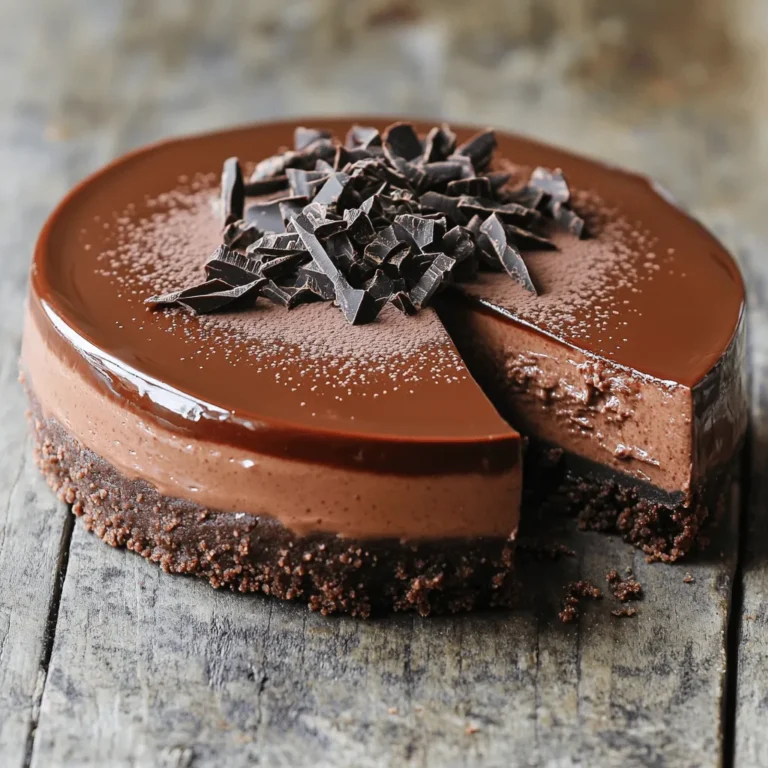
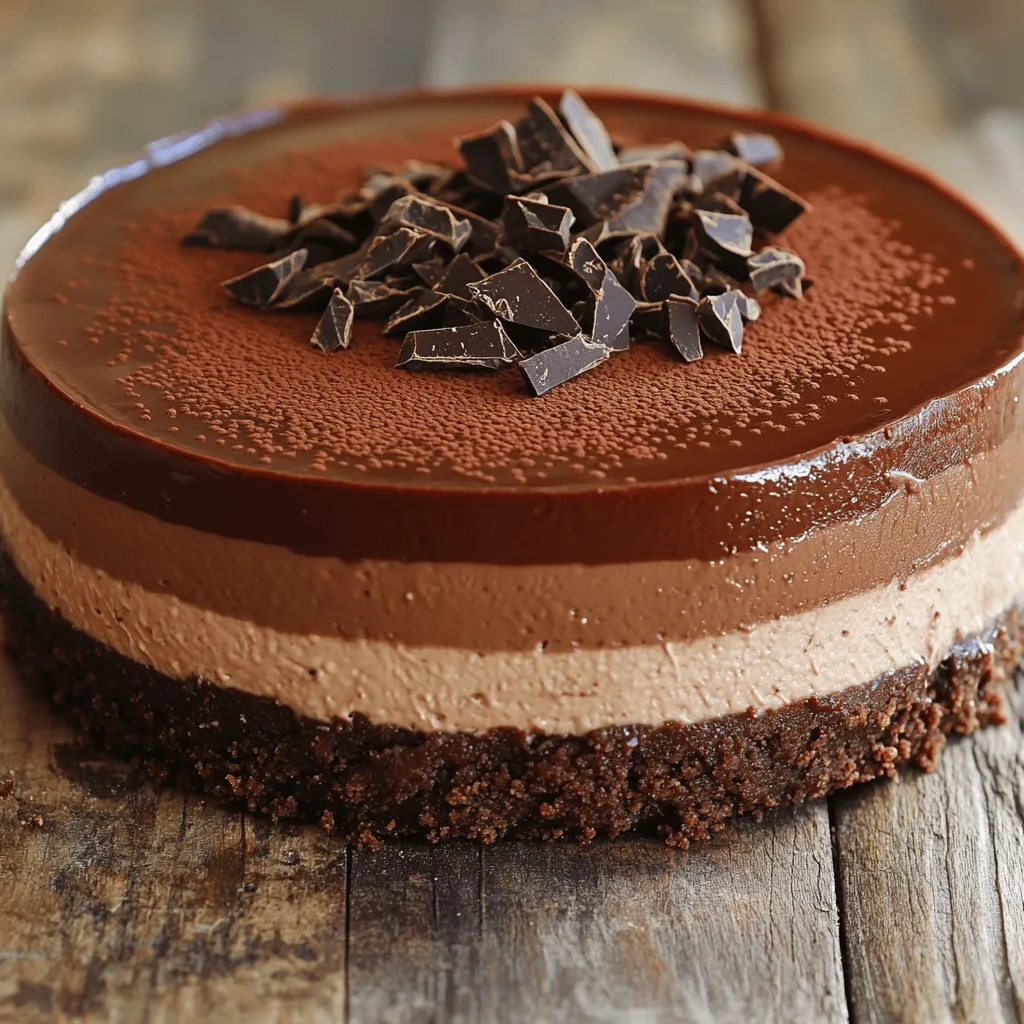
– Garnish options, like chocolate shavings or cocoa powder
These ingredients combine to create a delicious treat. The chocolate cookie crumbs give a tasty crust. Cream cheese adds creaminess, while heavy cream lends a light texture. Semi-sweet chocolate deepens the chocolate flavor, making each bite rich.This no-bake chocolate cheesecake is simple and rewarding. It’s perfect for any occasion, and you can easily customize it to suit your taste. Enjoy!
Step-by-Step Instructions
Preparing the Crust
1. In a medium bowl, combine the chocolate cookie crumbs and melted butter. Mix well until the crumbs look like wet sand.
2. Press this mixture firmly into the bottom of a 9-inch springform pan. Make sure it is even.
3. Place the crust in the freezer while you make the filling. This helps it set well.
Making the Filling
1. In a large bowl, beat the softened cream cheese with an electric mixer until it’s smooth and creamy.
2. Gradually add the powdered sugar. Keep mixing until it blends fully. Scrape down any bits stuck to the sides of the bowl.
3. In another bowl, whip the heavy cream with the vanilla extract. Beat until it forms stiff peaks. This will add volume and lightness to your filling.
Folding Ingredients Together
1. Gently fold the whipped cream into the cream cheese mixture. Make sure it’s well combined but don’t overmix.
2. Pour in the melted semi-sweet chocolate. Sift the cocoa powder into the bowl and add a pinch of sea salt.
3. Fold the mixture until it is uniform and smooth, making sure there are no lumps.
Refrigeration Instructions
1. Pour the chocolate cheesecake filling over the chilled crust. Use a spatula to smooth the top.
2. Cover the cheesecake with plastic wrap. Refrigerate for at least 5 to 6 hours. For the best results, leave it overnight.
3. Once set, carefully remove the cheesecake from the springform pan. Slice and garnish with chocolate shavings or a dusting of cocoa powder before serving.
Tips & Tricks
Perfecting the Texture
To get that creamy filling, start with softened cream cheese. If it is too cold, it won’t mix well. I recommend taking it out an hour before you begin. When you mix the cream cheese and sugar, do it slowly. This helps keep the air in the mix.
For cooling chocolate, let it sit at room temperature after melting. If it cools too fast, it can harden and clump. Stir it every few minutes to keep it smooth.
Serving Suggestions
This cheesecake pairs well with fresh berries or a dollop of whipped cream. The tartness of the berries balances the sweet chocolate. For a nice touch, drizzle some chocolate sauce on top.
When serving, consider adding chocolate shavings or a sprinkle of cocoa powder. This not only looks great but also adds texture to each slice.
Common Mistakes to Avoid
To ensure your crust is firm, press the crumbs down hard. If the crust is too loose, it will crumble when you slice it. Use the bottom of a glass to press it down evenly.
Avoid overmixing the filling after adding the whipped cream. Mixing too much can make the cheesecake dense. Gently fold until just combined for a light, airy texture.
Variations
Alternative Flavor Options
You can play with flavors in your no-bake chocolate cheesecake. Adding fruit toppings makes it fun and bright. Fresh strawberries, raspberries, or sliced bananas add a sweet twist. You can also try different chocolate types. Dark chocolate gives a rich taste, while milk chocolate offers a sweeter bite. Consider adding a hint of orange zest for a refreshing zing.
Dietary Adjustments
If you need a gluten-free option, use gluten-free cookie crumbs for the crust. Many brands offer these, and they work just as well. For vegan adaptations, swap cream cheese for a plant-based version. Use coconut cream in place of heavy cream. You can also use maple syrup instead of powdered sugar for sweetness. These changes make the cheesecake delicious for everyone.
Serving Size Adjustments
You can easily scale the recipe to fit your needs. If you want fewer servings, cut the ingredients in half. For a party, double the recipe. You can also create mini cheesecakes. Use muffin tins or small jars for cute individual servings. This way, everyone can enjoy their own piece.
Storage Info
Best Practices for Storing
To keep your no-bake chocolate cheesecake fresh, refrigeration is key. You can store it in the fridge for up to five days. Make sure to cover it tightly with plastic wrap. This keeps it moist and prevents it from absorbing other smells.
If you want to store it longer, you can freeze it. Wrap the cheesecake well in plastic wrap, then place it in an airtight container. It can last up to two months in the freezer. When ready to enjoy, move it to the fridge to thaw overnight.
How to Revive Leftovers
If you have leftovers, don’t worry! You can refresh them easily. Just take the cheesecake out of the fridge and let it sit at room temperature for a few minutes. This brings back some of the creaminess.
For the best way to serve leftovers, slice the cheesecake and top with fresh whipped cream or fruit. This adds a fresh touch and makes it look beautiful. You can also sprinkle more cocoa powder or chocolate shavings on top for extra flair.
FAQs
How long does it take to set the cheesecake?
The cheesecake needs at least 5 to 6 hours to set. For best results, let it chill overnight. This time allows the filling to firm up and develop great flavor.
Can I use whipped cream instead of heavy cream?
You can use whipped cream, but heavy cream is best. Heavy cream gives a richer texture, making the cheesecake creamier and more decadent. Whipped cream can work in a pinch, but the result may be lighter.
What’s the best way to slice a no-bake cheesecake?
To slice the cheesecake, use a sharp knife. Dip the knife in hot water and wipe it dry before each cut. This method helps create clean slices and keeps the filling intact.
Can I make this cheesecake ahead of time?
Yes, this cheesecake is perfect for making ahead. You can prepare it one or two days in advance. Just keep it covered in the fridge until you’re ready to serve.
What should I do if my cheesecake is too soft?
If the cheesecake is too soft, it may need more time in the fridge. Let it chill longer to firm up. If it’s still too soft, you can try adding more cocoa powder or melted chocolate to thicken it.
This blog covered how to make a delicious no-bake cheesecake. You learned about the key ingredients, step-by-step instructions, and useful tips. Perfecting the texture and avoiding common mistakes is key. You can explore variations to fit your taste, like fruit toppings or gluten-free options. Remember to store your cheesecake properly to keep it fresh. I hope you feel ready to try this recipe and impress friends and family. Enjoy your cheesecake-making journey!

